
Search Our Database
Managing private IP networks and instance assignment in Customer Portal
Introduction
Whether you are scaling your network infrastructure or adjusting your resource allocation, efficiently organizing your internal network is essential for seamless server communication. This guide explains how customers can control their internal networking environment directly through the IPServerOne Customer Portal. System administrators and infrastructure managers can perform these updates at any time from their account dashboard to ensure optimal connectivity and security. By organizing internal network spaces and binding private addresses to specific compute nodes, you can safely isolate backend traffic from the public internet. This manual covers creating, editing, and deleting private IPs, mapping them to your instances, and verifying the configuration across different operating systems.
Prerequisite
- Access to the IPServerOne Customer Portal
- Portal user account with instances created or with privileges
- Basic knowledge of private networking and IP addressing concepts
Step-by-step guide
Step 1: Access to networks managing site
- Login into our [Customer Portal]
- If you wish to assist to manage the instance’s networks that is not under your user account, you may ask instance’s owner to grant you the necessary role by [Delegate access in portal: Assigning roles and notifications to secondary users]
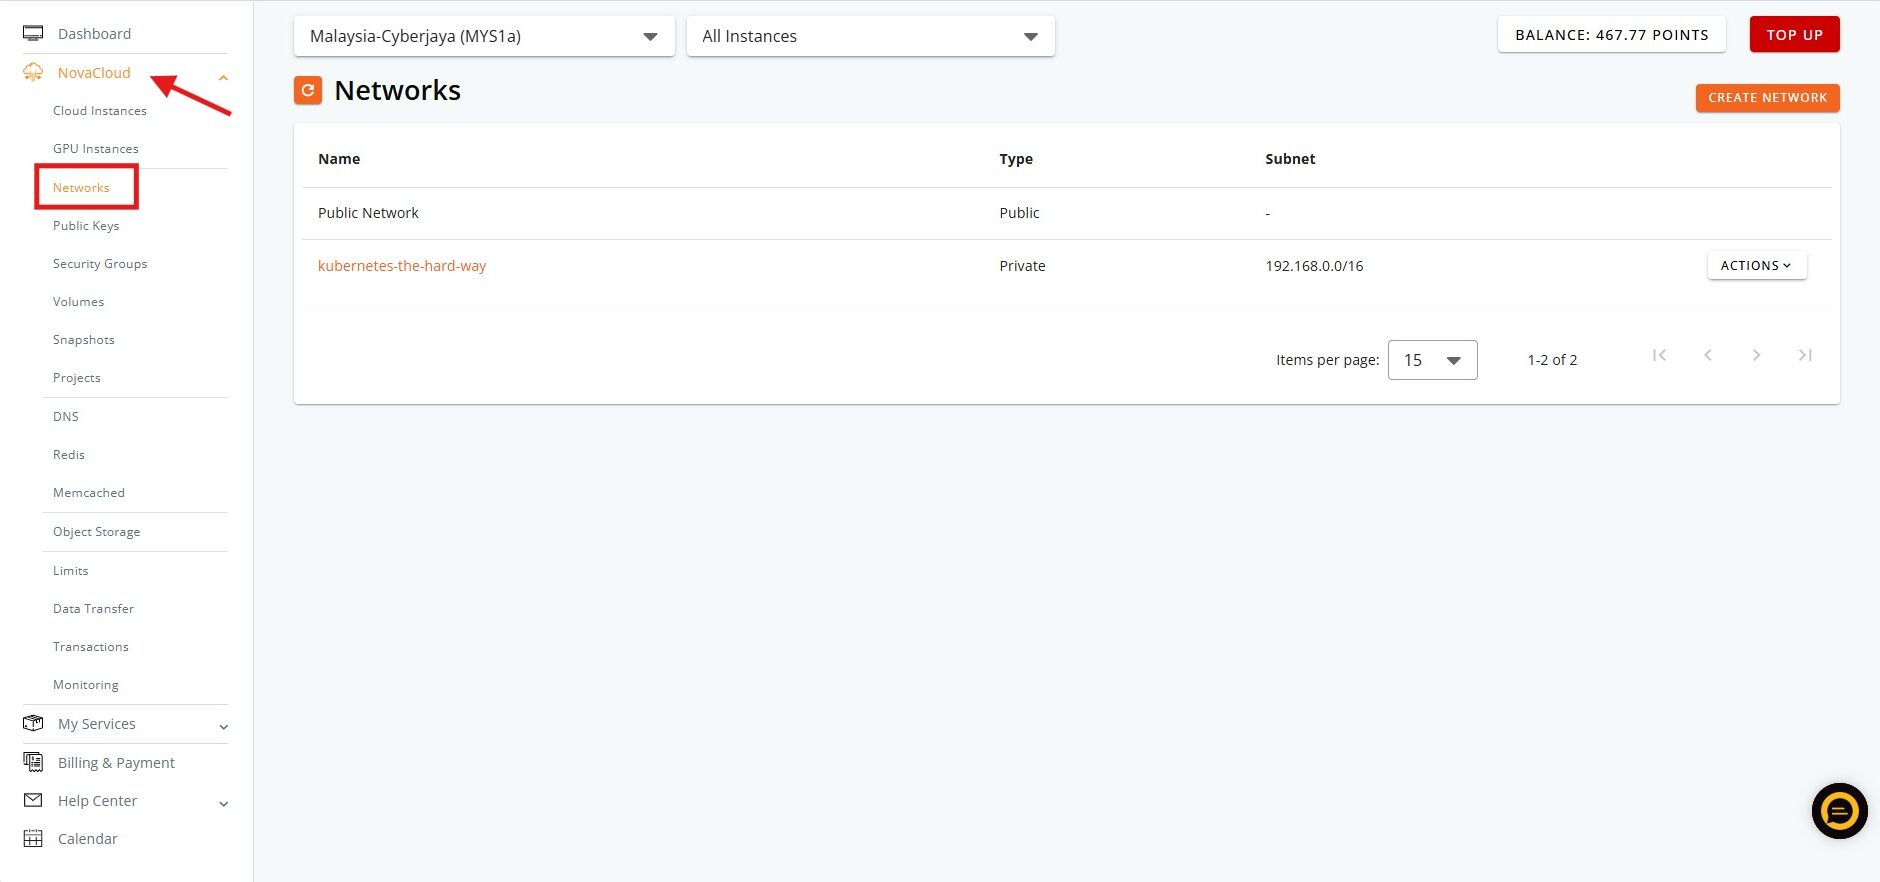
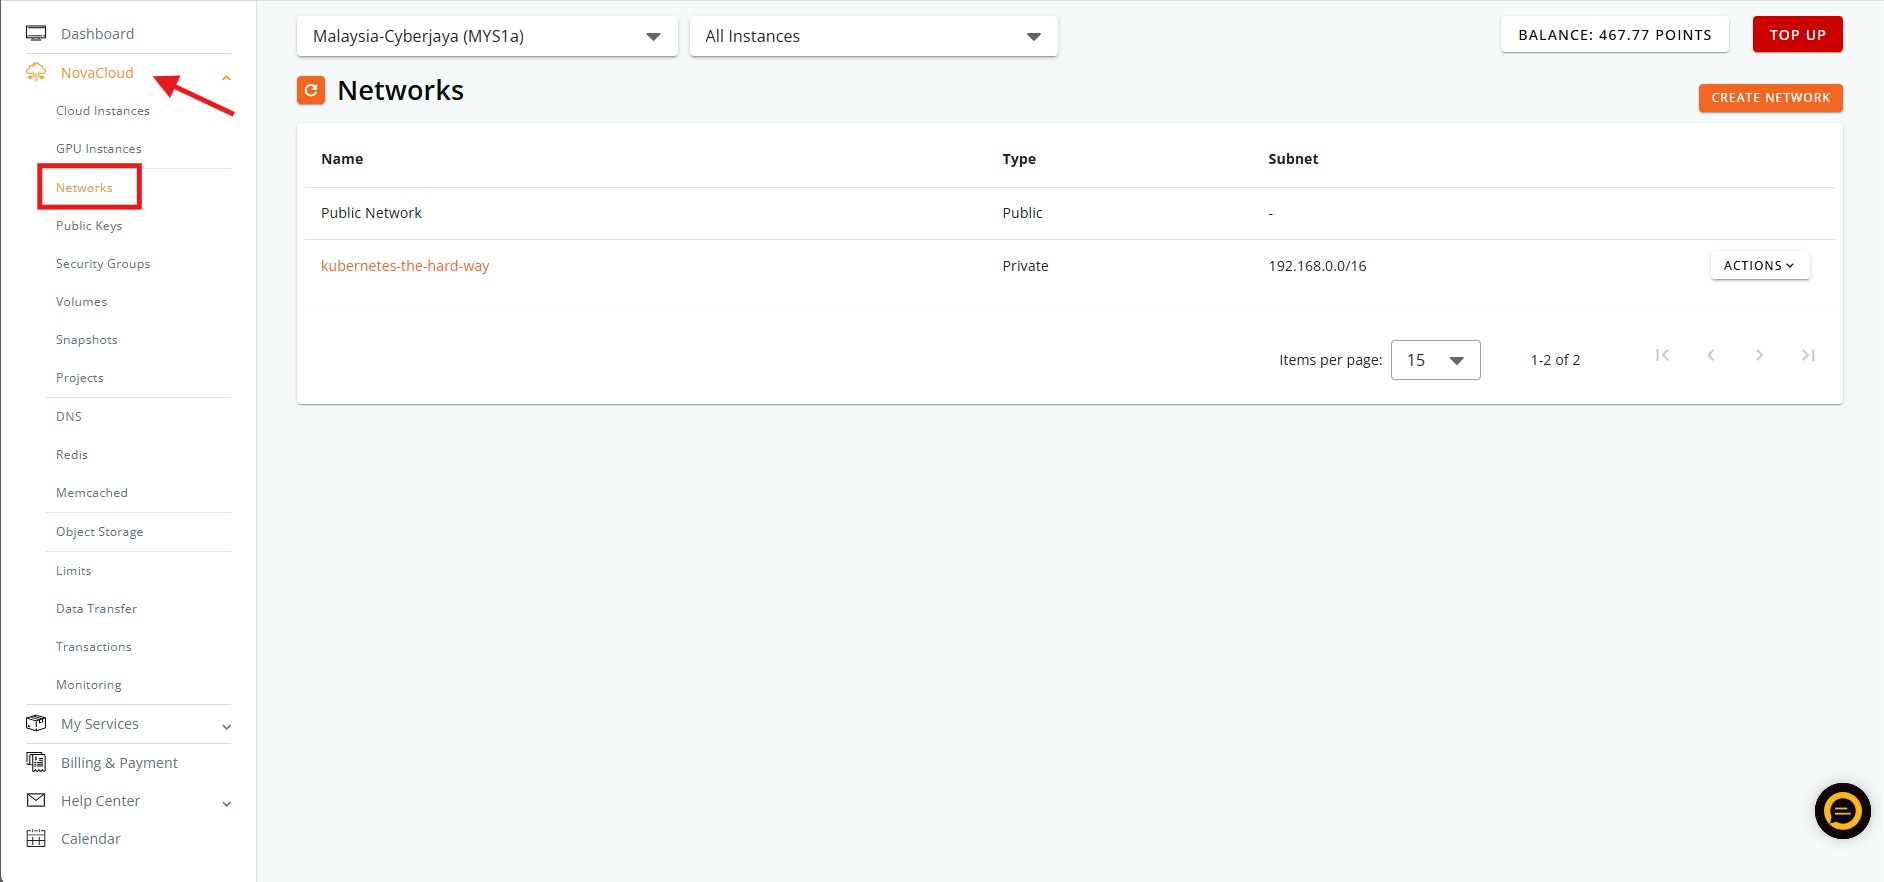
- Navigate to network managing site by click the Network on the left side menu
Step 2: Managing private IP networks
- There are 2 ways to create new private IP network in Customer Portal, which create within the network managing site and instance’s network managing site.
- For instance’s network managing site, the guidance will be share in the next step, Step 3: Assigning private IP networks.
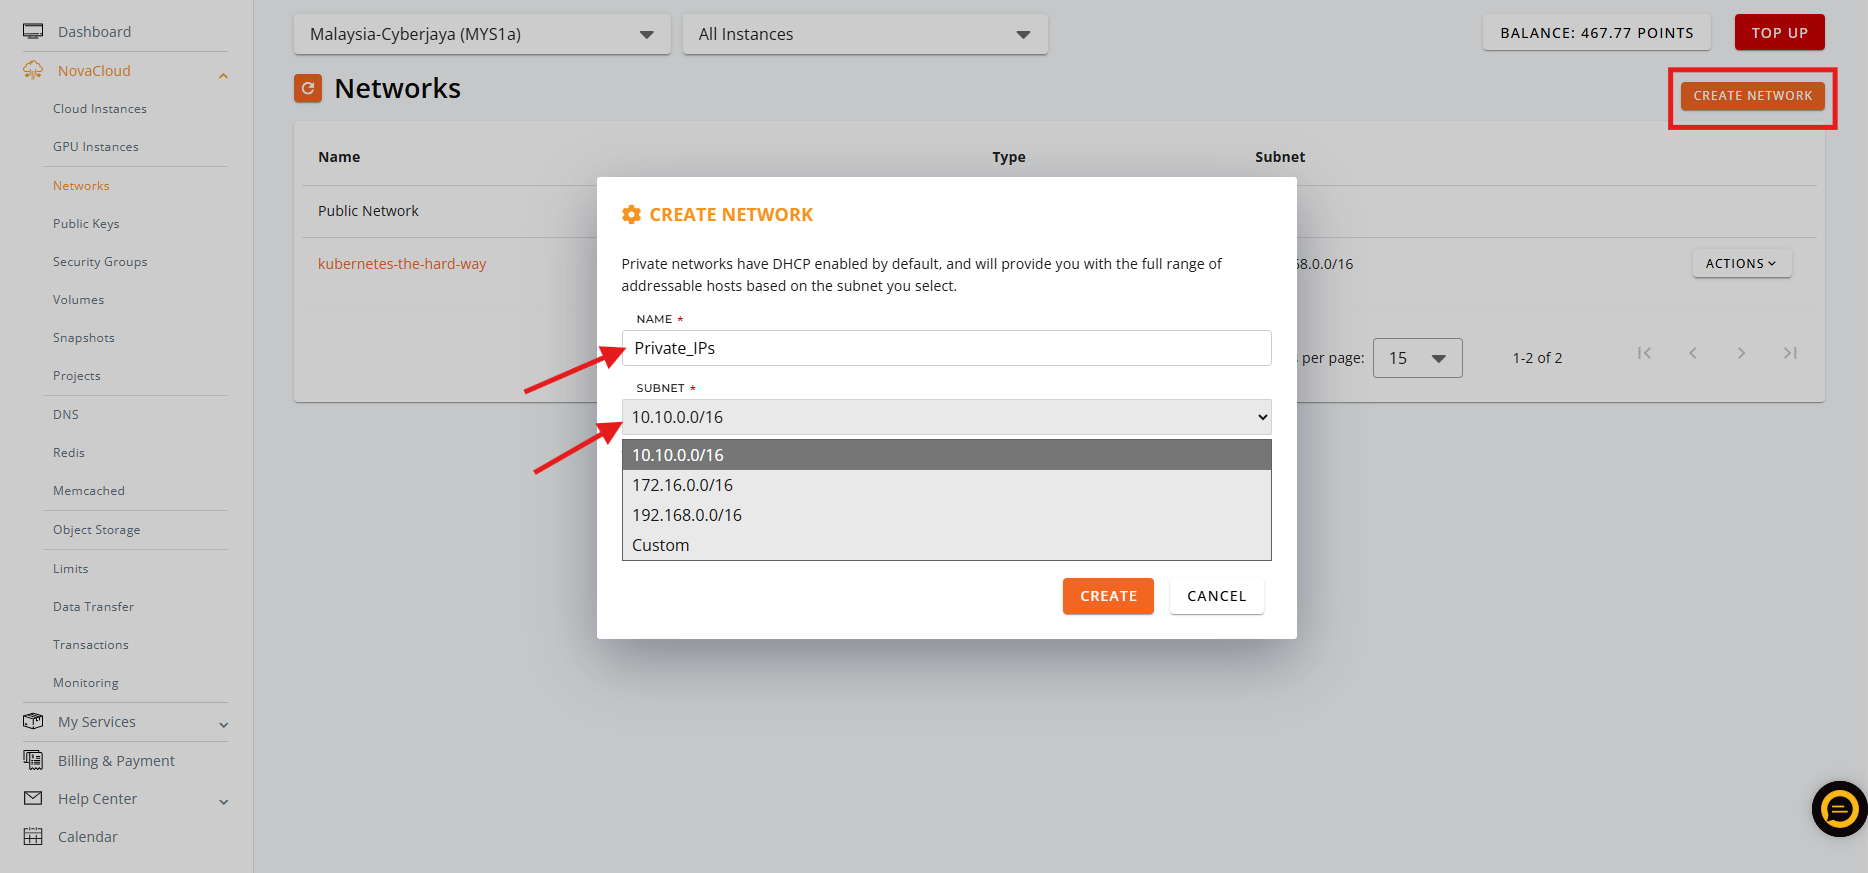
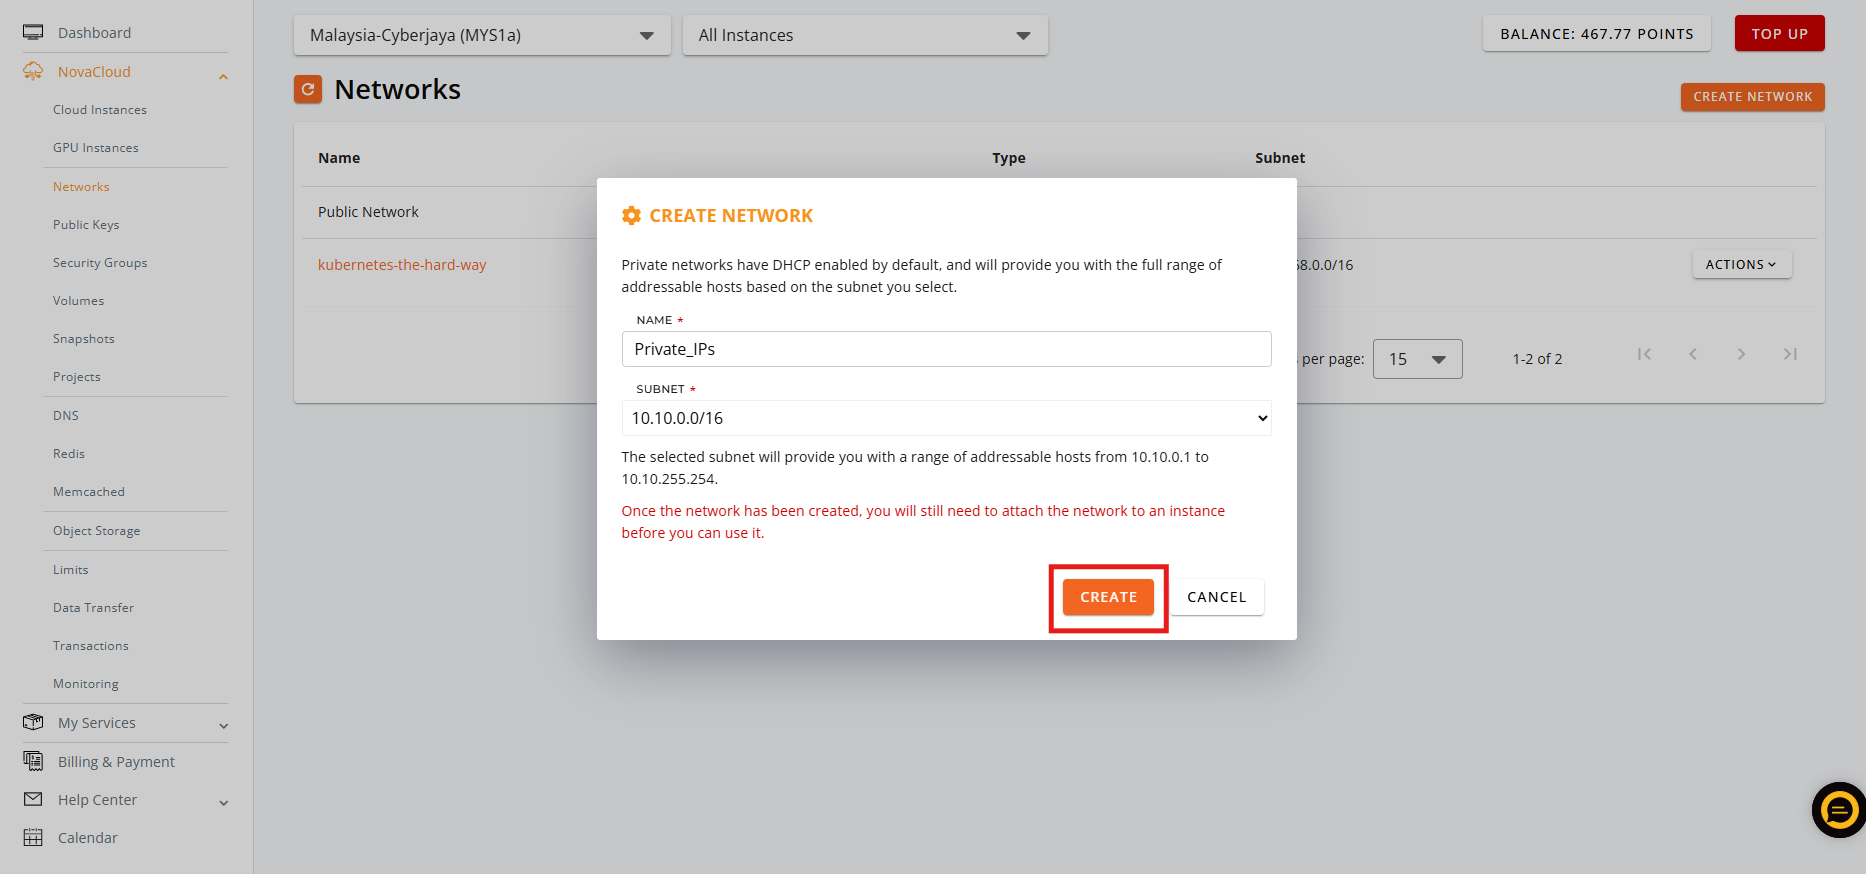
- Click on the CREATE NETWORK button
- Enter you desired name and choose the private IP subnet you wish to have
- You may choose Custom and enter your desired subnet
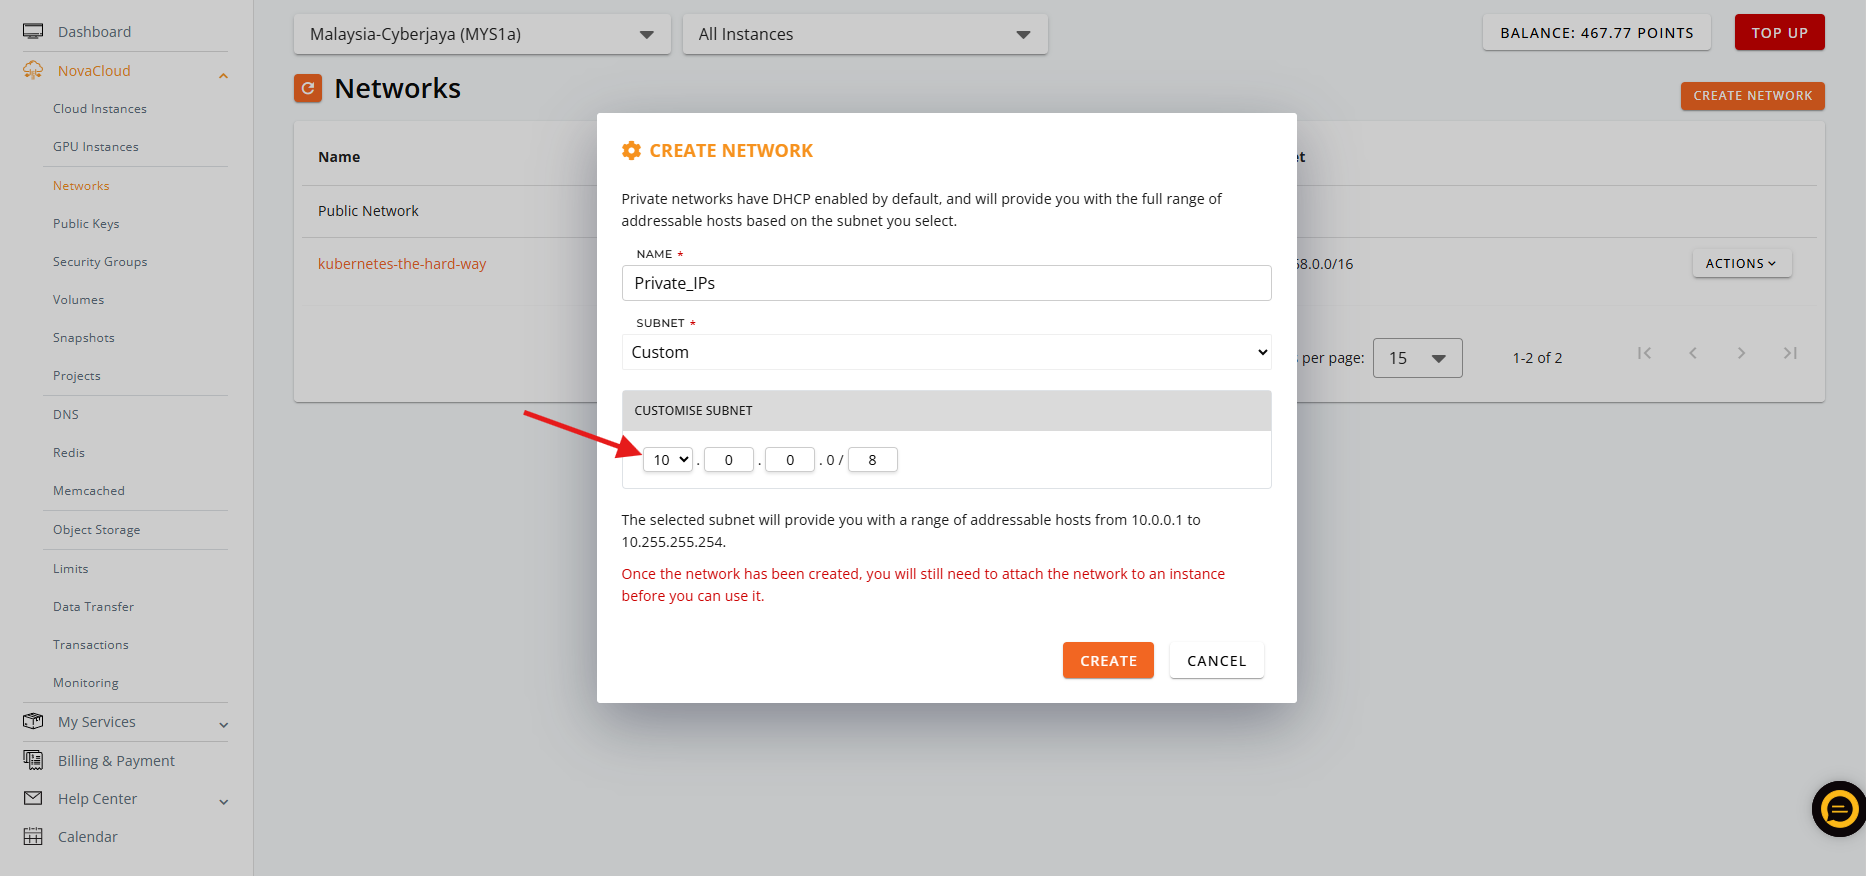
- Once you have entered the details, click CREATE button to save
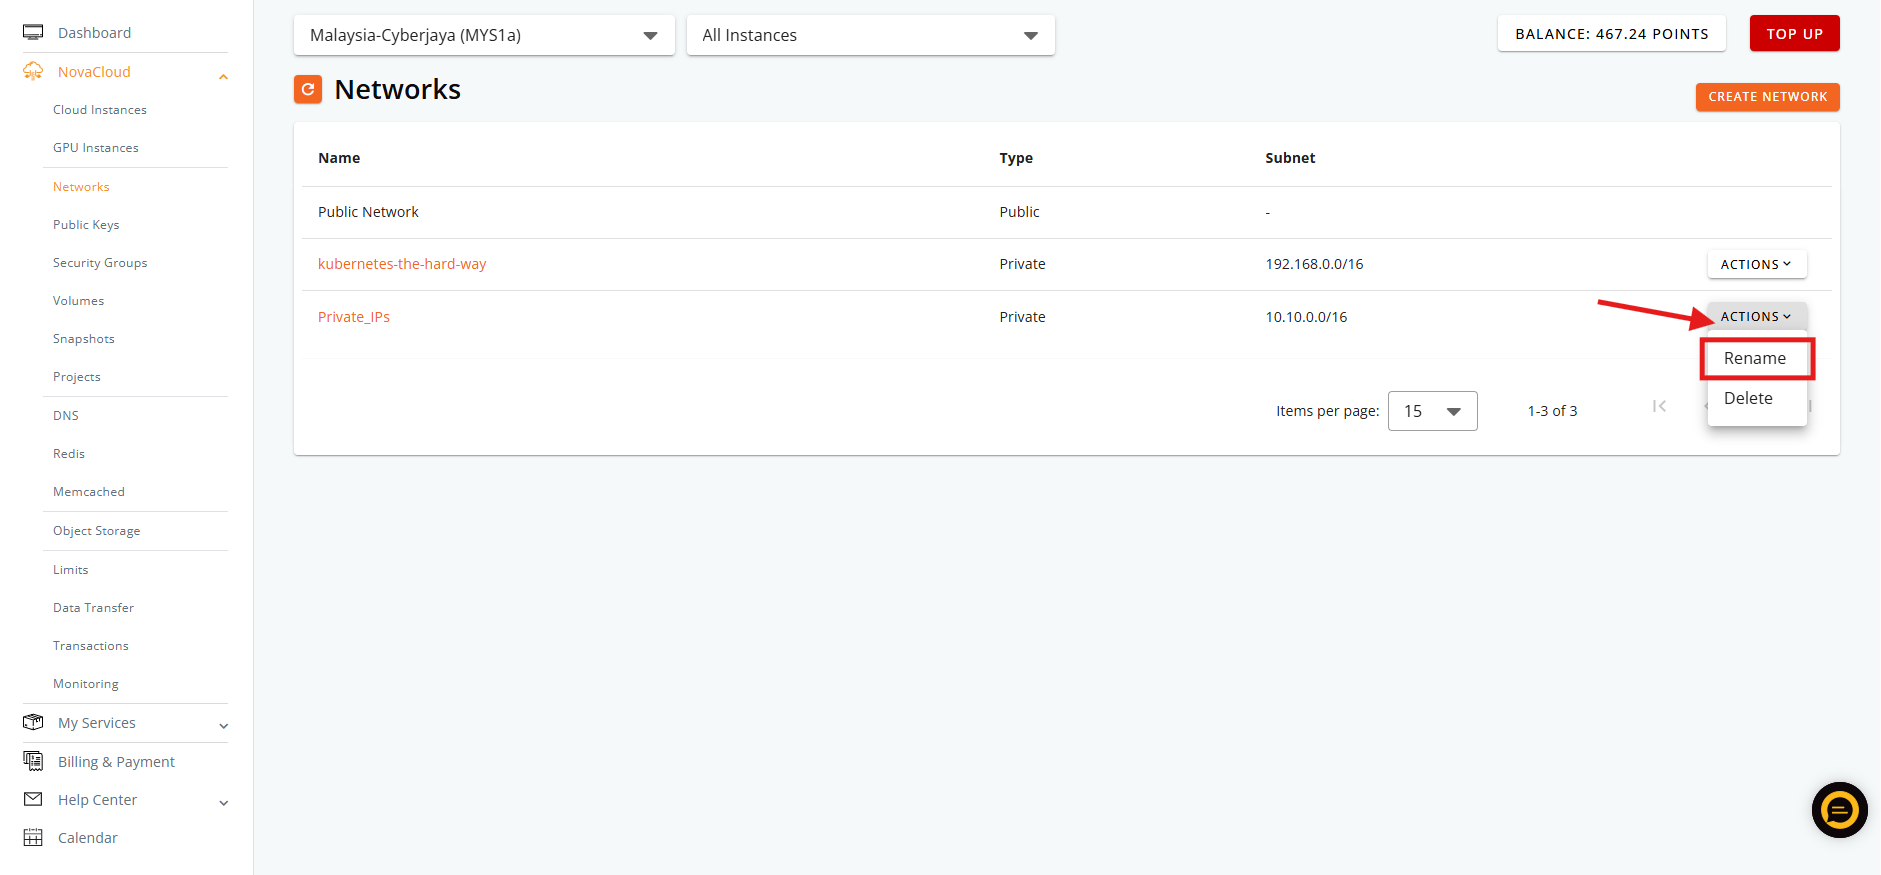
- Click on the ACTIONS drop-down menu and select Rename option
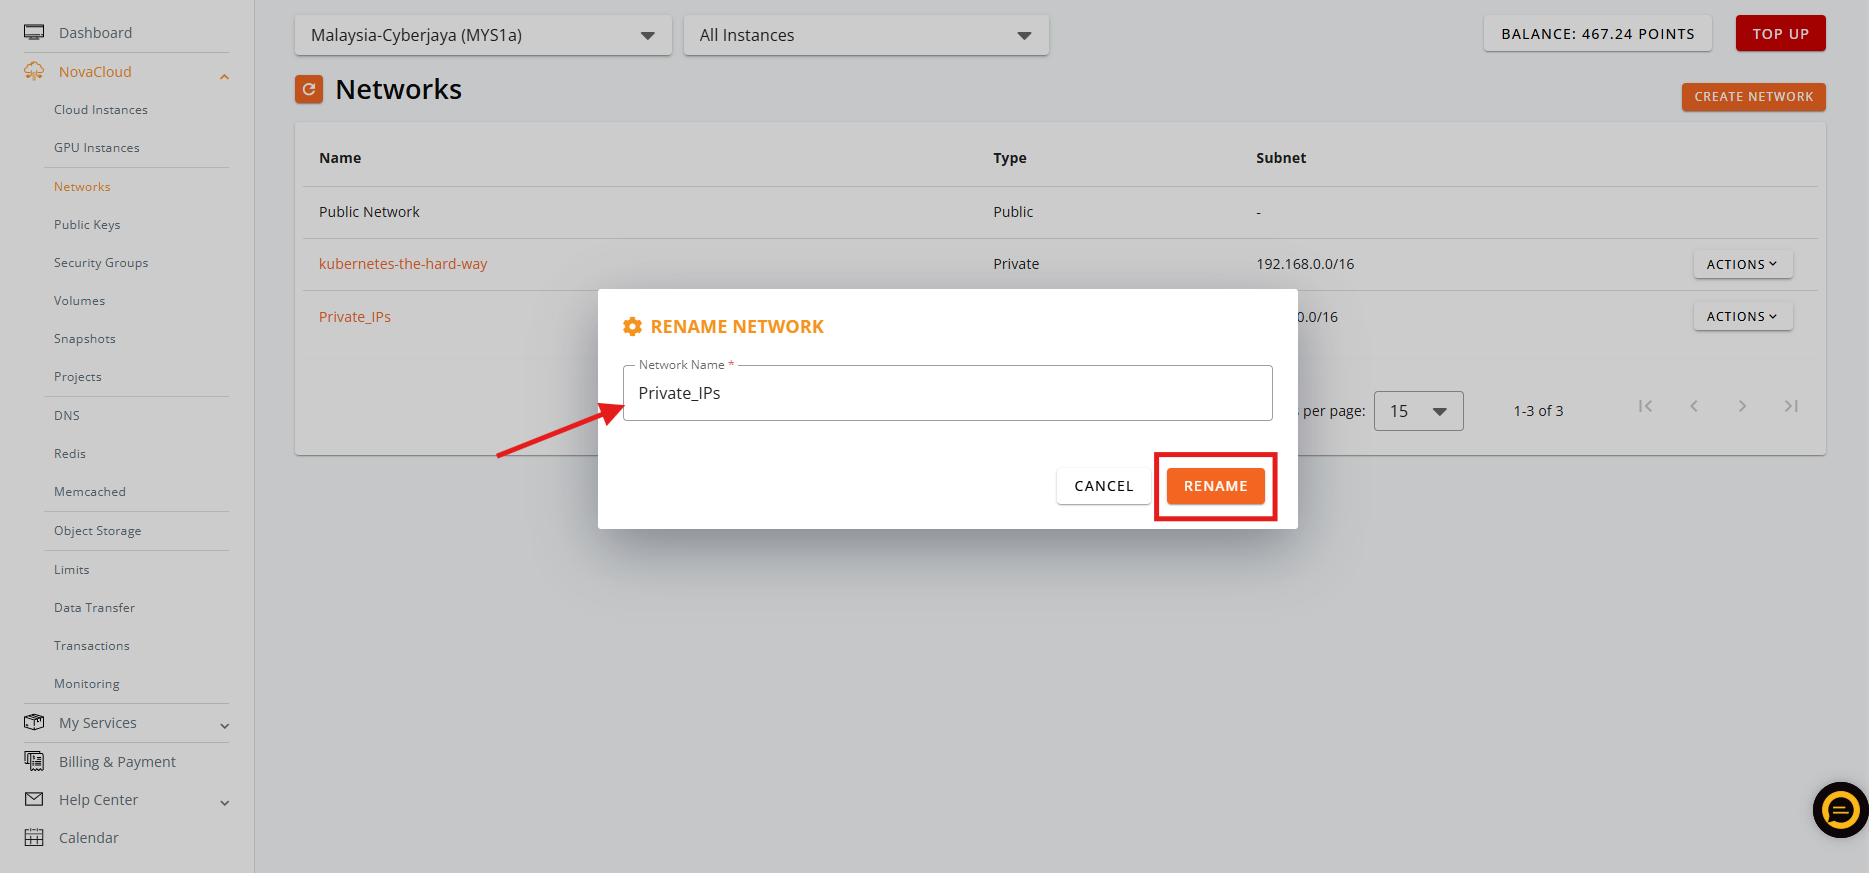
- Enter your new desired name and click RENAME to save
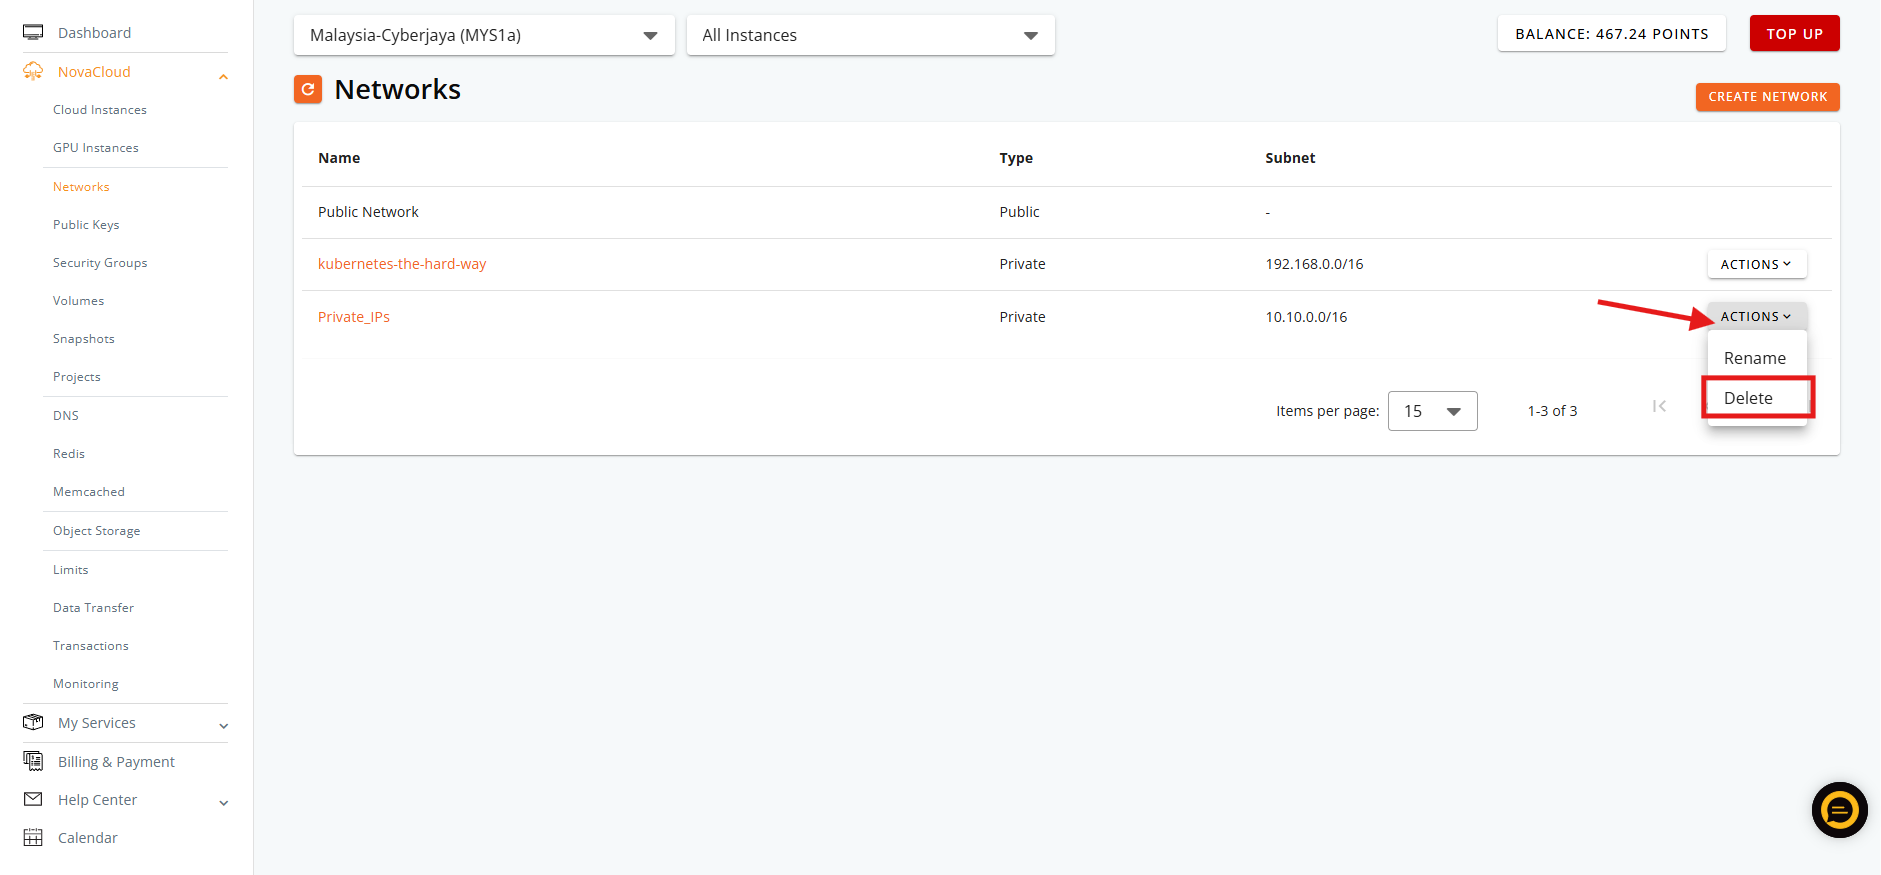
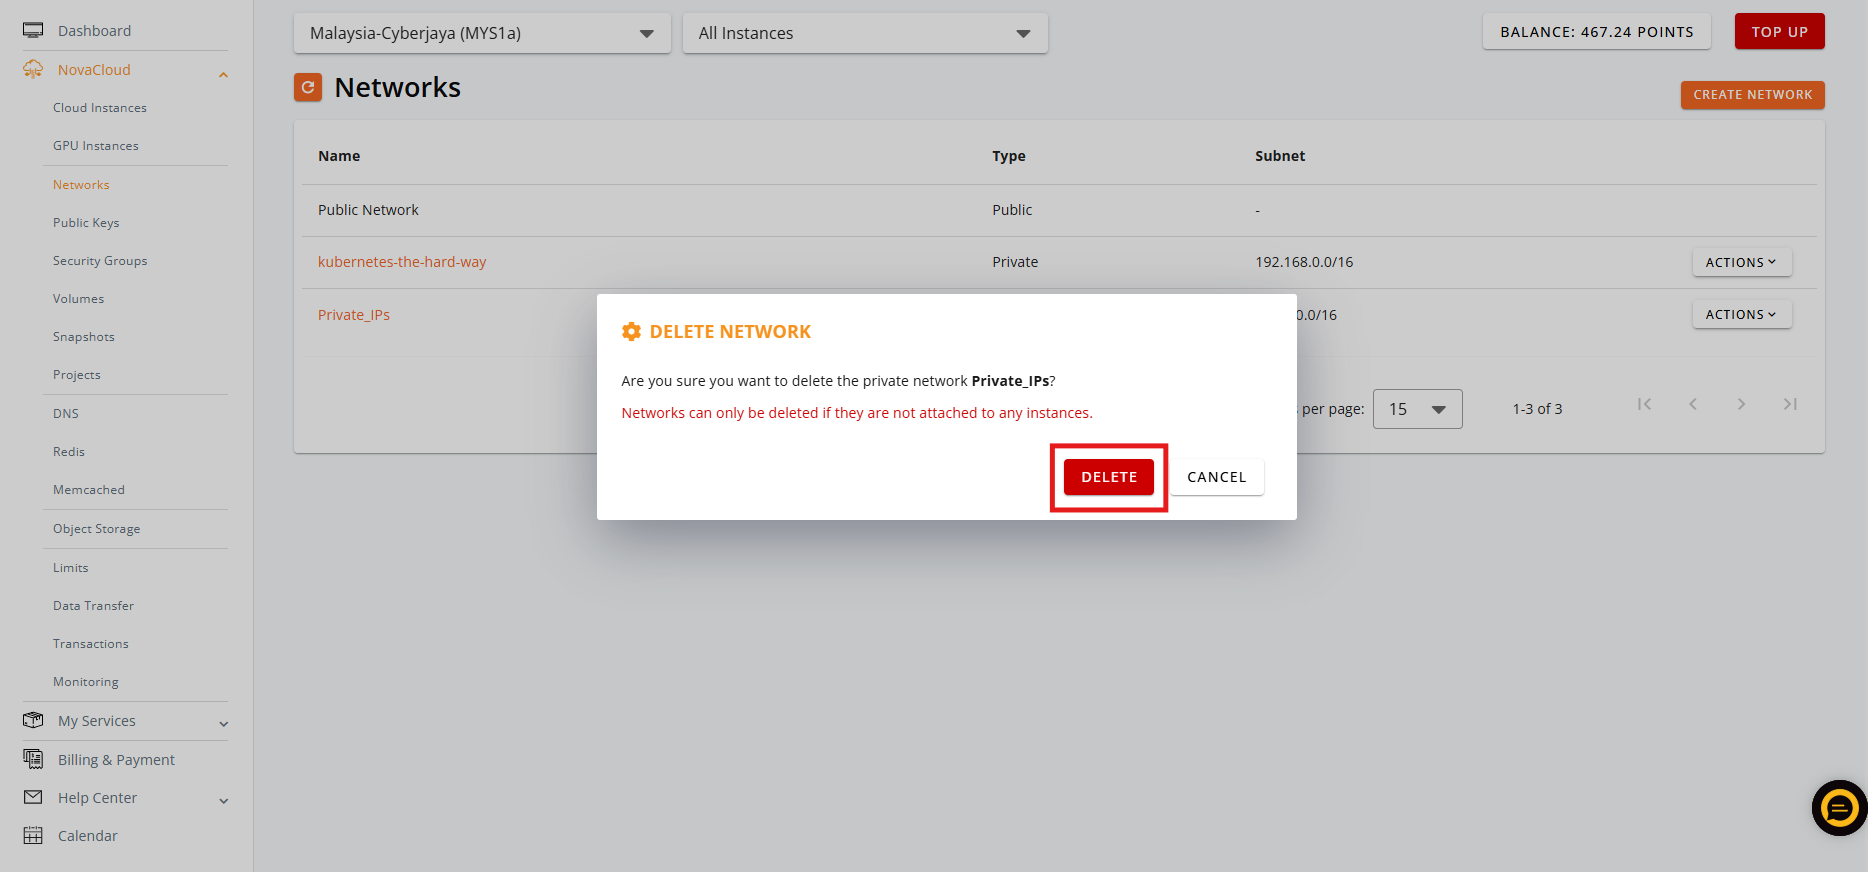
- Click on the ACTIONS drop-down menu and select Delete option
- Click DELETE again to confirm you wish to delete the private IP subnet
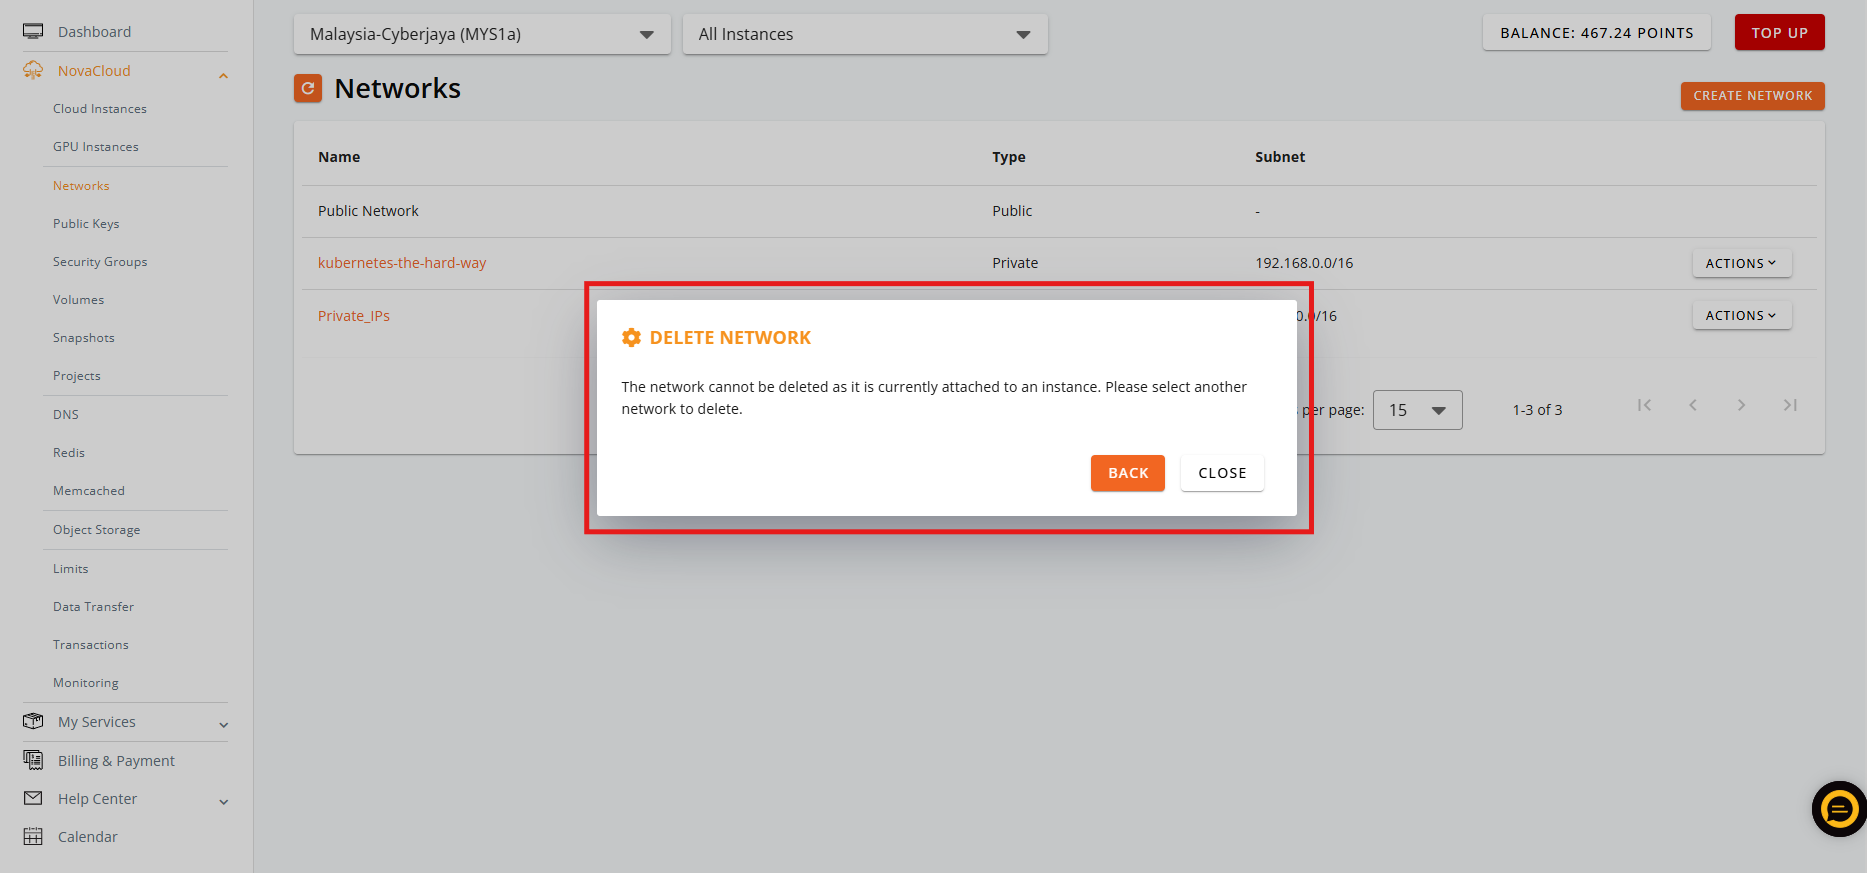
- If the private IP subnet is attached to any of the instances, you will be getting the message below to prevent it being delete
Step 3: Private IP network instance assignment
- There are 2 ways to assign the private IP network to instances in Customer Portal, in network managing site and instance’s network managing site.
- Using network managing site allow you to perform the actions in the fastest way. While instance’s network managing site allow you to fully review the instance before performing any actions.
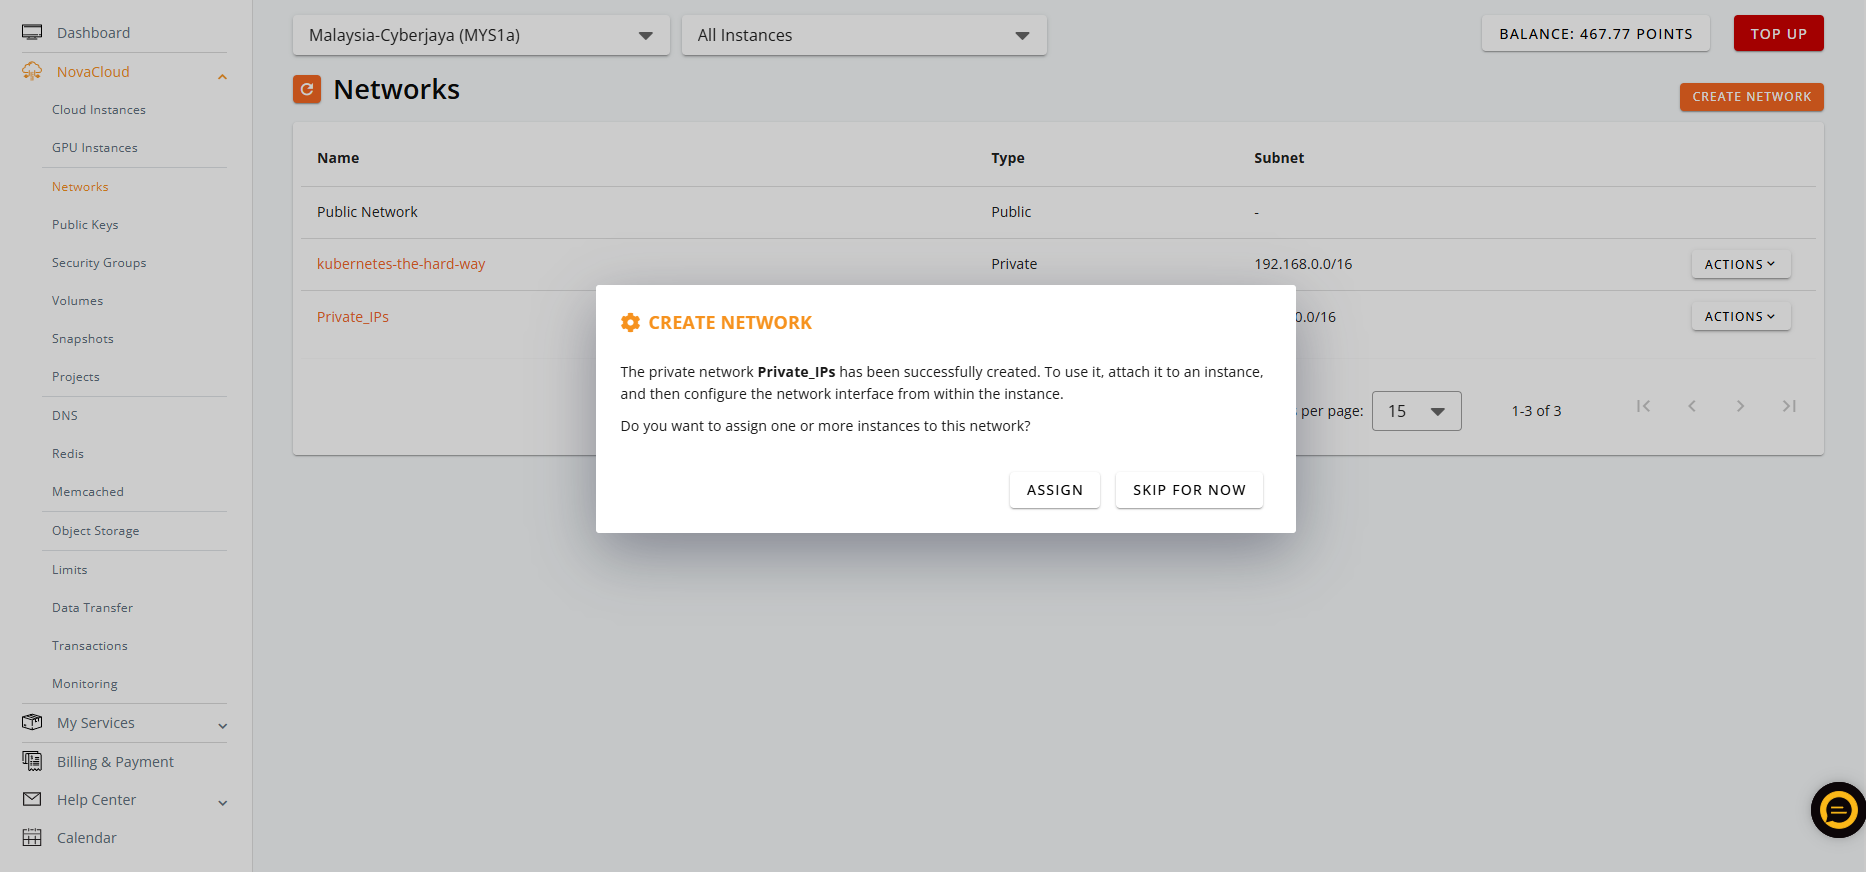
- Once you have created a new private IP network, a window will show up and provide the option ASSIGN or SKIP FOR NOW. Click ASSIGN to start assigning the private IP network to the instances
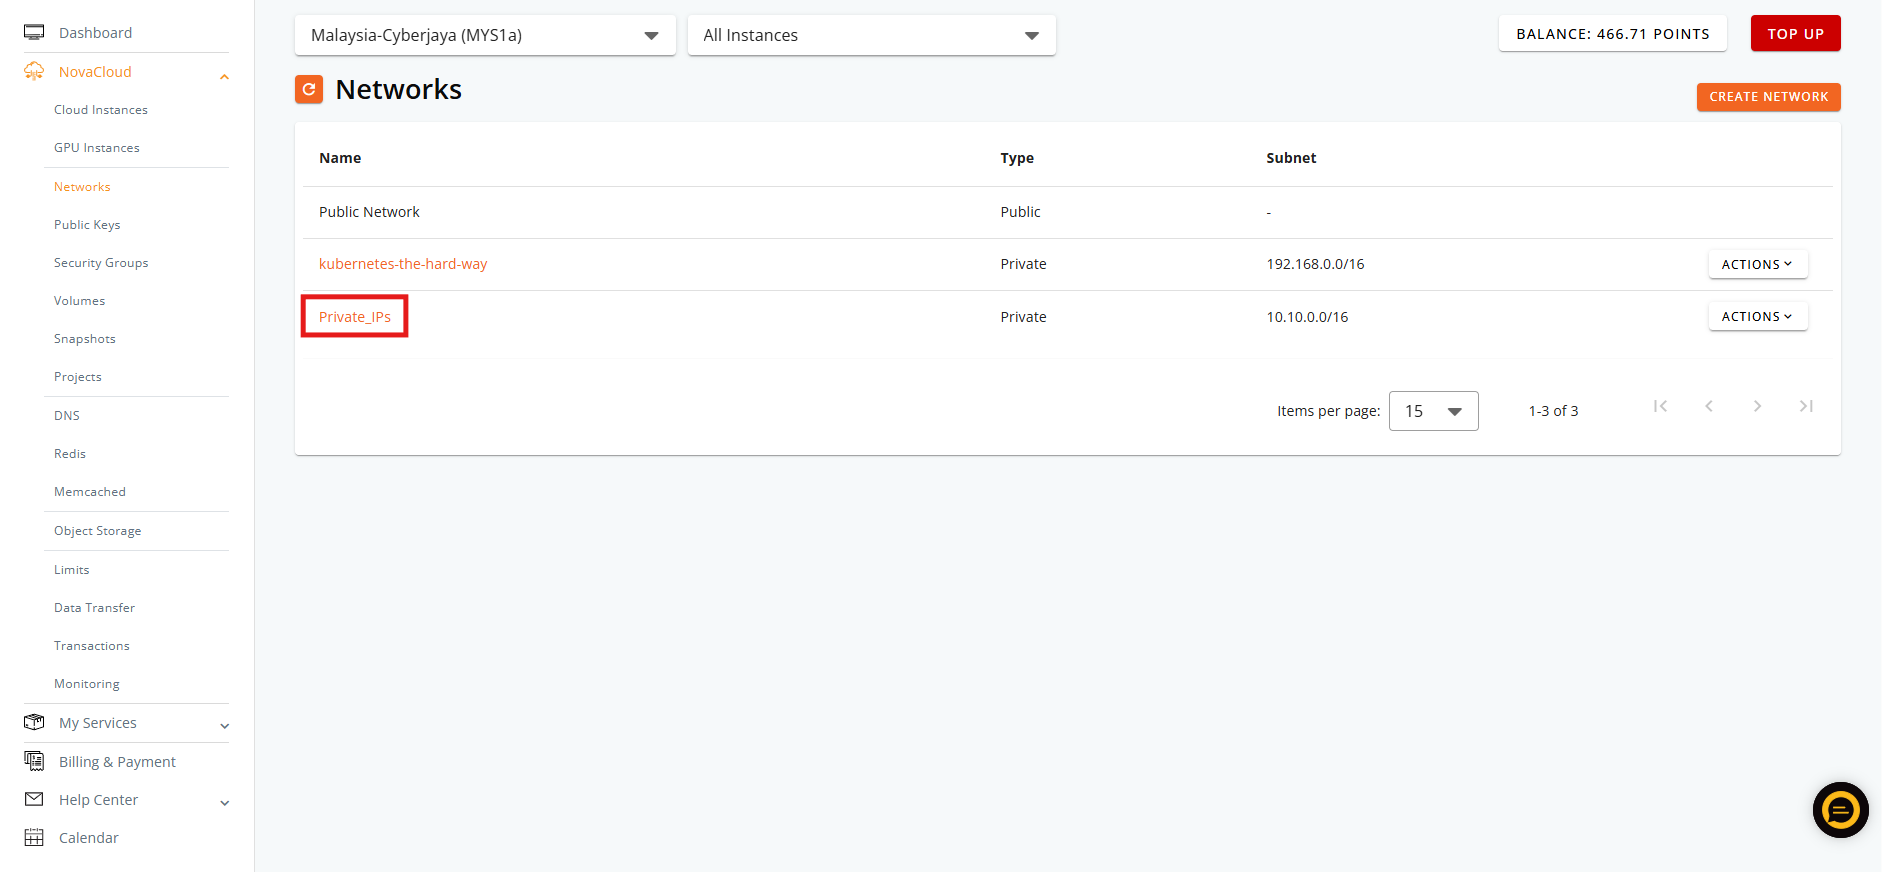
- If you have missed the window or the private IP network was not created recently, you may click on the NAME to start assigning the private IP network to the instances
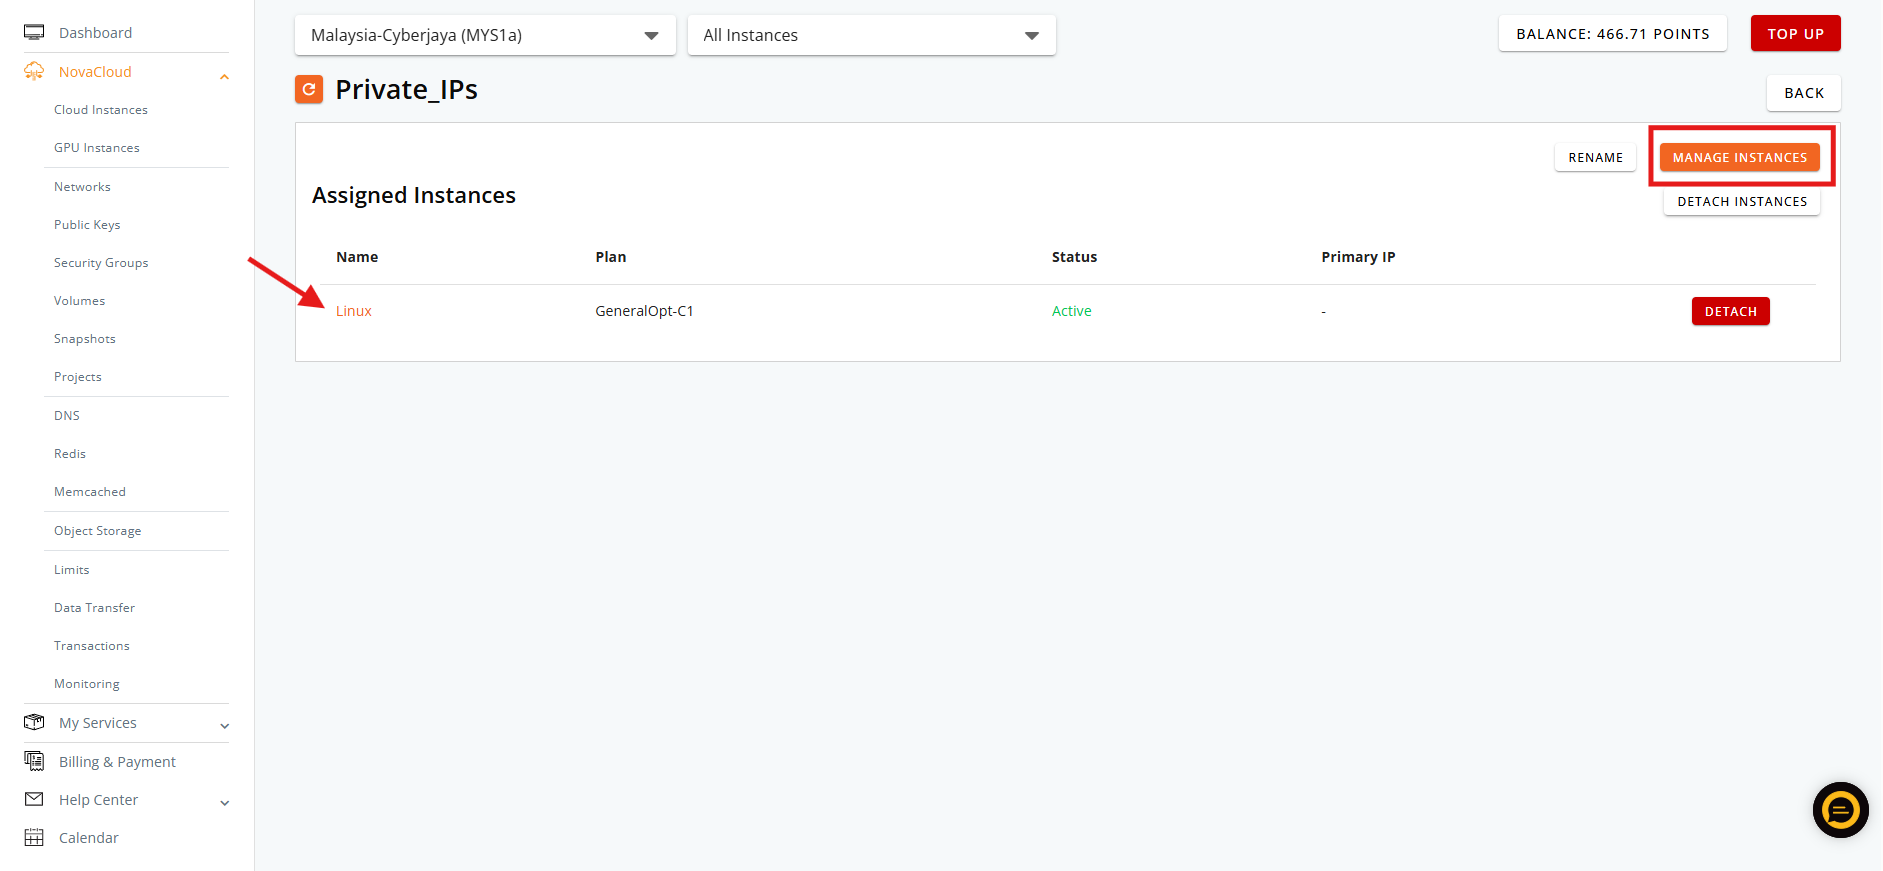
- In this screen, you will be seeing the assigned instances listed. Click MANAGE INSTANCES to start the assignment
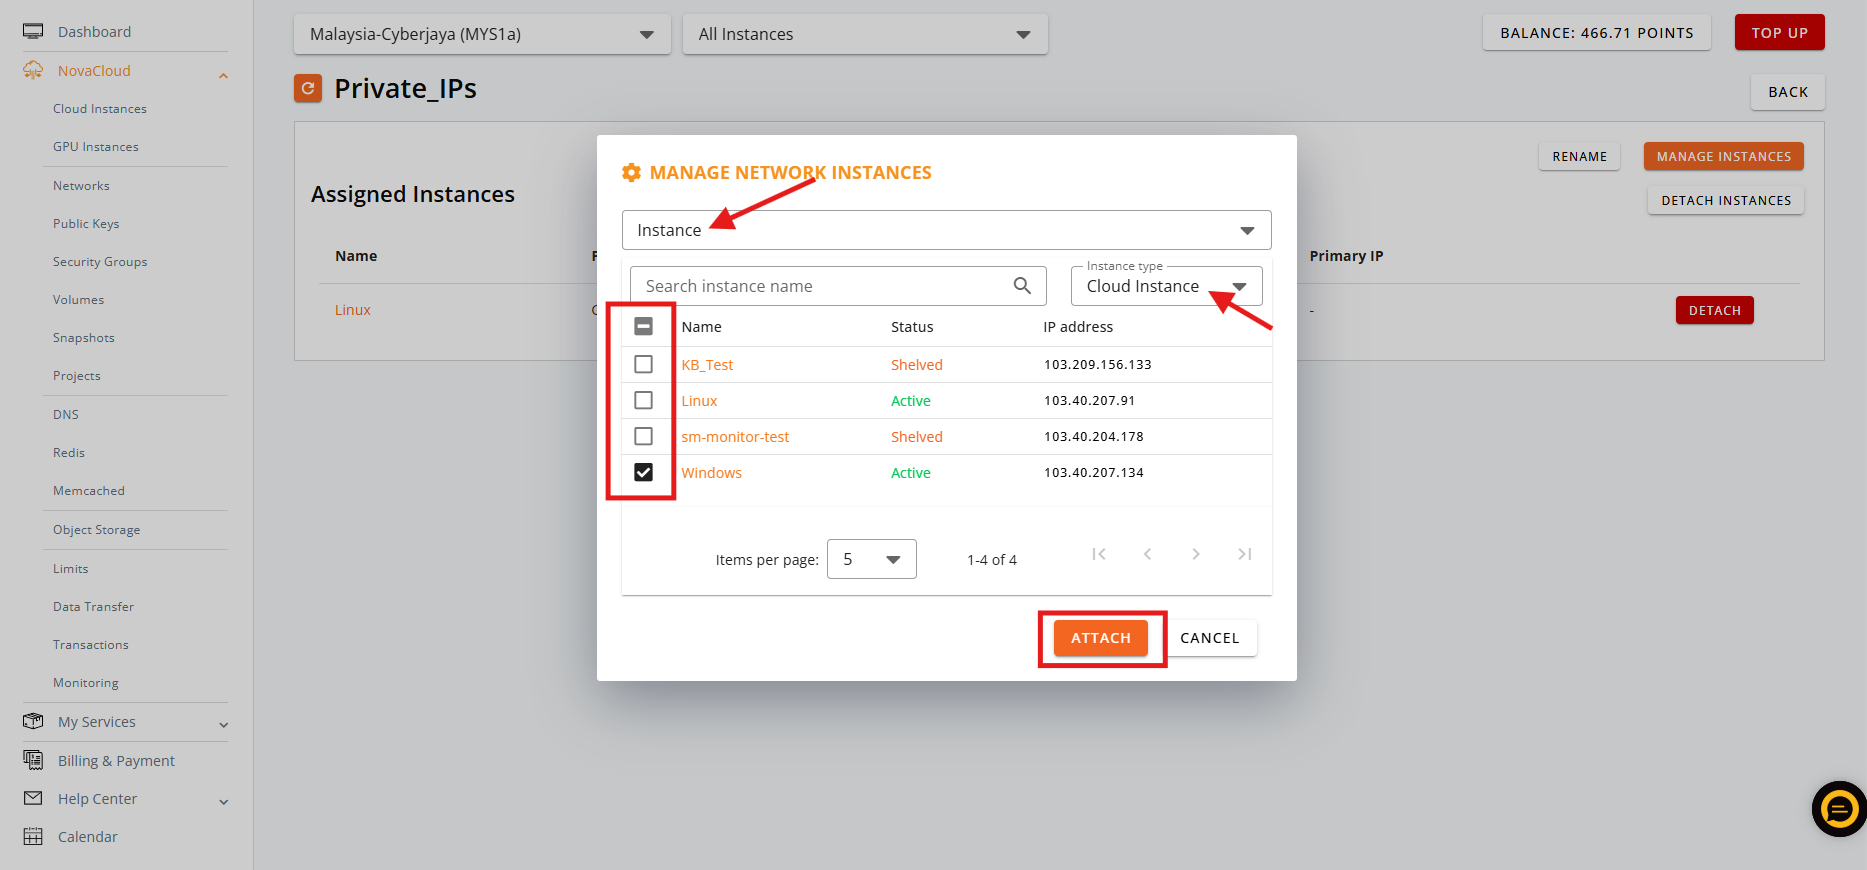
- Make sure you have selected Instance and the Instance type (Cloud Instance or GPU Instance). Tick on the instance you wish to assign then ATTACH to apply
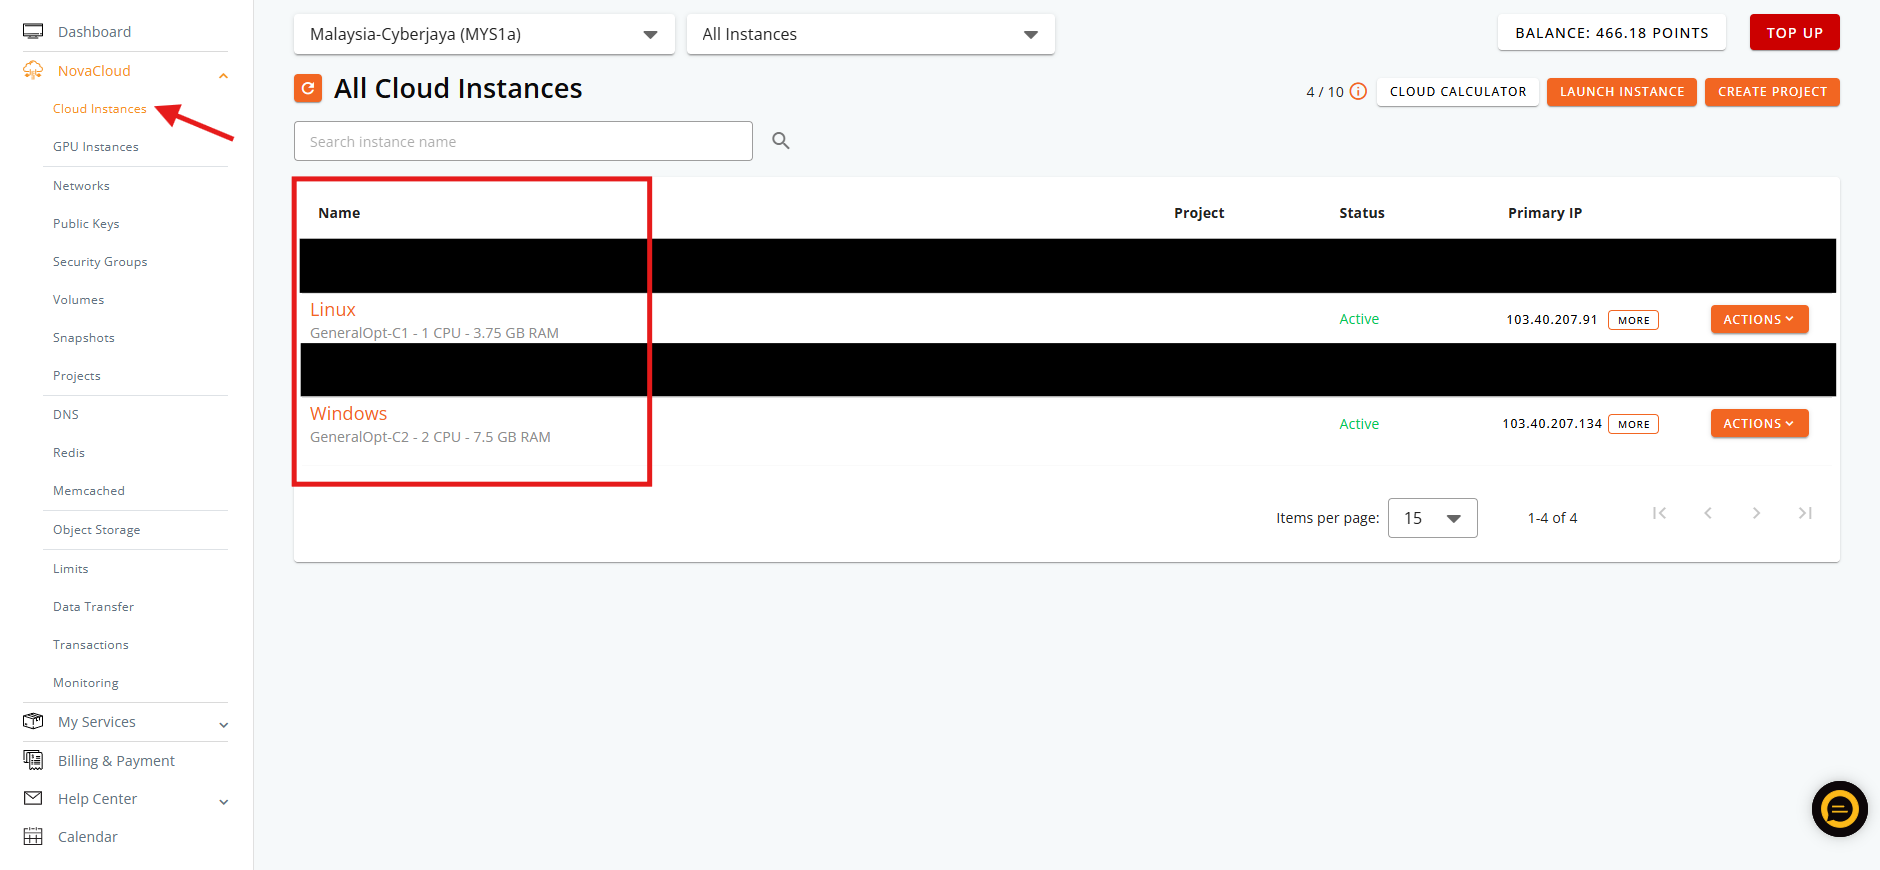
- Navigate Cloud Instance and select NAME to enter the instance management page
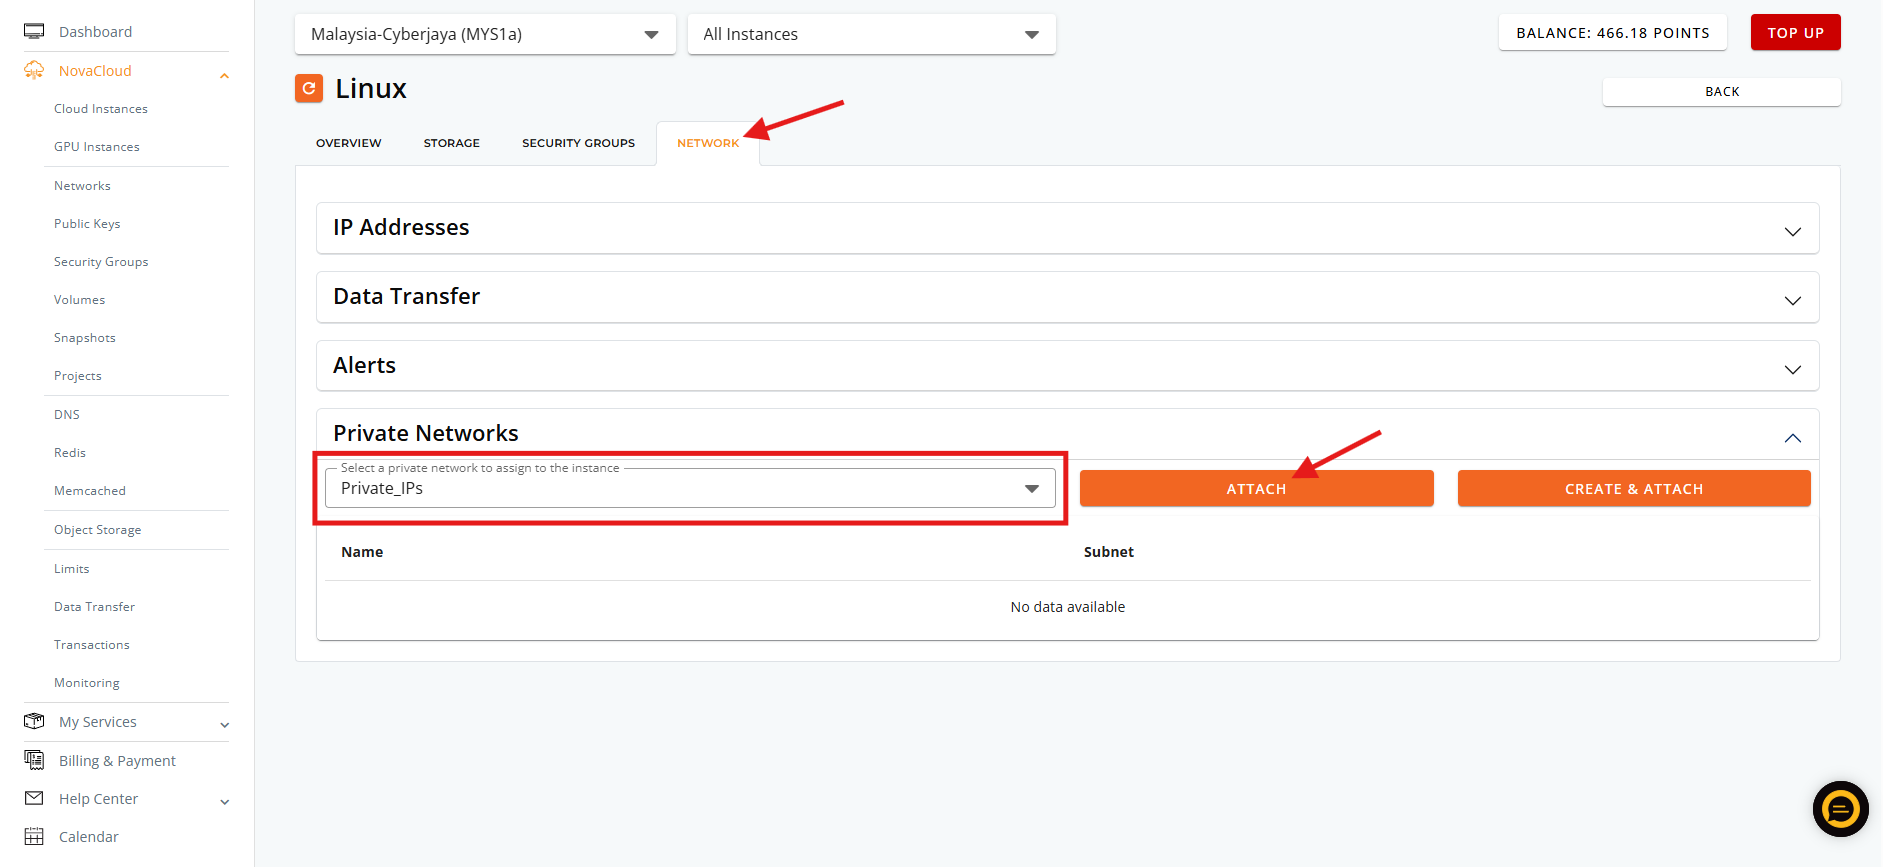
- Switch to NETWORK tab then open the Private Networks tab. Select the Private Networks from the drop-down then click ATTACH button to apply
Tips 🖊️: You can use CREATE & ATTACH to create new private IP network on the spot and attach it after creation
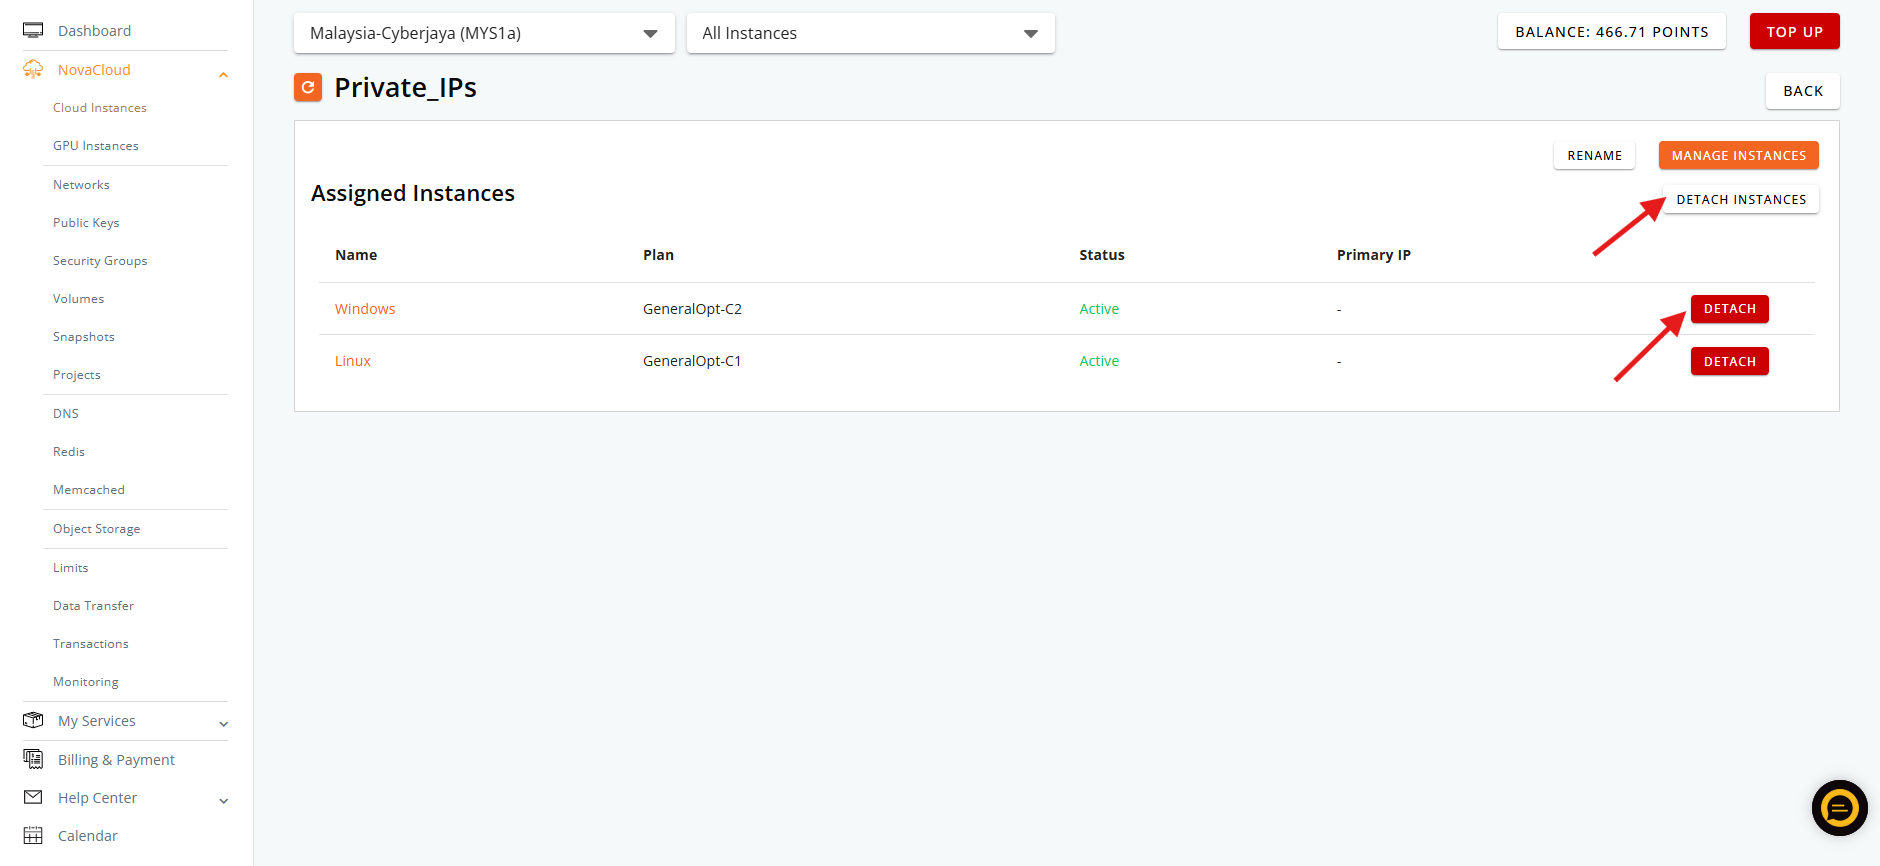
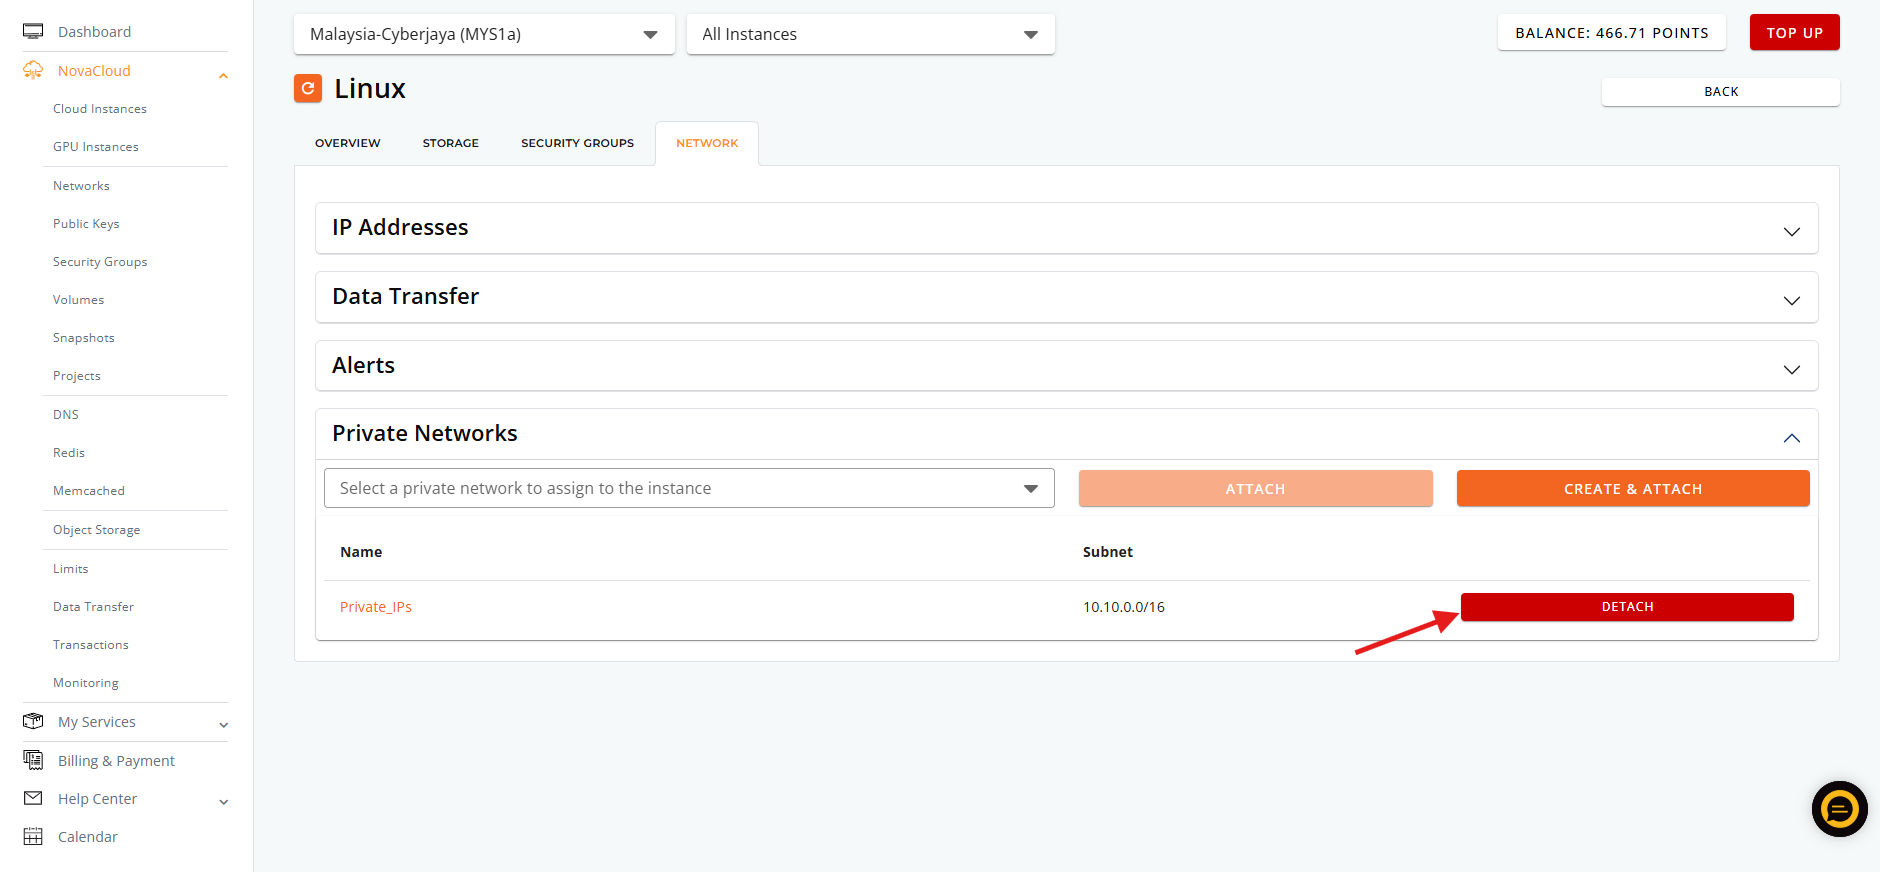
- To detach the private IP network from the instances in network managing site and instance’s network managing site.
- In network managing site, click on DETACH INSTANCES to detach in batch or using DETACH to detach from an instance
- In instance’s network managing site, click DETACH to detach the private IP network from the instance
Step 4: Verifying private IP network assignment in OS level
- After the private IP network is assigned to instance, it should be showing in the OS level automatically without rebooting the server and changing any configuration. To verify the private IP network within the OS level:
- Access the instance via SSH client, refer the step from [How to login to your Linux Server via SSH]
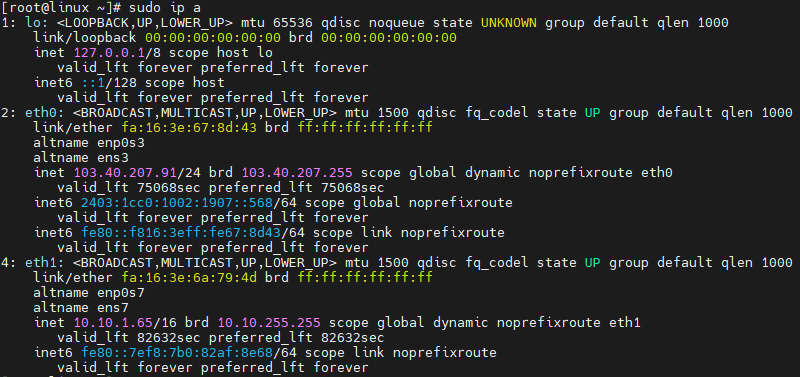
- Run the command below and the private IP network should be showing
sudo ip a
- Example output of the command
- Access the instance via RDP, refer the step from [How to login to your Windows Server via RDP]
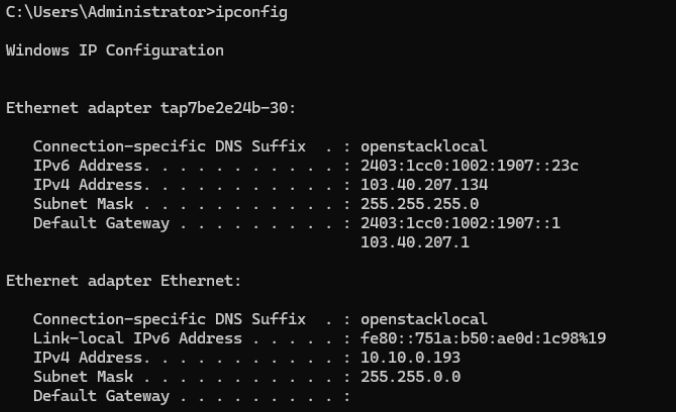
- Run the command below in Windows Command Prompt (CMD) and the private IP network should be showing
ipconfig
- Example output of the command
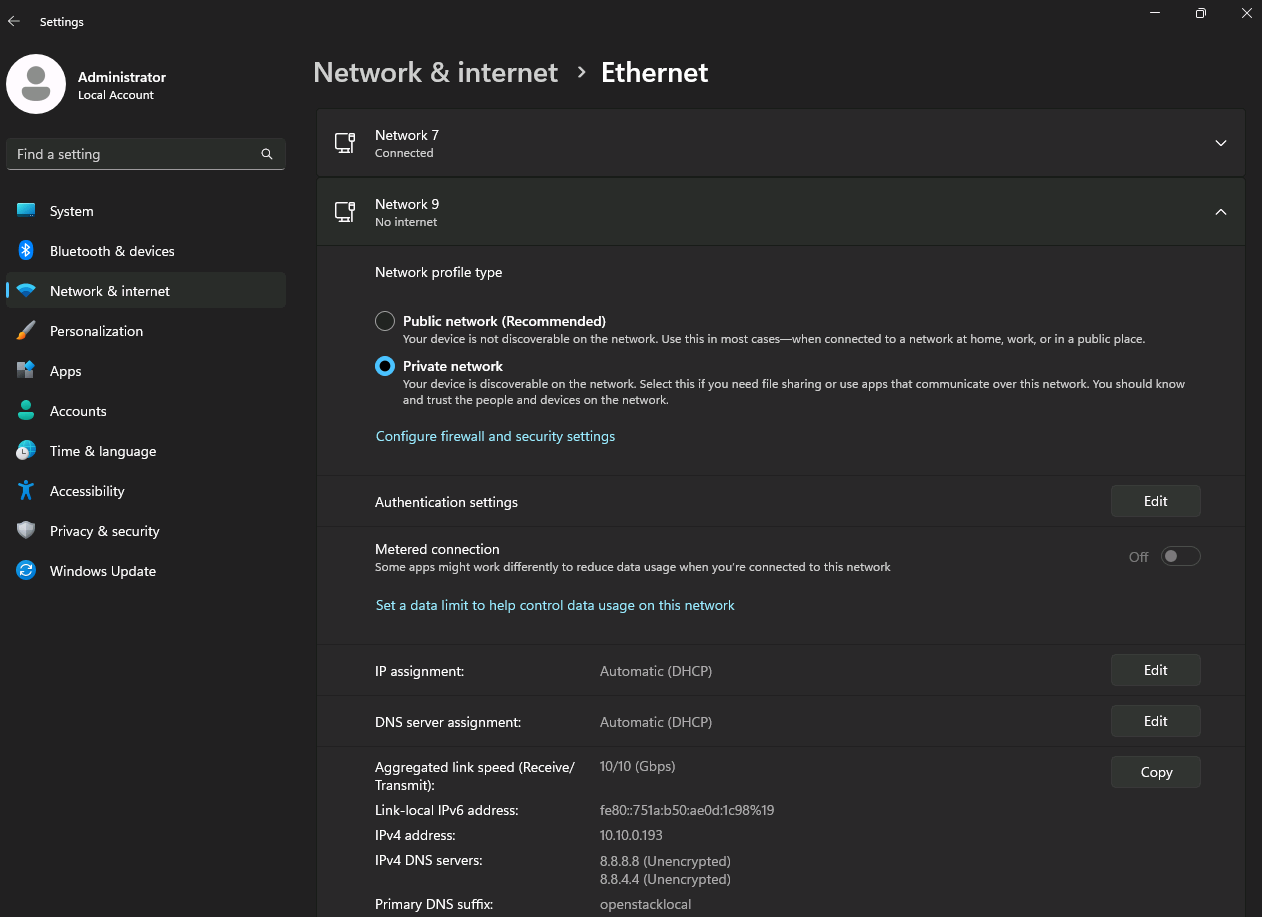
- In Windows Network Settings will also be showing, there will be 2 networks and one of it should be the private IP network
Conclusion
By following this guidance, you can successfully create, remove, and map private IP resources to your infrastructure instances using the portal dashboard, as well as confirm status changes inside your system environment.
For additional assistance or if you encounter any issues, please contact our support team at support@ipserverone.com.