
Search Our Database
Managing project and instance assignment in Customer Portal
Introduction
Organizing virtual infrastructure into structured groups allows account administrators to streamline resource management and maintain strict organizational control. The IPServerOne Customer Portal provides built-in tools to create dedicated project groups, assign instances to specific projects, remove unneeded assignments, or delete unused projects altogether. Whether you are categorizing cloud servers by department, client, or environment type, managing these assignments helps team members easily locate and monitor resources. By following this guide, system administrators can effortlessly handle the complete lifecycle of project groups directly through the IPServerOne management interface.
Prerequisite
- Access to IPServerOne Customer Portal
- Access to IPServerOne Customer Portal with active Cloud Instance service
- Basic knowledge of IPServerOne Customer Portal navigation
Step-by-step guide
Step 1: Access to projects managing site
- Login into our [Customer Portal]
- If you wish to assist to manage the instance’s projects that is not under your user account, you may ask instance’s owner to grant you the necessary role by [Delegate access in portal: Assigning roles and notifications to secondary users]
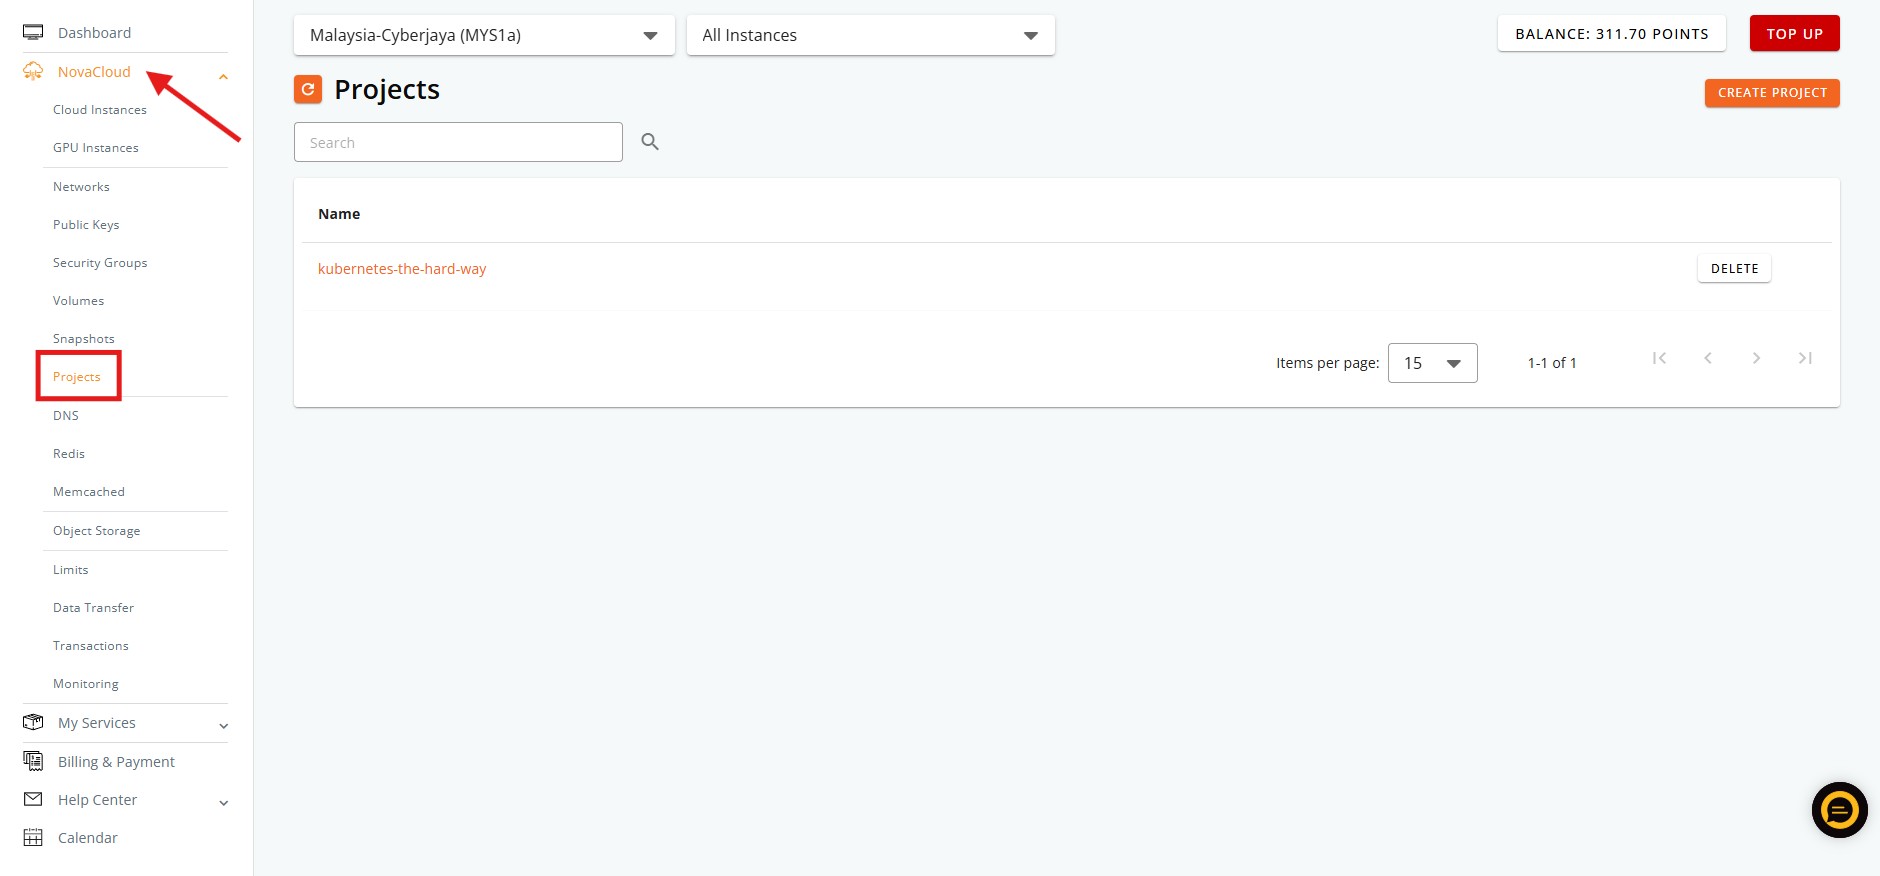
- Navigate to project managing site by click the Project on the left side menu.
Step 2: Managing projects
- There are 2 ways to create new project in Customer Portal, which create within the project managing site and instance managing site.
- For instance managing site, the guidance will be share in the next step, Step 3: Projects instance assignment.
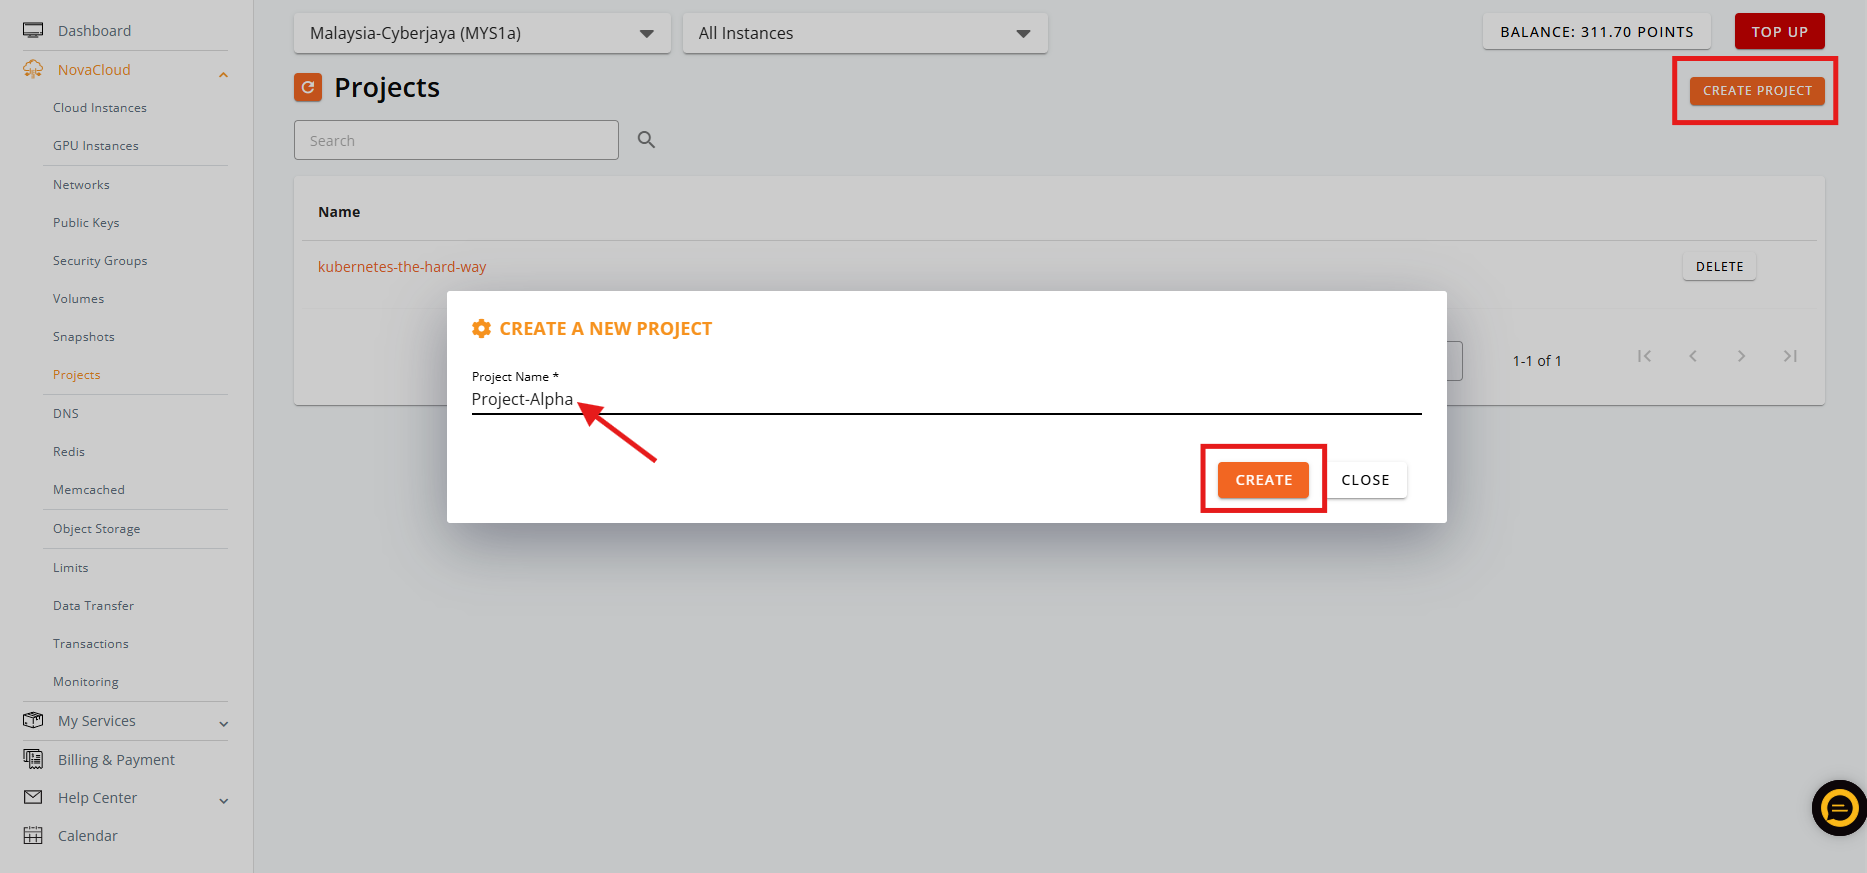
- Click on the CREATE PROJECT button.
- Enter you desired name for the new project.
- Once you have entered the details, click CREATE button to save.
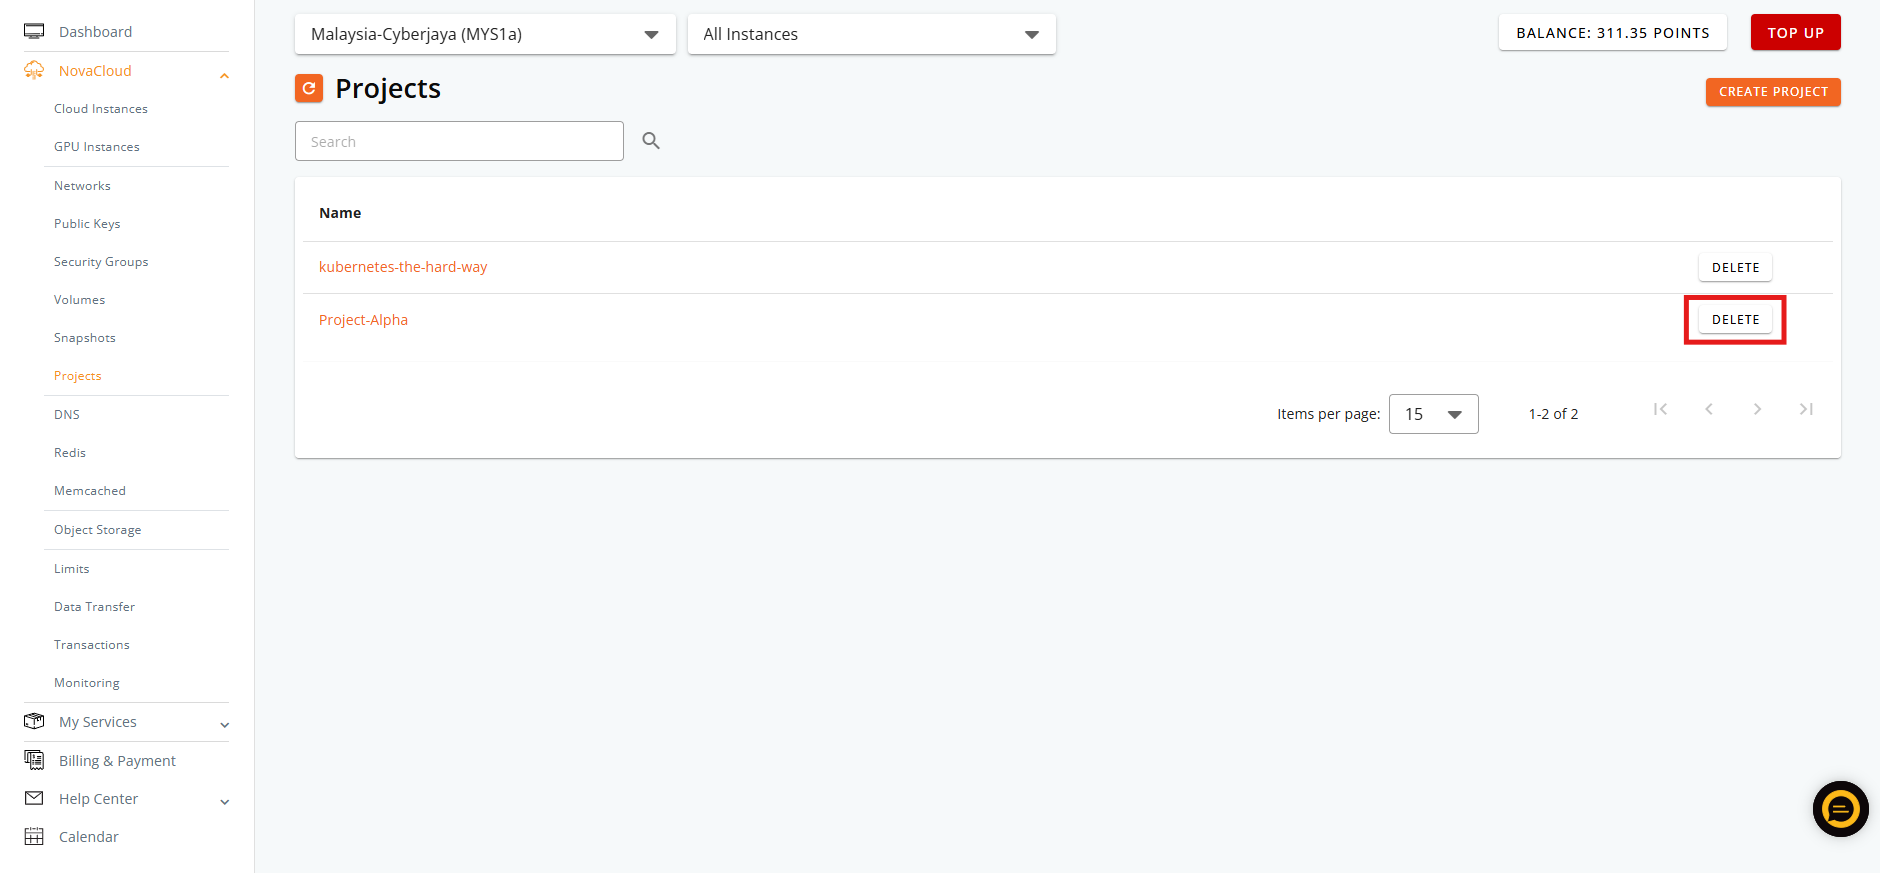
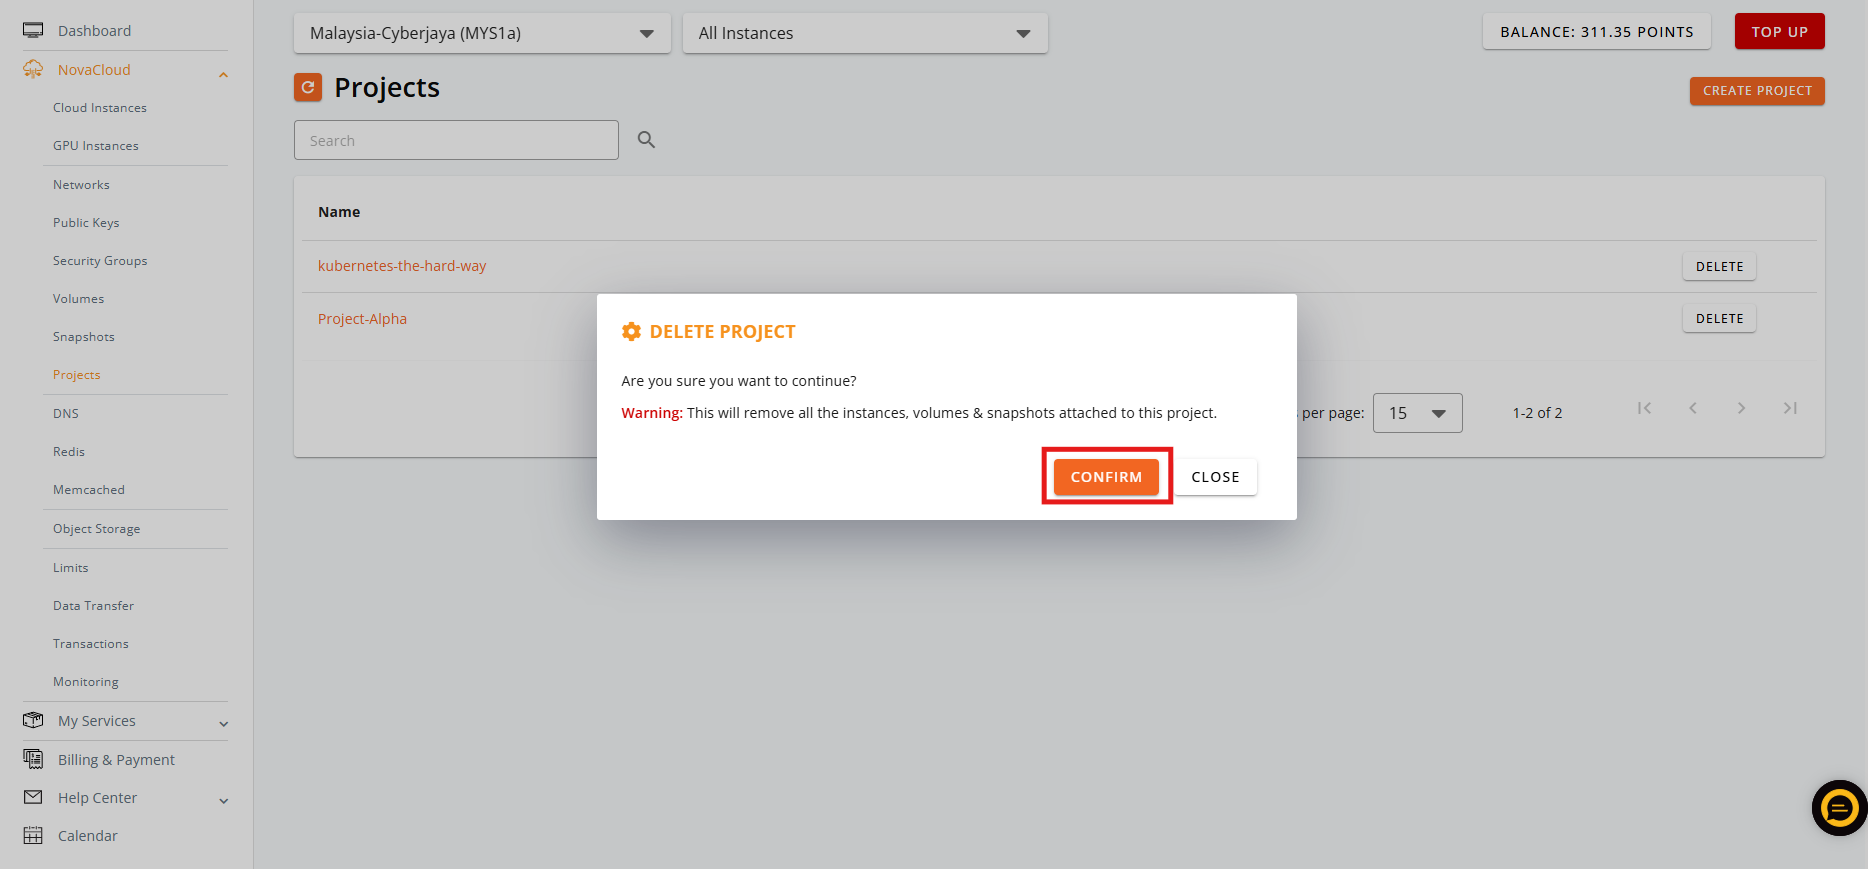
- Click DELETE button to begin the removal process.
- Click DELETE again to confirm you wish to delete the project.
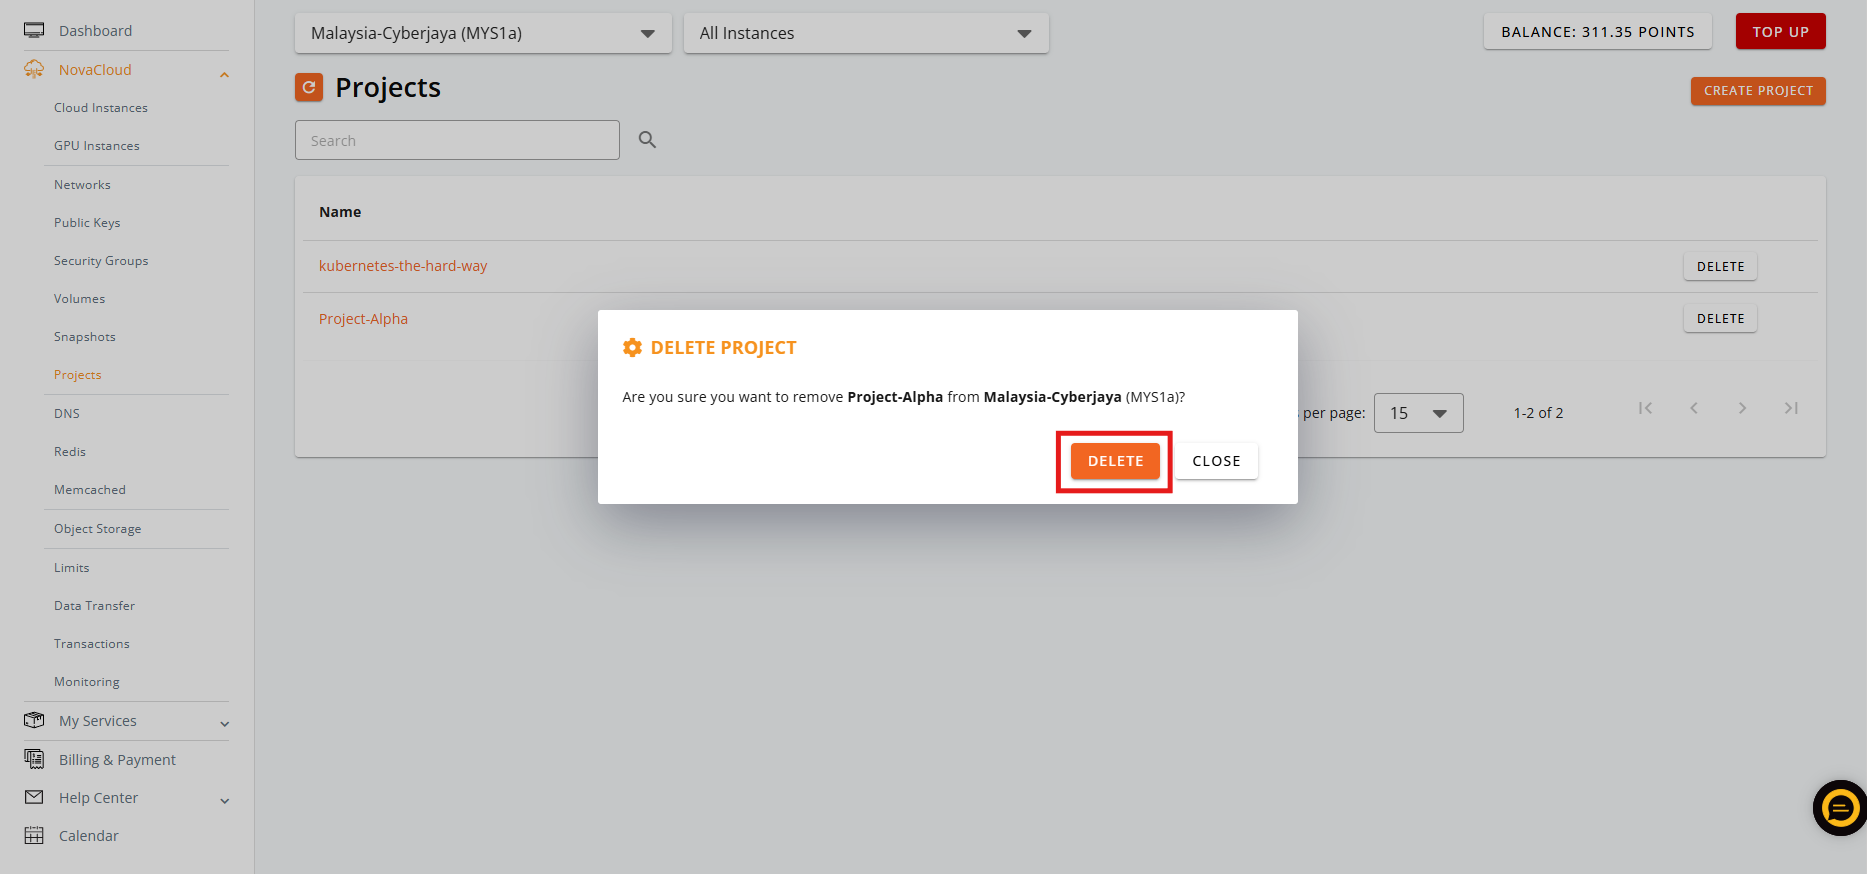
- If there are any of the instances, volumes & snapshots added to the project, it will be deleted together.
Important Note ⚠️: Deleting a project is permanent and will remove all associated cloud instances, volumes & snapshots. Ensure all necessary data is backed up or migrated before proceeding.
Step 3: Projects instance assignment
- There are 2 ways to assign the project to instances in Customer Portal, in project managing site and instance managing site.
- Using project managing site allow you to perform the actions in the fastest way. While instance managing site allow you to wider view of the instance list before performing any actions.
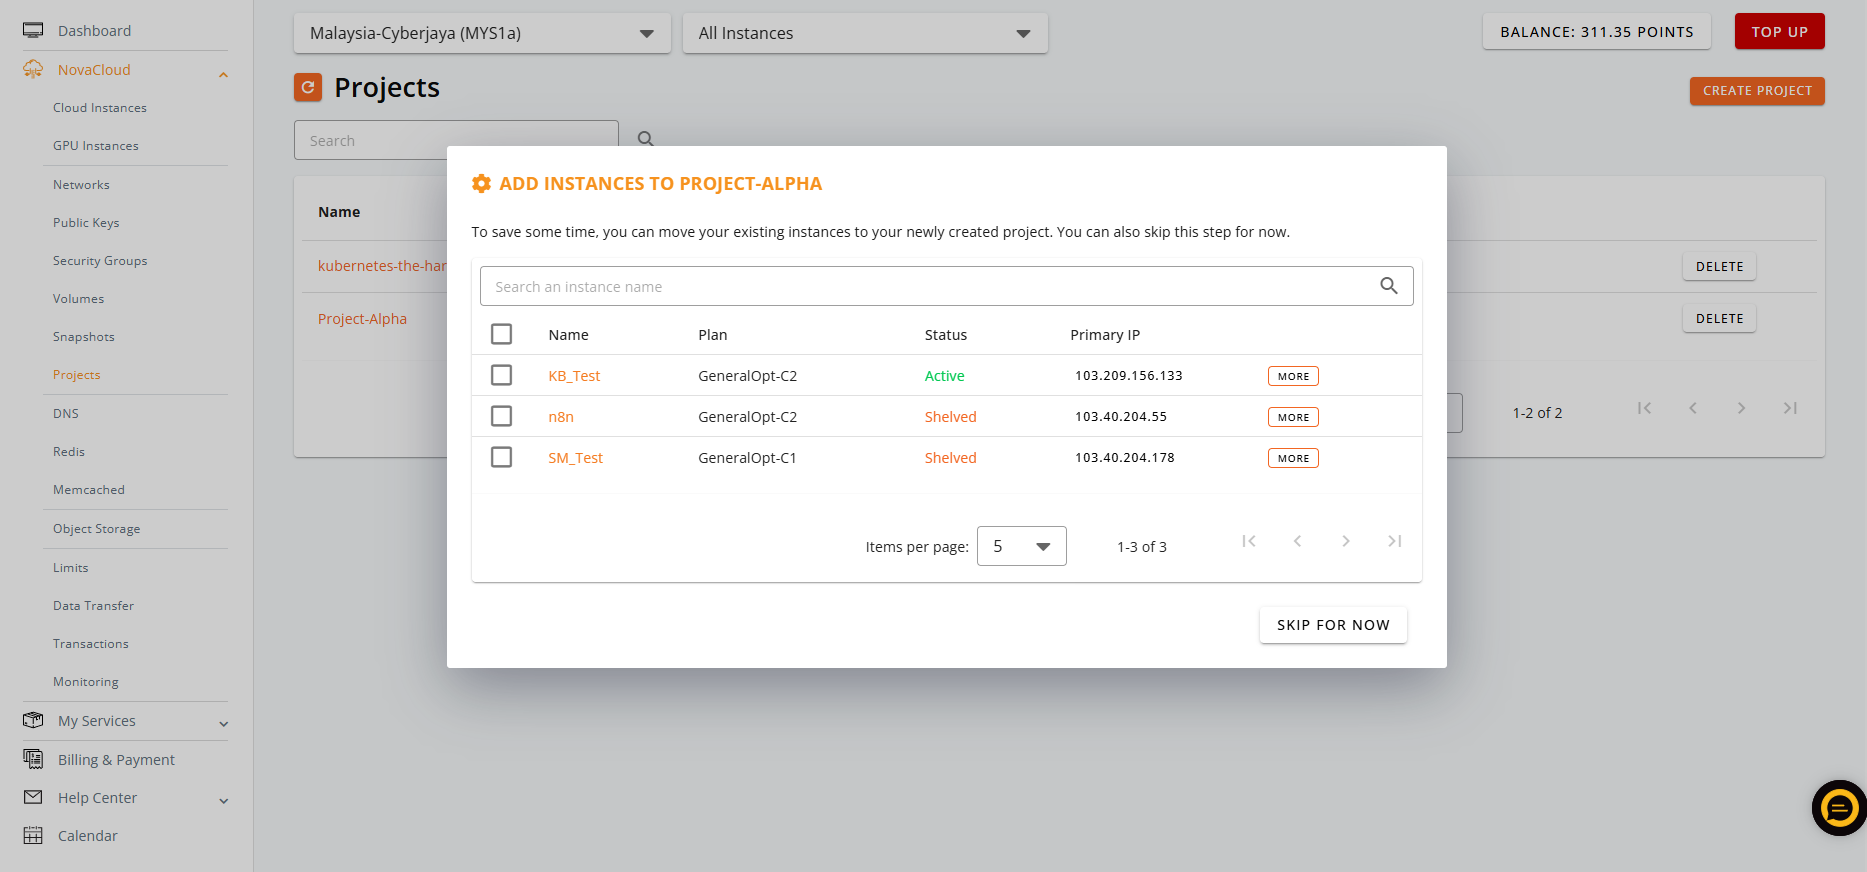
- Once you have created a new project, a window will show up and provide the option ADD (only appears when there are instances being selected) or SKIP FOR NOW.
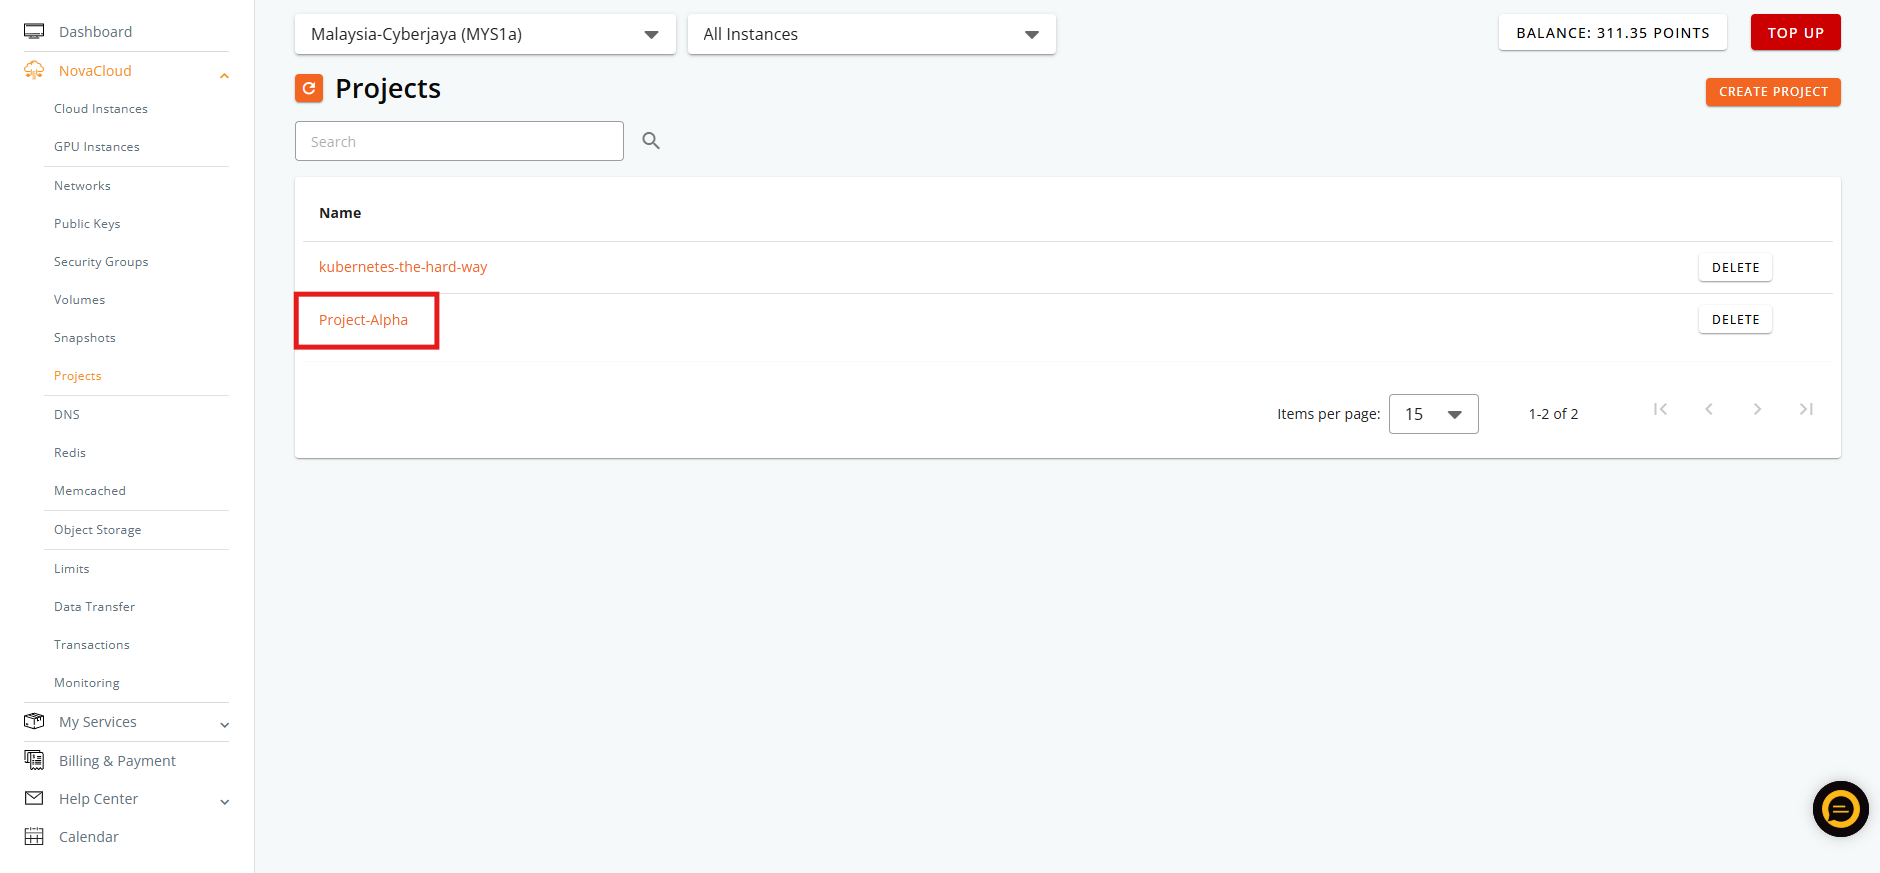
- If you have missed the window or the project was not created recently, you may click on the NAME to start adding the instances to the project.
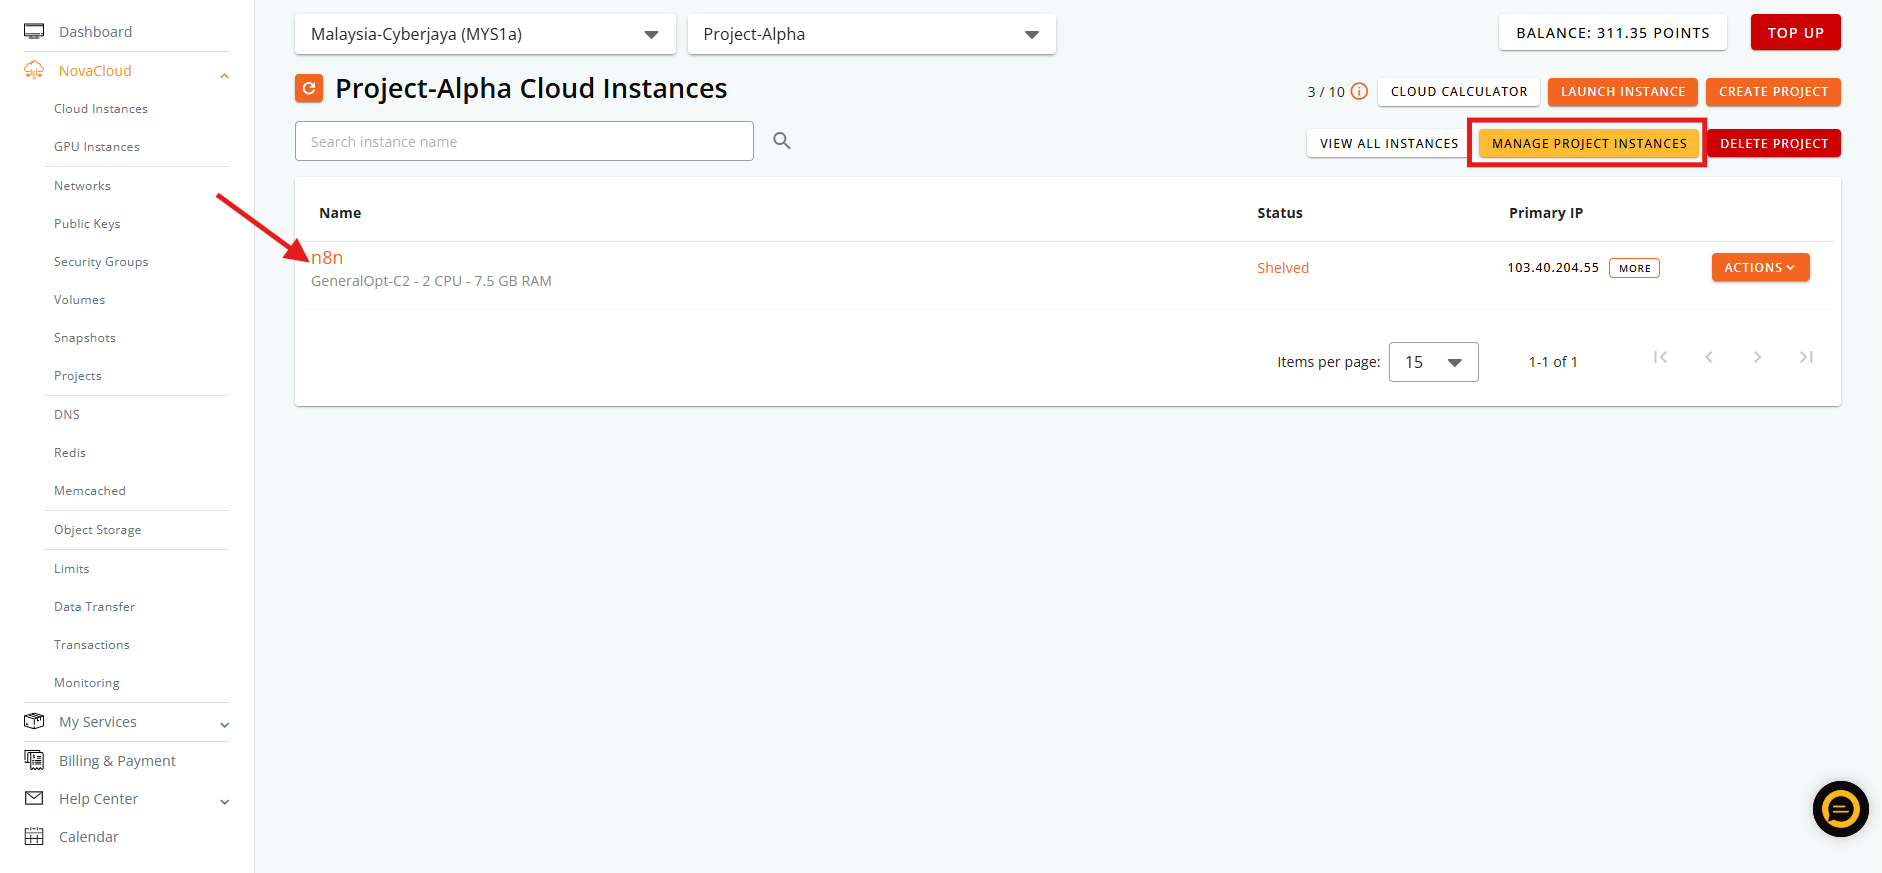
- In this screen, you will be seeing the assigned instances listed. Click MANAGE PROJECT INSTANCES to start the assignment.
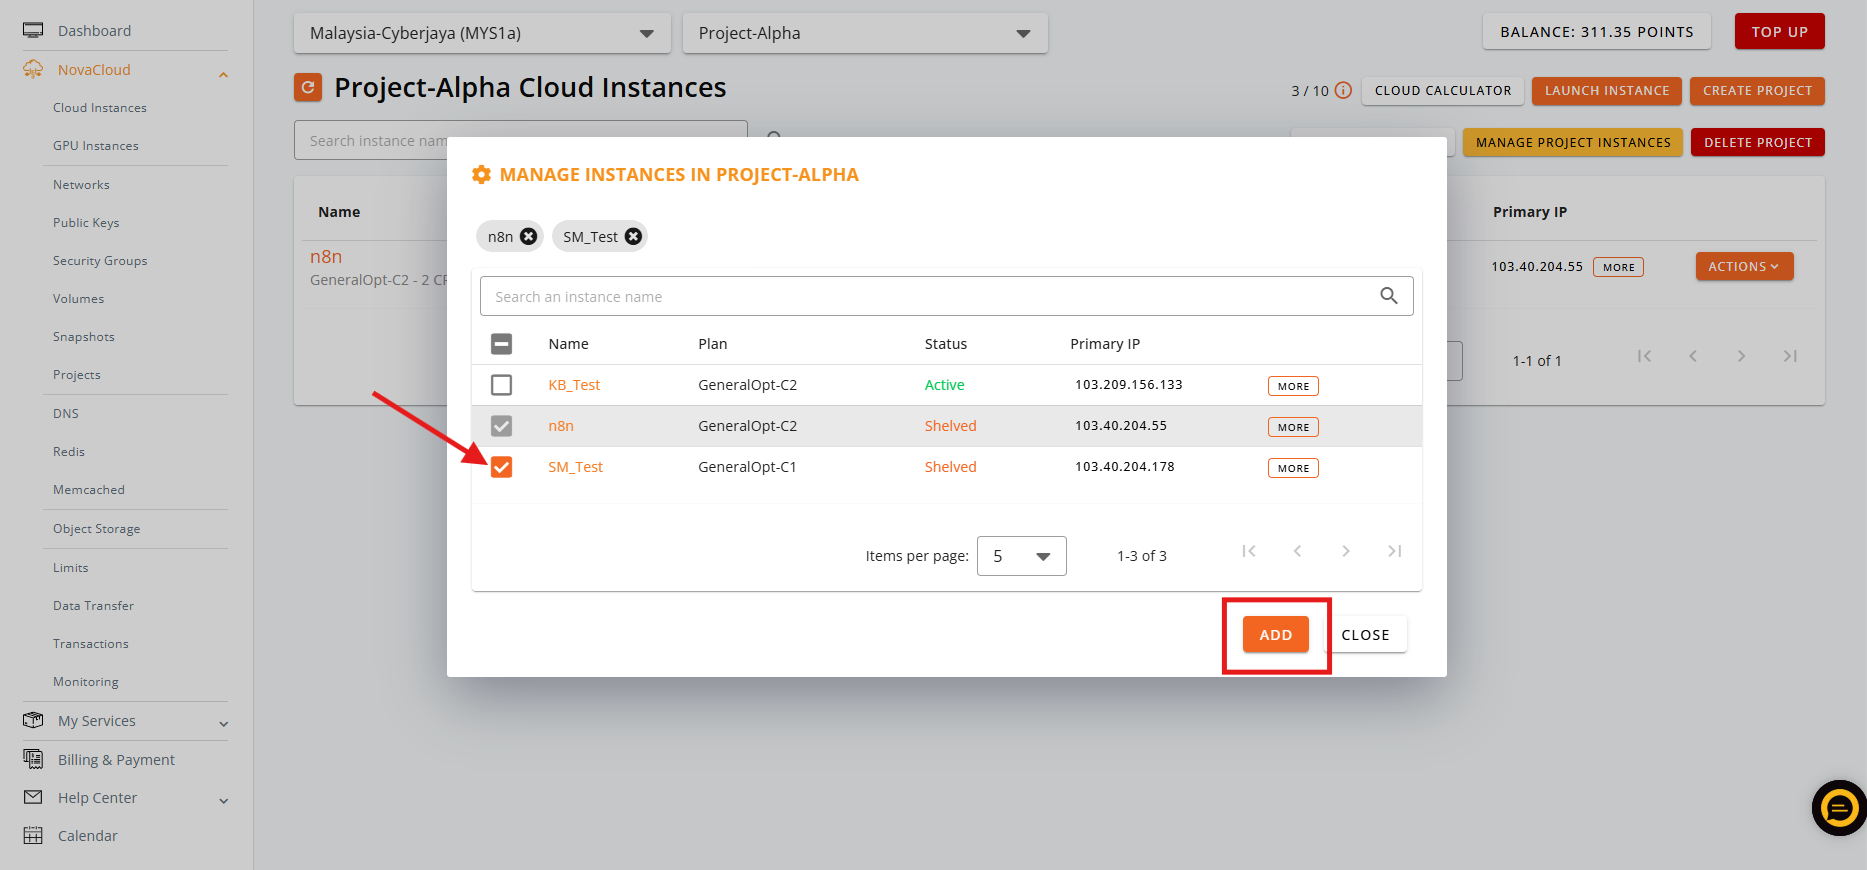
- Tick on the instance you wish to assign then ADD to apply.
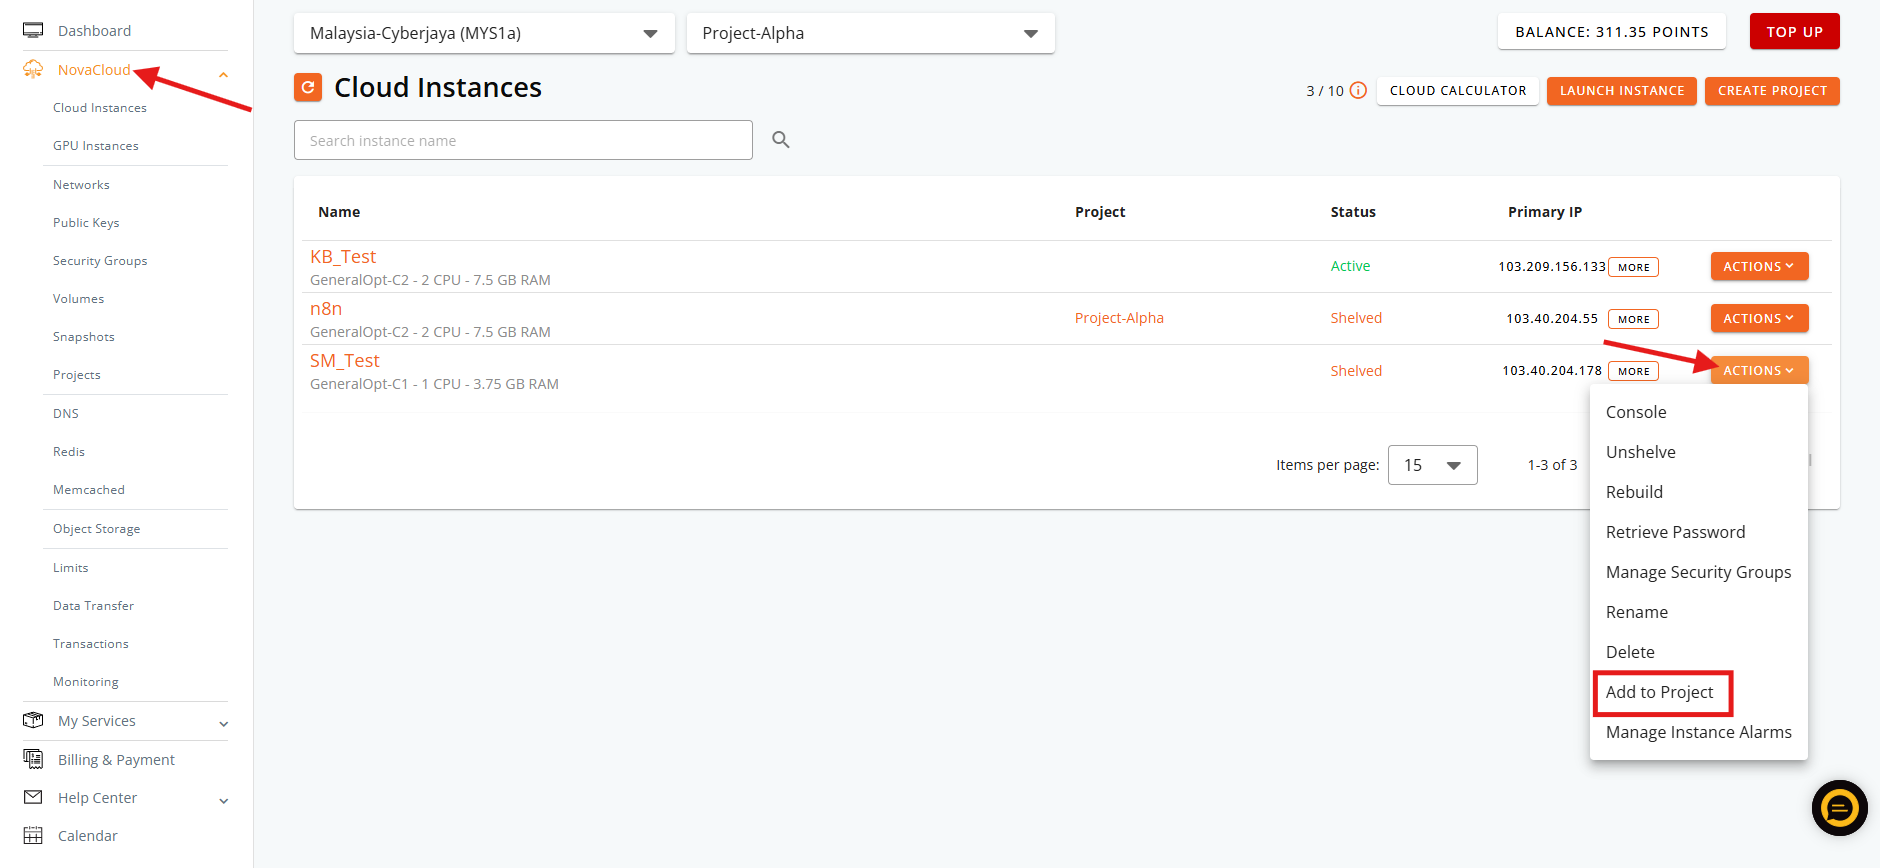
- Navigate Cloud Instance and click on ACTIONS drop-down then select Add to Project.
Tips 🖊️: You can use CREATE PROJECT to create new project on the spot and add to it after creation.
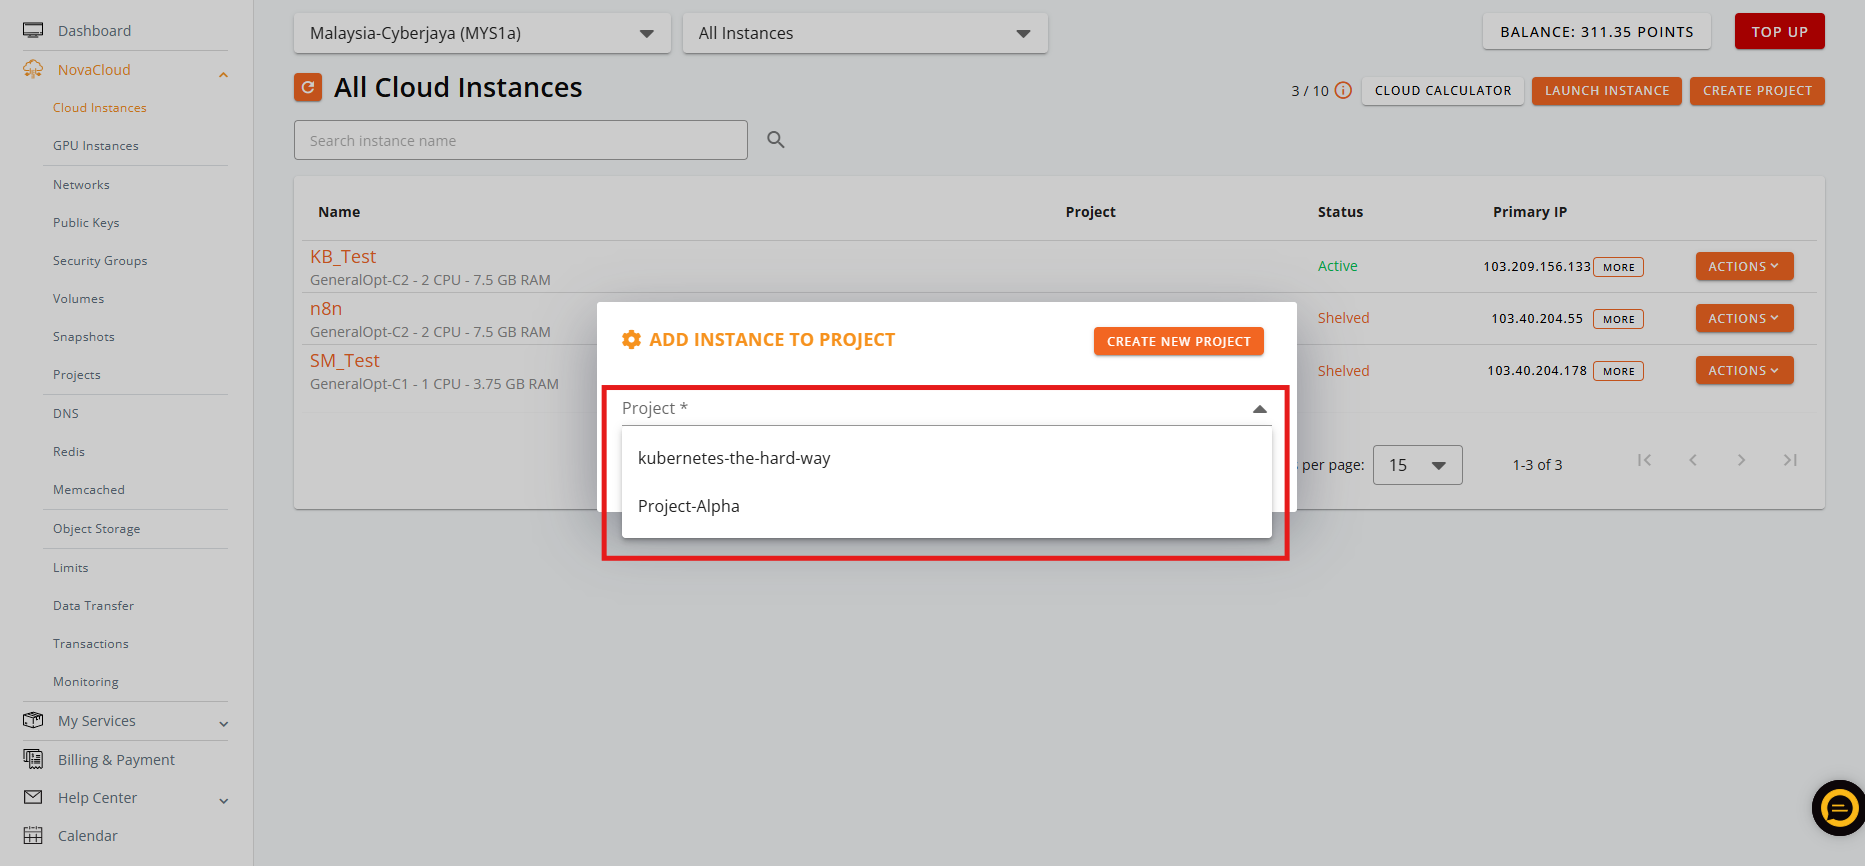
- Select the Project from the drop-down then click ADD button to apply.
- To remove the project from the instances in project managing site and instance managing site.
- In project managing site, click on ACTIONS drop-down then select Remove from Project_Name.
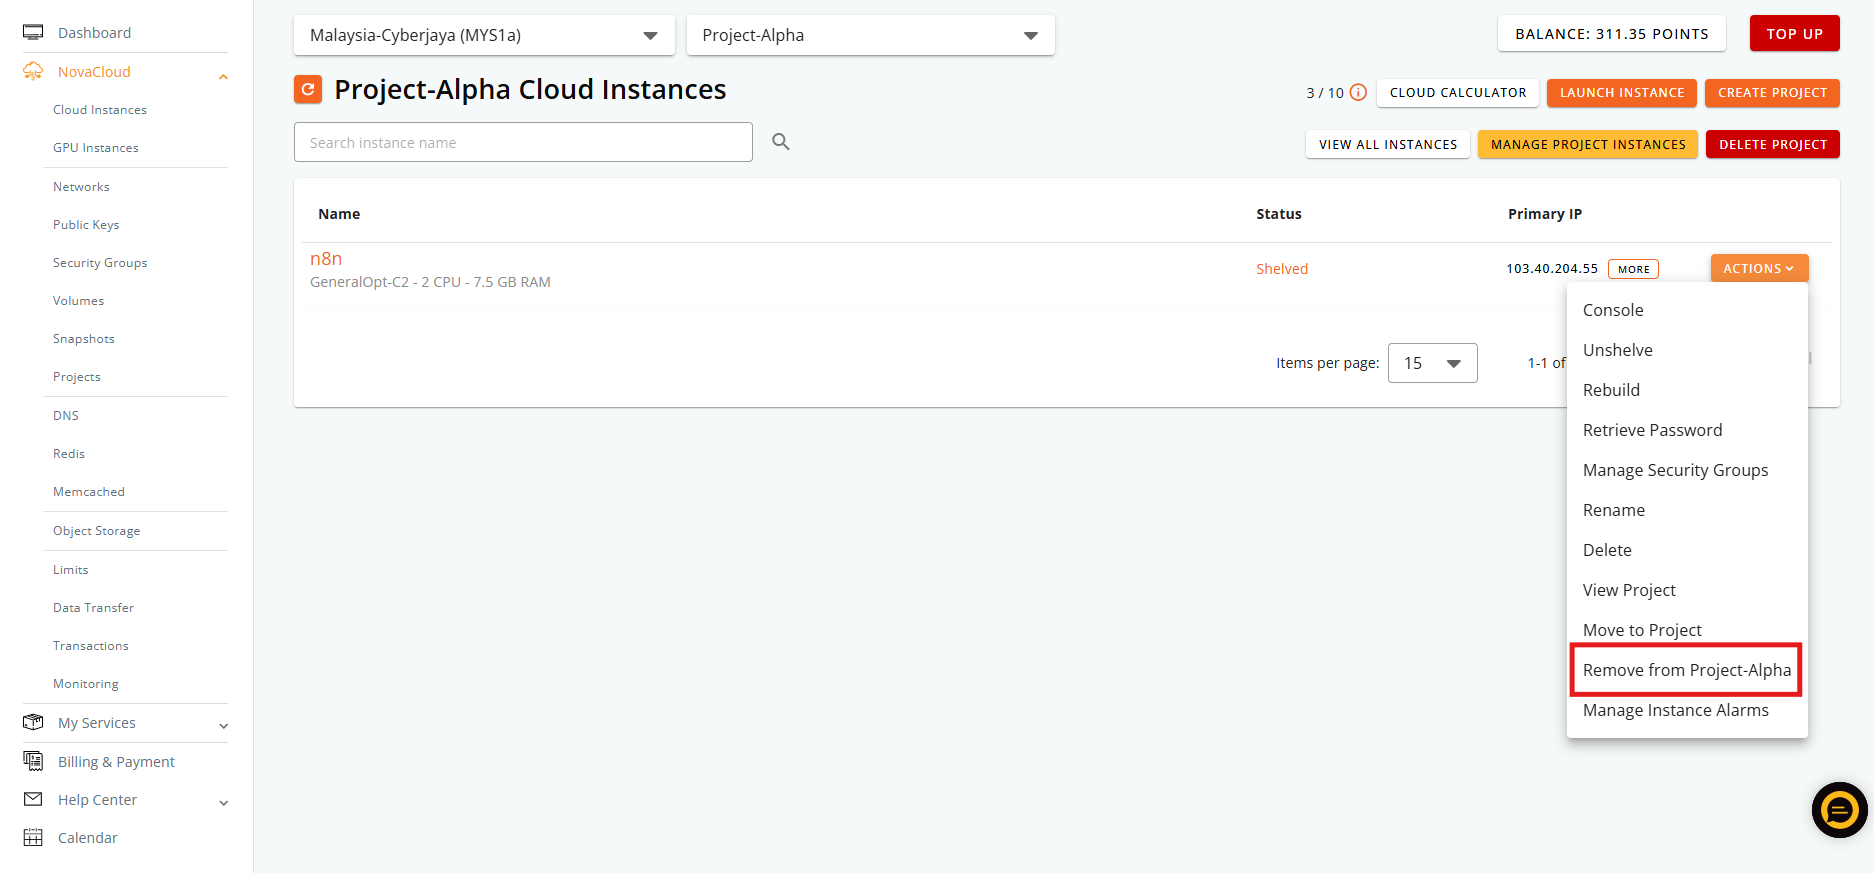
- In instance managing site, click on ACTIONS drop-down then select Remove from Project_Name.
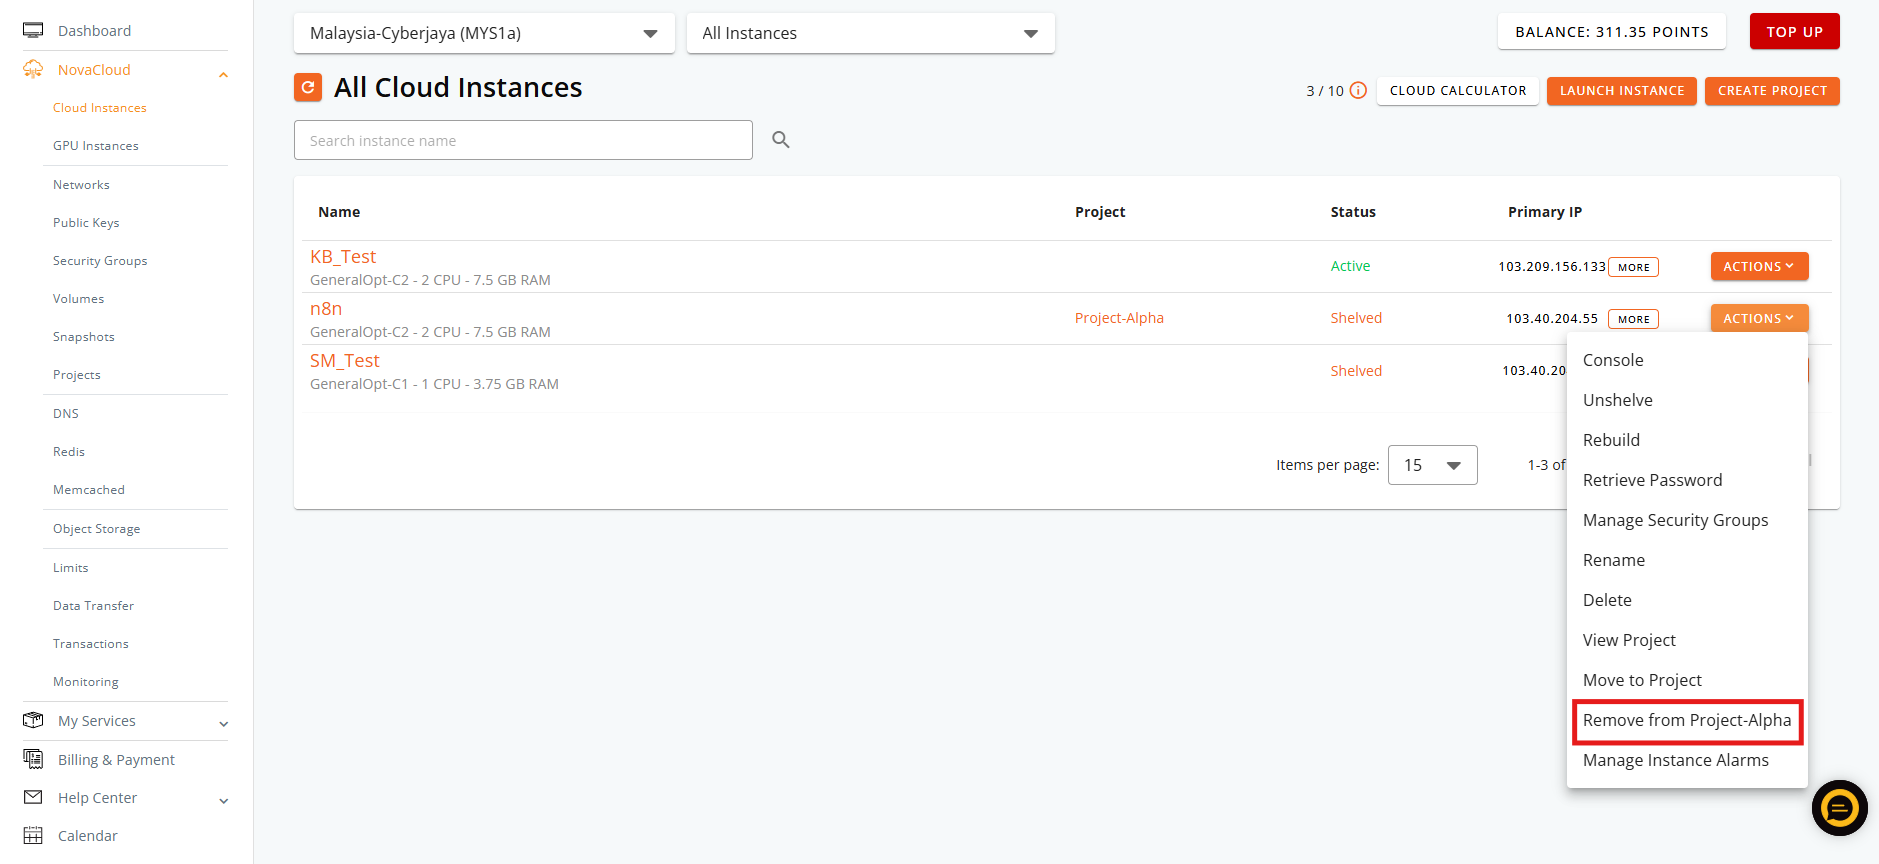
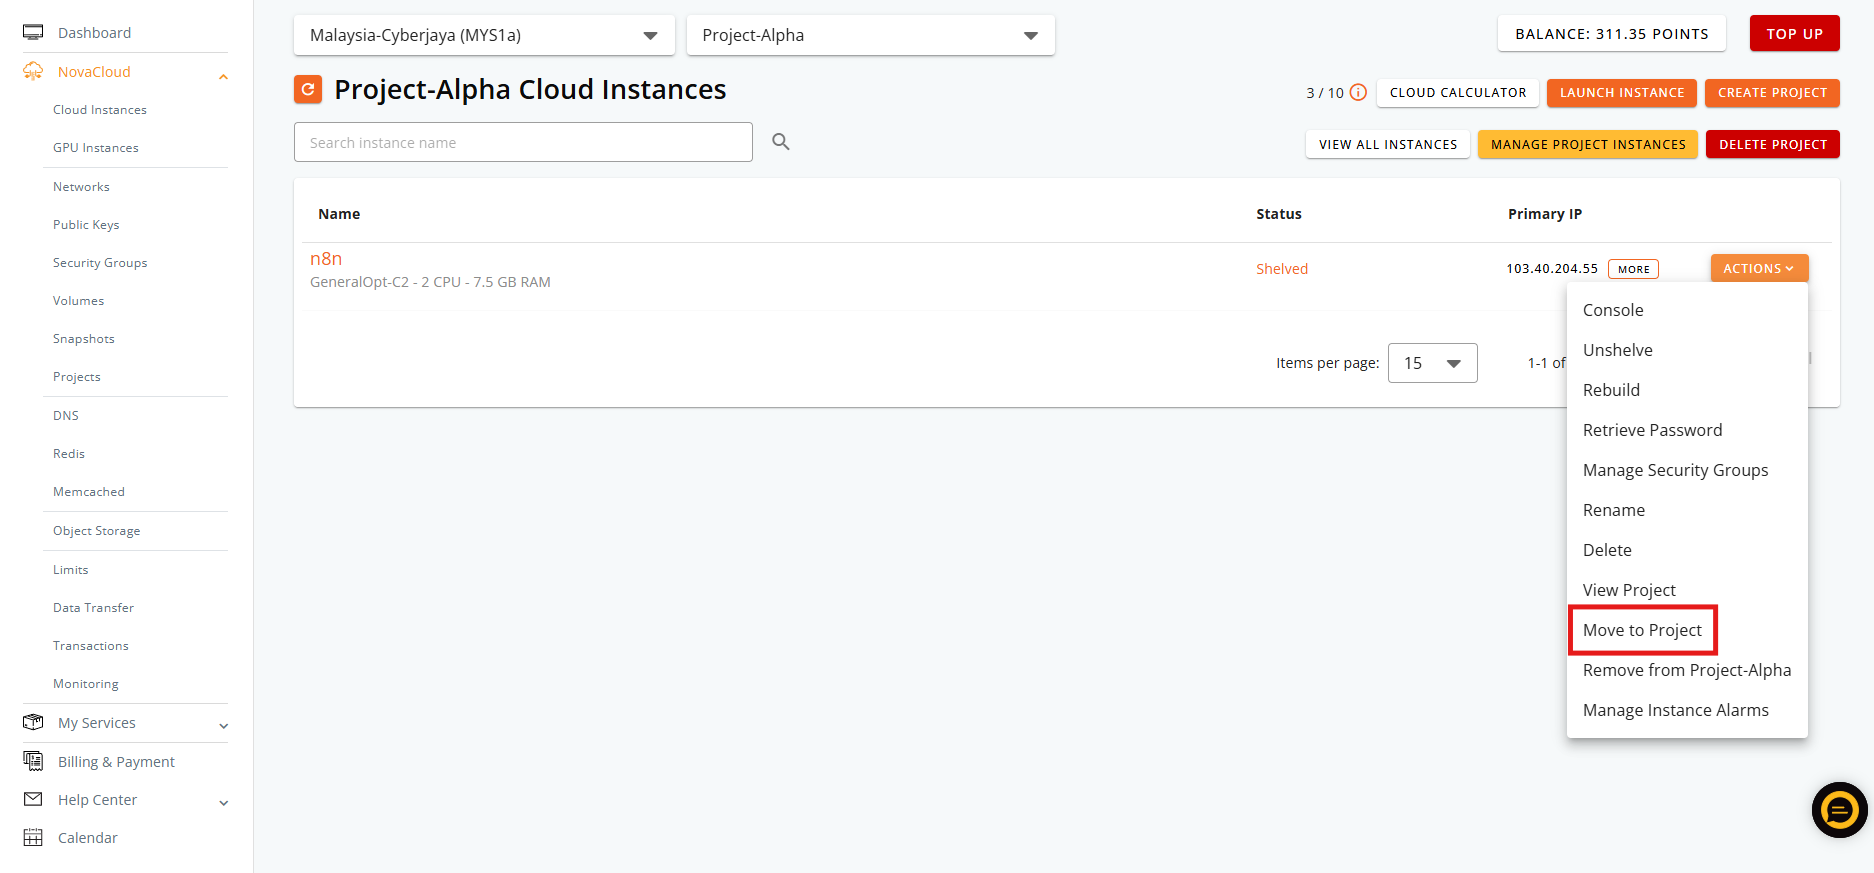
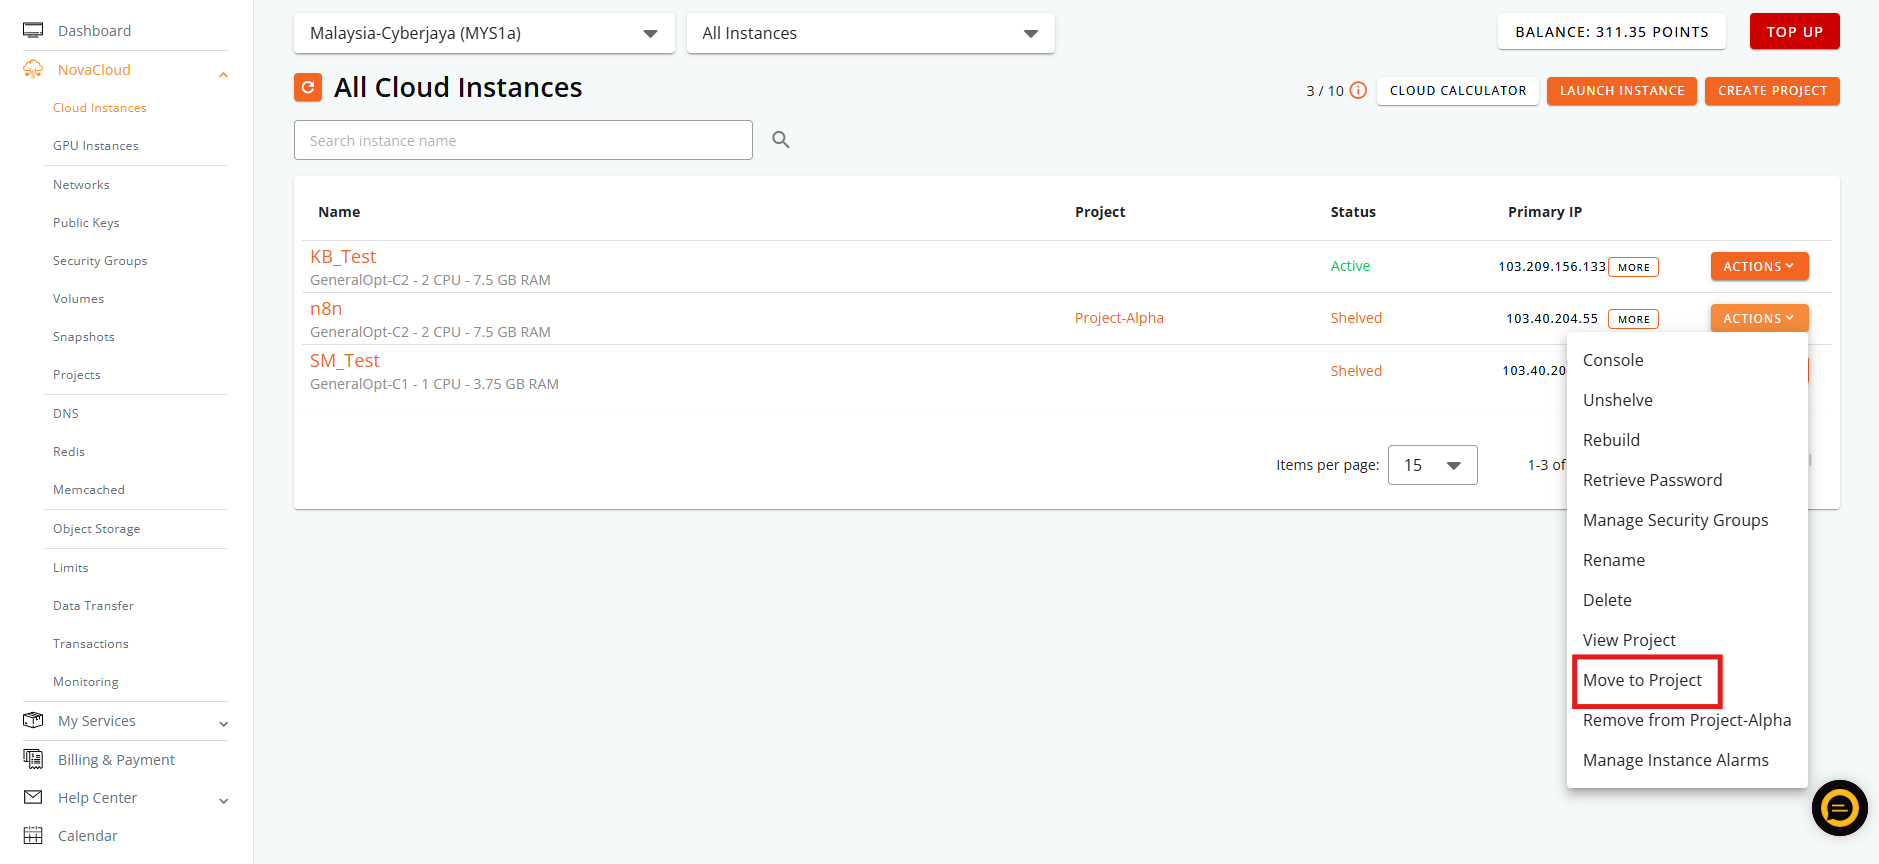
- To move instances from a project to another project in project managing site and instance managing site.
- In project managing site, click on ACTIONS drop-down then select Move to Project.
- In instance managing site, click on ACTIONS drop-down then select Move to Project.
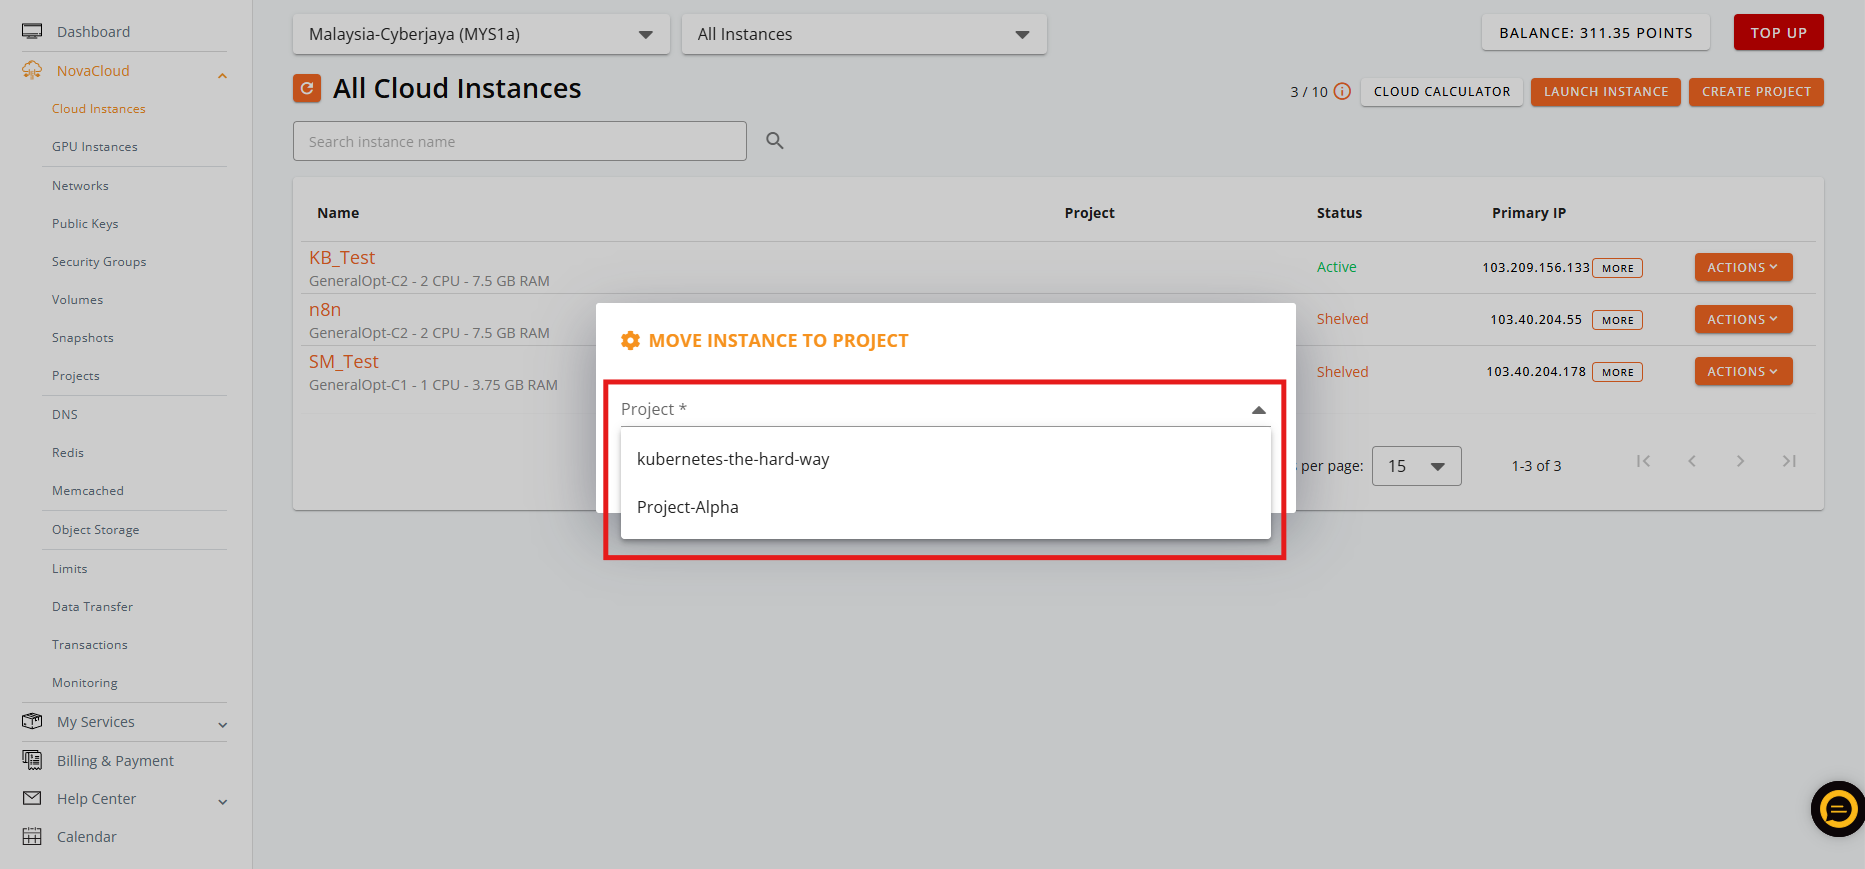
- Both project managing site and instance managing site will pop-up a new window, select the Project from the drop-down then click MOVE button to apply.
Conclusion
By following this guidance, you can efficiently create project groups, assign or remove cloud instances, and delete projects within the IPServerOne Customer Portal to maintain a well-organized cloud environment.
For additional assistance or if you encounter any issues, please contact our support team at support@ipserverone.com.
Article updated on 27 July 2027 by Johnny