
Search Our Database
How to configure network settings using nmtui on Linux
Introduction
Configuring your server’s network connection can be challenging, but NetworkManager’s Text User Interface (nmtui) provides a user-friendly, graphical-like terminal application to easily manage network interfaces. System administrators and users alike can utilize this utility anytime network settings need modification, directly from the server’s command-line interface. This tool simplifies the process of assigning static IP addresses, editing connections, or setting hostnames without manually editing complex configuration files. By using this tool, you ensure a reliable and accurate configuration of your Linux network infrastructure.
Prerequisite
- Access to the Linux server with root or sudo privileges
- Basic knowledge of command-line navigation and network settings (IP address, gateway, and DNS)
Step-by-step guide
Step 1: Verify and install NetworkManager
On Debian-based distributions (like Debian or Ubuntu), it may not be installed by default because these systems traditionally rely on alternative services like systemd-networkd or ifupdown for minimal server environments.
- Access your Linux server terminal via SSH. [How to login to your Linux Server via SSH]
- Check if NetworkManager is installed on your system by running the verification command.
sudo nmcli --version
- If you are seeing sudo: nmcli: command not found, it means that the NetworkManager has yet installed. Insert the installation command below to install NetworkManager, then run the start command to start it.
sudo apt update
sudo apt install network-manager -y
- Start and enable the NetworkManager service to ensure it runs automatically on system boot.
sudo systemctl enable NetworkManager
sudo systemctl start NetworkManager
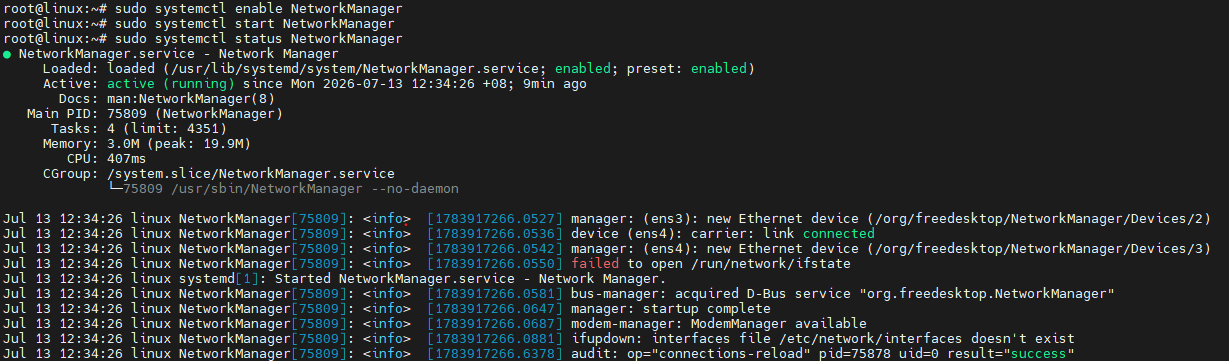
- Verify your service status using the following commands:
sudo systemctl status NetworkManager
- Expected output:
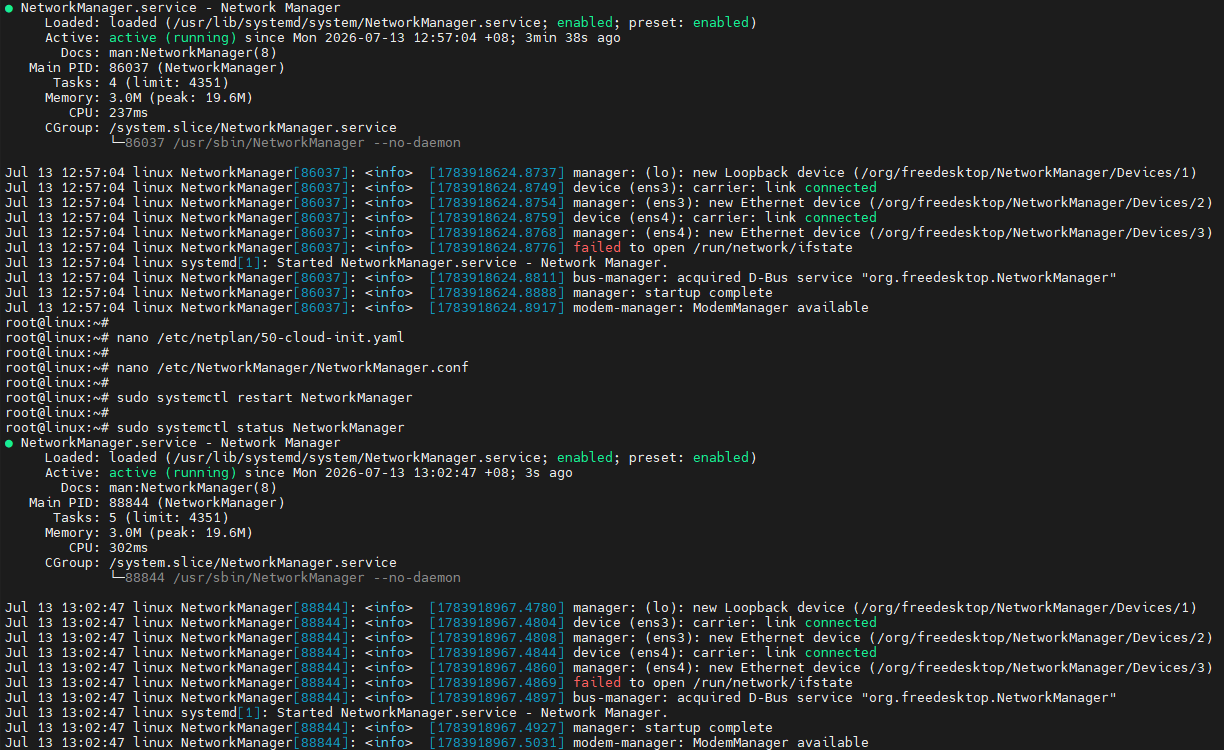
Netplan configuration:
Adding Renderer: NetworkManager in /etc/netplan/<network-configuration>.yaml
NetworkManager configuration:
Changing the managed=false to managed=true in /etc/NetworkManager/NetworkManager.conf
On RHEL-based distributions (like Rocky Linux or AlmaLinux), NetworkManager is installed and enabled by default to handle dynamic network tracking.
- Check if NetworkManager is installed on your system by running the verification command.
sudo nmcli --version
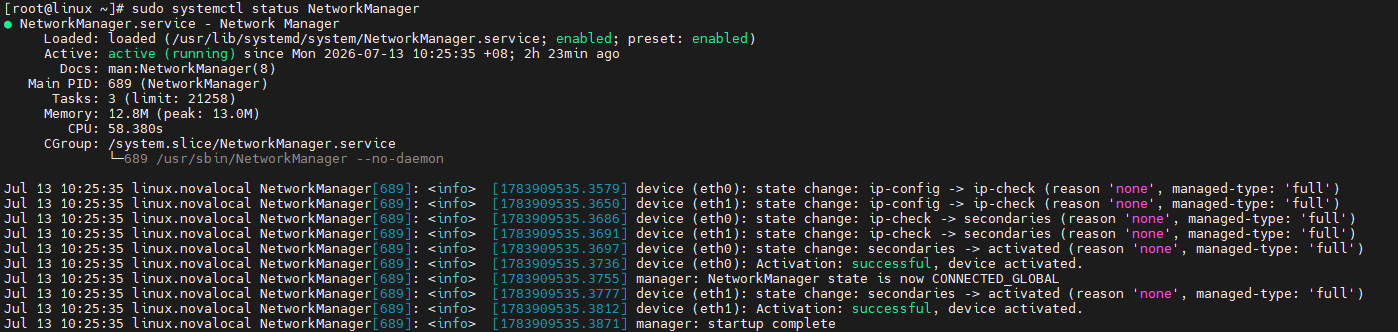
- Verify your service status using the following commands:
sudo systemctl status NetworkManager
- Expected output:
Step 2: Configure network interface via nmtui
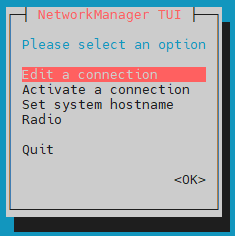
- Launch the NetworkManager Text User Interface utility from your terminal screen.
sudo nmtui
- Navigate the graphical terminal menu using the arrow keys, select Edit a connection, and press Enter key on keyboard.
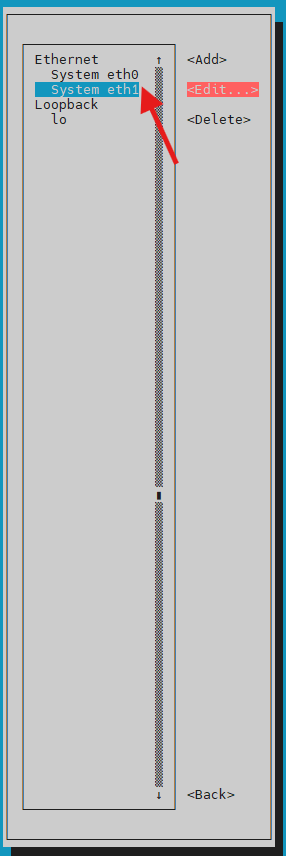
- Choose the specific network interface card you want to configure from the list and select Edit.
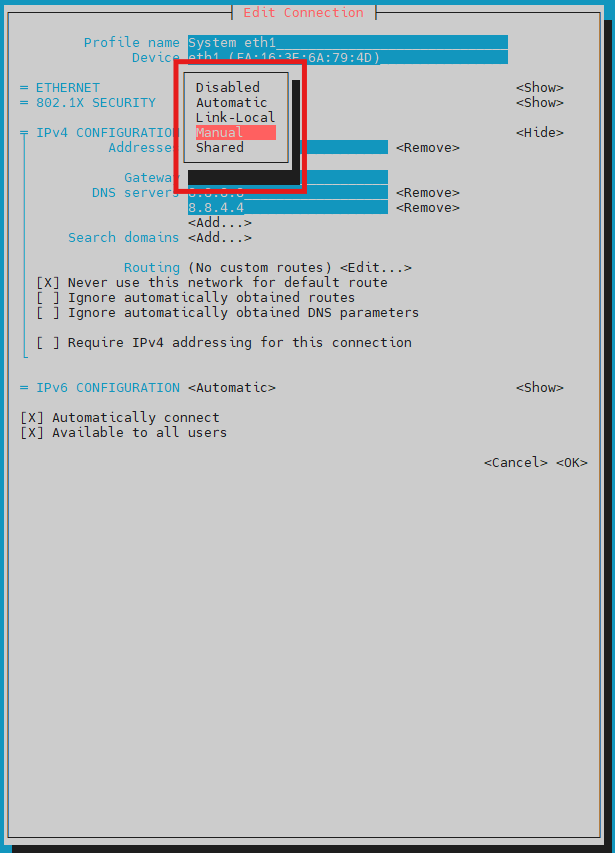
- Change the IPv4 configuration setting from Automatic (DHCP) to Manual if assigning a static IP network.
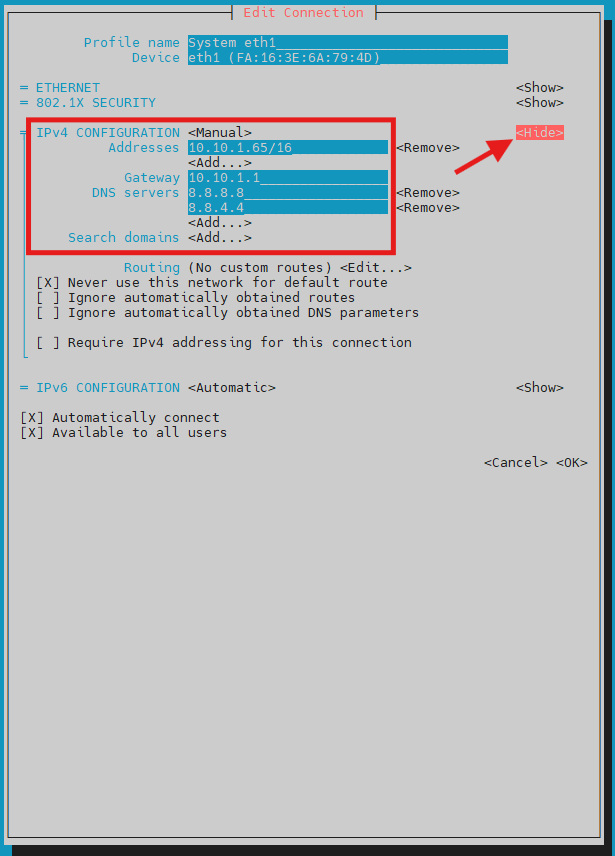
- Select Show next to the IPv4 configuration to expand the network details entry fields. Enter your designated IP Address with its subnet mask prefix, Gateway IP, and preferred DNS Servers into the respective fields.
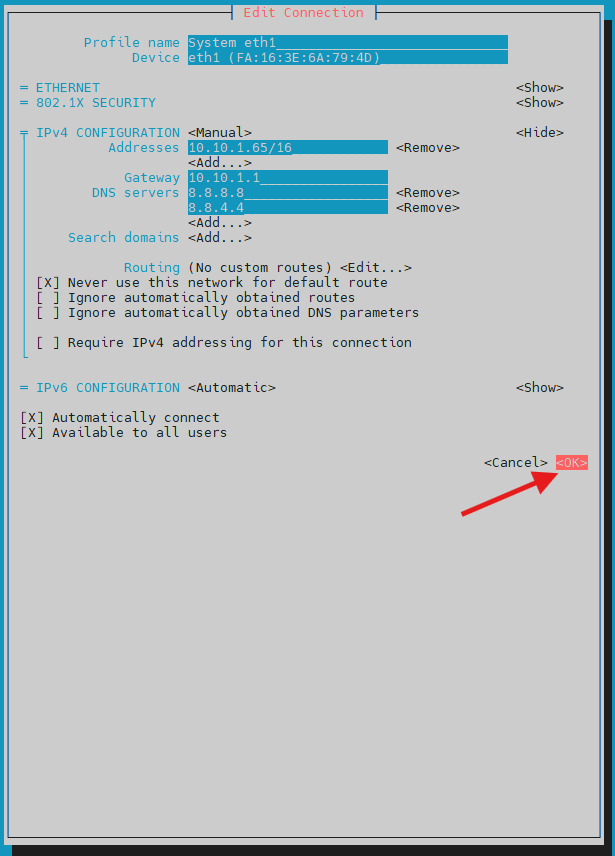
- Select OK to save your changes.
- Select Activate a connection from the main menu.
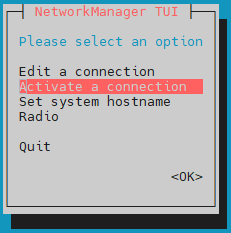
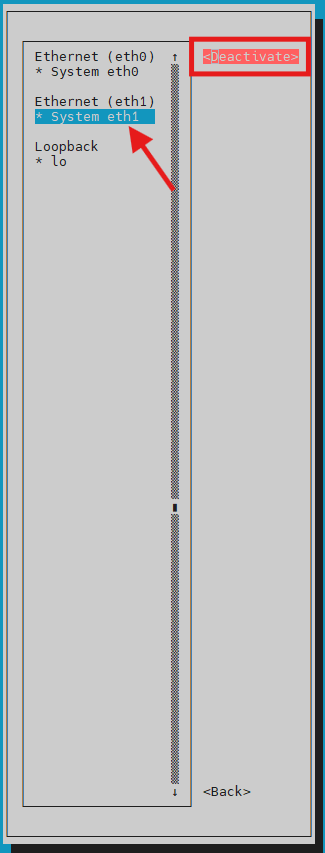
- Choose your updated interface, select Deactivate, and then select Activate again to restart the interface.
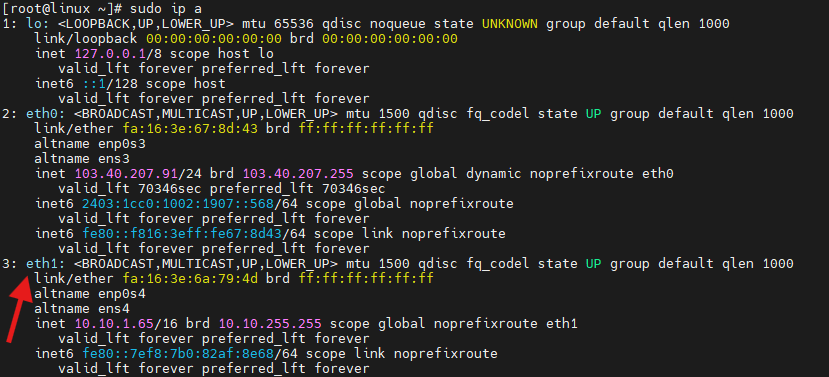
- Exit the interface screen by continue pressing ESC key on your keyboard and verify your network connectivity using the terminal command line tool. For example:
Conclusion
By following this guidance, you can seamlessly configure and manage your network settings across Debian and RHEL systems using the nmtui utility.
For additional assistance or if you encounter any issues, please contact our support team at support@ipserverone.com.