
Search Our Database
How to Install or Replace an SSL Certificate in Nginx
Introduction
In this article, you will learn how to manually install a new SSL certificate or replace an expiring one in Nginx. This guide is suitable for users who have obtained their SSL certificate files and need to configure their web server to establish a secure, encrypted HTTPS connection for their website. Following this process ensures that sensitive information transmitted between your server and visitors is protected against unauthorized access.
Prerequisite
- Access to the Nginx server via SSH with root or sudo privileges.
- A valid SSL certificate file, its corresponding private key file, and the CA bundle (intermediate certificates).
- Basic knowledge of Linux command-line operations.
Step-by-step Guide
Depending on your current setup, you can either install a completely new SSL certificate or replace an existing one. Select the appropriate method below.
Method 1: Install a New SSL Certificate
Use this method if you are installing an SSL certificate for a domain that does not currently have HTTPS configured in Nginx.
Step 1: Login as root access
Access your server terminal and switch to the root user account to ensure you have the necessary permissions for the following steps.
sudo su
Step 2: Upload the SSL certificate and private key files
First, upload your SSL certificate, private key and CA bundle files to your server using your preferred method (such as SCP or SFTP). Once uploaded, use the following commands to move them to a standard location like /etc/ssl/certs/ for the certificates and /etc/ssl/private/ for the private key.
mv yourdomain.crt /etc/ssl/certs/
mv yourdomain.ca-bundle /etc/ssl/certs/
mv yourdomain.key /etc/ssl/private/
Step 3: Combine the certificate and CA bundle
Nginx requires the primary certificate and the CA bundle to be concatenated into a single file to establish a full chain of trust. Run the following command to combine them (ensure your primary certificate comes first).
cat /etc/ssl/certs/yourdomain.crt /etc/ssl/certs/yourdomain.ca-bundle > /etc/ssl/certs/yourdomain_fullchain.crt
Step 4: Determine the Nginx configuration file location
Run the Nginx configuration test command to find the exact path of your active configuration file (commonly /etc/nginx/nginx.conf or /etc/nginx/sites-available/yourdomain).
nginx -t
Step 5: Update the Nginx configuration file
Open your Nginx configuration file using a text editor.
nano /etc/nginx/sites-available/yourdomain
Step 6: Add the SSL directives to the server block
Modify the server block to listen on port 443 and include the paths to your SSL certificate and private key. Add the necessary directives for your files.
server {
    listen 443 ssl;
    server_name yourdomain.com;
    ssl_certificate /etc/ssl/certs/yourdomain_fullchain.crt;
    ssl_certificate_key /etc/ssl/private/yourdomain.key;
}
Step 7: Test the Nginx configuration
Before restarting the service, verify that your configuration syntax is correct.
nginx -t
Step 8: Restart the Nginx service
If the test is successful, restart the Nginx service to apply the new SSL certificate.
systemctl restart nginx
Step 9: Verification
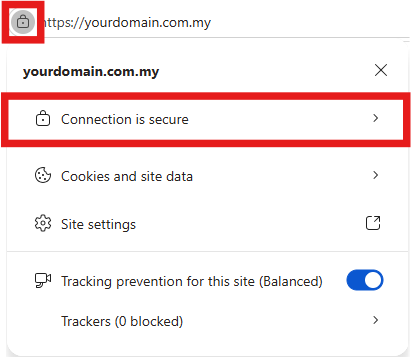
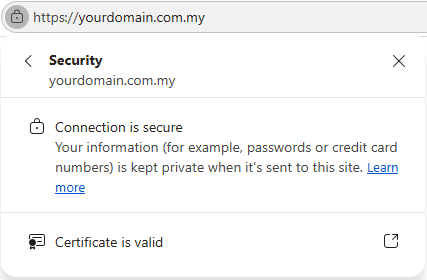
Open your website in a web browser and check for the secure padlock icon next to your domain name.
Method 2: Replace an Existing SSL Certificate
Use this method if you are updating an expiring or compromised SSL certificate for a domain that is already configured with HTTPS in Nginx.
Step 1: Login as root access
Access your server terminal and switch to the root user account to ensure you have the necessary permissions for the following steps.
sudo su
Step 2: Determine the Nginx configuration file location
Run the Nginx configuration test command to find the exact path of your active configuration file.
nginx -t
Step 3: Locate the existing SSL certificate paths
Check the Nginx configuration file identified in the previous step to find exactly where your current certificate and key are stored. As a reference, the common directory for the Nginx configuration file varies depending on your operating system:
- Common directory for CentOS, AlmaLinux, and Rocky Linux: /etc/nginx/nginx.conf
- Common directory for Debian/Ubuntu-based distributions: /etc/nginx/sites-available/ and sites-enabled/ structure.
Use the cat command to view the file contents:
cat /etc/nginx/sites-available/yourdomain
Step 4: Backup the old certificate and private key files
Navigate to the directory containing your current SSL files and create a backup of them before making changes.
cp /etc/ssl/certs/yourdomain_fullchain.crt /etc/ssl/certs/yourdomain_fullchain.crt.bak
cp /etc/ssl/private/yourdomain.key /etc/ssl/private/yourdomain.key.bak
Step 5: Move the new certificate files
Upload your new SSL certificate, private key, and CA bundle files to the server. Then, move them to their respective directories.
mv yourdomain.crt /etc/ssl/certs/
mv yourdomain.ca-bundle /etc/ssl/certs/
mv yourdomain.key /etc/ssl/private/
Step 6: Combine the new certificate and CA bundle
Combine your new primary certificate with the CA bundle to create a full chain file, overwriting or replacing the old file mapped in your Nginx configuration.
cat /etc/ssl/certs/yourdomain.crt /etc/ssl/certs/yourdomain.ca-bundle > /etc/ssl/certs/yourdomain_fullchain.crt
Step 7: Test the Nginx configuration
Verify that your configuration syntax is correct and that Nginx can read the new certificate files.
nginx -t
Step 8: Reload the Nginx service
If the test is successful, gracefully reload the Nginx service to apply the new SSL certificate without dropping active connections.
systemctl reload nginx
Step 9: Verification
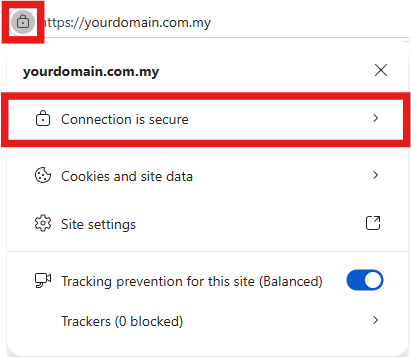
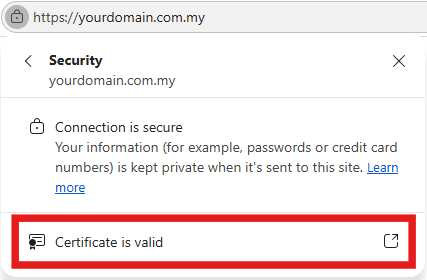
Visit your website in an Incognito or Private browsing window, click the padlock icon in the address bar, and verify that the certificate’s expiration date has updated.
Conclusion
By following this guidance, you can successfully install or replace an SSL certificate on an Nginx web server using the terminal, securing your website with HTTPS.
If you need further assistance, please contact us at support@ipserverone.com.