
Search Our Database
How to configure network settings on Windows Server
Introduction
Configuring a static IP address on your Windows Server ensures a stable and predictable network identity, which is essential for hosting services, managing remote connections, and maintaining seamless local area network communication. System administrators and users typically perform this configuration during initial server deployment or network restructuring within their data center environments. By assigning a persistent IP address, you prevent the server from unexpectedly dropping connections or changing addresses due to dynamic DHCP leases. This guide walks you through the straightforward process of adjusting your IPv4 settings using three different system management approaches.
Prerequisite
- Access to the Windows Server operating system with Administrator privileges
- A valid IP address, subnet mask, default gateway, and DNS server details from your network administrator
Step-by-step guide
Method 1: Configure via System Settings
Suitable for users accustomed to the modern, streamlined Windows settings application layout.
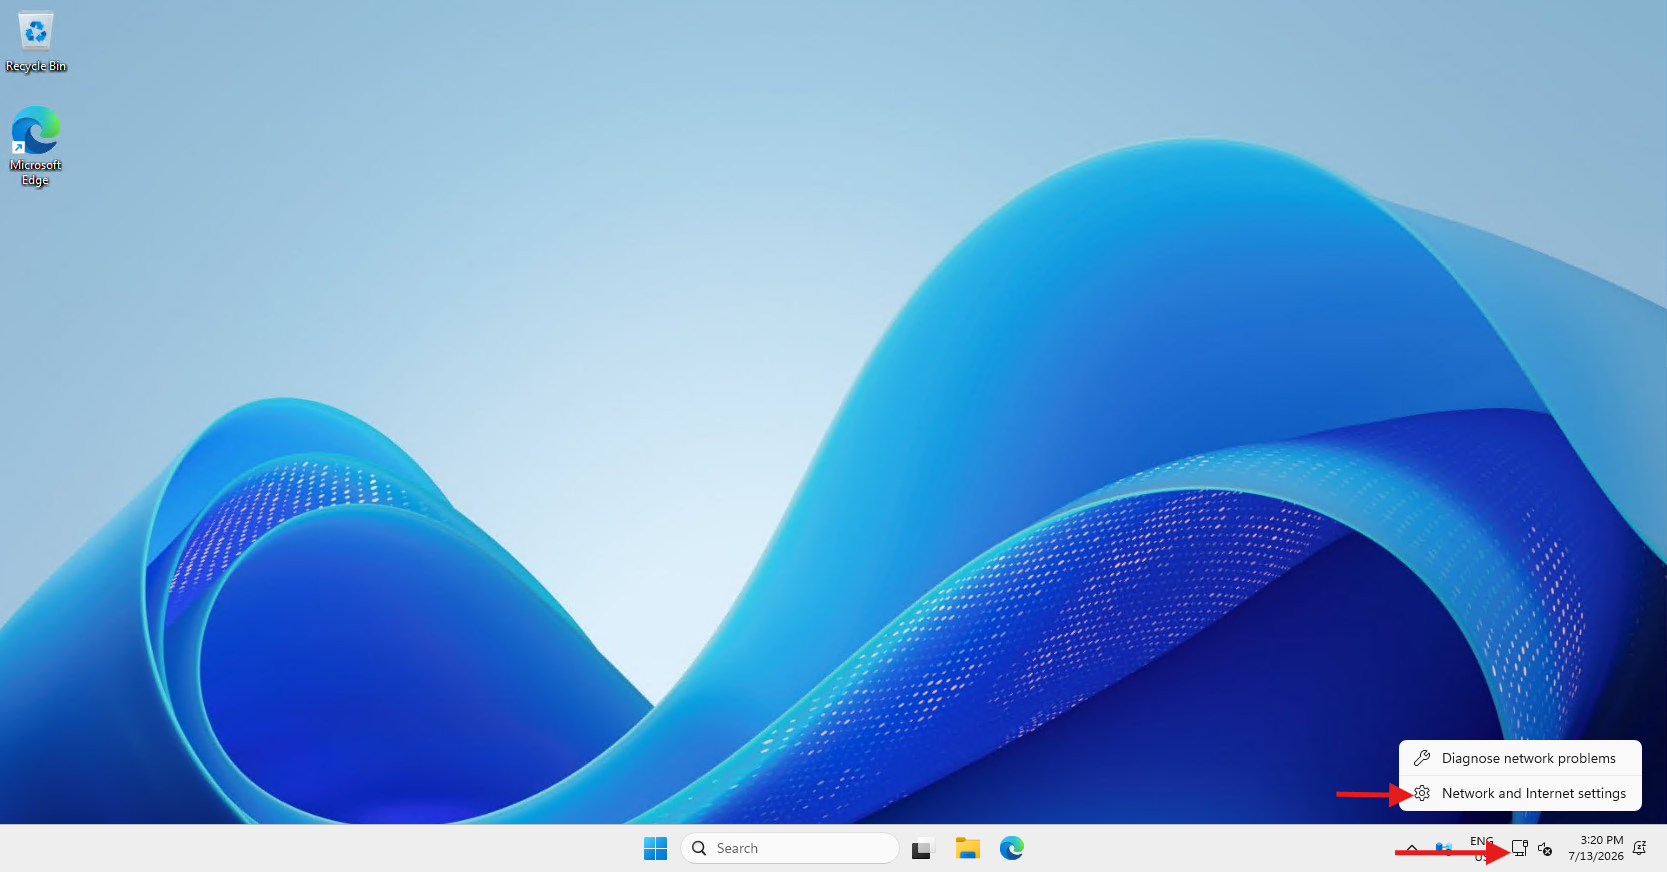
- Right click the Network Icon and select Network and Internet settings from the taskbar.
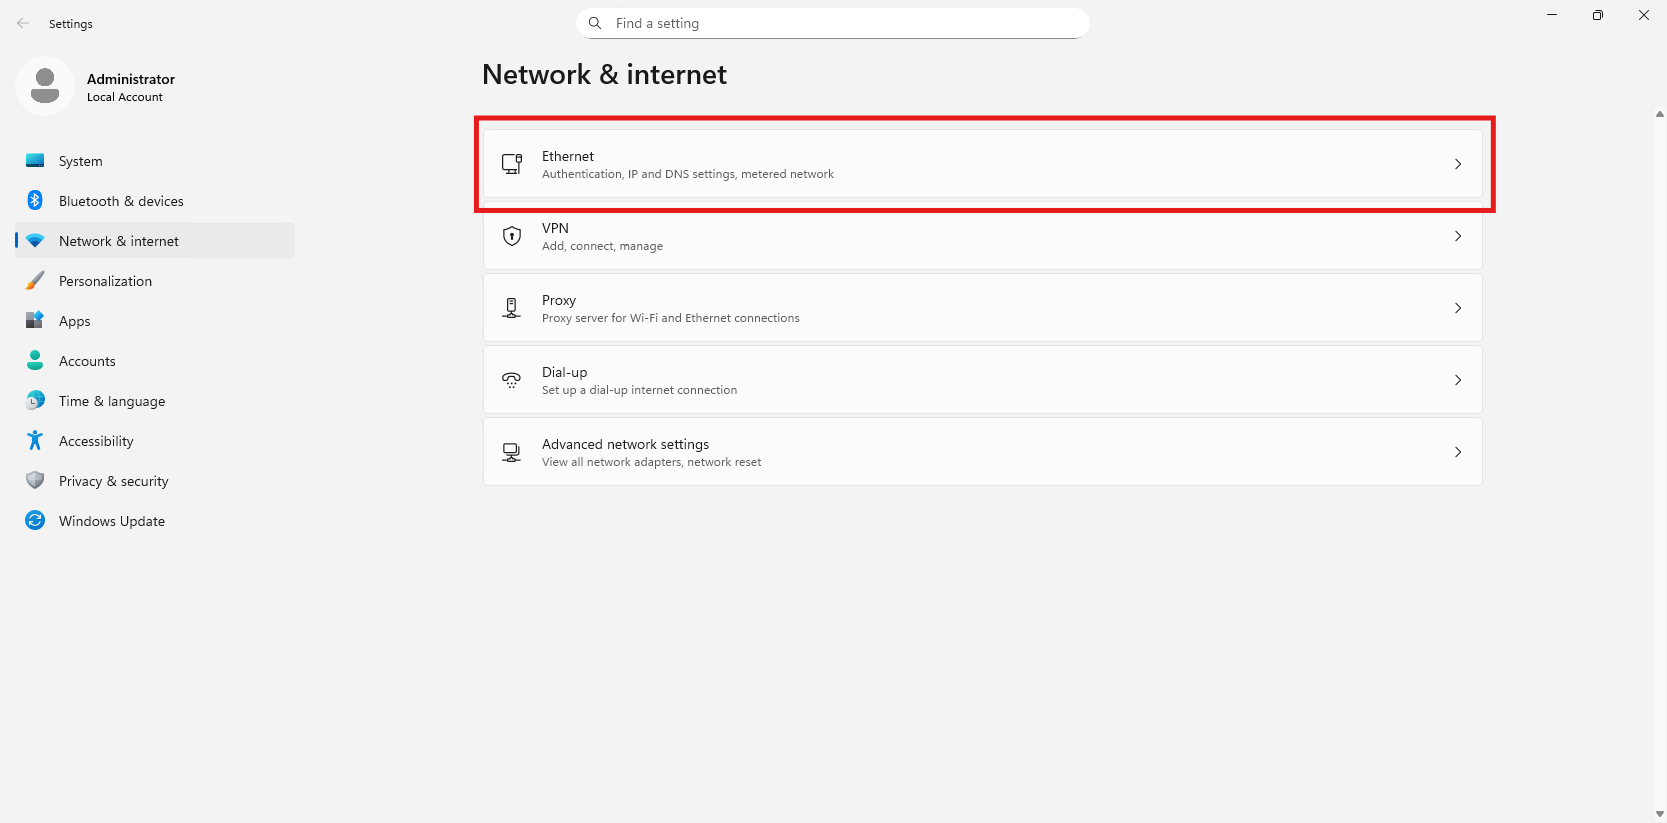
- Select Ethernet from the navigation pane.
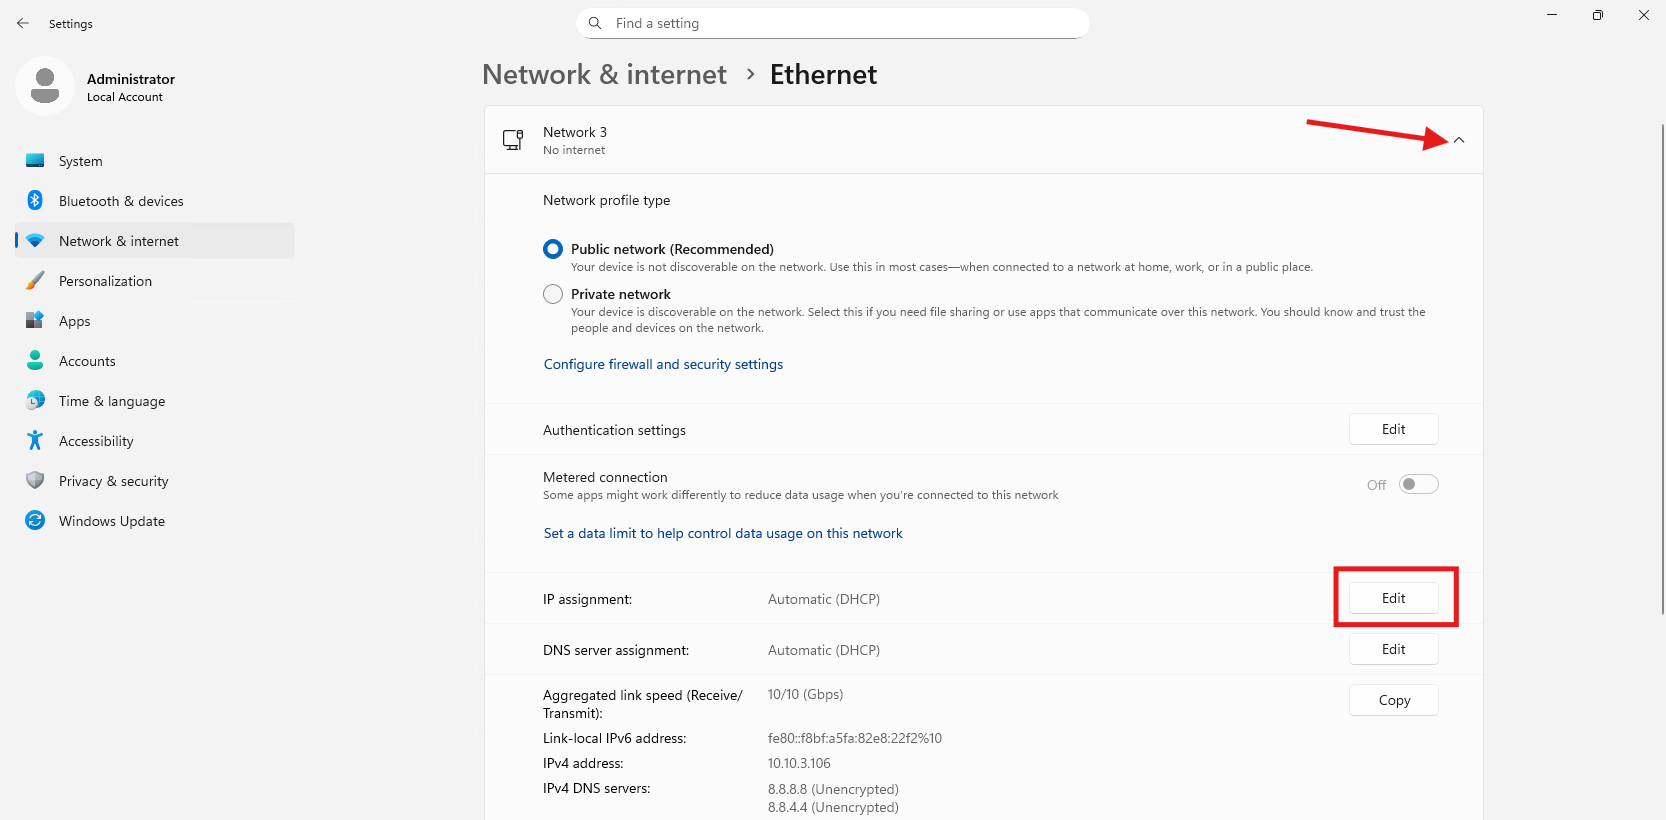
- Click on your active network connection to expand the details, then the Edit button to start changing its configurations.
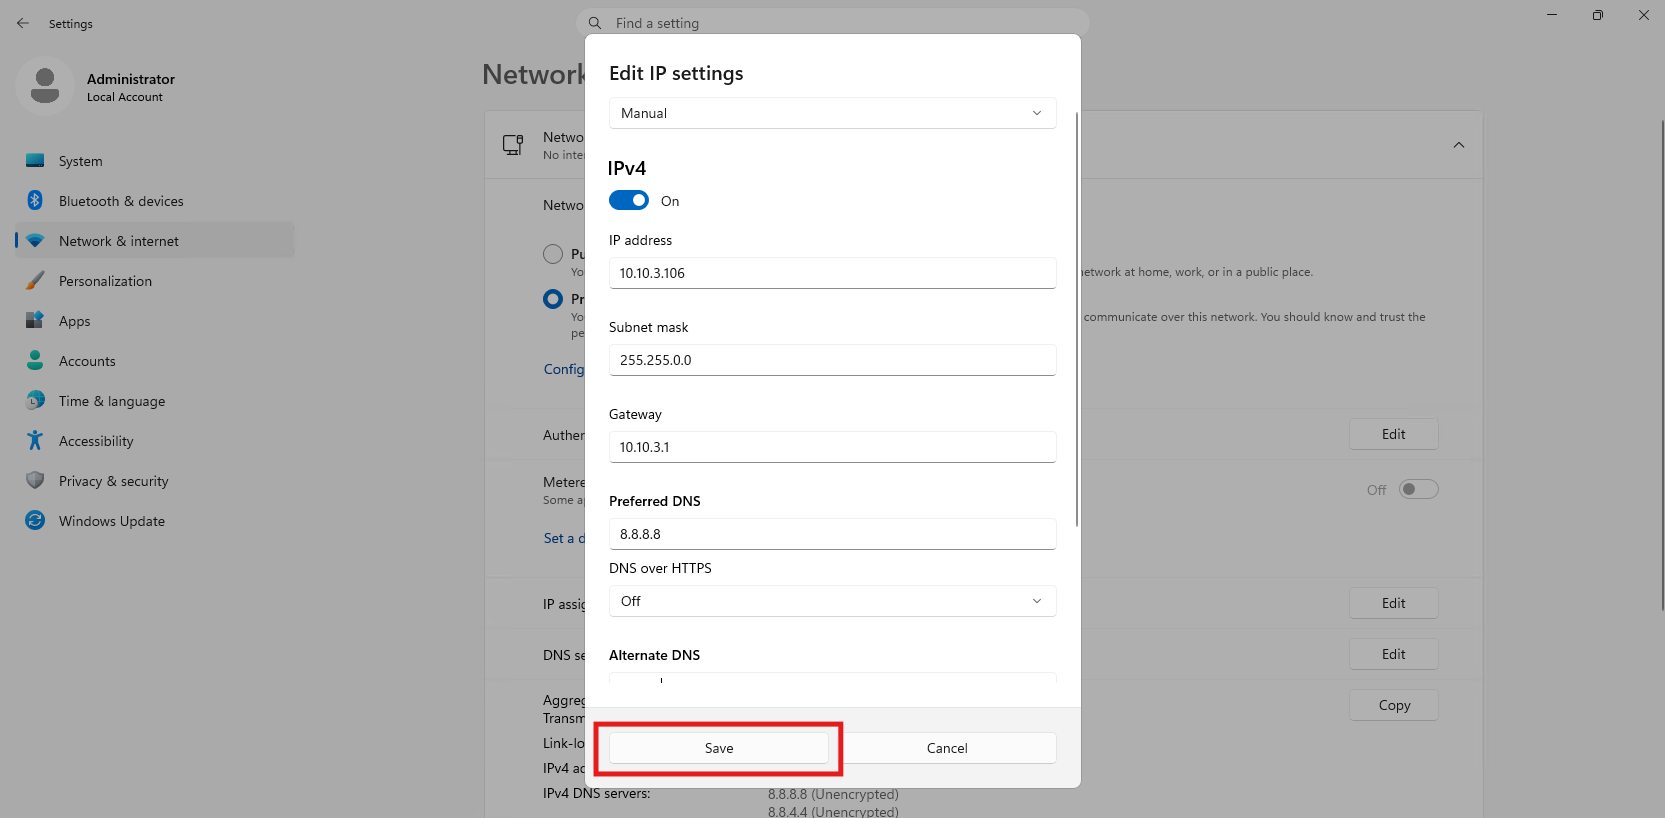
- Change the toggle from Automatic (DHCP) to Manual and switch ON the IPv4 toggle. Fill in the fields for your IP address, Subnet prefix length (e.g., 24 for 255.255.255.0), Gateway, and DNS servers.
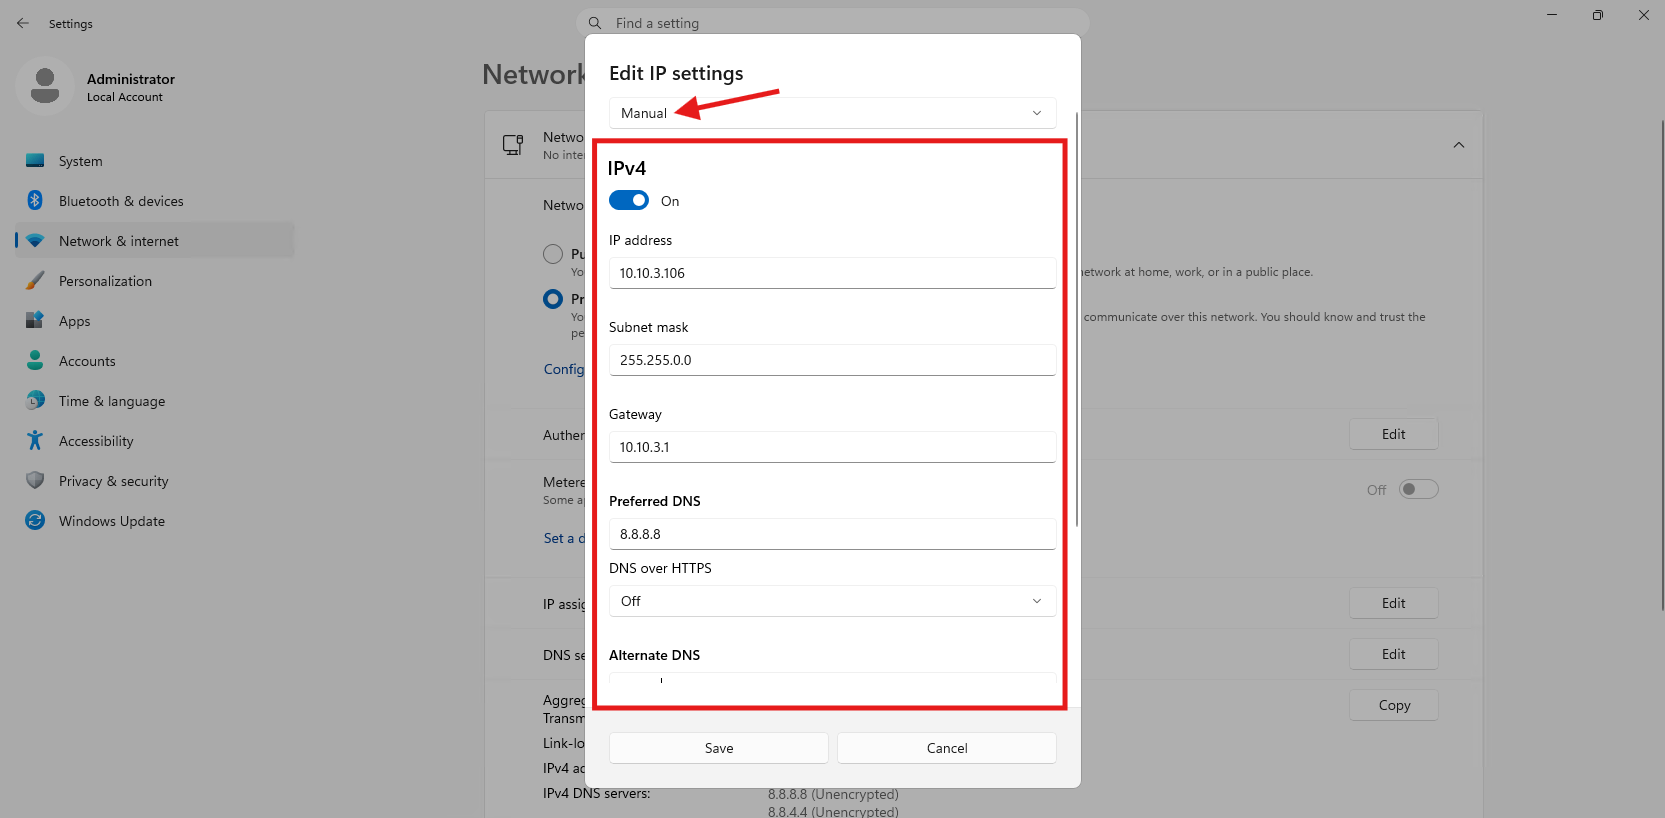
- Click Save to commit your new network configurations.
Method 2: Configure via Control Panel
Ideal for users who prefer a classic, visual step-by-step graphical wizard.
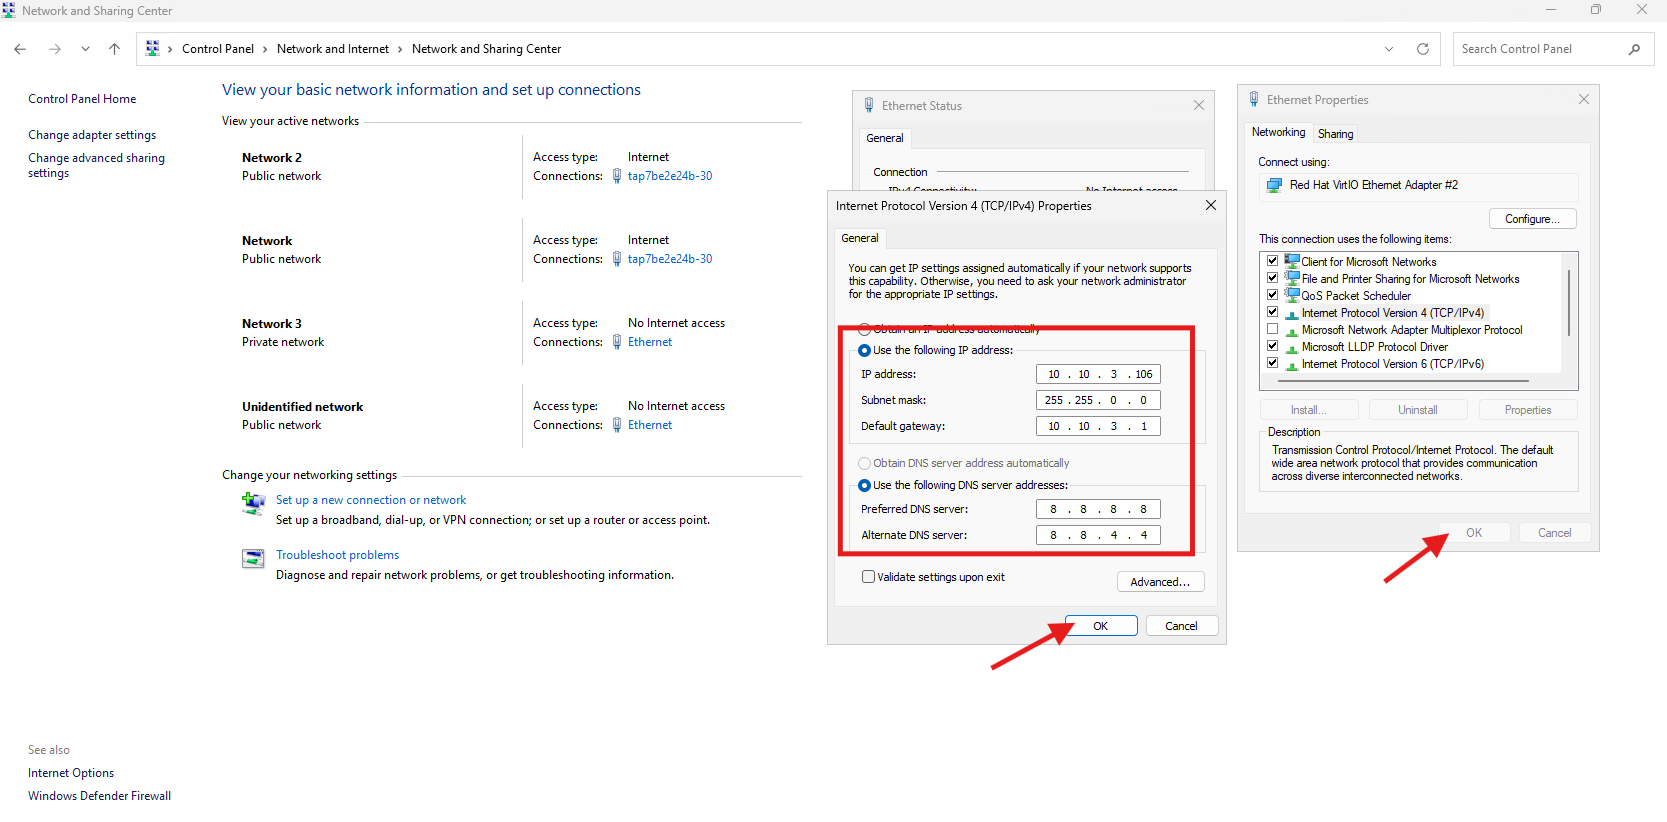
- Enter Control Panel.
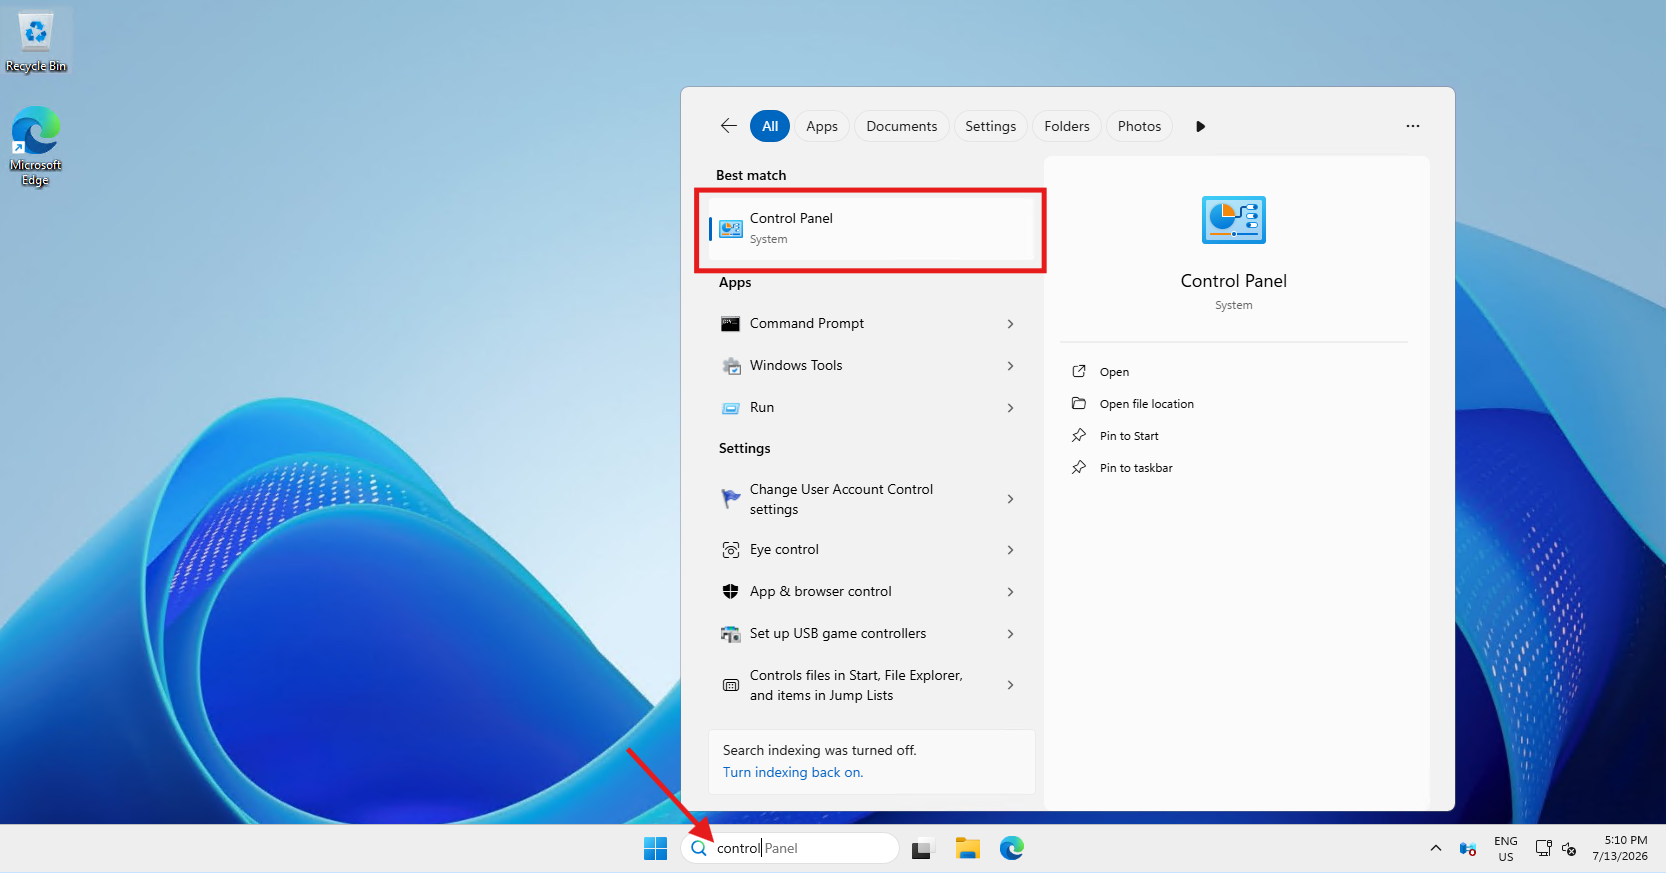
- Navigate to Network and Sharing Center to view all existing network connections.
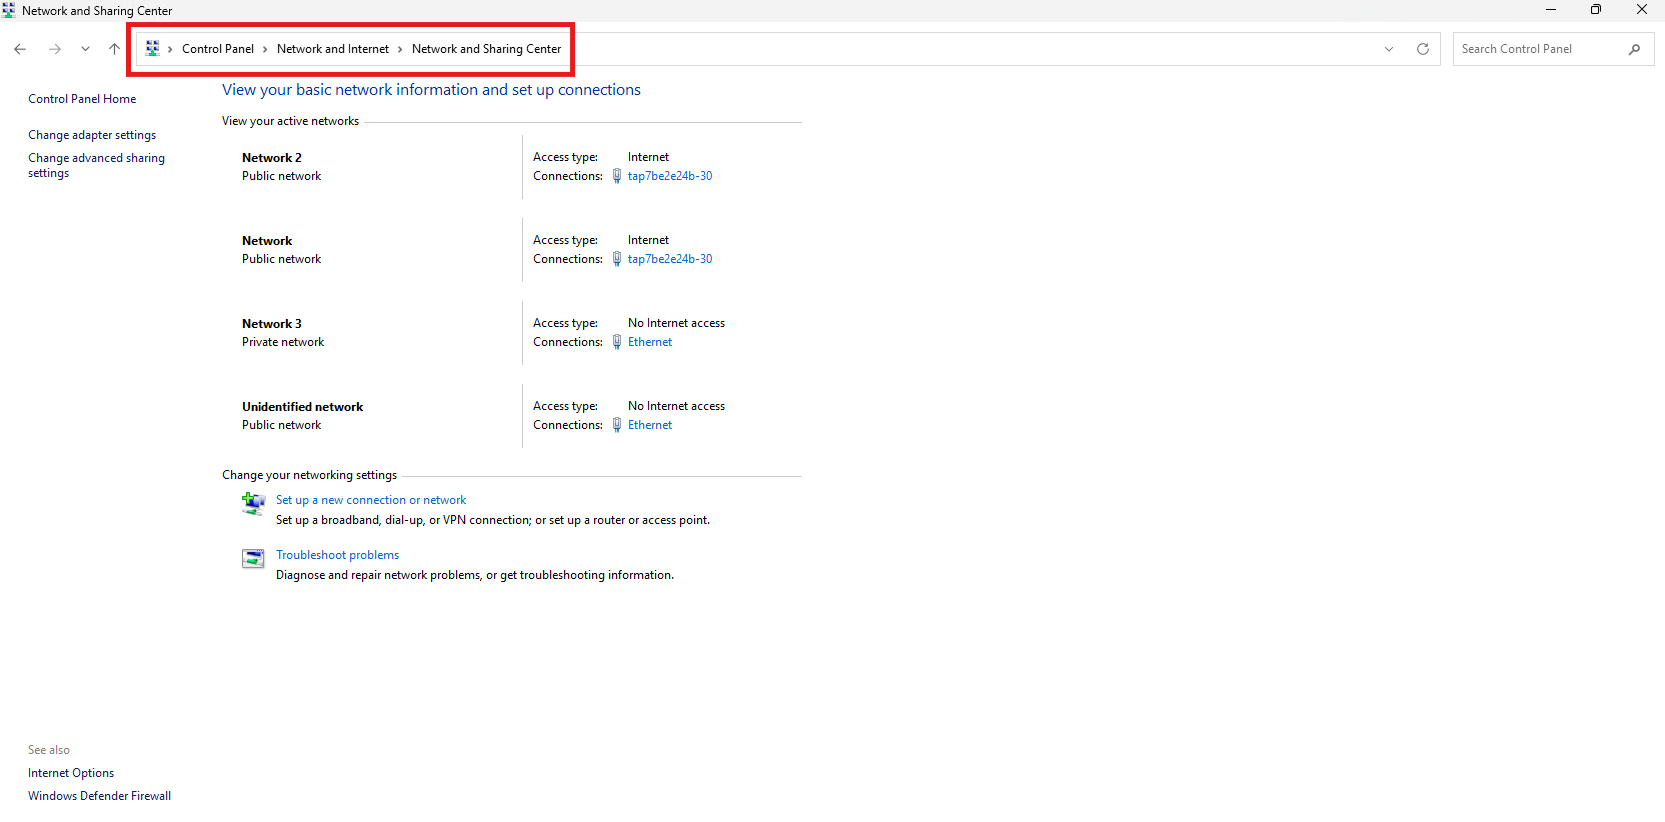
- Locate the network you wish to configure and click on it. Select Properties then double-click Internet Protocol Version 4 (TCP/IPv4) in the list.
- Fill in your IP address, Subnet prefix length (e.g., 24 for 255.255.255.0), Gateway, and DNS servers into the respective fields. Click OK on both windows to apply and save the new network configurations.
Method 3: Configure via Command Prompt (CMD)
Best for quick configurations without navigating multiple menus.
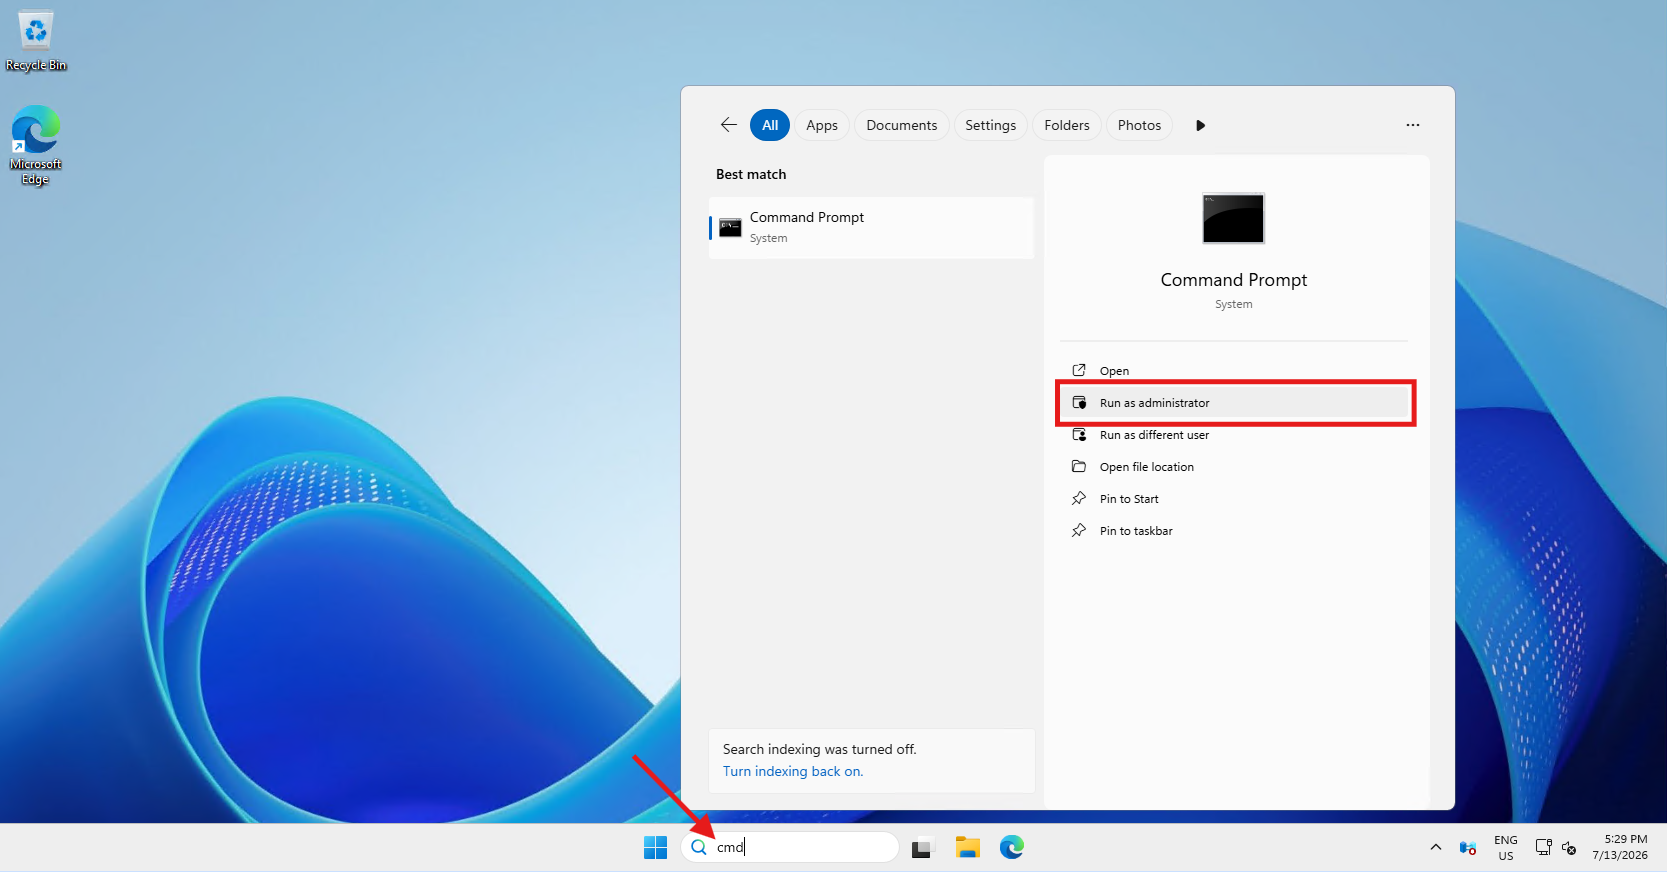
- Open the Start Menu, type cmd, right-click Command Prompt, and select Run as administrator.
- Execute the interface configuration command to assign your IP address, Subnet prefix length (e.g., 24 for 255.255.255.0) and Gateway.
netsh interface ipv4 set address name="<Network_Name>" static <IP_Address> <Subnet> <Gateway>
- Execute the DNS configuration command to set up your preferred name resolution server, index=1 and index=2 used to identify the primary and secondary DNS Server:
netsh interface ipv4 add dnsservers "<Network_Name>" <DNS_Server_IP> index=1
netsh interface ipv4 add dnsservers "<Network_Name>" <DNS_Server_IP> index=2
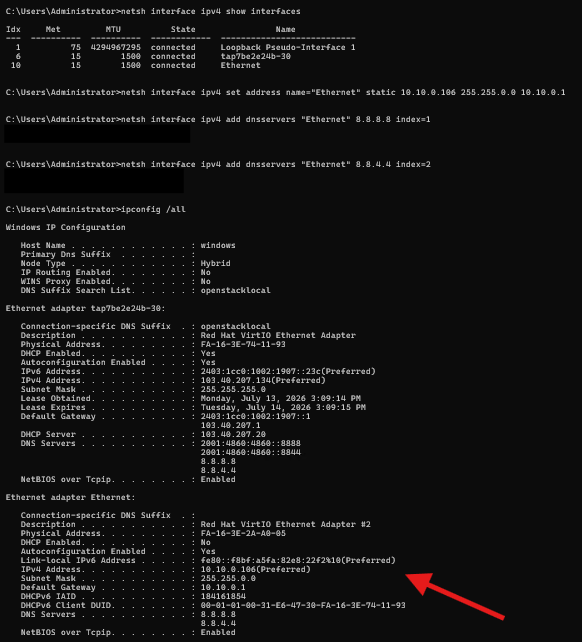
- Execute the operational verification command to confirm that your network card successfully updated with the static parameters:
ipconfig /all
- Expected output:
Conclusion
By following this guidance, you can successfully assign and manage a static IP address on your Windows Server using the graphical user interface or the command line.
For additional assistance or if you encounter any issues, please contact our support team at support@ipserverone.com.