
Search Our Database
How to deploy RabbitMQ using One-Click Applications in Customer Portal
Introduction
RabbitMQ is a widely used, open-source message broker (or message queue). It acts as a middleman that allows different software applications or microservices to communicate asynchronously. Instead of services calling each other directly and waiting for a response, they send and receive messages through RabbitMQ, making systems faster, more reliable, and easily scalable. Deploying a powerful message broker shouldn’t be complicated. This guide shows you how to easily launch RabbitMQ using the One-Click Applications feature within the IPServerOne Customer Portal today, providing a rapid, automated setup for your cloud environment.
Prerequisites
-
Access to the IPServerOne Customer Portal
-
Sufficient Cloud Credits in account
Before diving into the launching cloud instance, you may refer to the guidance below, as there are being used across this guidance.
- To register and login into our Customer Portal
-> [How to register and login to Customer Portal] - To configure Security Group for the cloud instance, you may consider as the simple firewall for the cloud instance
-> [Configure Security Group in IPServerOne Customer Portal] - If you wish to unify the Public Key for all cloud instance, you may generate a Public Key before launching the cloud instance
-> [How to Create Public Key for the Cloud Server in Customer Portal] - If you have existing Public Key, you may consider import the Public Key
-> [How to Import Public Key(s) for the Cloud Server in Customer Portal] - To create a Project for your cloud instance for easier managing, and you are having an option to assign the Project later
-> [How to Create Project(s) in Customer Portal]
-> [How to assign instance(s) to a project group in Customer Portal] - To login the cloud instance via SSH
-> [How to login to your Linux Server via SSH] - To retrieve the Windows Administrator password for RDP access
-> [How to Retrieve the Windows Administrator Password]
Step-by-step guide
Step 1: Launching new cloud instance
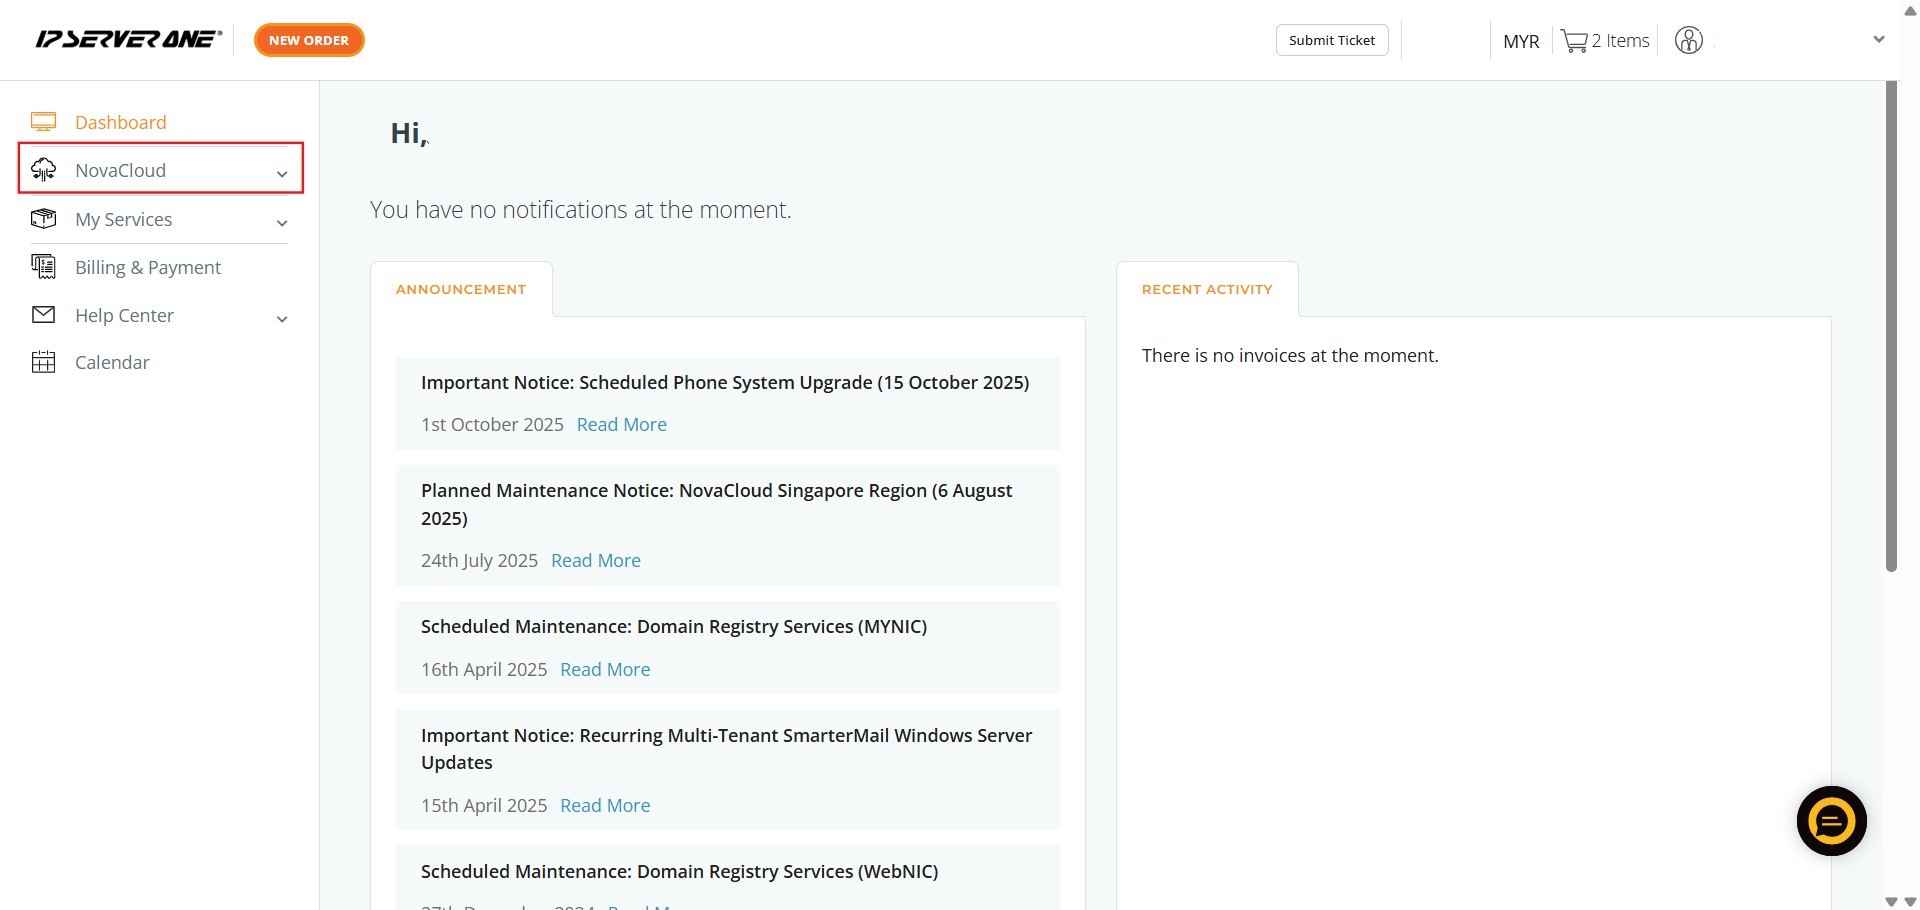
- Locate and click on the NovaCloud in the left-hand navigation menu to access NovaCloud resources page
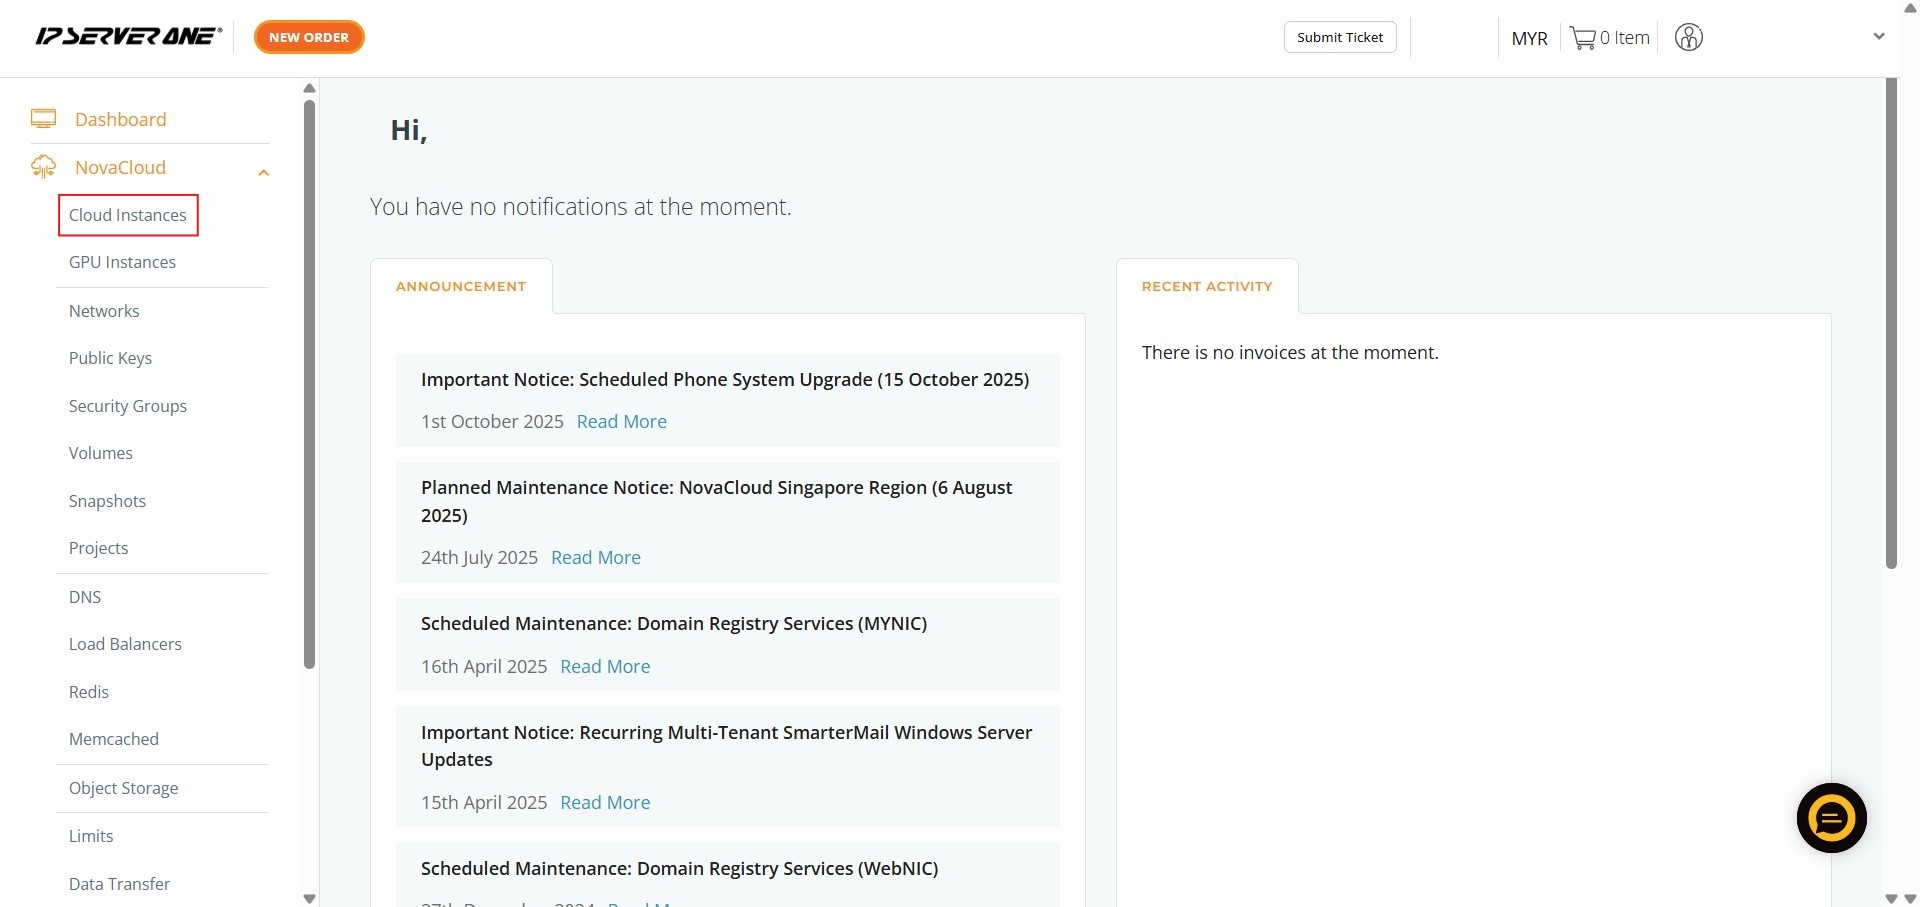
- Click on Cloud Instances to navigate to the cloud instance management page
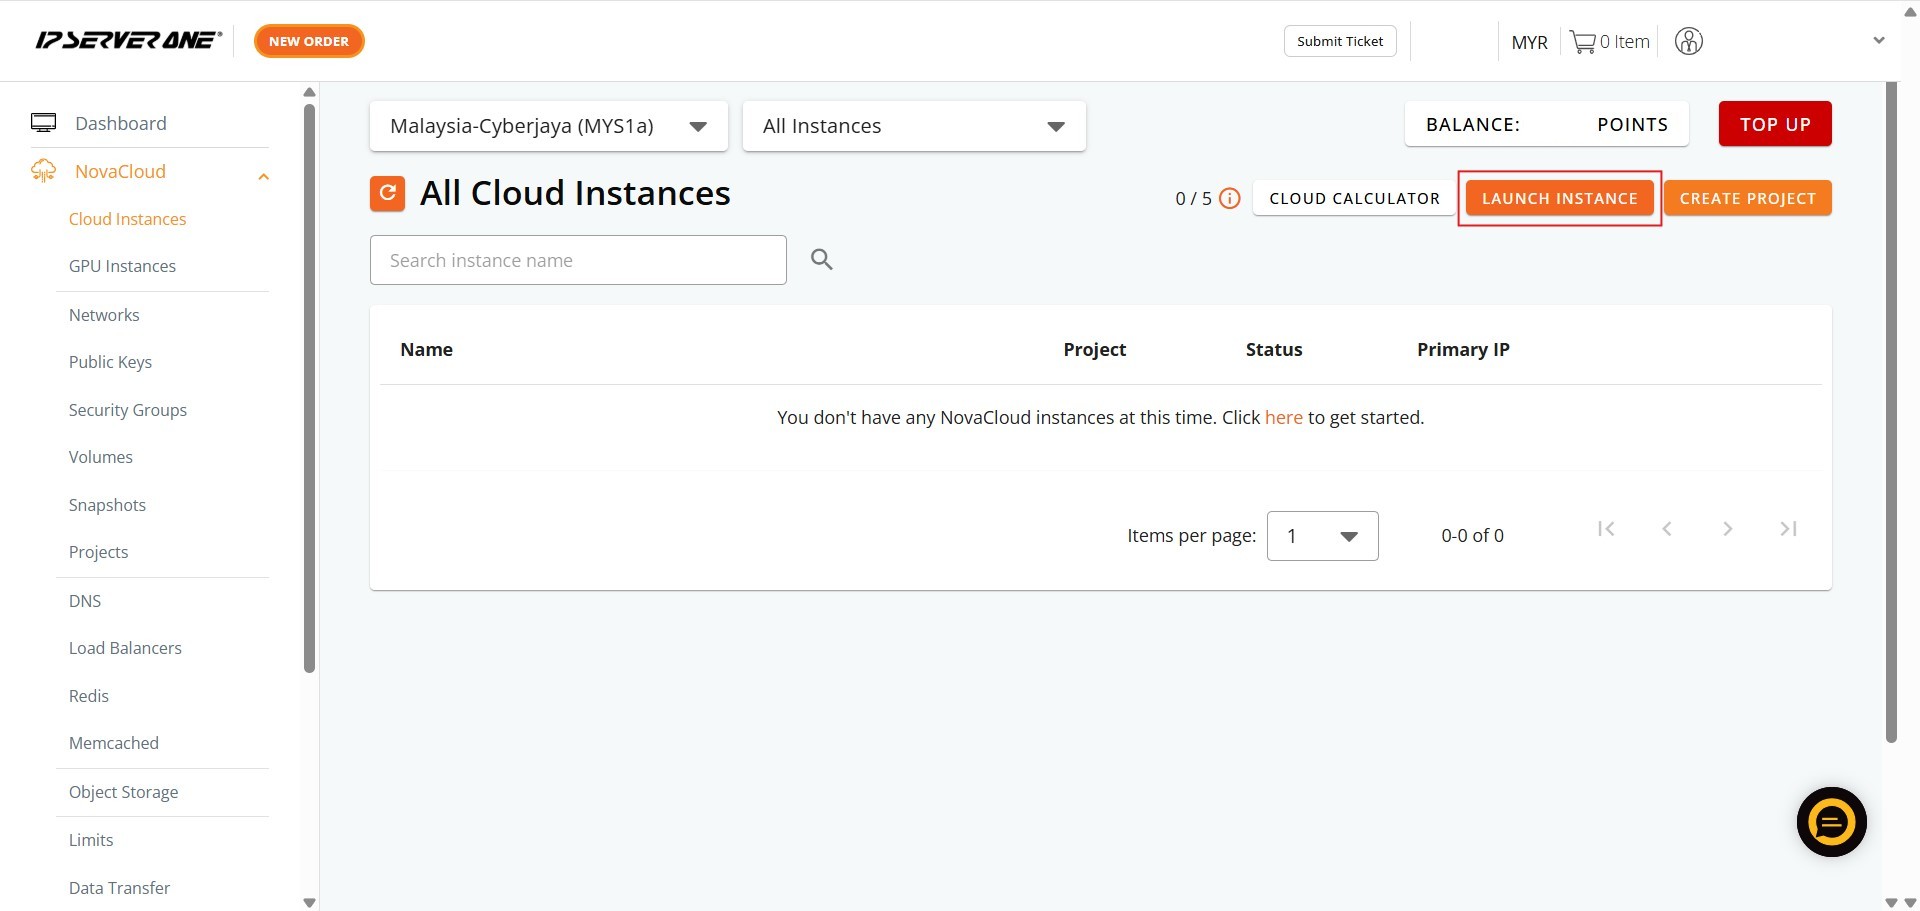
- Initiate the process for deploying a new cloud instance by clicking the Launch Instance
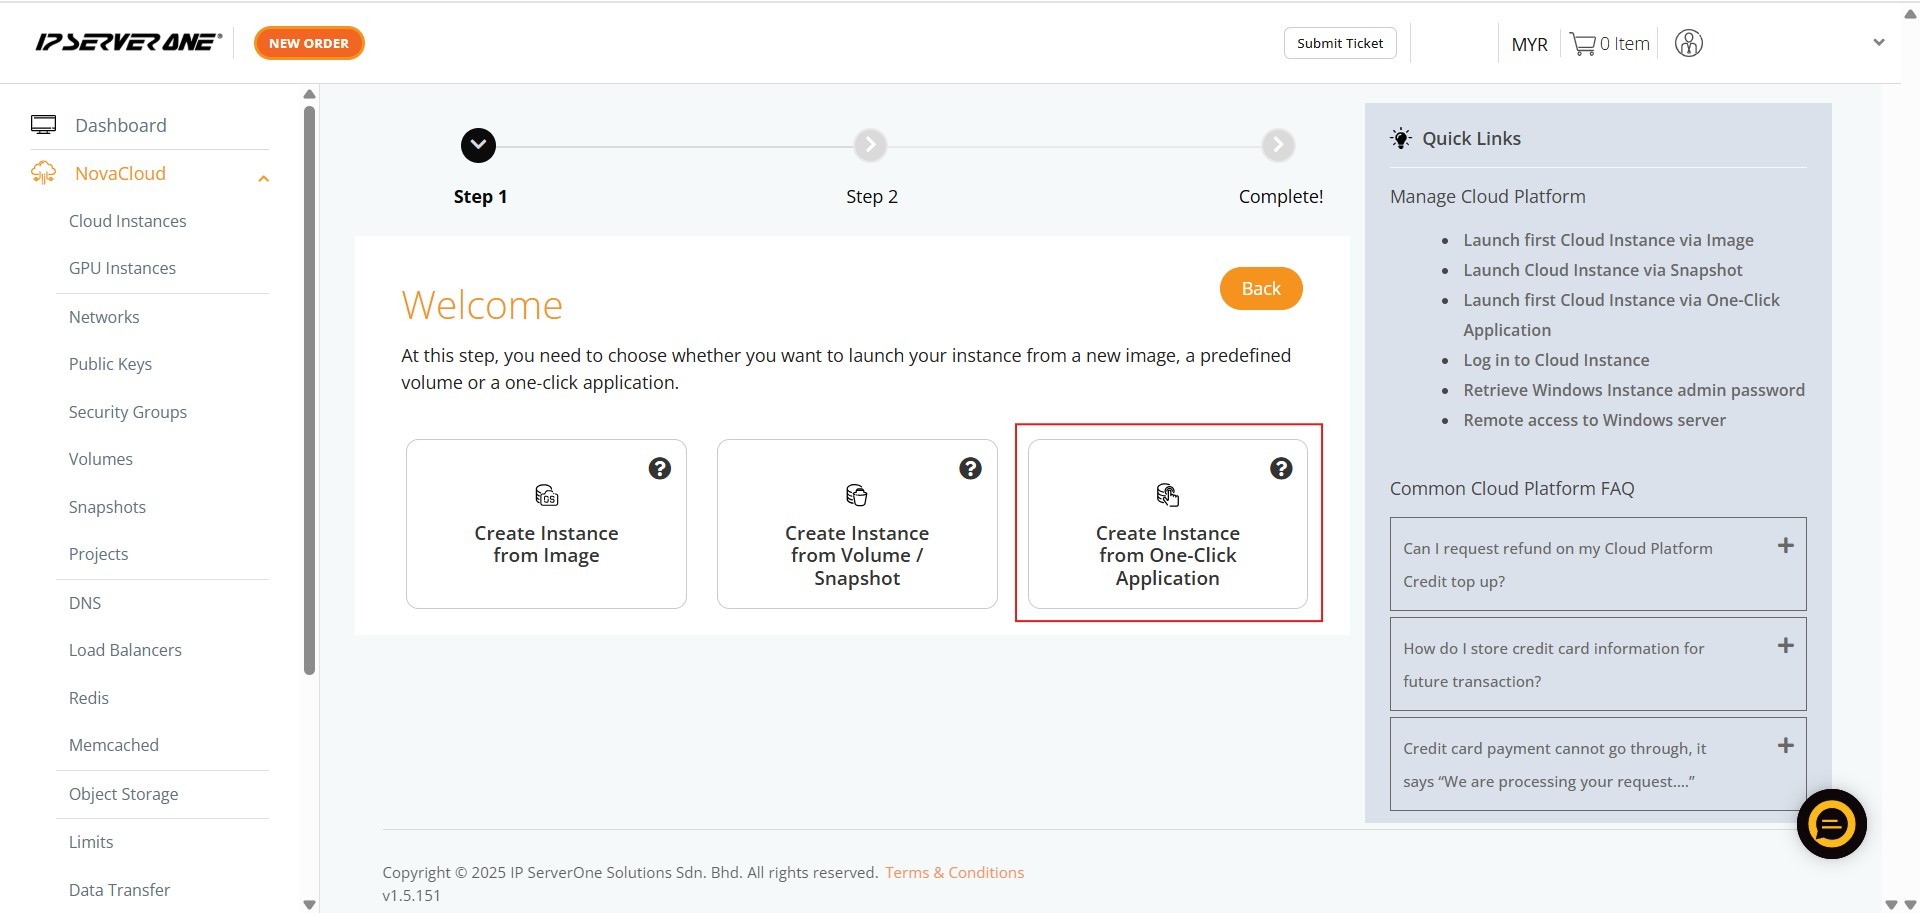
- Select Create Instance from One-Click Application for provisioning instances pre-installed with your chosen application or database
Step 2: Select application for the cloud instance
- Ensure the Category is selected as Queue
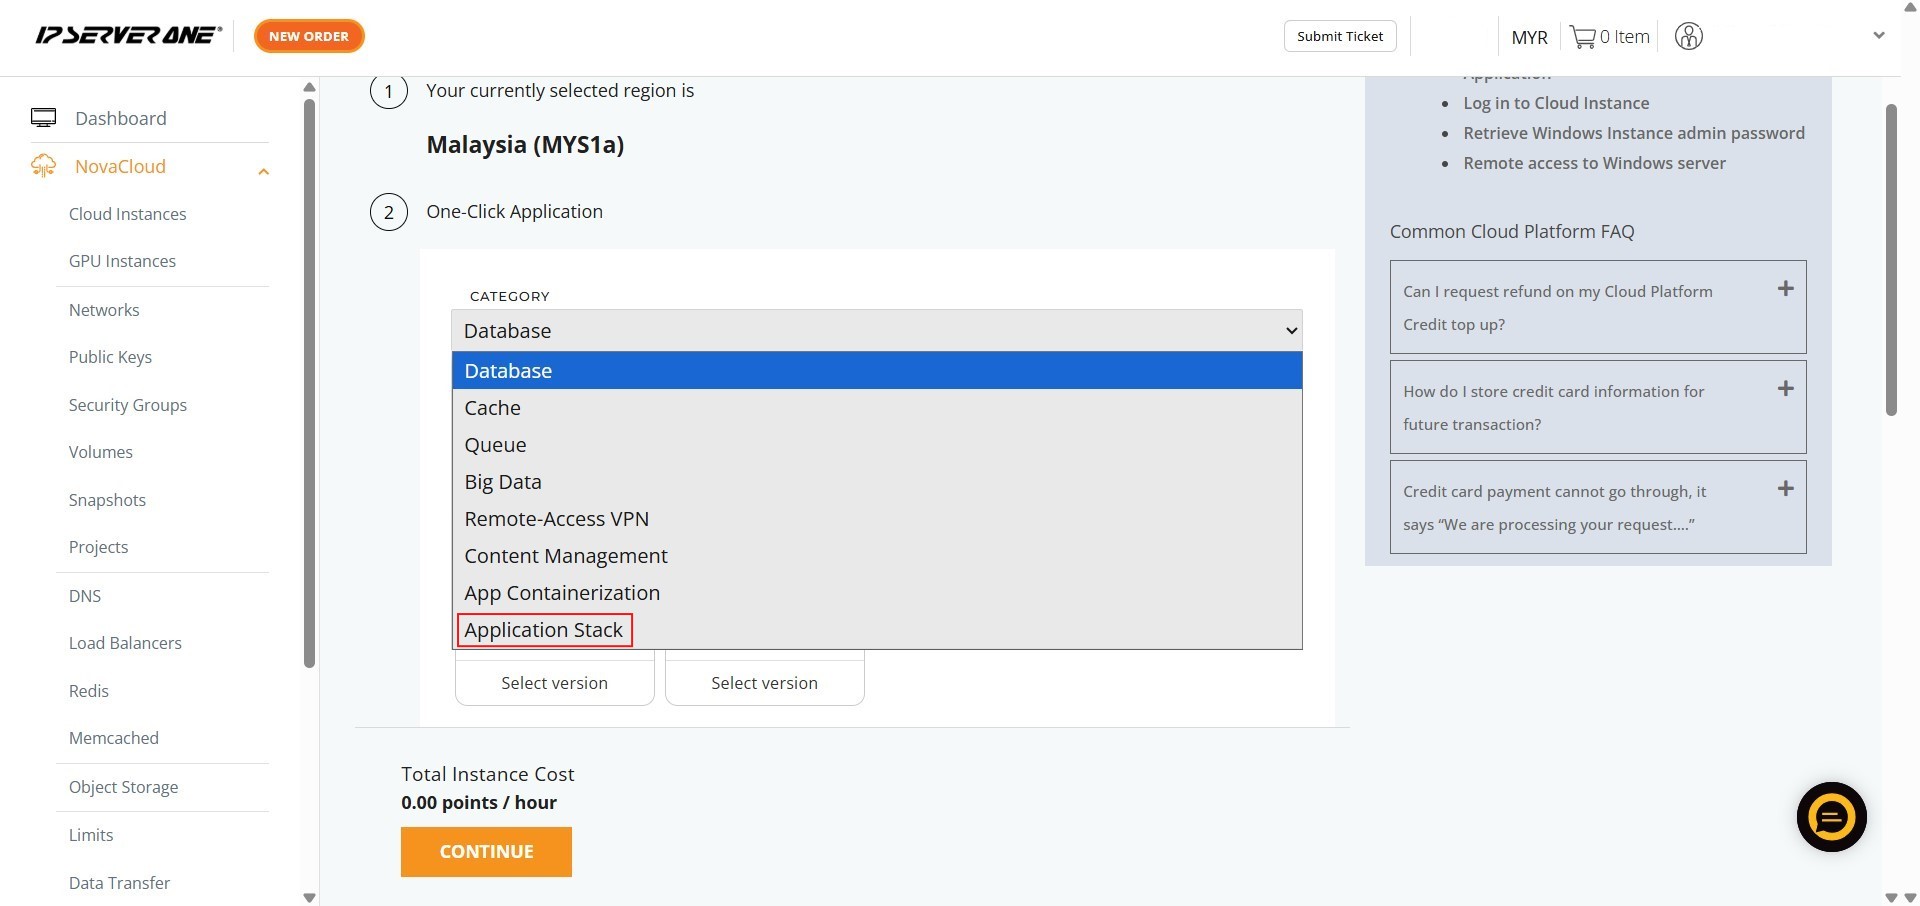
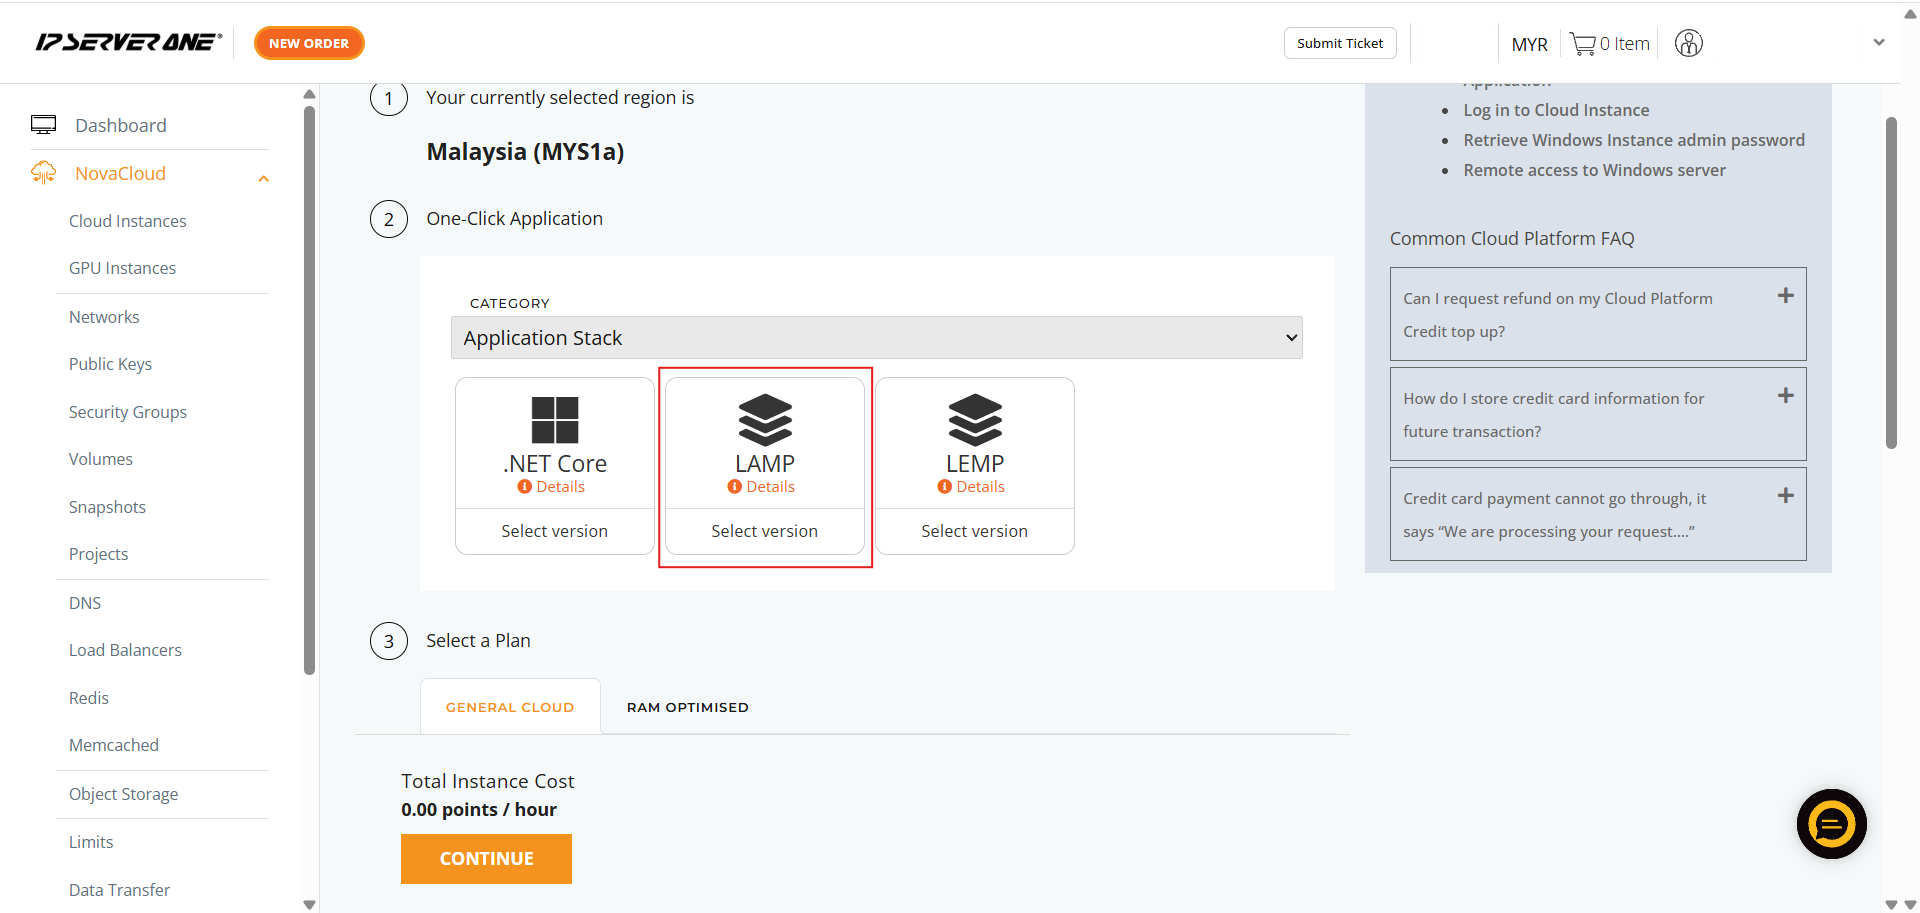
- Select the specific application – RabbitMQ
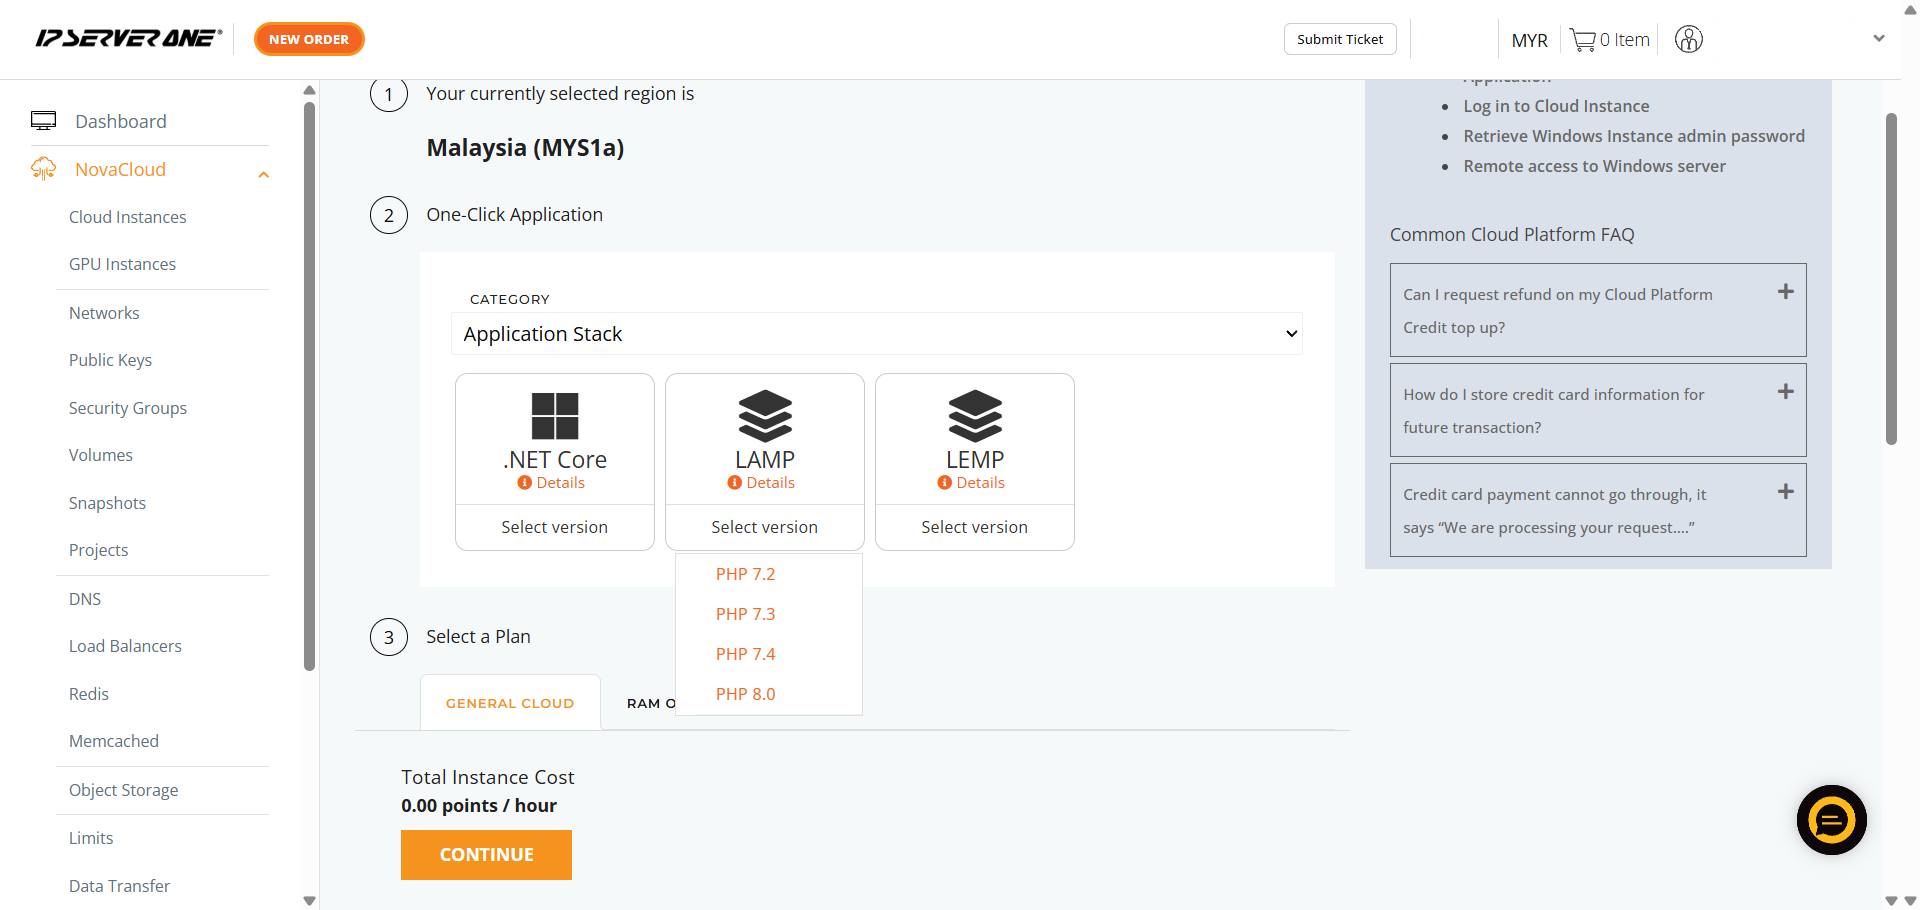
- Choose the required RabbitMQ version you wish to deploy
- Choose the appropriate resource plan (CPU, RAM, data transfer limits) for the cloud instance
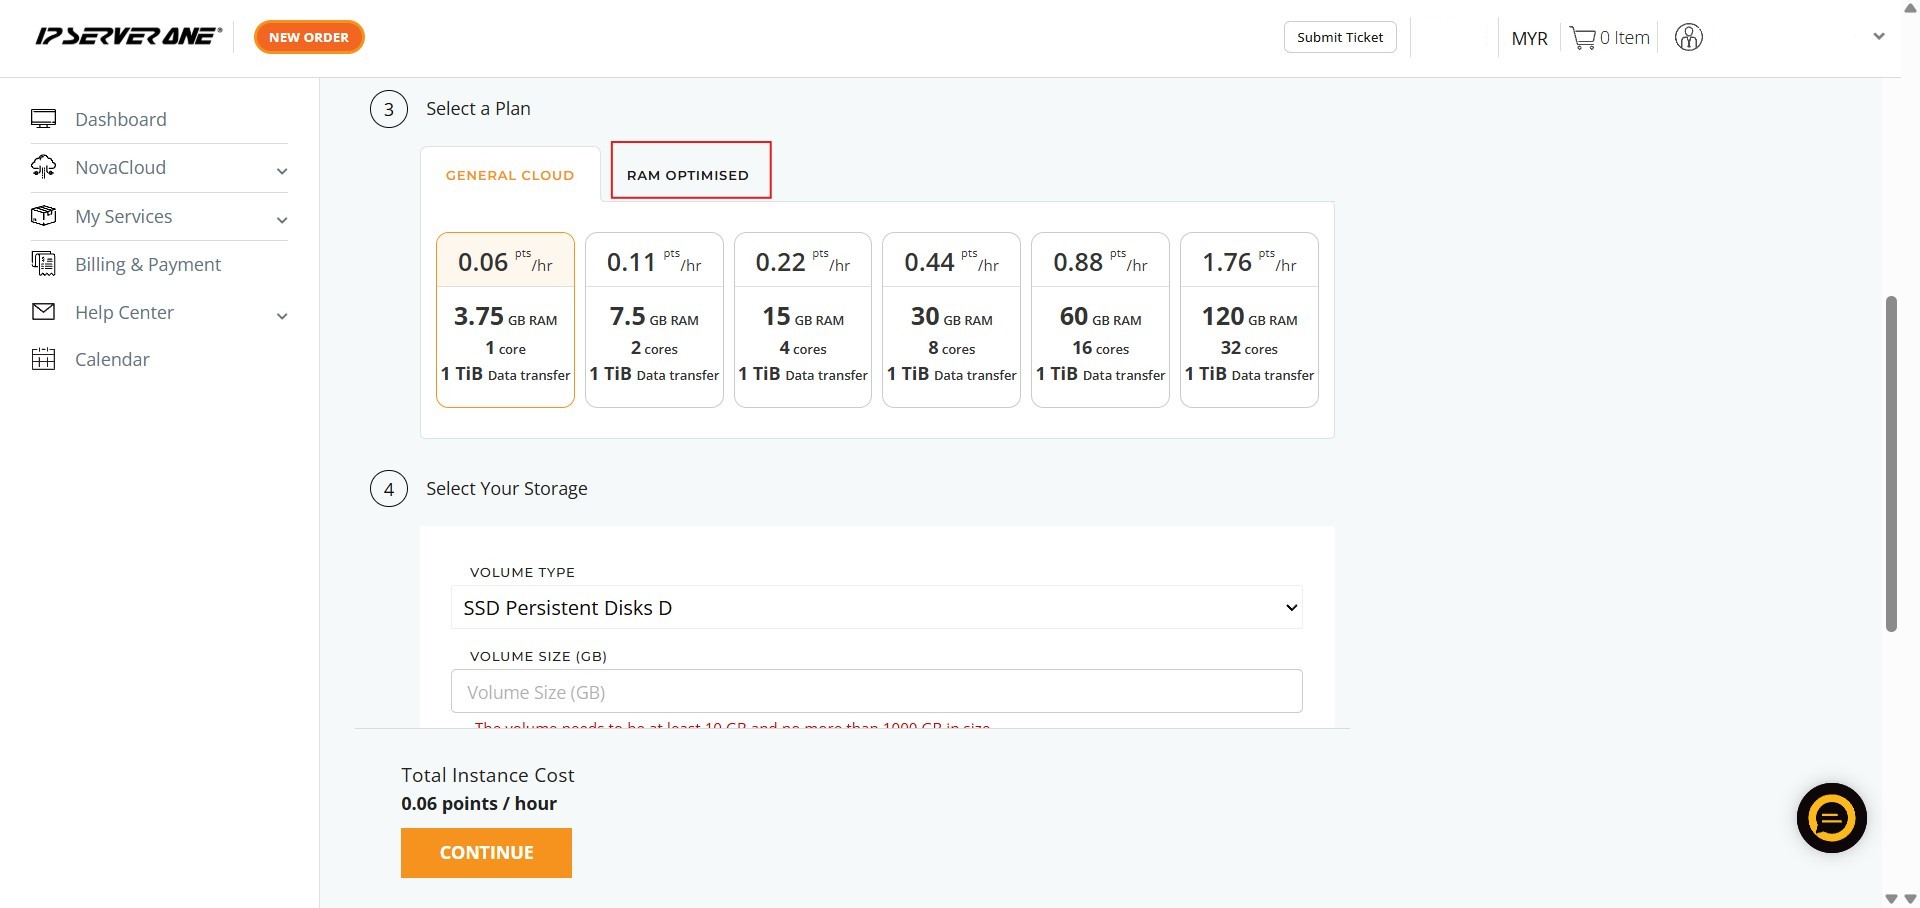
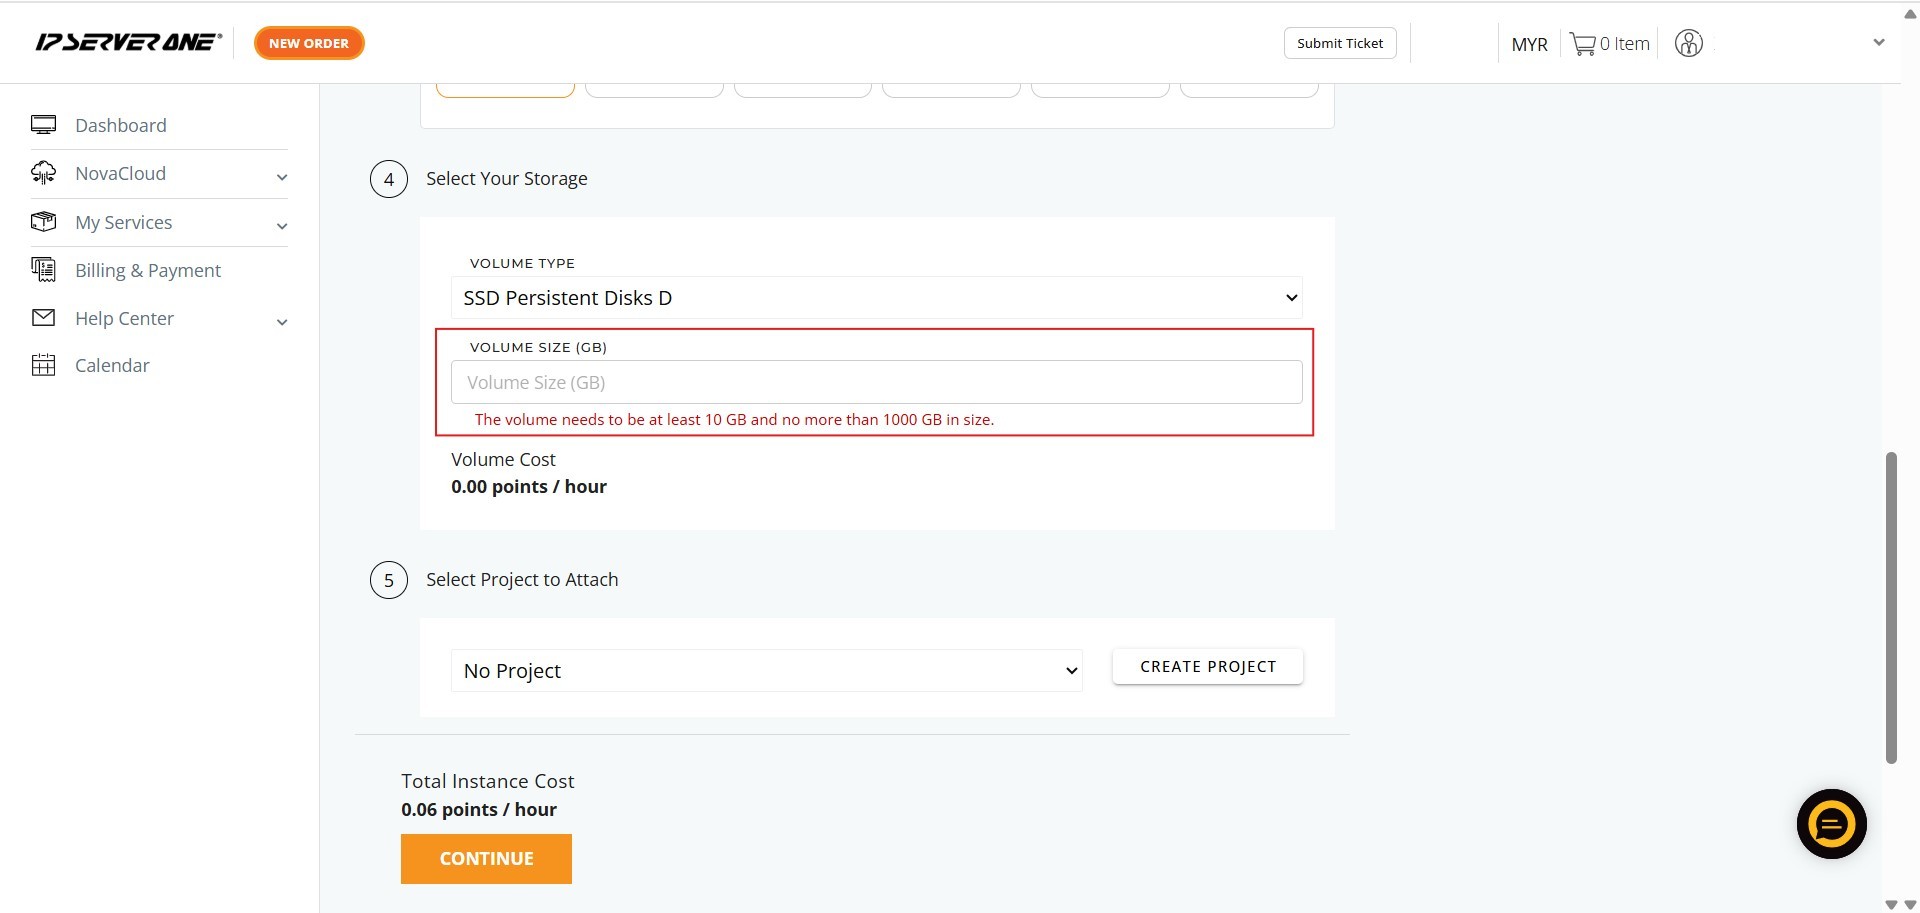
- Define the volume size for the cloud instance
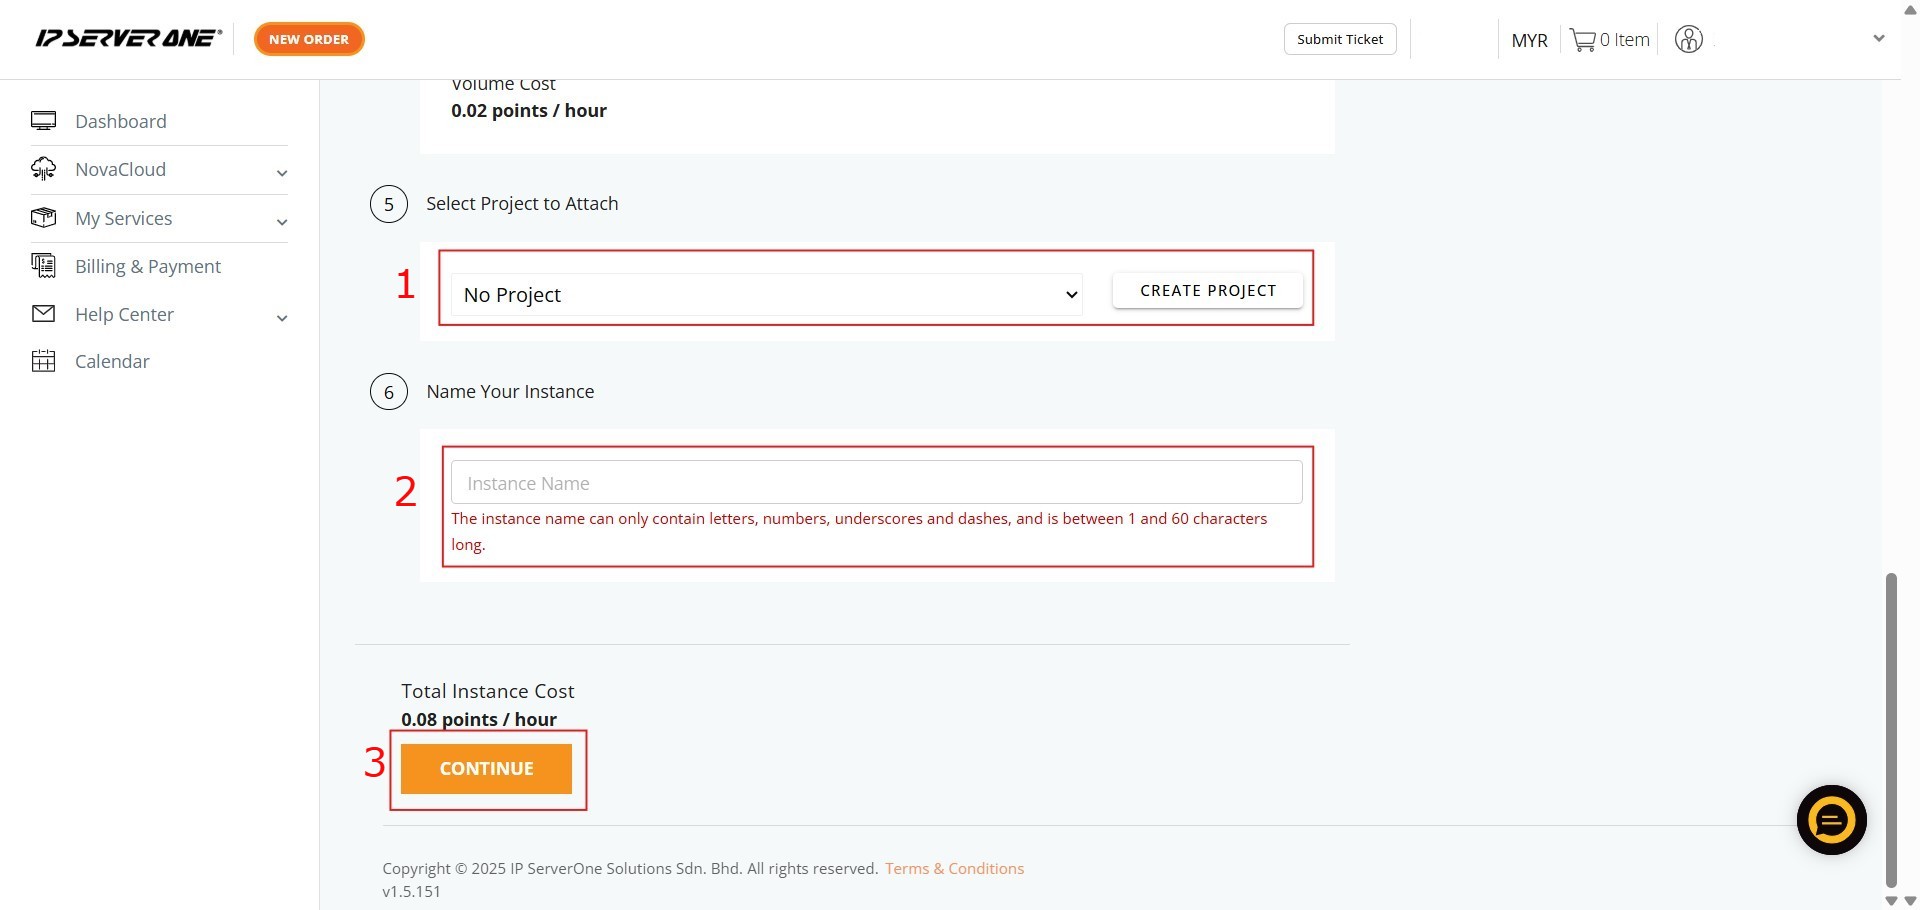
- Associate the instance with an existing project (if desired) and provide a unique name for the cloud instance
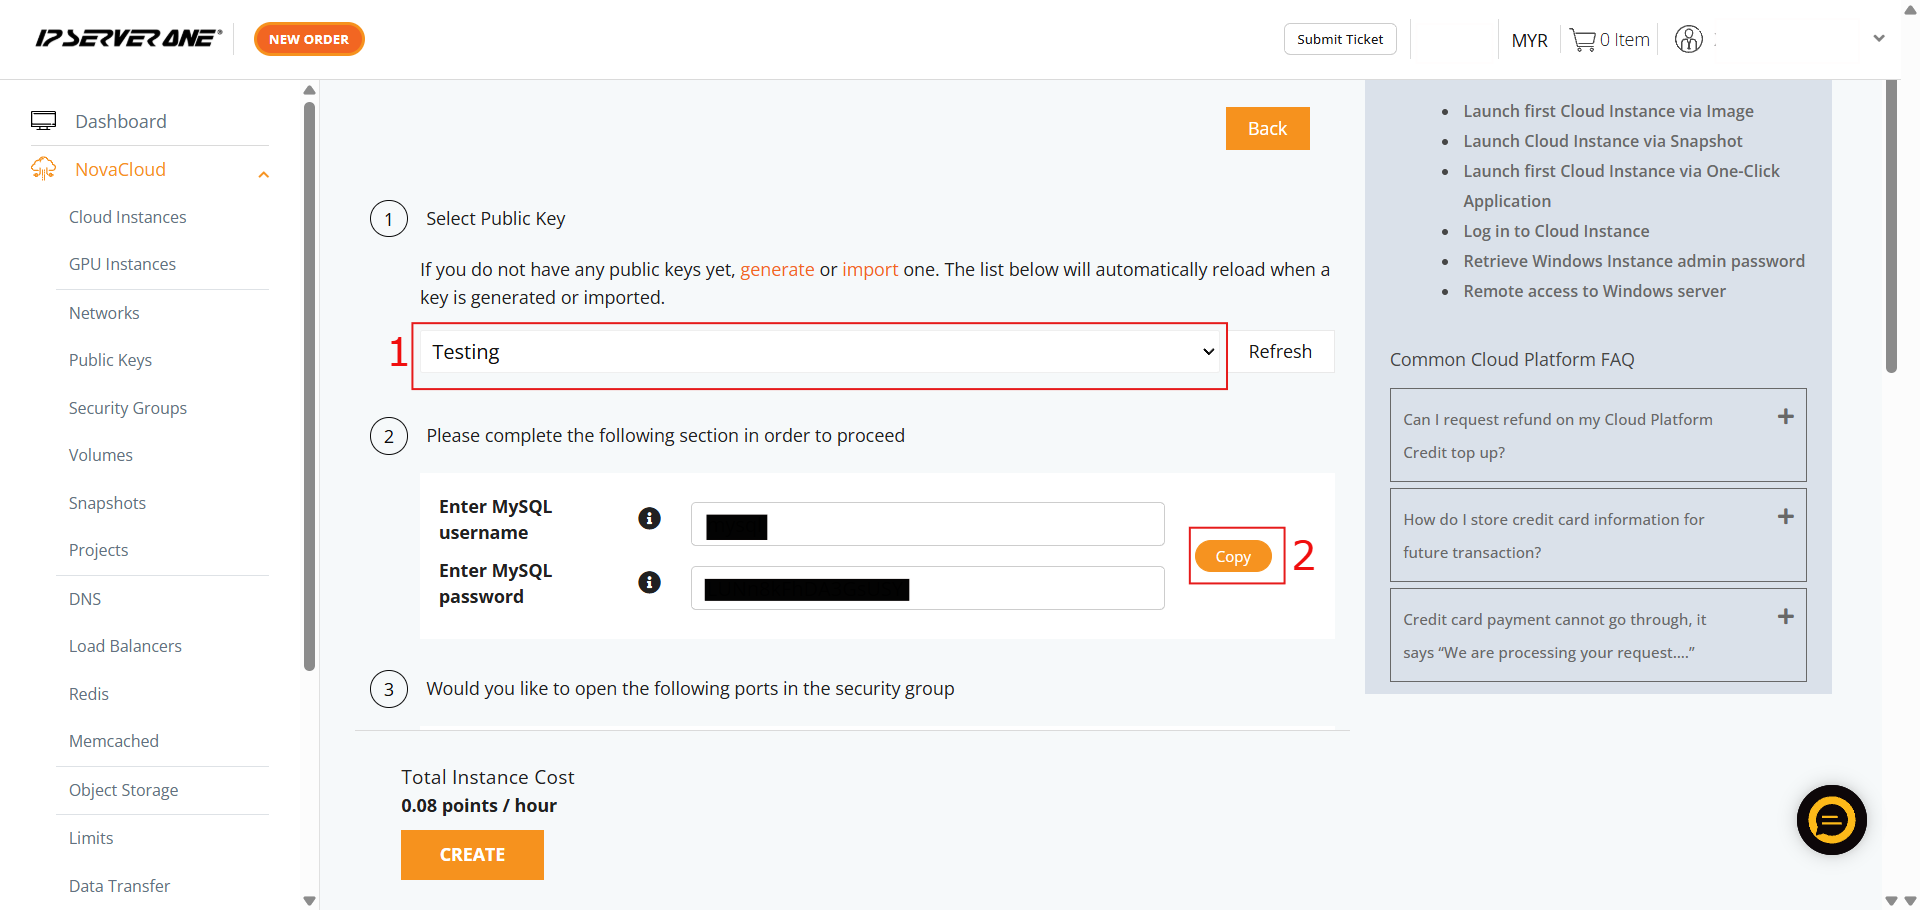
- Select the necessary Public Key and copy the provided RabbitMQ login information
Step 3: Verify launched cloud instance
- If you HAVE NOT created any Security Group, you may consider follow the selection here and our system will assist to create the Security Group for the cloud instance
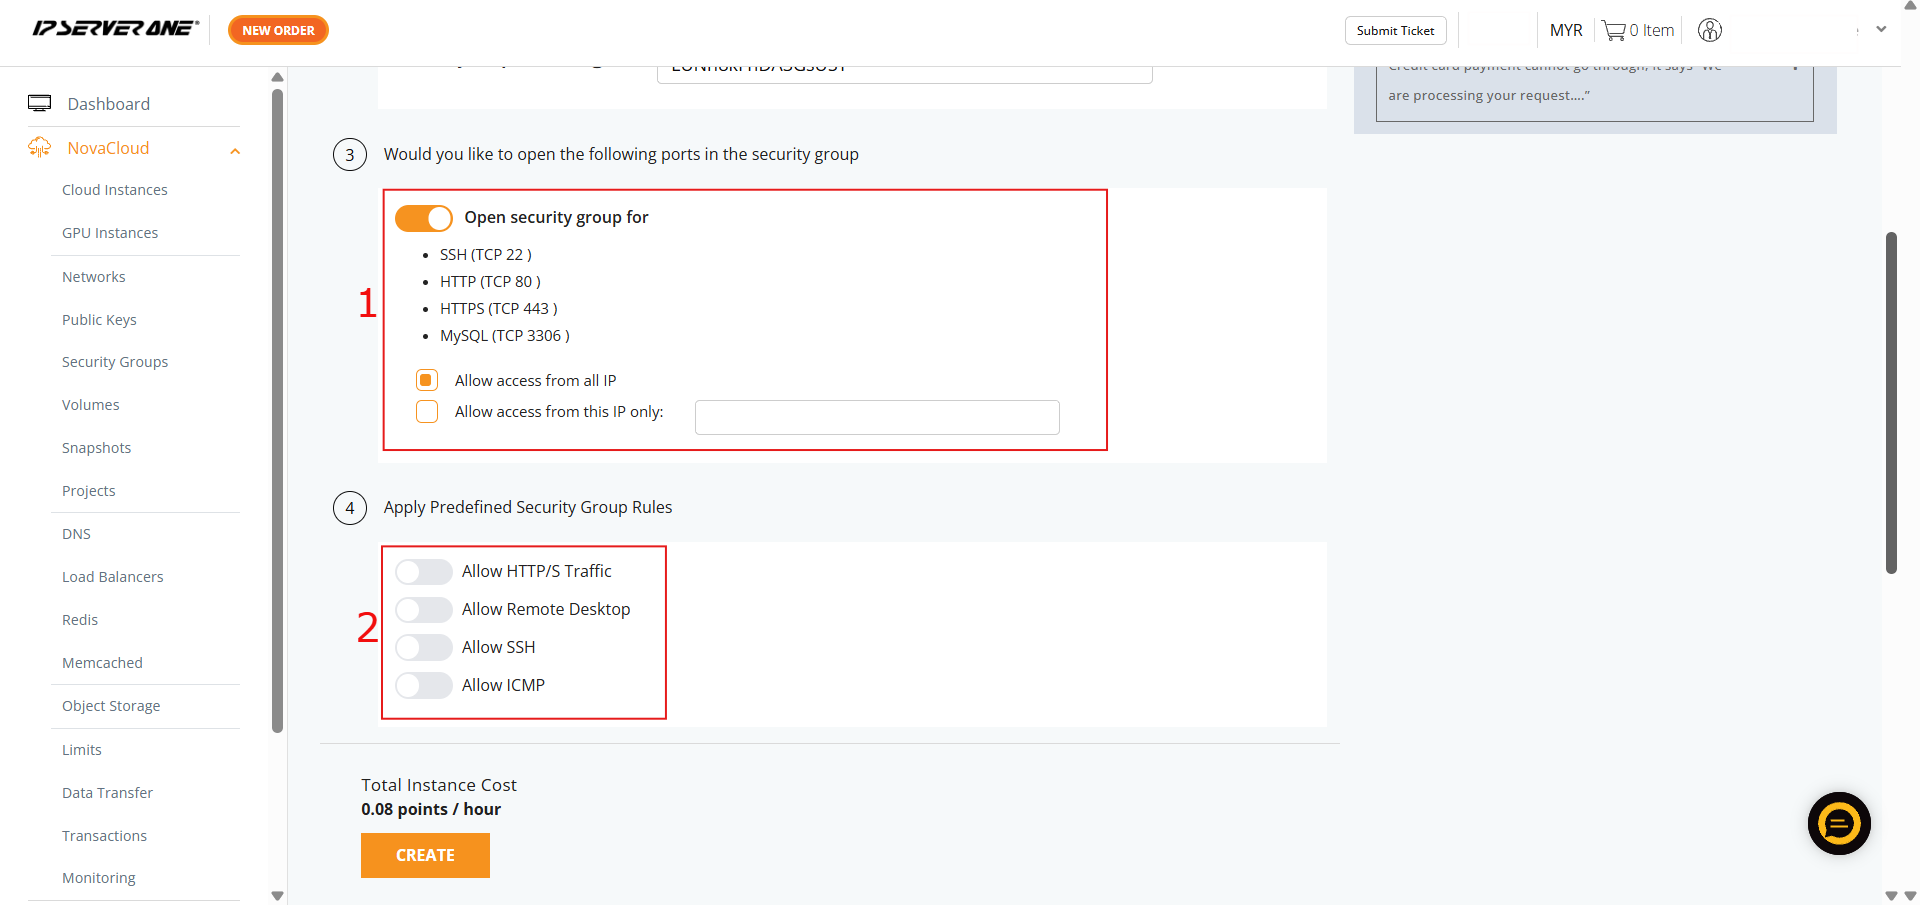
- If you HAVE created Security Group, you may select and apply the Security Group to the cloud instance
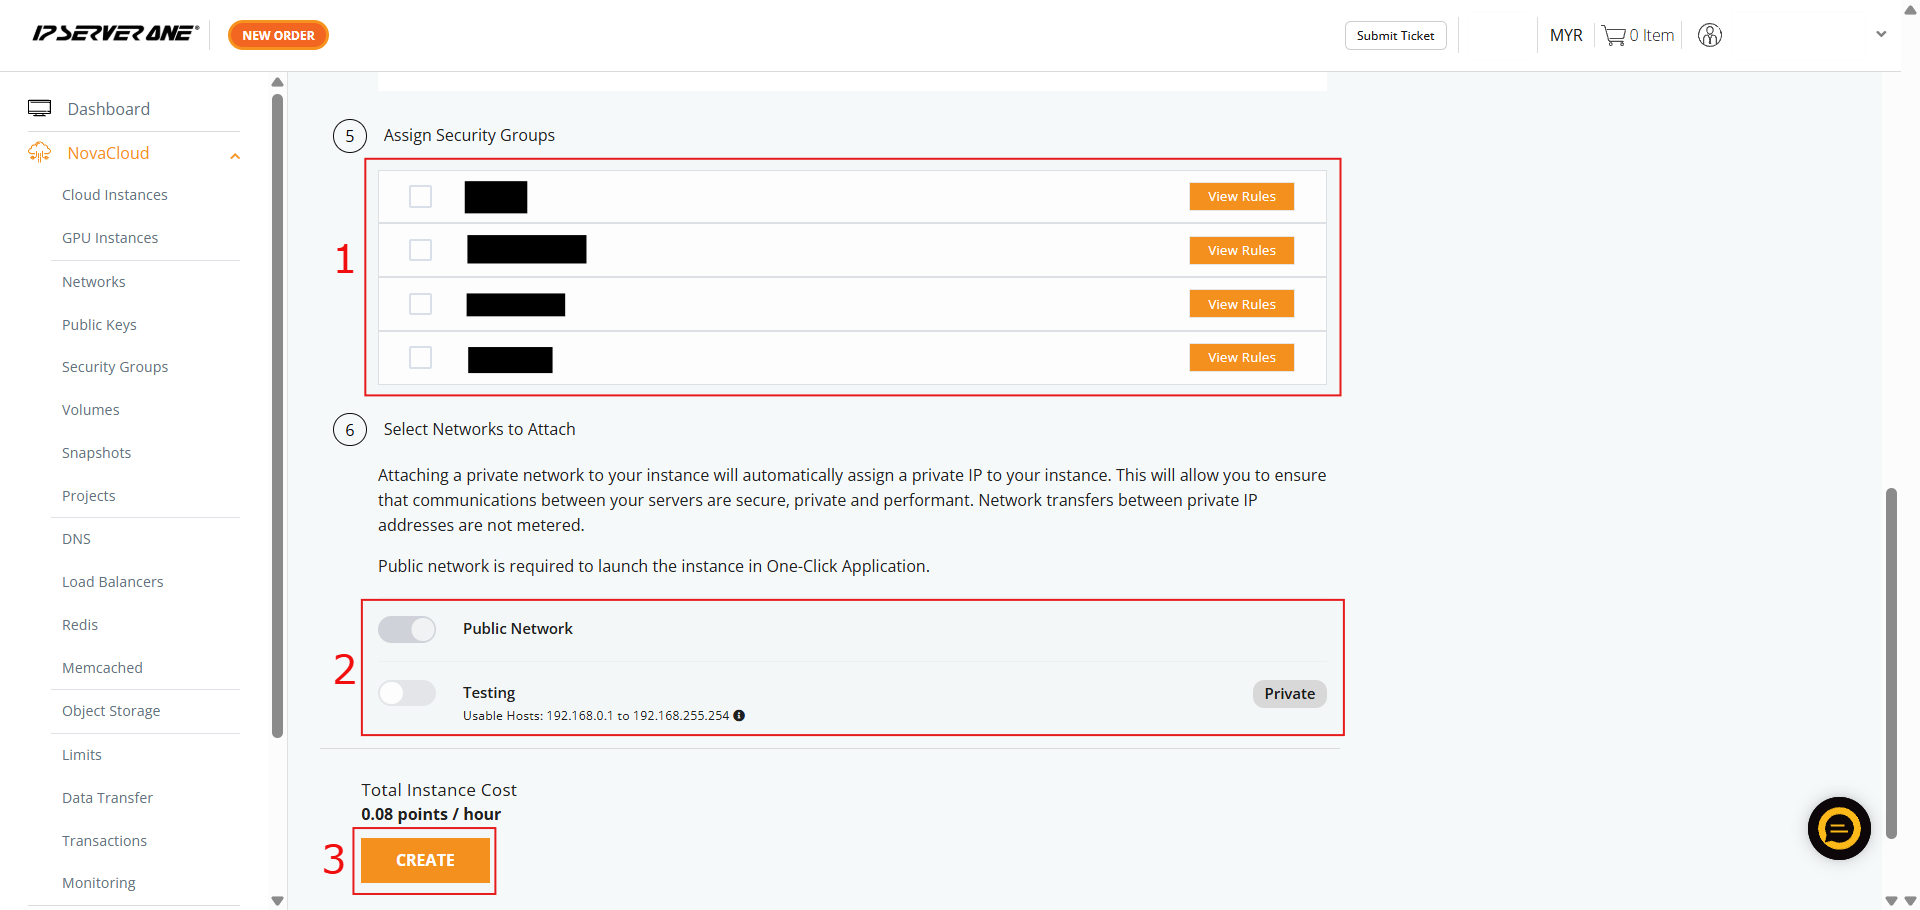
- A confirmation pop-up will appear. Review the specifications, scroll to the bottom, and click Create to launch the cloud instance
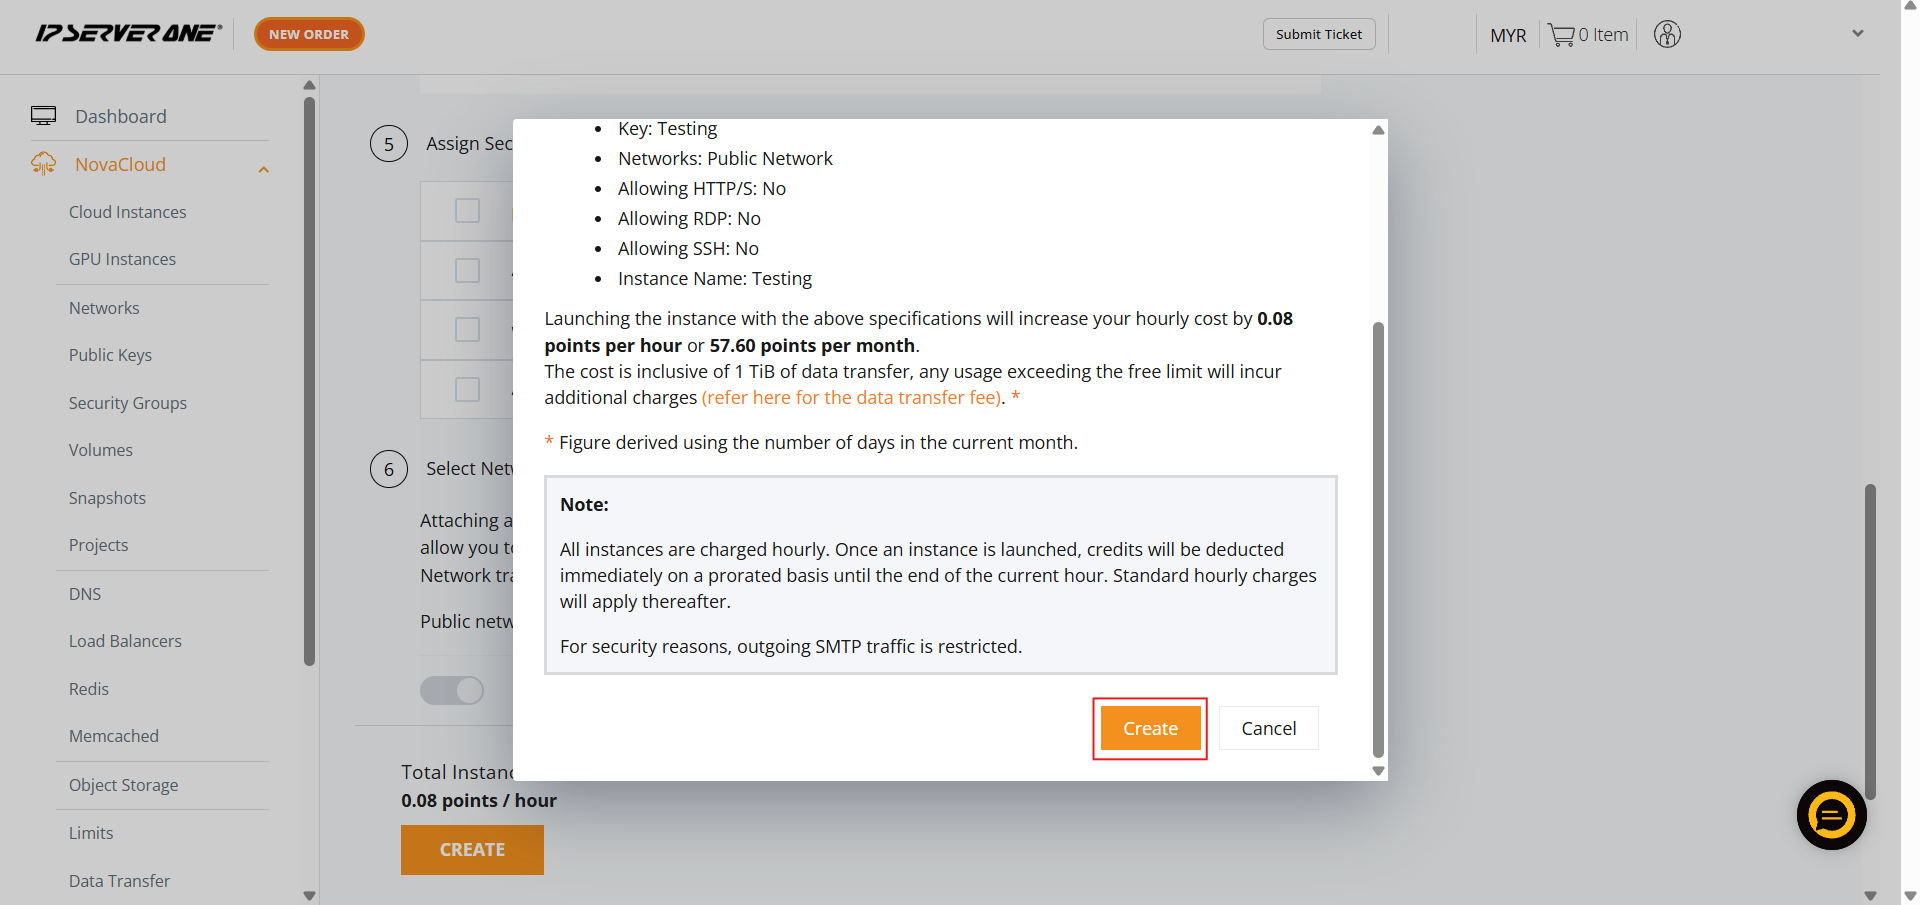
- Click the Instances button in the confirmation pop-up to navigate to the list of Cloud Instances
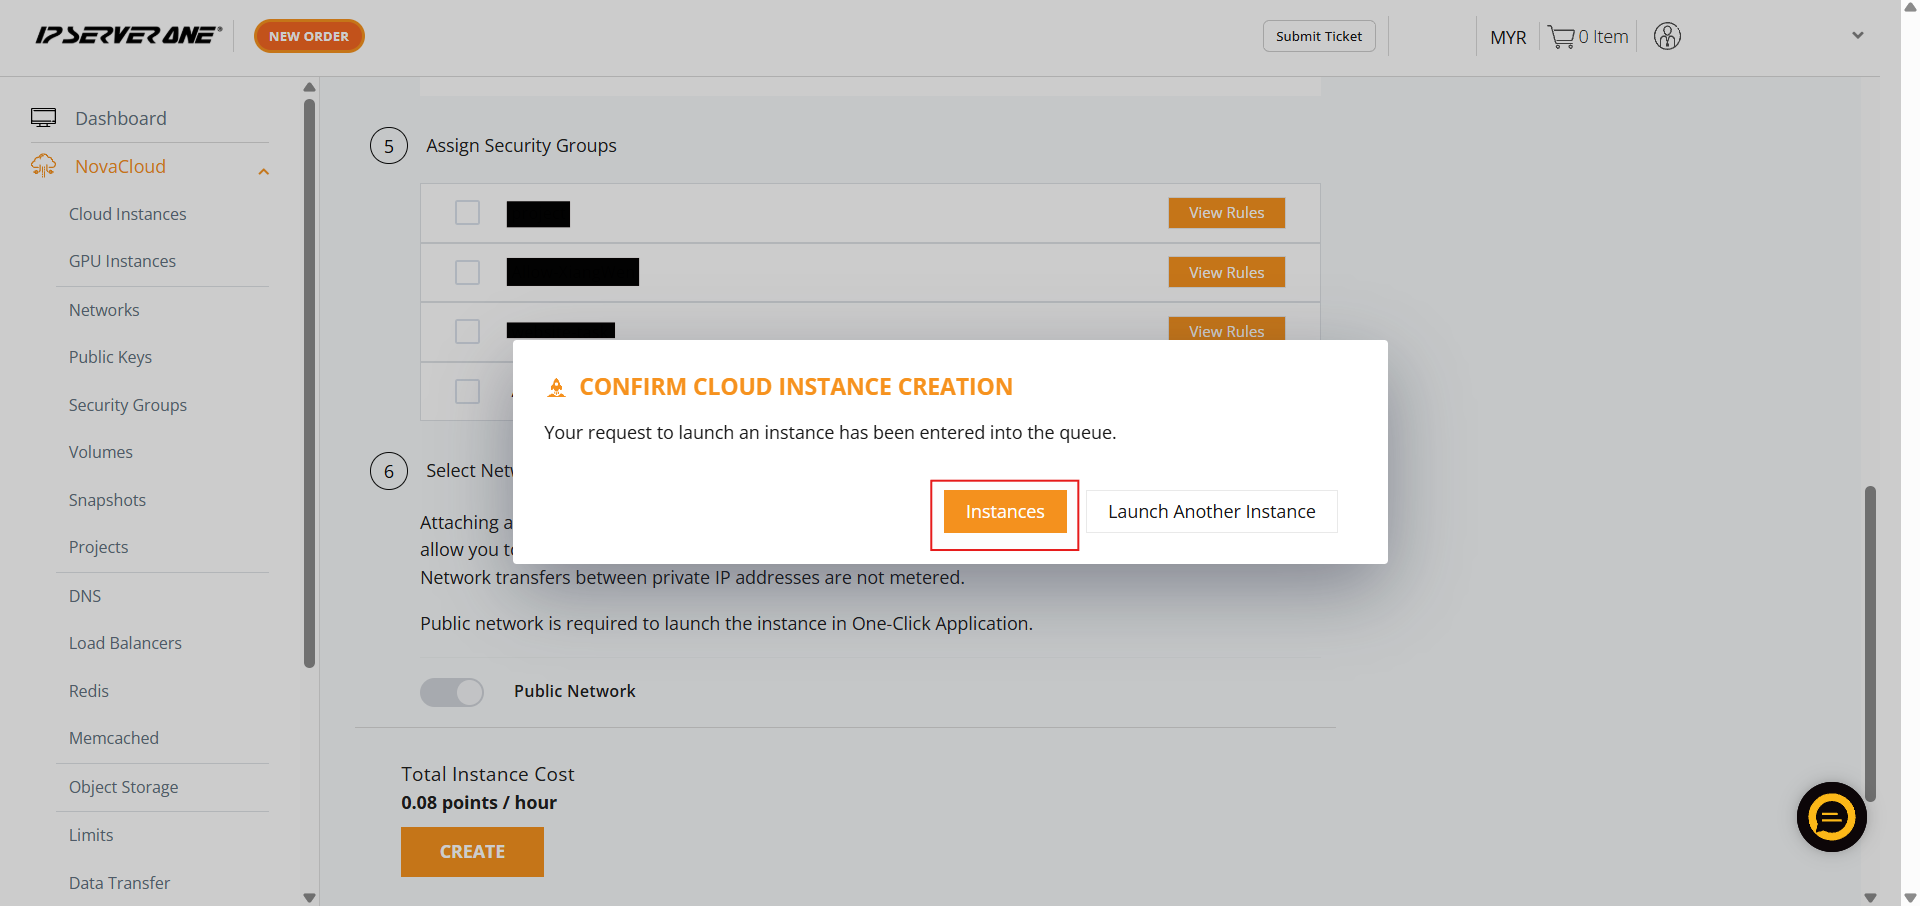
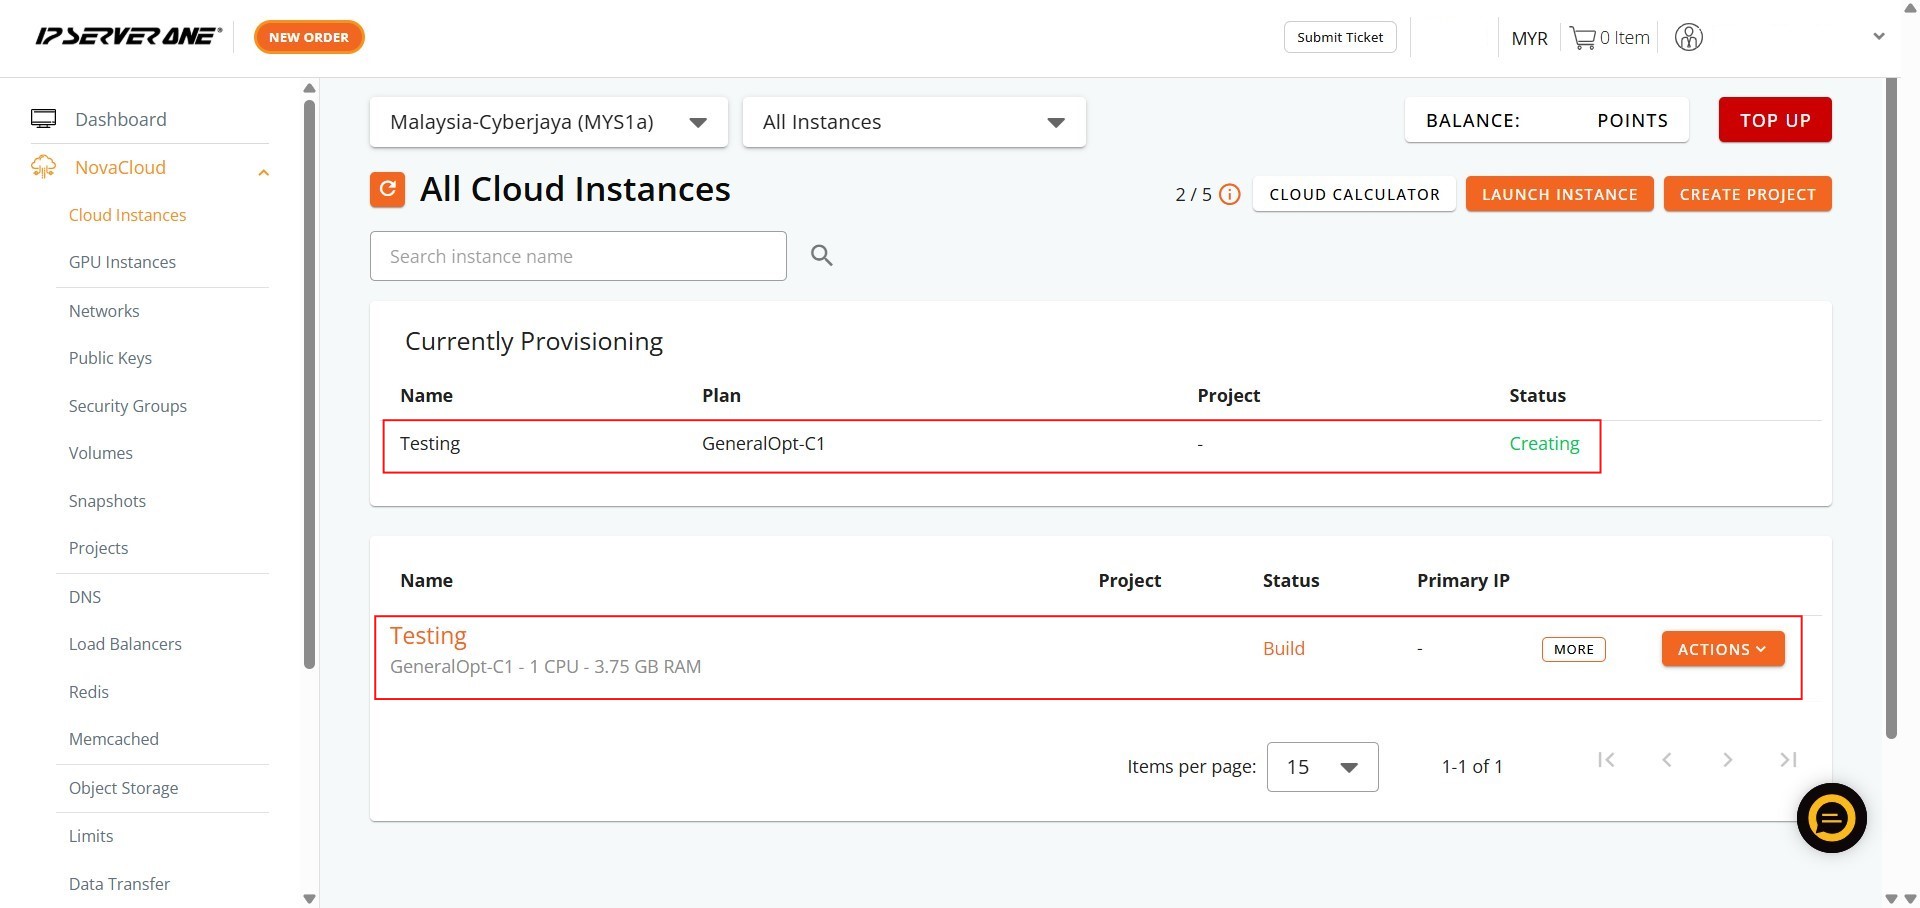
- Your request to launch the instance has been queued, and the provisioning process is underway (status “Creating” or “Active”)
Conclusion
By following this guidance, you can quickly spin up a RabbitMQ instance without dealing with manual server installations or complex configuration files.
For additional assistance or if you encounter any issues, please contact our support team at support@ipserverone.com.
Article updated on 08 July 2026 by Johnny H.