
Search Our Database
How to deploy Elasticsearch using One-Click Applications in Customer Portal
Introduction
Elasticsearch is a highly scalable, distributed search and analytics engine built on Apache Lucene. It allows you to store, search, and analyze massive volumes of data in near real-time. Instead of storing data in rigid rows and columns like a traditional relational database, it stores schema-free JSON documents. Because it indexes every single word within those documents, it can locate specific information instantly. This guide shows how to instantly deploy an Elasticsearch instance via the IPServerOne Customer Portal today. This automated setup eliminates manual installation hassles, allowing you to quickly provision a production-ready search engine machine directly from your account dashboard.
Prerequisites
-
Access to the IPServerOne Customer Portal
-
Sufficient Cloud Credits in account
Before diving into the launching cloud instance, you may refer to the guidance below, as there are being used across this guidance.
- To register and login into our Customer Portal
-> [How to register and login to Customer Portal] - To configure Security Group for the cloud instance, you may consider as the simple firewall for the cloud instance
-> [Configure Security Group in IPServerOne Customer Portal] - If you wish to unify the Public Key for all cloud instance, you may generate a Public Key before launching the cloud instance
-> [How to Create Public Key for the Cloud Server in Customer Portal] - If you have existing Public Key, you may consider import the Public Key
-> [How to Import Public Key(s) for the Cloud Server in Customer Portal] - To create a Project for your cloud instance for easier managing, and you are having an option to assign the Project later
-> [How to Create Project(s) in Customer Portal]
-> [How to assign instance(s) to a project group in Customer Portal] - To login the cloud instance via SSH
-> [How to login to your Linux Server via SSH] - To retrieve the Windows Administrator password for RDP access
-> [How to Retrieve the Windows Administrator Password]
Step-by-step guide
Step 1: Launching new cloud instance
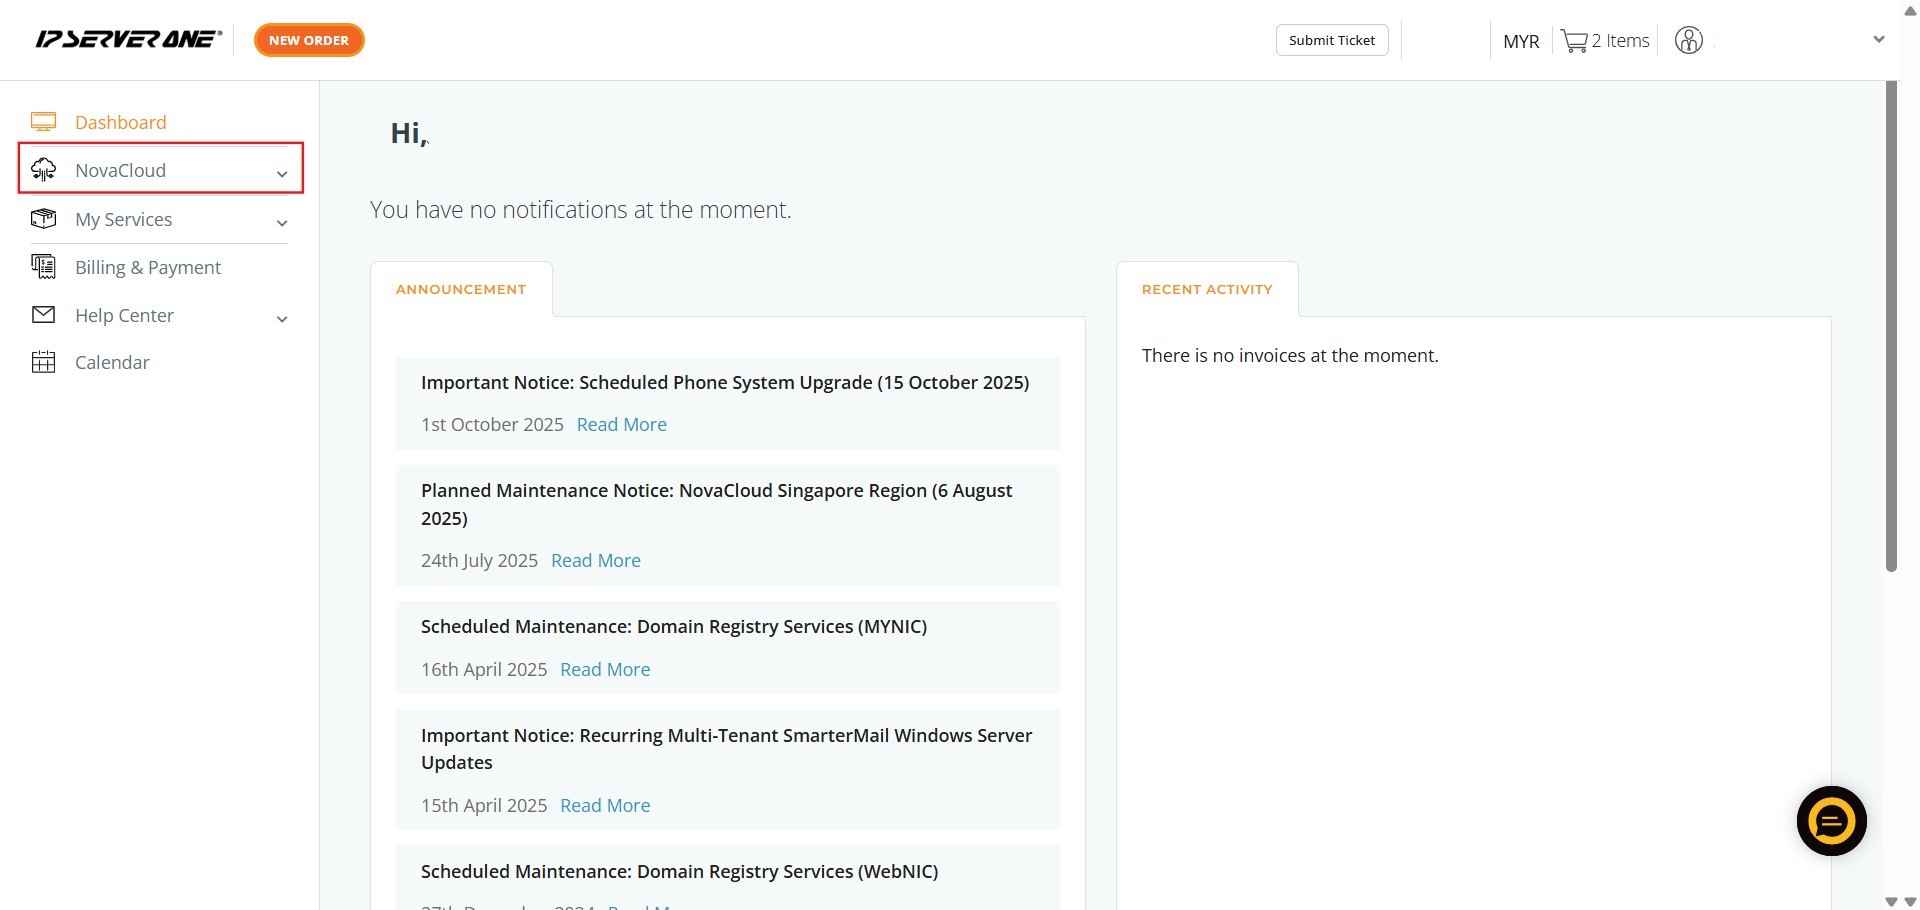
- Locate and click on the NovaCloud in the left-hand navigation menu to access NovaCloud resources page
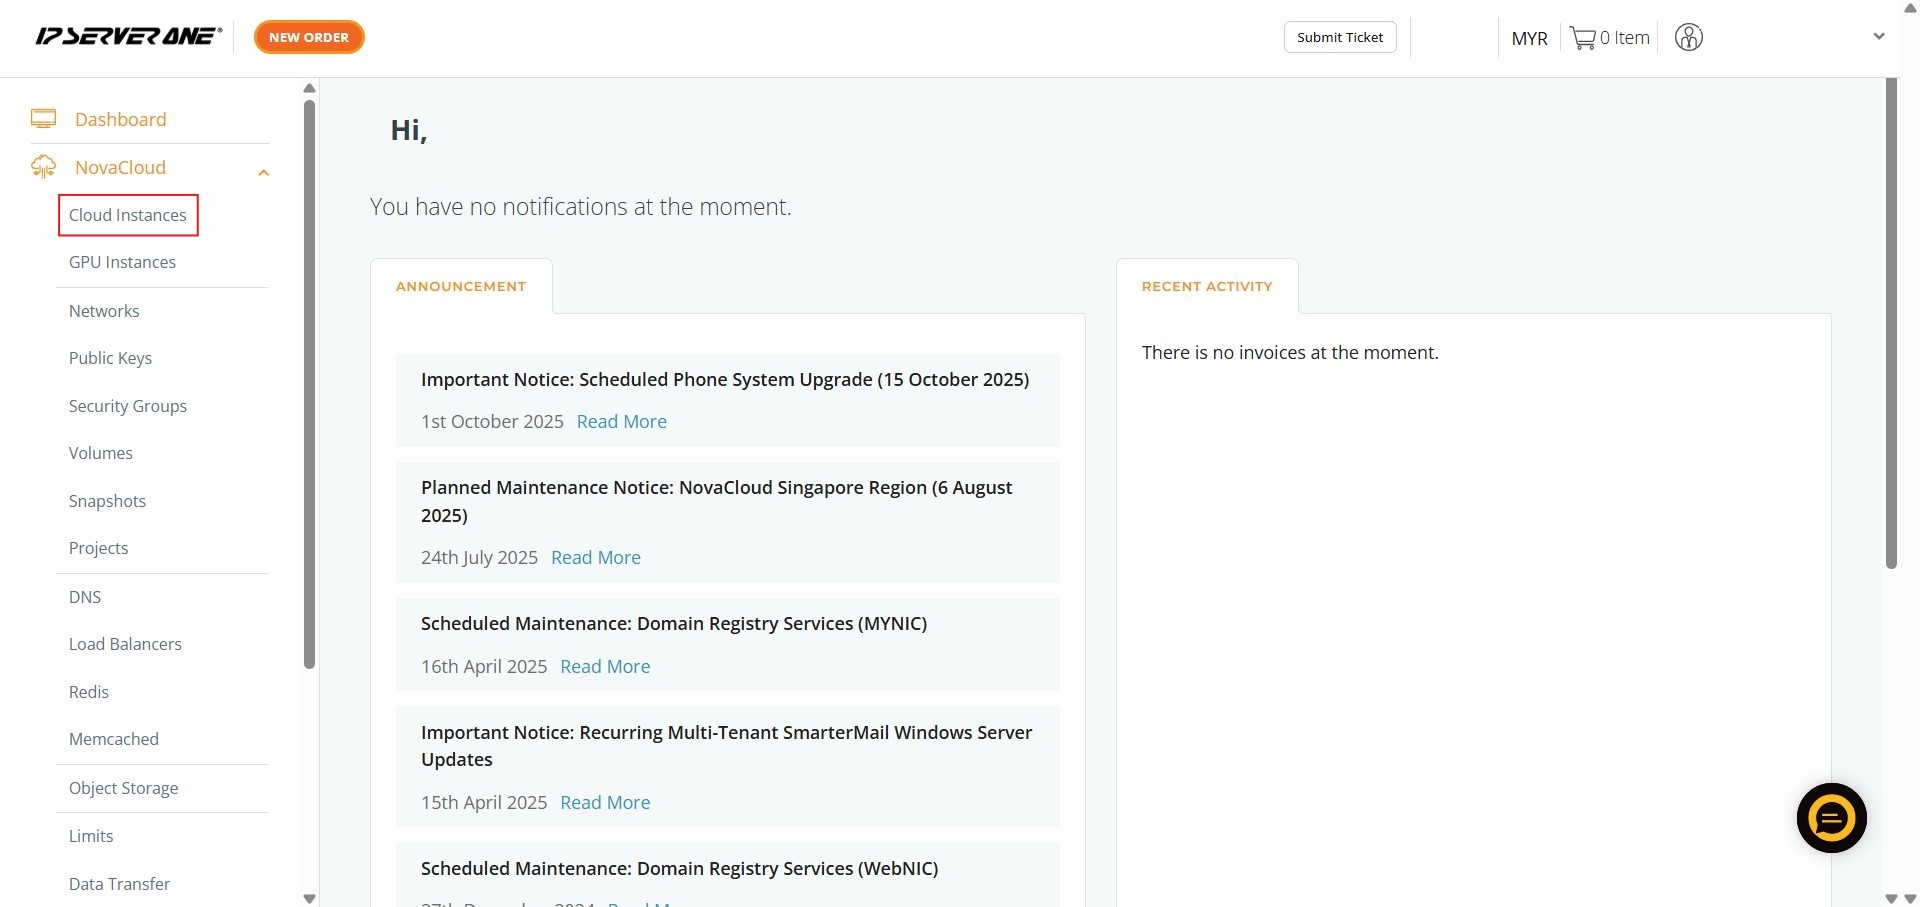
- Click on Cloud Instances to navigate to the cloud instance management page
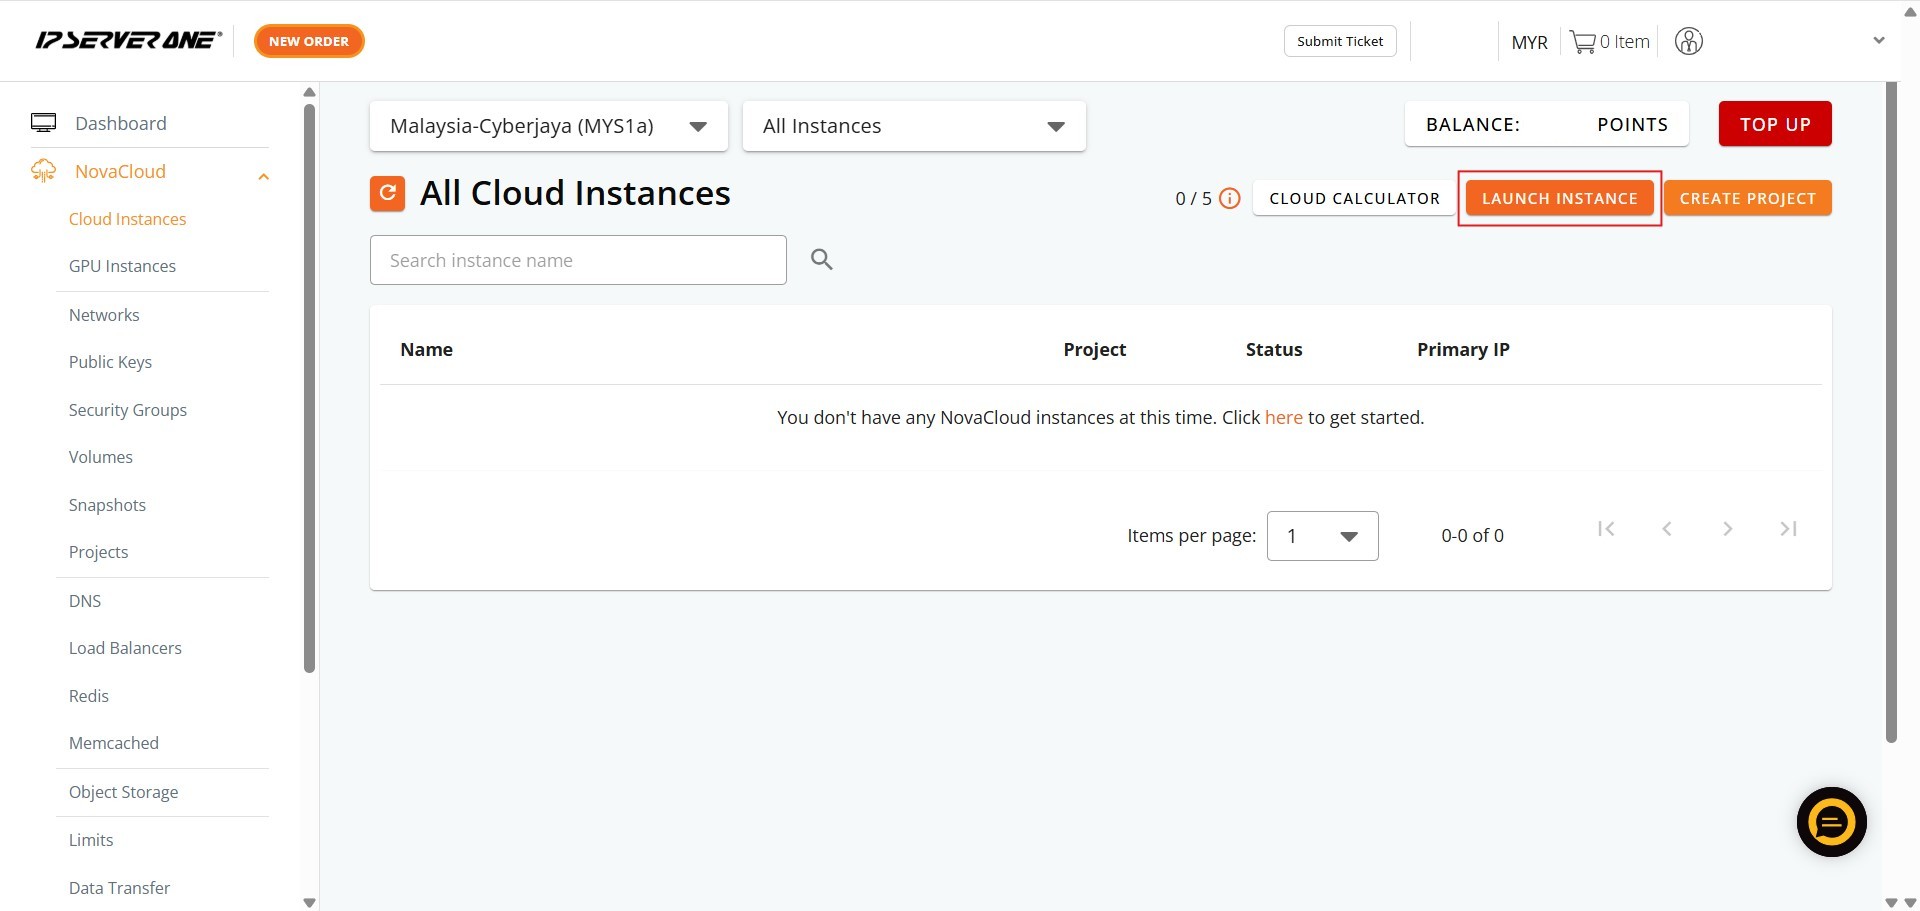
- Initiate the process for deploying a new cloud instance by clicking the Launch Instance
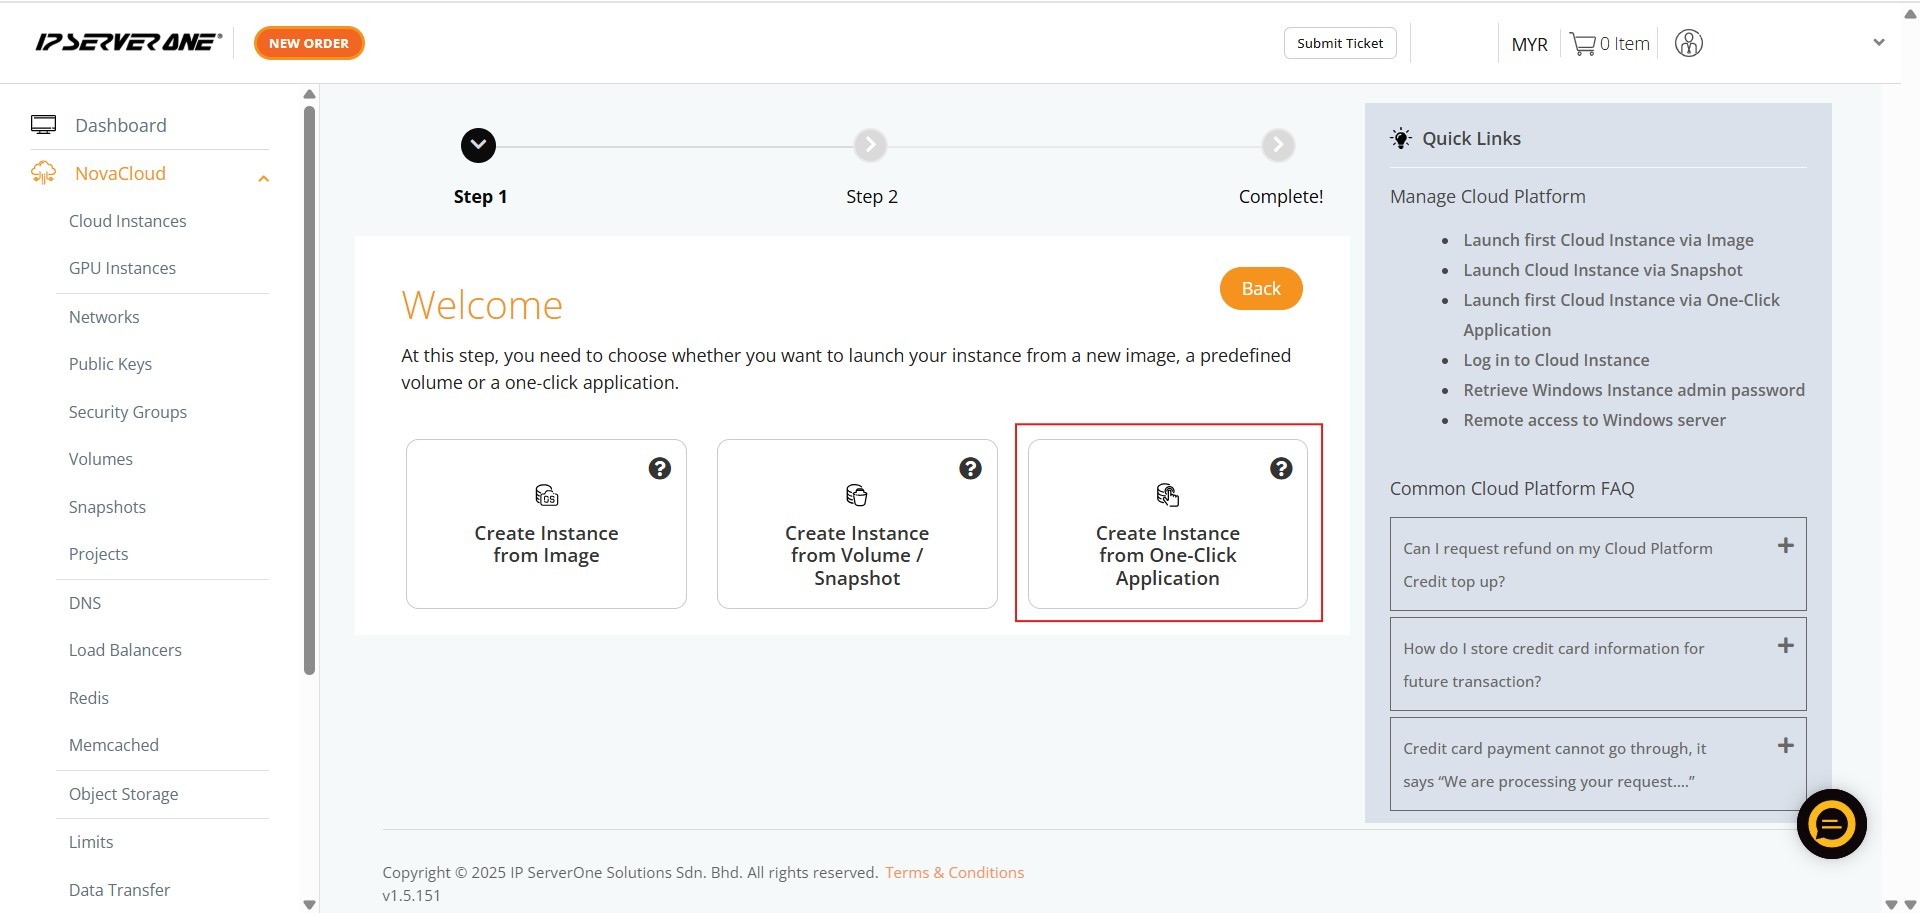
- Select Create Instance from One-Click Application for provisioning instances pre-installed with your chosen application or database
Step 2: Select application for the cloud instance
- Ensure the Category is selected as Big Data
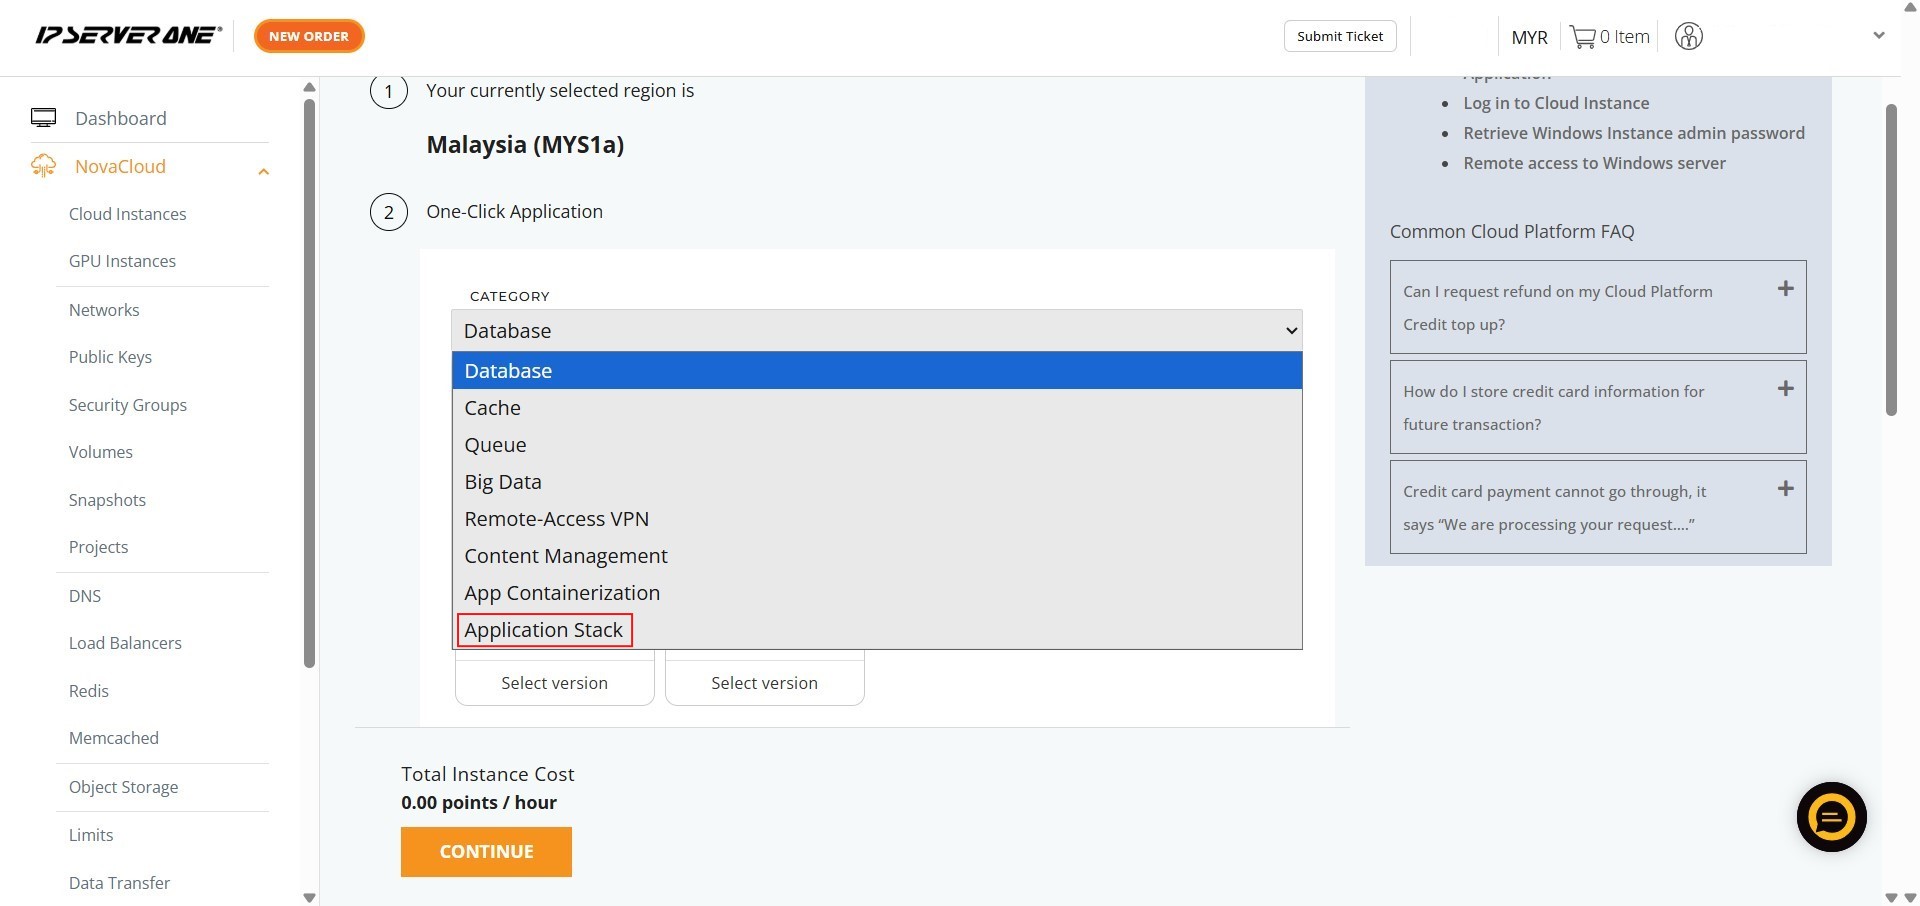
- Select the specific application – Elasticsearch
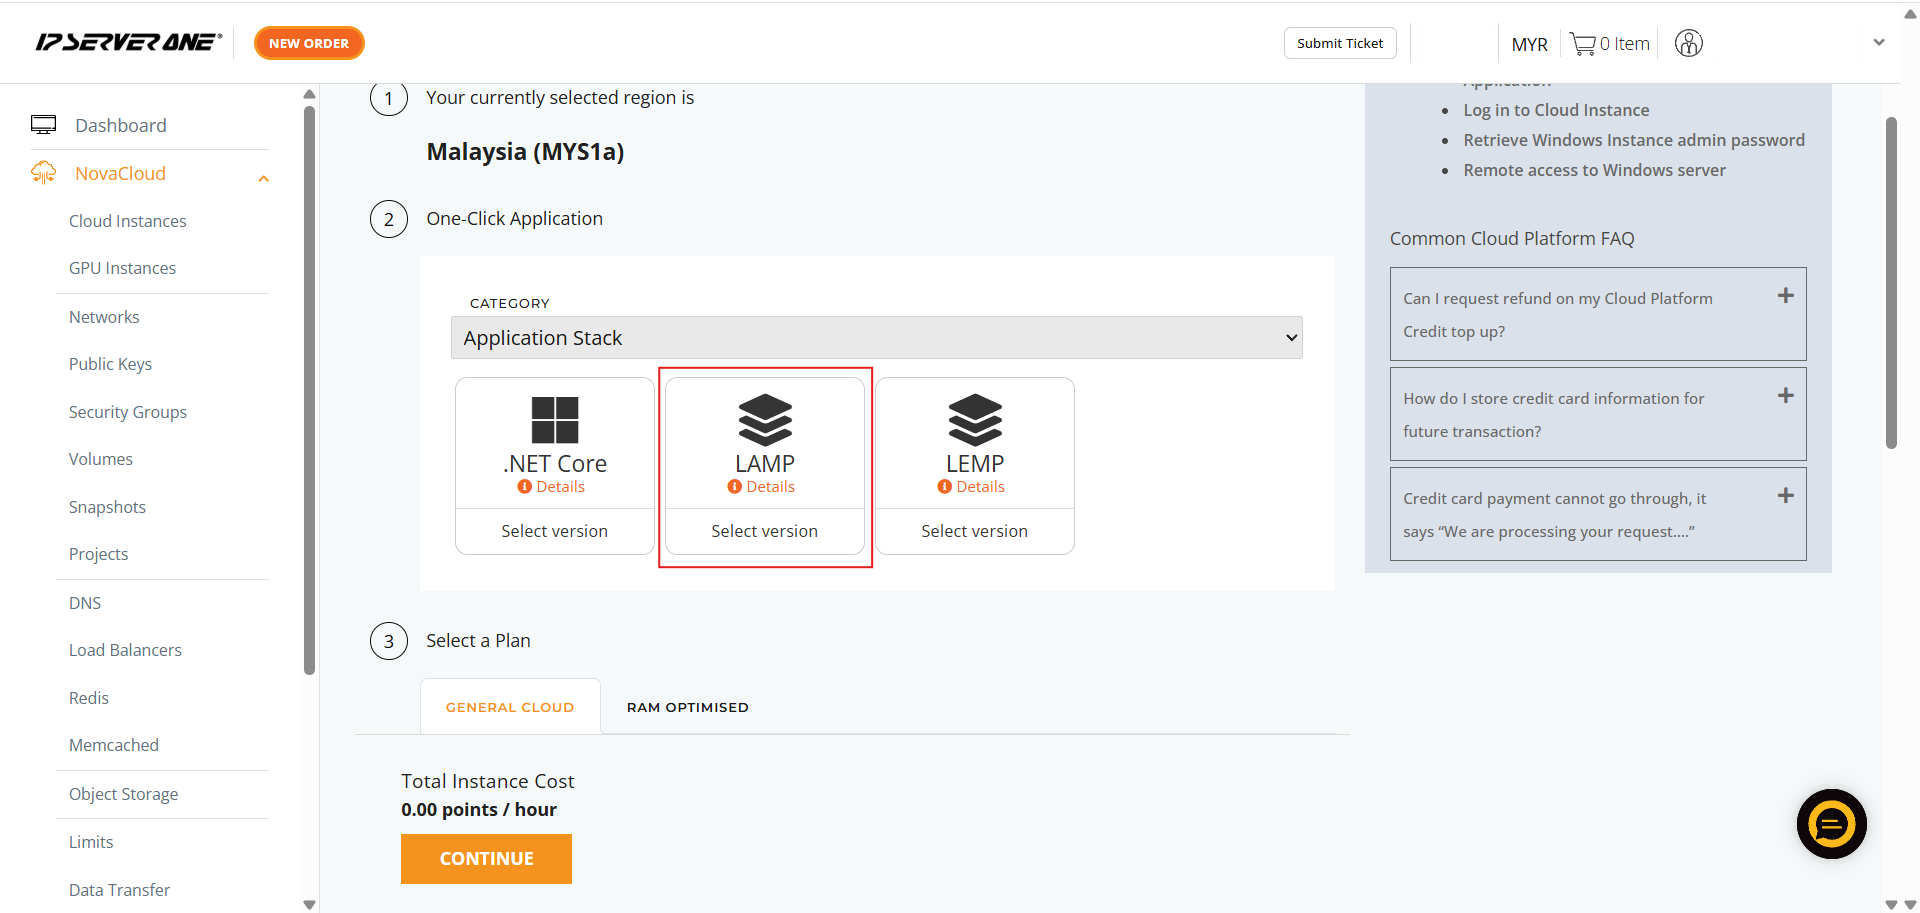
- Choose the required Elasticsearch version you wish to deploy
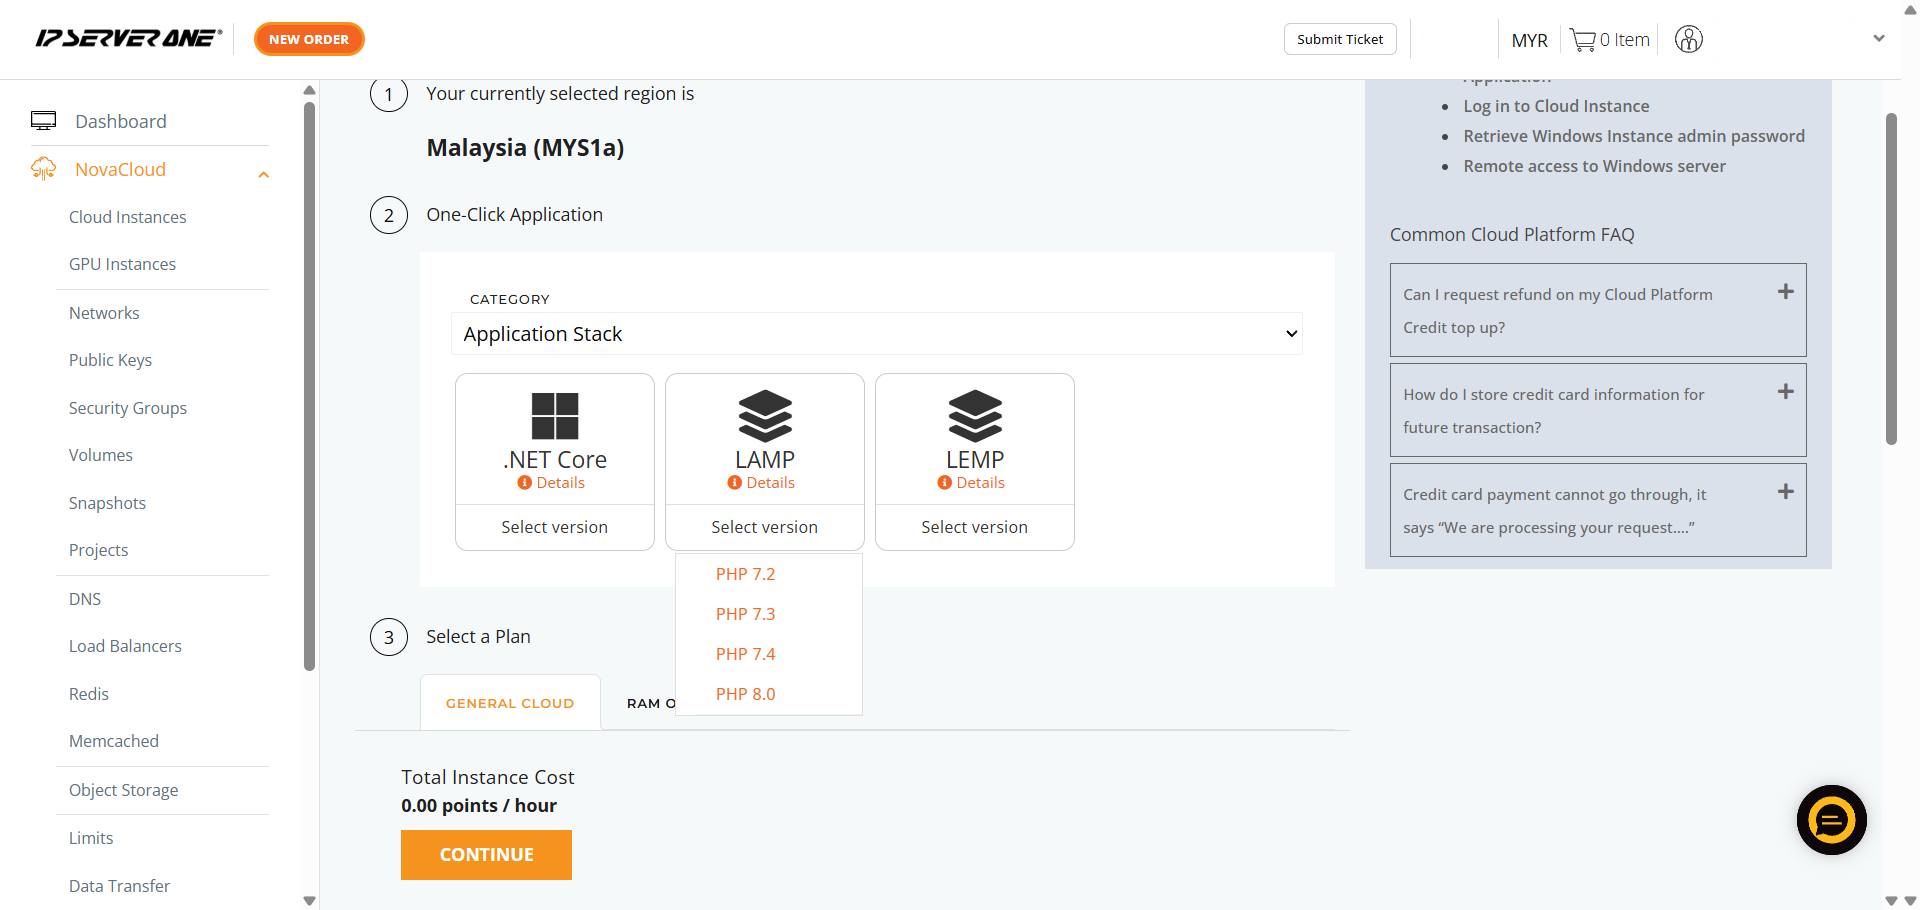
- Choose the appropriate resource plan (CPU, RAM, data transfer limits) for the cloud instance
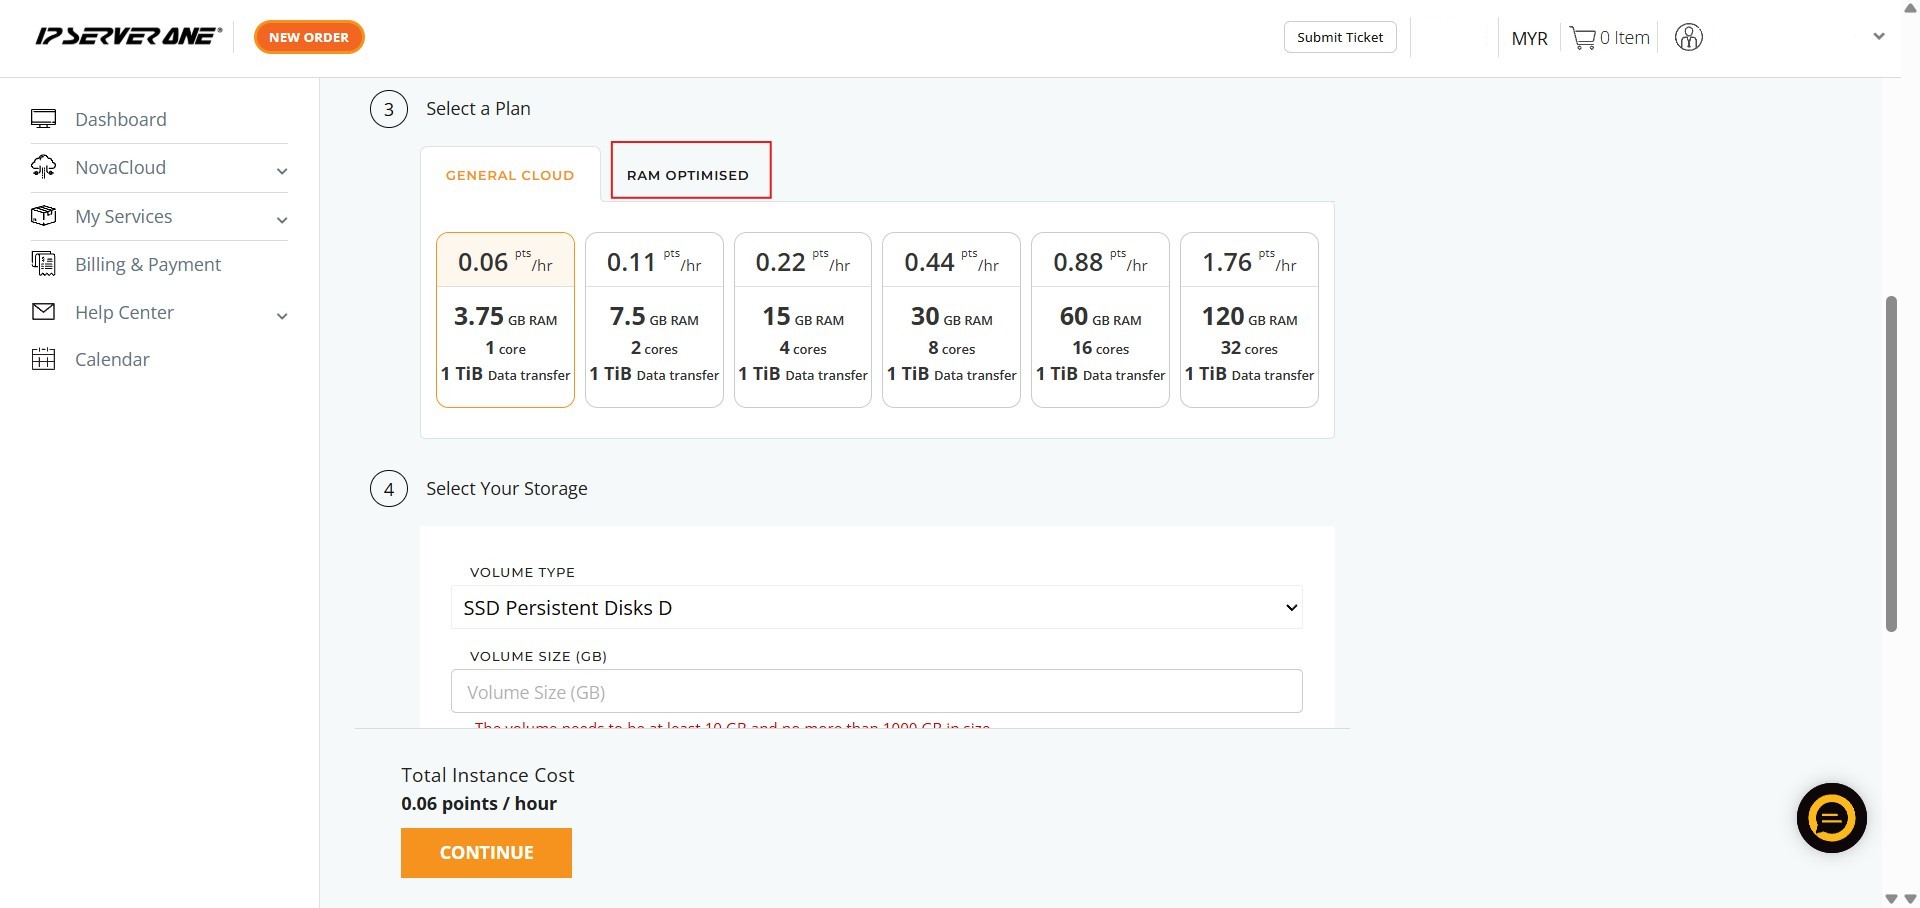
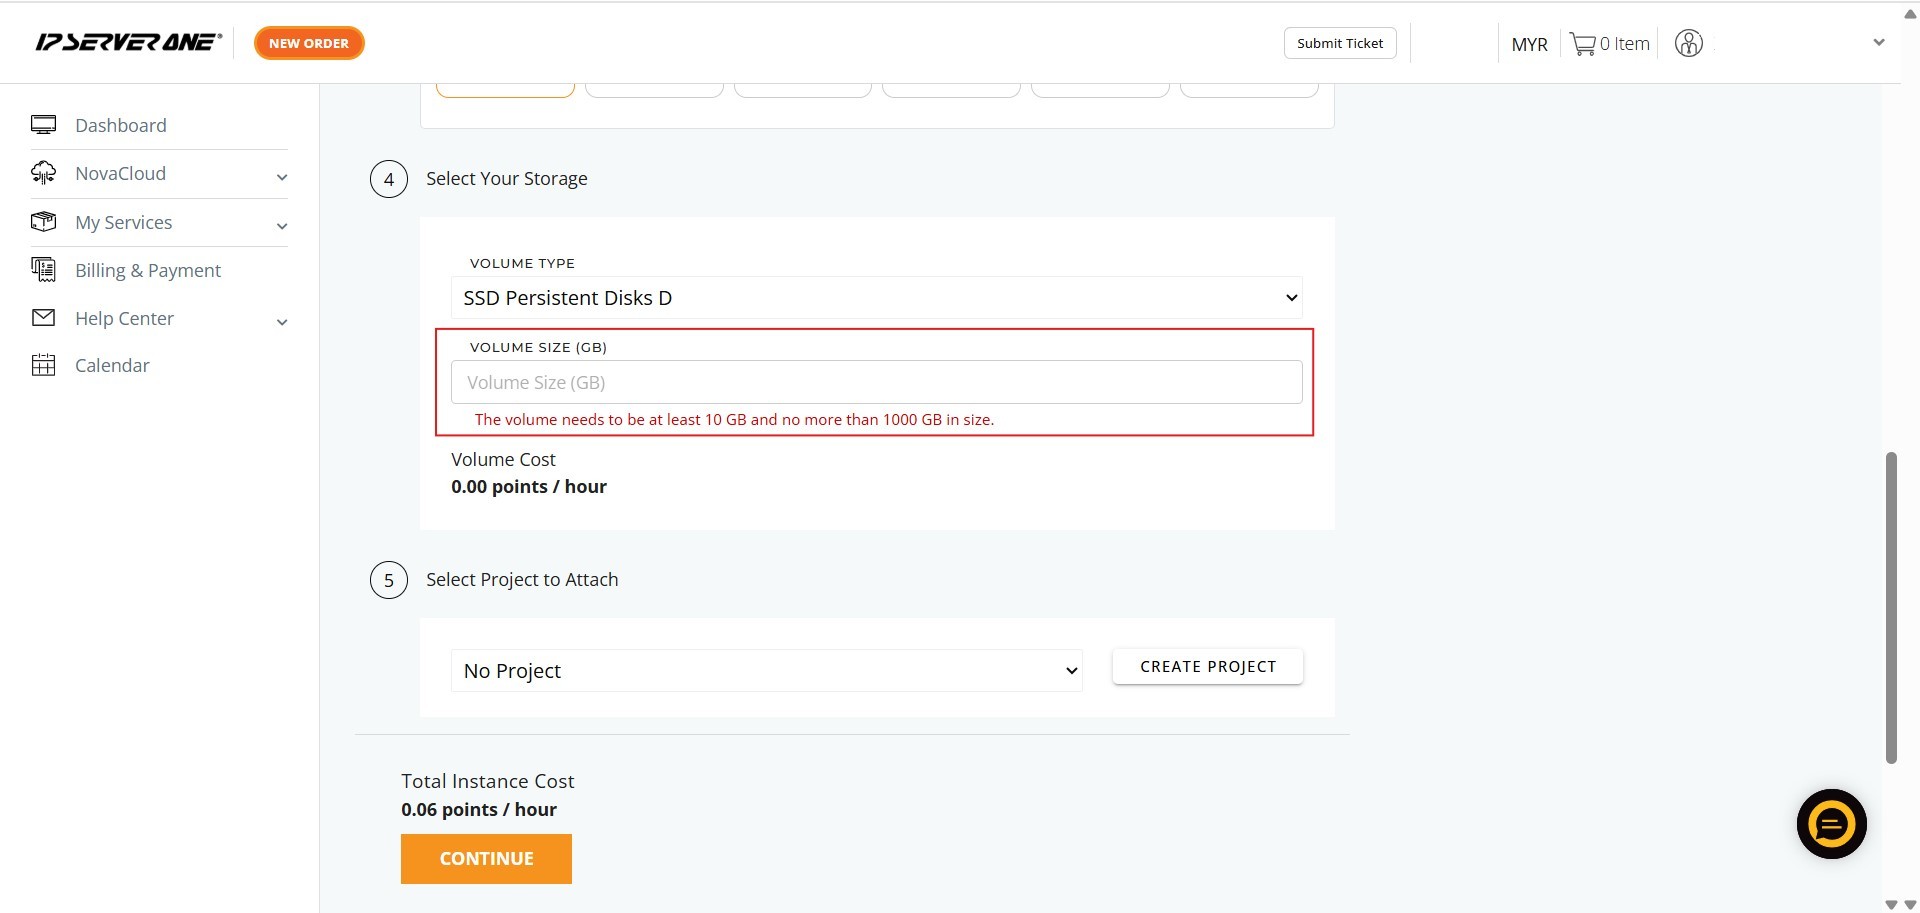
- Define the volume size for the cloud instance
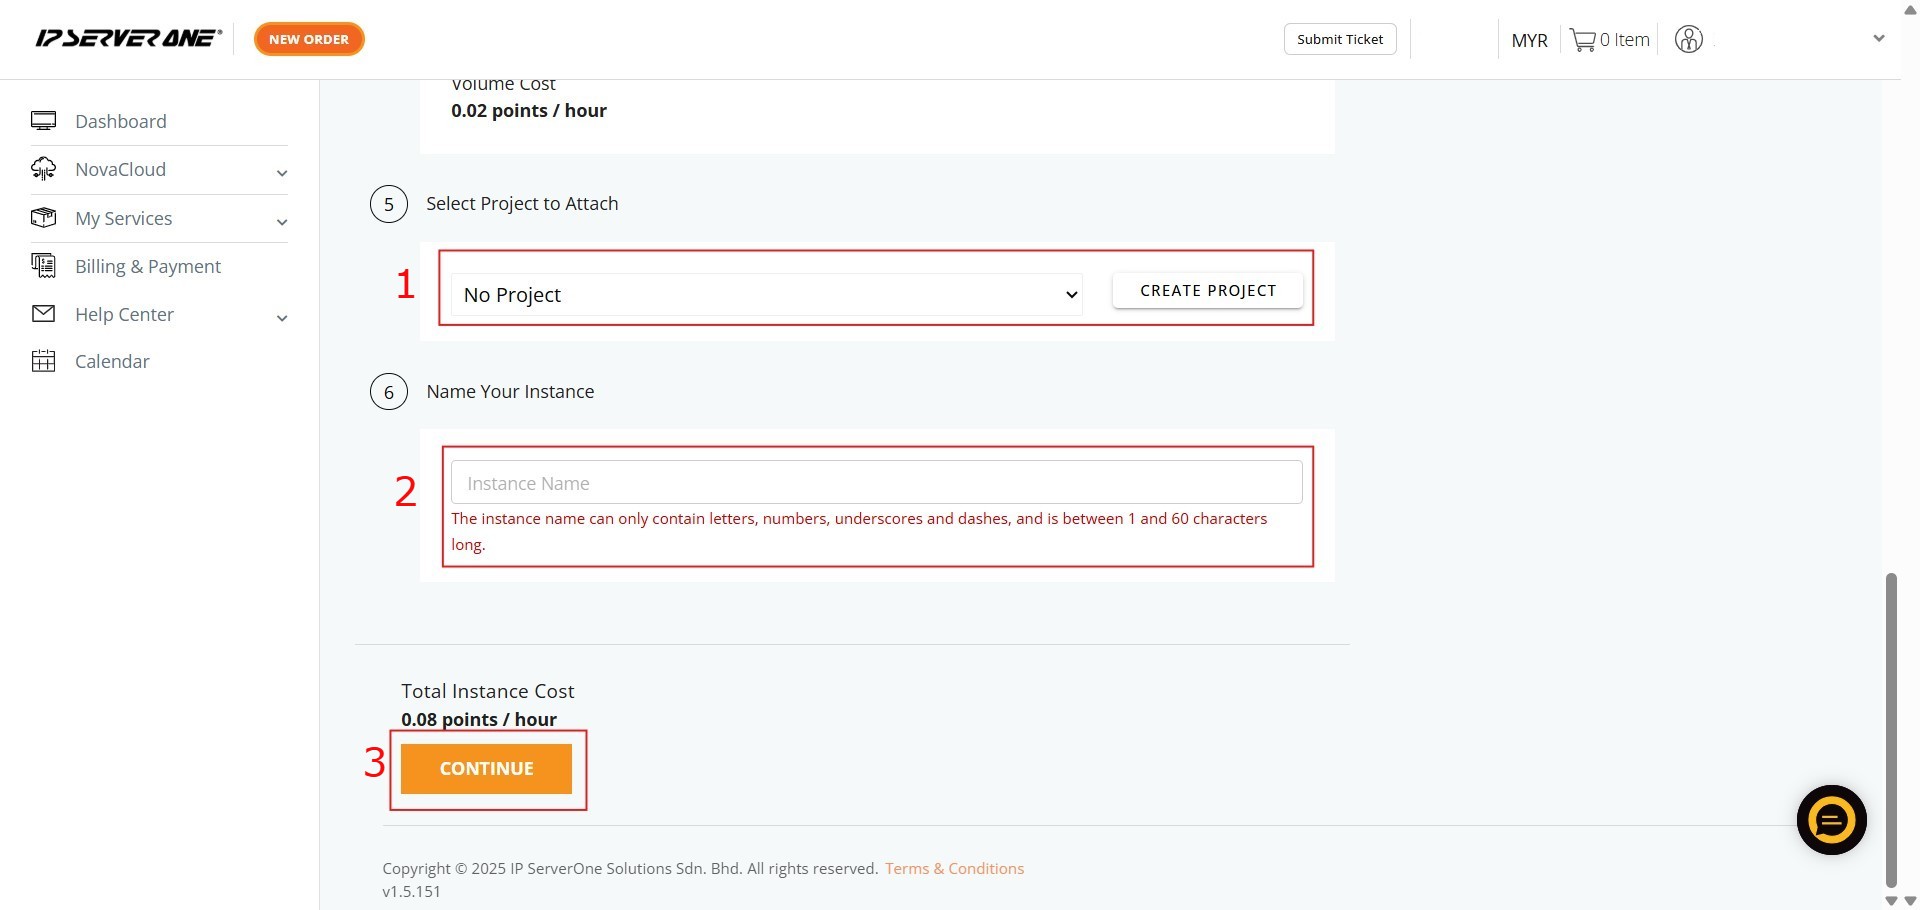
- Associate the instance with an existing project (if desired) and provide a unique name for the cloud instance
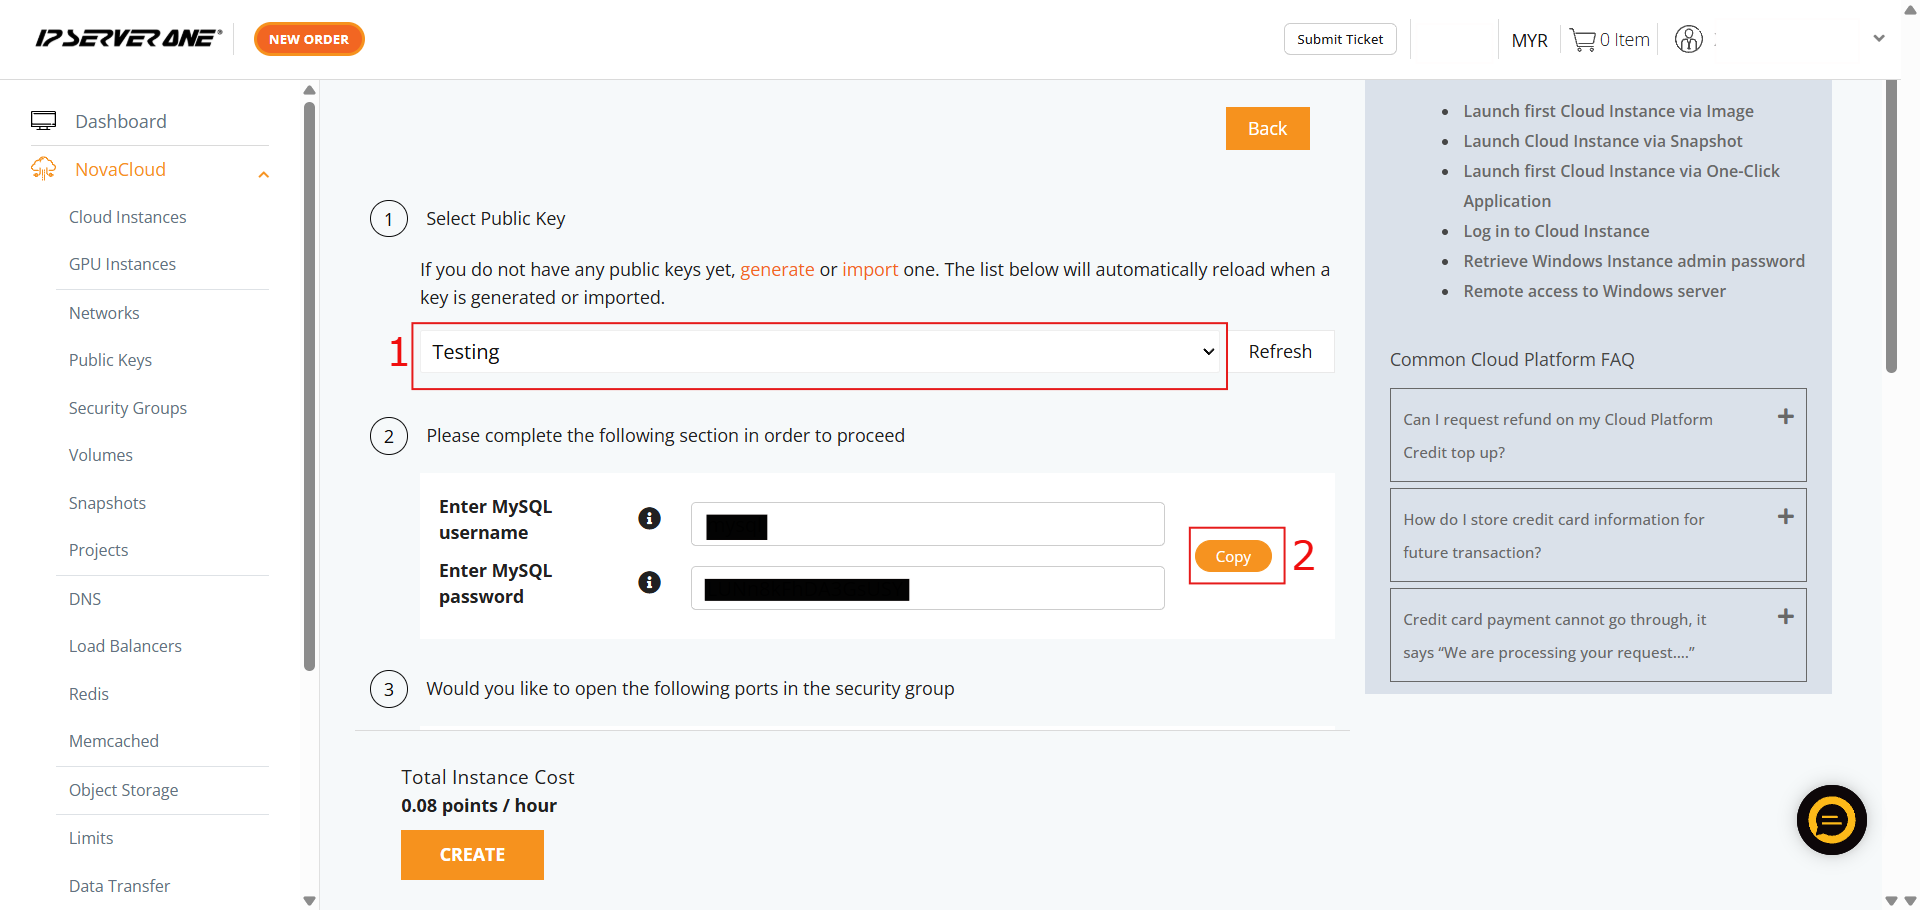
- Select the necessary Public Key
Step 3: Verify launched cloud instance
- If you HAVE NOT created any Security Group, you may consider follow the selection here and our system will assist to create the Security Group for the cloud instance
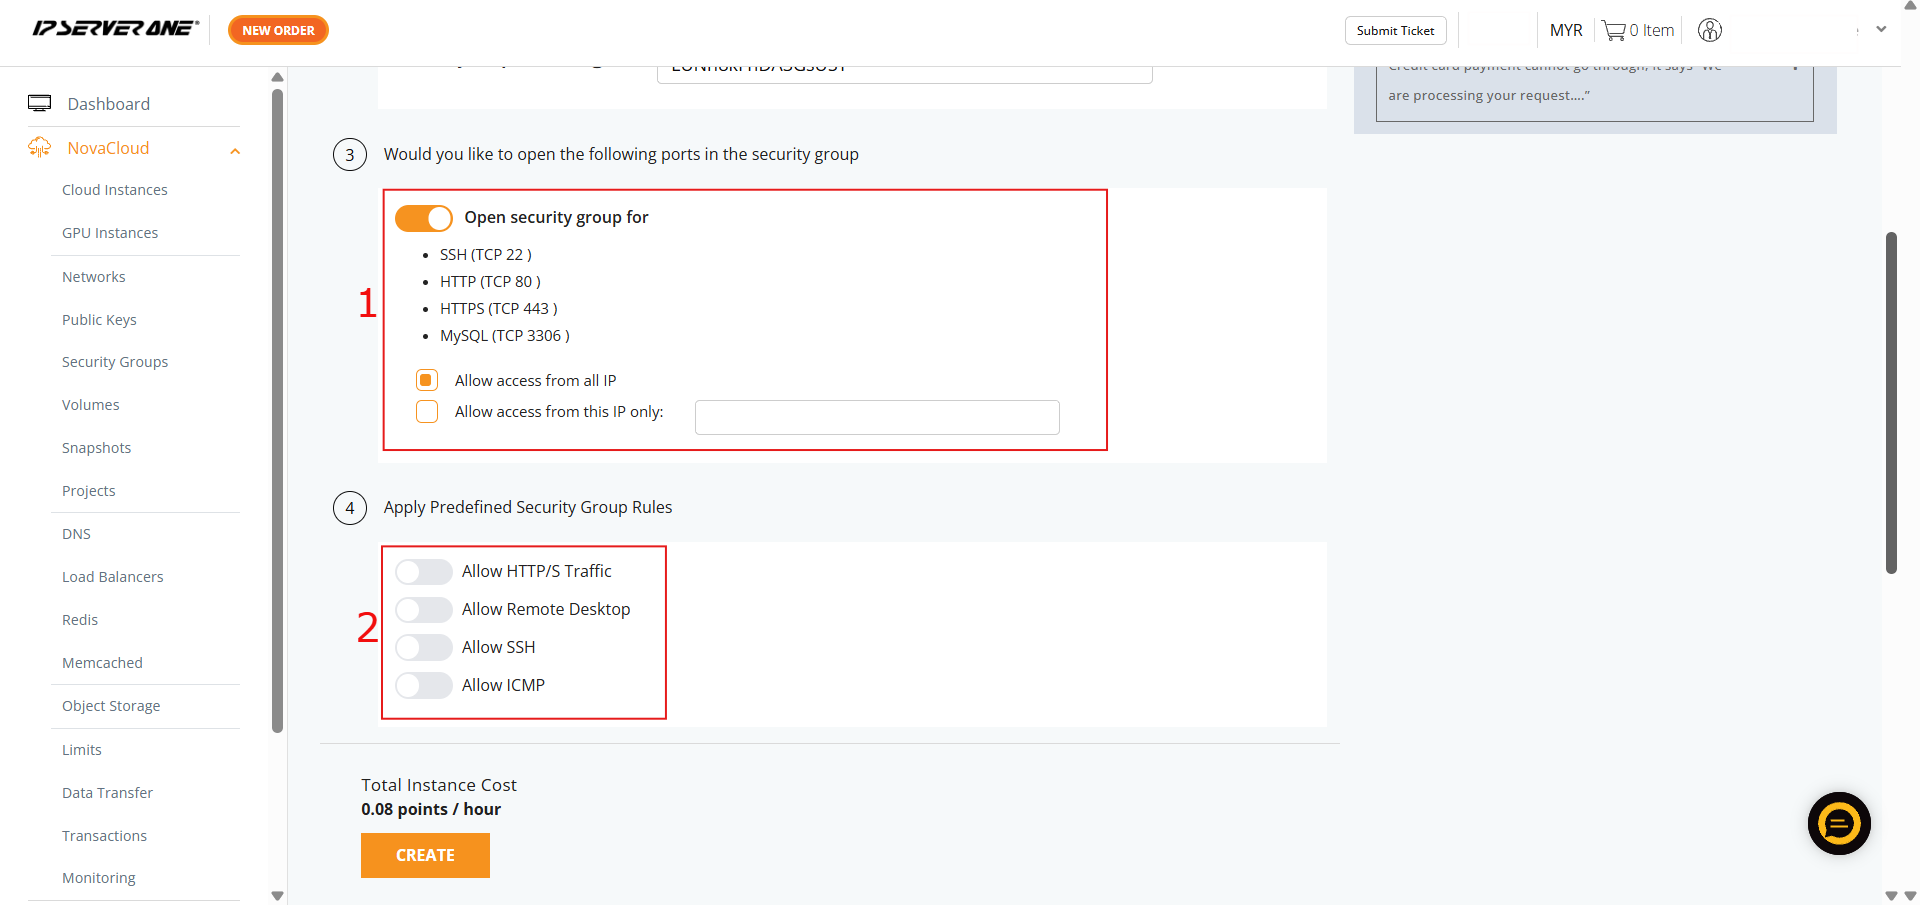
- If you HAVE created Security Group, you may select and apply the Security Group to the cloud instance
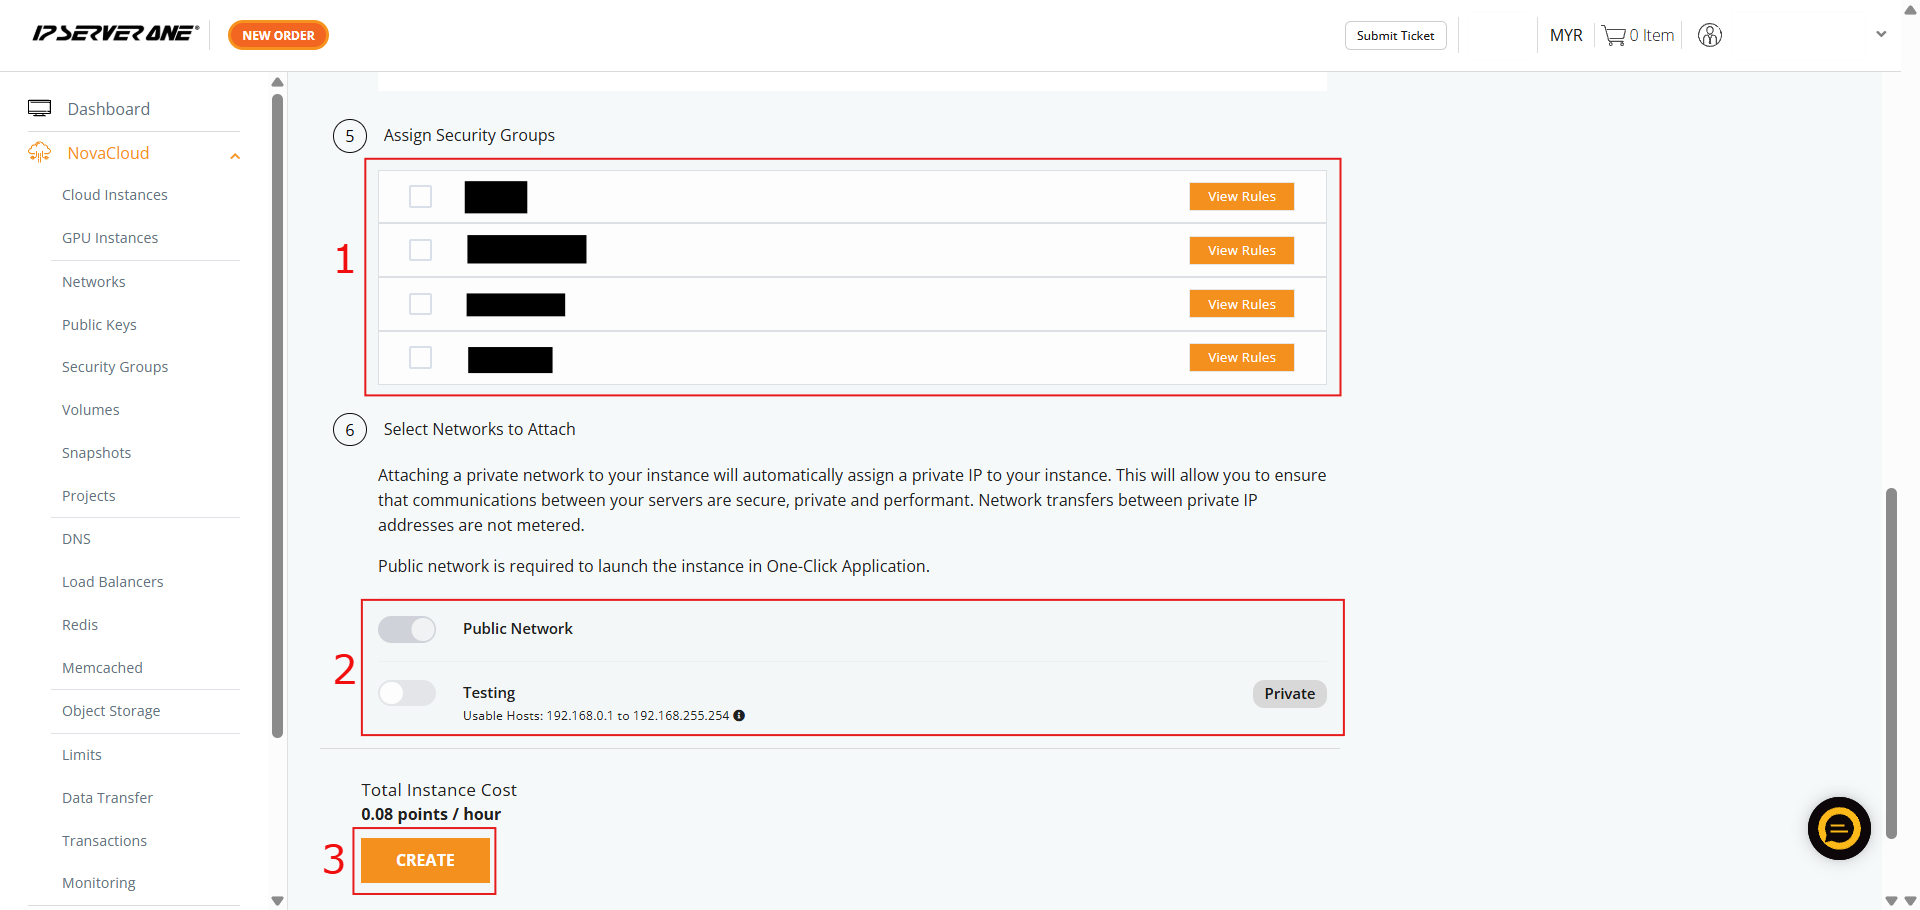
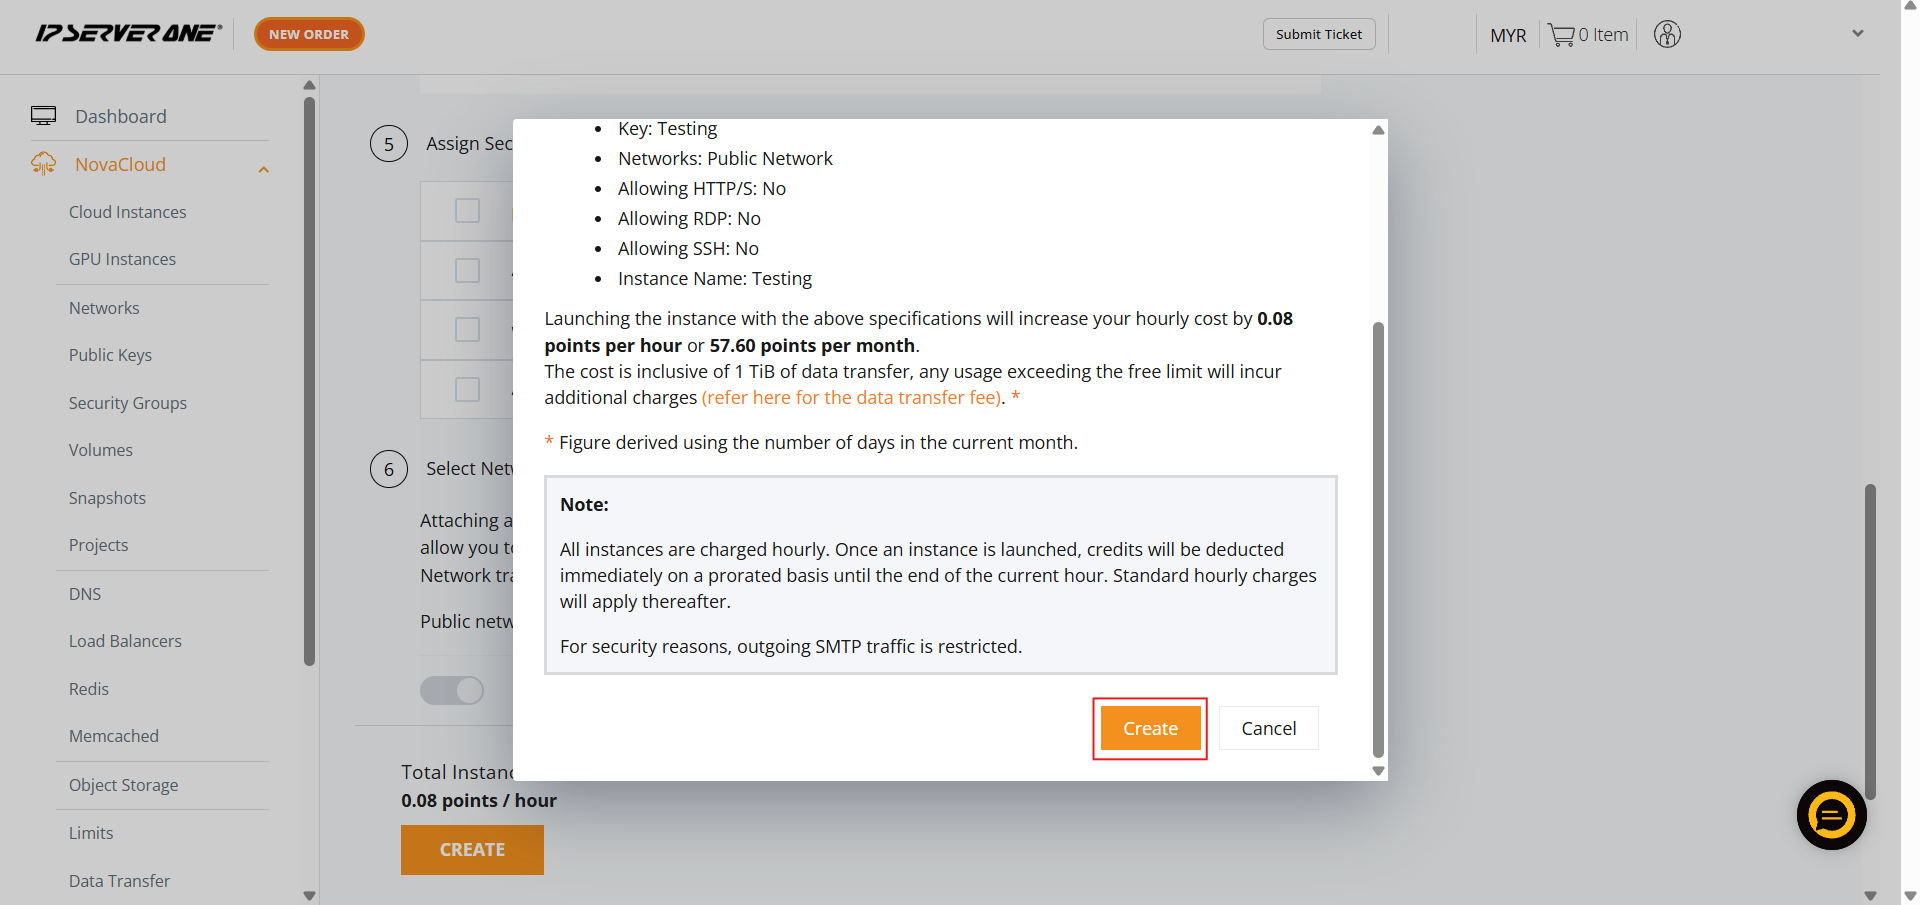
- A confirmation pop-up will appear. Review the specifications, scroll to the bottom, and click Create to launch the cloud instance
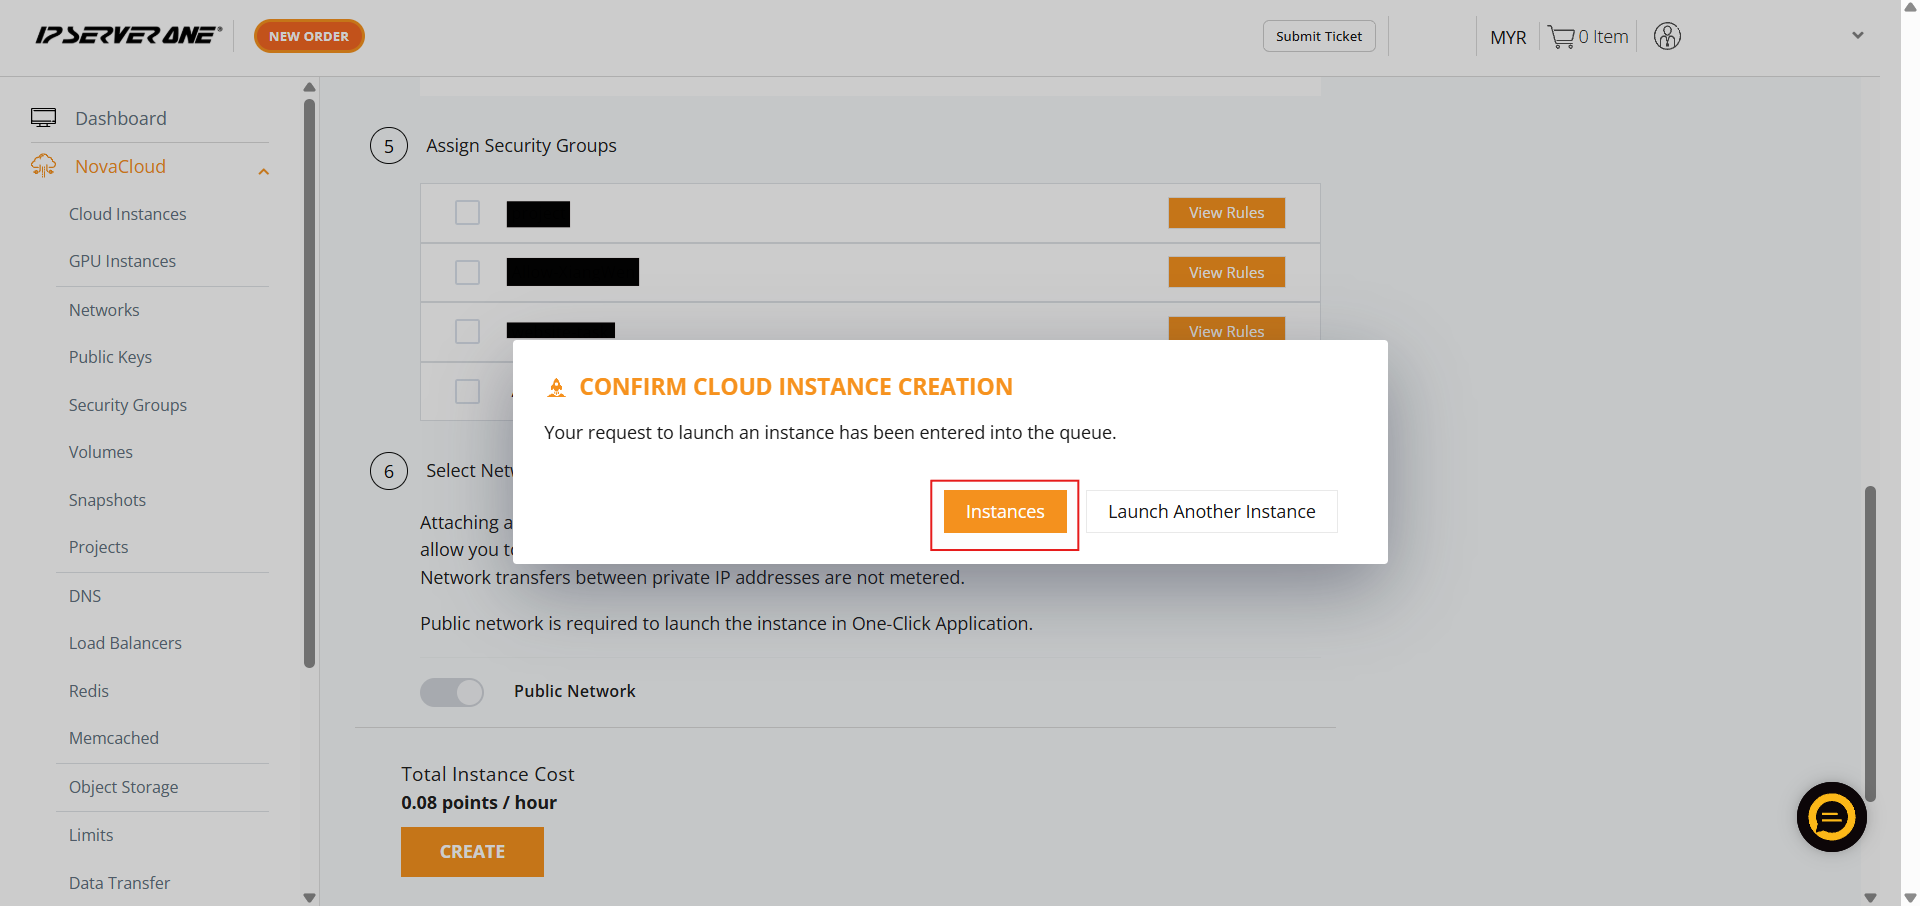
- Click the Instances button in the confirmation pop-up to navigate to the list of Cloud Instances
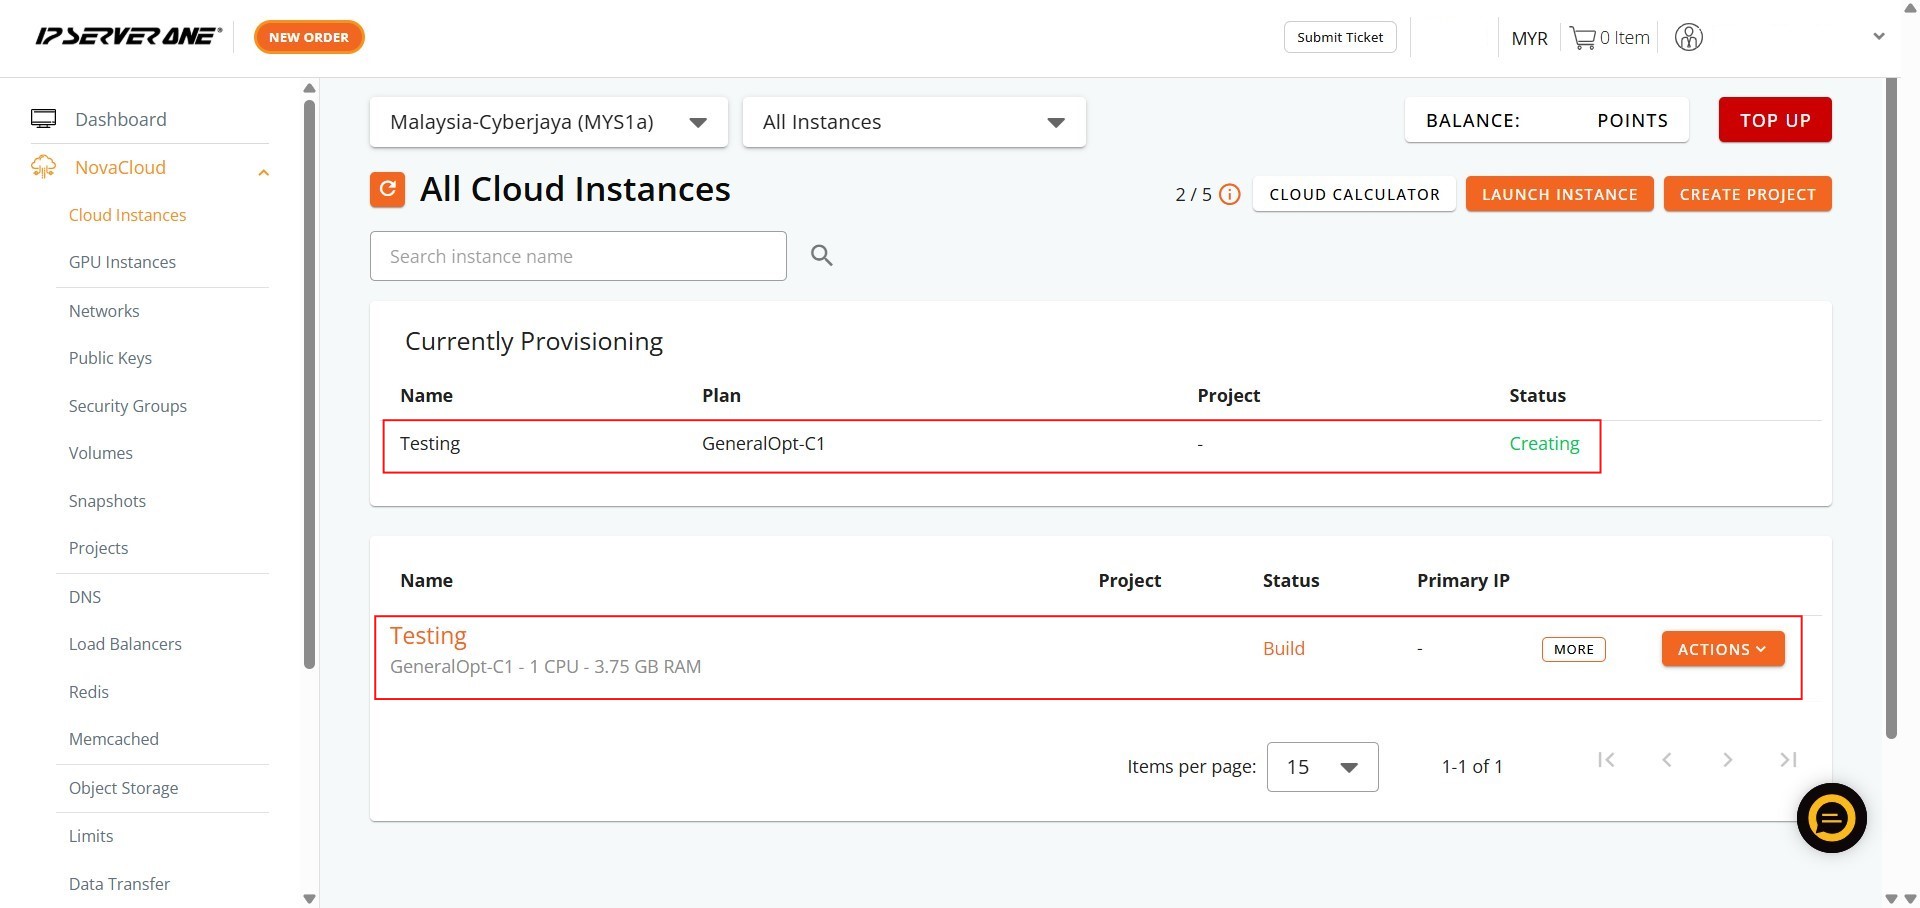
- Your request to launch the instance has been queued, and the provisioning process is underway (status “Creating” or “Active”)
Conclusion
By following this guidance, you can successfully launch a fully functional Elasticsearch instance without manual package installation.
For additional assistance or if you encounter any issues, please contact our support team at support@ipserverone.com.
Article updated on 09 July 2026 by Johnny H.