
Search Our Database
How to Configure Cross-Origin Resource Sharing (CORS) in IIS
Introduction
When hosting backend APIs on Windows Server Internet Information Services (IIS), administrators often encounter CORS policy blocks when frontend applications hosted on different domains attempt to access the API. Cross-Origin Resource Sharing (CORS) is a browser security feature that restricts cross-origin HTTP requests. This guide explains how to configure the necessary CORS HTTP response headers in IIS for a specific origin, such as a dedicated hosting domain, and verify the setup using a test JSON file.
Prerequisite
- Access to Windows Server via RDP with Administrator privileges.
- Basic knowledge on IIS Manager and HTTP headers.
Step-by-step Guide
Step 1: Configure CORS
If you prefer not to use the GUI, you can manually apply the headers by editing the web.config file inside your application’s root folder.
Via IIS Manager (GUI method):
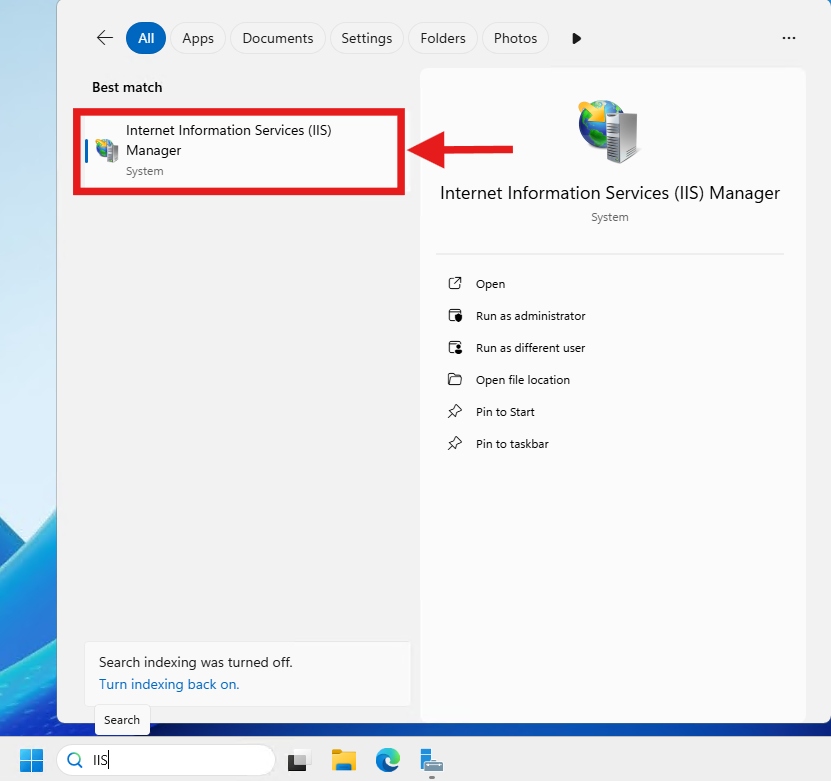
- Open Internet Information Services (IIS) Manager from the Windows Start menu.
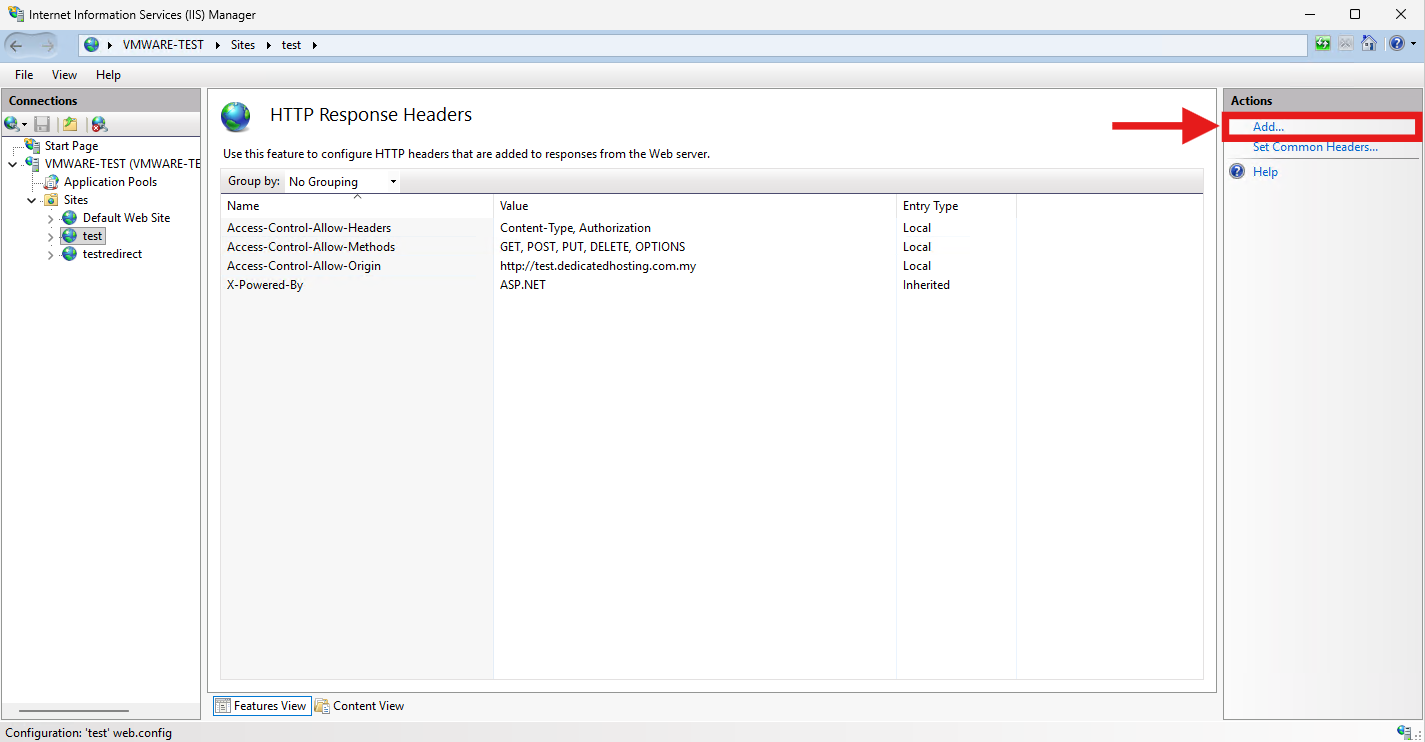
- In the left Connections pane, select the specific website or API application where you want to enable CORS.
- In the middle pane, double-click on the HTTP Response Headers icon.

- On the right Actions pane, click on Add...
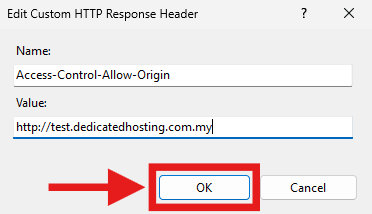
- In the Add Custom HTTP Response Header dialog, enter Access-Control-Allow-Origin in the Name field. In the Value field, enter your exact allowed frontend domain (e.g., http://test.dedicatedhosting.com.my). Click OK.
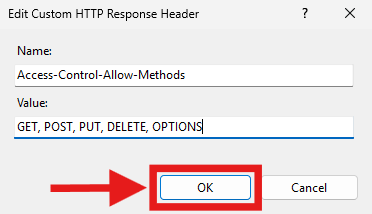
- Repeat the process to add a new header named Access-Control-Allow-Methods with a value of GET, POST, PUT, DELETE, OPTIONS.
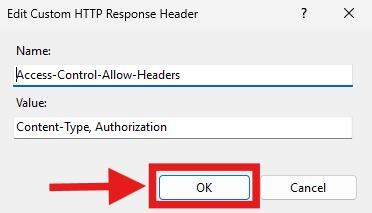
- Add a third header named Access-Control-Allow-Headers with a value of Content-Type, Authorization.
Step 2: Verify and Test CORS Setup
- Open Notepad and create a dummy file containing the text {“message”: “CORS is working!”}. Save it as data.json in the root physical directory of your IIS website.
- Open your web browser and navigate to the external domain you authorized (e.g., http://test.dedicatedhosting.com.my).
- Press F12 to open Developer Tools (or right click on any empty space and select Inspect) and navigate to the Console tab.
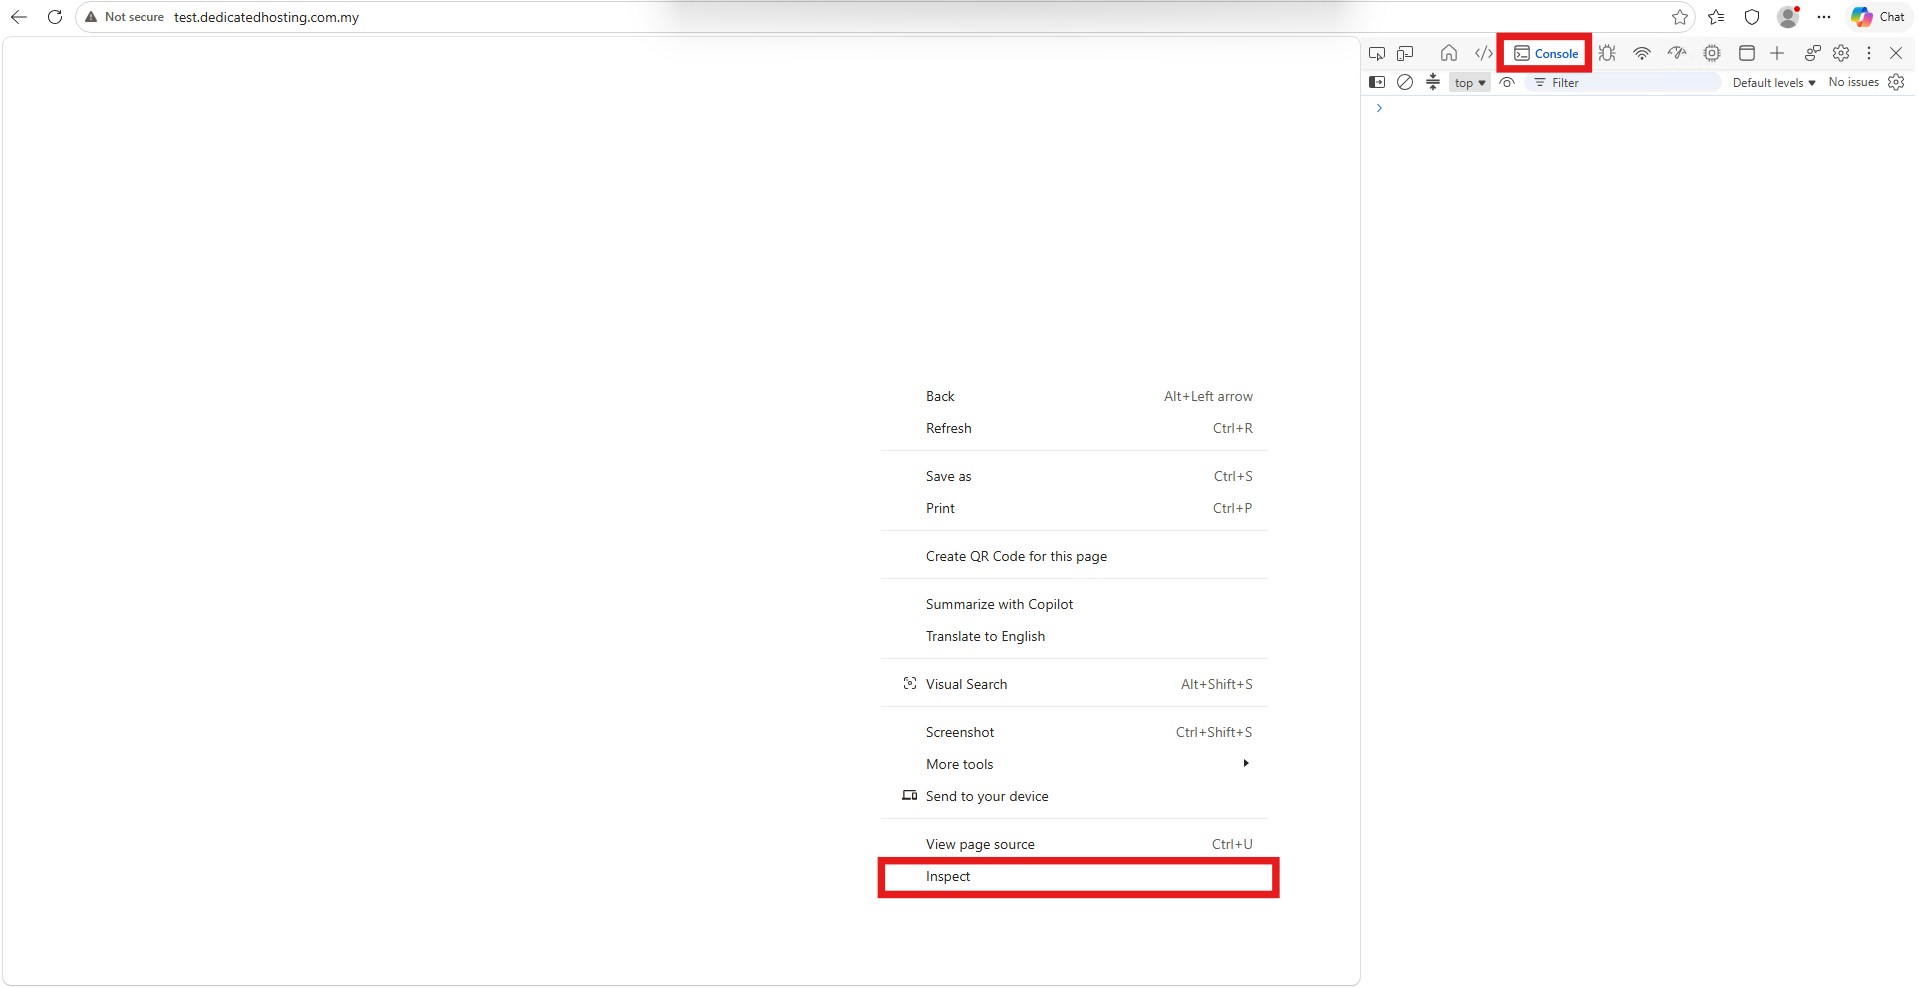
- Paste the following JavaScript fetch command and press Enter. Replace http://test.yourdomain.com.my/ with the domain where you enabled CORS.
fetch('http://test.yourdomain.com.my/data.json').then(res => res.json()).then(console.log); - If the configuration is successful, the console will output {message: ‘CORS is working!’} without displaying any red CORS policy or 404 Not Found errors.
 Tips 🖊️: If your dummy JSON file returns a 404 error during testing, IIS might be blocking the extension. Return to your site’s home screen in IIS Manager, double-click the MIME Types icon, and click Add… to configure .json with the MIME type application/json.
Conclusion
By following this guidance, you can successfully configure and verify Cross-Origin Resource Sharing (CORS) headers on your IIS web server, ensuring that your backend APIs can securely and reliably communicate with authorized external frontend applications.
If you require further assistance, please contact our support team at support@ipserverone.com.