
Search Our Database
How to Configure IIS to Host PHP Applications Using FastCGI
Introduction
By configuring Microsoft Internet Information Services (IIS) with the FastCGI module, you can seamlessly host dynamic PHP applications like WordPress on a Windows server environment. This setup allows IIS to route requests to the PHP engine efficiently, ensuring high performance and stability for your websites.
Prerequisite
- Access to a Windows Server with Administrator privileges.
- IIS role installed on the server.
- Basic knowledge of IIS Manager.
Step-by-step Guide
Step 1: Install the CGI Role Service
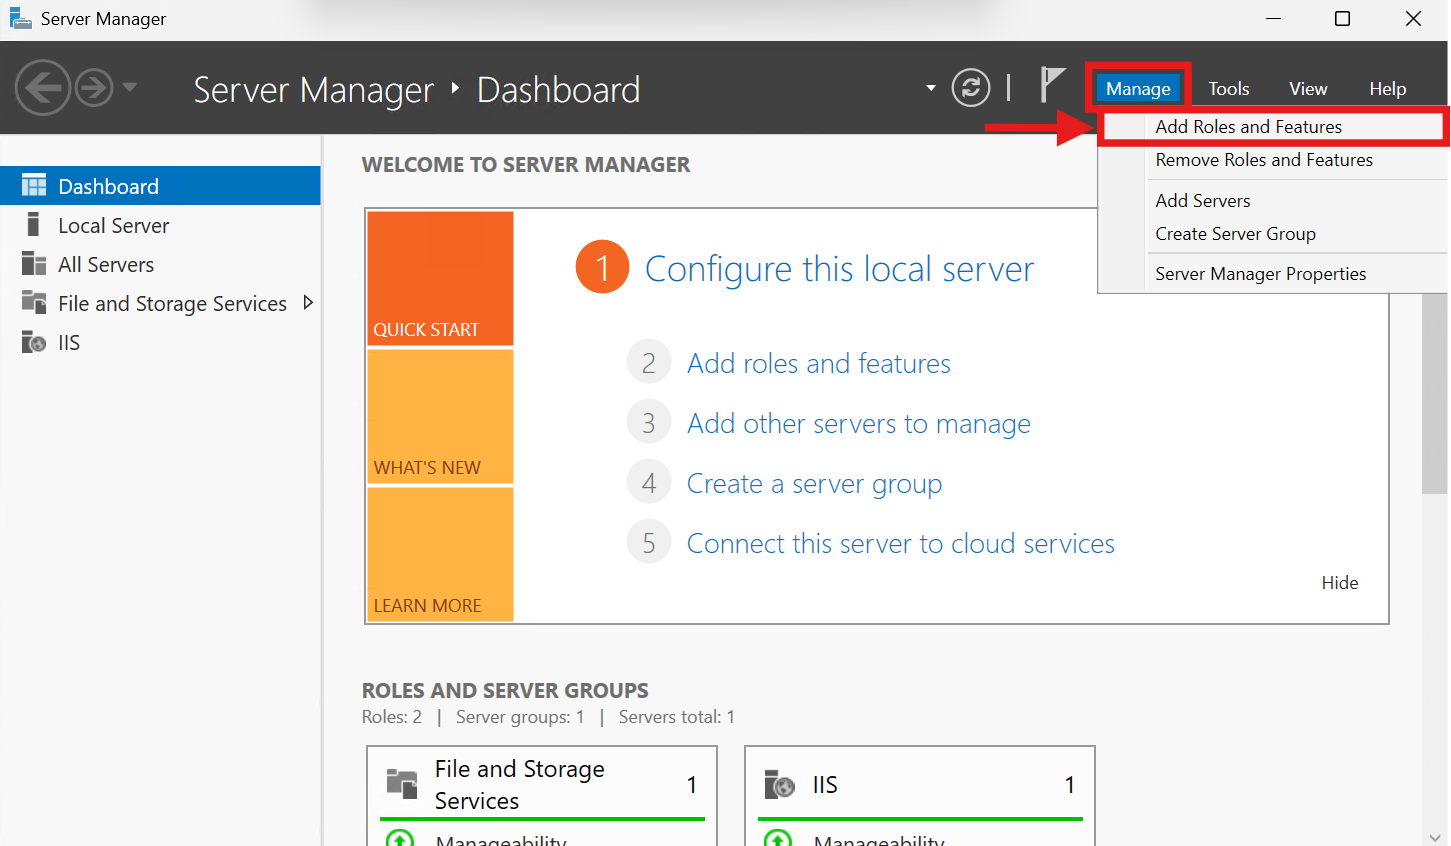
- Open Server Manager on your Windows server.

- Navigate to Manage > Add Roles and Features.
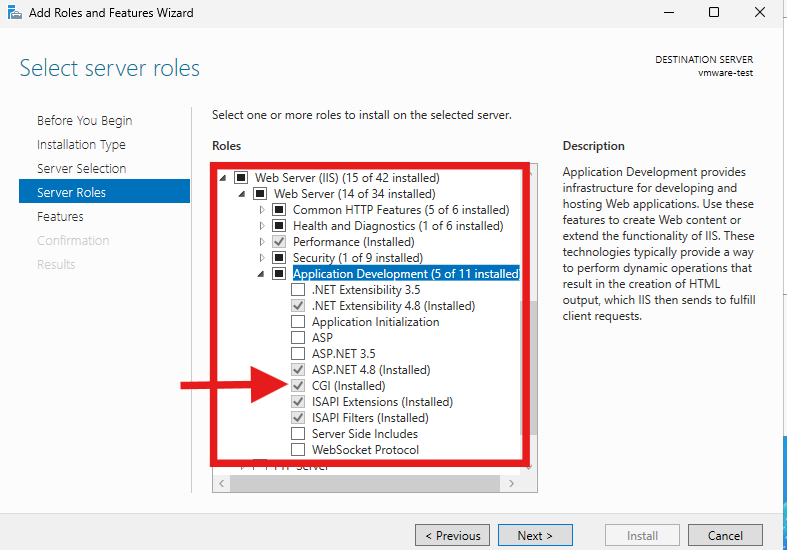
- Under Server Roles, expand Web Server (IIS) > Web Server > Application Development, and select the CGI checkbox. Complete the installation wizard.
Step 2: Download and extract PHP
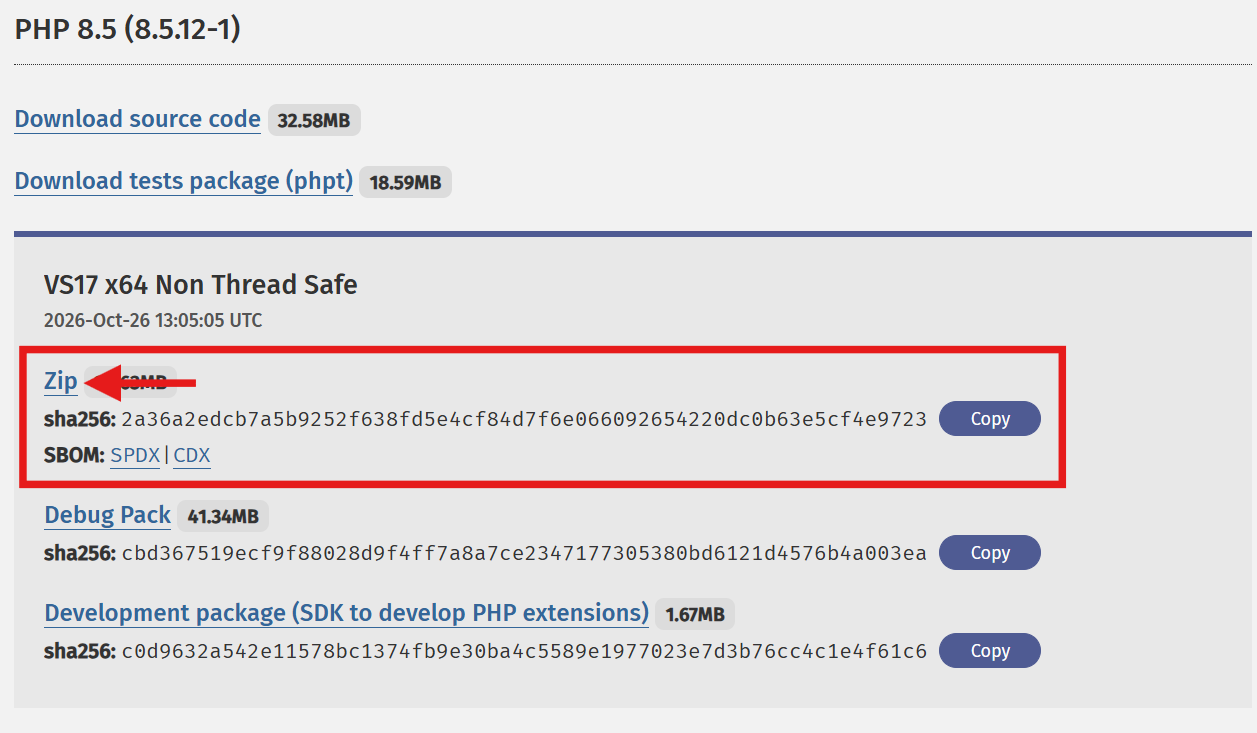
- Download the Non-Thread Safe (NTS) zip package from the [official PHP for Windows website].
Important Note ⚠️: It is highly recommended to download the Non-Thread Safe (NTS) version of PHP for Windows when using FastCGI with IIS.
- Extract the contents to a local directory, for example, C:\PHP.
Step 3: Configure FastCGI in IIS Manager
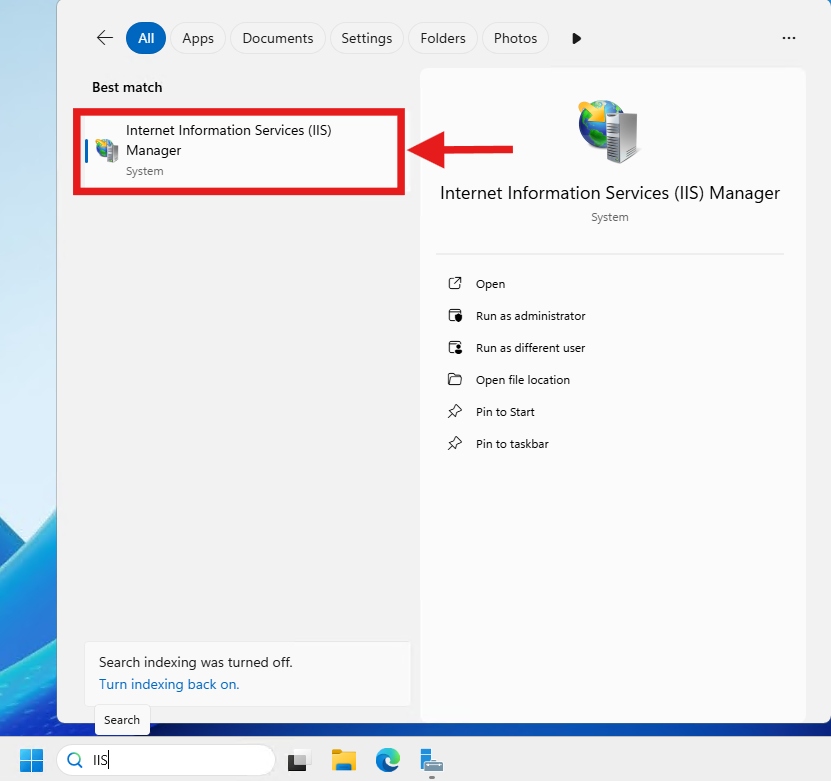
- Open IIS Manager.
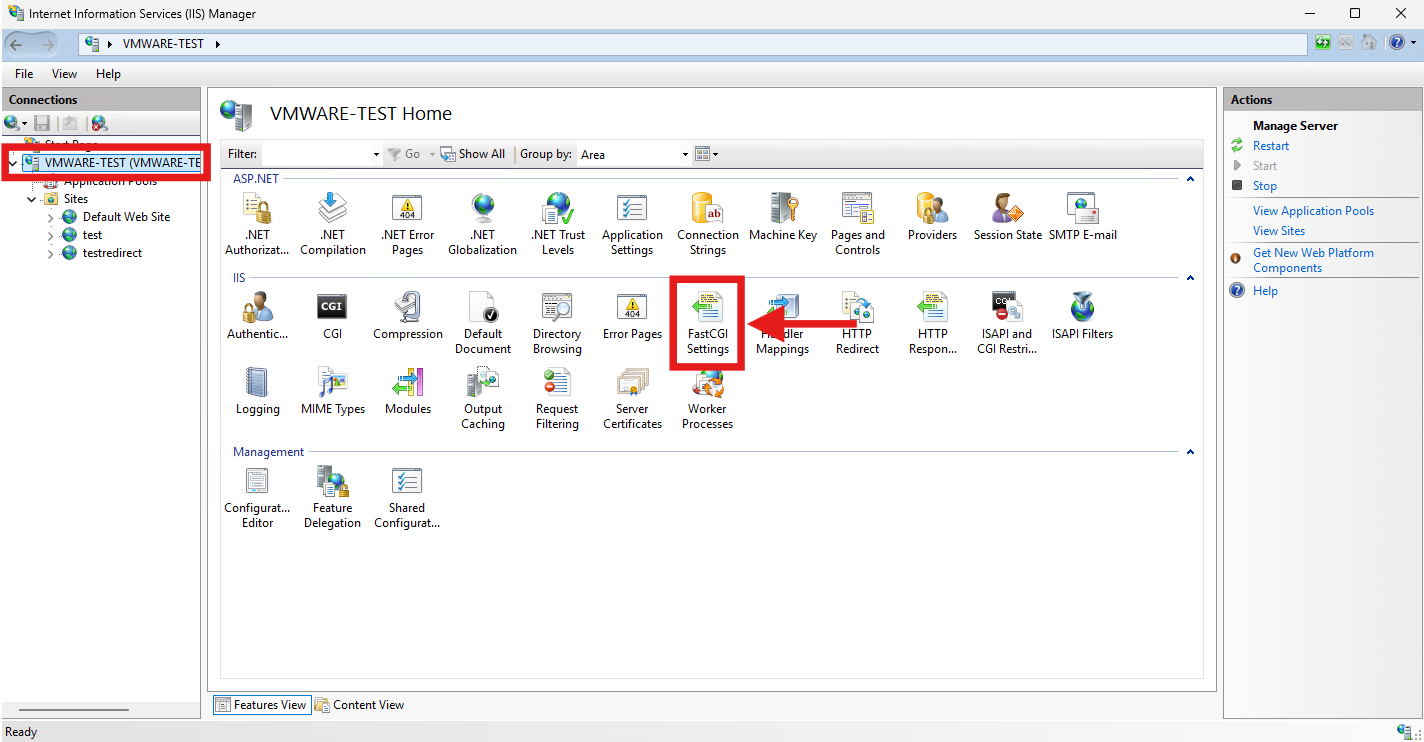
- Select your server node in the left Connections panel. In the main view, double-click on FastCGI Settings.
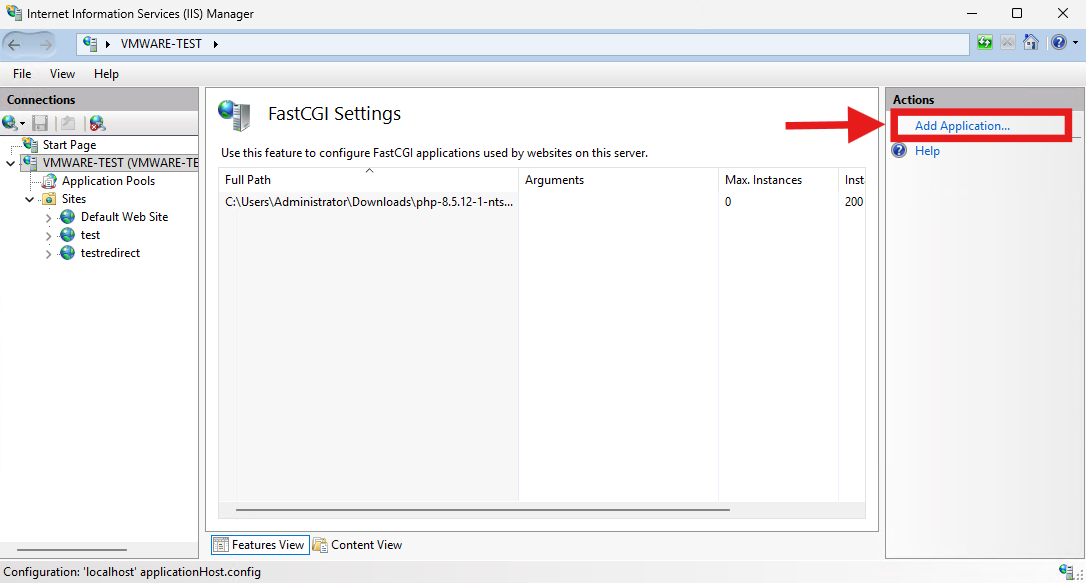
- Click Add Application in the right-hand Actions pane.
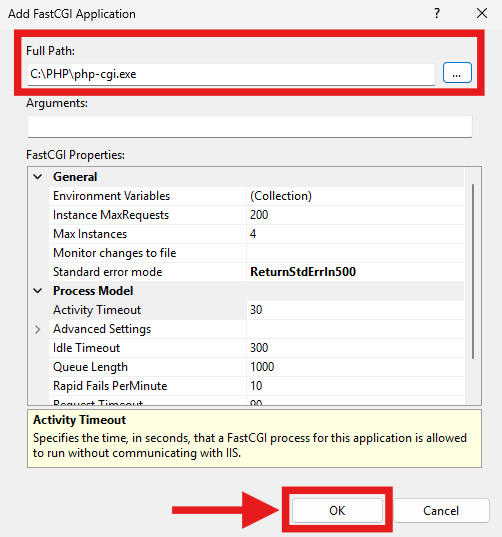
- In the Full Path field, enter or browse to C:\PHP\php-cgi.exe and click OK.
Step 4: Add a Handler Mapping for PHP
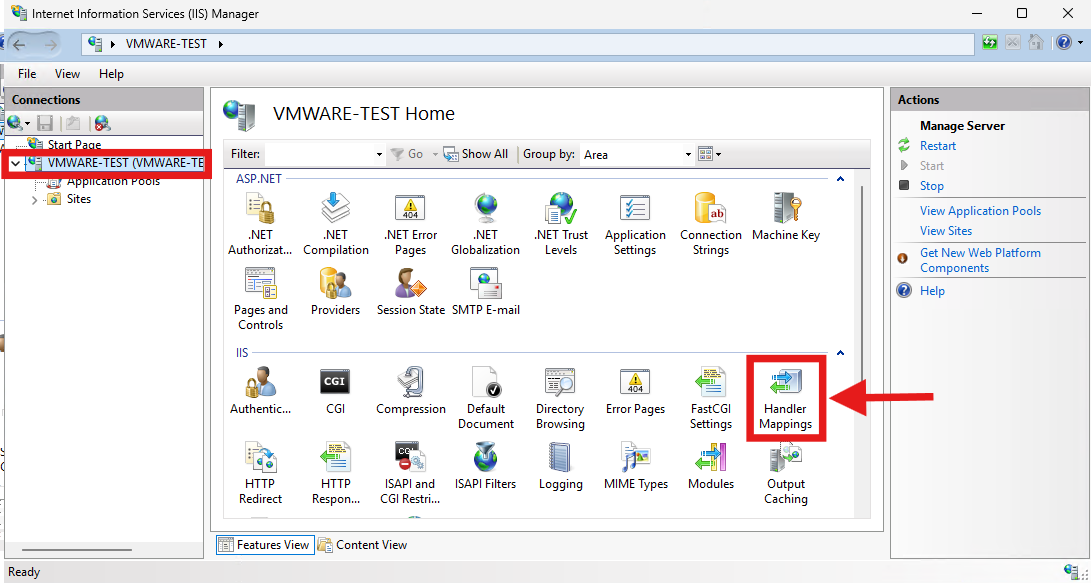
- Go back to the main server node or your specific website in IIS Manager. Double-click Handler Mappings.
- Then, click Add Module Mapping… on the right.
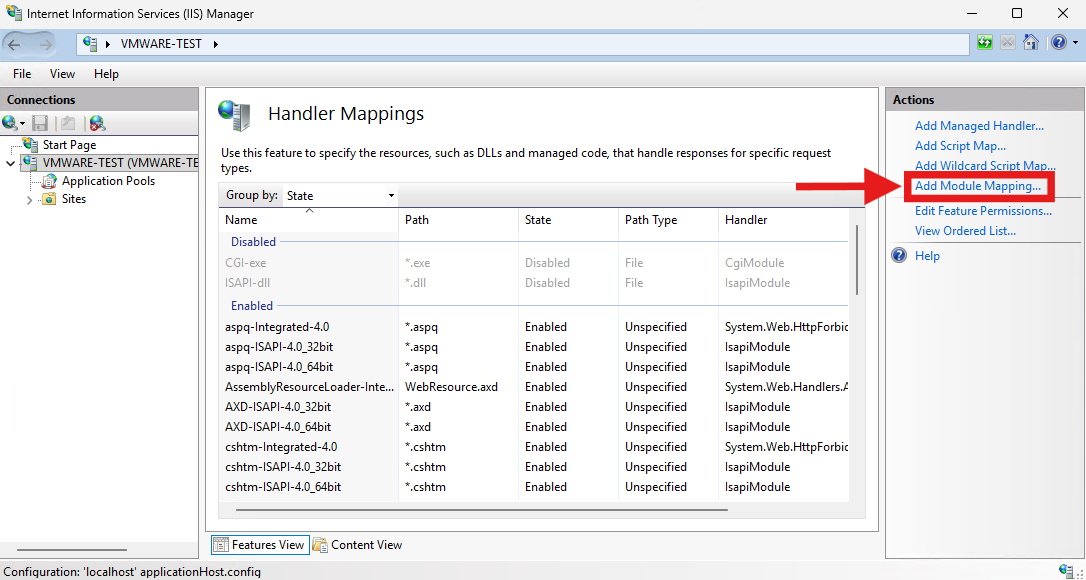
- Fill in the details as follows:
- Request path: *.php
- Module: FastCgiModule
- Executable: C:\PHP\php-cgi.exe
- Name: PHP_via_FastCGI
- Click OK.
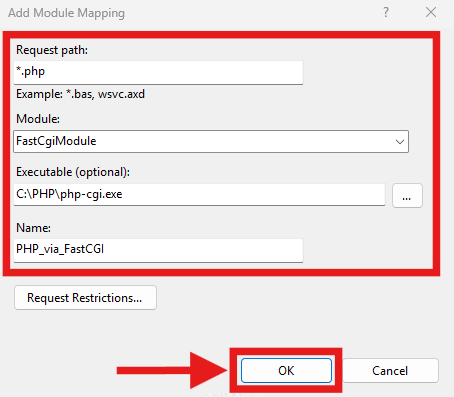
- Confirm Yes when prompted to create a FastCGI application for this executable.
Step 5: Add a default document
- Return to your site settings in IIS Manager and double-click Default Document.
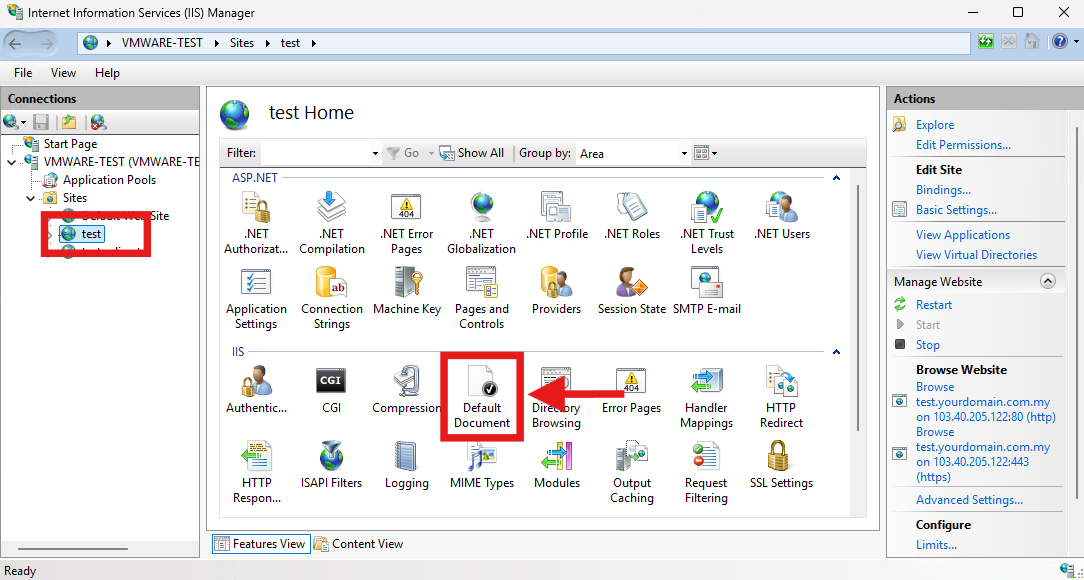
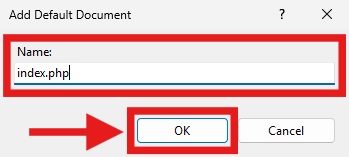
- Click Add… on the right Actions pane.
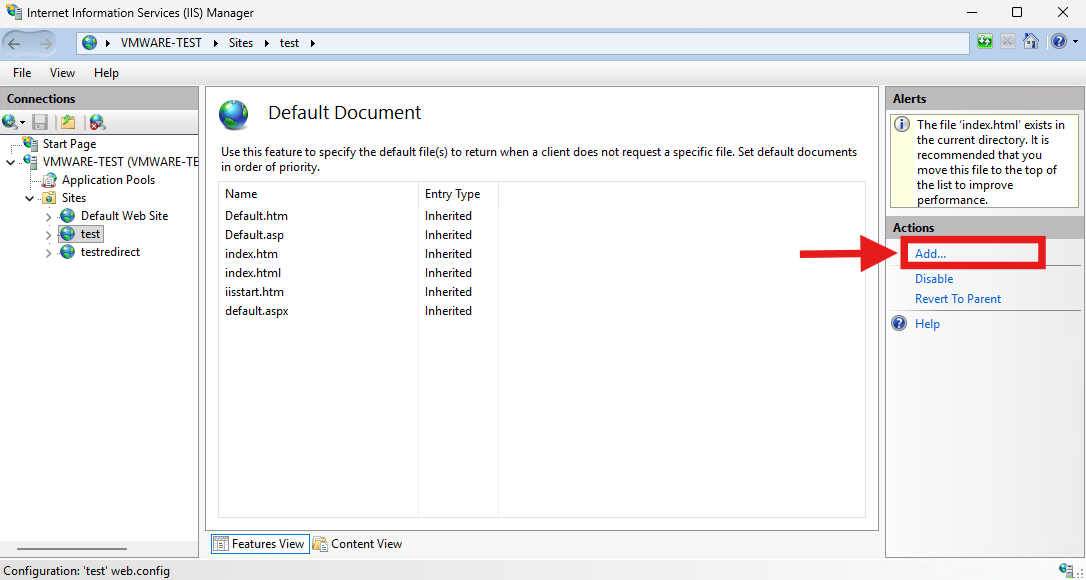
- Type index.php, and click OK. This ensures IIS automatically serves the PHP index file when visitors load your domain.
Step 6: Verify the PHP setup
- To confirm PHP is processing correctly, create a new text file in your website’s root directory (e.g., C:\inetpub\wwwroot) and name it phpinfo.php.
Important Note ⚠️: For security reasons, it is highly recommended to delete the phpinfo.php file immediately after verification, as it exposes sensitive server configuration details to the public.
- Add the following code into the file and save it:
<?php phpinfo(); ?>
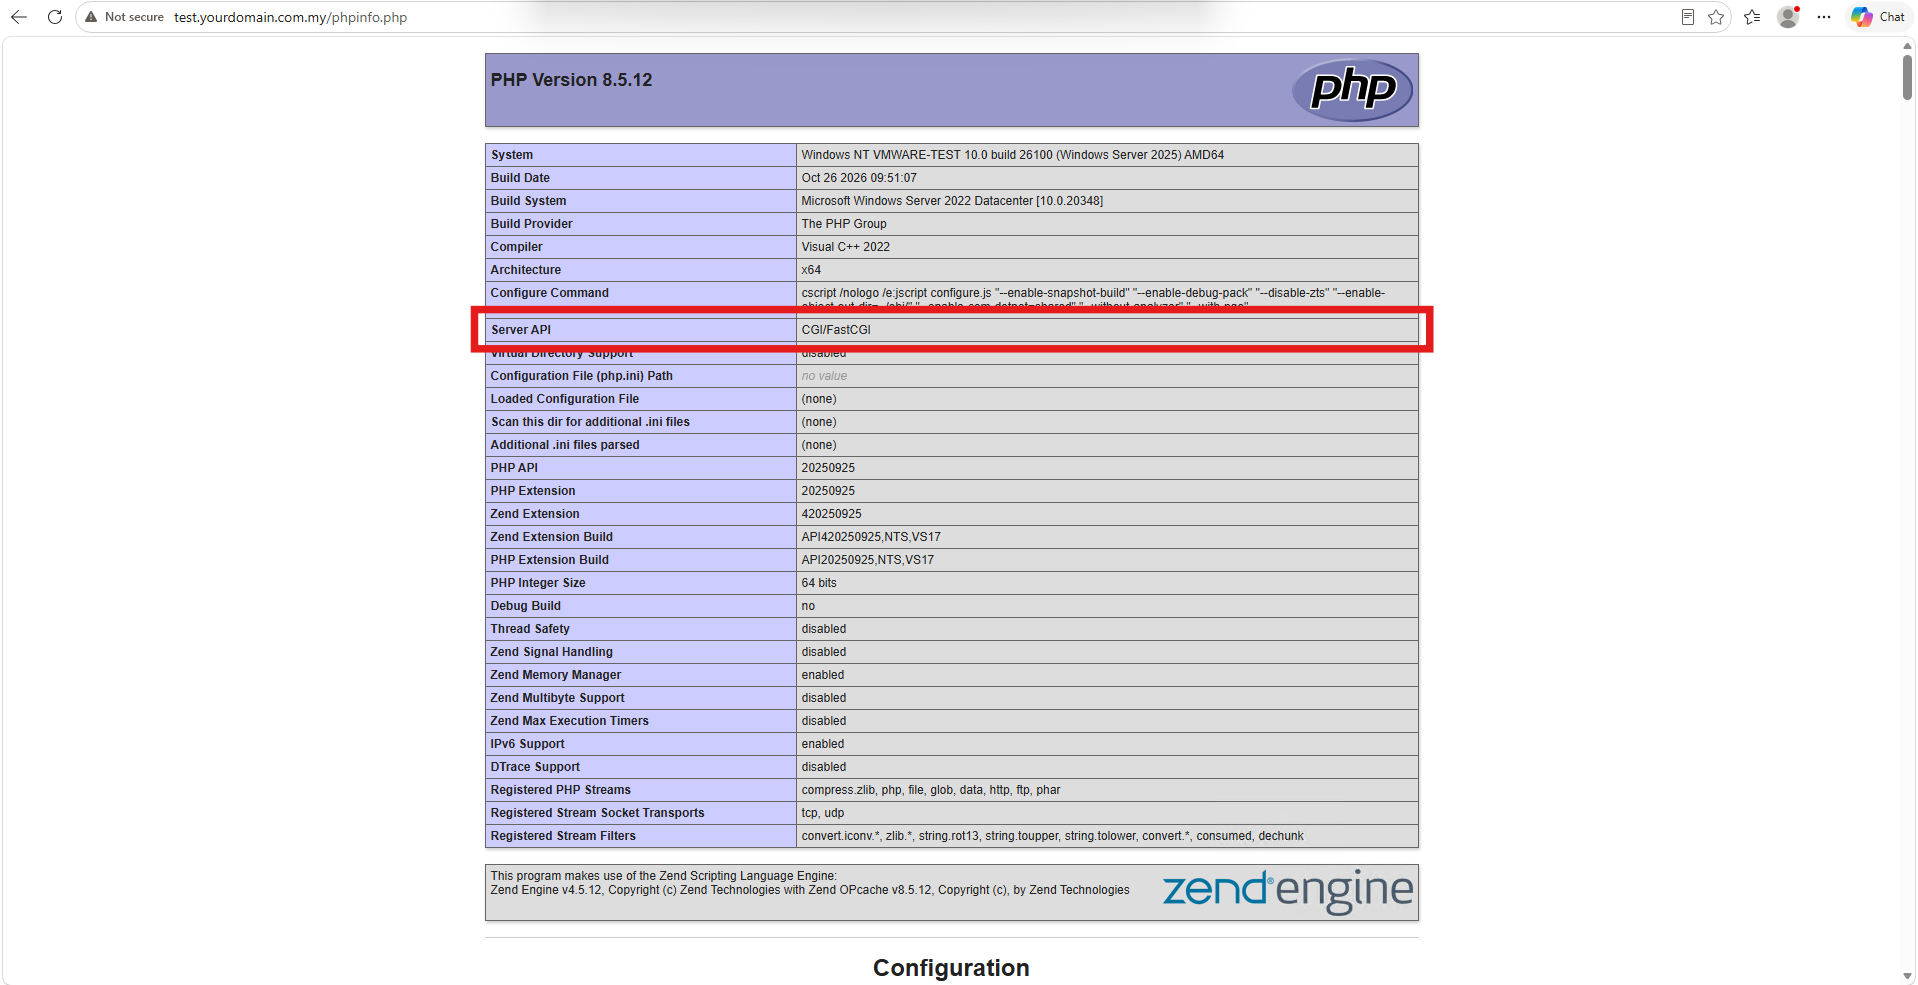
- Open your web browser and navigate to http://localhost/phpinfo.php (or use your domain name). If the setup is successful, a detailed PHP configuration page will be displayed, and the Server API row will show CGI/FastCGI.
Conclusion
By following this guidance, you can successfully host and run PHP applications on an IIS web server using FastCGI.
If you require any assistance, please contact us at support@ipserverone.com.