
Search Our Database
How to Set CPU Limits for an IIS Application Pool
Introduction
When hosting web applications on Windows Server Internet Information Services (IIS), sudden traffic spikes or poorly optimized code can cause a single application to consume all available CPU resources, heavily impacting other sites on the server. To prevent this resource exhaustion, administrators can configure hard CPU limit percentages for specific IIS Application Pools. This guide explains how to set up CPU throttling in IIS Manager and specify the exact action IIS should take, such as terminating the worker process or throttling its CPU cycles, when the limit is exceeded.
Prerequisite
- Access to Windows Server via RDP with Administrator privileges.
- Basic knowledge on navigating IIS Manager.
Step-by-step Guide
Step 1: Access the Application Pool Advanced Settings
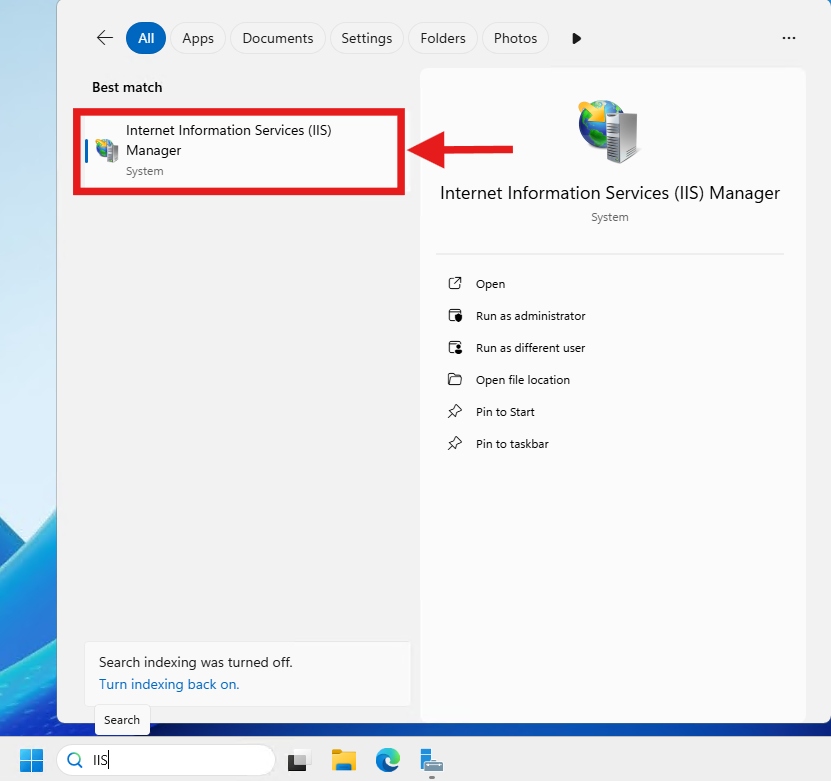
- Open Internet Information Services (IIS) Manager from the Windows Start menu.
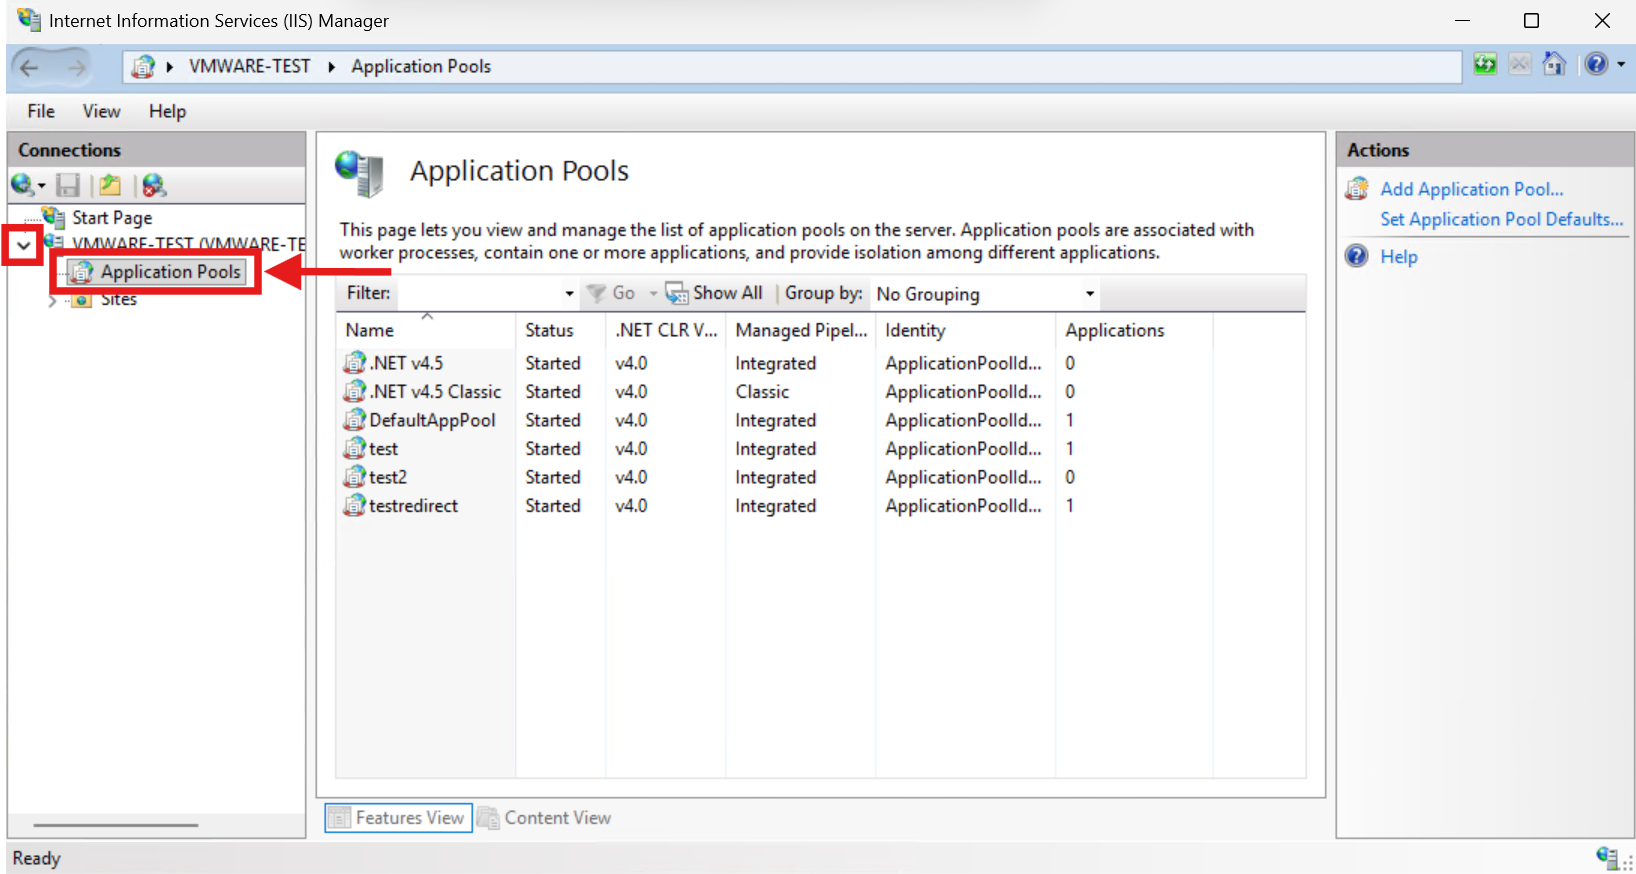
- In the left Connections pane, expand the server node and click on Application Pools.
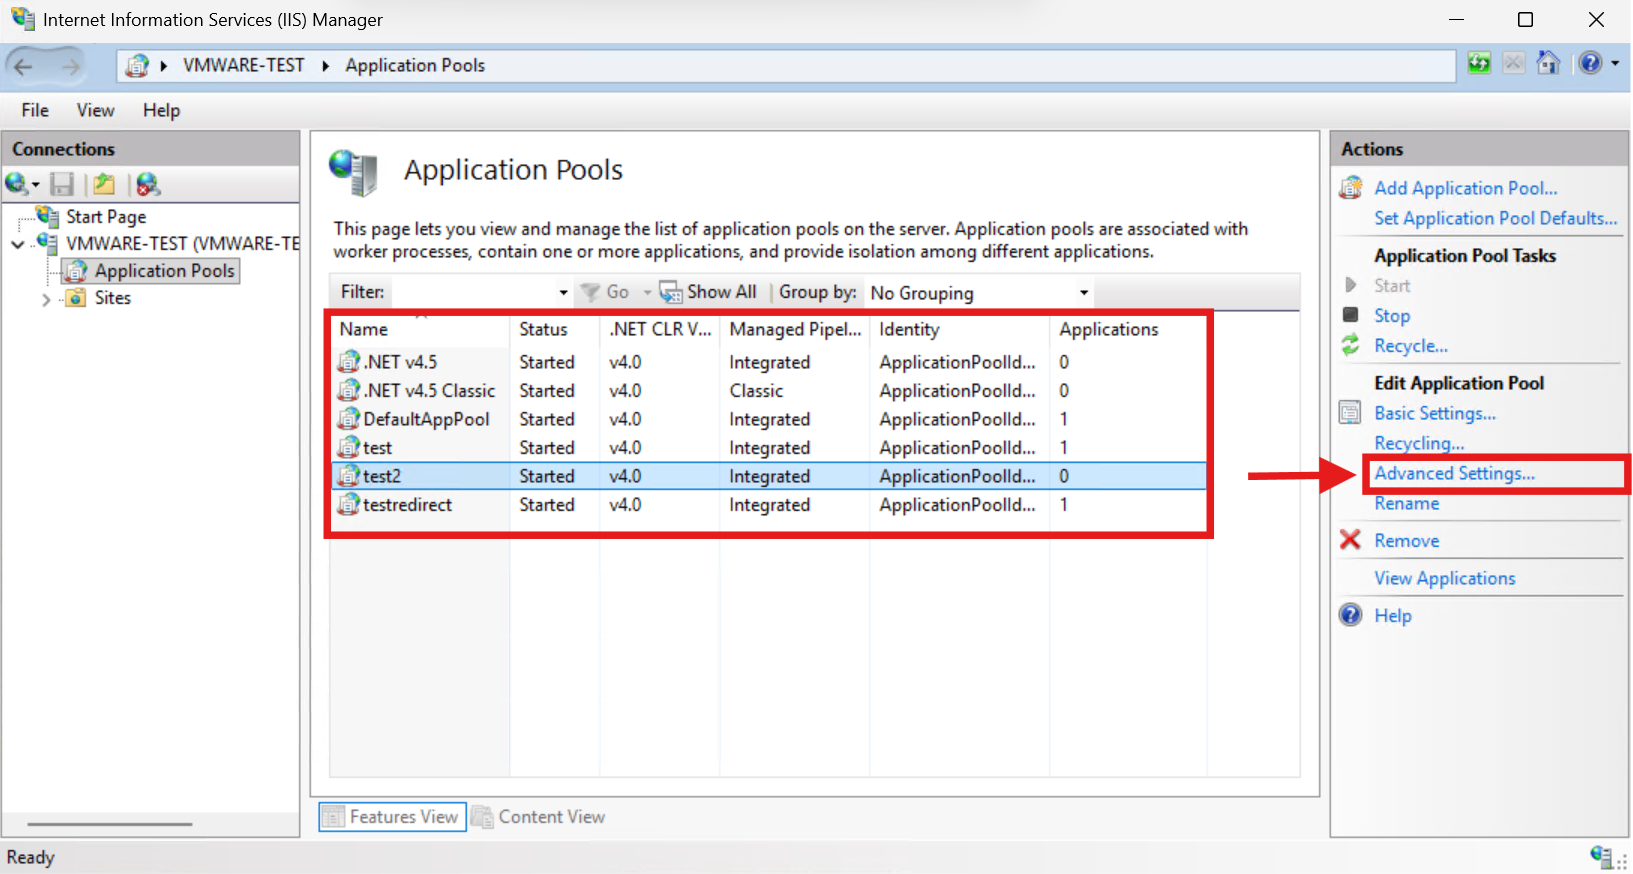
- In the middle pane, select the specific application pool you want to restrict.
- In the right Actions pane, click on Advanced Settings….
Step 2: Configure the CPU Limit Percentage
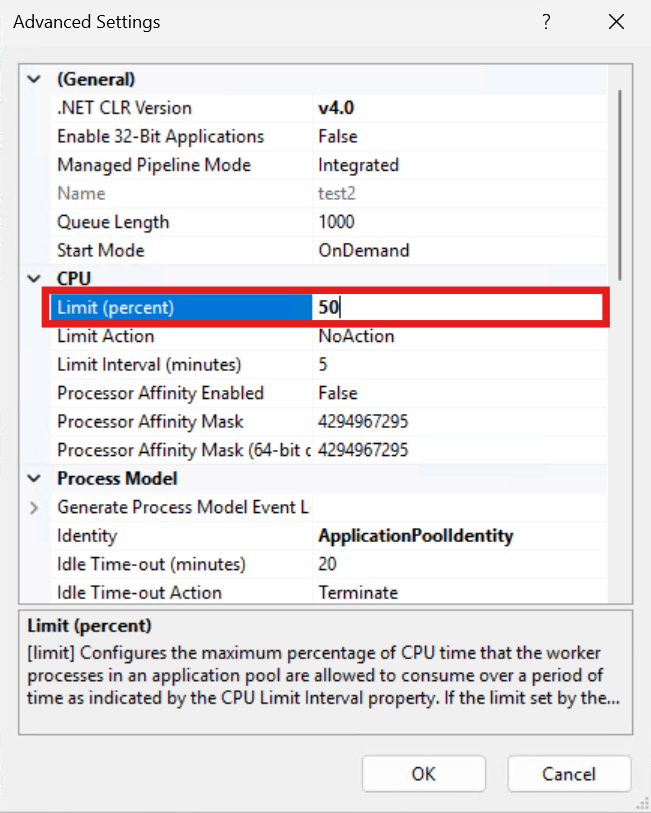
- In the Advanced Settings window, scroll down to the CPU section.
- Locate the Limit (percent) property.
- Enter your desired CPU maximum. For example, to set a 50% CPU limit, enter 50.
Step 3: Define the Limit Action
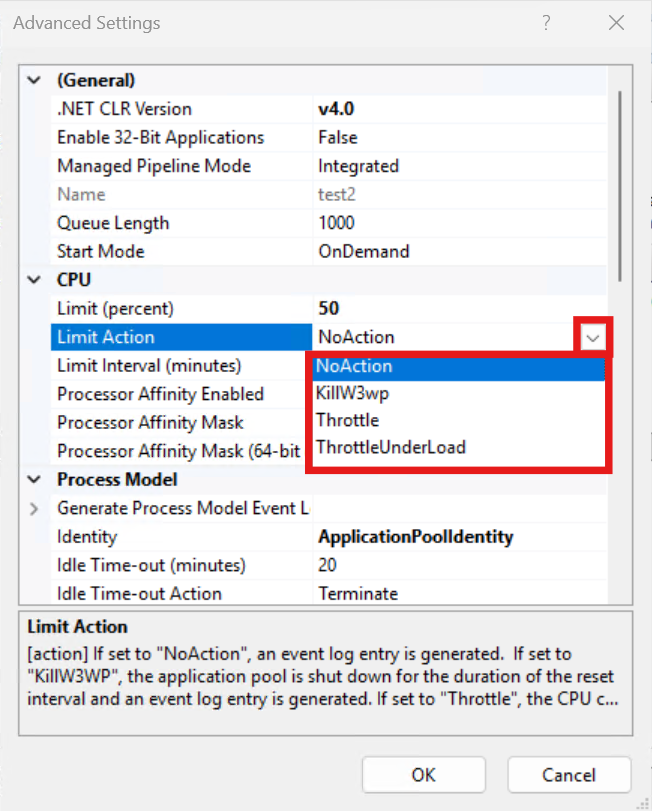
- Locate the Limit Action property directly below the Limit (percent) setting.
- Click the drop-down menu and choose a limit action based on your requirements:
- NoAction: Takes no action, effectively disabling the limit.
- KillW3wp: Completely terminates the worker process when the limit is reached.
- Throttle: Places a permanent, strict cap on the worker process regardless of overall server load.
- ThrottleUnderLoad: Acts as a flexible cap, dynamically restricting CPU usage only when the overall server experiences high load.
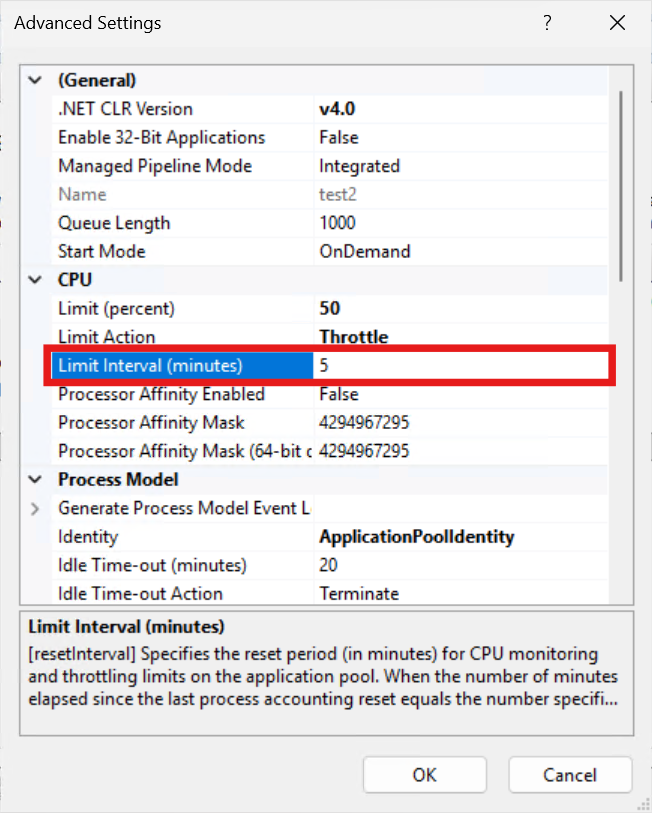
- Locate the Limit Interval (minutes) property and ensure it is set to a reasonable monitoring window (the default is usually 5 minutes). This dictates how often IIS resets the CPU monitoring period.
Step 4: Apply and Verify Changes
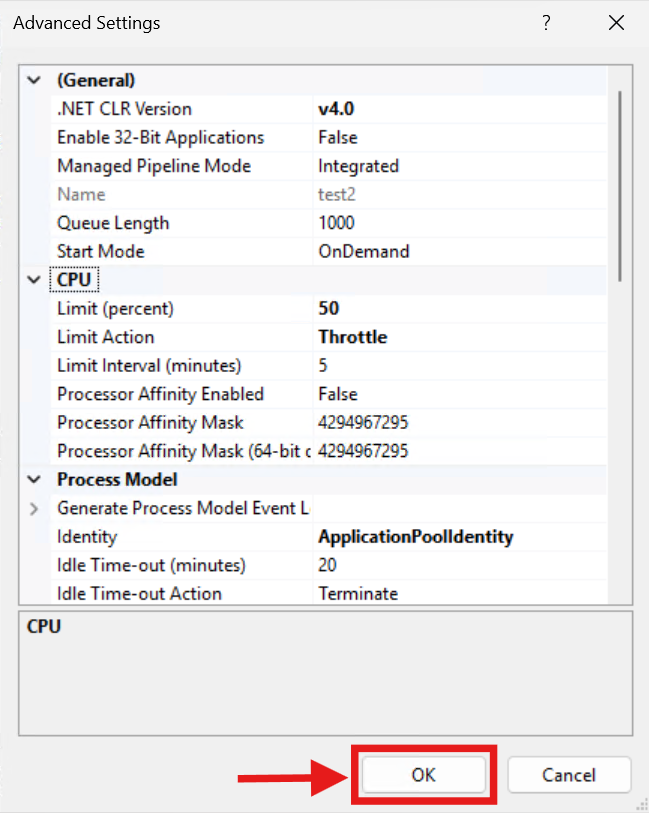
- Click OK to save the Advanced Settings and apply the CPU throttling.
- To verify the setup, open Windows Task Manager during peak traffic hours and monitor the w3wp.exe process associated with this application pool to ensure its CPU usage does not exceed your configured percentage.
Conclusion
By following this guidance, you can successfully configure CPU limits and throttling actions for your IIS Application Pools, ensuring that a single heavy application does not exhaust the server’s processing resources.
If you require further assistance, please contact our support team at support@ipserverone.com.