
Search Our Database
How to Increase Upload Limits and Timeouts in IIS for Large File Uploads
Introduction
When hosting web applications on Windows Server Internet Information Services (IIS), administrators often encounter “404.13 Request Entity Too Large” or mid-stream timeout errors when users upload high-resolution media or large database exports. By default, IIS restricts HTTP POST requests to approximately 28.6 MB and sets strict connection timeouts to protect the server from Denial of Service (DoS) attacks. This guide explains how to properly increase the request filtering upload limits, IIS connection timeouts, and application-specific execution timeouts (for ASP.NET or PHP FastCGI) to ensure large file uploads are processed seamlessly.
Prerequisite
- Administrator access to the server.
- Basic knowledge on IIS Manager.
Step-by-step Guide
Step 1: Increase IIS Request Filtering Limit
- Open Internet Information Services (IIS) Manager from the Windows Start menu.
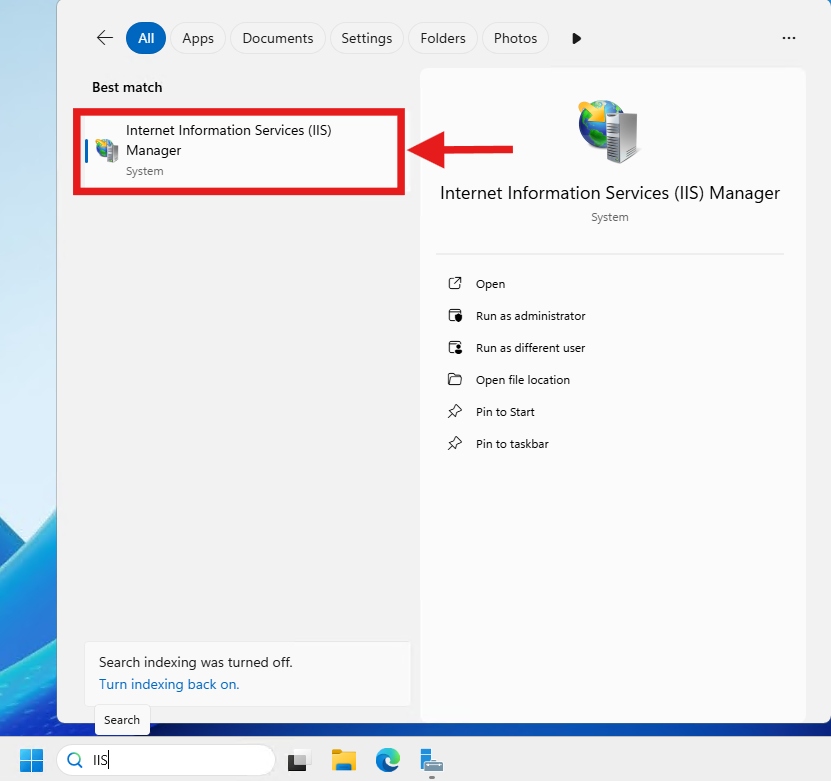
- In the left Connections pane, select the specific website where you want to increase the upload limit.
- In the middle pane, double-click on the Request Filtering icon.
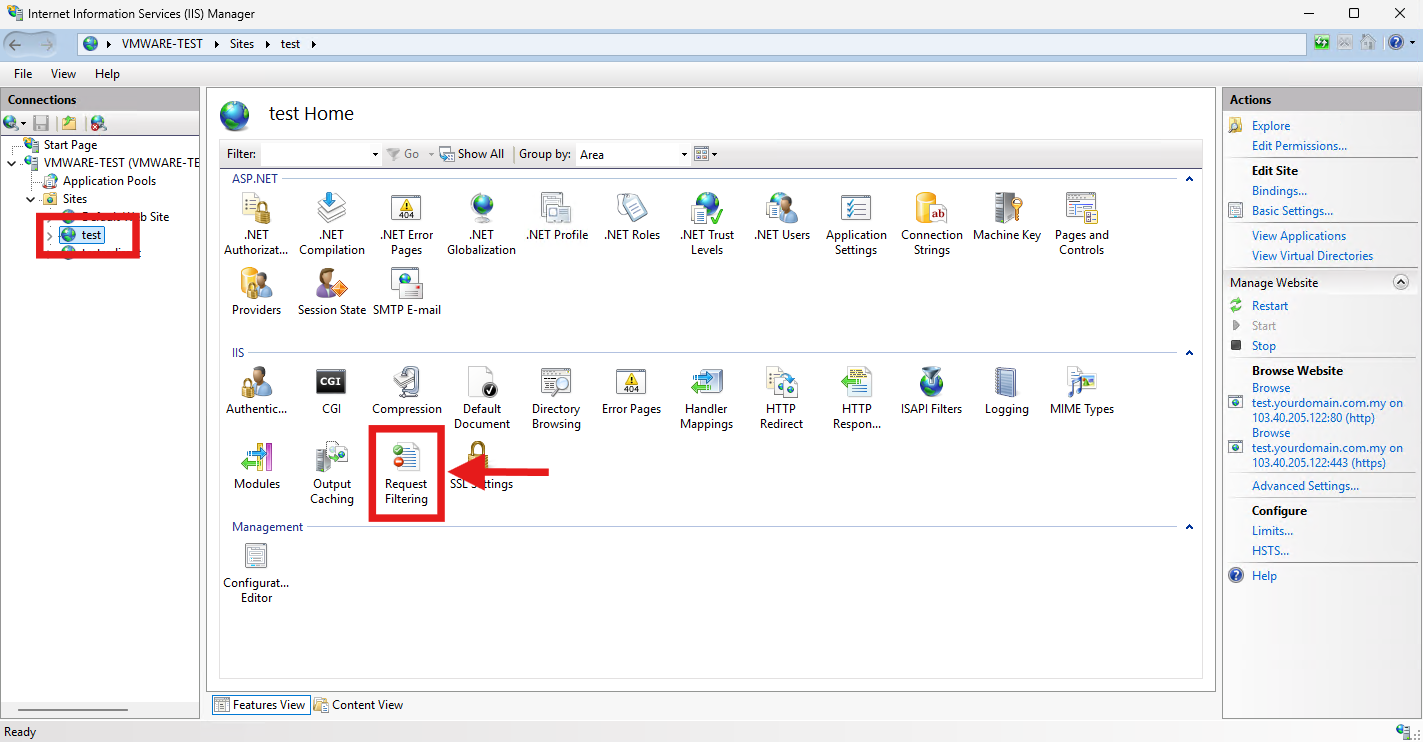
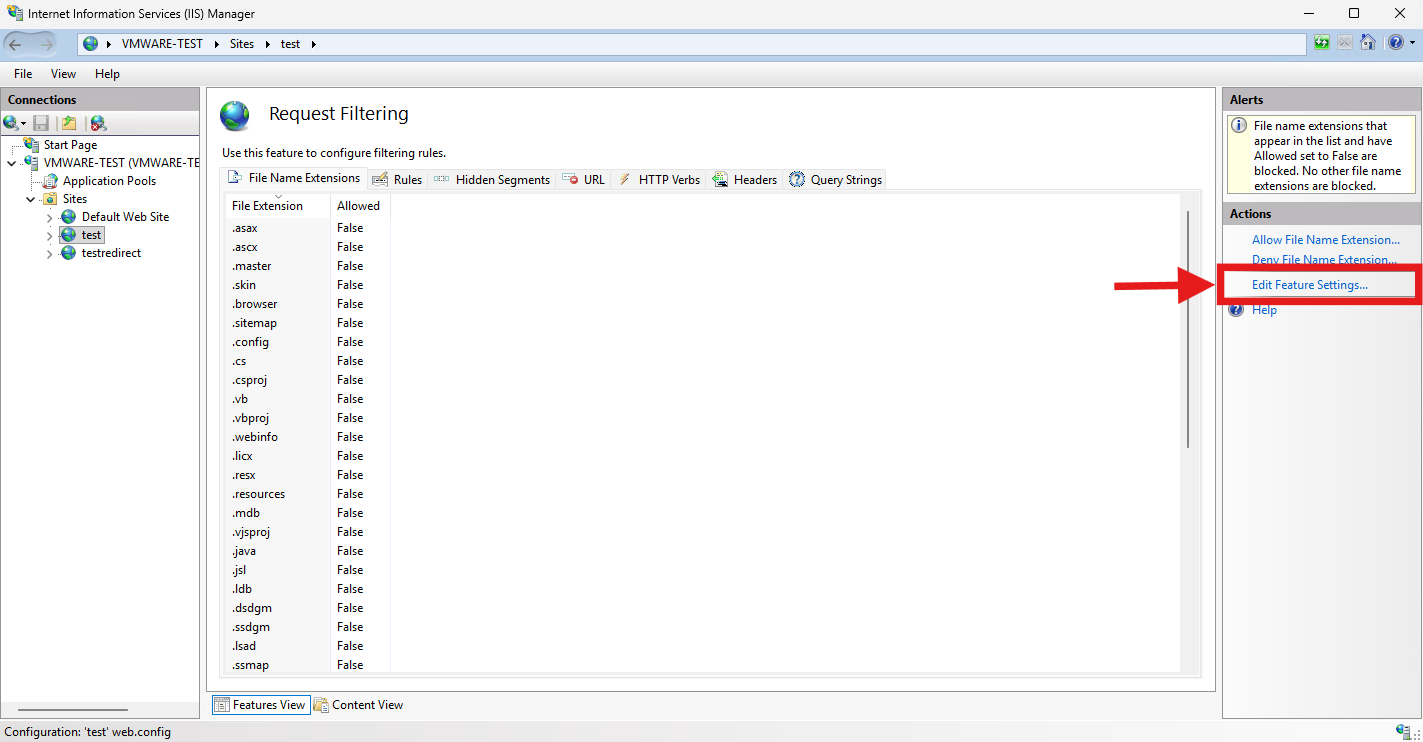
- On the right Actions pane, click on Edit Feature Settings….
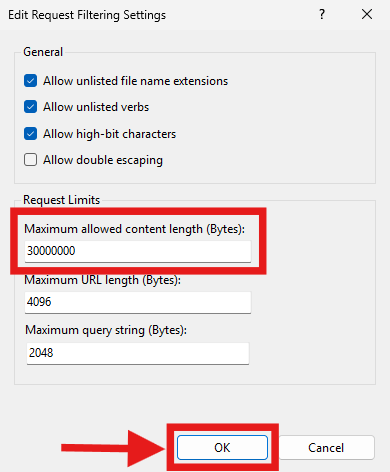
- In the Edit Request Filtering Settings window, locate the Maximum allowed content length (Bytes) field.
- Enter your desired limit in bytes (e.g., enter 1073741824 for 1GB).
- Click OK to save the changes.
Step 2: Increase IIS Connection Timeout
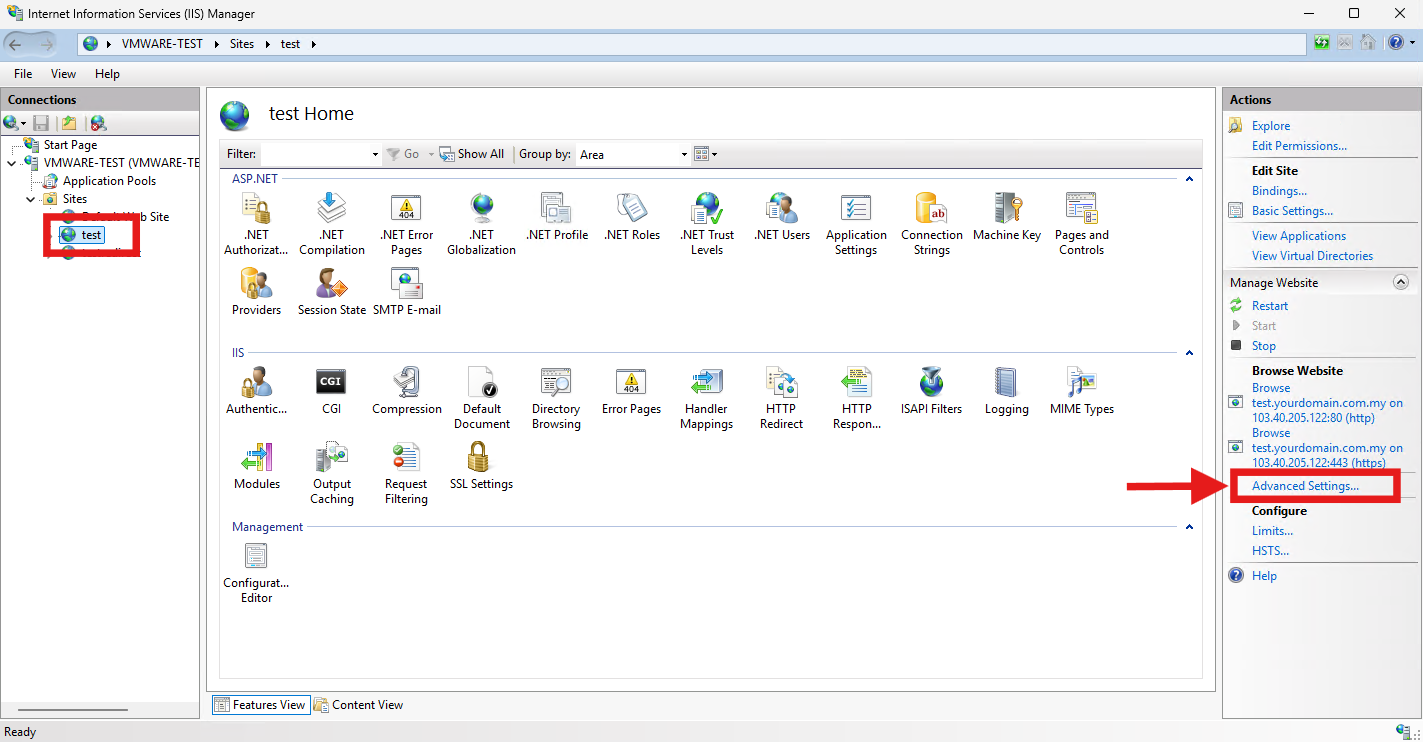
- In IIS Manager, select your website from the left Connections pane.
- In the right Actions pane, click on Advanced Settings….
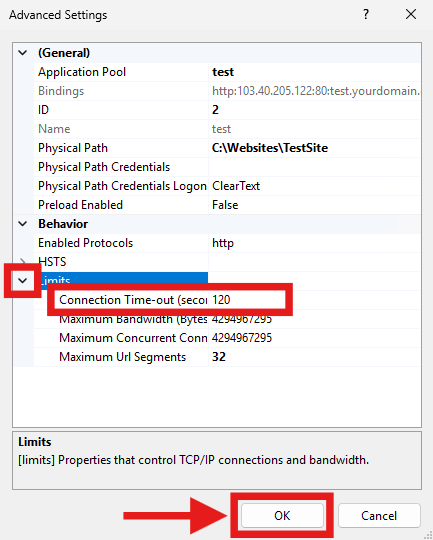
- Expand the Limits section.
- Increase the Connection Time-out (seconds) from the default 120 to a higher value suitable for large uploads (e.g., 3600 for 1 hour).
- Click OK to apply the changes.
Step 3: Update Application-Level Timeouts
Depending on your web application framework, you must also increase its internal execution limits to prevent the application from terminating the upload.
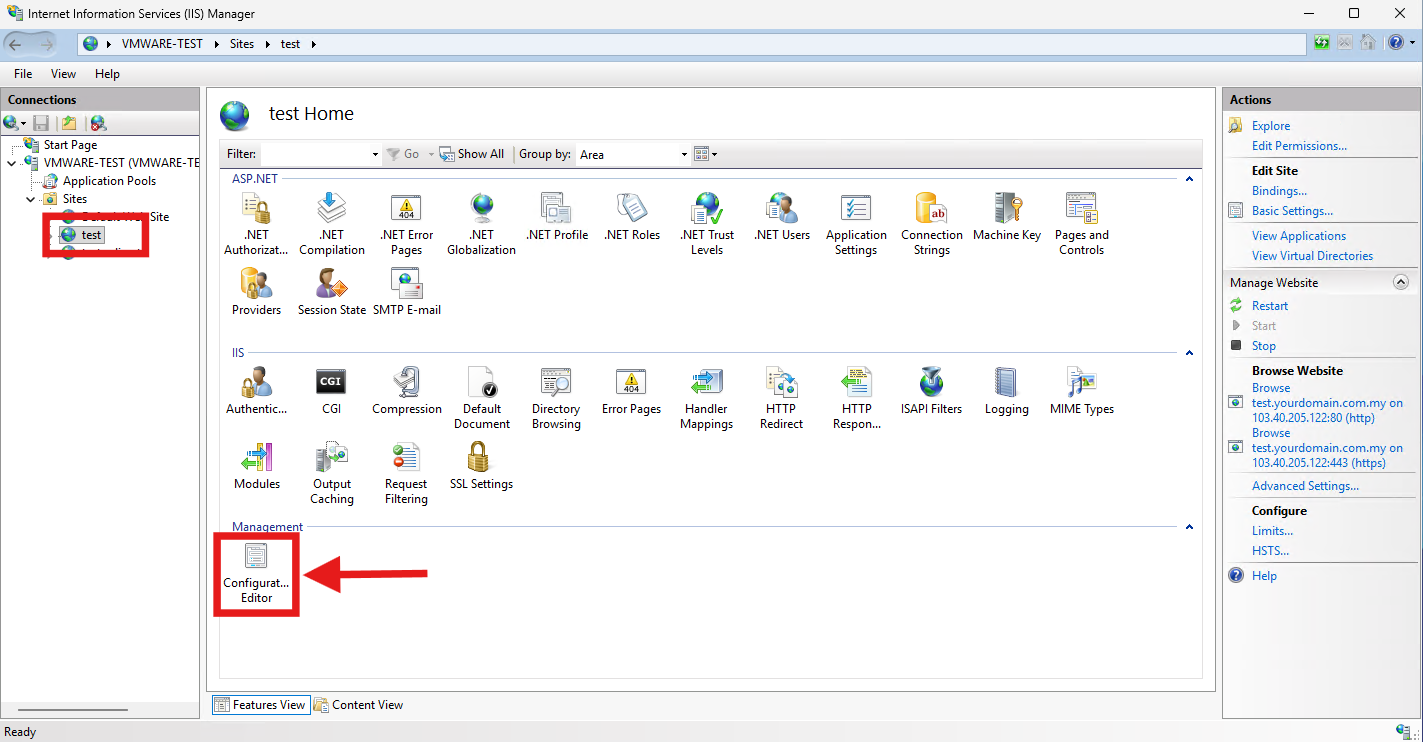
- Open IIS Manager.
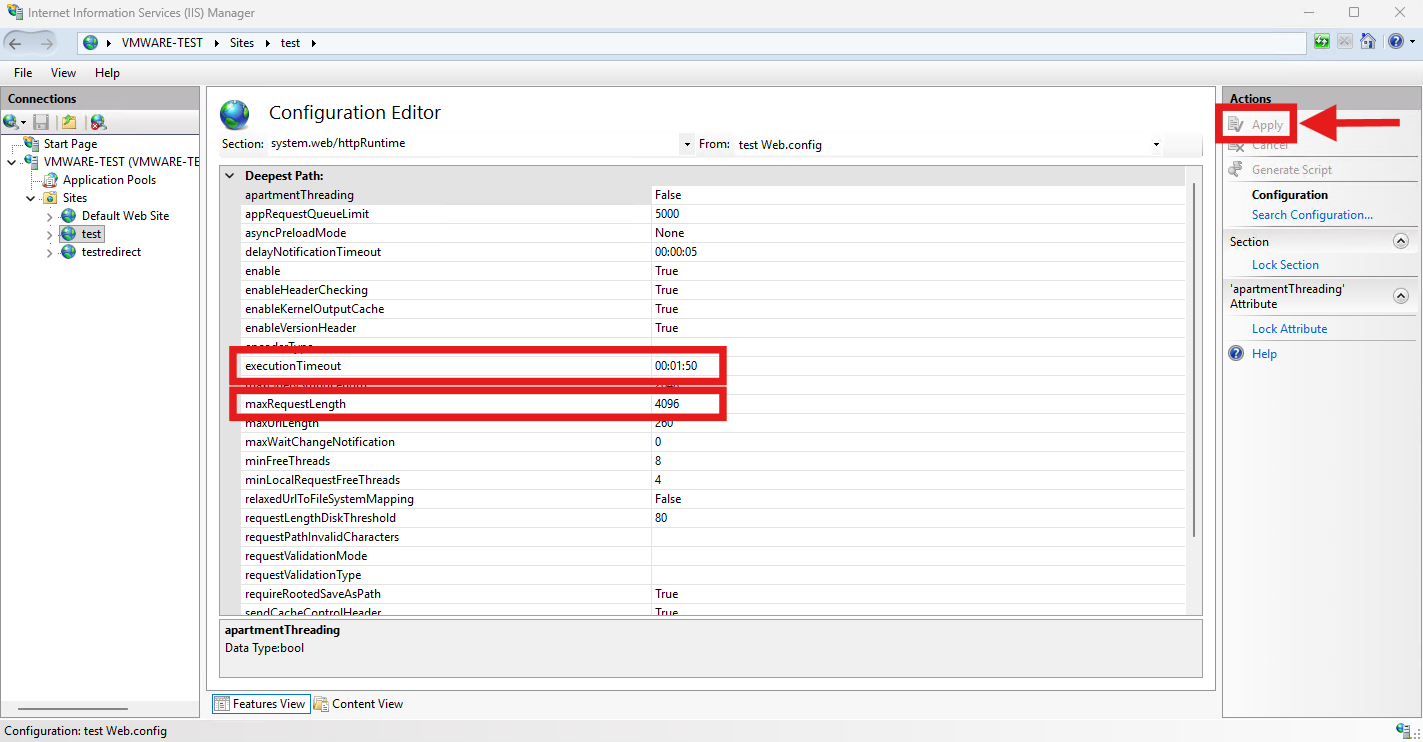
- Select your website from the left Connections pane. In the middle pane, scroll down to the Management section and double-click Configuration Editor.
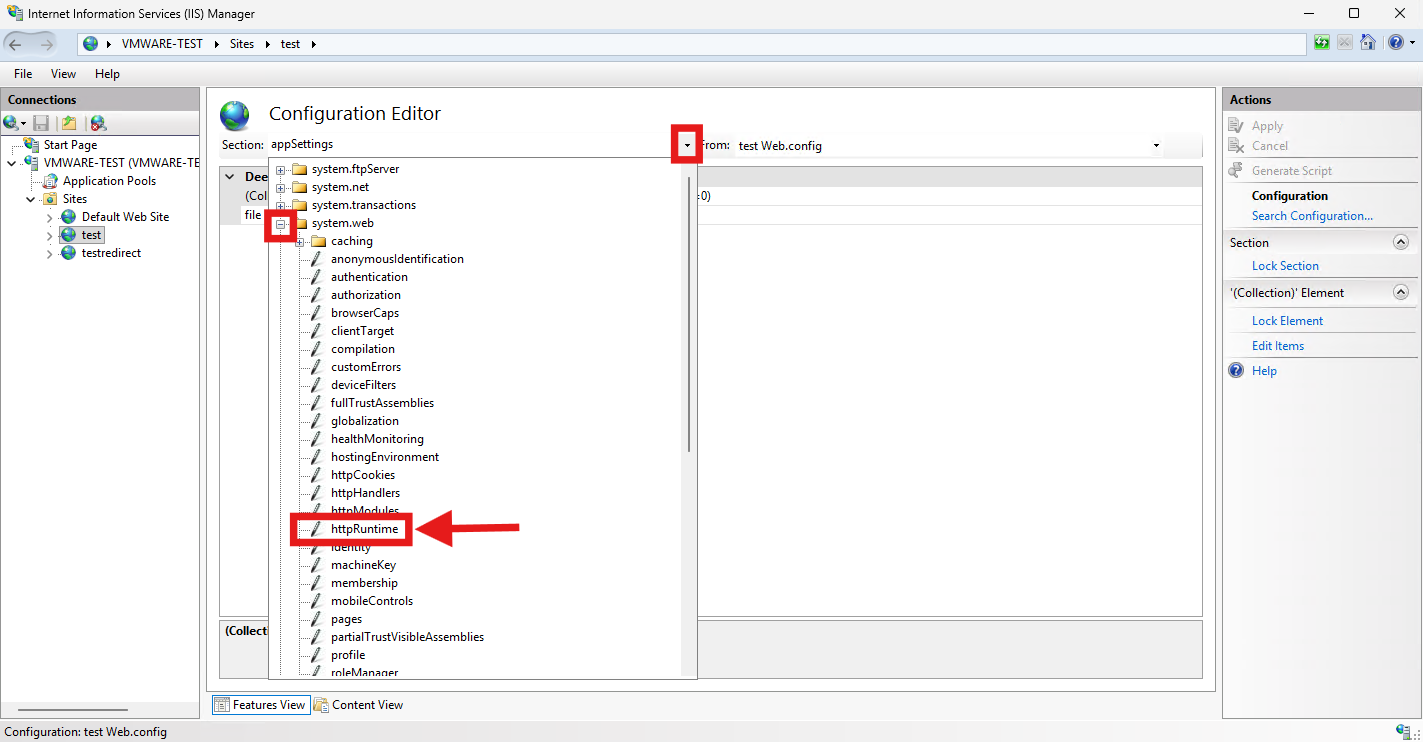
- At the top of the Configuration Editor, click the Section drop-down menu.
- Expand the tree to system.web, then click on httpRuntime. (Alternatively, you can just type system.web/httpRuntime directly into the Section box).
- A list of properties will appear in the grid below. Locate maxRequestLength and enter your desired limit in kilobytes (e.g., 1048576 for 1GB).
- Locate executionTimeout in the same list and enter your desired timeout (e.g., 01:00:00 for 1 hour, or 3600 depending on how your specific IIS version formats the time span).
- In the right Actions pane, click Apply to save your changes.
- Open IIS Manager.
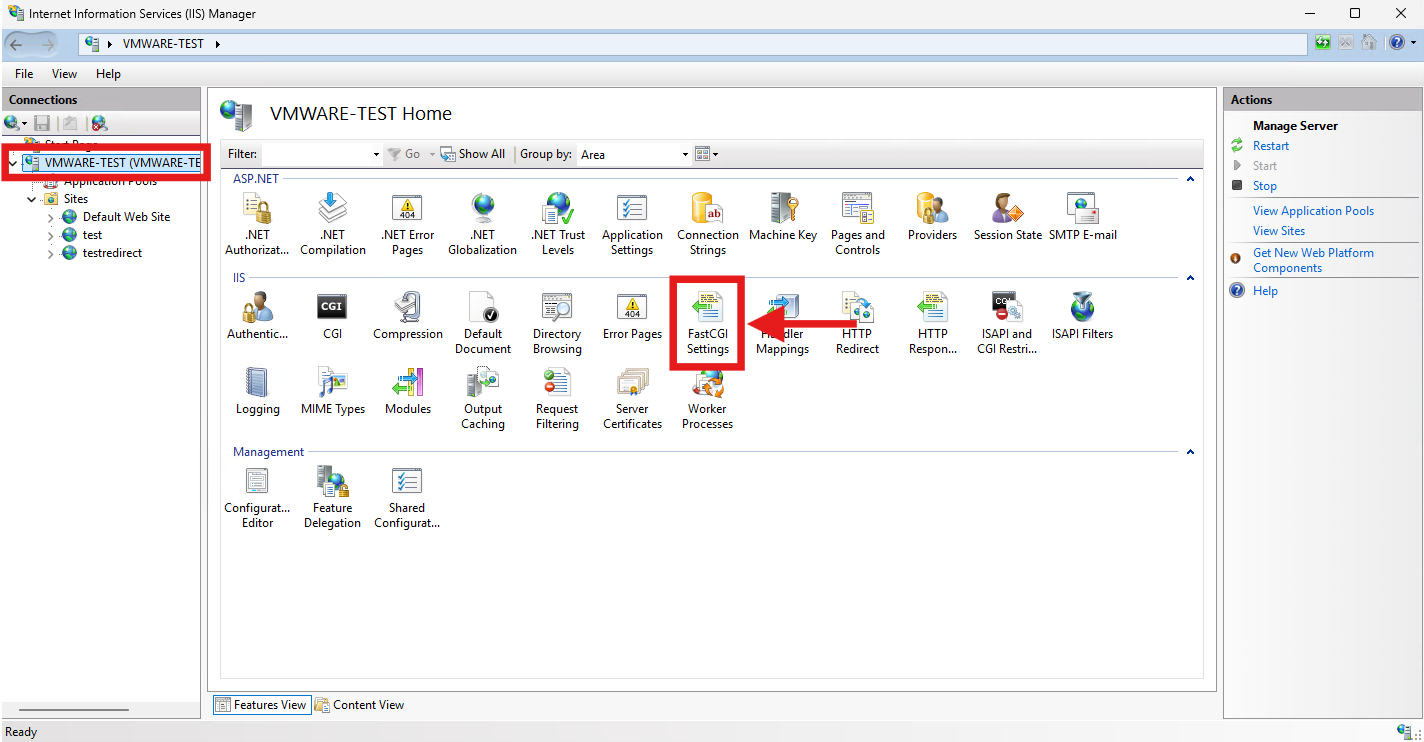
- In IIS Manager, click on the root server node in the left Connections pane. Double-click on FastCGI Settings in the middle pane.
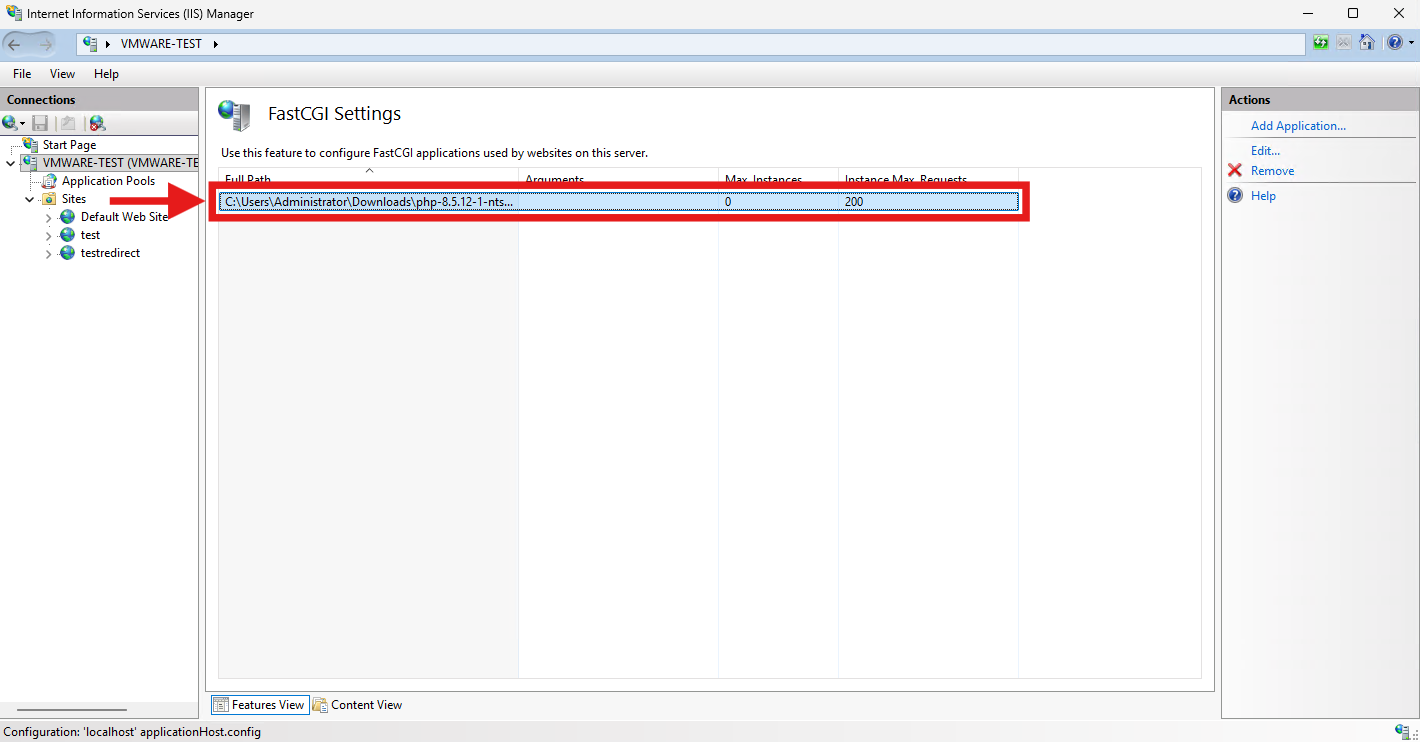
- Double-click your PHP application executable path in the list.
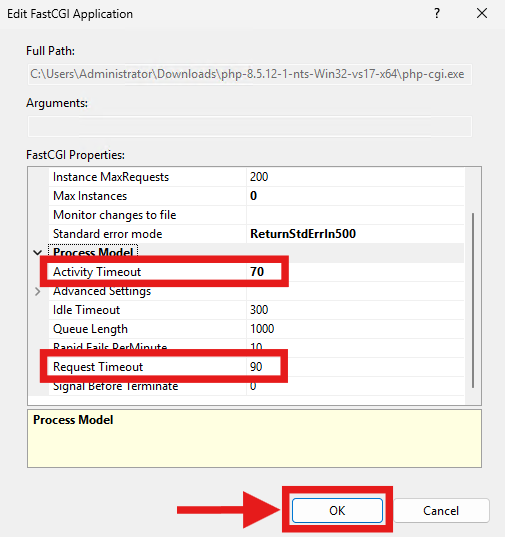
- Increase both the Activity Timeout and Request Timeout values (in seconds) to match the max_execution_time set in your php.ini file.
- Click OK and restart IIS for the changes to take effect.
Conclusion
By following this guidance, you can successfully increase the maximum upload limits and connection timeouts on your IIS web server, allowing users to upload large files without encountering abrupt connection drops or file size restriction errors.
If you require further assistance, please contact our support team at support@ipserverone.com.