
Search Our Database
How to Simplify pfSense Firewall Rules Using Aliases
Introduction
When managing a pfSense firewall on your network, administrators often face cluttered and confusing rule sets as the environment grows. To solve this, you can actively simplify your configuration by using the Aliases feature directly within the pfSense web interface. Aliases allow you to logically group multiple IP addresses, networks, or ports into a single, easily identifiable name. By implementing this feature, you significantly reduce the overall number of firewall rules required, making your network security policies much easier to read, update, and securely manage over time.
Prerequisite
-
Access to the pfSense web interface with administrative privileges.
-
Basic knowledge of network routing and firewall concepts.
Step-by-step Guide
Step 1: Navigate to the Aliases menu
-
Log in to your pfSense web interface.
-
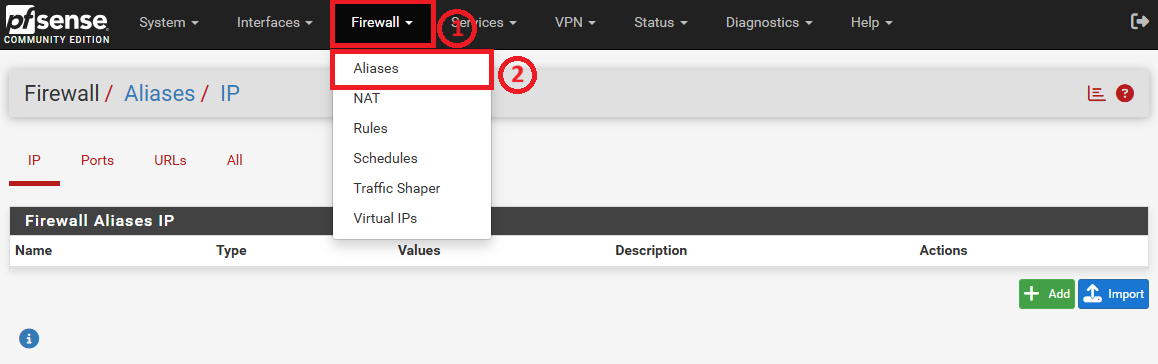
From the top menu, click on Firewall and select Aliases.
Step 2: Create a new Alias
-
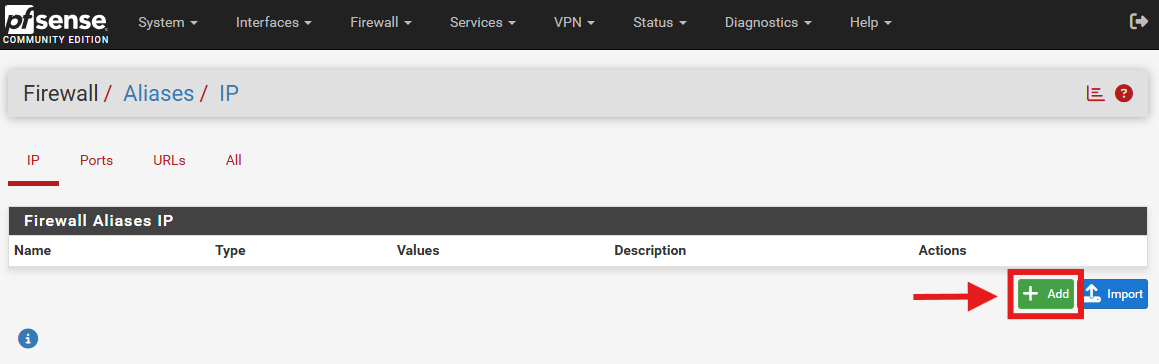
Click the + Add button to create a new alias.
-
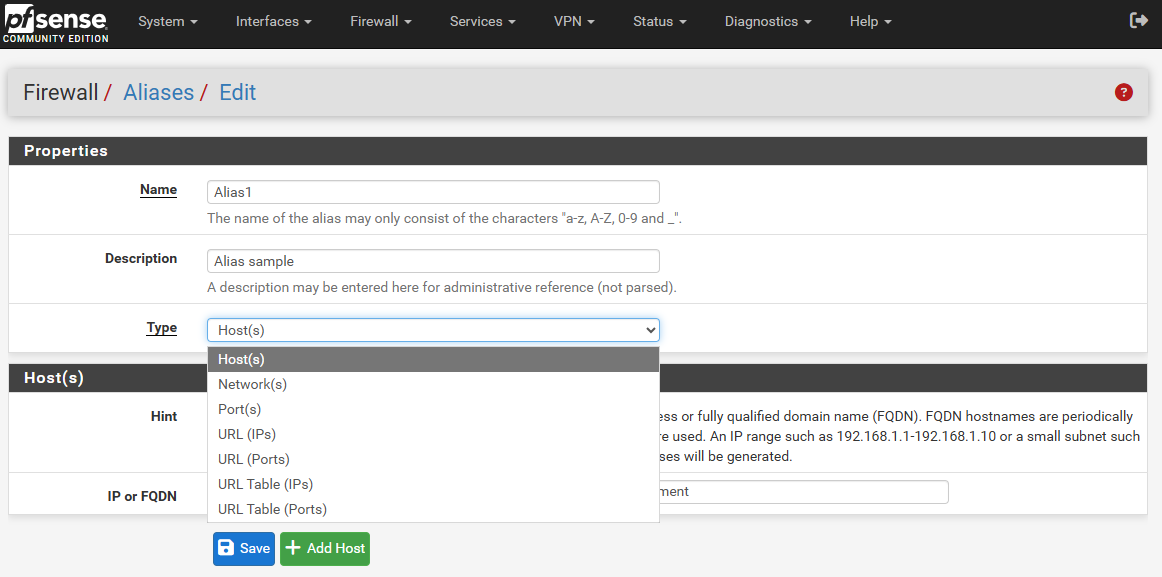
Enter a recognizable name in the Name field and provide a brief description in Description field.
-
Choose the Type from the dropdown menu, such as Host(s), Network(s), or Port(s).
Step 3: Add details to the Alias
-
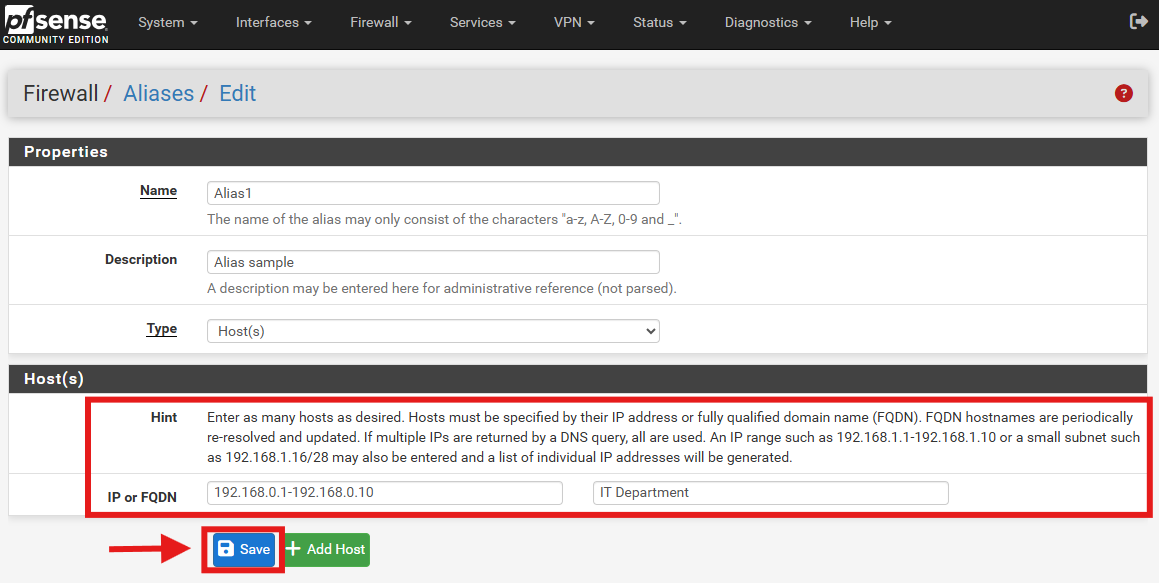
At the second section, enter the specific IP addresses, subnets, or ports you want to group together. In this example, Host(s) is chosen from the dropdown of Type and range of IP (192.168.0.1-192.168.0.10) is entered at IP or FQDN field.
-
Click Save to keep the changes.
-
Click Apply Changes at the top of the screen to activate the new alias.
Step 4: Apply the Alias in Firewall Rules
-
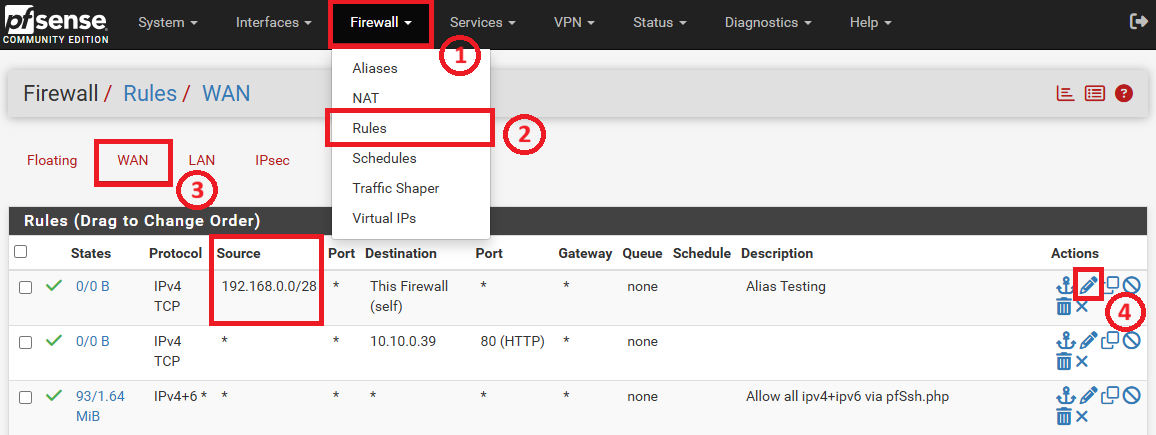
Navigate to Firewall and click on Rules.
-
Select the interface tab where you want to apply the rule (for example, LAN or WAN).
-
Click Add to create a new rule or click the pencil icon to edit an existing one.
-
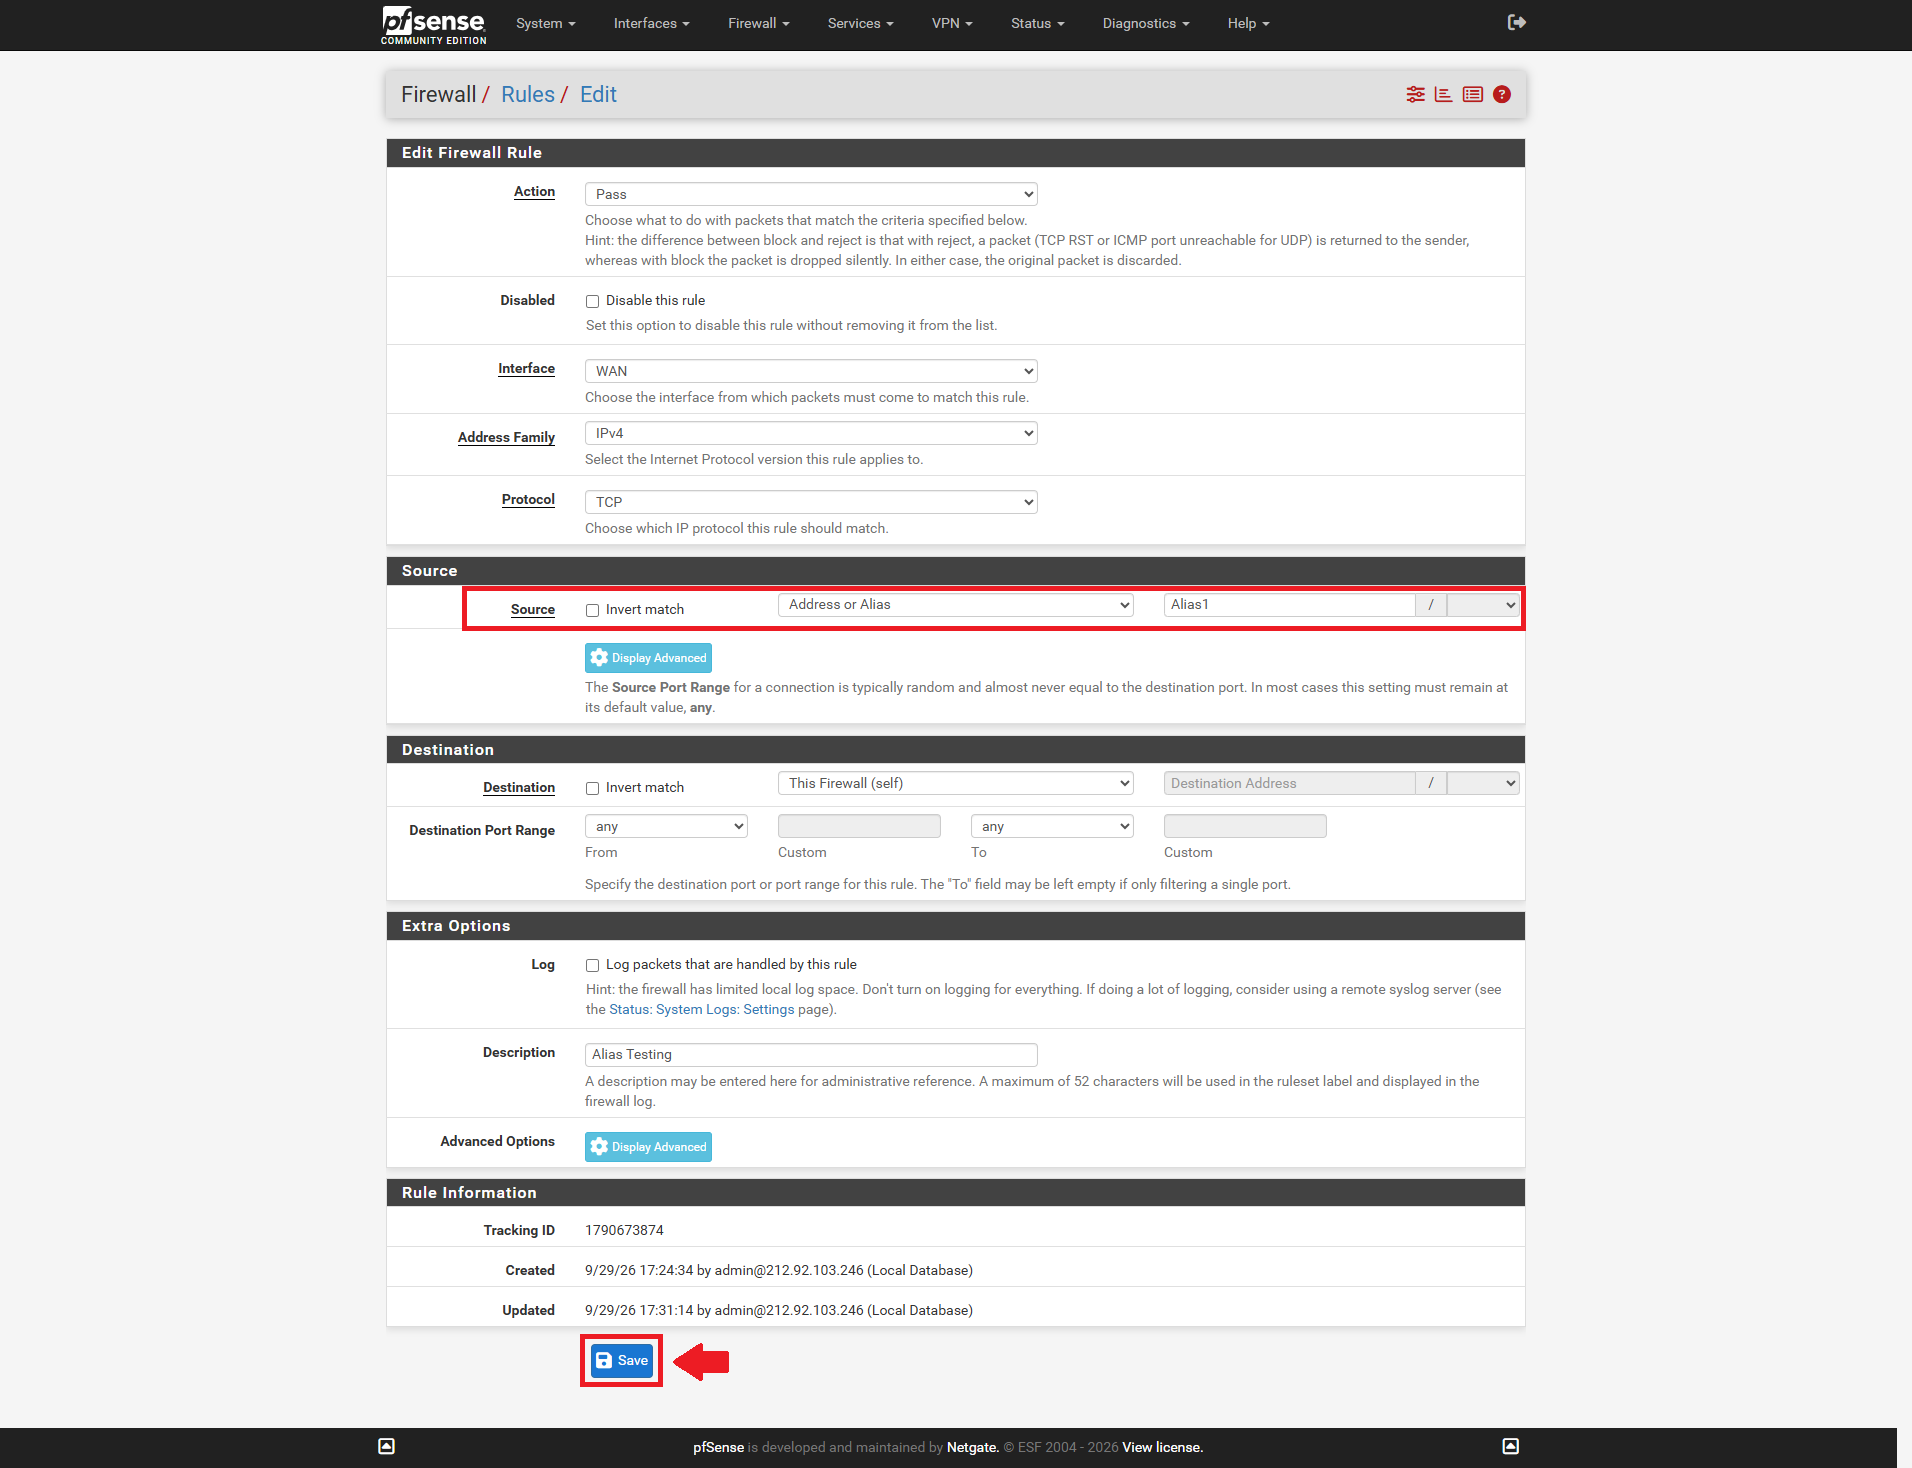
In the Source or Destination fields, select Single host or alias and type the exact name of the alias you just created.
-
Click Save and then Apply Changes to enforce the simplified rule.
- In this case, the Source of first rule in WAN tab is edited to converted from 192.168.0.0/28 to Alias1, which is 192.168.0.1-192.168.0.10.
Conclusion
By following this guidance, you can effectively reduce clutter and simplify your pfSense firewall rules using aliases, making future network management significantly more efficient.
For additional assistance or if you encounter any issues, please contact our support team at support@ipserverone.com.