
Search Our Database
How to Manage User in pfSense
Introduction
Managing user accounts effectively in pfSense is crucial for maintaining firewall security and administrative control, ensuring that only authorized personnel can access the web configurator. Network administrators create local user profiles, assign specific privileges tailored to job roles, and update credentials when necessary to prevent unauthorized access. This process typically takes place within the pfSense web interface during initial system setup or routine maintenance. By implementing strict user management protocols, organizations safeguard their network infrastructure against potential security breaches and unauthorized configuration changes.
Prerequisite
- For Administrative Tasks (Creating users & assigning privileges): Access to the pfSense web configurator with administrative privileges.
- For Self-Service Password Changes: Standard user access (any authenticated user can change their own password, administrative privileges are not required).
- Basic knowledge of network administration and security roles.
Step-by-step Guide
Create New User
Follow the steps below to create a brand new local user profile within the pfSense web interface:
Step 1: Access User Management Settings
- Log in to your pfSense WebGUI using your administrator credentials.
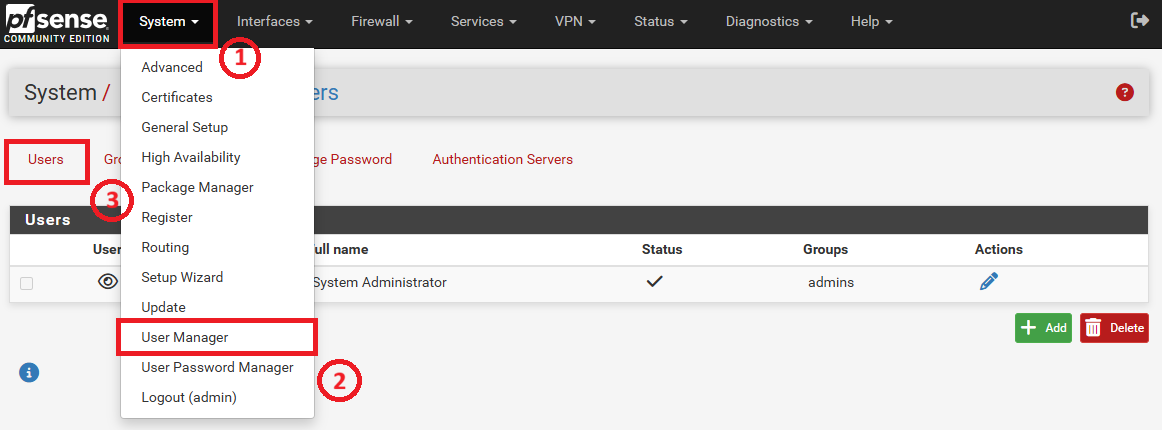
- Navigate to the top menu, click on System, and select User Manager from the dropdown. Then, click on Users tab.
Step 2: Add a New User
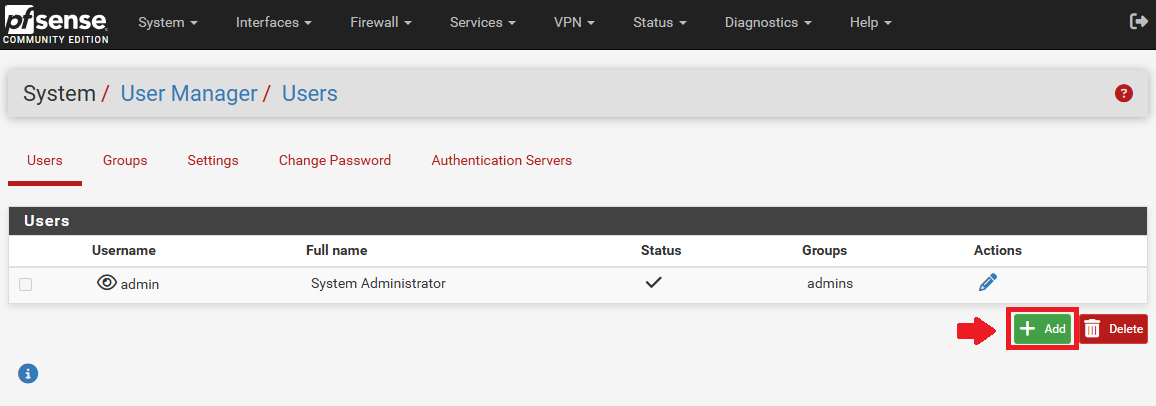
- On the Users page, click the + Add button located at the bottom right of the users list.
Step 3: Configure User Details and Privileges
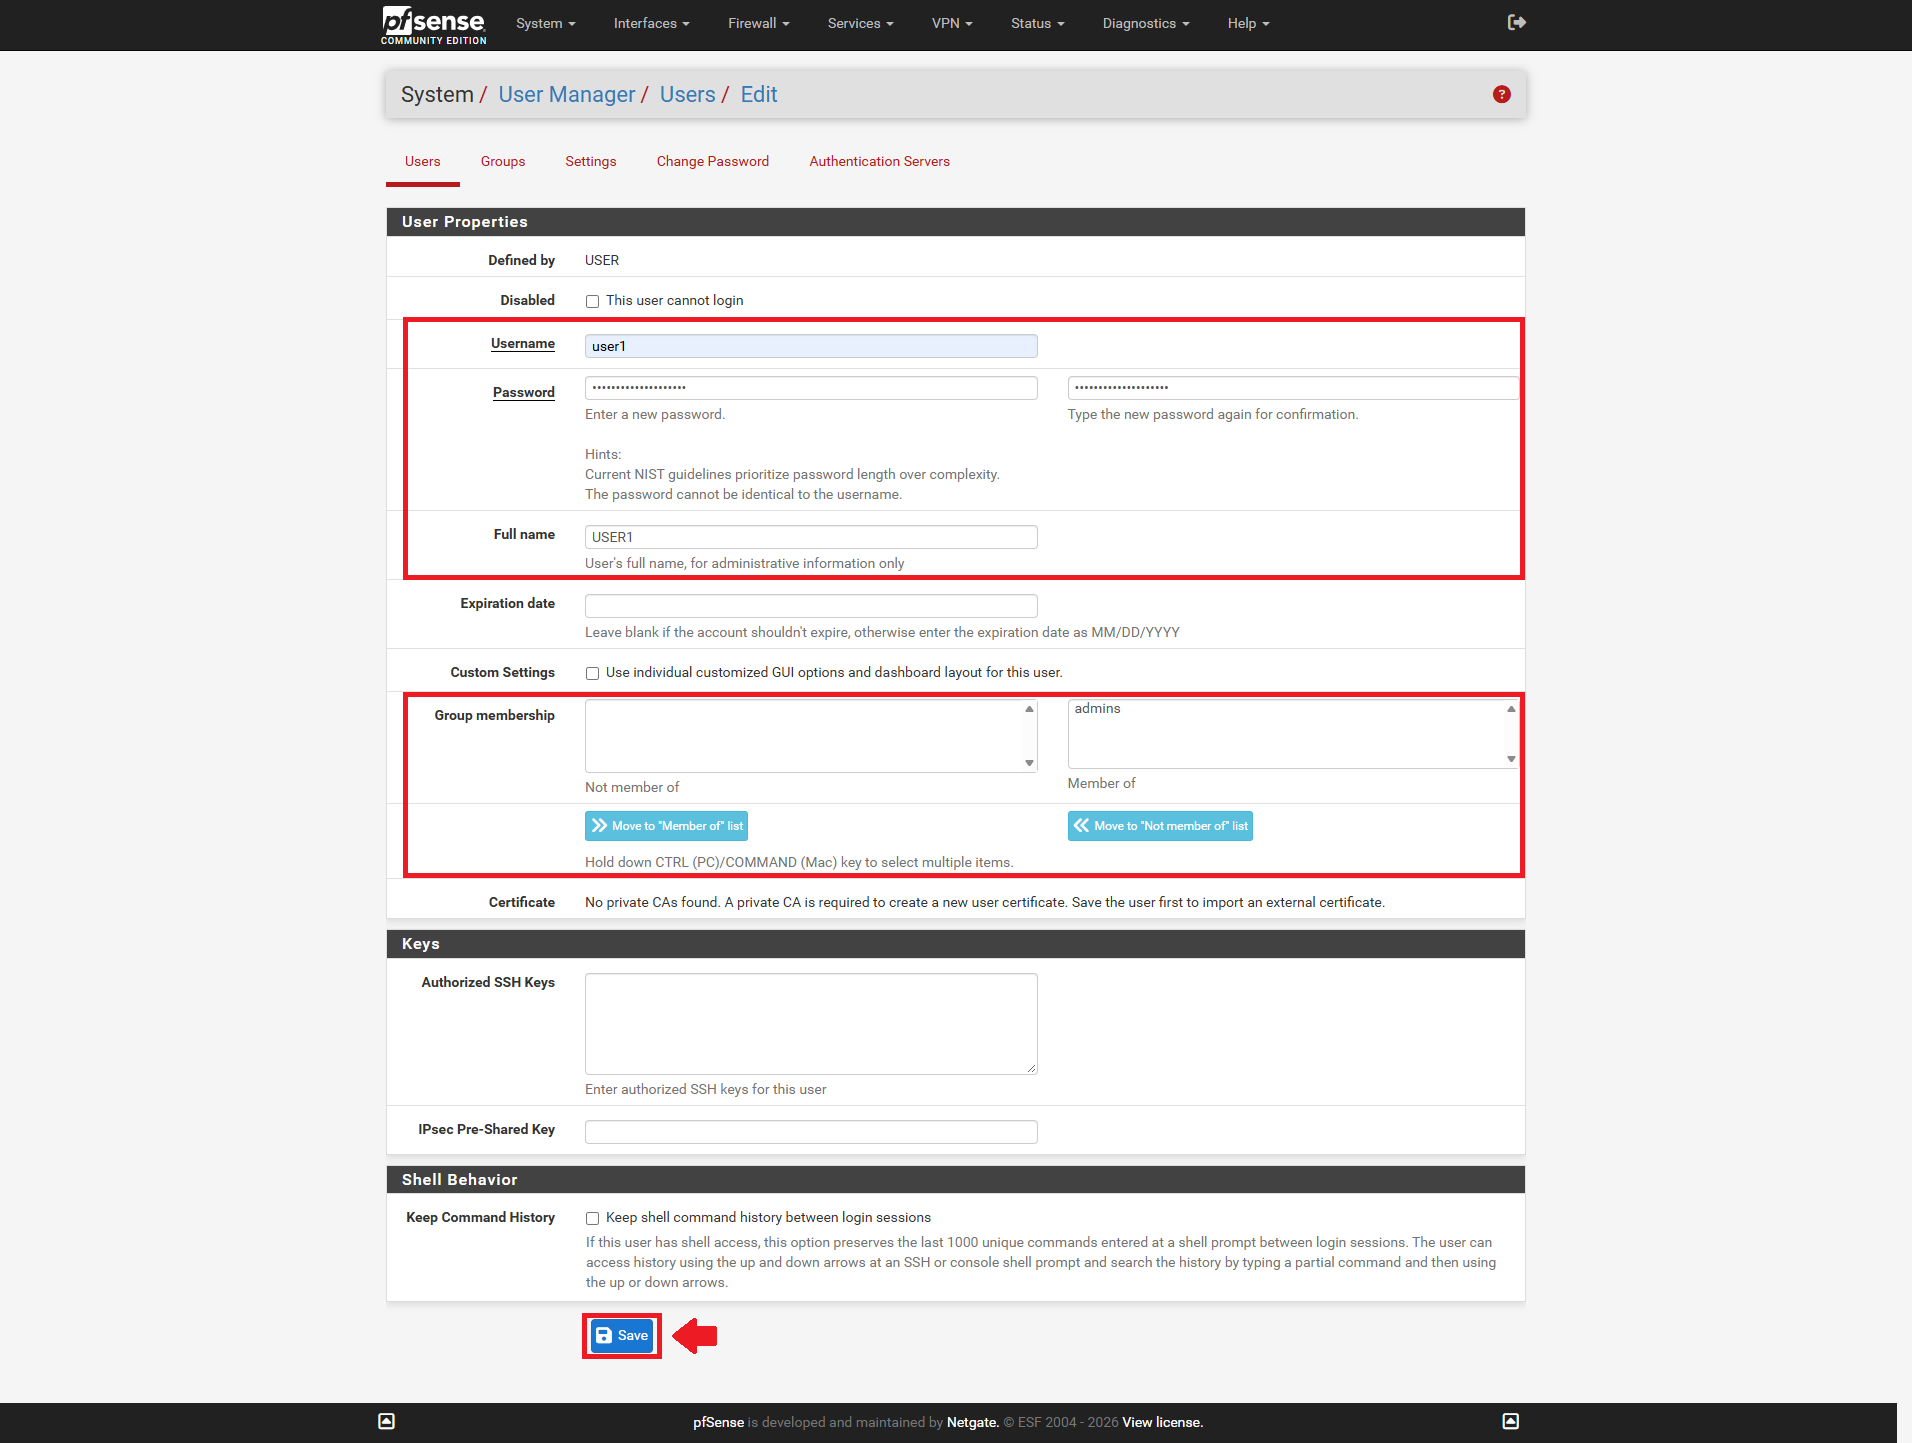
- Fill in the required fields including Username, Password, and Full name.
- Scroll down to the Group membership section, select the desired group from the Not Member Of list, click the >> Move to “Member of” list button to assign it.
- Finally, click Save.
Step 4: Verify New User Login
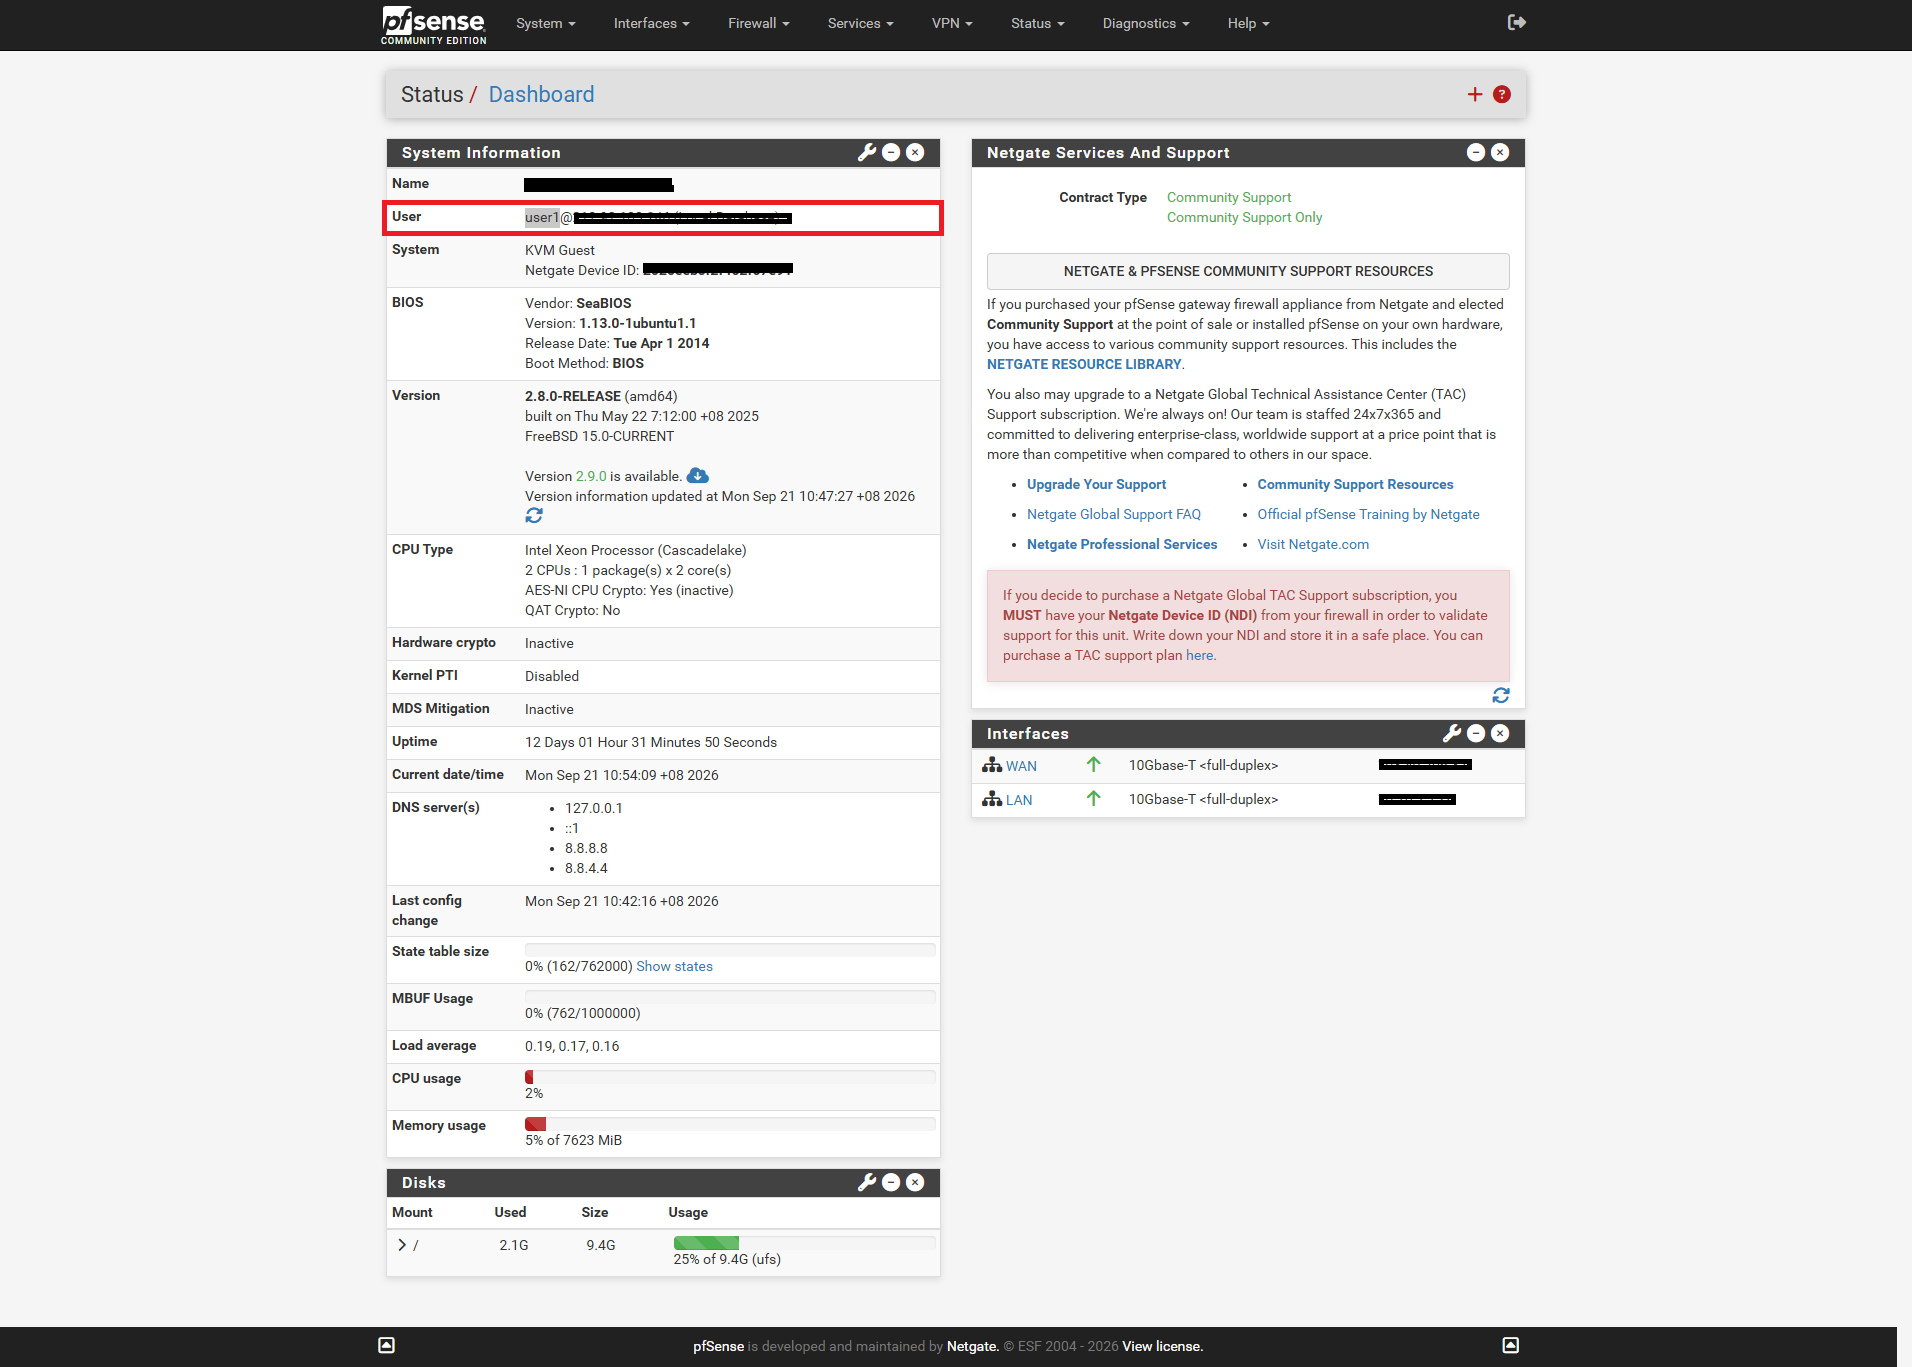
- Log out of your current admin session or open an incognito browser window.
- Access the pfSense login page and enter the new username and password to confirm successful creation and login.
Extra: Edit or Delete a User
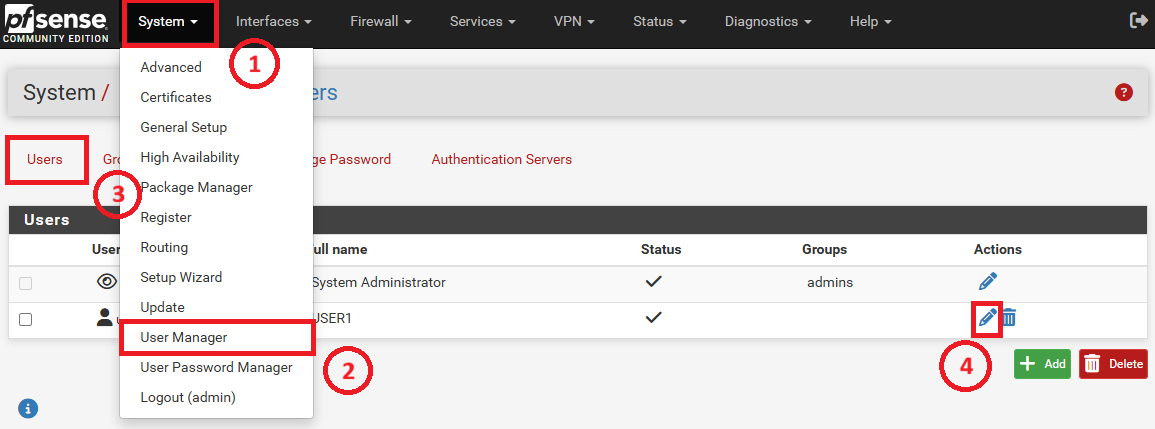
- Navigate to the top menu, click on System, and select User Manager from the dropdown. Then, click on Users tab.
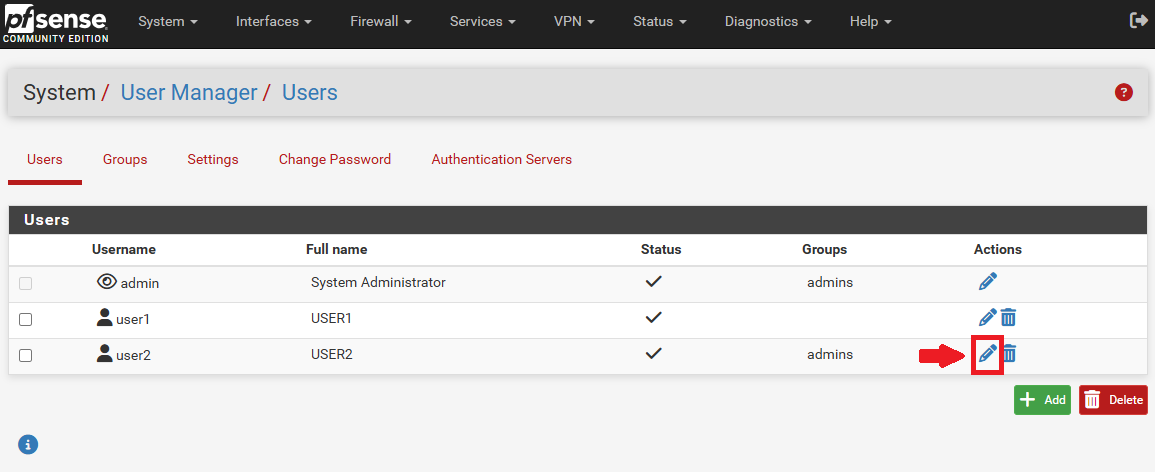
- To edit a user, click the pencil icon on the right side of the desired user.
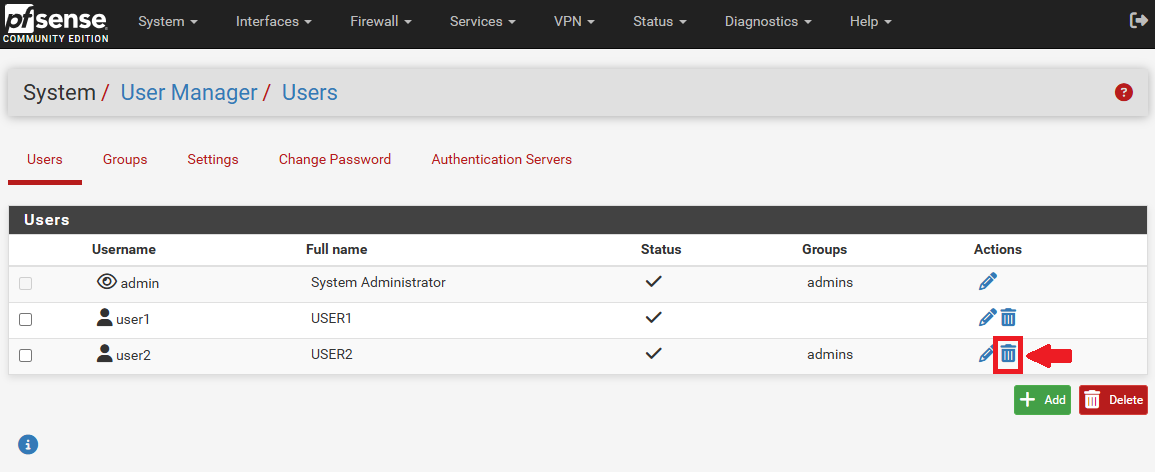
- To delete a user, click the dustbin icon on the right side of the desired user.
Assign Privilege to Specific User
Use this section to tailor and configure role-based access control for existing user accounts:
Step 1: Access User Management Settings
- Log in to your pfSense WebGUI using your administrator credentials.
- Navigate to the top menu, click on System, and select User Manager from the dropdown. Then, click on Users tab.
Step 2: Locate and Edit the User
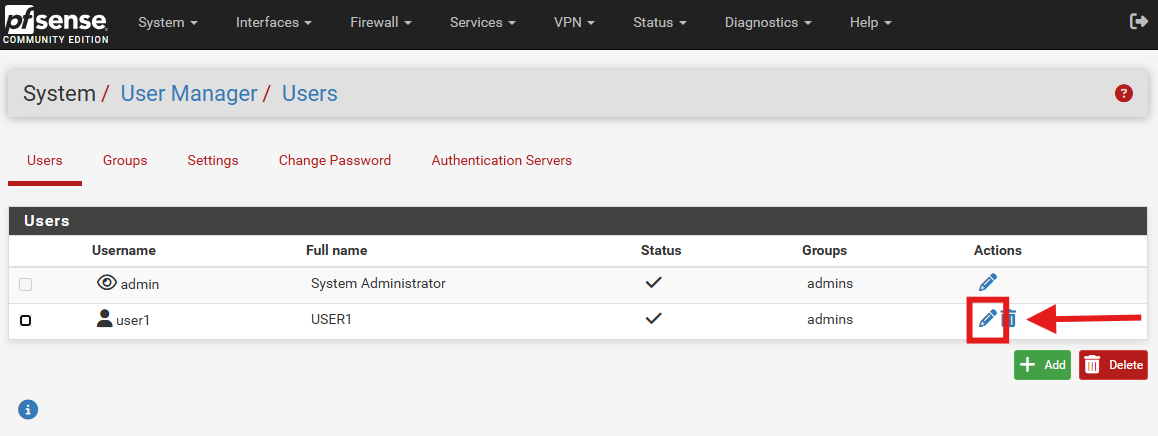
- Find the user whose privileges you want to modify in the list of users.
- Click the Edit icon (pencil symbol) next to their username.
Step 3: Assign Specific Privileges
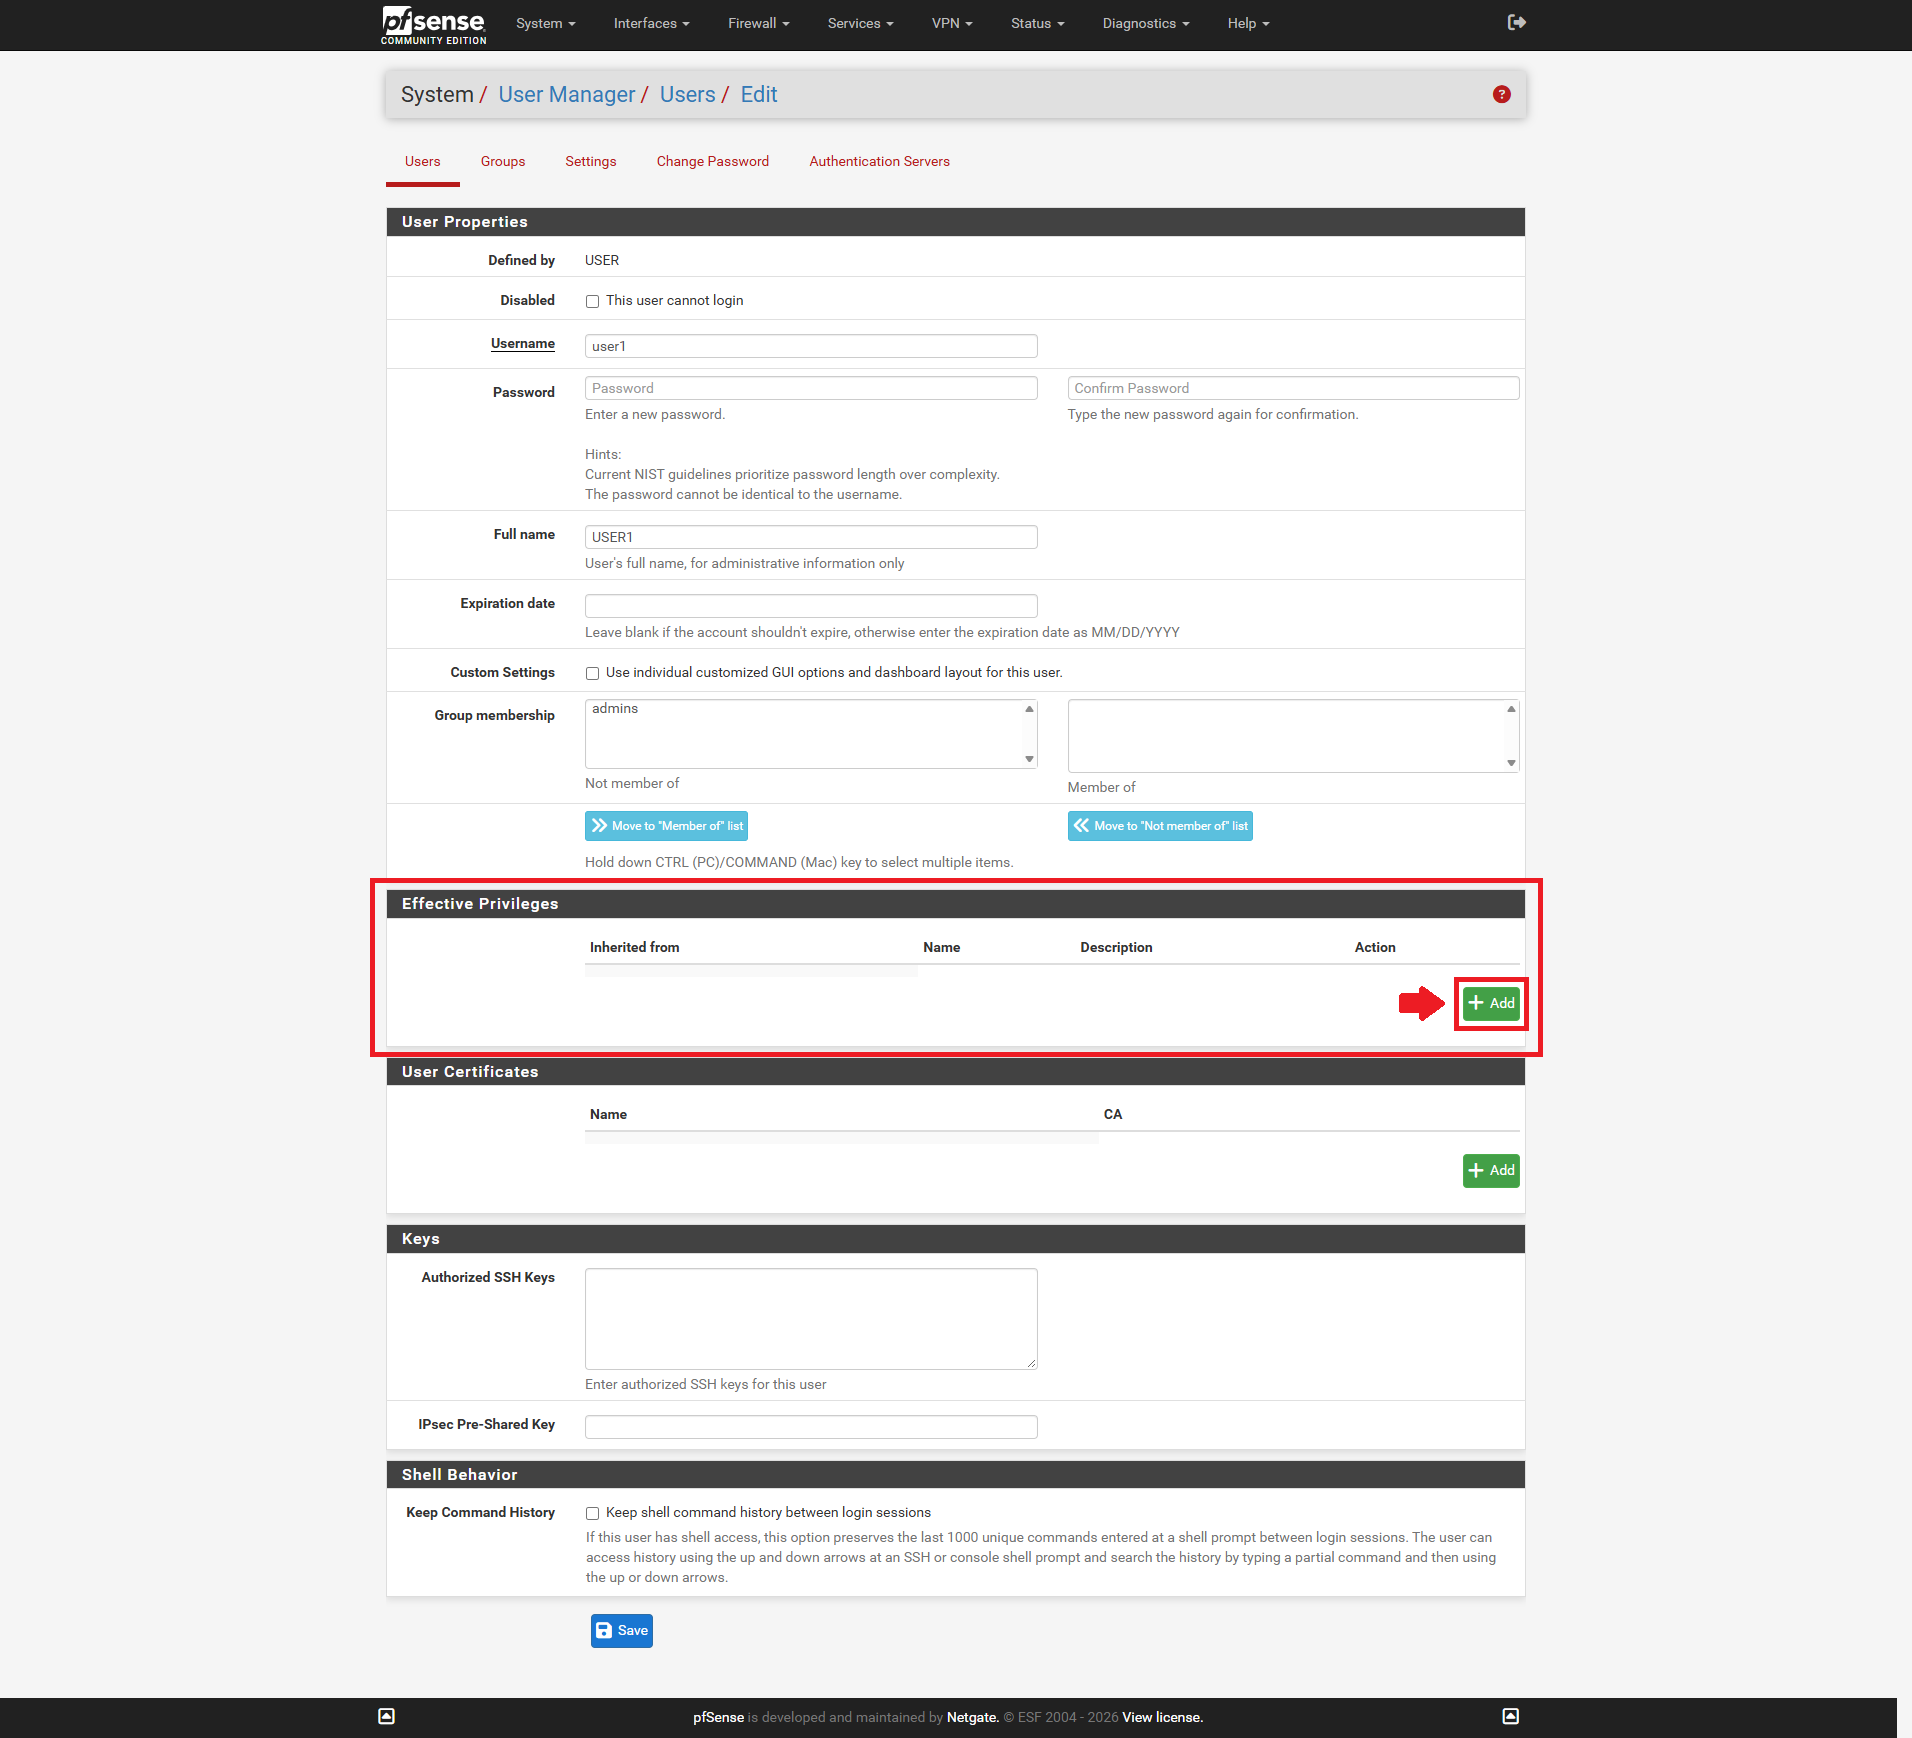
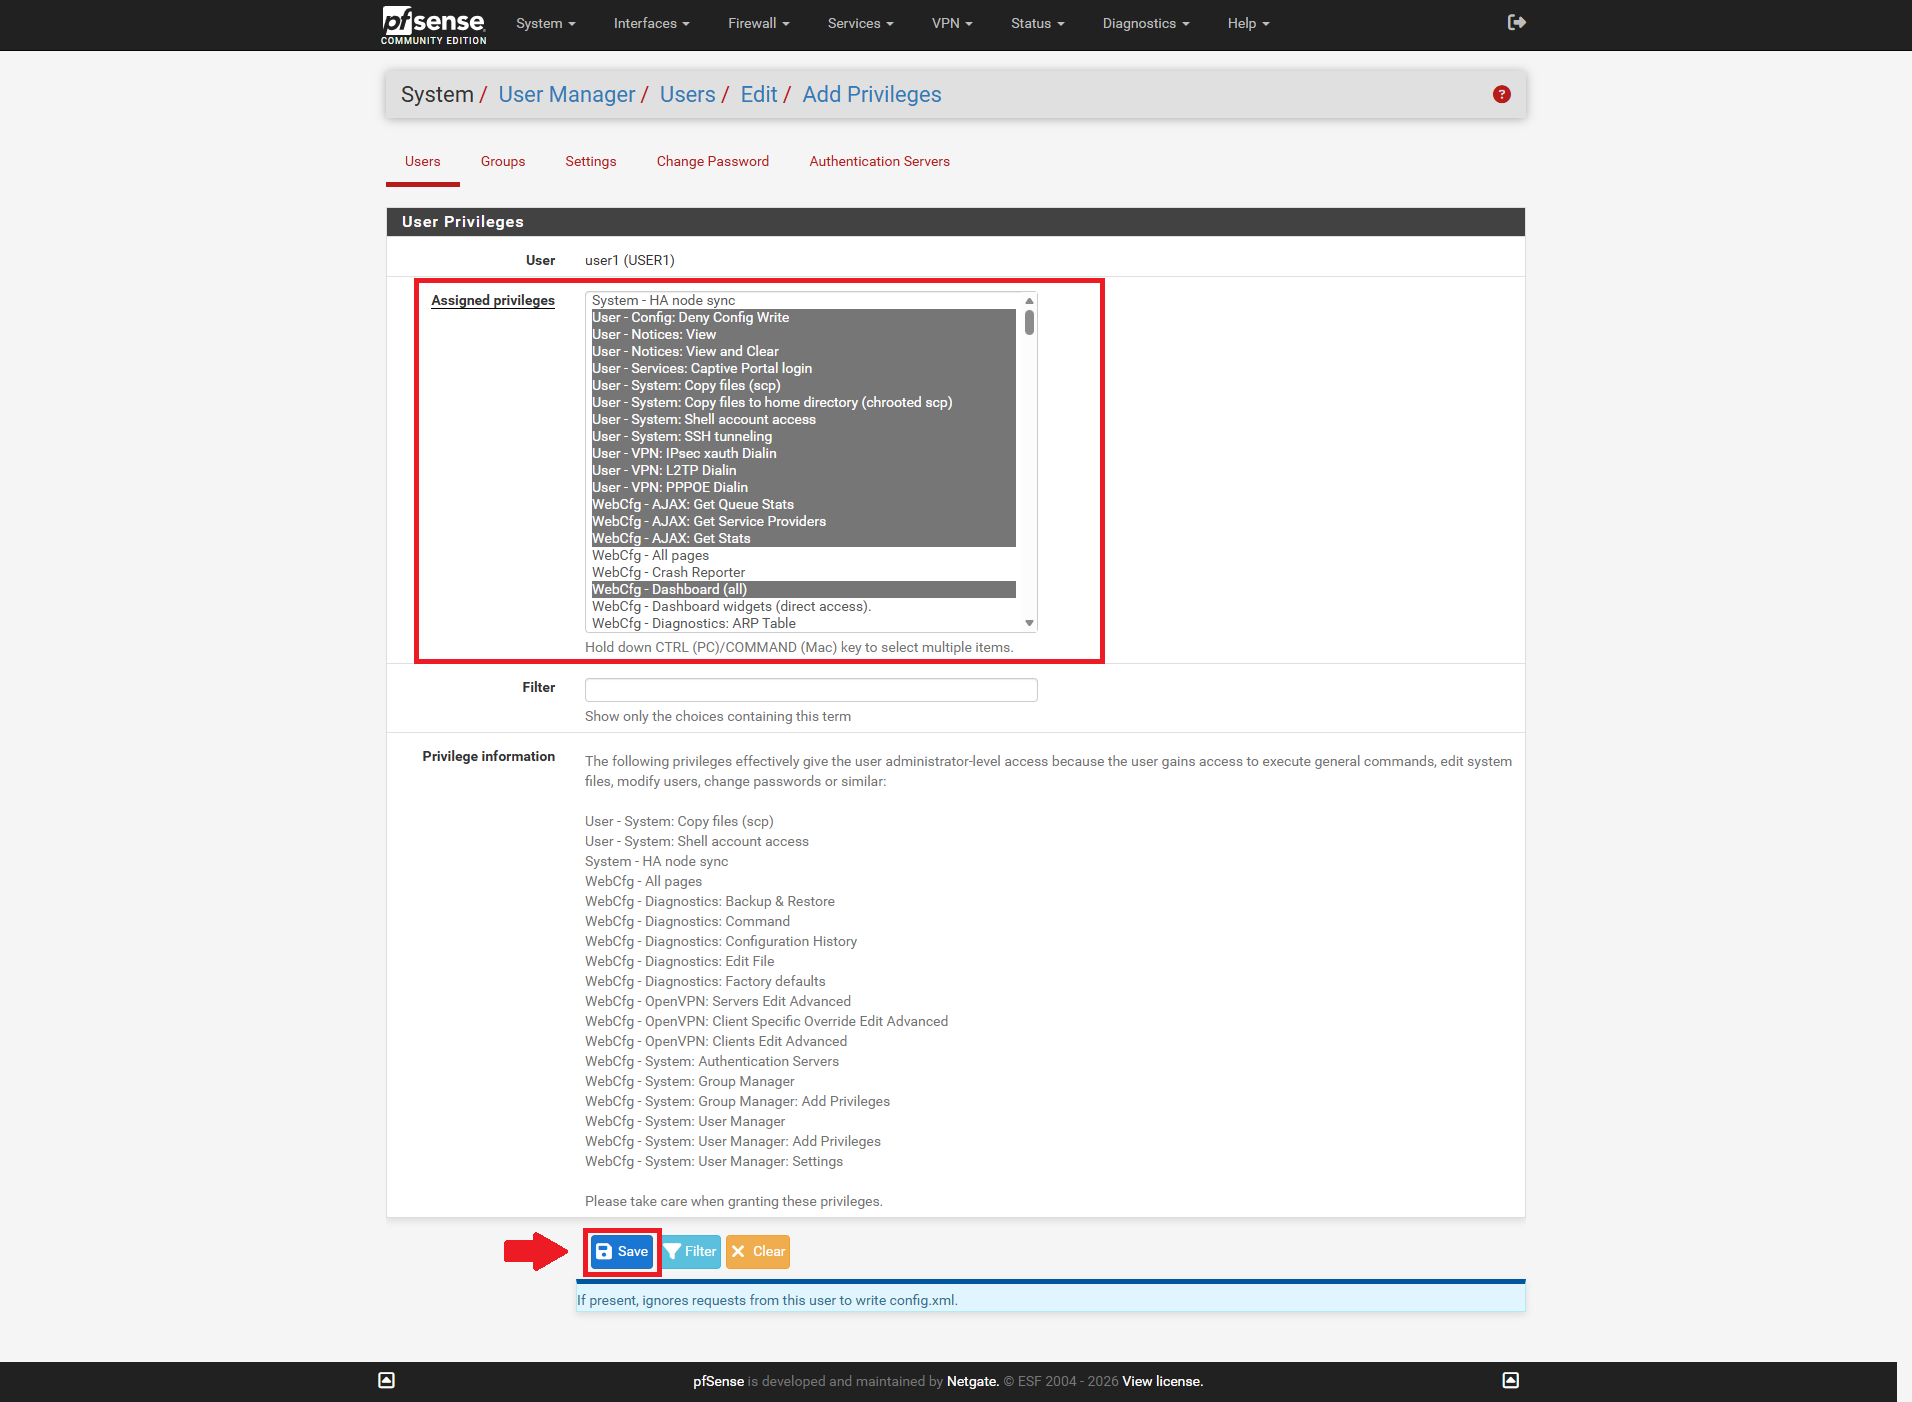
- Scroll down to the Effective Privileges section and click the + Add button.
- Select the appropriate privileges required for the user’s role (such as WebCfg – All privileges or specific diagnostic/monitoring permissions) from the Assigned privileges list.
- Finally, click Save on Add Privileges page to save the privilege.
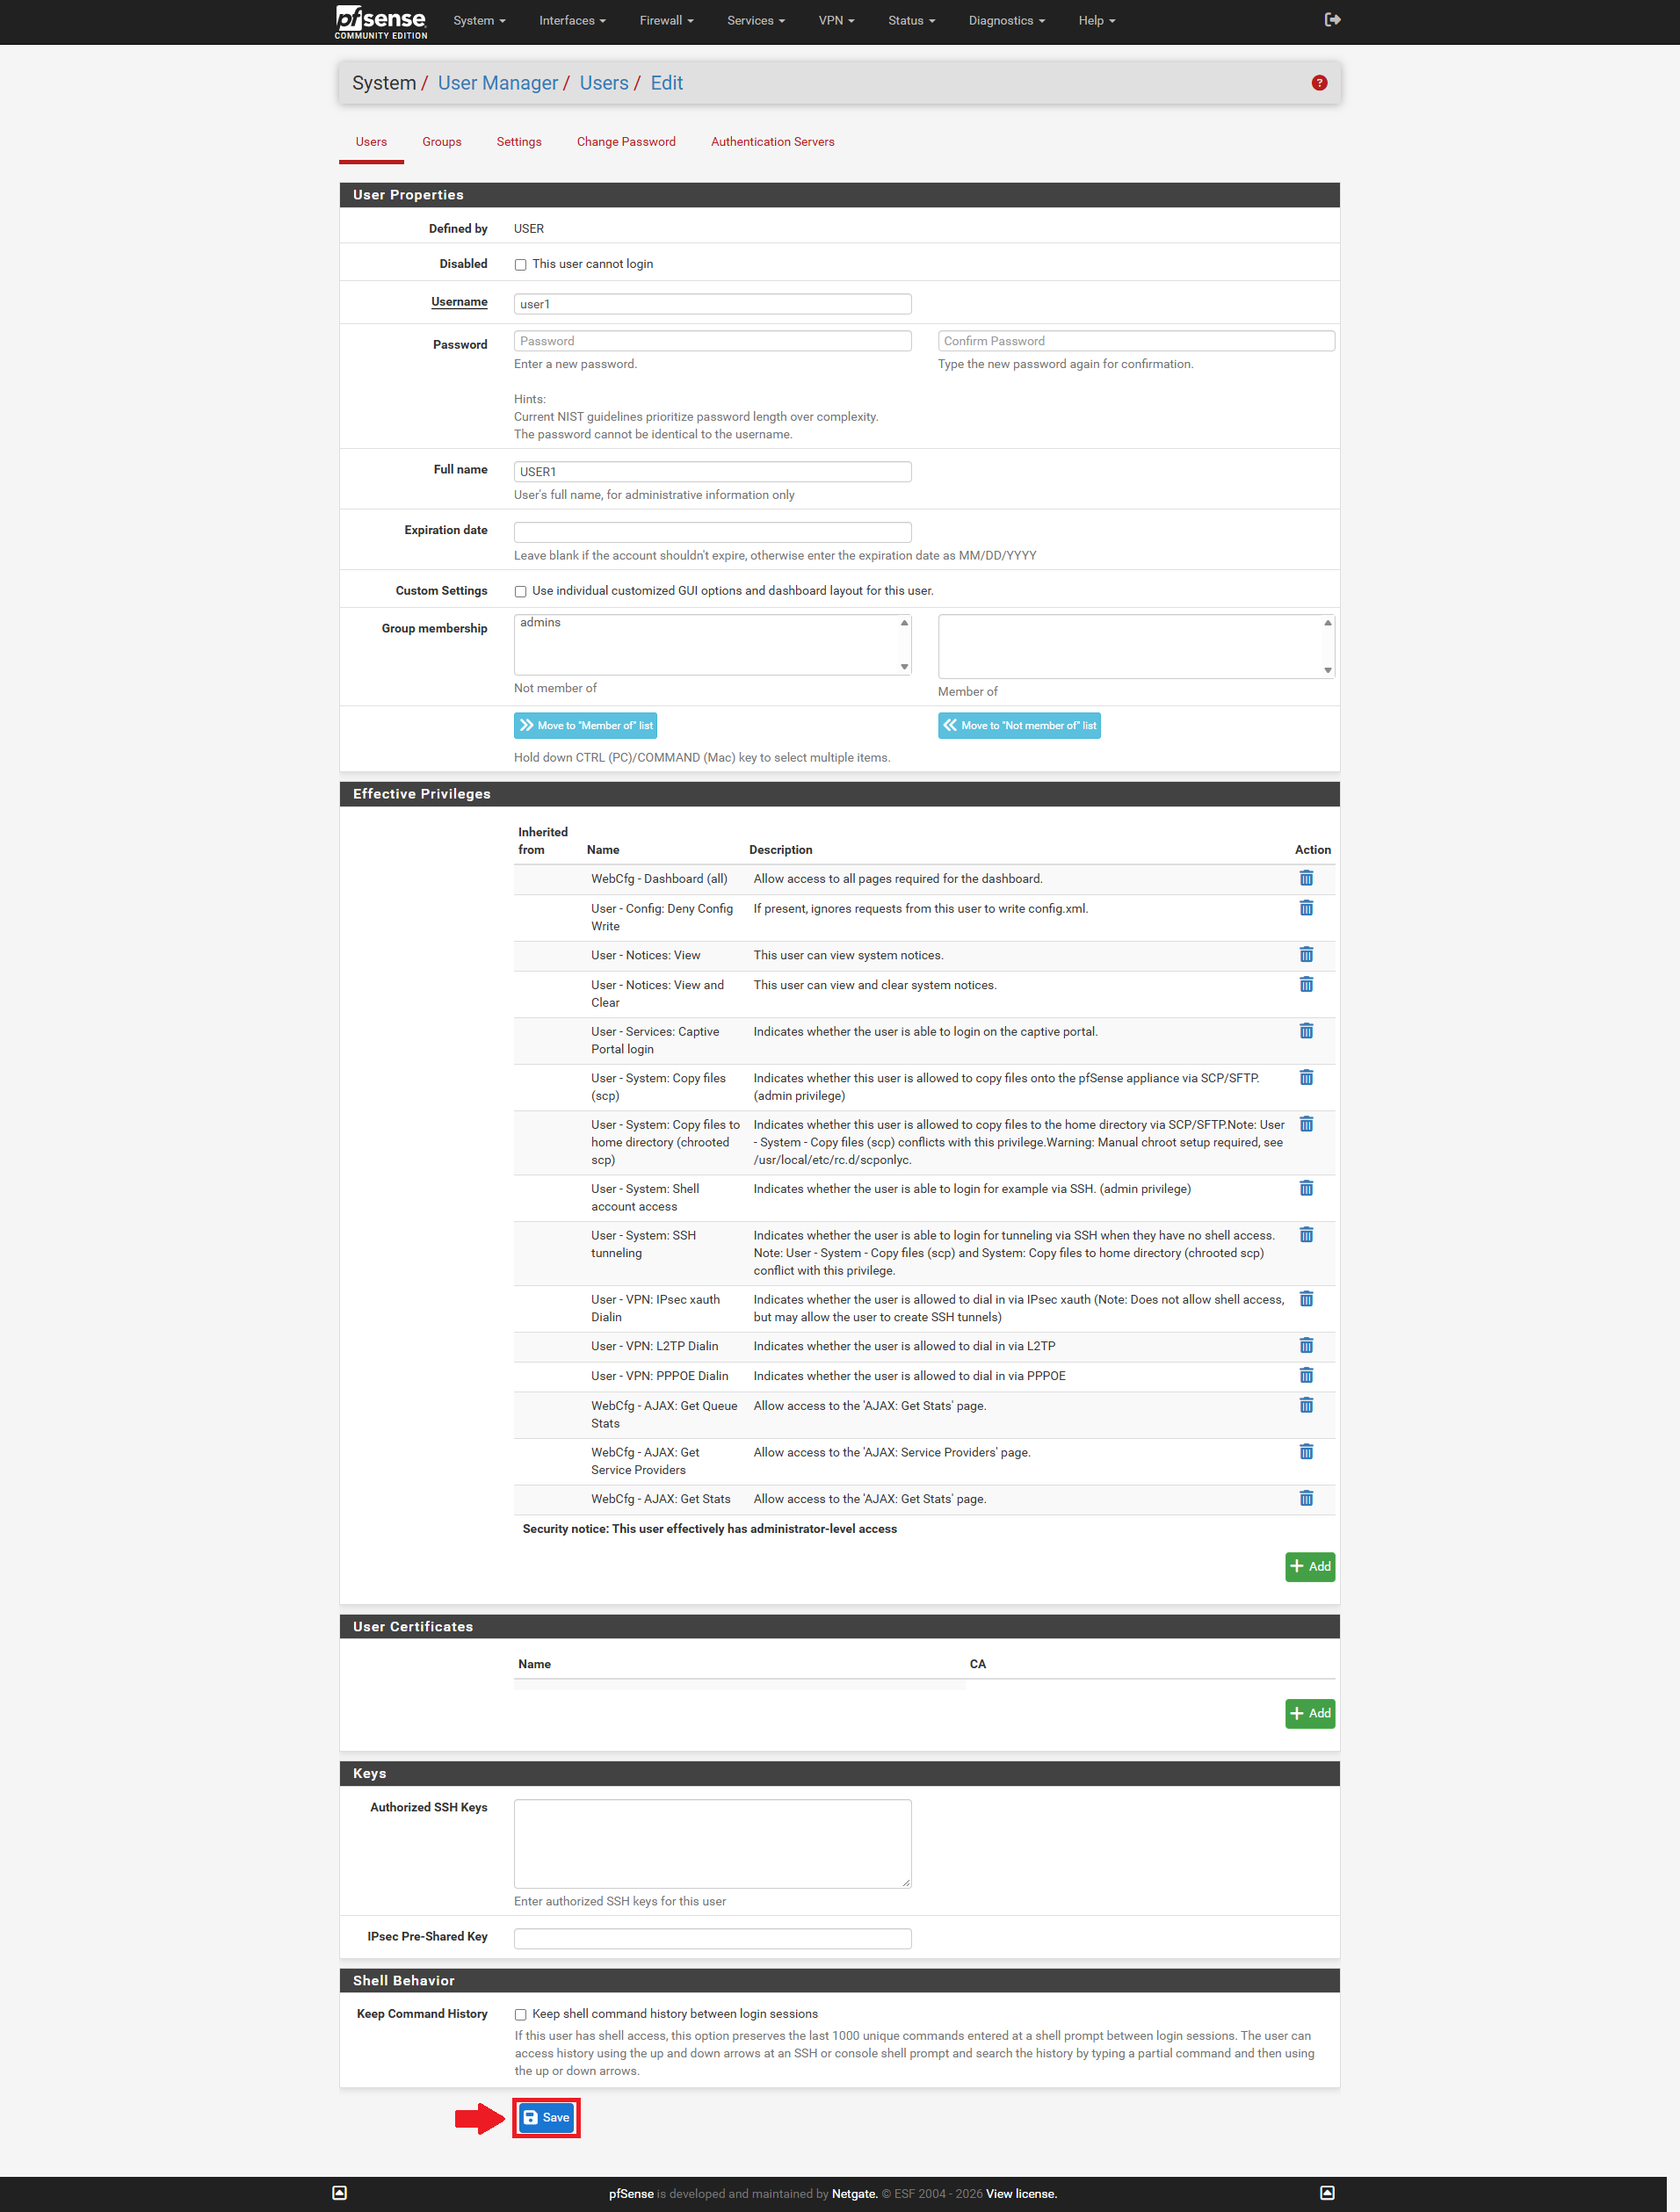
- And click Save on Users Edit page to save the user settings.
Step 4: Verify Privilege Access
- Log in using the updated user’s credentials or have the user test their access.
- Confirm that they can view or manage only the specific areas and menus corresponding to the privileges you assigned.
Change User Password
Refer to these procedures whether an administrator needs to update a user credential or a standard user is changing their own password:
You can update passwords in two different ways depending on who is making the change:
- Go to System > User Manager > Users and click the Edit icon next to the target user.
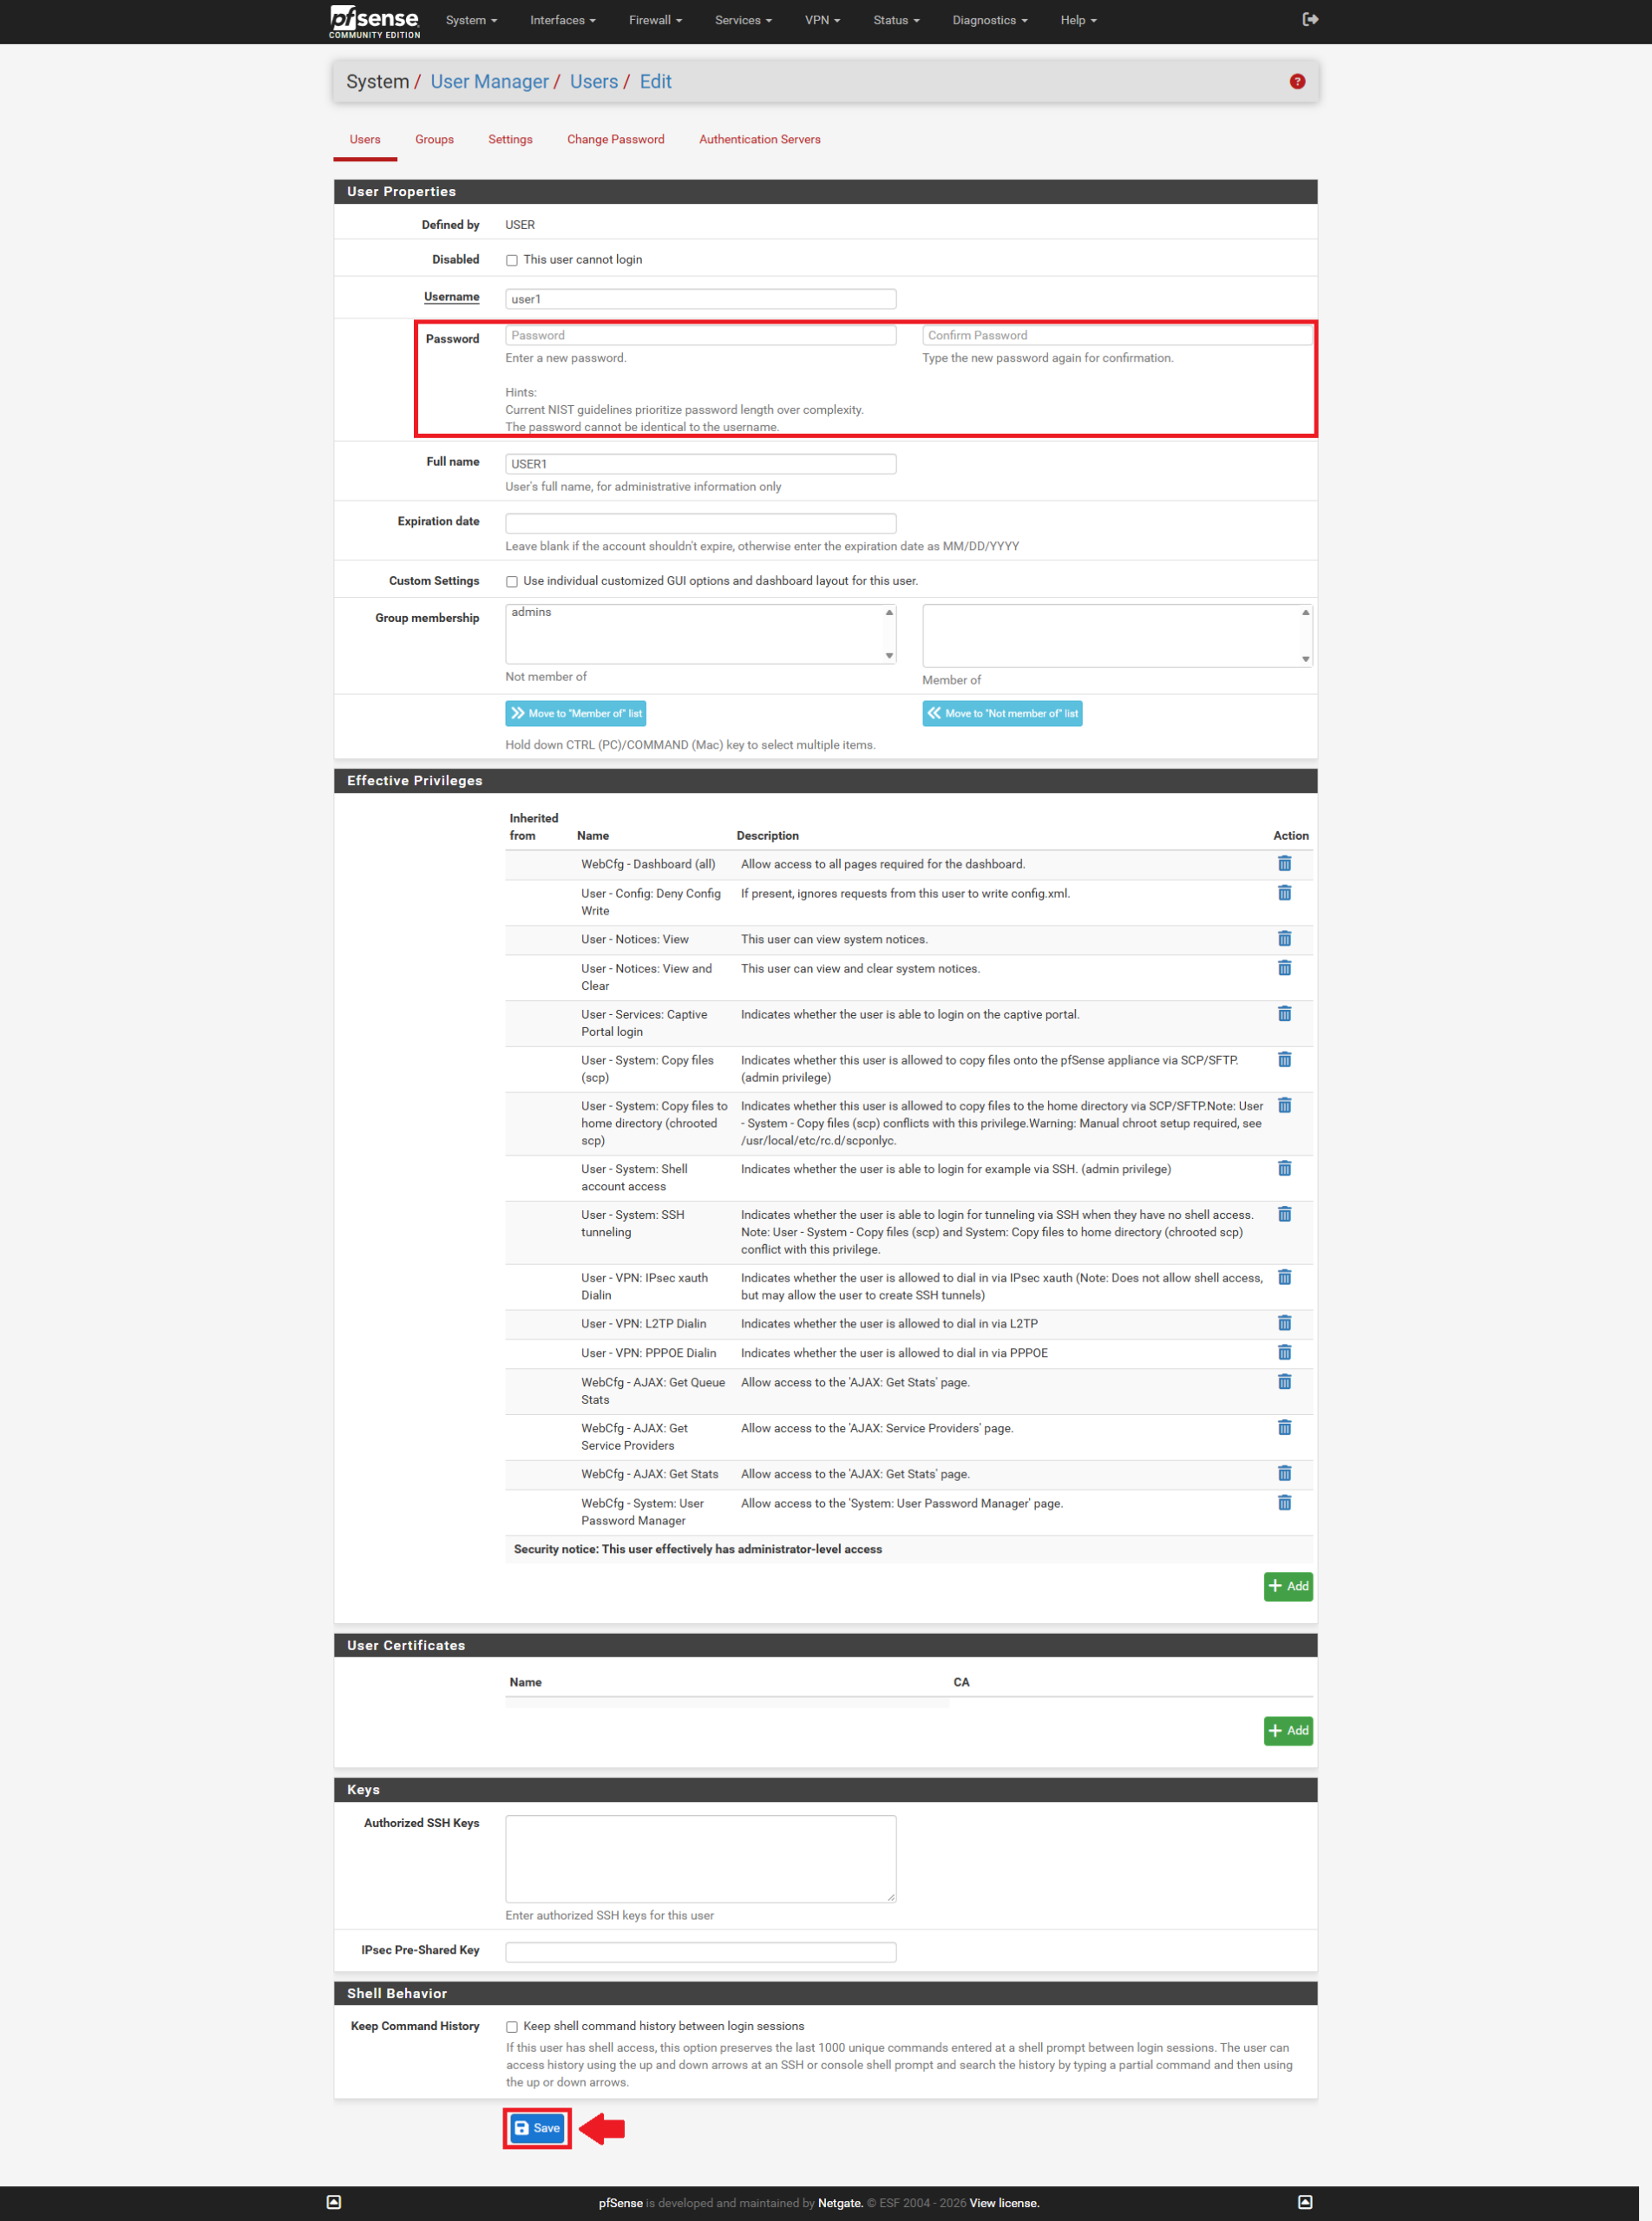
- Enter the new password in the Password and Confirmation fields.
- Scroll to the bottom and click Save.
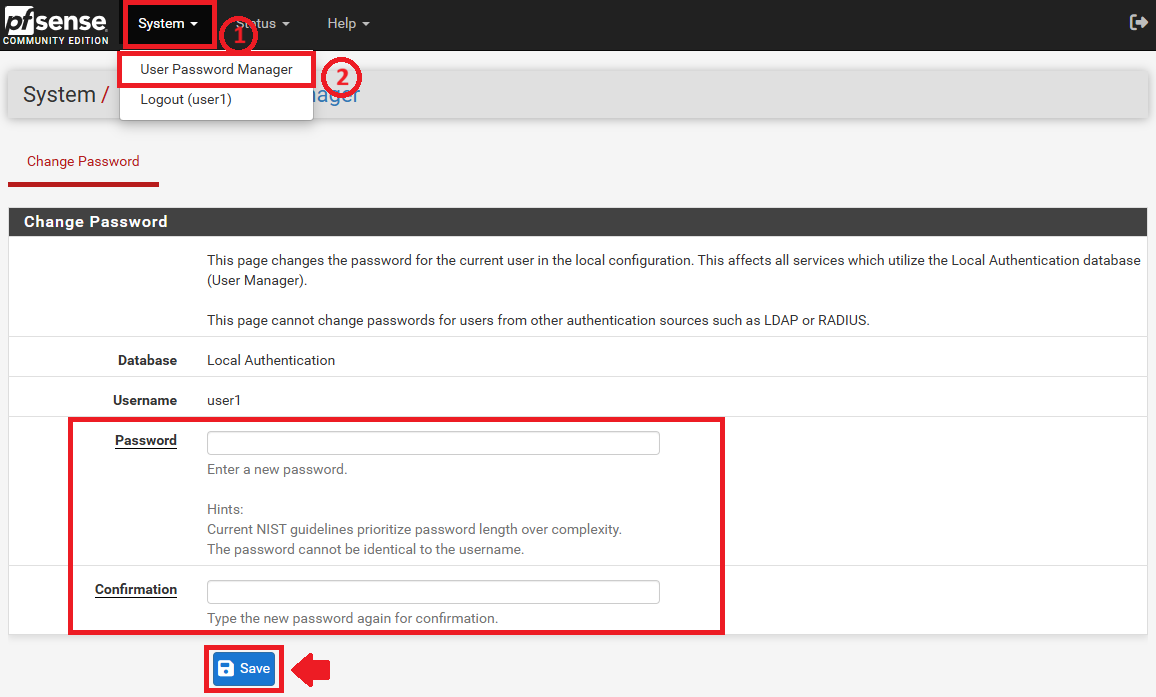
- Log into the pfSense web configurator with your own credentials.
- Navigate to System > User Password Manager (or click their username/profile icon depending on the pfSense version).
- Enter the current password, followed by the new Password and Confirmation.
- Click Save to apply the changes immediately without needing administrator rights.
Conclusion
By following these steps, you can securely manage user accounts, delegate appropriate role-based privileges, and empower users to maintain their own credentials securely.
For additional assistance or if you encounter any issues, please contact our support team at support@ipserverone.com.