
Search Our Database
How To Configure Static Routes in FortiGate
Introduction
Configuring static routes in FortiGate enables network administrators to manually direct network traffic to specific destinations through designated gateways. This setup is ideal for enterprise environments, remote branches, or multi-WAN networks requiring explicit, predictable routing paths for target subnets or internet-bound traffic. Network administrators can perform this configuration at any time using either the FortiGate web console GUI or Command Line Interface (CLI) to ensure reliable network interconnectivity, proper packet delivery, and optimal traffic management across the network infrastructure.
Prerequisite
- Access to FortiGate GUI with Admin privilege
- Basic knowledge of IP networking, subnet masks, and gateway IP addresses
- Access privilege for SSH.
Step-by-step guide
Method 1: Manage Static Routes using GUI
The guide covers how to manage static routes using the graphical user interface (GUI)
Log in to FortiGate GUI
- Open a web browser and enter your FortiGate IP address.
- Enter your admin credentials and click Login.
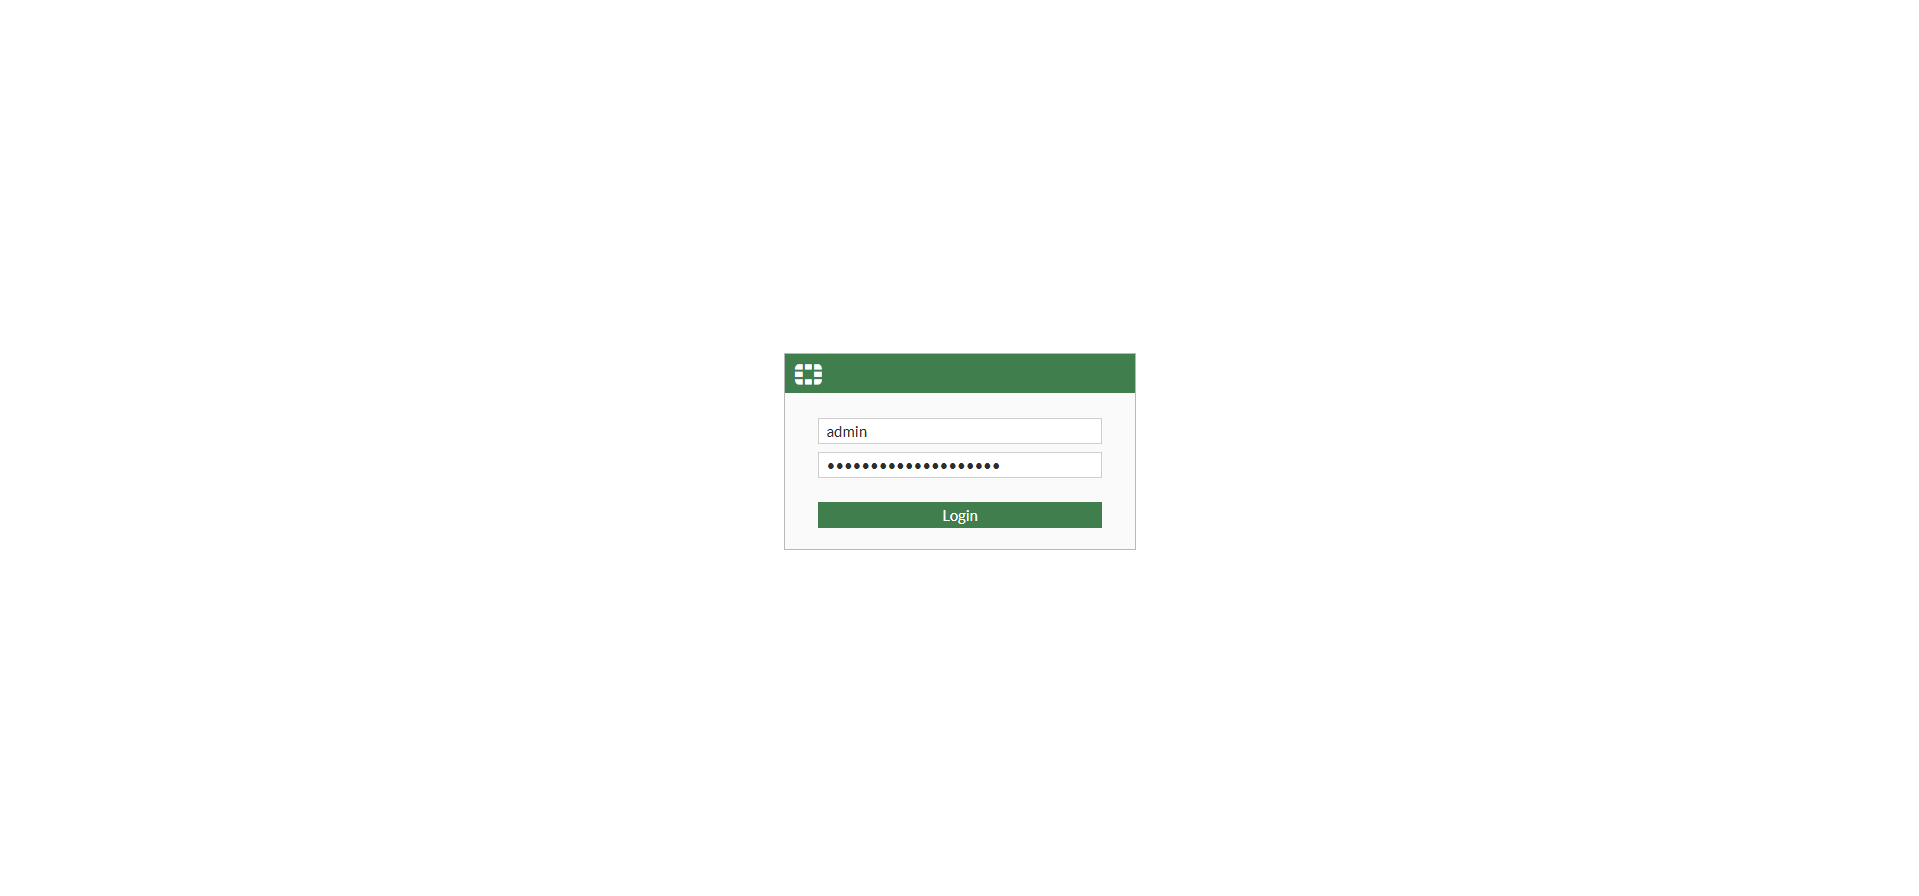
This guide covers how to configure static routes using the graphical user interface (GUI)
Step 1: Navigate to Static Routes
- On the left sidebar menu, click Network.
- Select Static Routes.
- Click Create New at the top menu bar to add a new route entry.
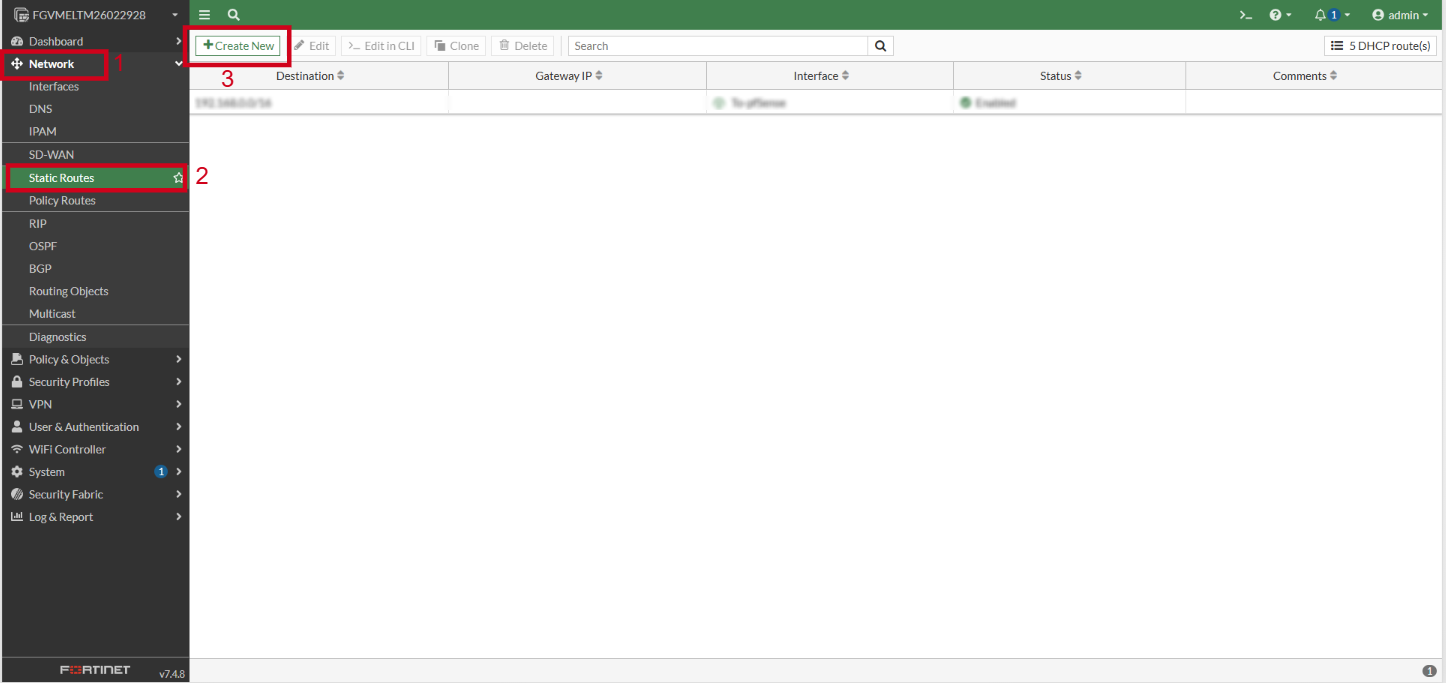
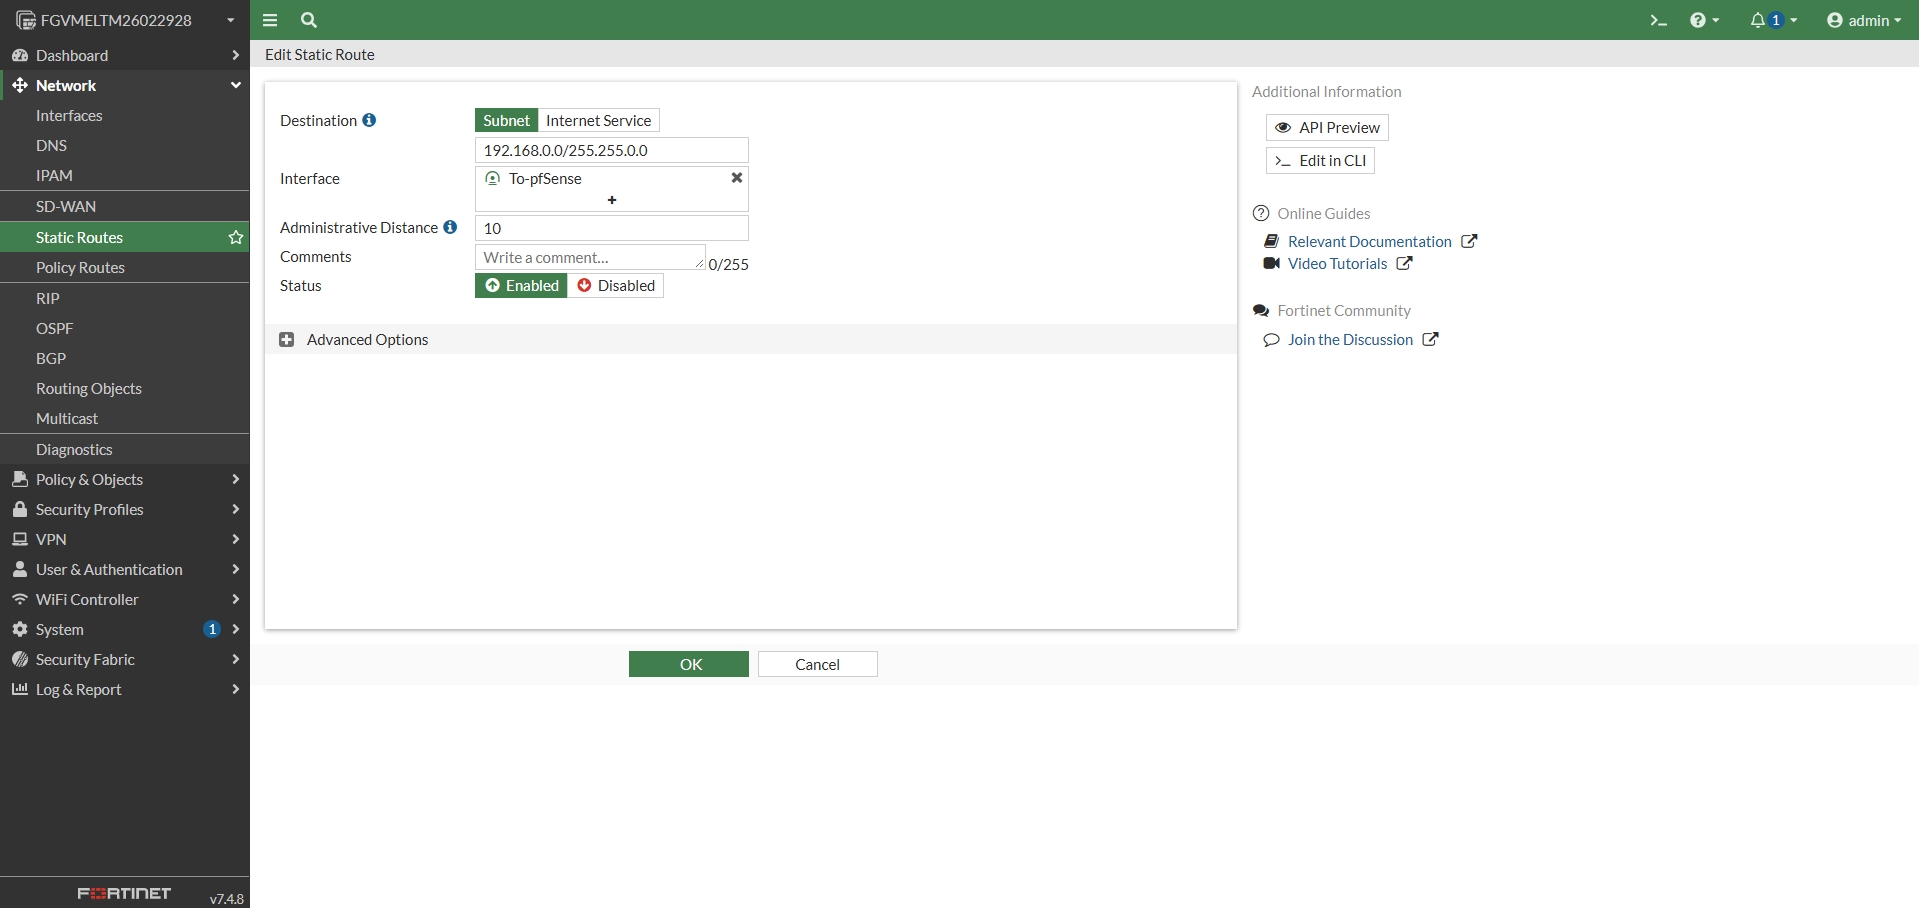
Step 2: Define destination subnet and gateway
- In the Destination field, select Subnet and enter the destination IP address and subnet mask.
- In the Gateway Address field, enter the IP address of the next-hop router.
- Select the appropriate Interface from the dropdown list.
- Keep the Administrative Distance at its default value or adjust as needed.
- Click OK to save the static route.
Step 3: Verify static route configuration
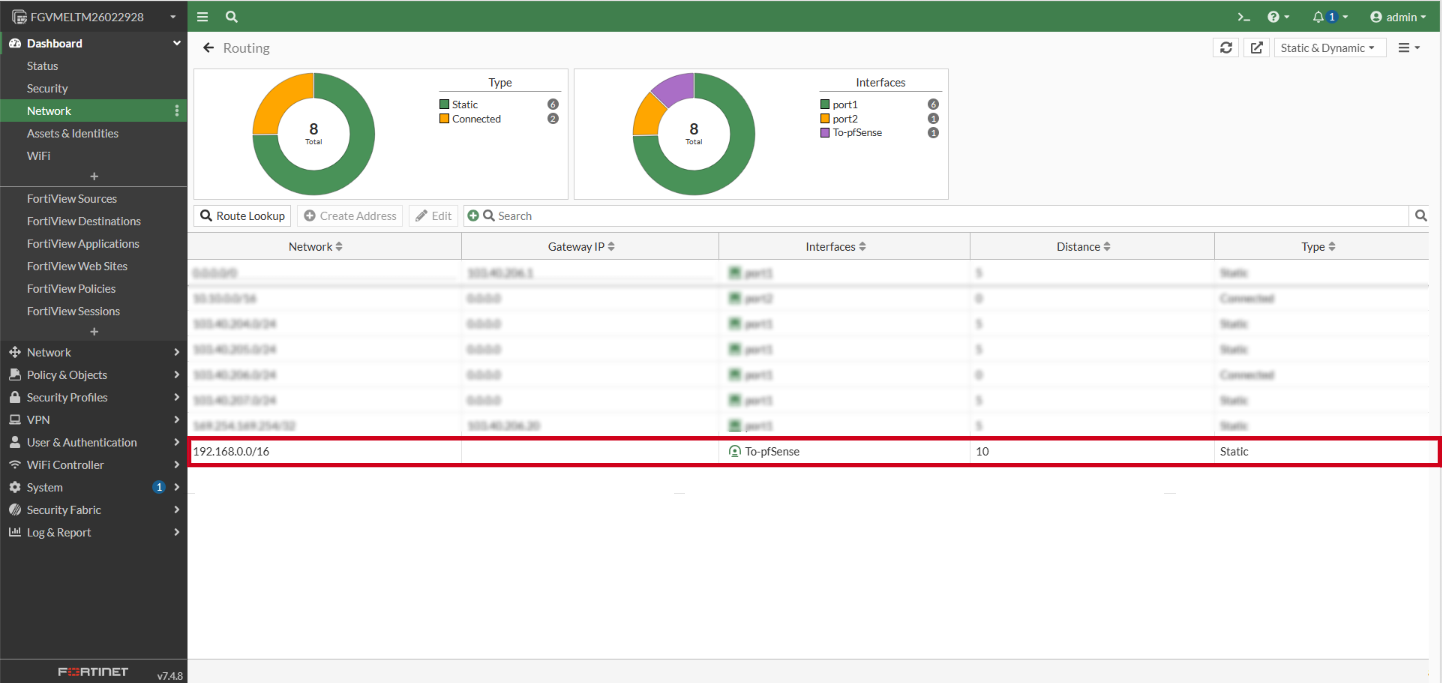
- Go to Dashboard and click Network to view the widget of Static & Dynamic Routing.
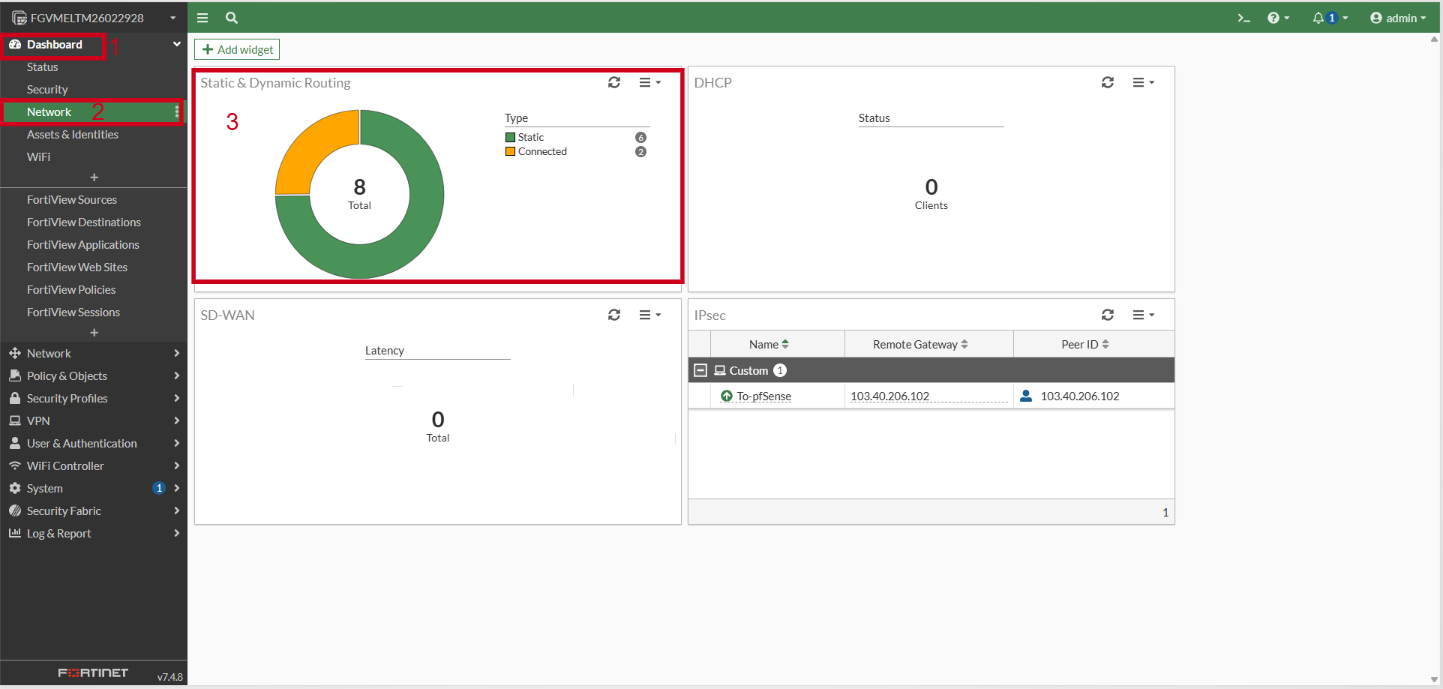
- Confirm that the newly created static route appears in the routing table.
This guide covers how to edit static routes using the graphical user interface (GUI).
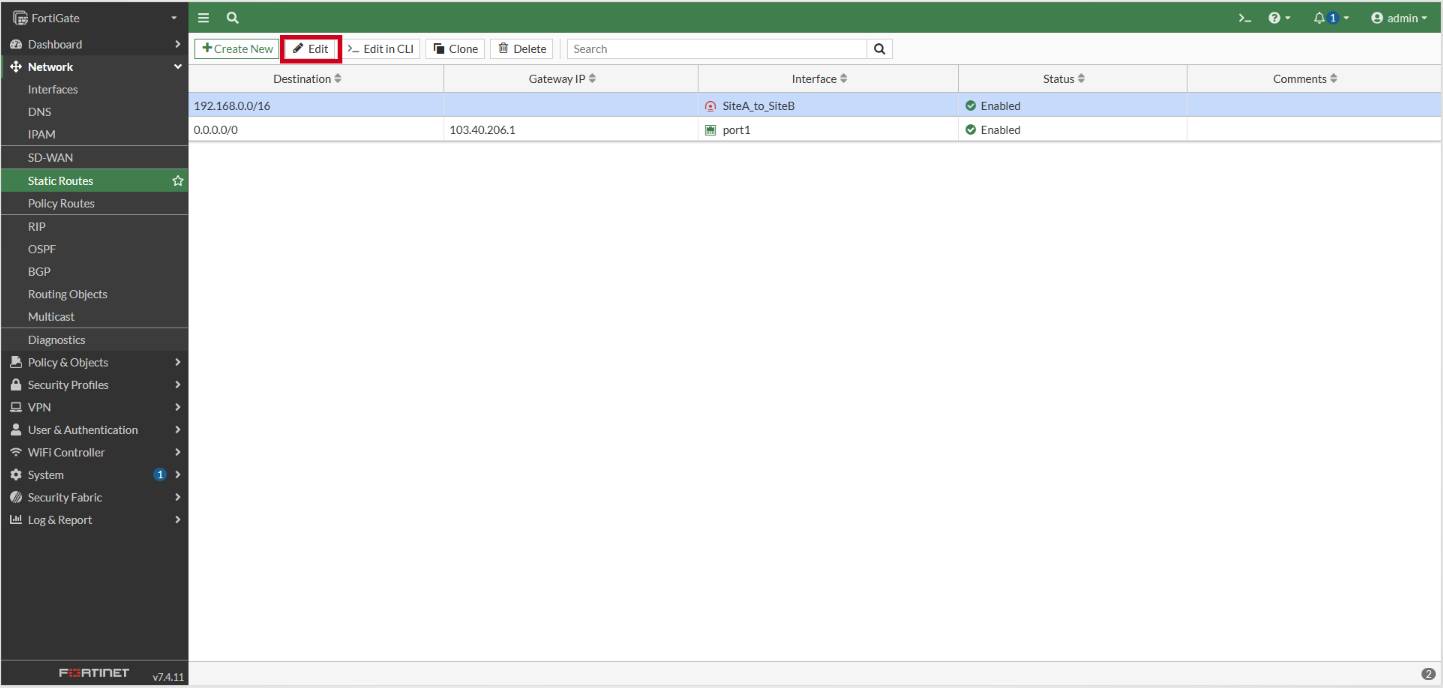
- Select the static routes to be edited.
- Click Edit to enter to the editing page.
This guide covers how to remove static routes using the graphical user interface (GUI).
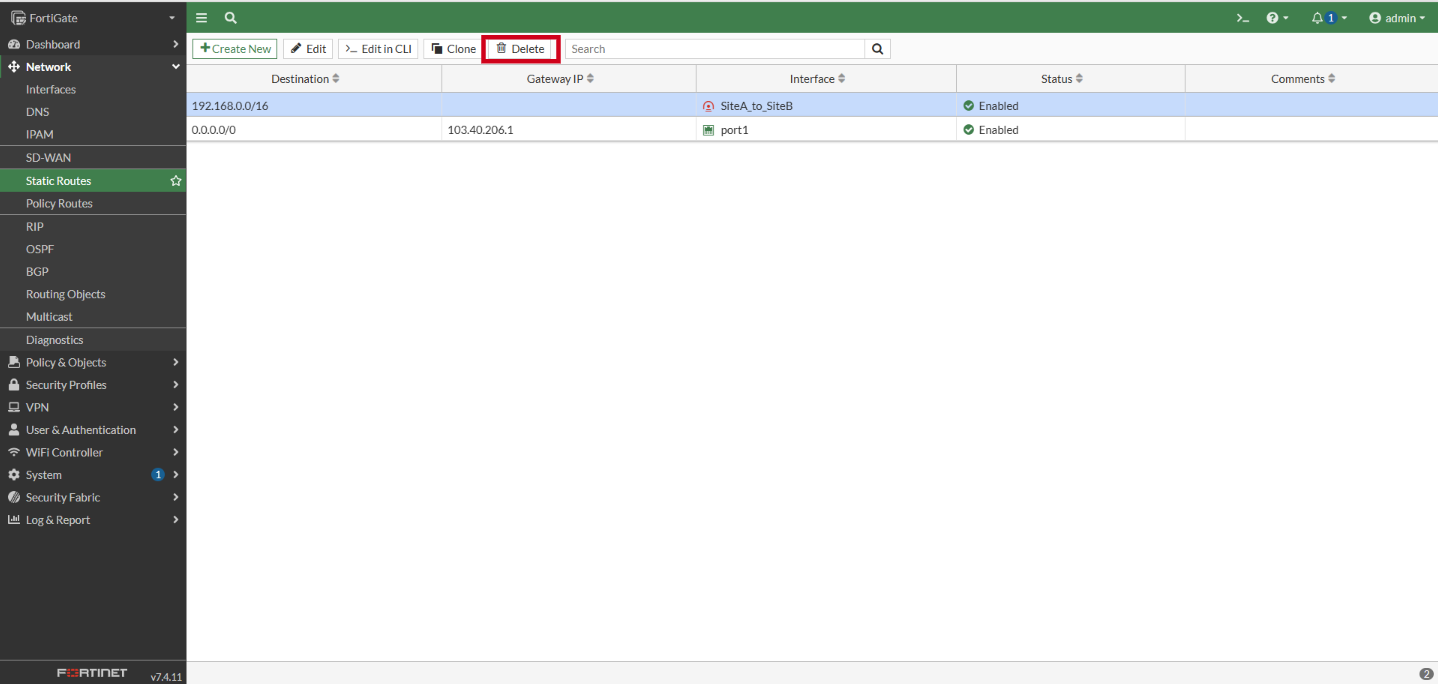
- Select the static routes to be deleted.
- Click on Delete.
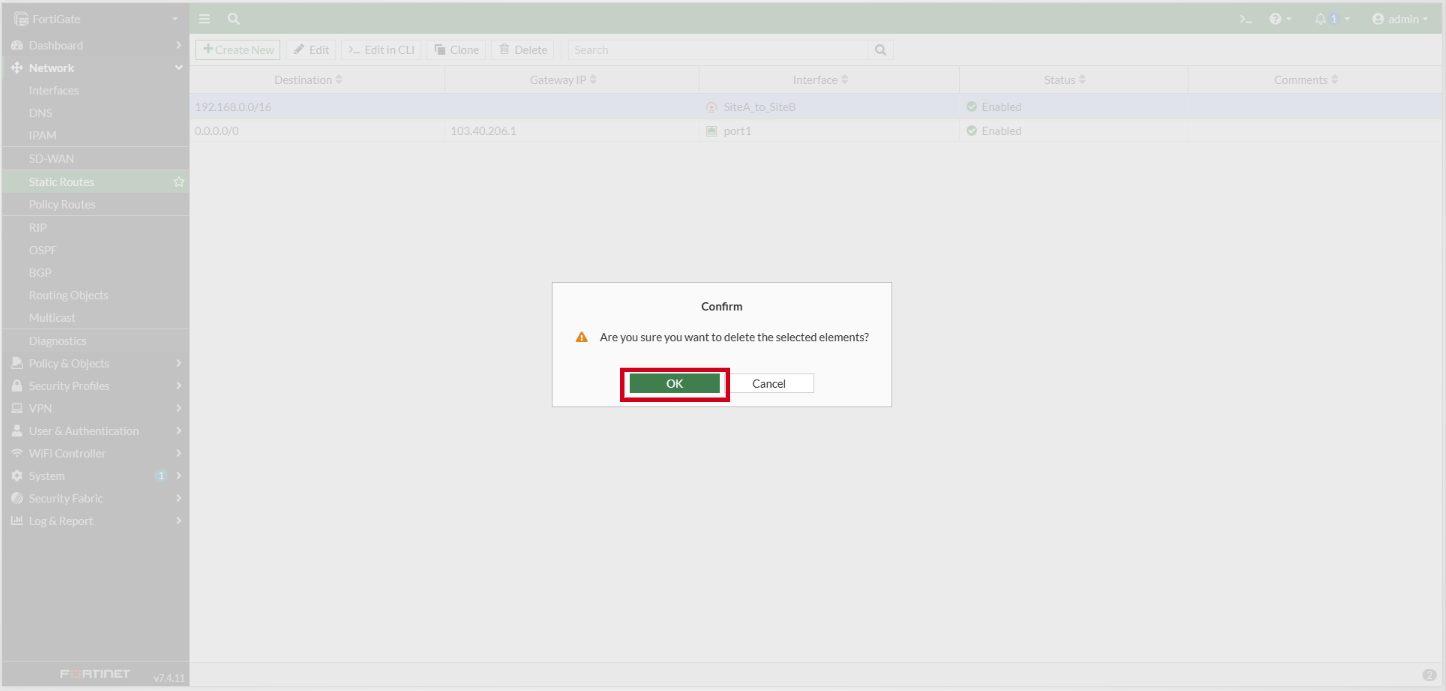
- Click OK to perform the delete of the static route.
Method 2: Manage Static Routes using CLI
The guide covers how to manage static routes using the command line interface (CLI).
Access FortiGate CLI terminal
- Open your preferred SSH client (such as PuTTY). Kindly refer to this knowledge base: [How to login to your Linux Server via SSH]
- Log in with your administrator credentials. Launch the CLI console from the FortiGate web interface.
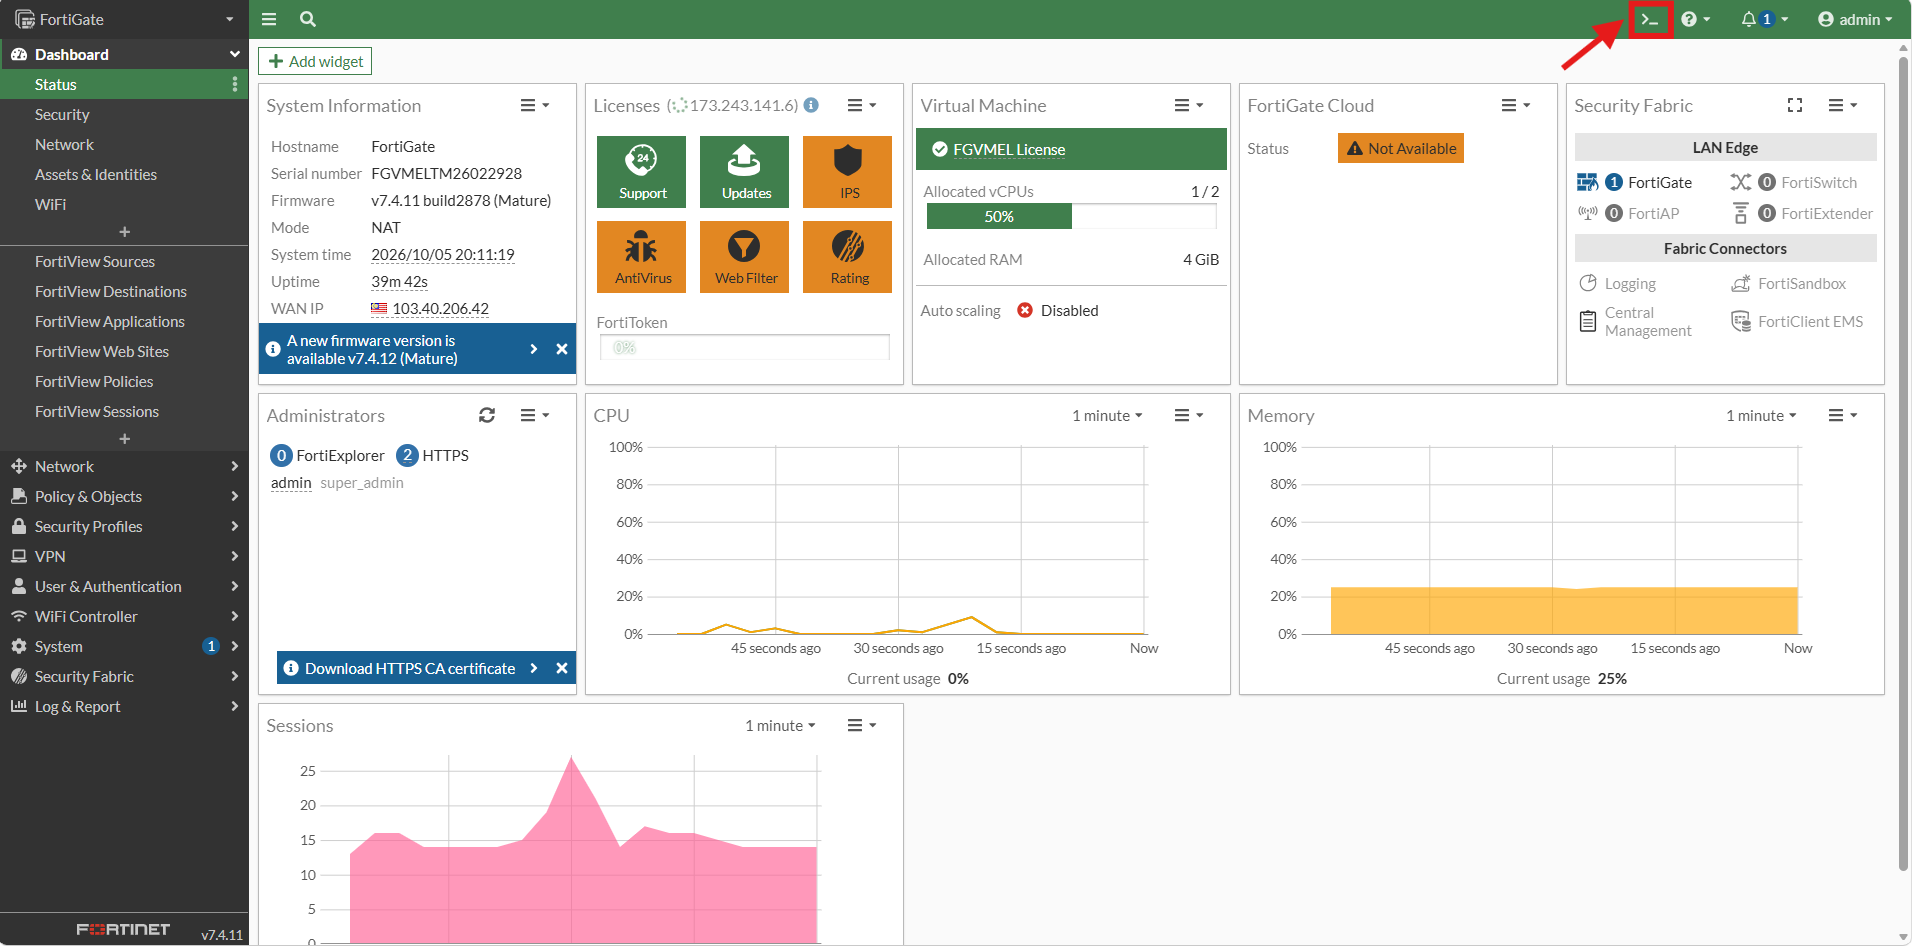
This guide covers how to configure static routes using the command line interface (CLI).
Step 1: Enter static route configuration mode
- Type the following command and press Enter to enter the router static configuration context:
config router static
Step 2: Create and configure the static route
- Run the following commands to create a new route entry, define the destination IP/subnet, set the gateway address, assign the exit interface, and apply the settings:
edit 0
set dst 192.168.0.0 255.255.255.0
set gateway 10.0.0.1
set device "port1"
next
end
Gateway configuration is optional. Skip the gateway configuration step if a gateway is not required.
Keep the Administrative Distance at its default value by leaving it unmentioned, or adjust it as needed with the following command:
set distance 5
Step 3: Verify static route configuration
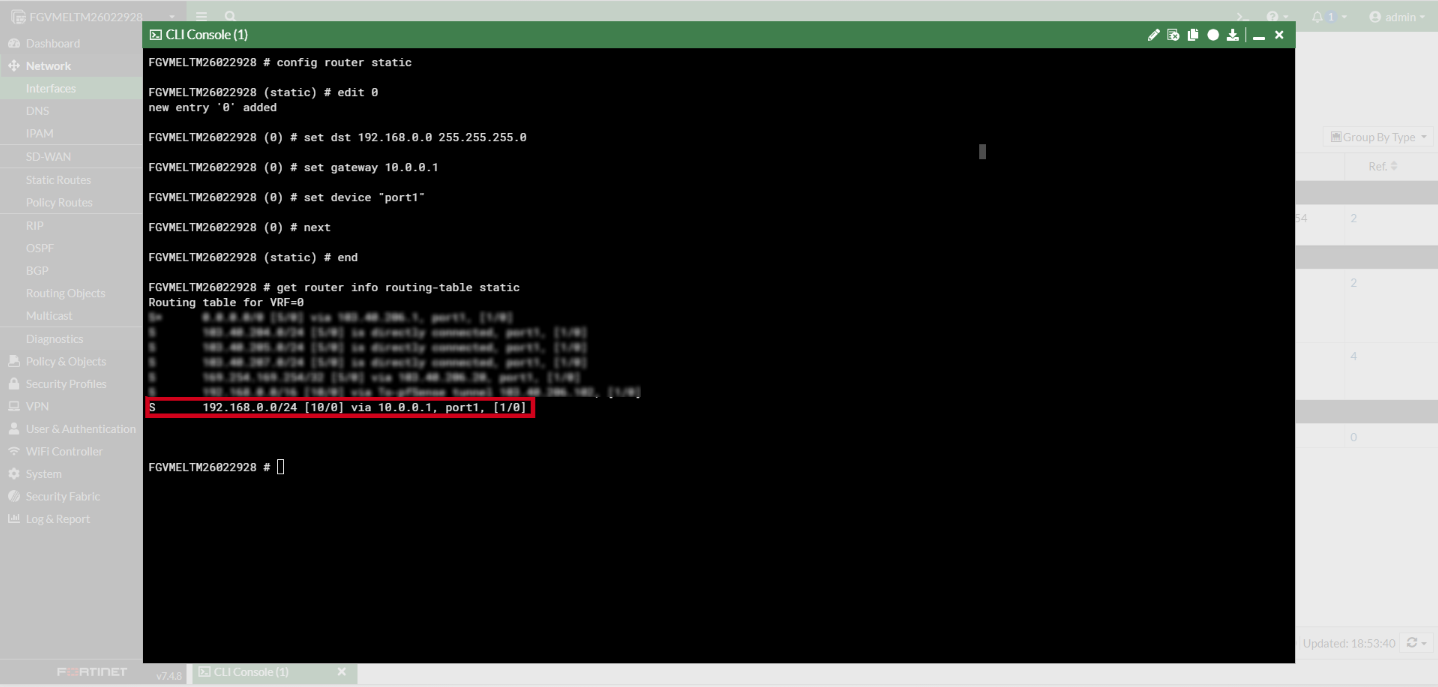
- Execute the routing table display command to verify that the static route is active:
get router info routing-table static
- Expected result:
This guide covers how to edit static routes using the command line interface (CLI)
This guide covers how to remove static routes using the command line interface (CLI)
Conclusion
By following this guidance, you can successfully configure static routes in FortiGate to manage network traffic routing effectively.
For additional assistance or if you encounter any issues, please contact our support team at support@ipserverone.com.