
Search Our Database
How to set up, manage, and delete Email Forwarding in Gmail
Introduction
Email forwarding in Gmail Web helps users automatically route incoming messages to another address, streamlining communication for individuals and businesses. Managing these settings directly in the web browser allows you to set up forwarding rules, customize how original emails are handled, or delete old forwarding addresses when they are no longer needed. This ensures important messages reach the right destination while maintaining a clutter-free inbox.
Prerequisite
- Access to a Gmail account via a web browser.
- Access to the destination email account to complete verification.
Step-by-step guide
Step 1: Access to forwarding settings in Gmail Web
- Log in to your Gmail account on a web browser.
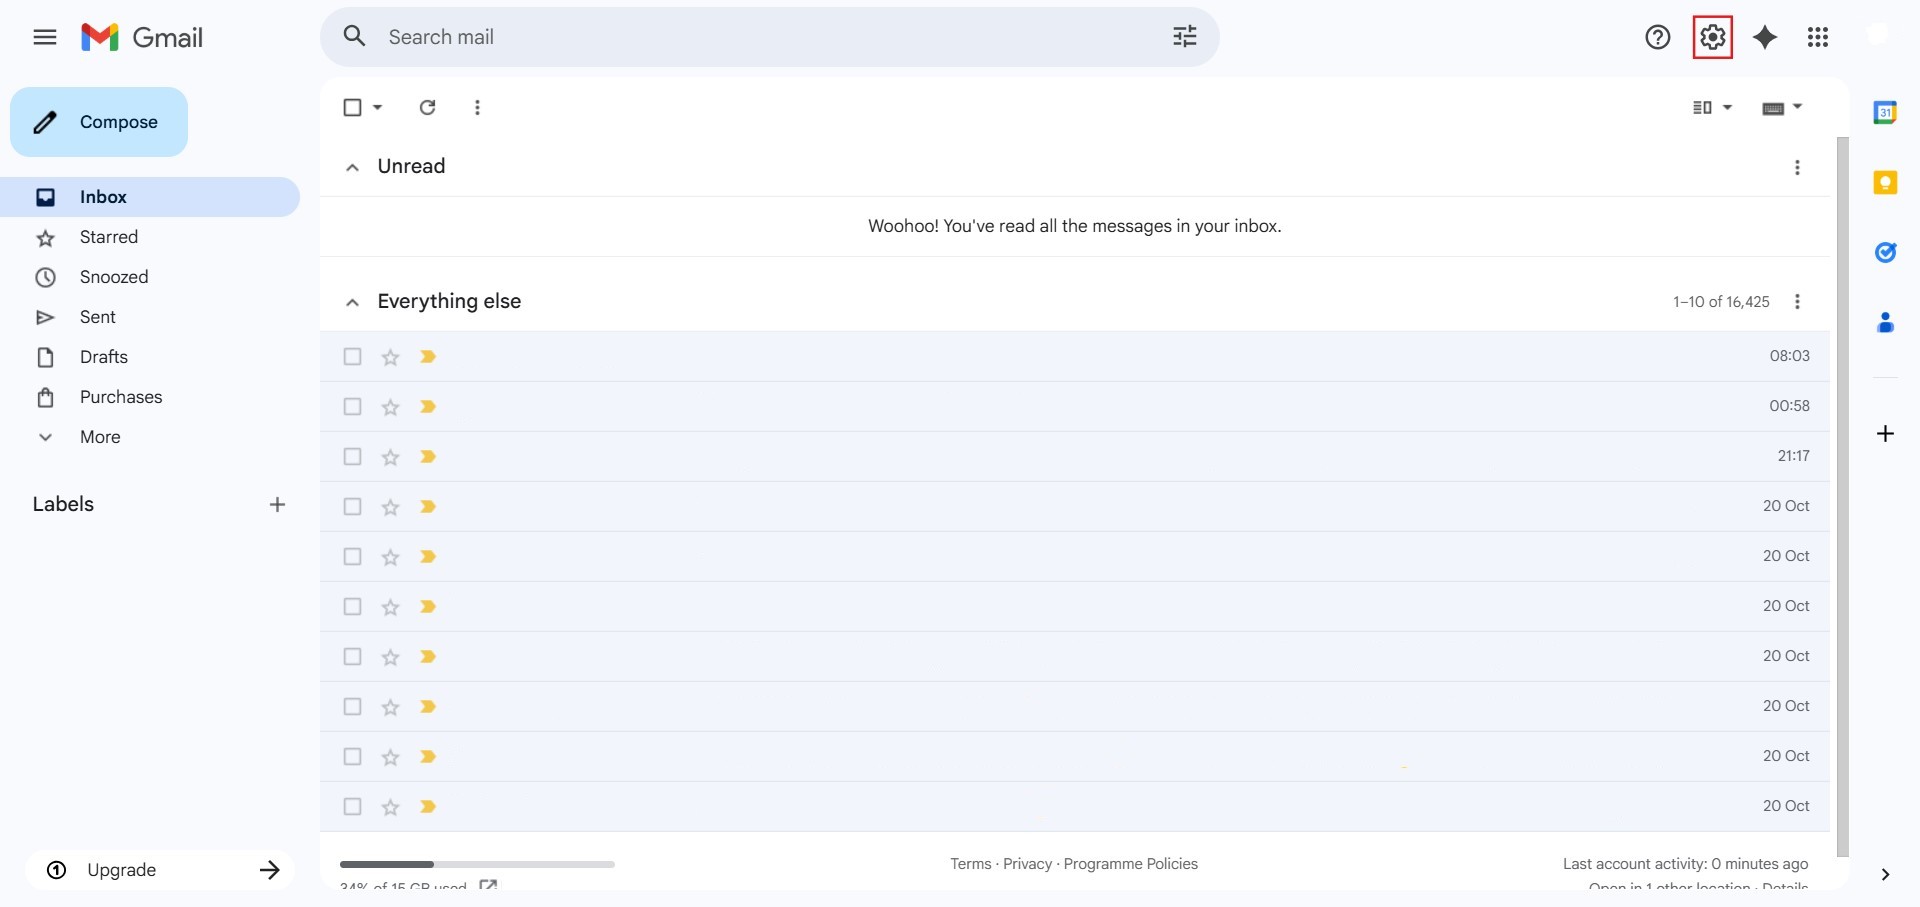
- Click the Settings icon (gear icon) in the top right corner.
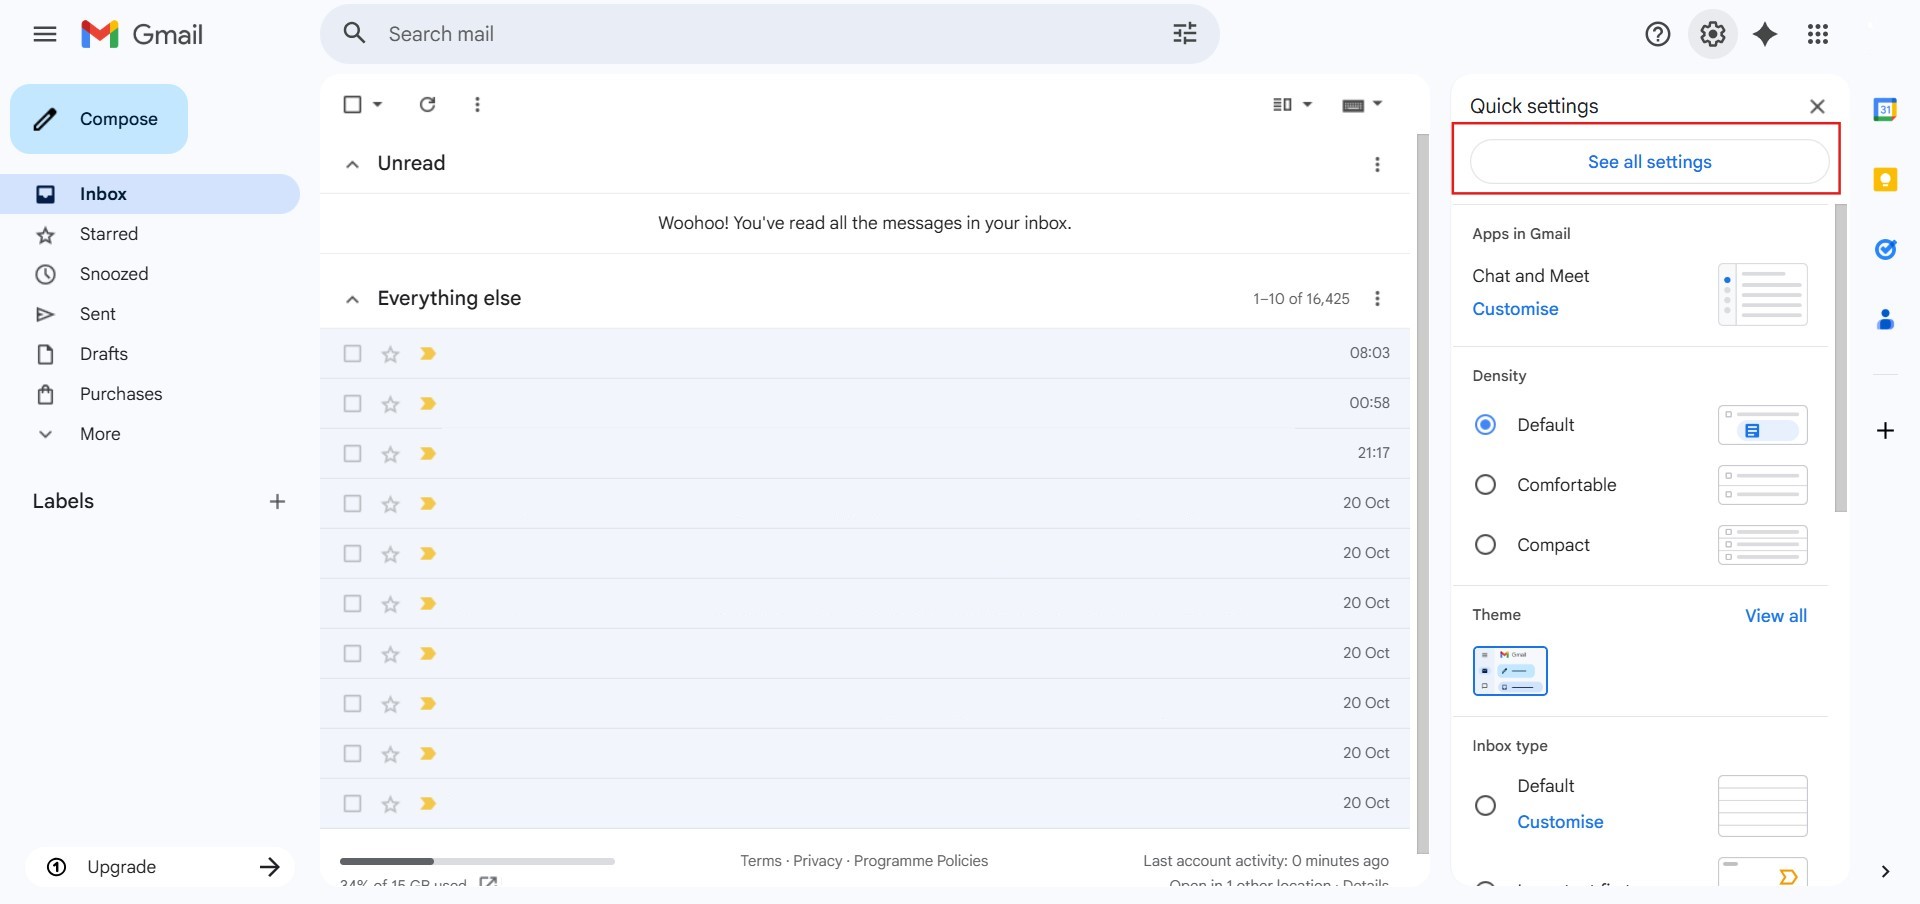
- Then click See all settings.
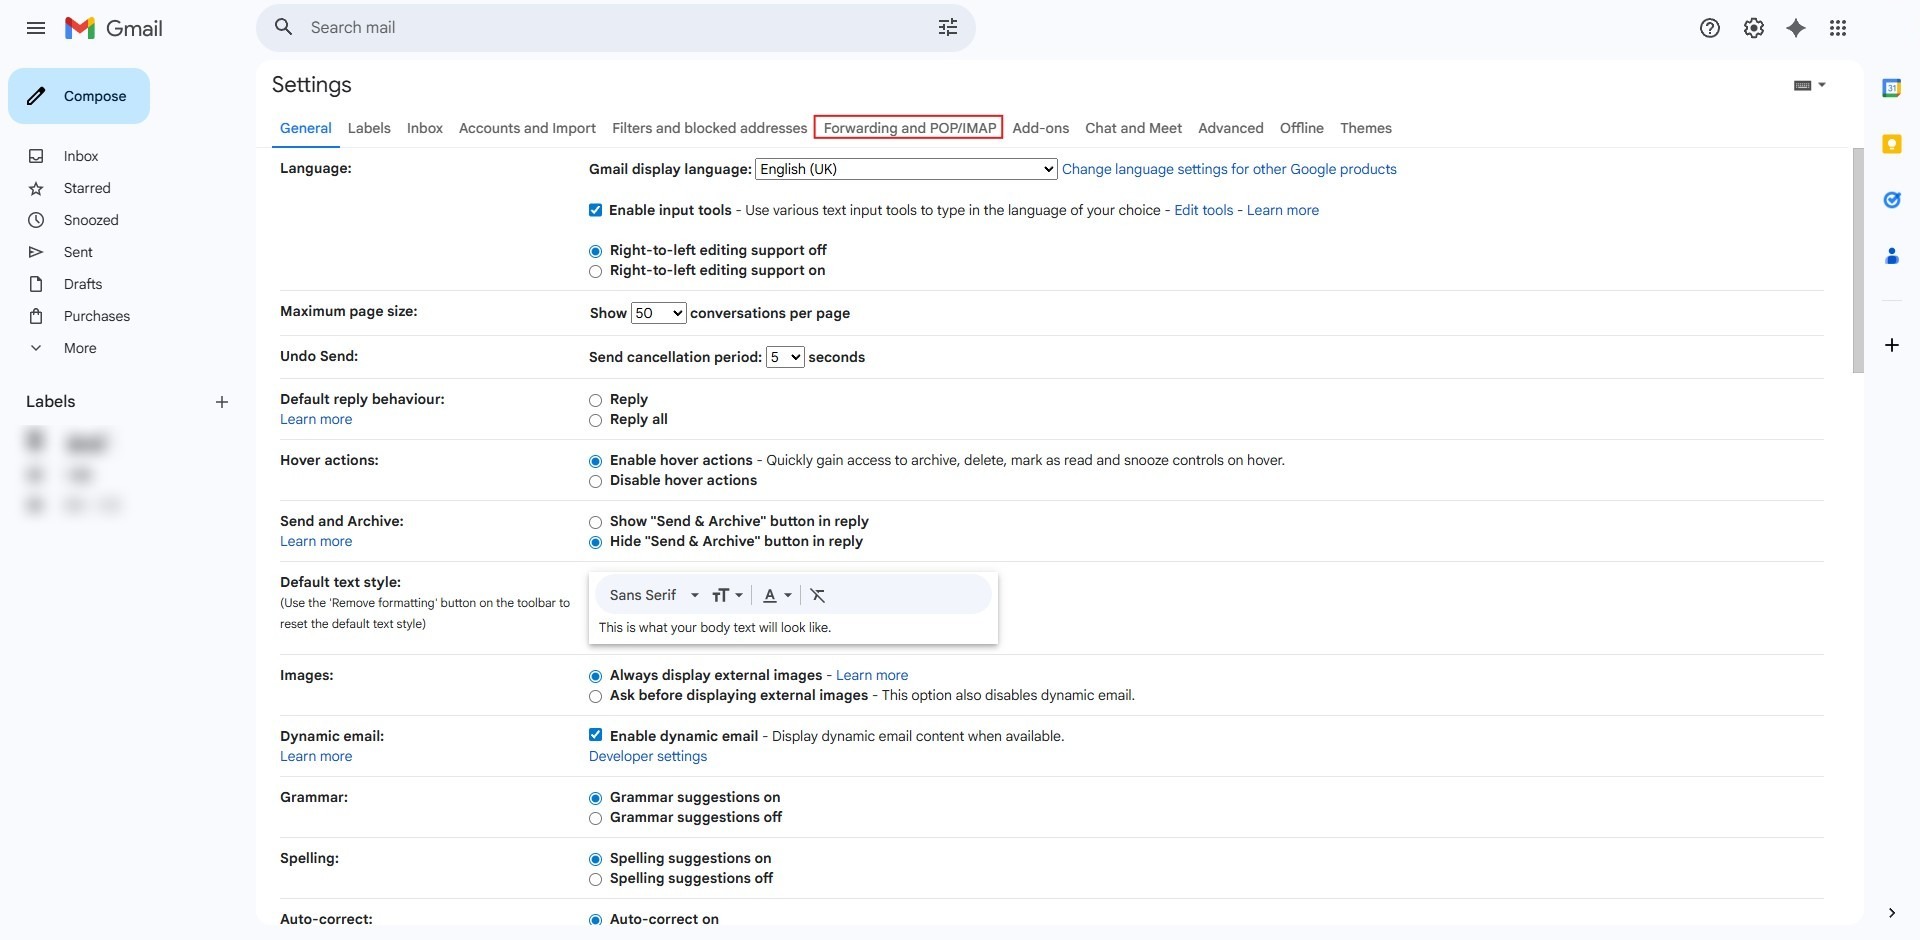
- Navigate to the Forwarding and POP/IMAP tab.
Step 2: Set up, manage, and delete Email Forwarding
Set Up Email Forwarding
Configure Gmail to automatically send incoming emails to a new address.
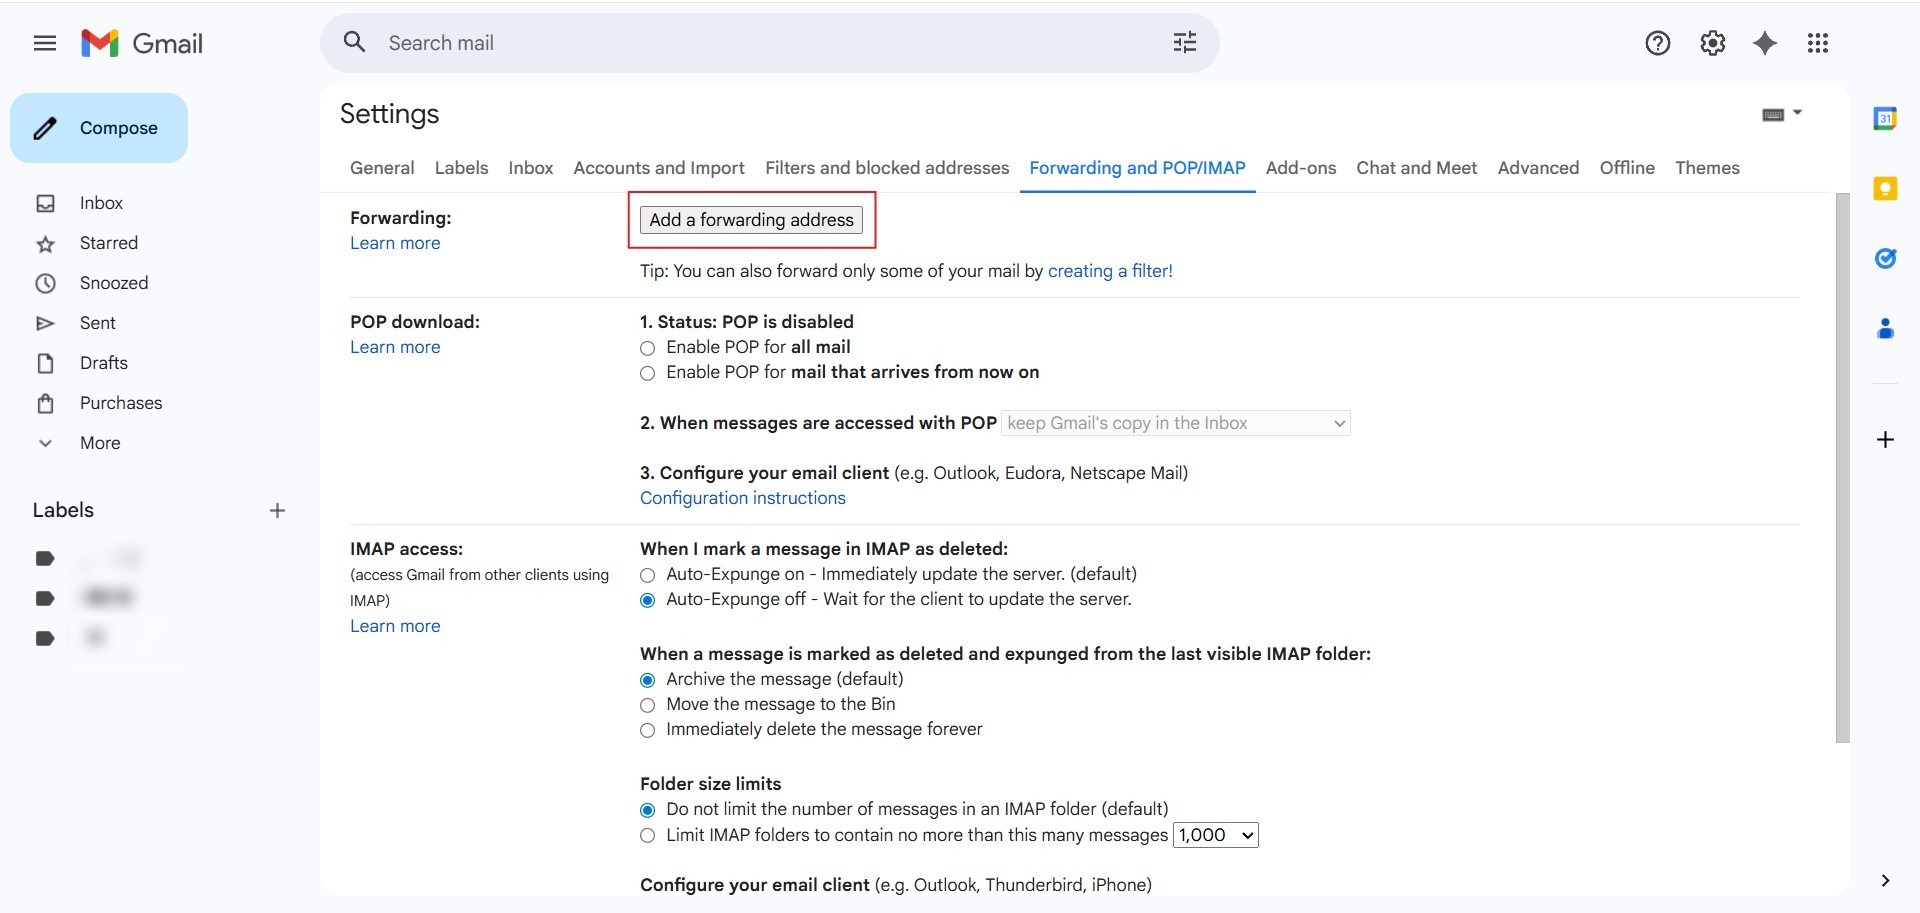
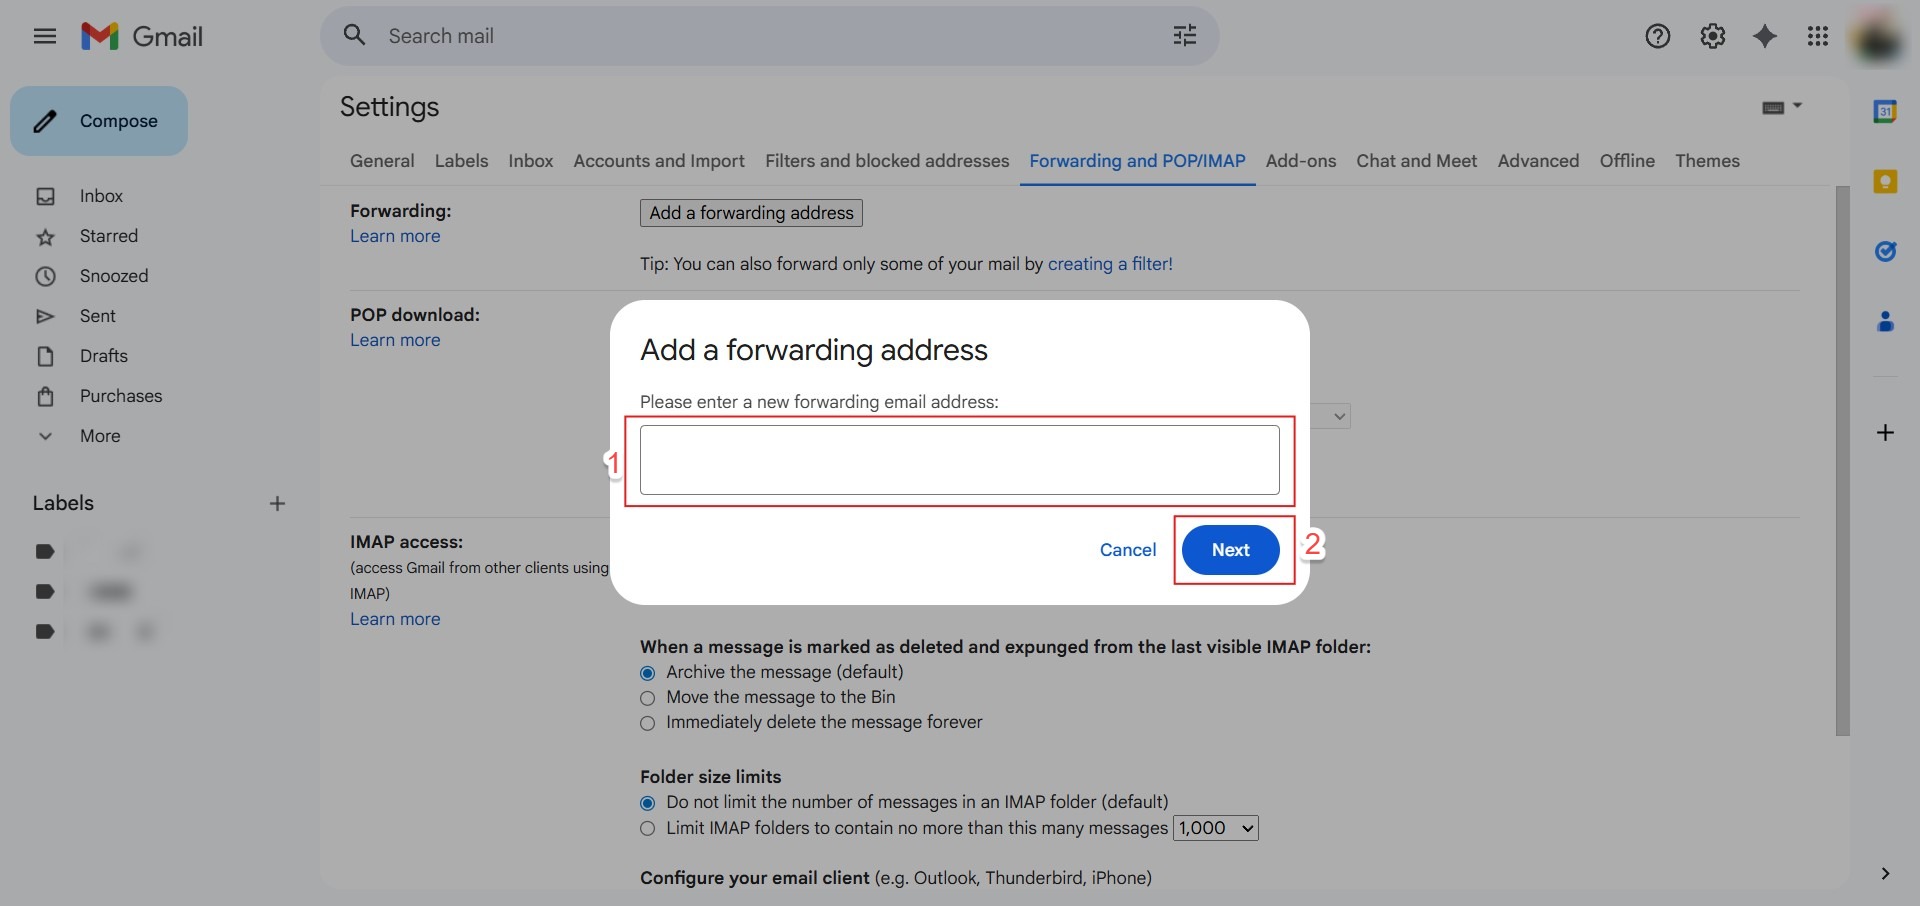
- In the Forwarding section, click Add a forwarding address.
- Enter the target email address and click Next, then click Proceed and OK.
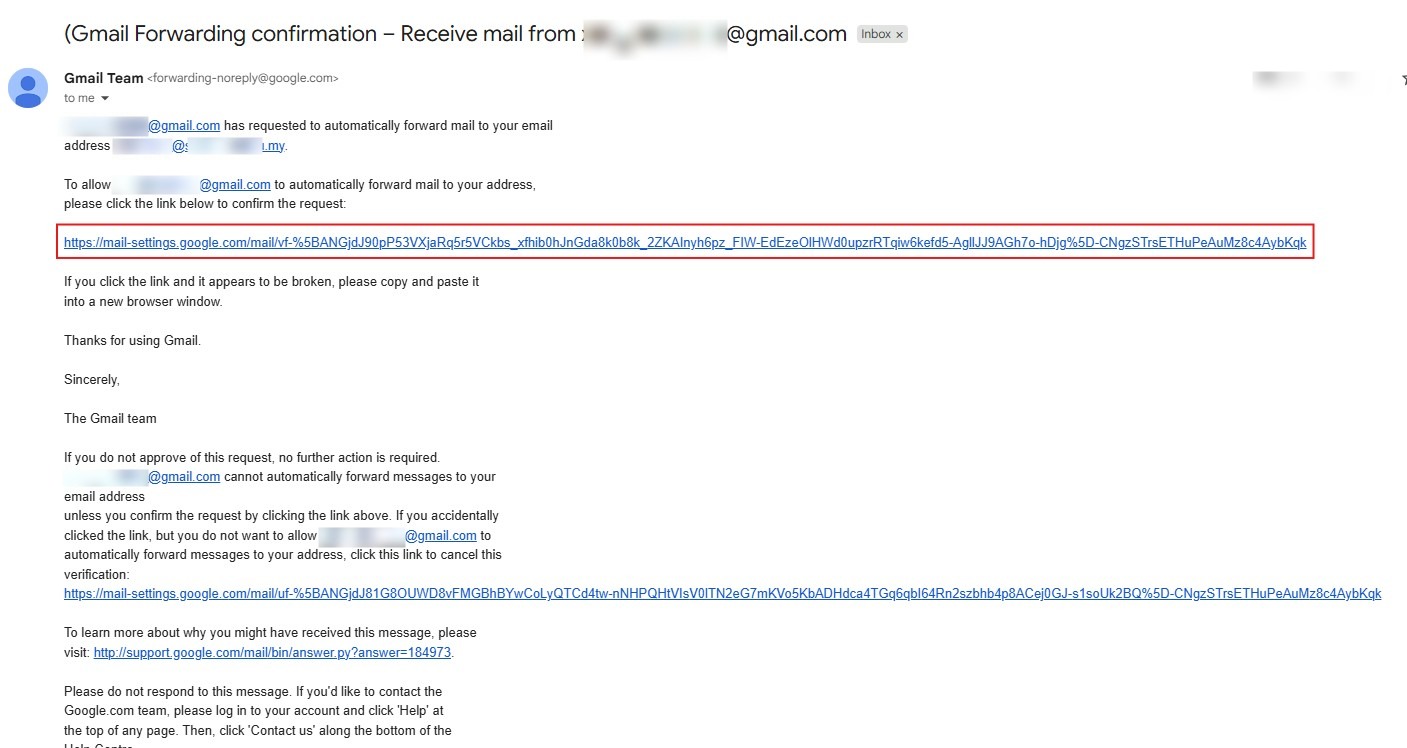
- A verification link will send to the target email inbox. Locate the verification message and click the verification link.
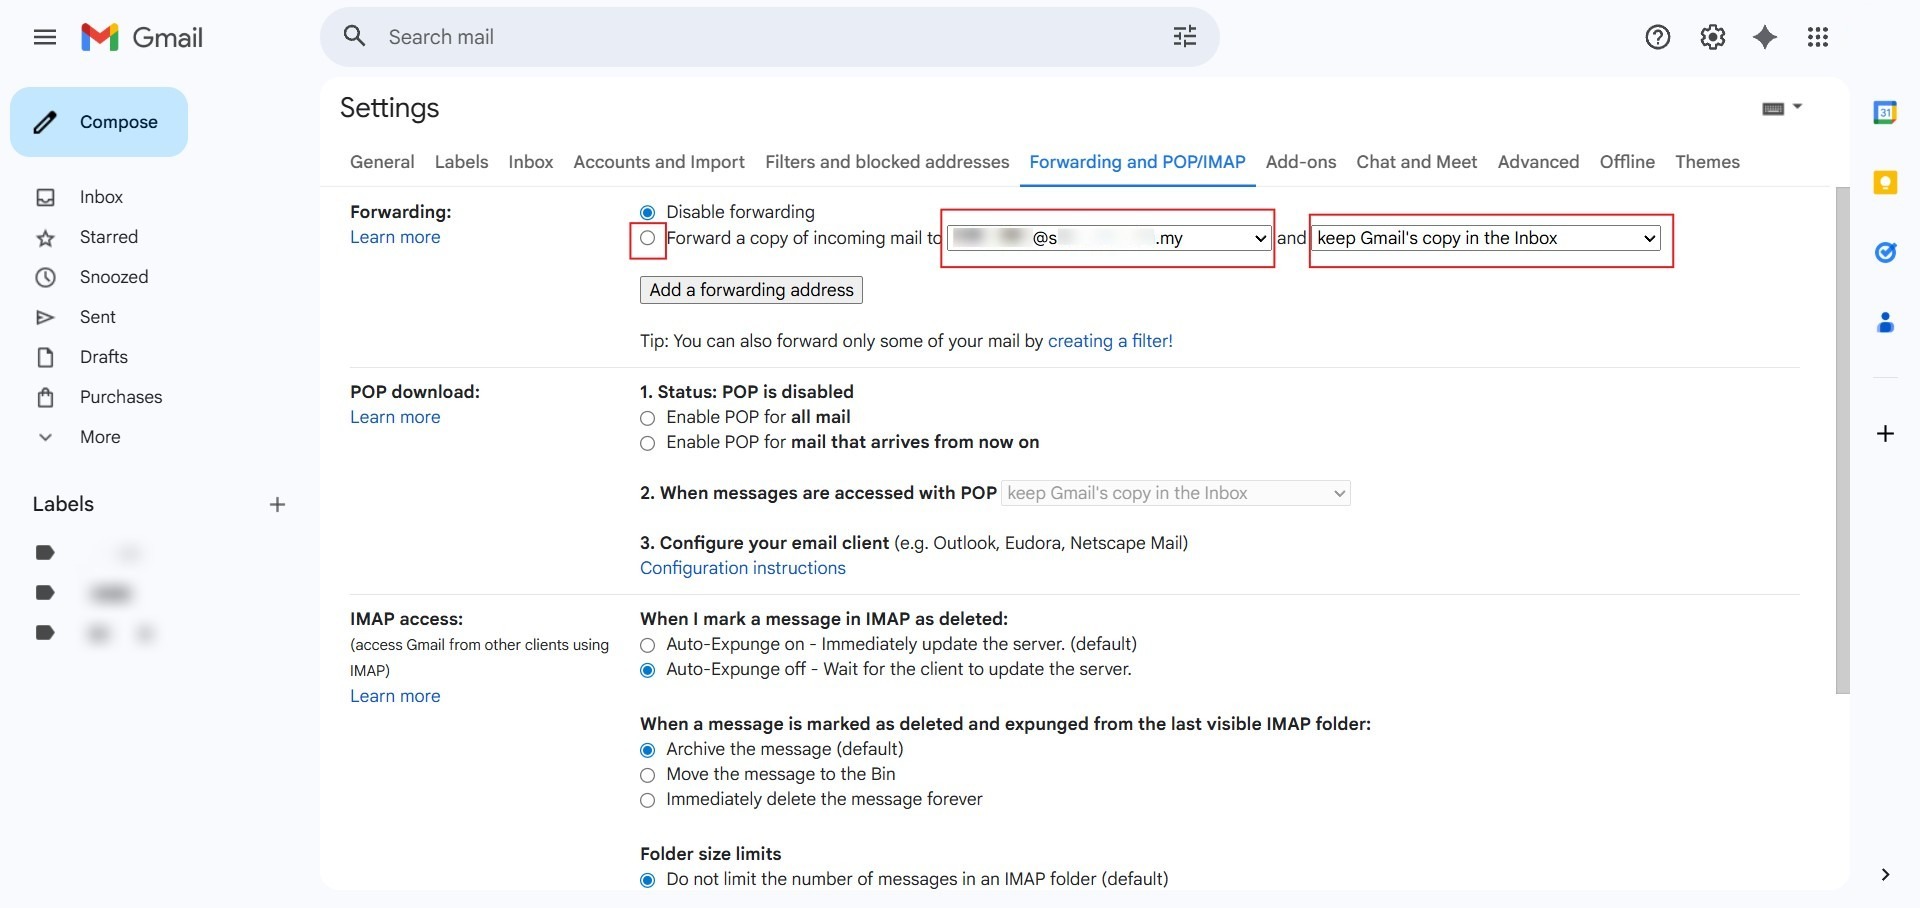
- Return to your Gmail settings page, refresh the browser, and go back to the Forwarding and POP/IMAP tab to verify the forwarder was setup successfully.
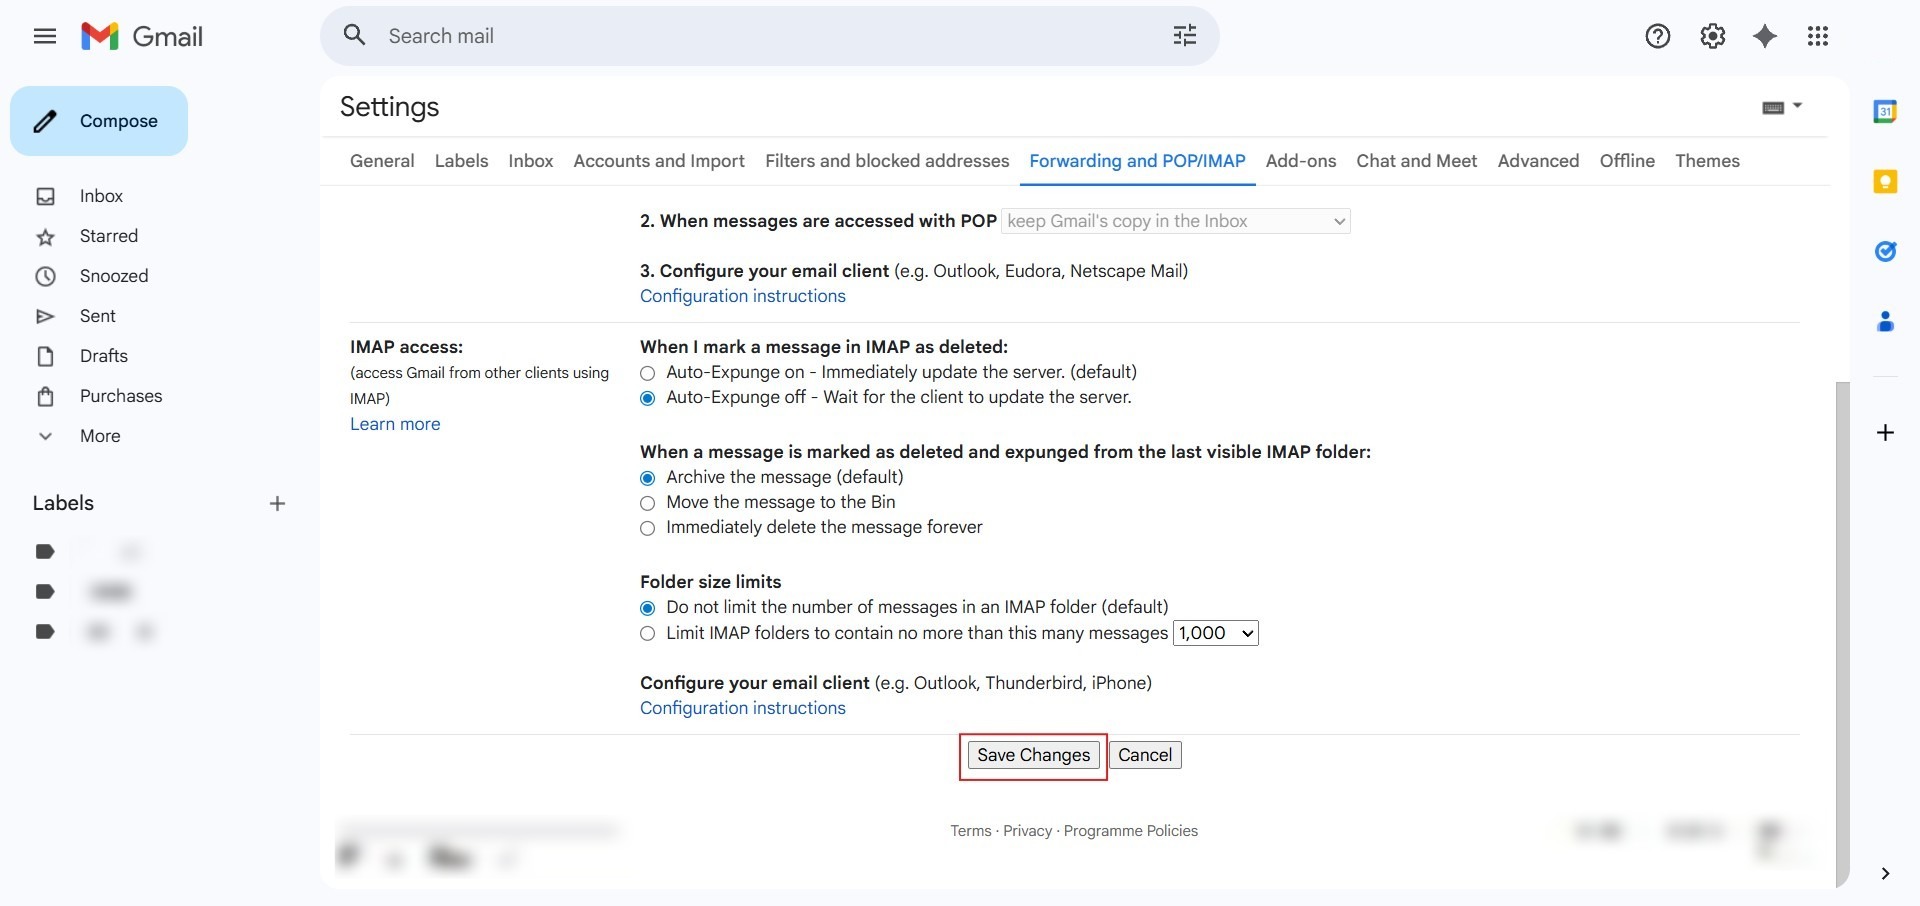
- Scroll to the bottom of the page and click Save Changes.
Manage Forwarding Options for Gmail Copies
Adjust how original emails are handled in your Gmail inbox after forwarding.
- Locate the Forward a copy of incoming mail to dropdown menu. Select one of the following options:
– Keep Gmail’s copy in the Inbox: Retains the original message as unread in your inbox.
– Mark Gmail’s copy as read: Retains the original message in your inbox, but marks it as read.
– Archive Gmail’s copy: Moves the original message out of the inbox into “All Mail”.
– Delete Gmail’s copy: Automatically sends the original message to the Trash bin.
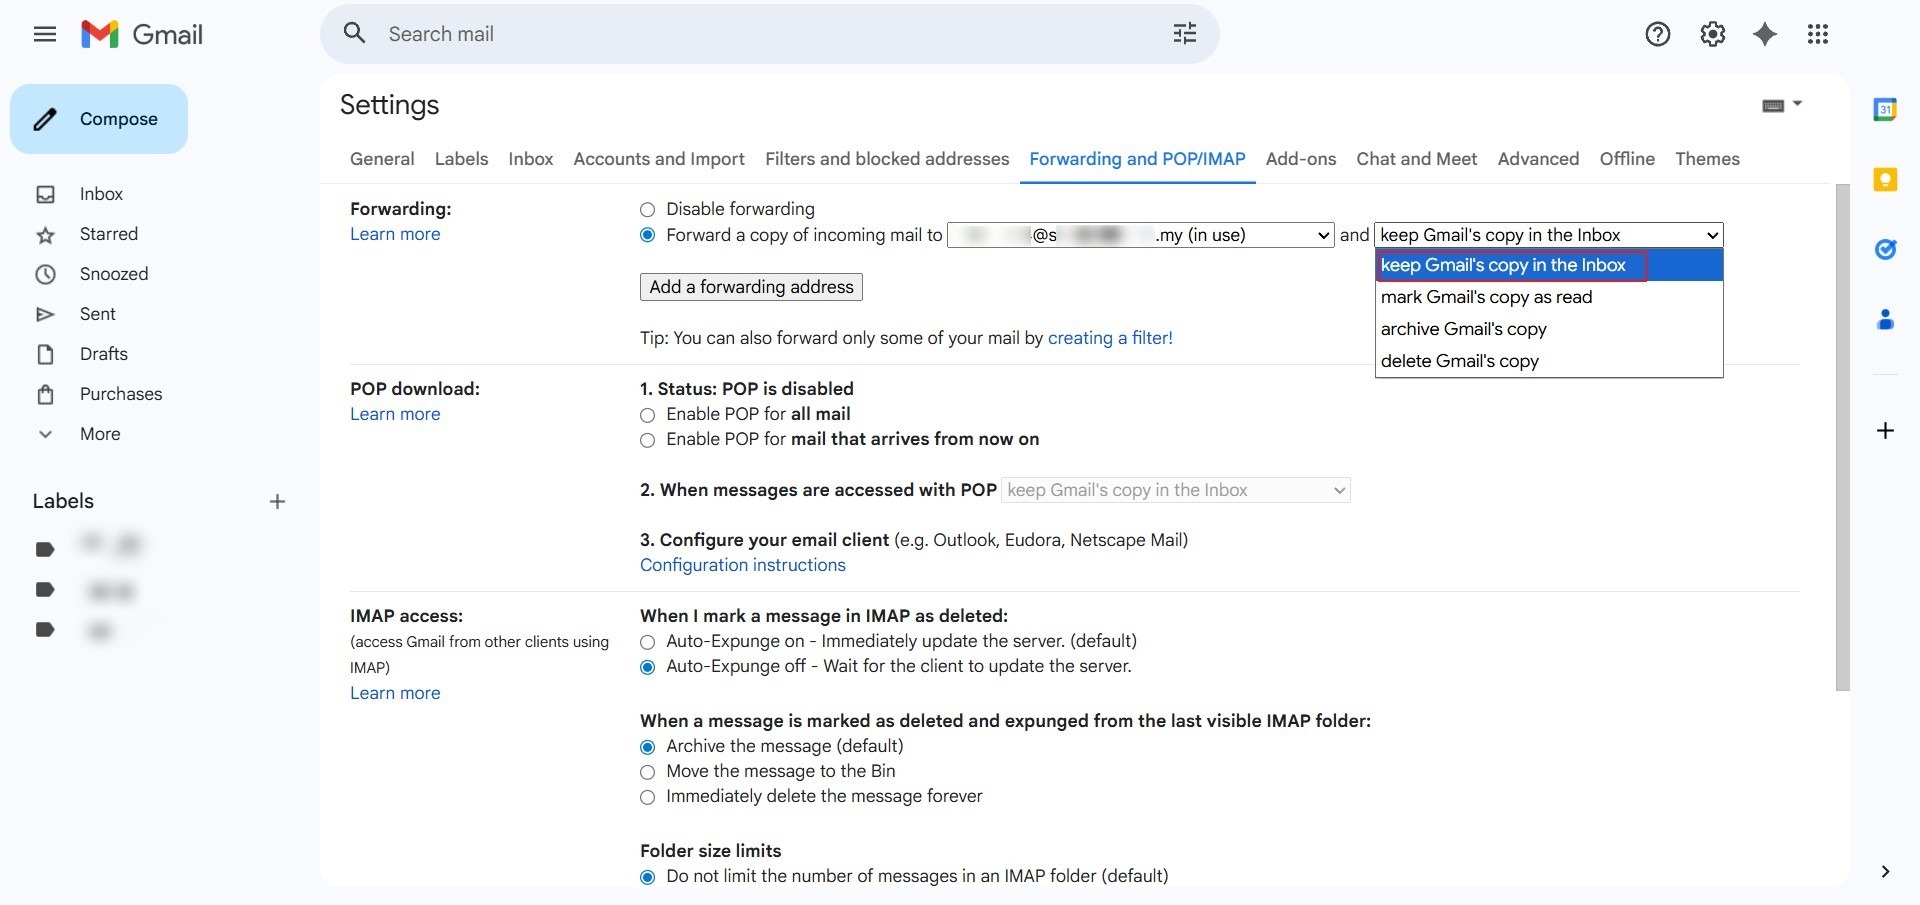
- Scroll to the bottom of the page and click Save Changes.
Delete or Disable Email Forwarding Address
Stop forwarding or permanently remove an existing forwarding destination.
- To temporarily turn off forwarding, select Disable forwarding.
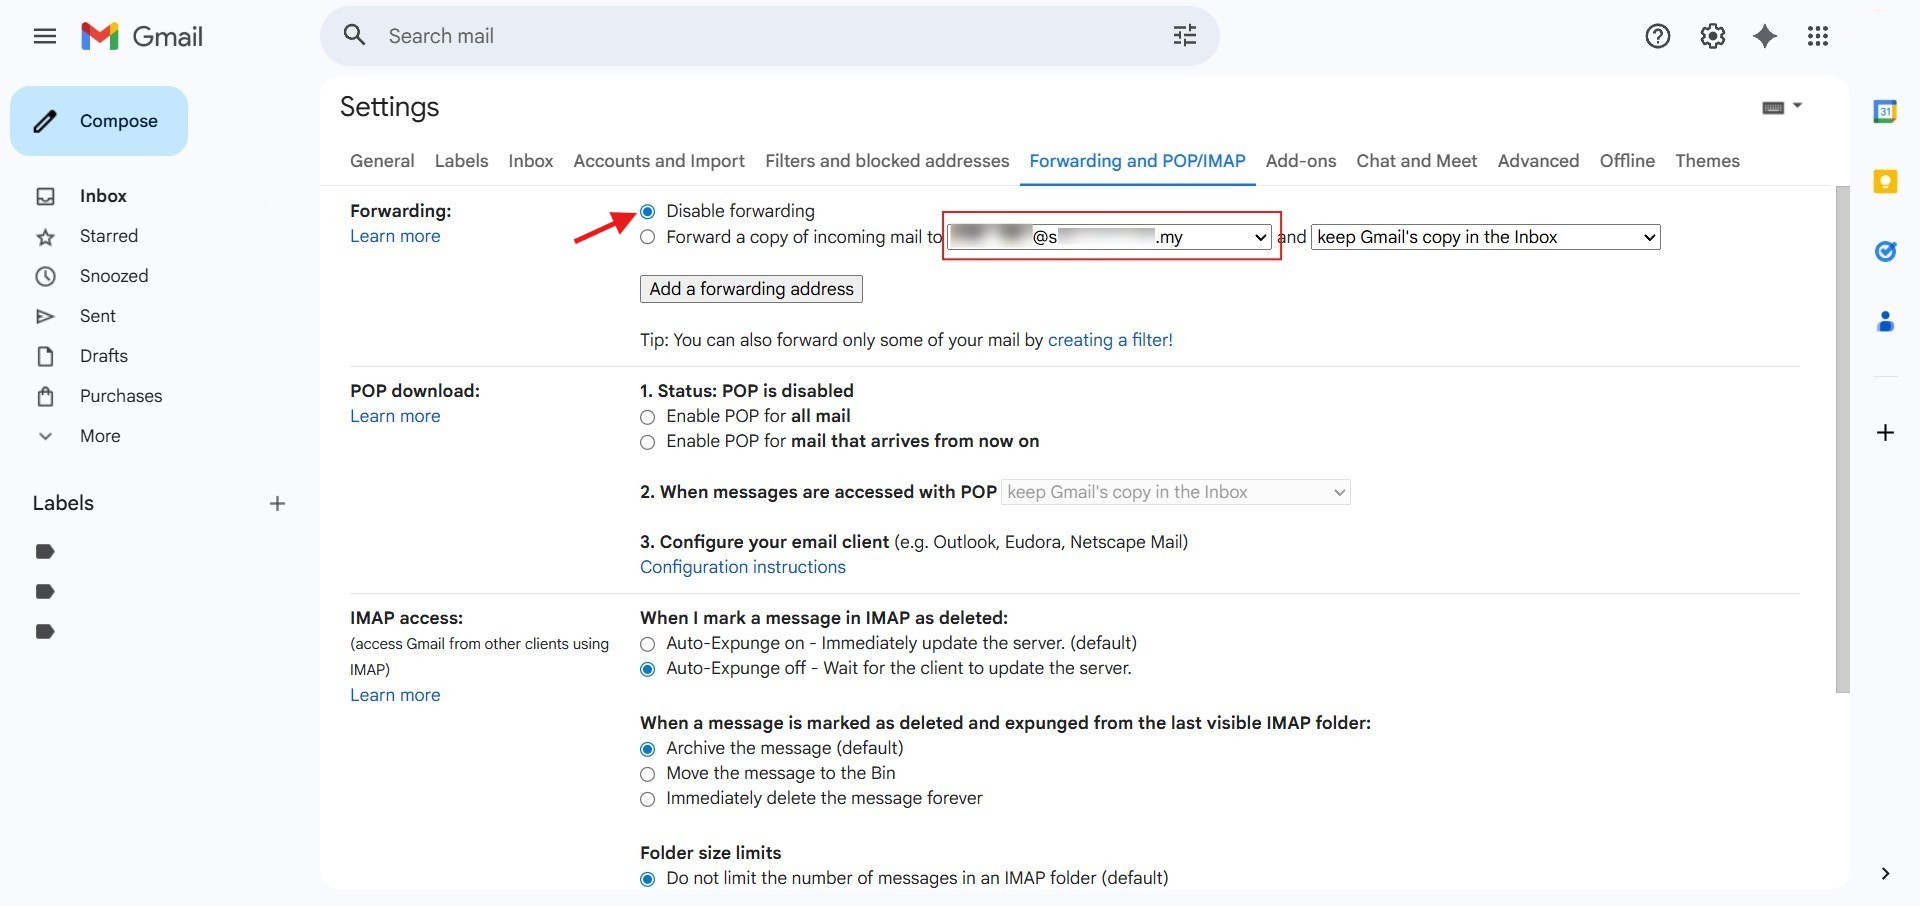
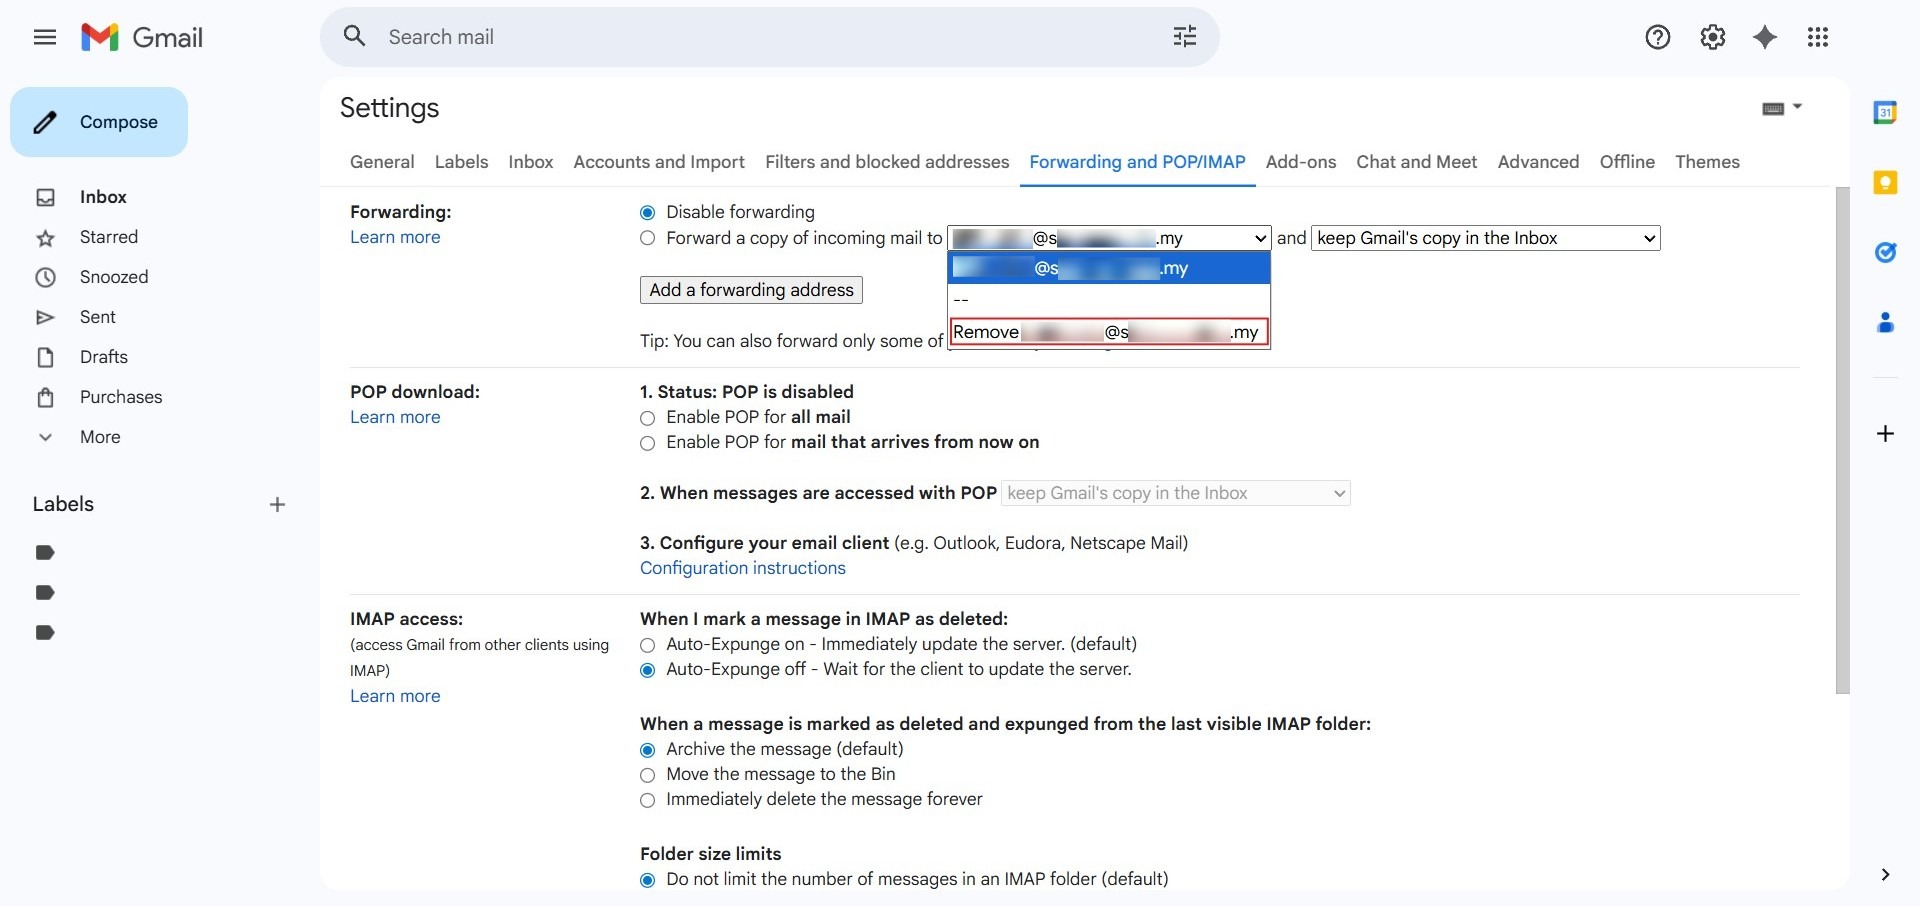
- To completely remove a forwarding address, click the dropdown menu next to the forwarding address and select Remove [email address].
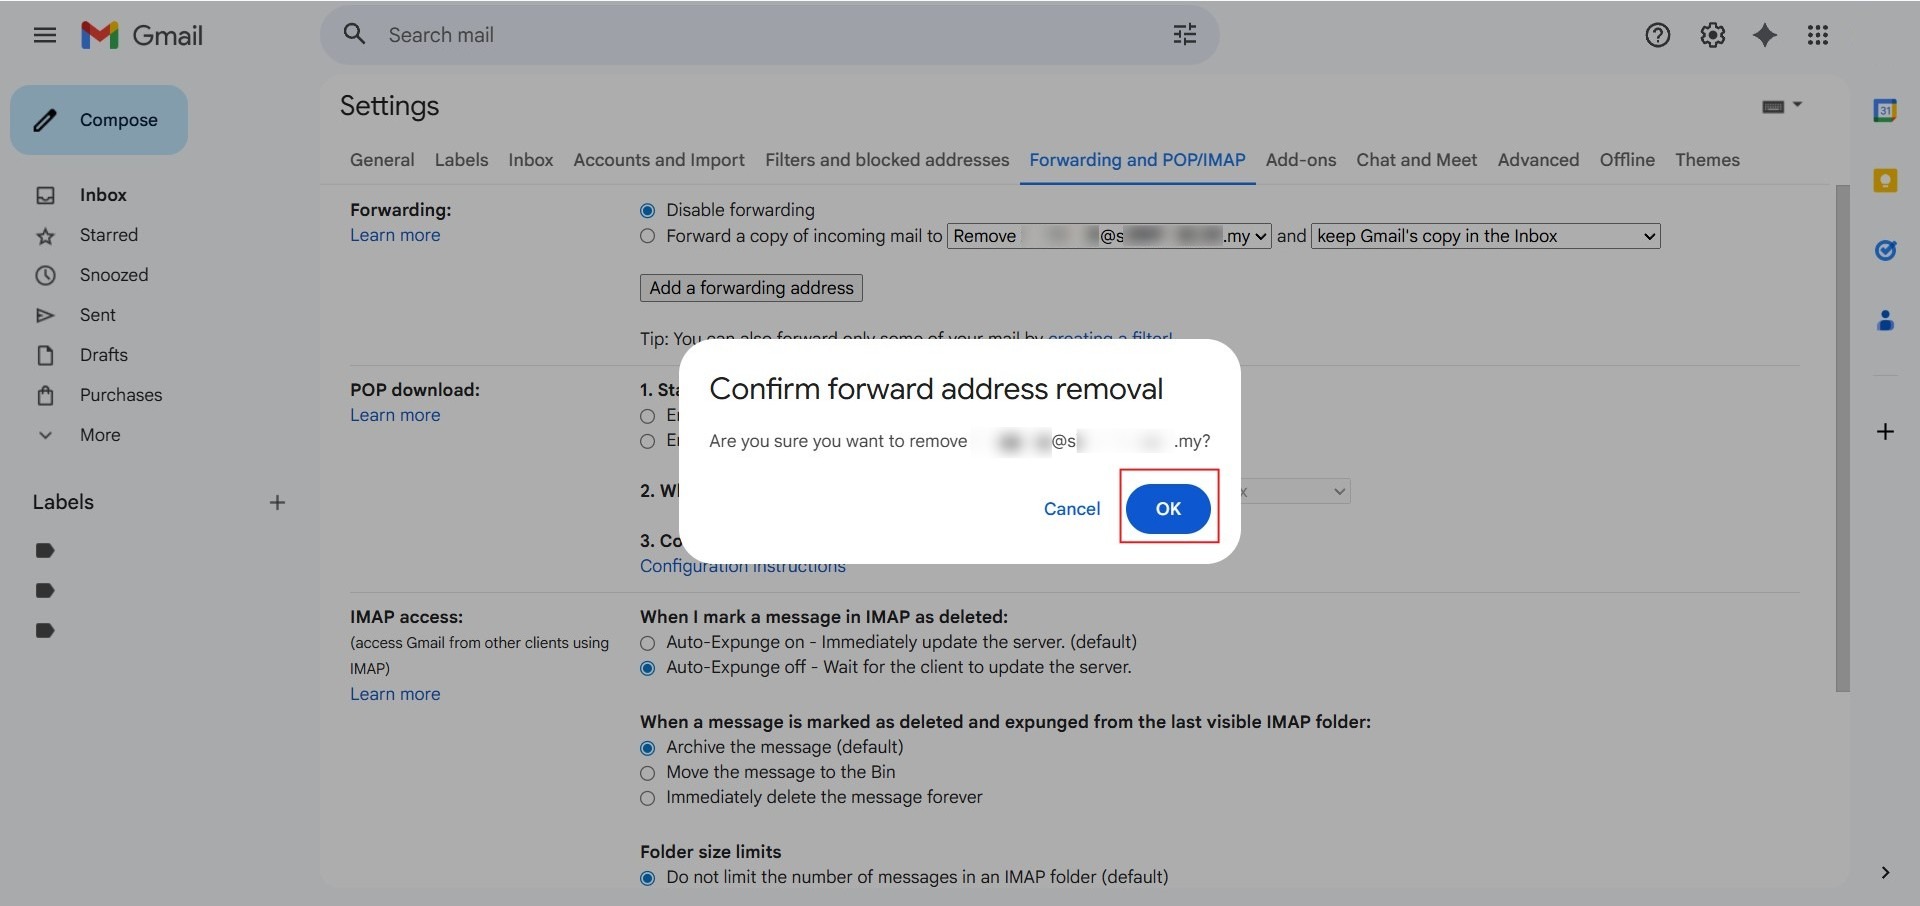
- Click OK to confirm the removal.
- Scroll down and click Save Changes.
Conclusion
By following this guidance, you can seamlessly set up, customize, and delete email forwarding configurations in Gmail Web to suit your operational requirements.
For additional assistance or if you encounter any issues, please contact our support team at support@ipserverone.com.
Article updated on 03 August 2026 by Johnny