
Search Our Database
How to create, export, import, and delete Email Filters and Block Rules in Gmail
Introduction
Managing an inbox efficiently requires automated organization tools to prevent unwanted spam and streamline workflow communication. Designed for individual and enterprise email users, Gmail provides robust filtering and blocking capabilities that allow users to manage incoming messages based on specific senders, keywords, or subject lines. By creating custom rules, exporting settings to XML files, and importing rules across multiple accounts, you can maintain a clean and secure inbox. This guide demonstrates how to create, export, import, and delete email filters and block rules using Gmail Web.
Prerequisite
- Access to an active Gmail account
- Access to the Gmail Web interface
Step-by-step guide
Managing Email Filters in Gmail Web
Organize incoming messages or block emails by targeting specific senders or unique keywords.
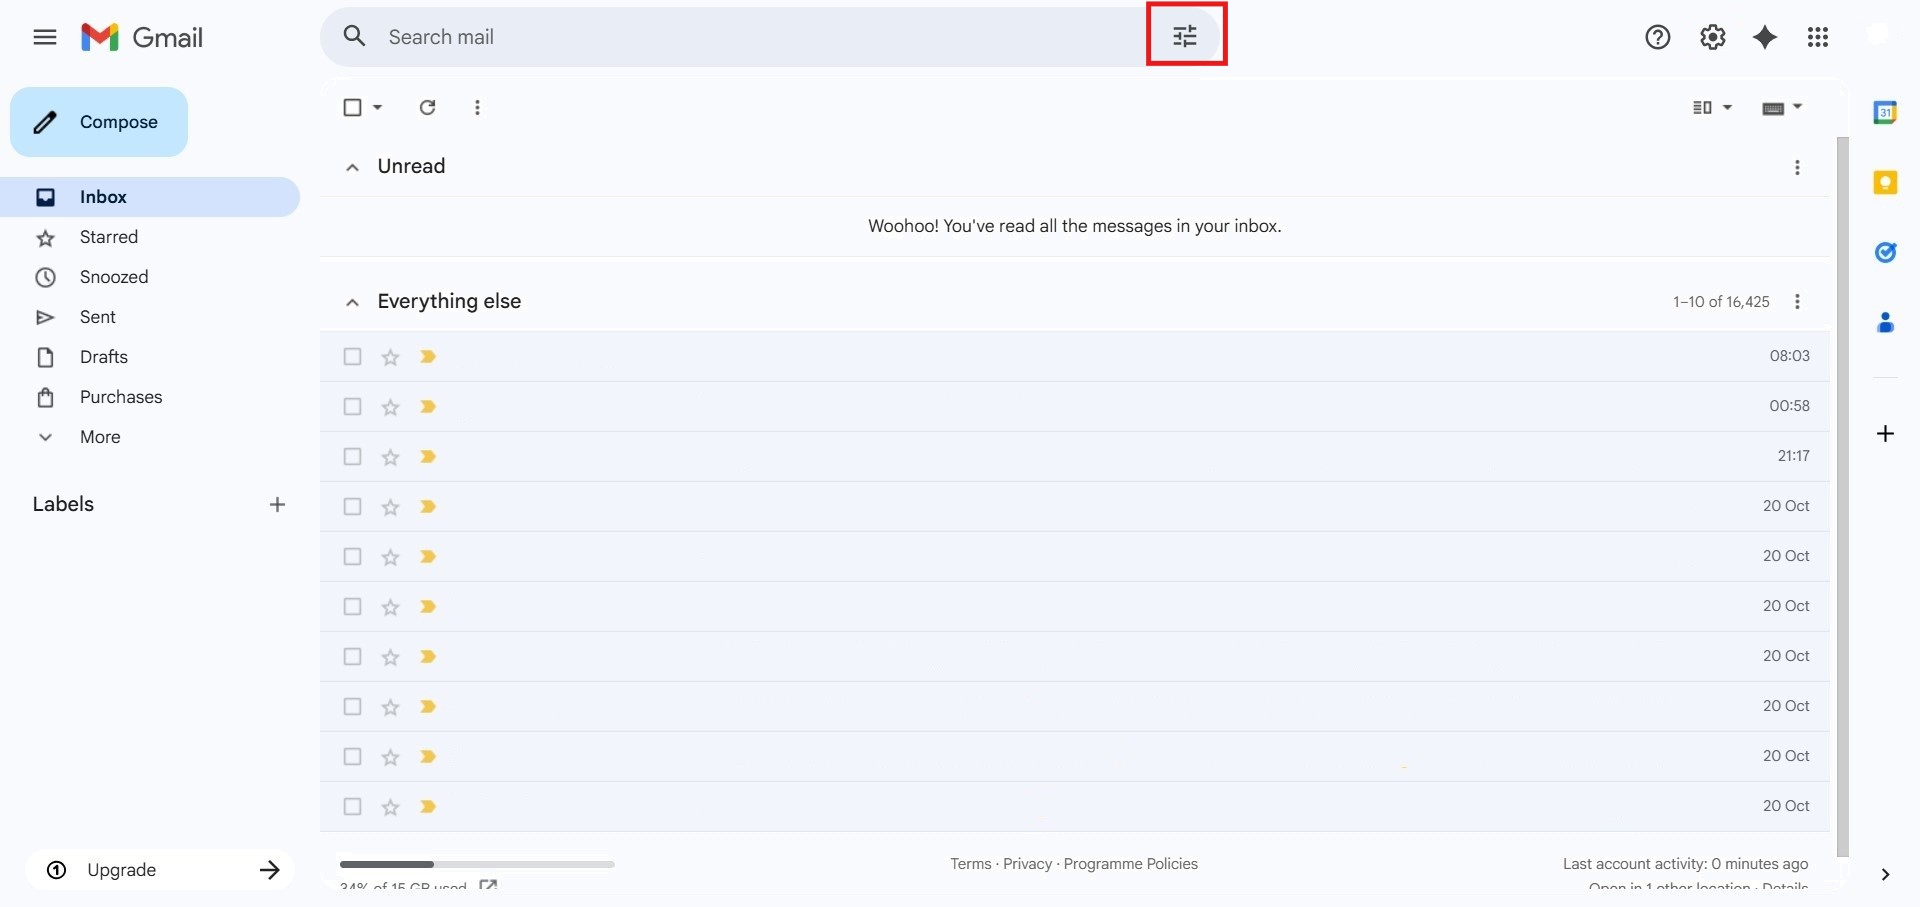
- Log into Gmail Web. In the search box at the top, click the Show search options icon on the right side.
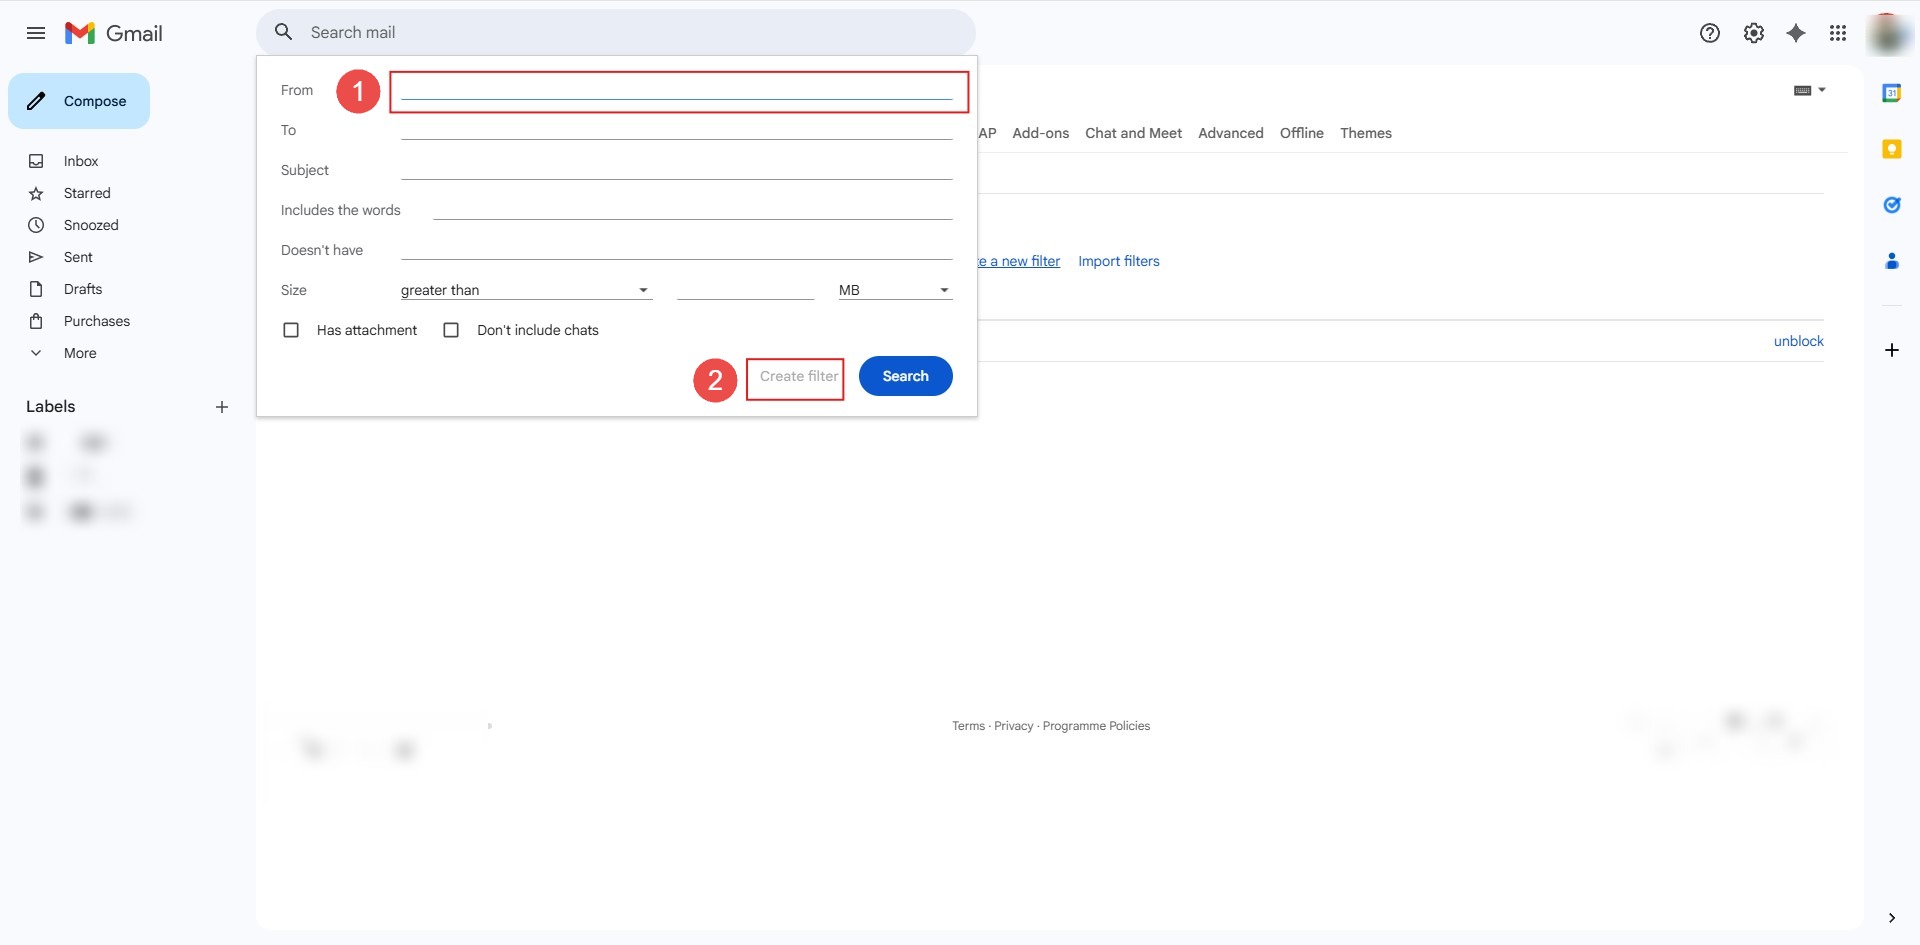
- To filter or block a specific email user, enter their address in the From field.
- To filter by specific words, enter the targeted terms in the Has the words or Subject fields.
- Then, click Create filter.
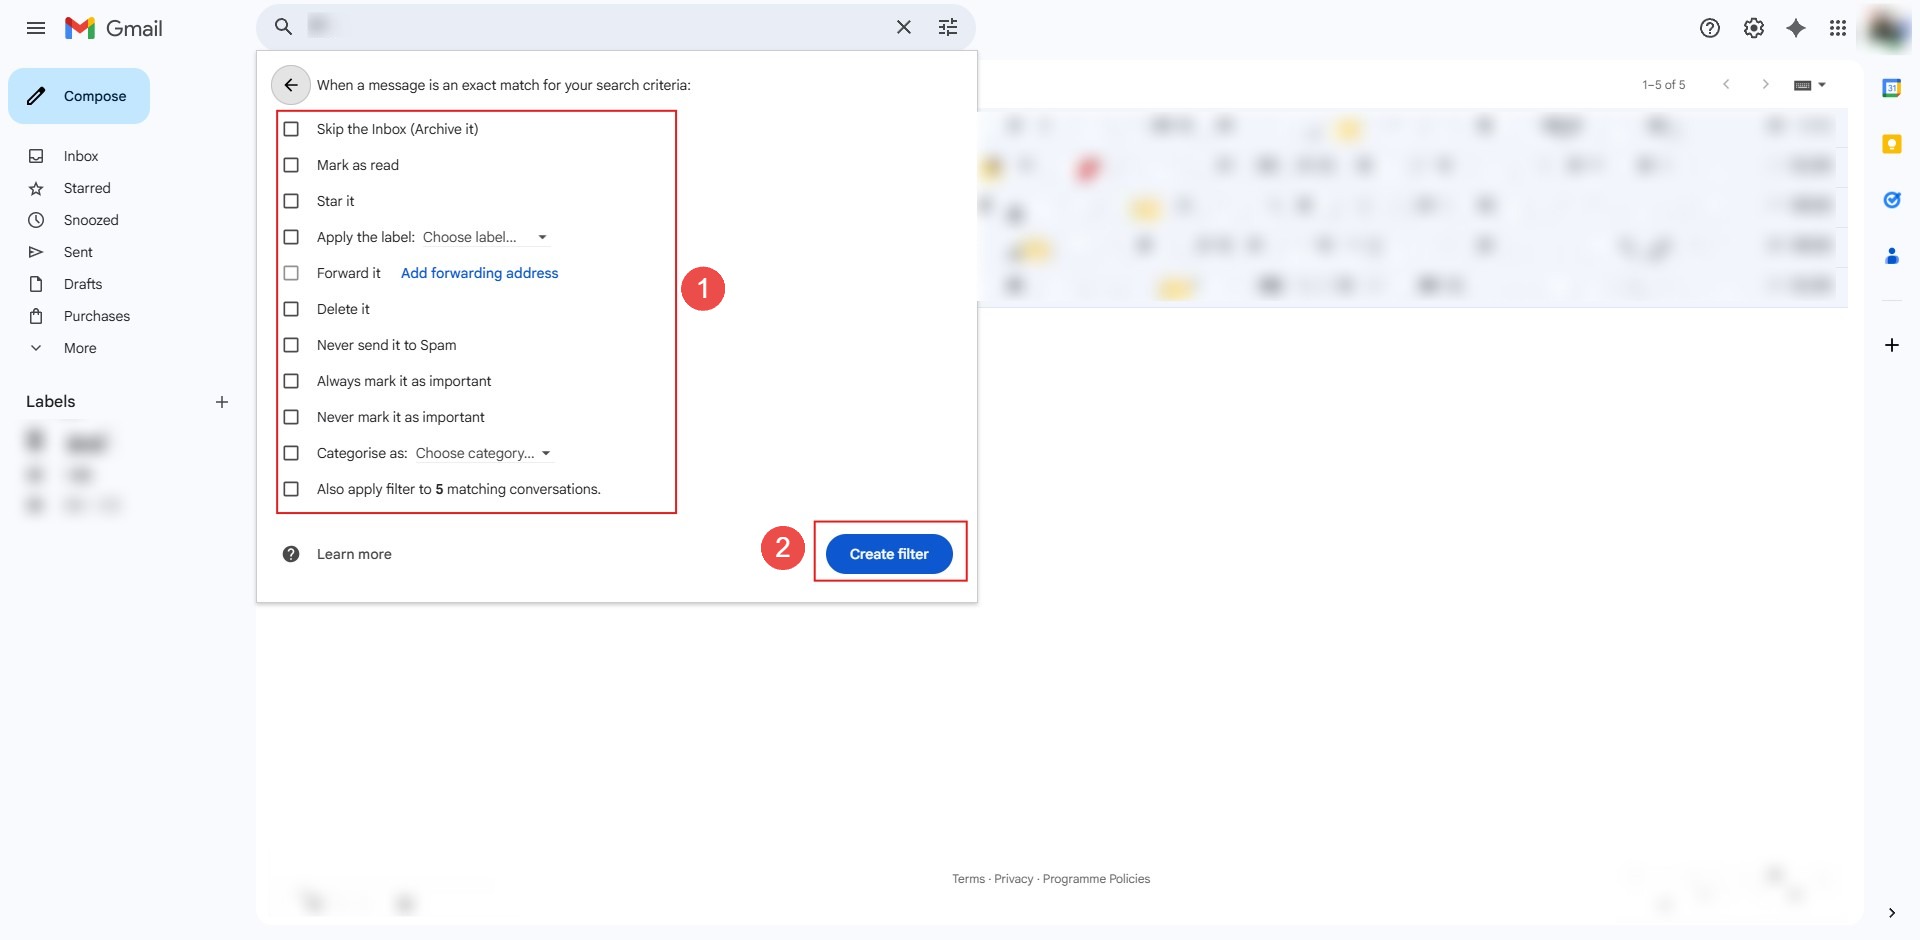
- Select your desired action (such as Skip the Inbox (Archive it), Apply the label, or Delete it to block). Click Create filter to apply the rule.
Modify existing filter settings or remove outdated block rules to restore regular inbox flow.
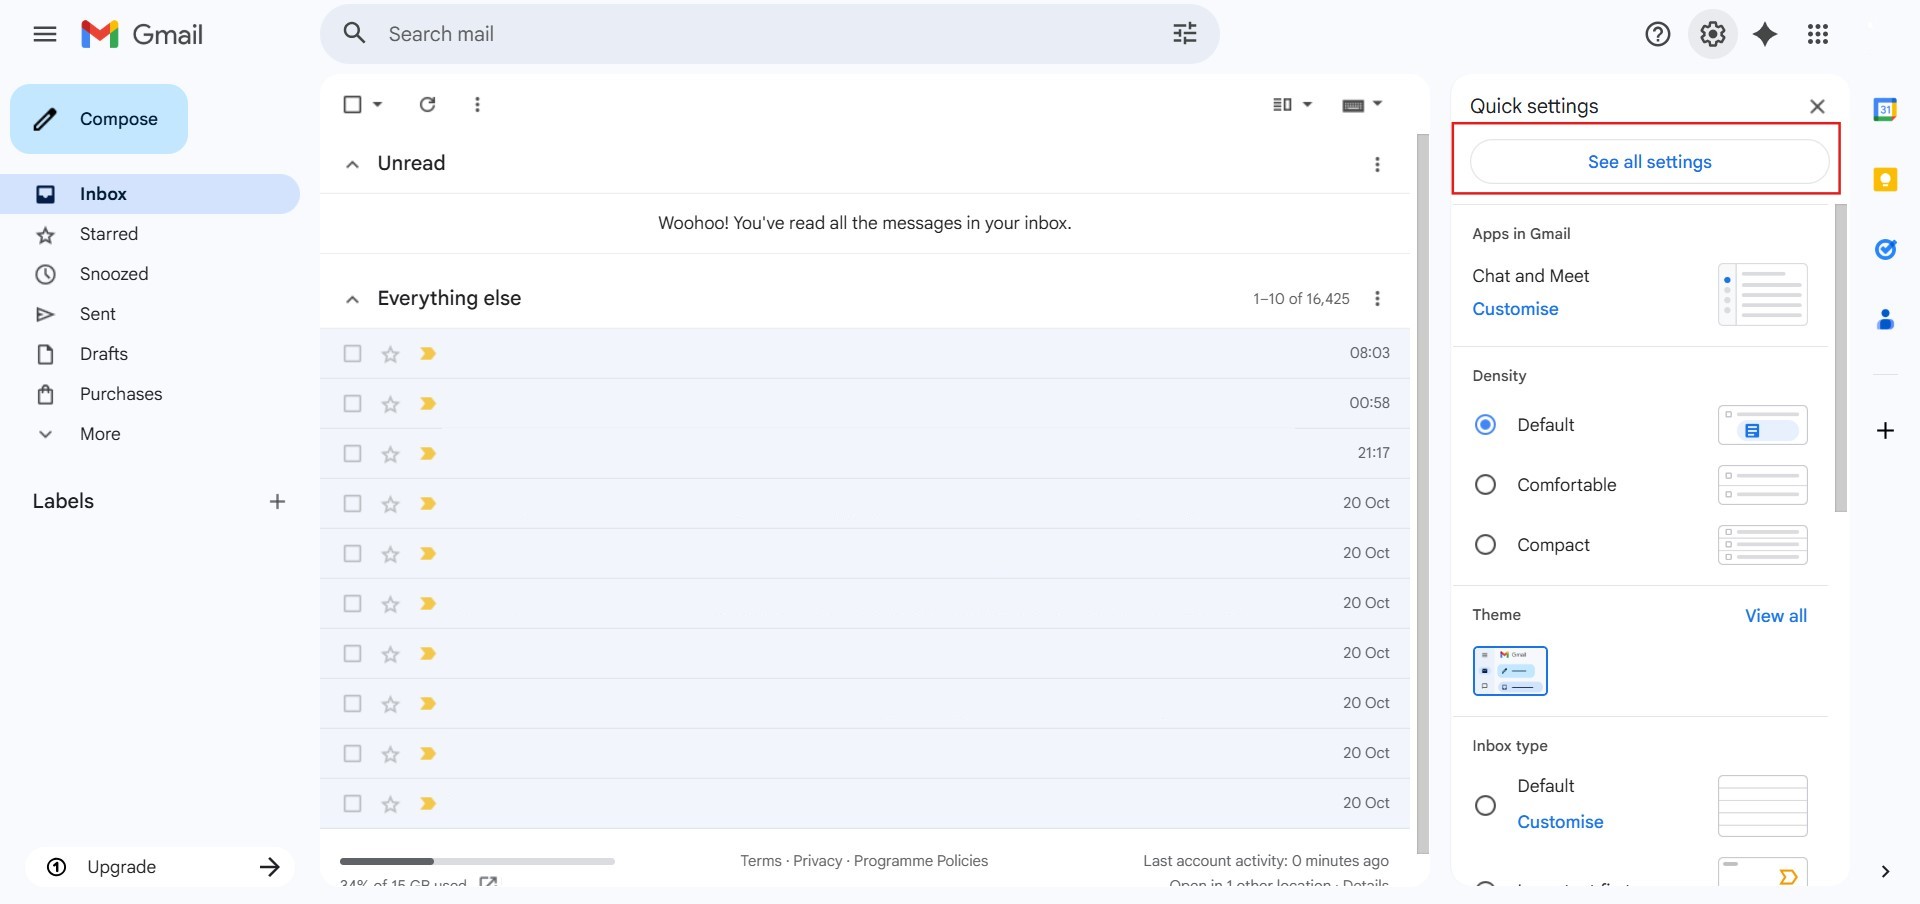
- Click the Gear icon (Settings) in the top right corner, select See all settings.
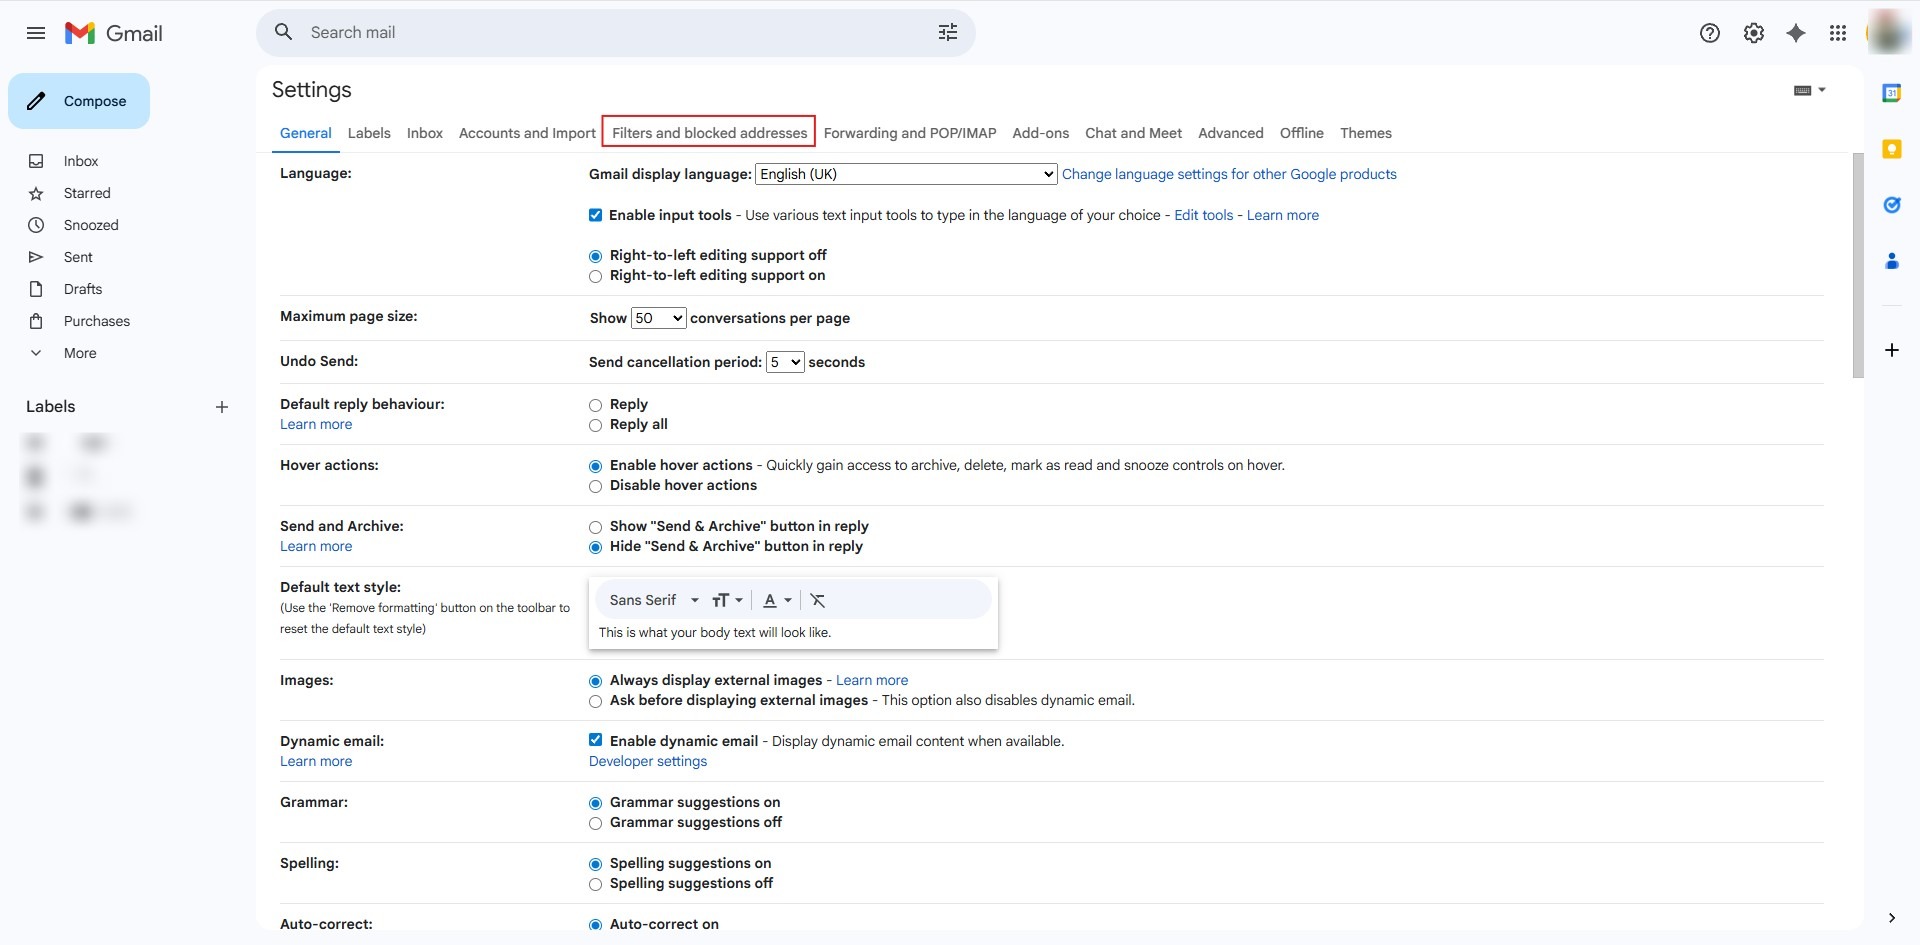
- Navigate to the Filters and Blocked Addresses tab.
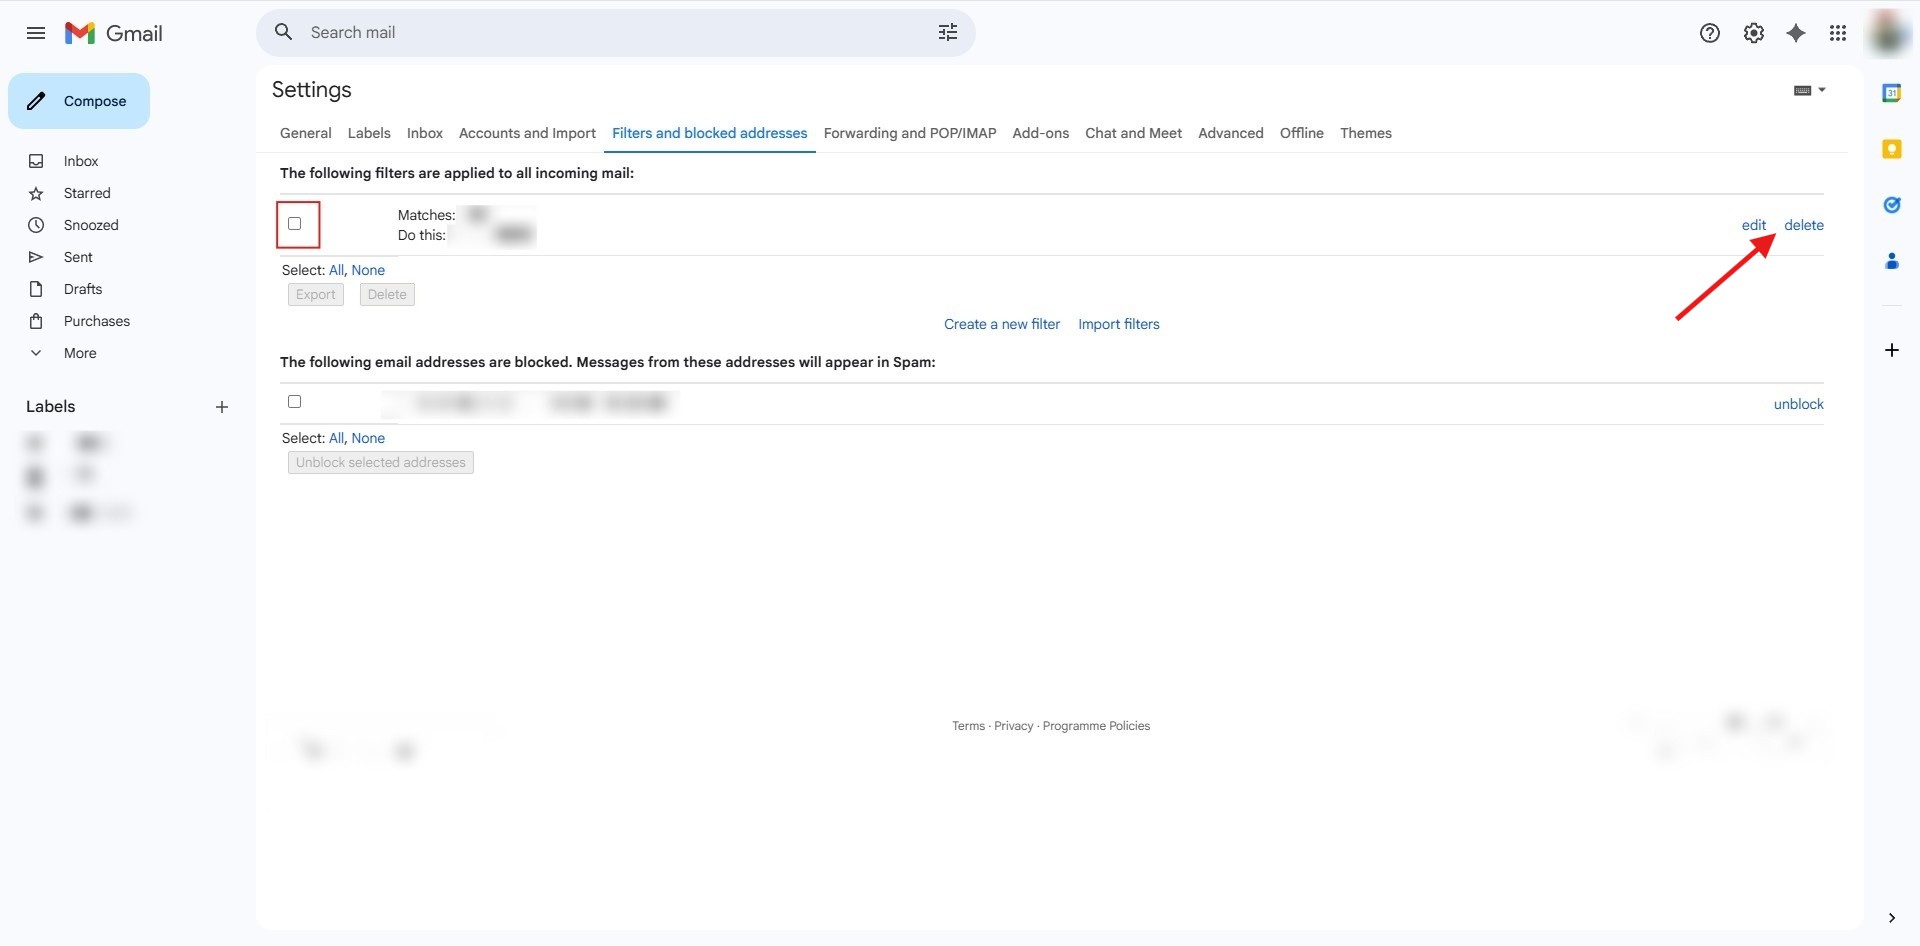
- Locate the filter rule then click edit or delete on the right side of the filter.
Exporting Filter Rules to XML Files
Backup existing sender or keyword rules to an external XML file for deployment elsewhere.
- Click the Gear icon (Settings) in the top right corner, select See all settings.
- Navigate to the Filters and Blocked Addresses tab.
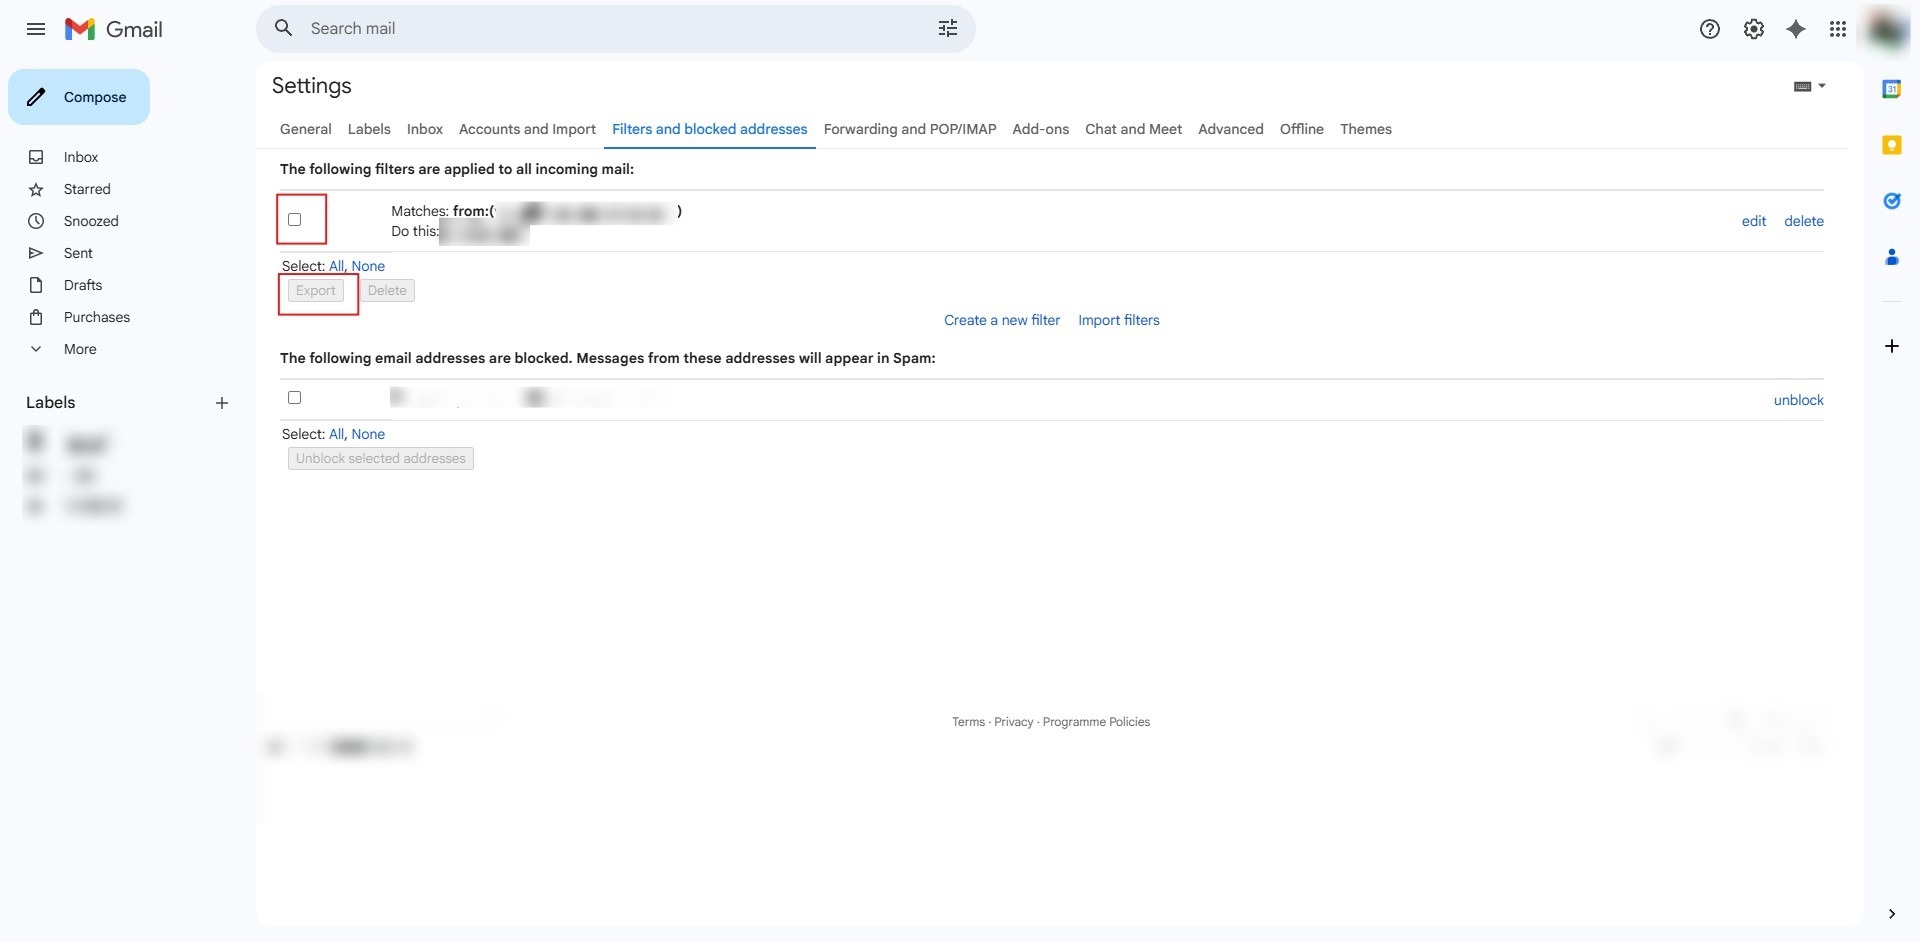
- Check the checkboxes next to the email user or word-based filters you wish to save, scroll down, and click Export. Save the generated XML file to your computer.
Importing Filter Rules into Gmail Account
Quickly restore or transfer filter configurations from a saved XML file into your account.
- Click the Gear icon (Settings) in the top right corner, select See all settings.
- Navigate to the Filters and Blocked Addresses tab.
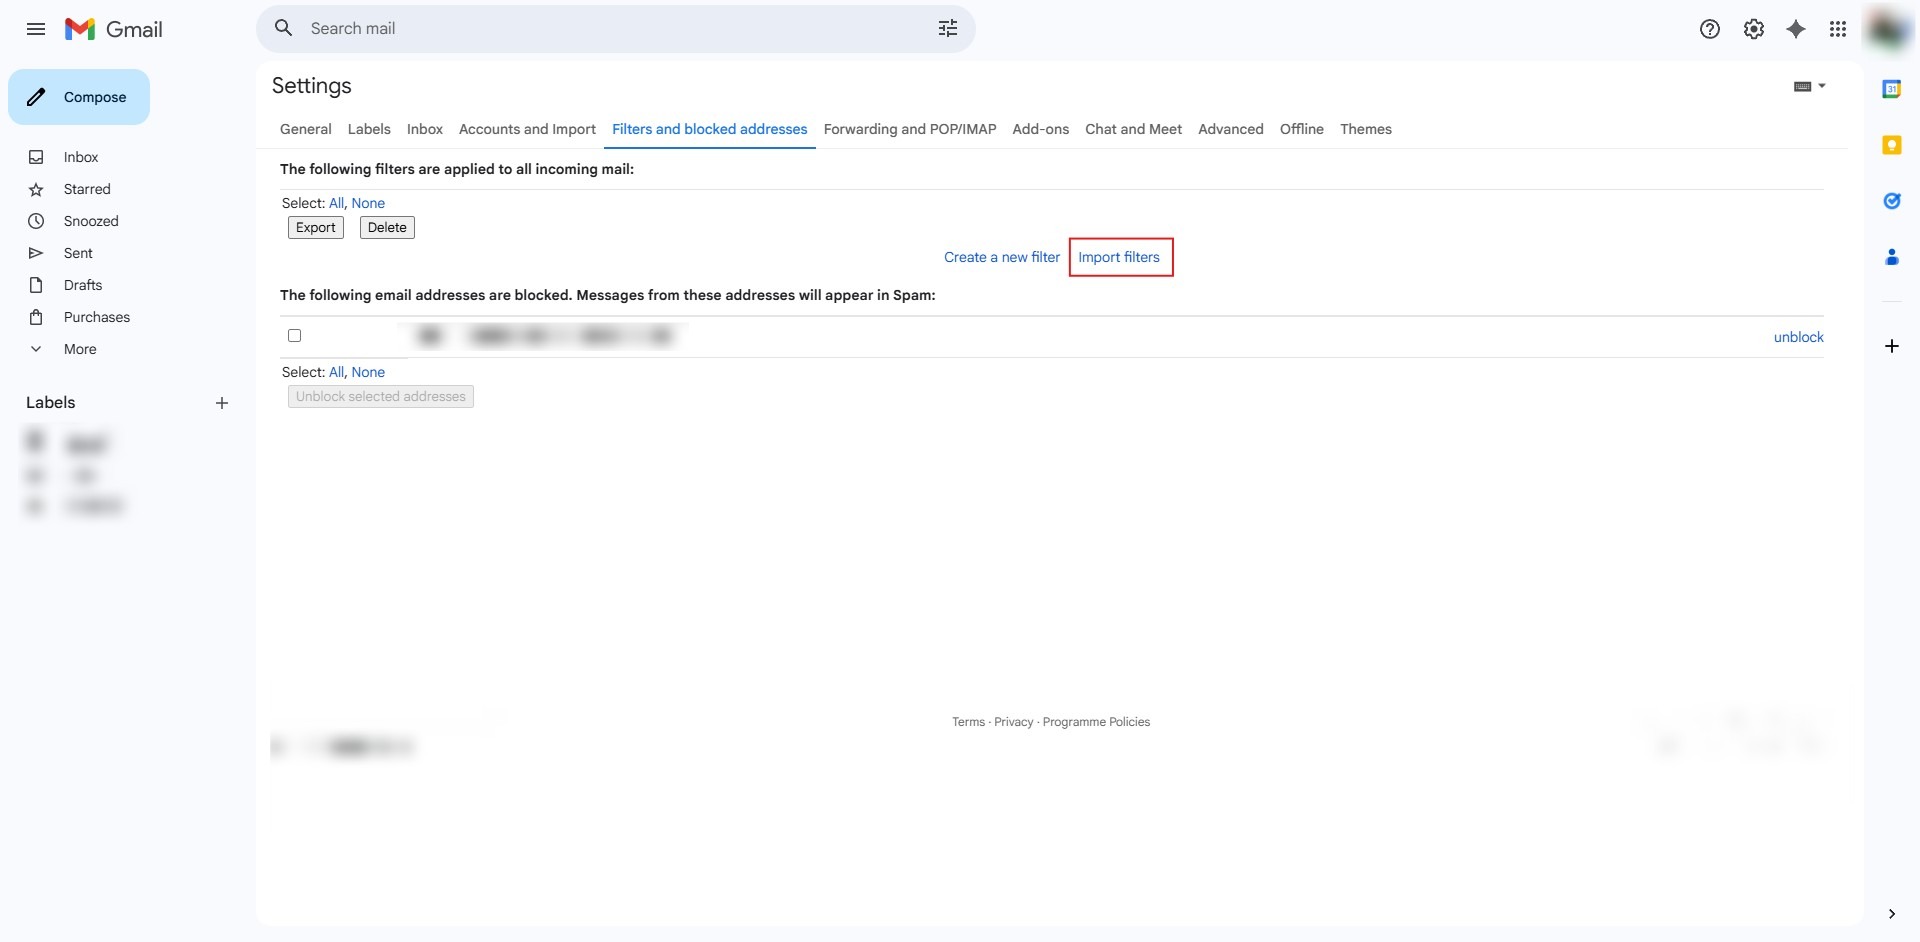
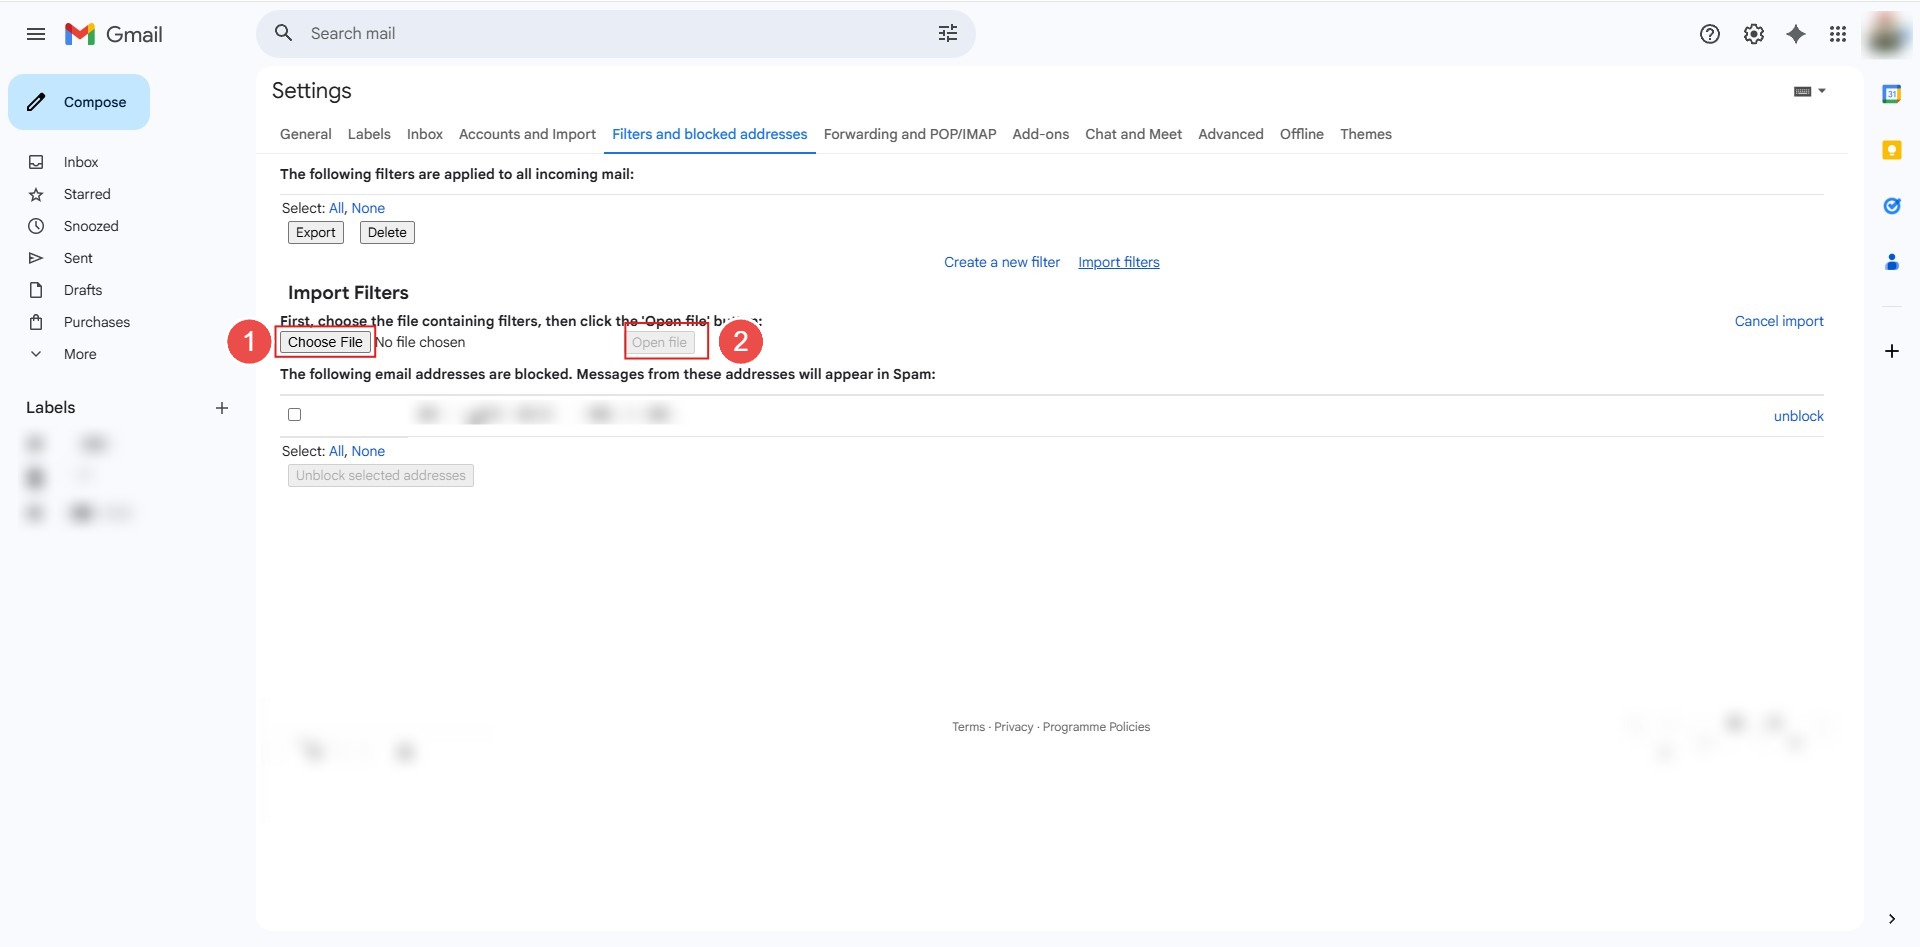
- Scroll down to the bottom and click Import filters.
- Click Choose File, select your exported XML filter file, and click Open file.
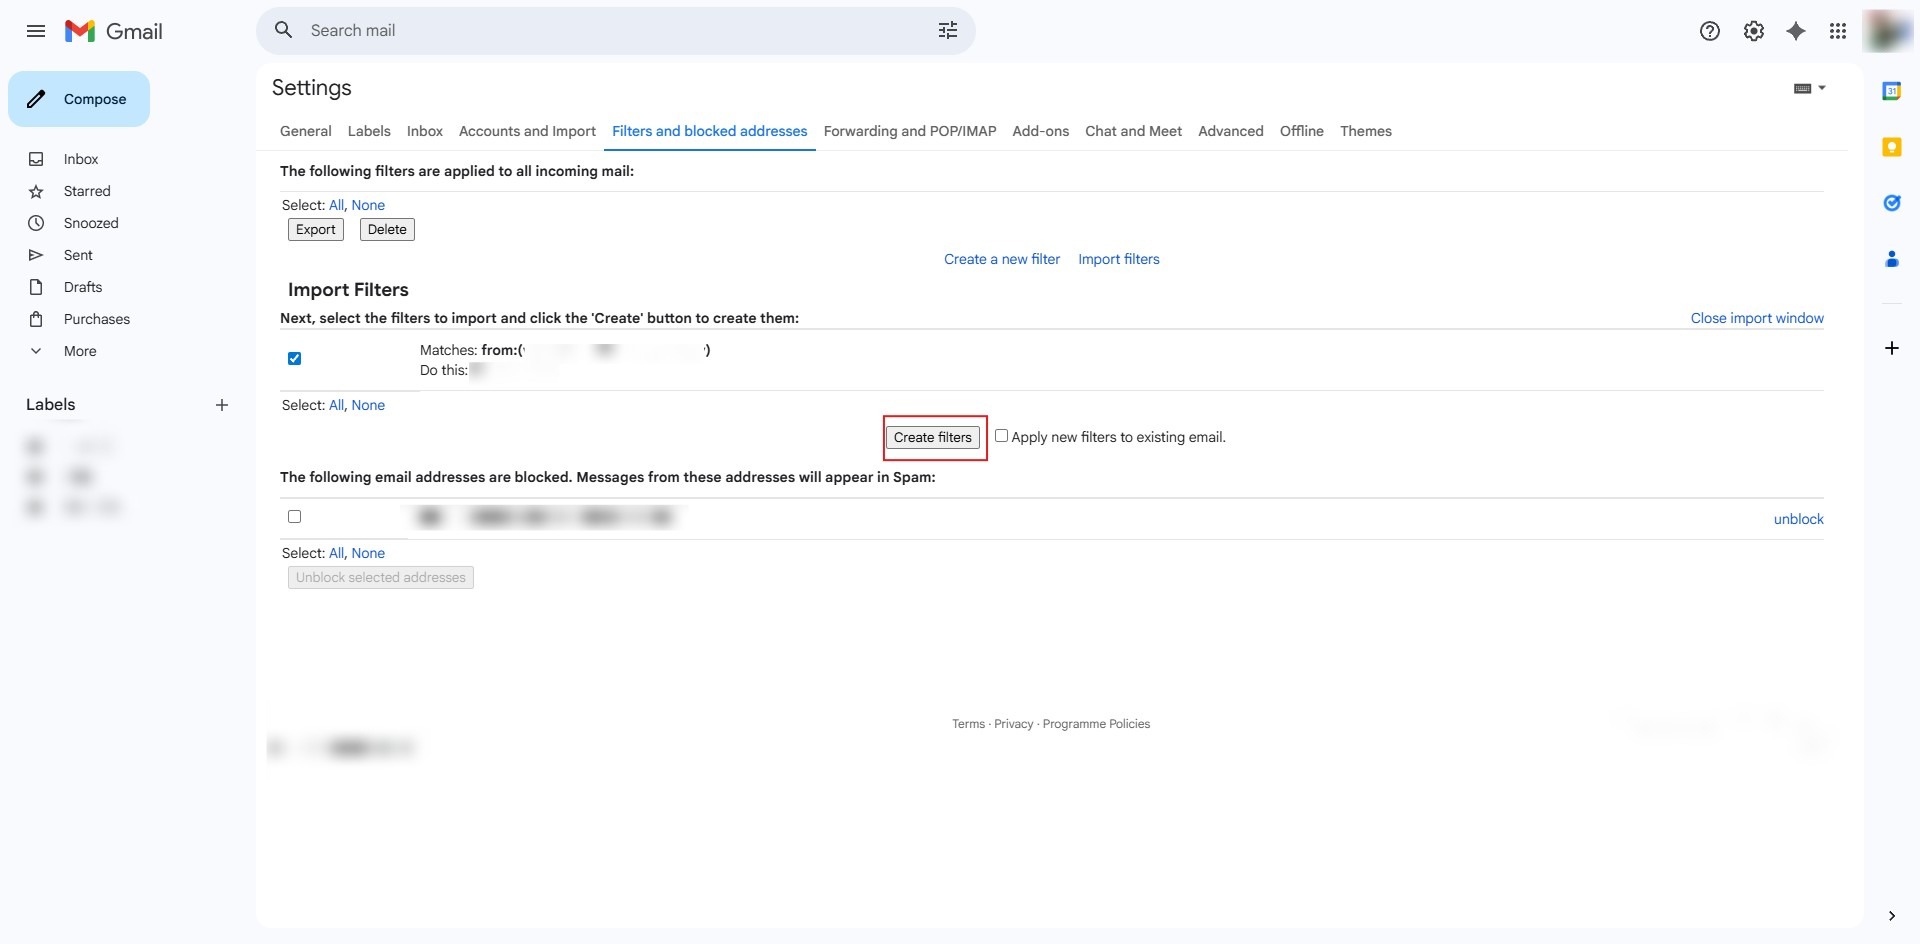
- Check the rules to apply and click Create filters to finalize.
Conclusion
By following this guidance, you can seamlessly create custom email rules, export and import backup configurations, and remove outdated filters to keep your Gmail inbox secure and structured.
For additional assistance or if you encounter any issues, please contact our support team at support@ipserverone.com.
Article updated on 14 August 2026 by Johnny