Search Our Database
How to repair Outlook data files using Outlook Inbox Repair tool
Introduction
When your email files become corrupted or inaccessible, the Outlook Inbox Repair tool (SCANPST.EXE) can safely diagnose and mend these internal database errors. This built-in Windows utility allows Microsoft Outlook users to quickly restore file integrity and recover missing folders directly from their local machine.
Prerequisite
- Administrator privileges on the local machine (if required to access system folders)
-
Basic knowledge of navigating Windows File Explorer
Step-by-step guide
Step 1: Locate Outlook data file
-
Open Microsoft Outlook
-
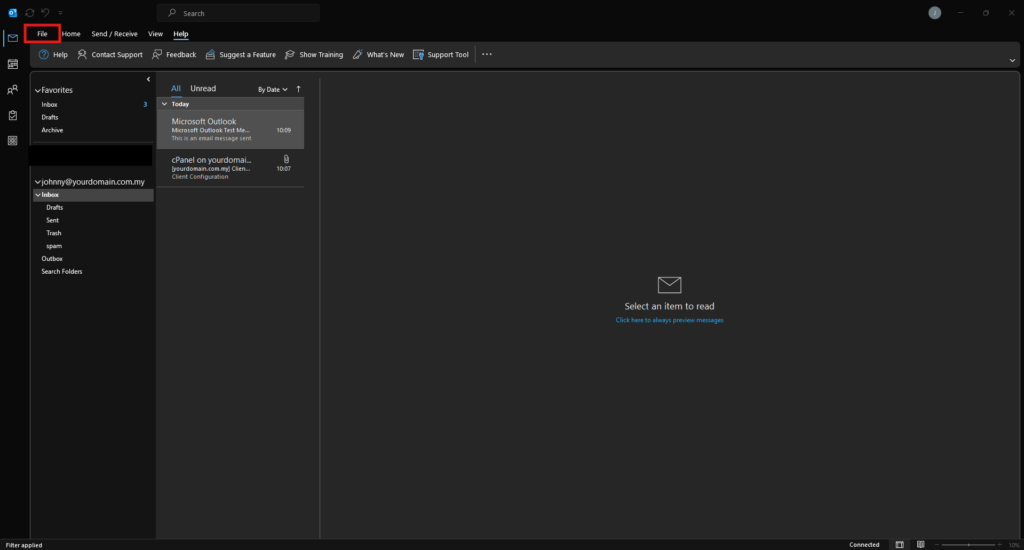
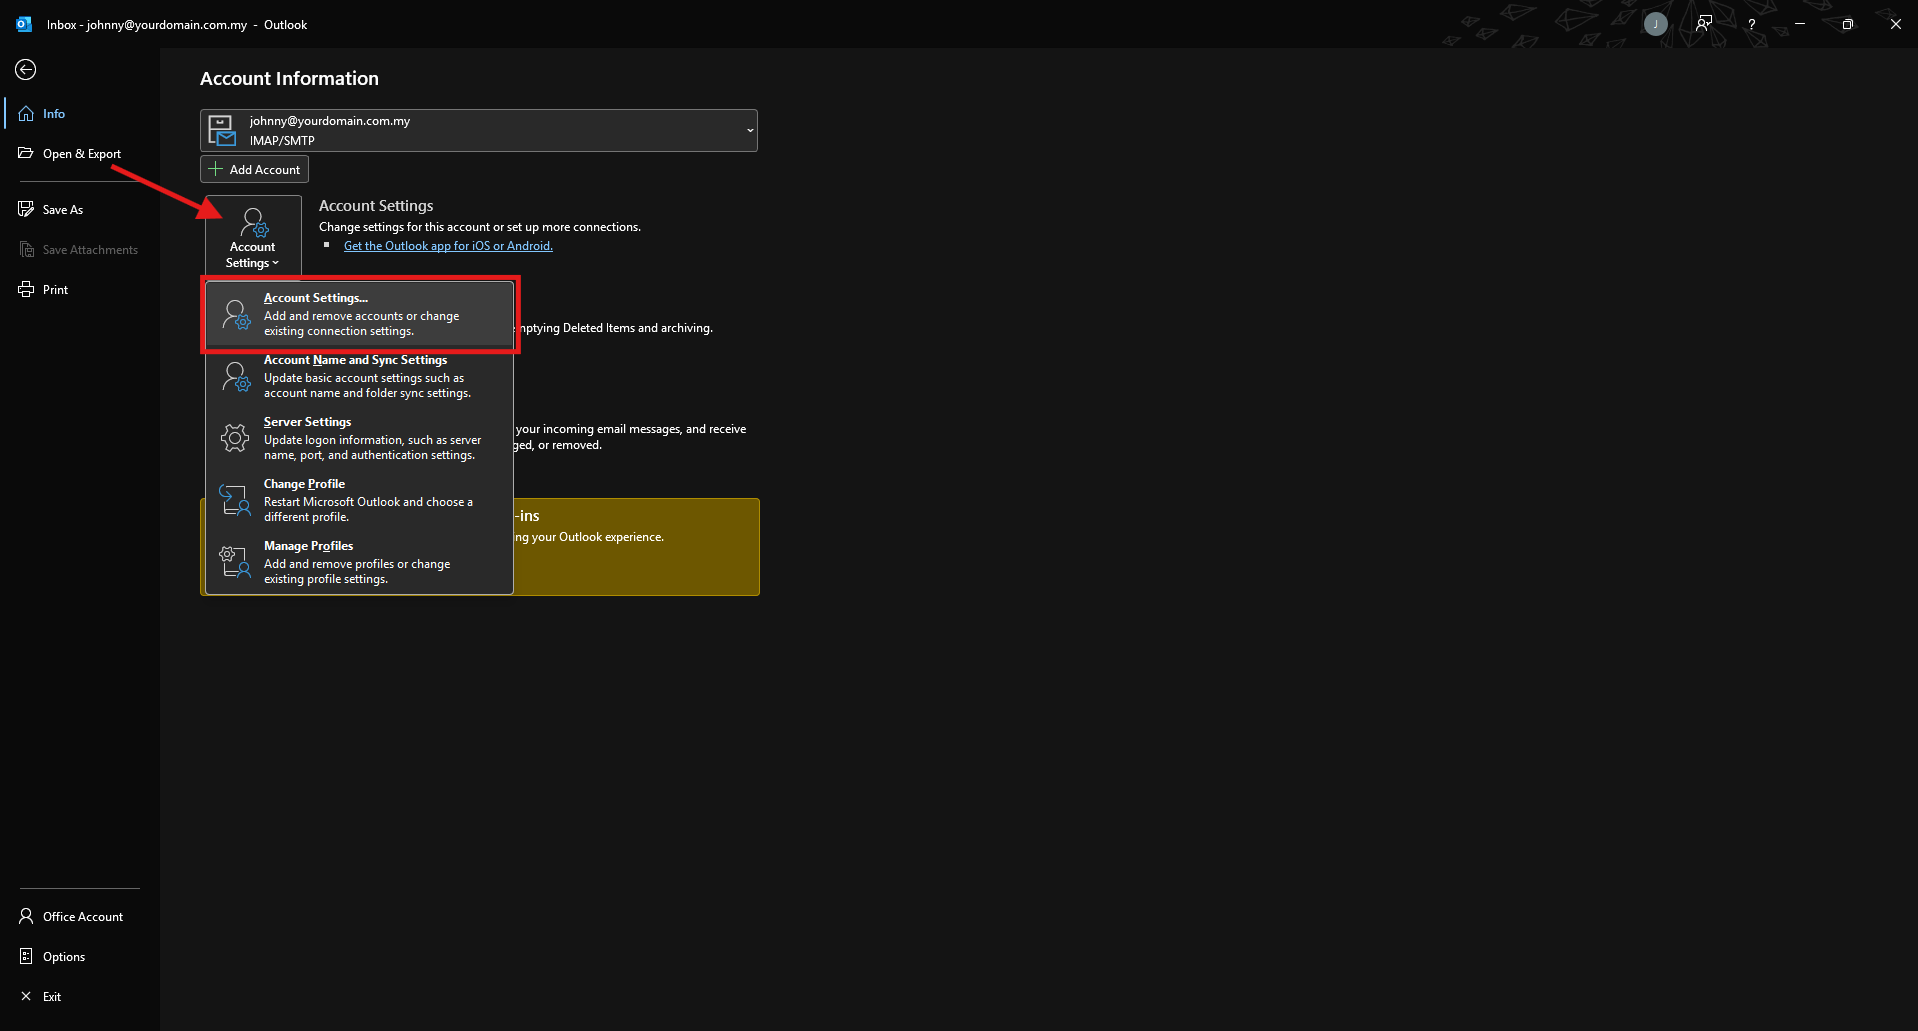
Click on the File in the top left corner
-
Select Account Settings, and then click Account Settings from the dropdown

-
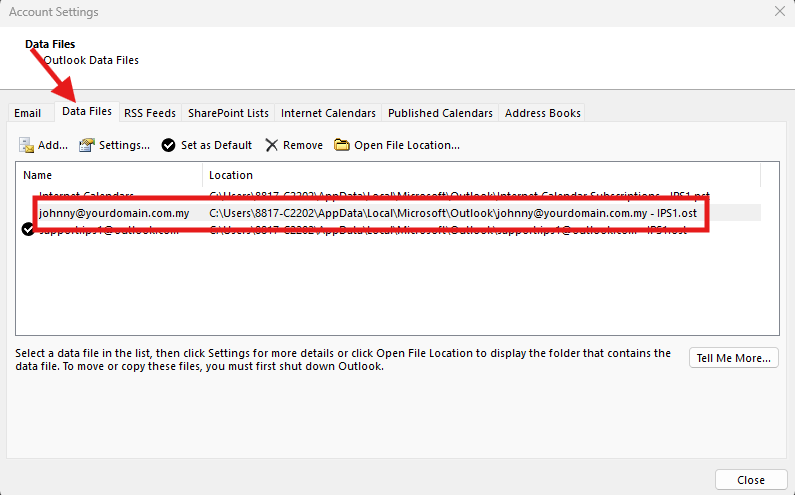
Switch to the Data Files in the pop-up window. Note down the exact file path and name of the .pst or .ost file you need to repair, then close the Account Settings window
Step 2: Close Microsoft Outlook completely
-
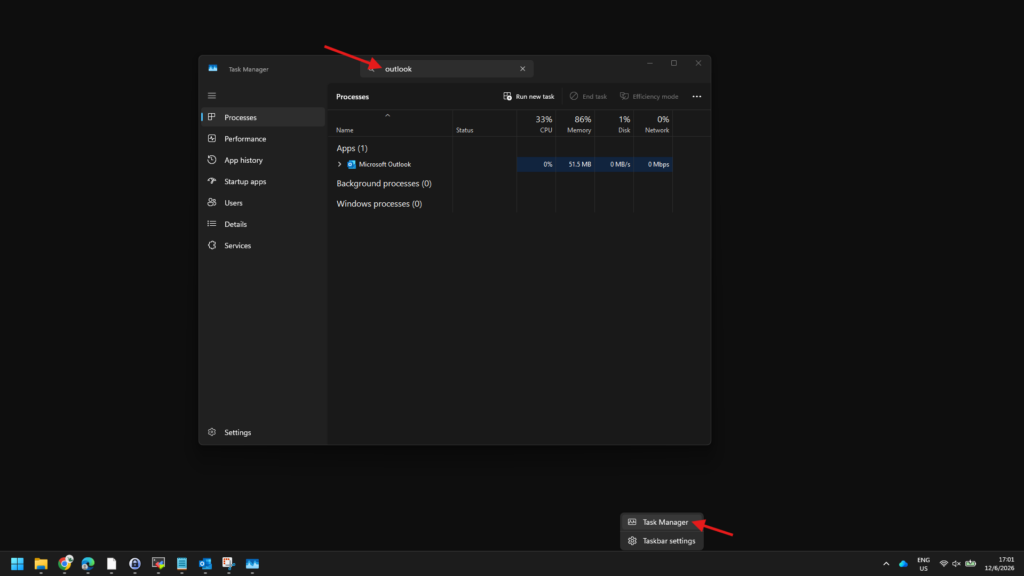
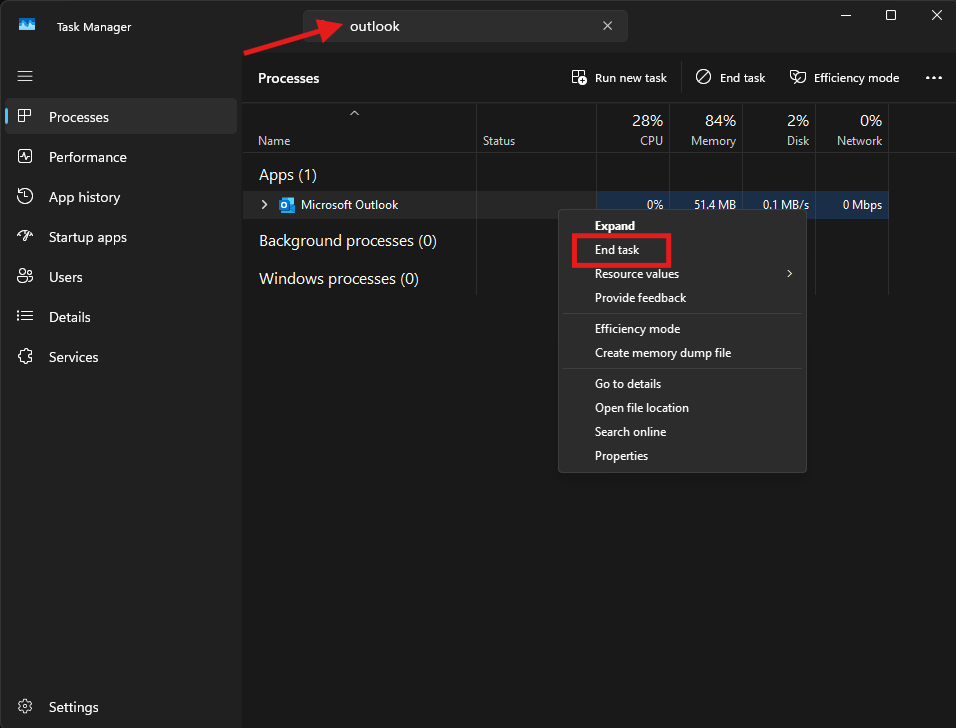
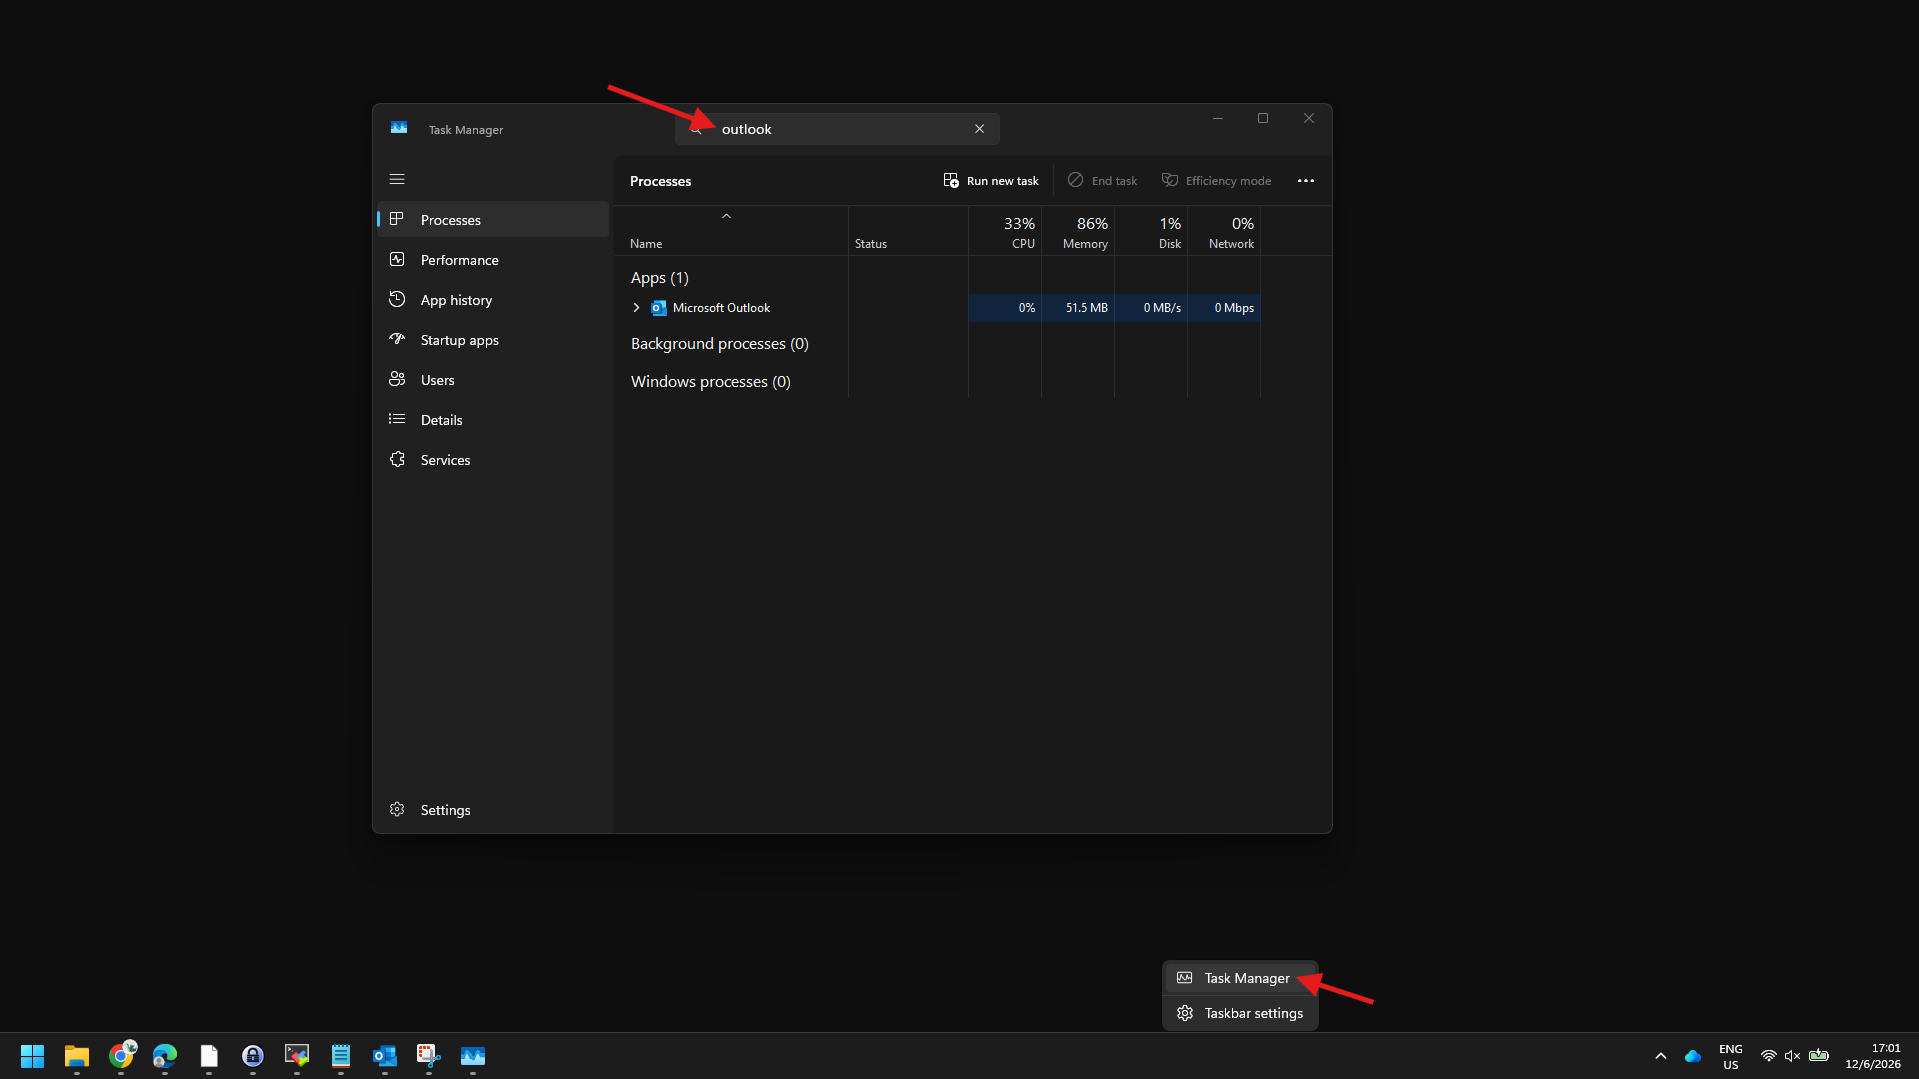
Right-click the Windows Task Bar and select Task Manager
-
Under the Processes, look for Microsoft Outlook or outlook.exe and right-click Microsoft Outlook and select End Task to ensure Microsoft Outlook is stopped completely
Step 3: Locate and launch the Inbox Repair tool
-
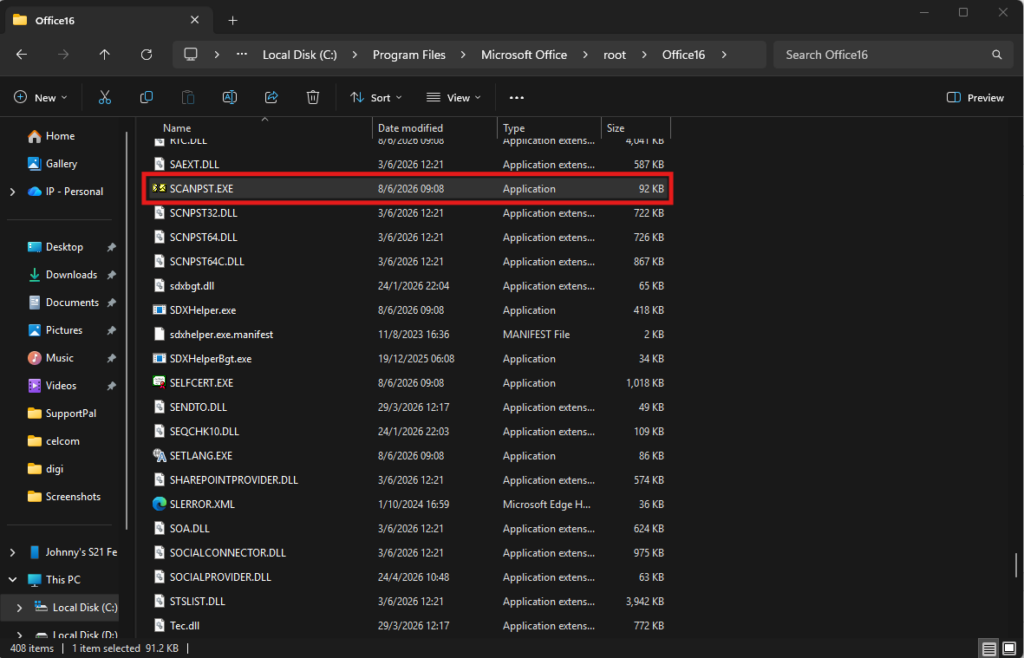
Open Windows File Explorer and navigate to your Outlook installation folder (typically found in C:\Program Files\Microsoft Office\root\OfficeXX or C:\Program Files (x86)\Microsoft Office\root\OfficeXX, where XX is your Office version number)
-
Double-click on SCANPST.EXE to open the Inbox Repair tool

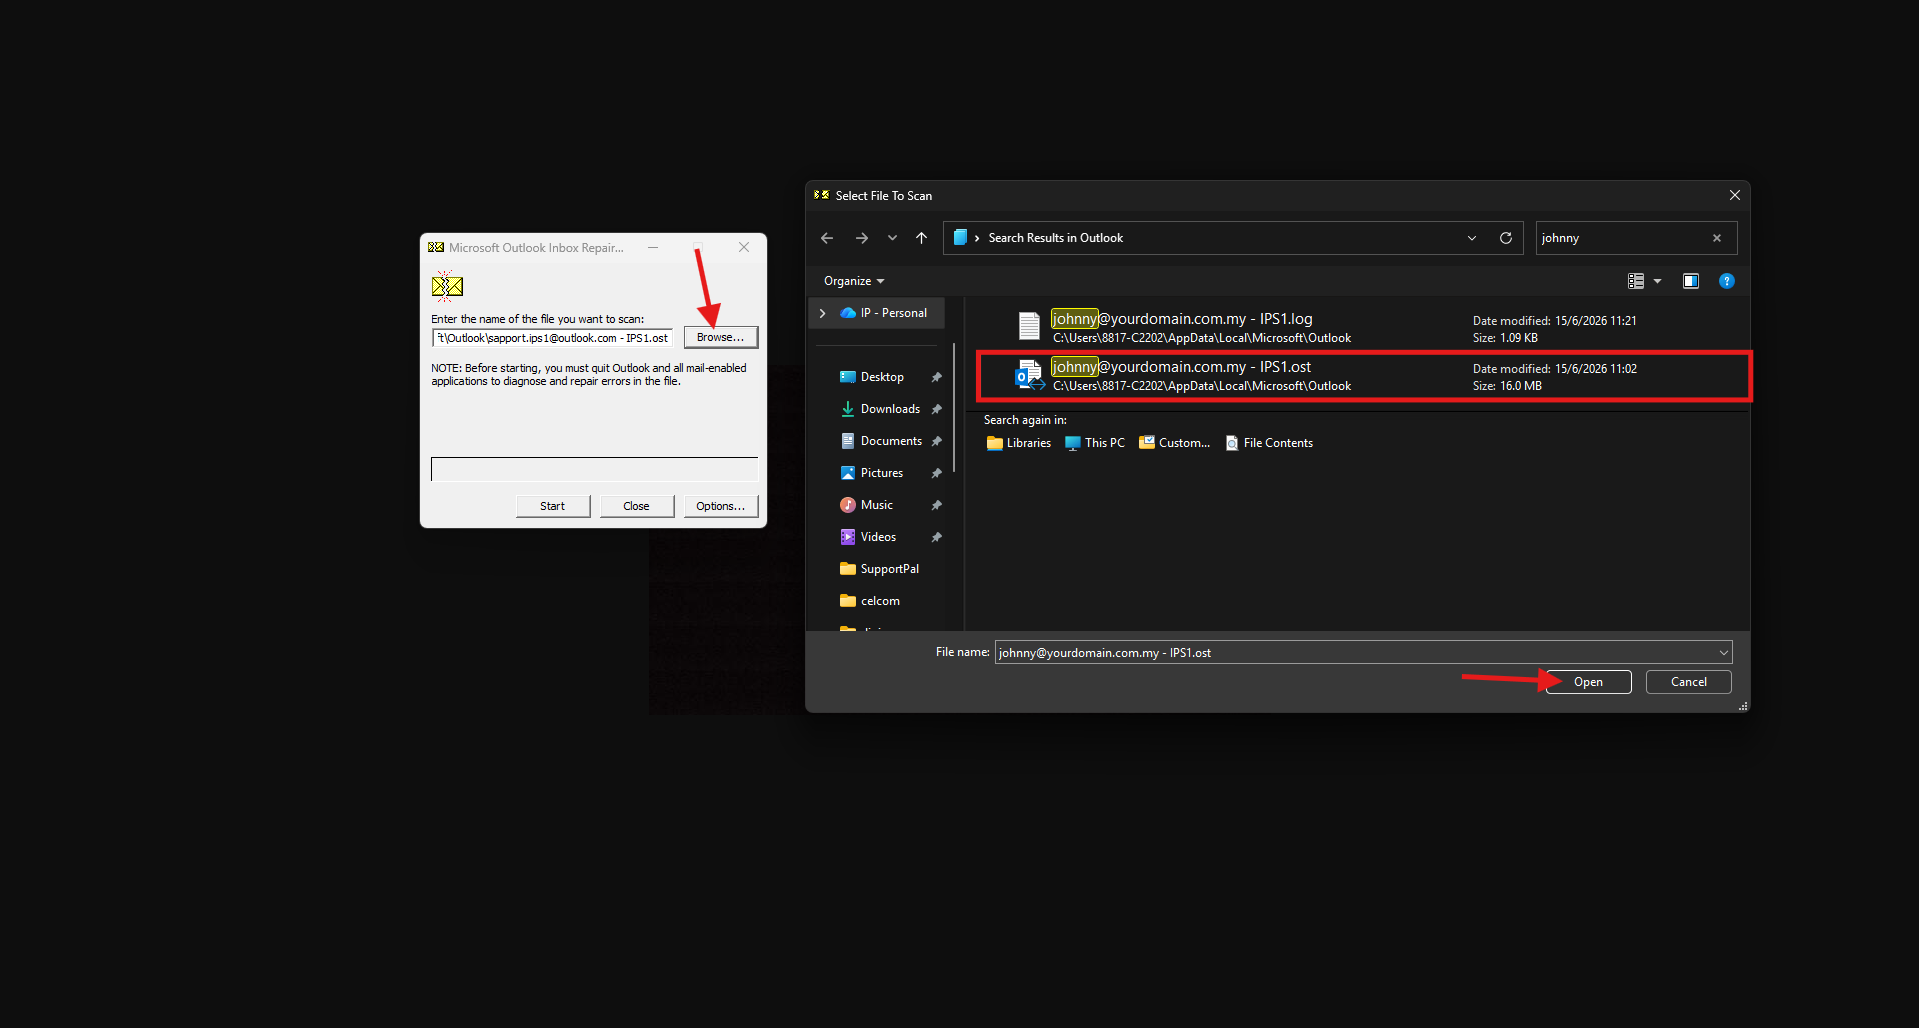
Step 4: Select and scan the corrupted Outlook data file
-
Click Browse in the Inbox Repair tool window
-
Navigate to the location of your Outlook data file (usually an .pst or .ost file located in your Documents/Outlook Files folder)
-
Select the file you want to repair and click Open

-
Click the Start to begin the analysis process

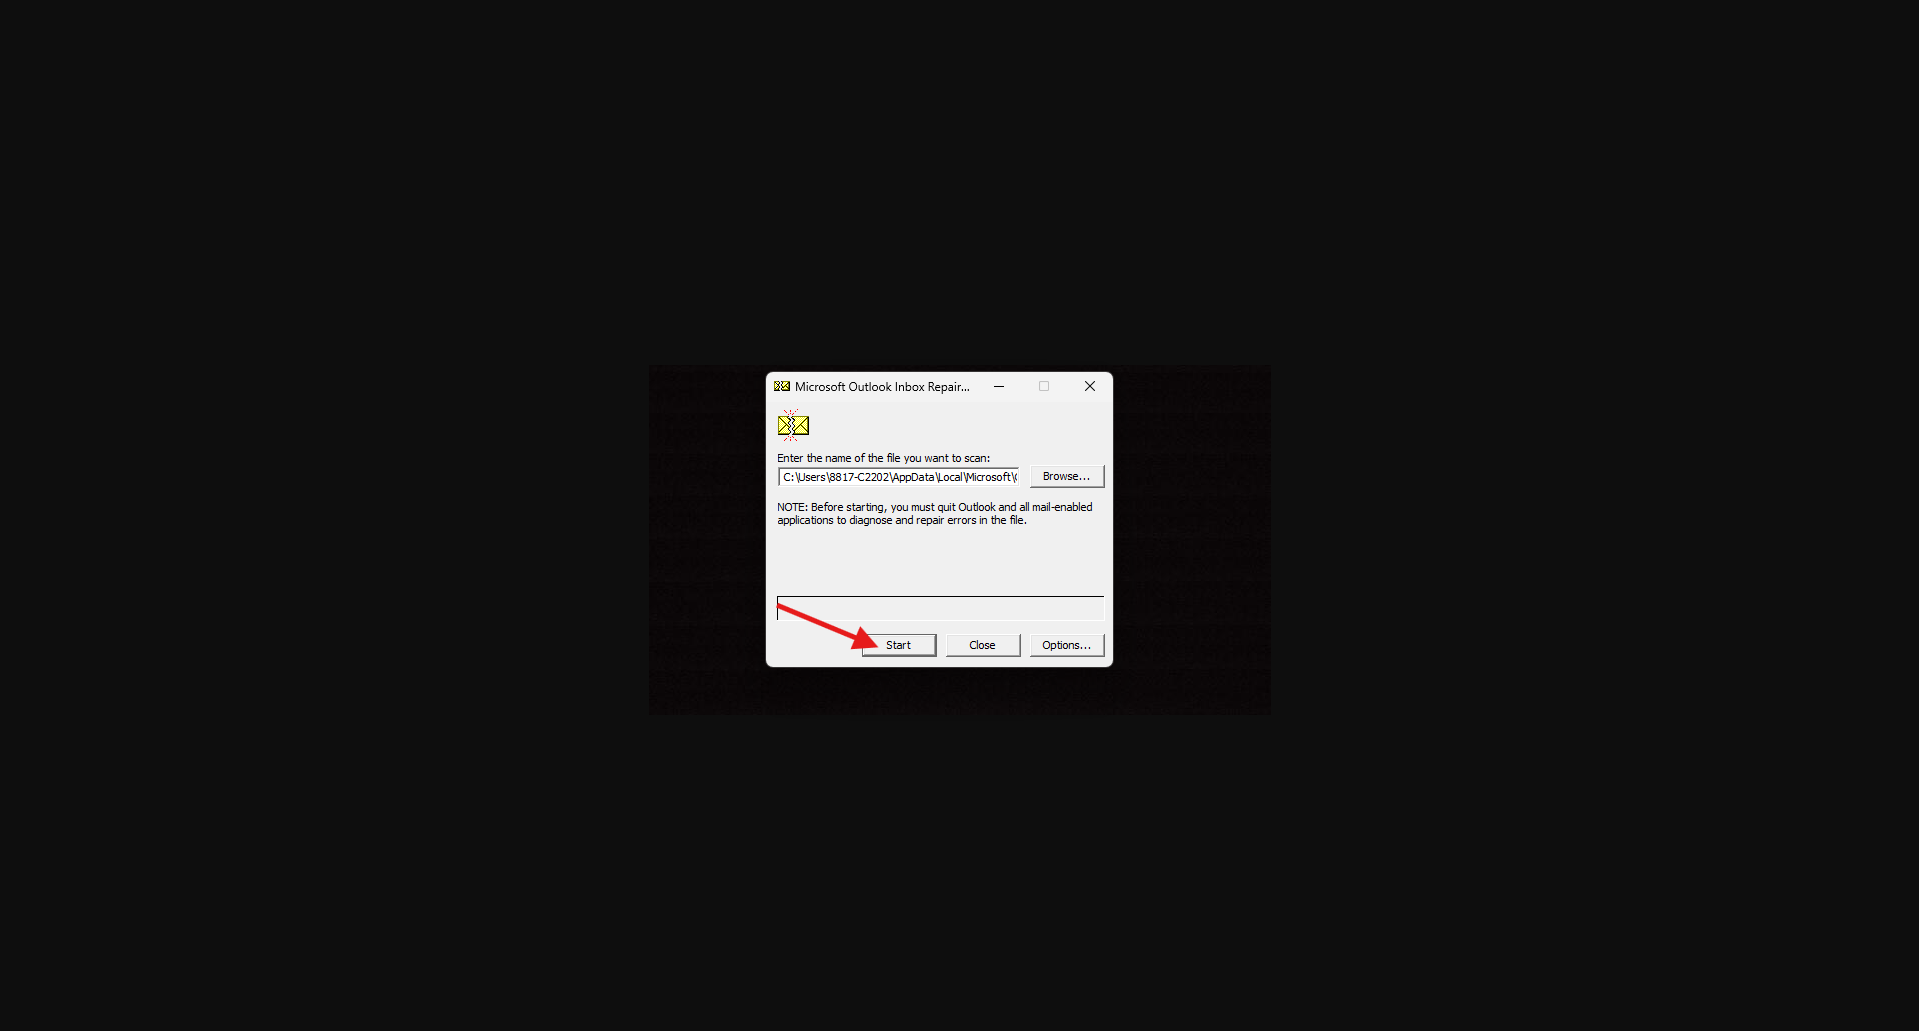
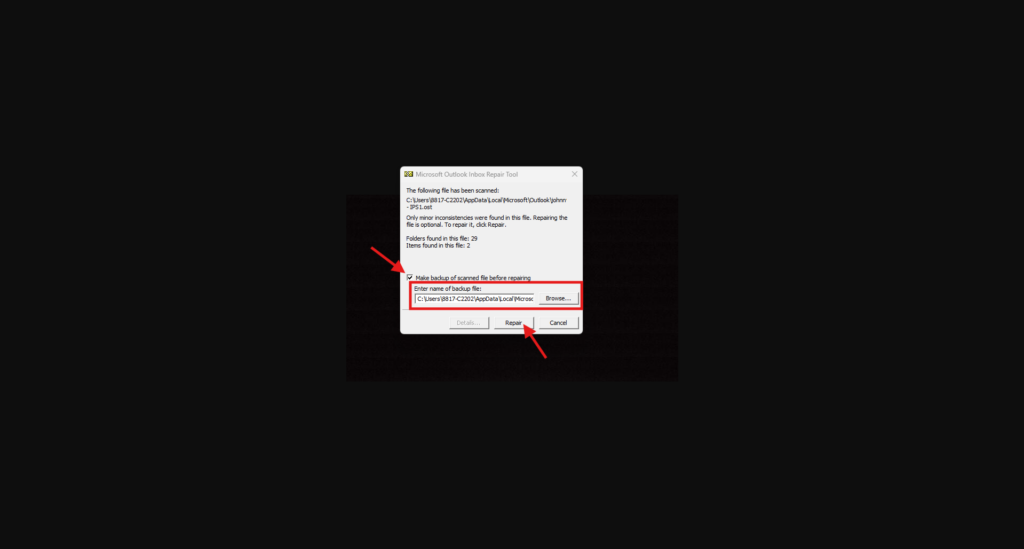
Step 5: Repair the detected errors
-
Wait for the tool to finish scanning the file for inconsistencies
-
Check the box that says Make backup of scanned file before repairing to protect your data
-
Click the Repair button to begin the fixing process
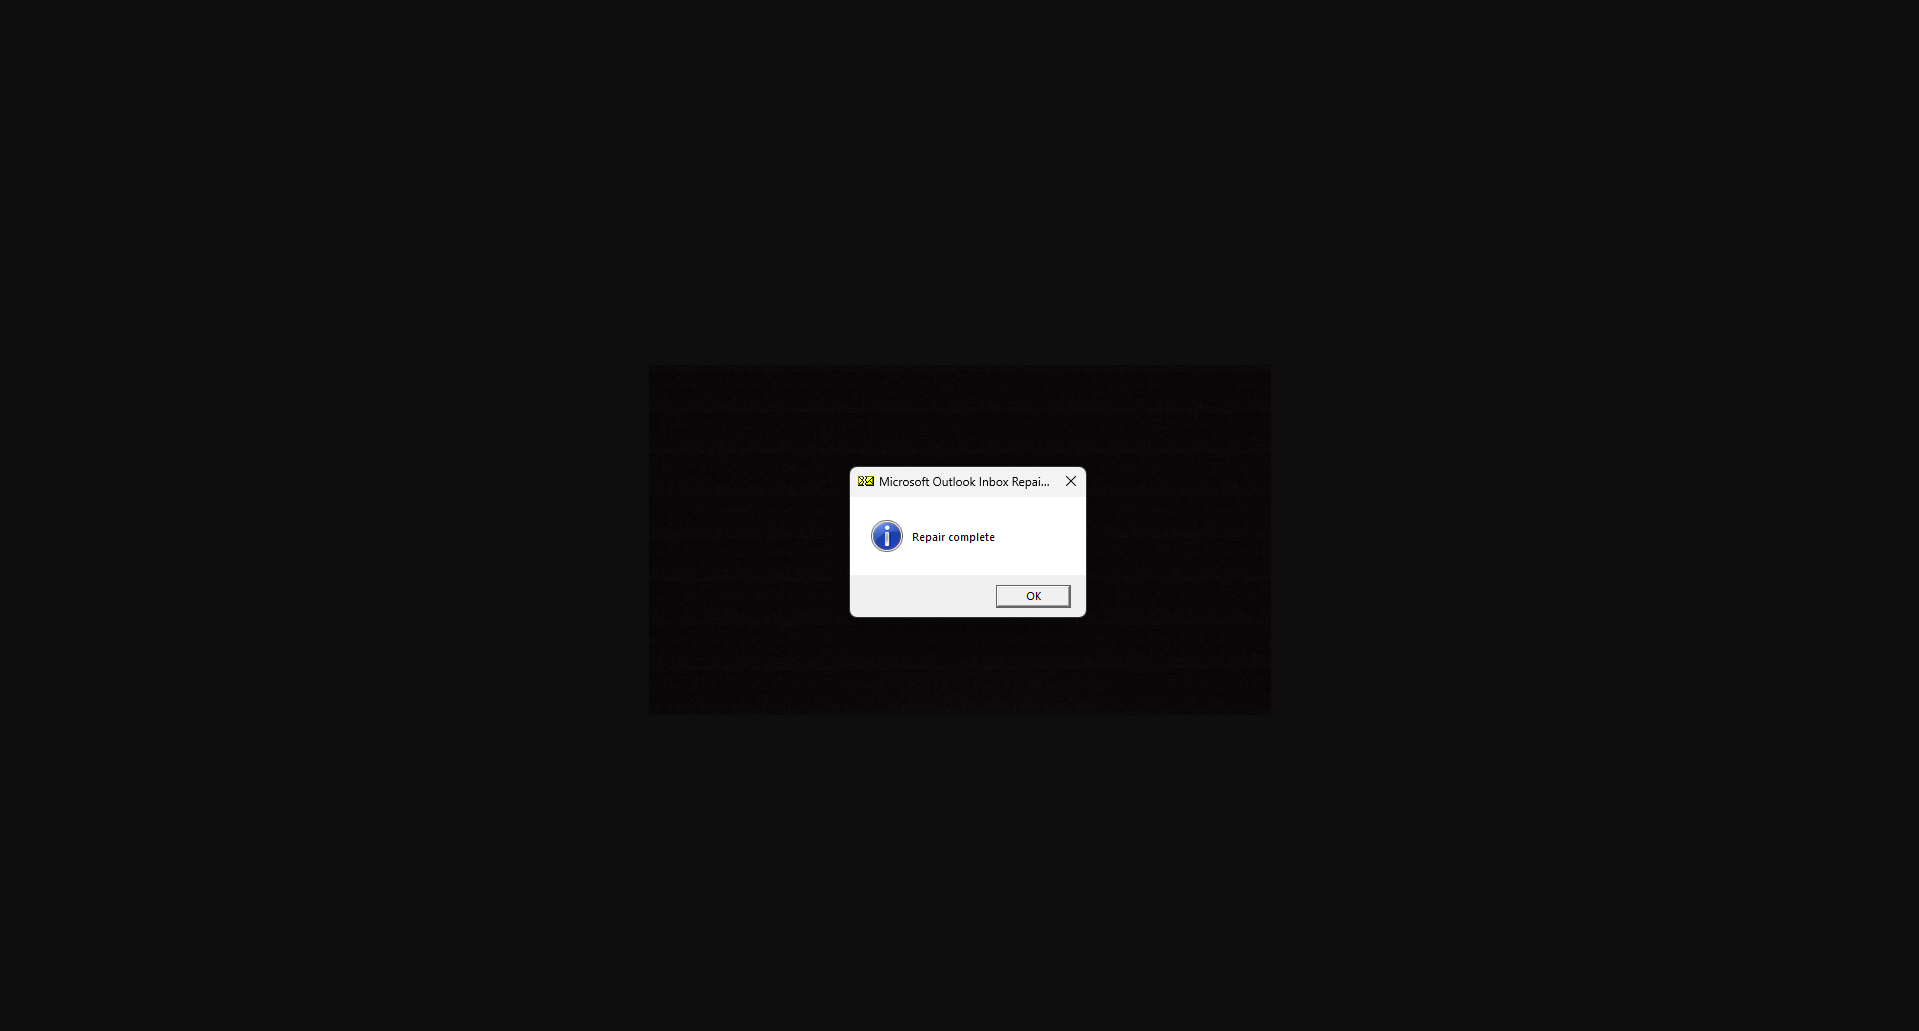
-
Click OK once the “Repair complete” dialog box appears


Step 6: Verify the repaired data file
-
Launch the Microsoft Outlook
-
Confirm that your folders, emails, and calendar items are visible and accessible
Conclusion
By following this guidance, you can successfully resolve corruption issues in your Outlook data files and restore your email client back to a stable working condition, ensuring your email client runs smoothly and your important mailbox data is restored.
For additional assistance or if you encounter any issues, please contact our support team at support@ipserverone.com.