
Search Our Database
How to Resolve Outlook Email Security Pop-up Warnings
Introduction
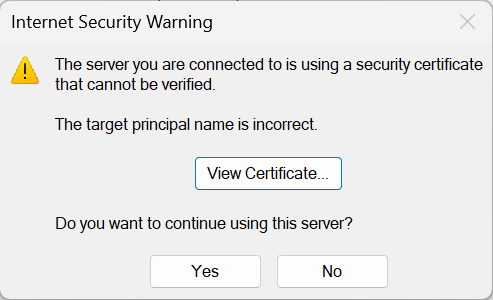
Microsoft Outlook users may occasionally encounter an “Internet Security Warning” pop-up when launching the application or checking emails. This error typically occurs when the email server’s SSL certificate has expired, the domain name does not match the server configuration, or the certificate is self-signed. By renewing the expired SSL certificate on the server or manually trusting the certificate within the email client, you can quickly restore your connection. This guide explains how to bypass or permanently resolve these security warnings safely so you can resume sending and receiving emails without interruption.
Prerequisite
- Access to the local computer with Microsoft Outlook installed.
- Access to the server or control panel with Admin privilege (if renewing the server SSL).
- Basic knowledge of navigating email client settings.
Step-by-step Guide
There are two primary ways to resolve this security error in Outlook. The first method requires renewing the actual SSL certificate on the server if it has expired, while the second method involves manually installing or trusting the certificate directly in the client.
Method 1: Renew Expired SSL Certificate
If the SSL certificate on the email server has actually expired, it must be renewed and reinstalled on the server to resolve the security error permanently for all users.
Method 2: Trust and Install the Certificate Manually
This method allows you to bypass the warning by installing the certificate into your local machine’s trusted root store, which is useful if the server uses a self-signed or mismatched certificate that you are confident is SECURE.
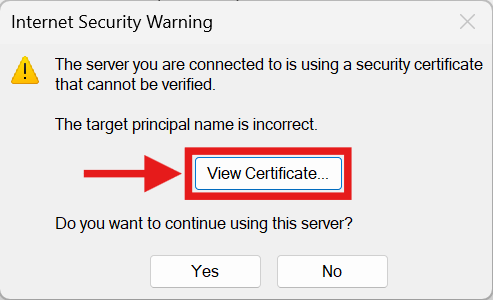
- When the Internet Security Warning dialog box appears in Outlook, click on the View Certificate… button.
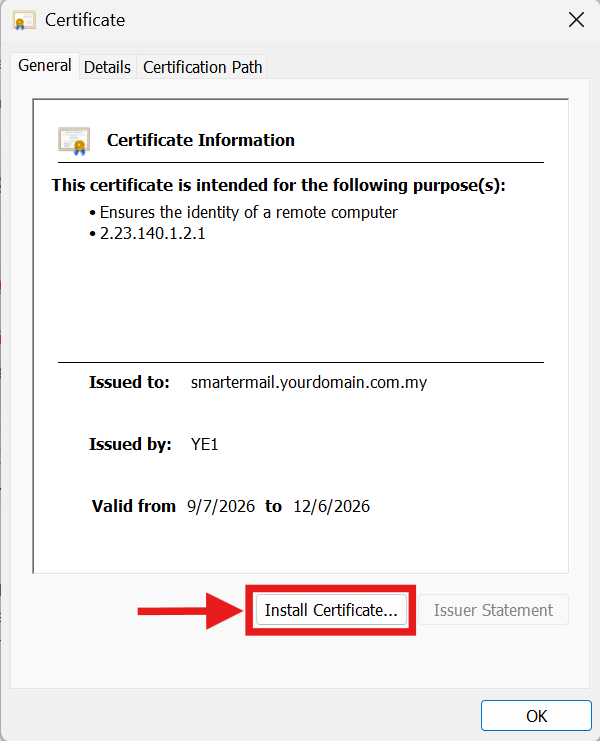
- In the Certificate window, click on Install Certificate… to open the Certificate Import Wizard.
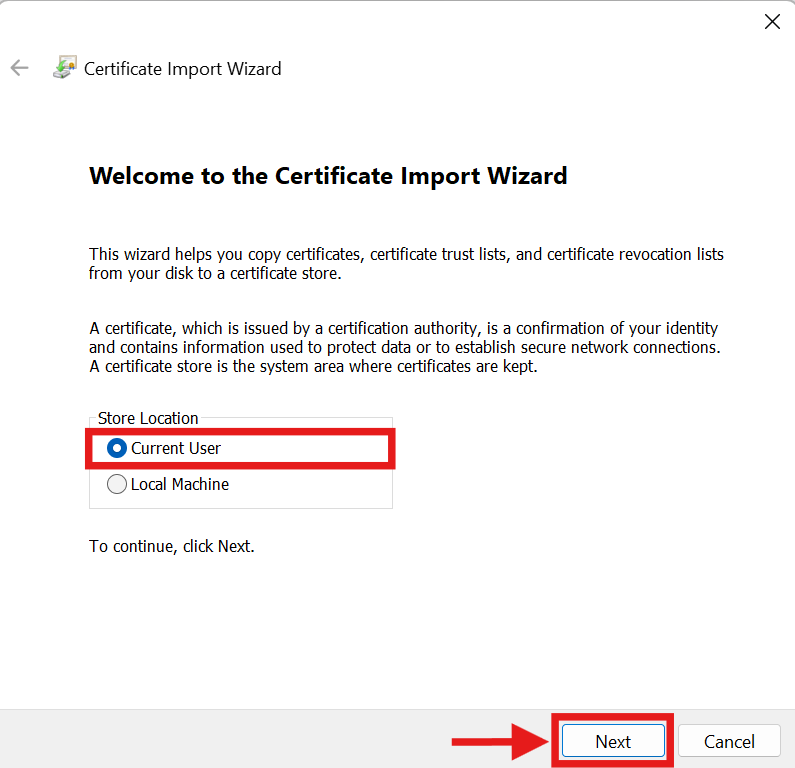
- Select Current User and click Next.
- Choose Place all certificates in the following store and click Browse….
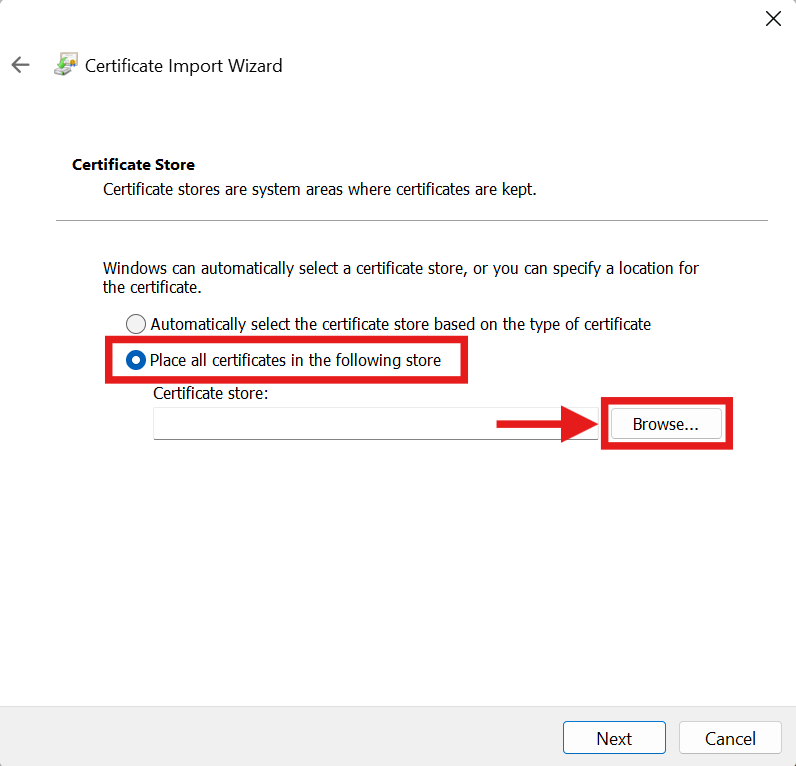
- Select Trusted Root Certification Authorities from the list, click OK, and then click Next.
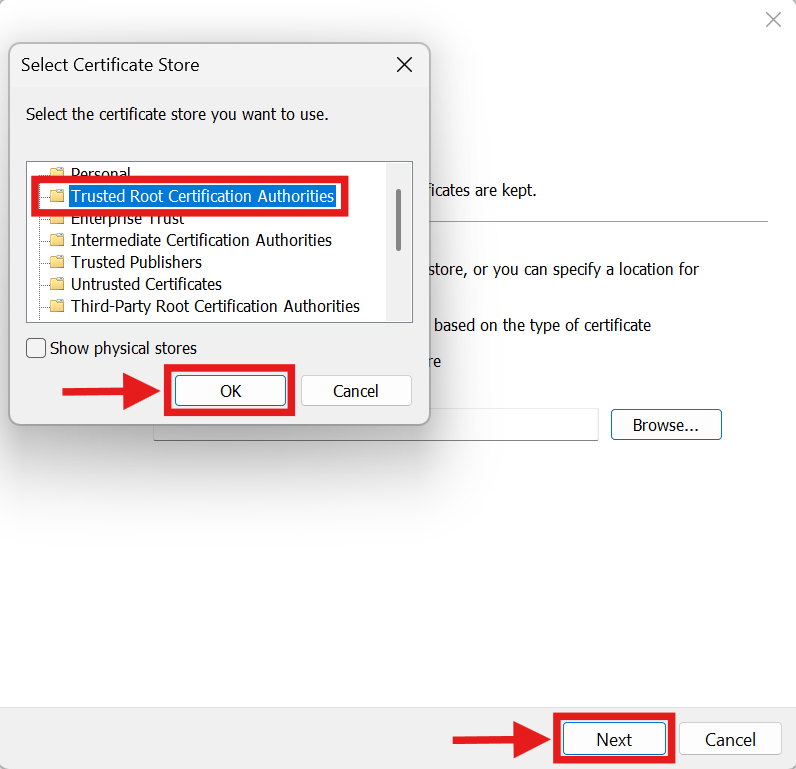
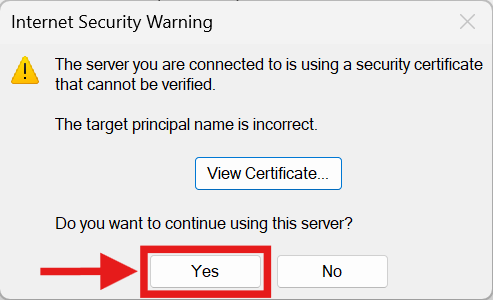
- Click Finish to complete the import, and confirm any subsequent security prompts by clicking Yes.
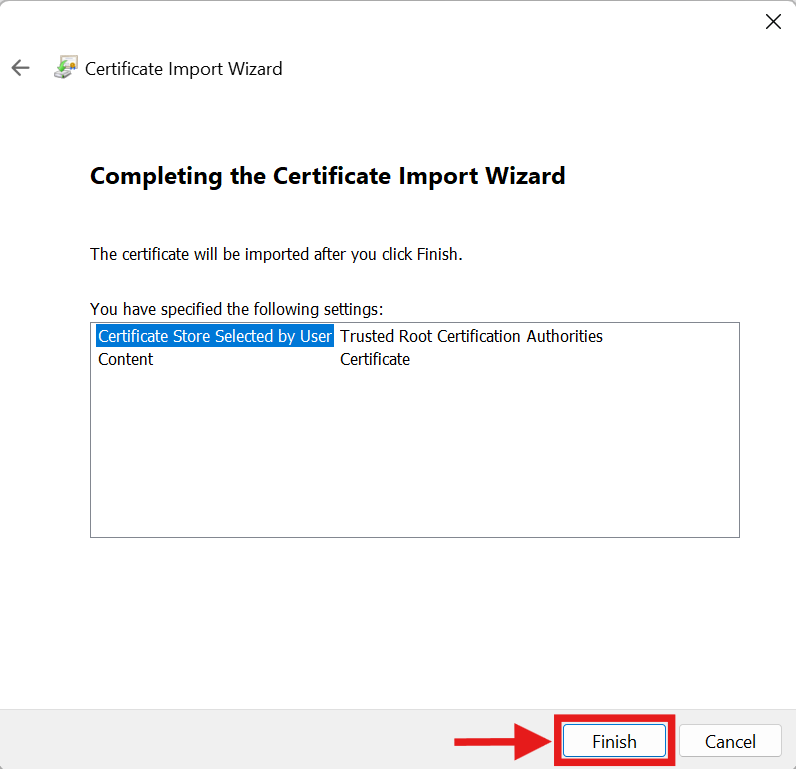
- Finally, click Yes on the original Internet Security Warning prompt to continue using the server, and restart Outlook.
Conclusion
By following this guidance, you can effectively resolve Microsoft Outlook email security pop-up warnings caused by expired, self-signed, or mismatched SSL certificates.
If you require further assistance, please contact our support team at support@ipserverone.com.