
Search Our Database
How to Take and Rollback VM Snapshots in Proxmox
Introduction
A virtual machine (VM) snapshot in Proxmox Virtual Environment (Proxmox VE) records the complete state of a VM’s disk and, optionally, its memory at a specific point in time. Administrators who manage virtual machines on Proxmox take snapshots before applying updates, changing configurations, or testing new software, because snapshots allow the VM to be restored quickly if anything goes wrong. This guide shows how anyone with access to a Proxmox host can take and roll back VM snapshots through both the web interface and the command line, keeping systems safe during maintenance.
Prerequisite
- Access to the Proxmox VE web interface with valid login credentials
- A virtual machine (VM) created on the Proxmox host
- Sufficient free storage space on the VM storage to hold snapshot data
- For the command line method, SSH access to the Proxmox host with root privileges
Step-by-Step Guide
Method 1: Take and Rollback Snapshots via the Proxmox Web Interface
This method uses the built-in Proxmox VE web interface and is recommended for users who prefer a visual interface without any command line knowledge.
Step 1: Log in to the Proxmox VE Web Interface
Open your web browser and navigate to https://your-node-ip:8006, then sign in with your username and password.
Step 2: Access the VM Snapshots Menu and Take a Snapshot
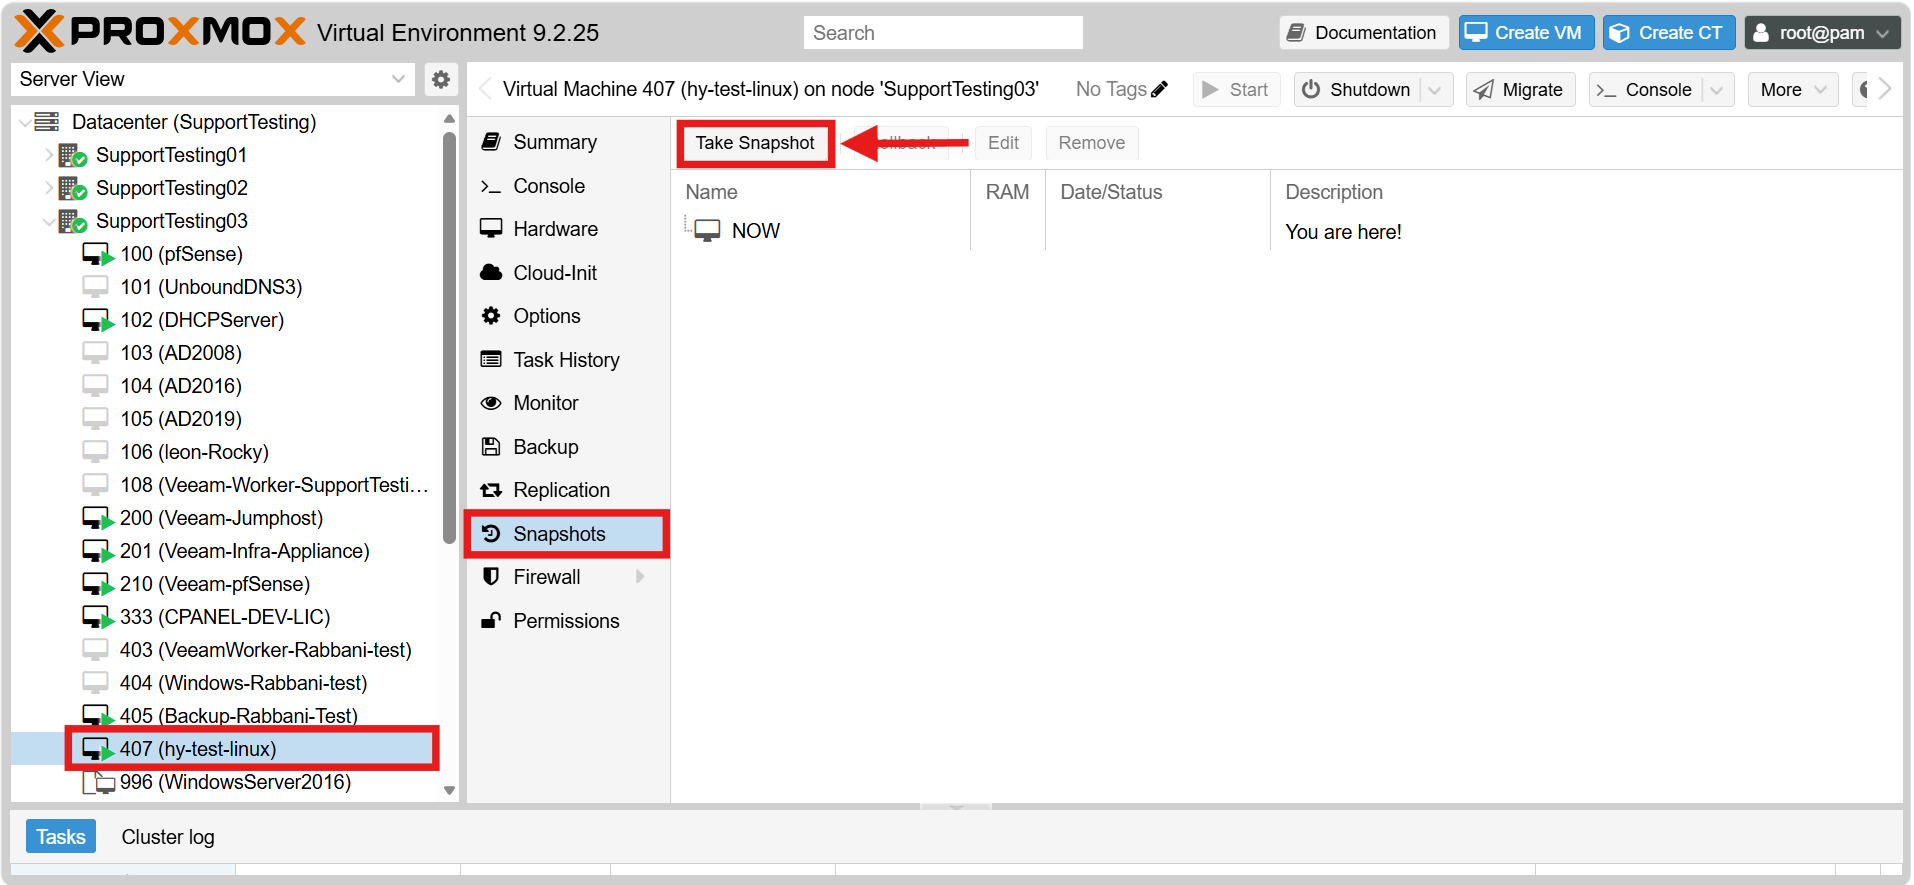
- In the Server View tree on the left panel, click the virtual machine that you want to snapshot.
- Under the virtual machine’s settings, click Snapshots to view the snapshot list of the selected VM.
- Then, click the Take Snapshot button at the top of the Snapshots page.
Step 3: Configure the Snapshot
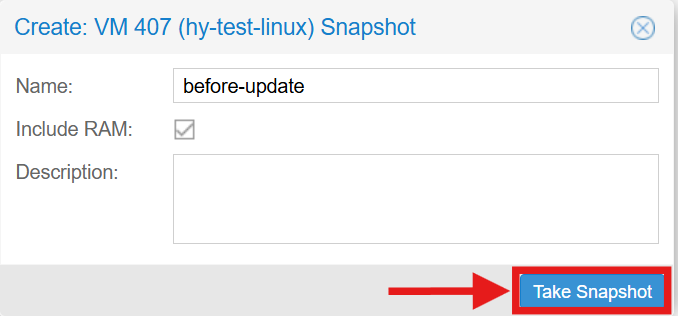
- In the pop-up window, enter a Name for the snapshot (e.g., before-update), optionally add a Description.
- Tick Include RAM if the VM is running and you also want to save its memory state.
- Then, click Take Snapshot to proceed.
Step 4: Verify the Snapshot
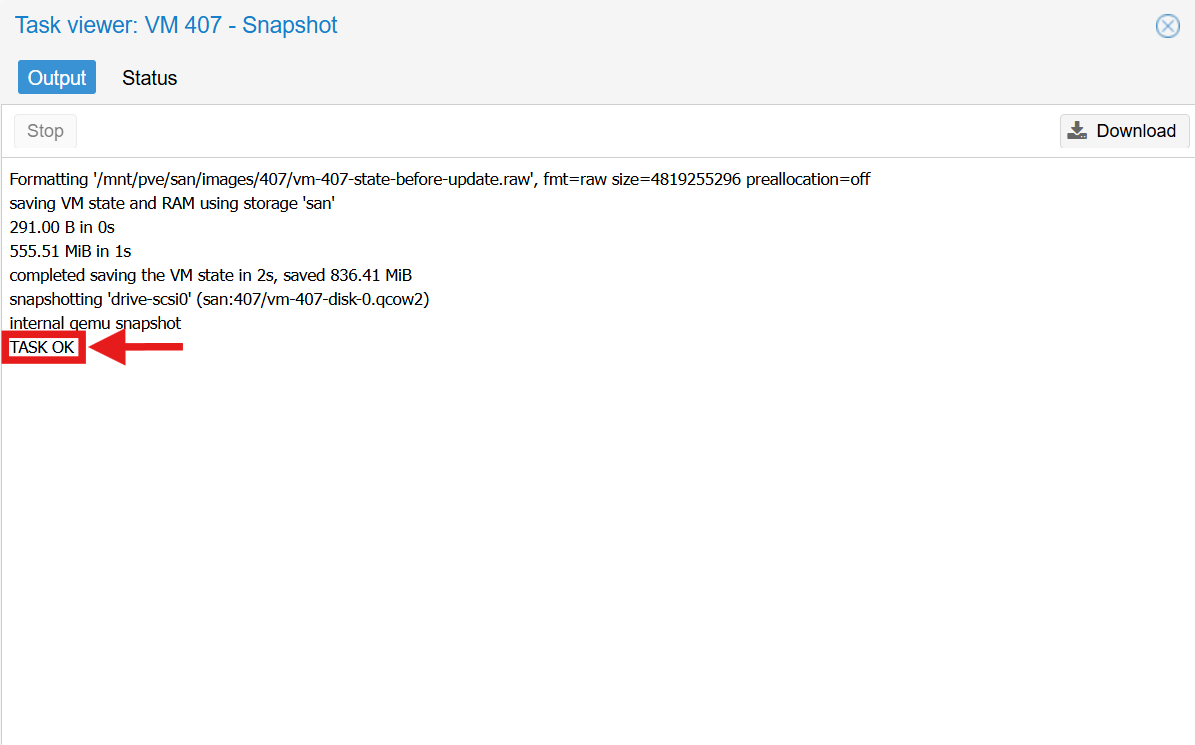
- Wait for the task to complete. A Task viewer window will appear displaying the progress log.
- You can click the Download button to save a text copy of this log, or view the Status tab to check task details such as the start and end times.
- To verify success, look for the TASK OK message at the bottom of the log output.
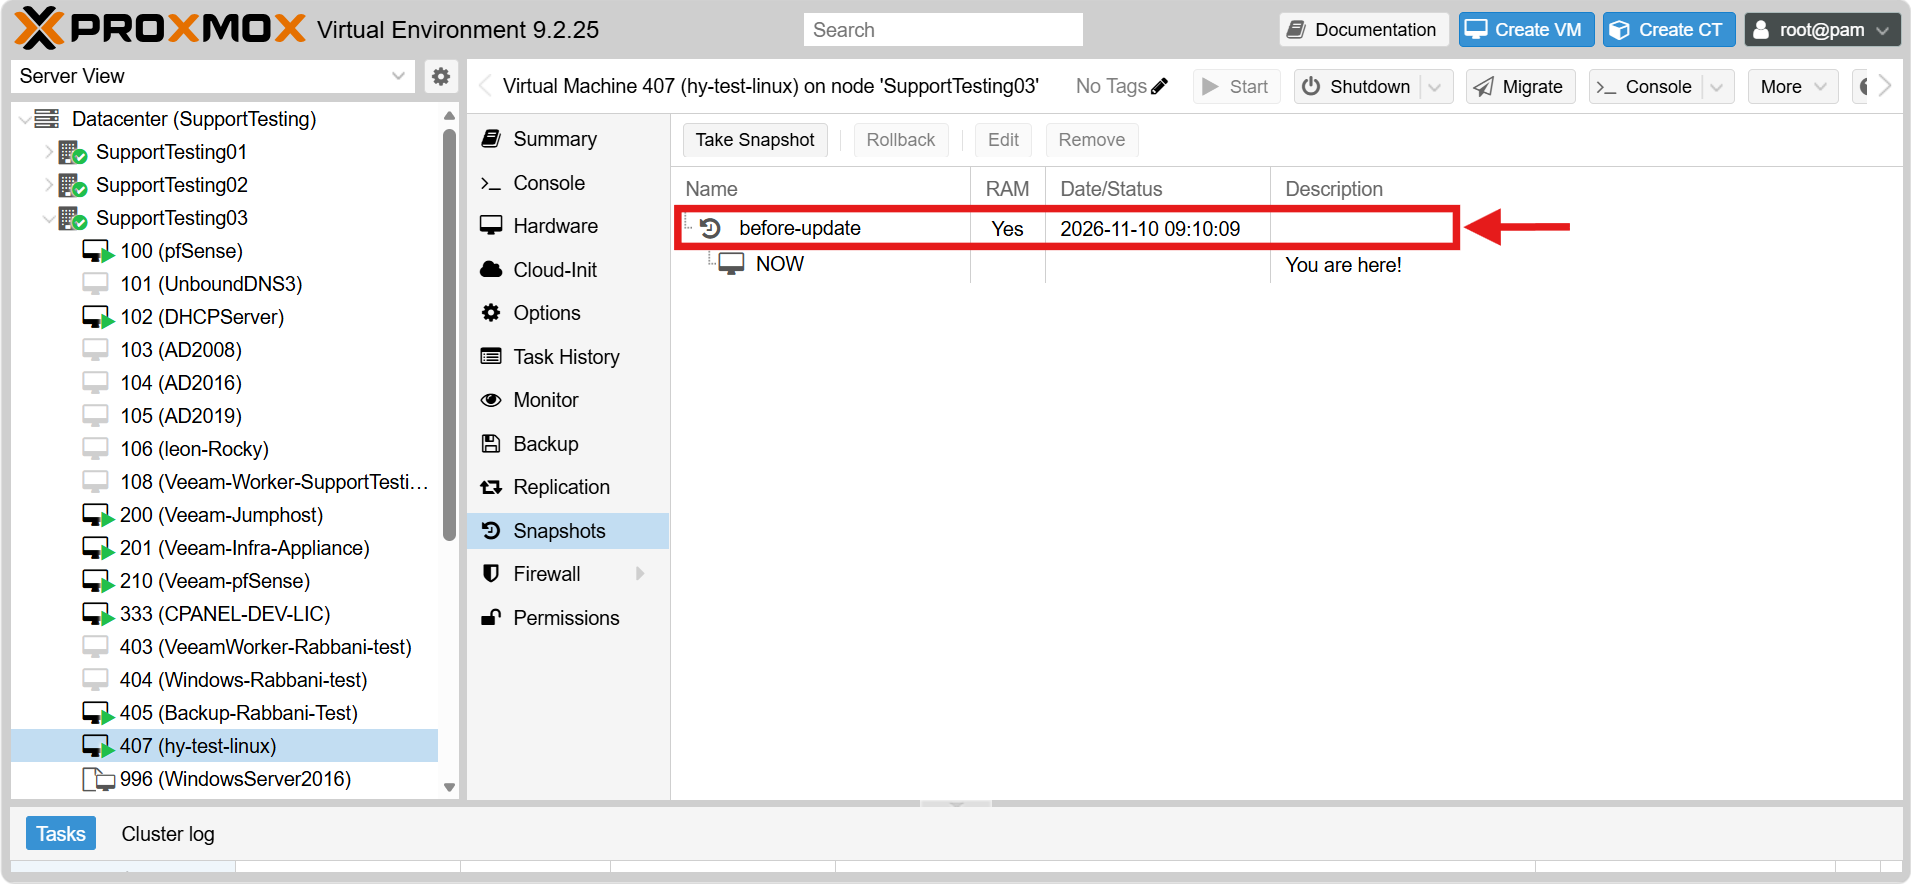
- You can then close the Task viewer window, and the new snapshot will appear in the snapshot list under the Name you specified in Step 3.
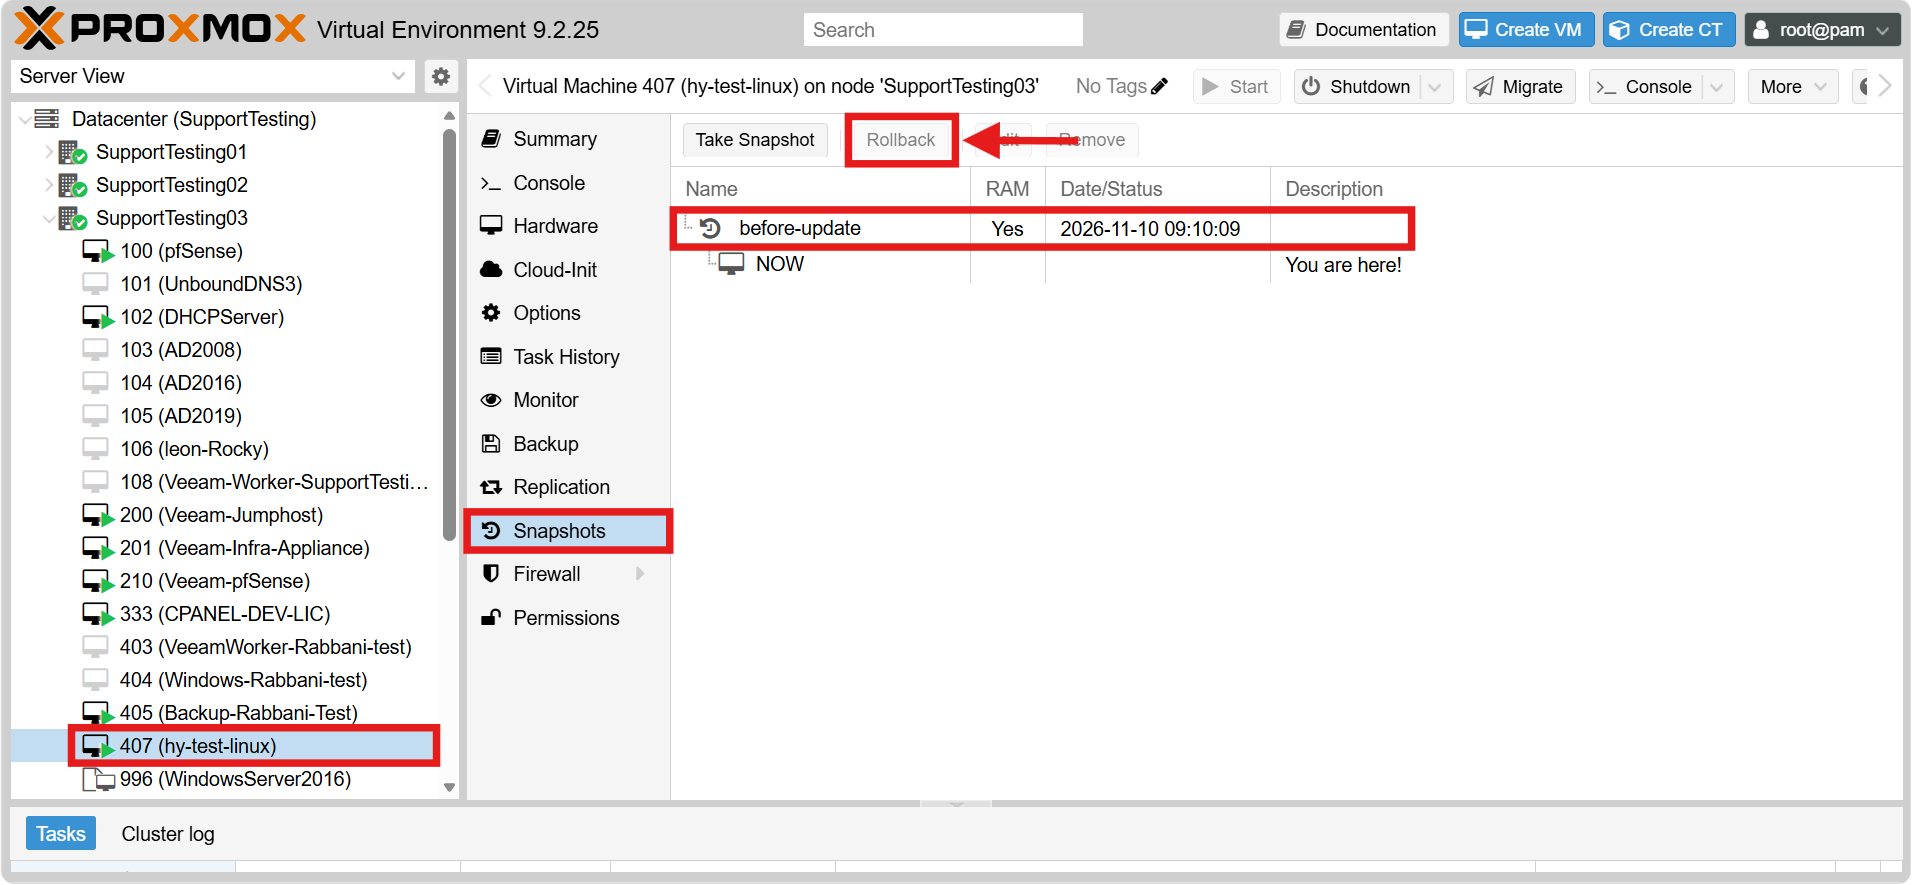
Step 1: Access the Snapshots Menu and Initiate Rollback
- Select the same virtual machine and click Snapshots to view all available snapshots.
- Click the snapshot that you want to roll back to, then click the Rollback button at the top of the Snapshots page.
Step 2: Confirm the Rollback
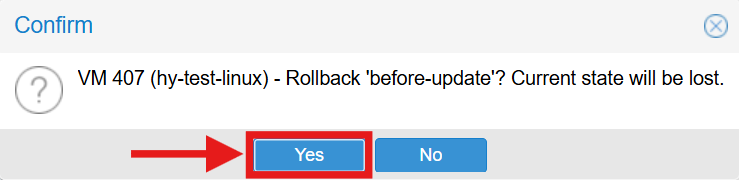
- A confirmation window will appear, warning that the VM will revert to the state saved in the snapshot and that all changes made after the snapshot was taken will be lost.
- Click Yes to confirm.
Step 3: Verify the Restored State
- The VM will stop and revert to the snapshot state automatically.
- If the snapshot includes RAM, the VM resumes running. Otherwise, start it manually and verify that the system is back to the expected state.
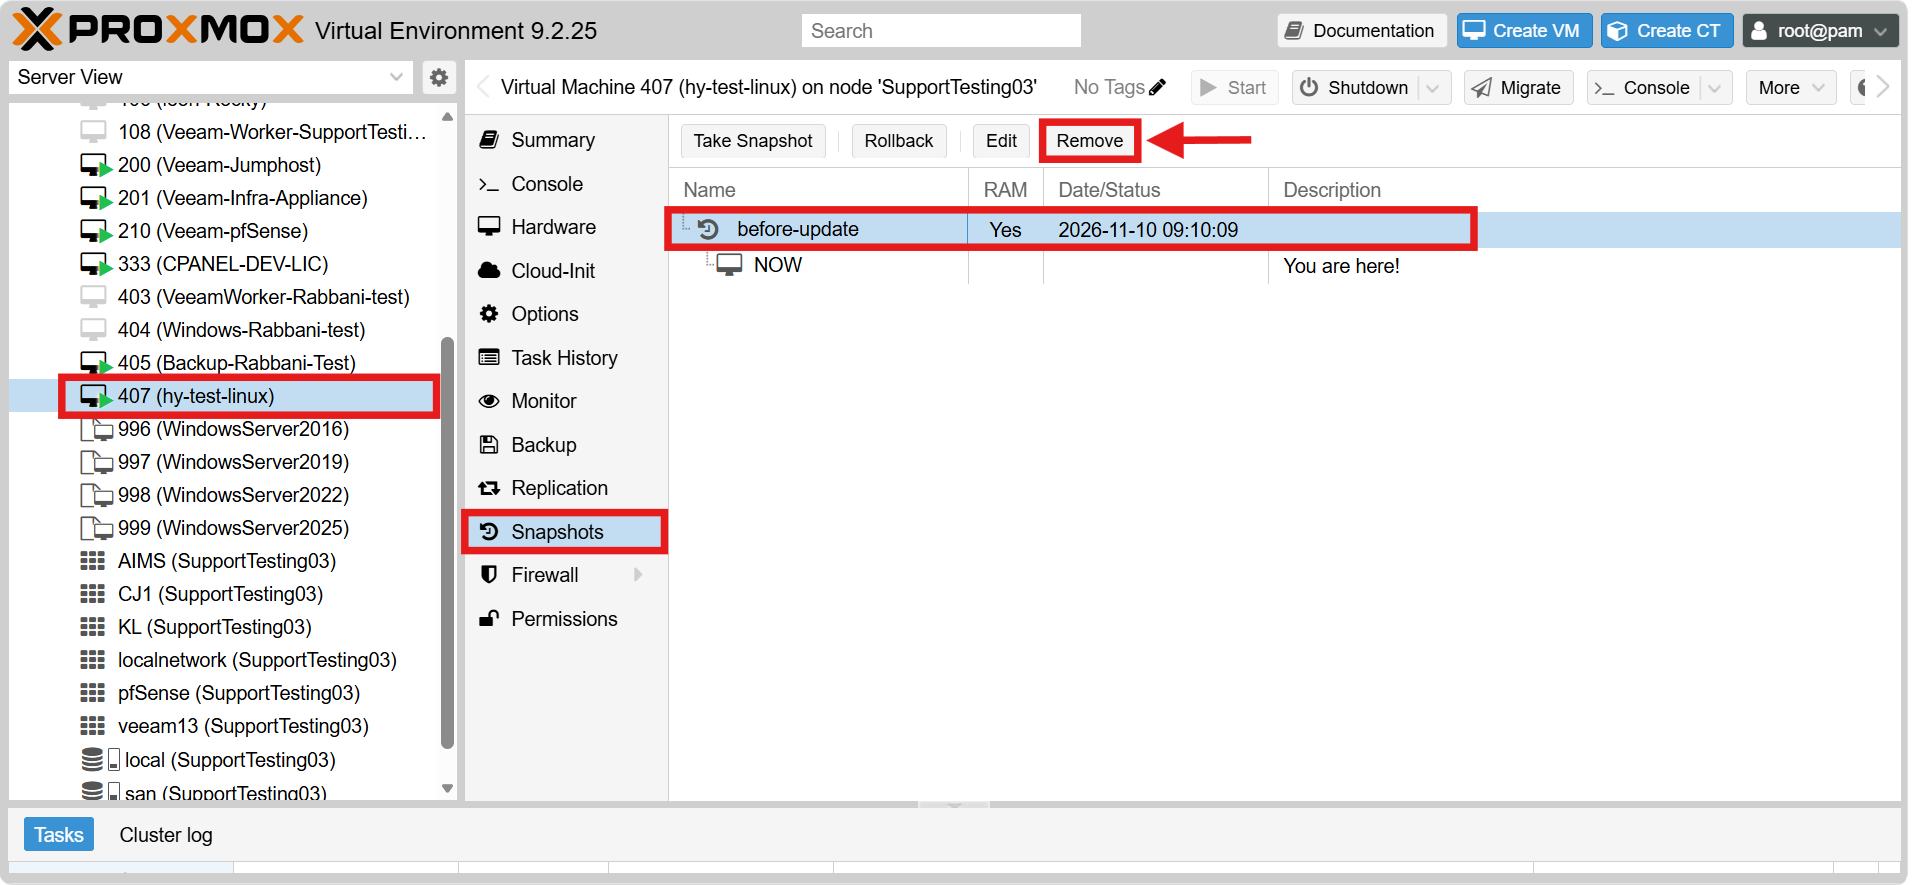
Step 4: Remove the Snapshot After Use (Optional)
Once the VM is confirmed healthy, you may remove the snapshot to free up storage.
Method 2: Take and Rollback Snapshots via the Command Line
This method uses the qm commands in the Proxmox host shell and is suitable for users who manage Proxmox remotely through SSH or prefer command line automation.
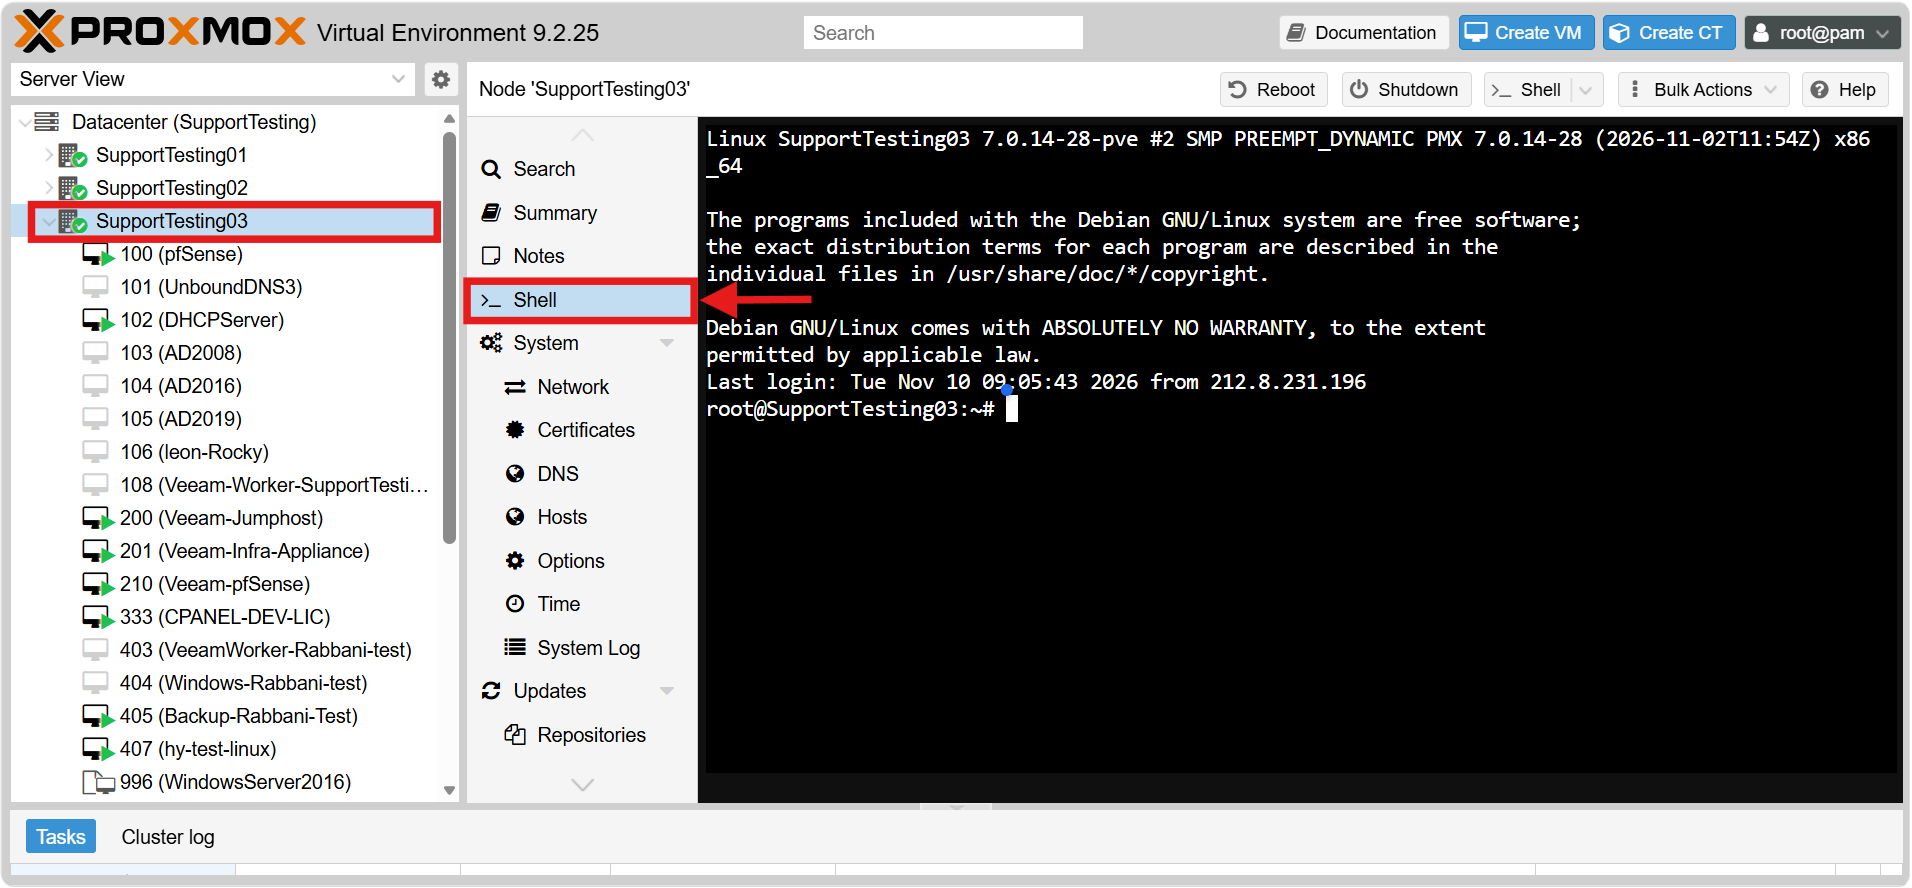
Step 1: Access the Proxmox Host Shell
Connect to the Proxmox host via SSH or select the node in the web interface and click Shell.
ssh root@<your-proxmox-ip-or-node-name>
Step 2: Identify the VM ID
Run the following command to list all virtual machines and confirm the VM ID:
qm list
Step 3: Take the Snapshot
Run the following command, replacing <vmid> with your VM ID and <snapshot-name> with your preferred snapshot name. Note that the –description parameter is entirely optional and can be omitted:
qm snapshot <vmid> <snapshot-name> --description "Snapshot before system update"
To also save the memory of a running VM alongside your description, add the –vmstate 1 option to the command:
qm snapshot <vmid> <snapshot-name> --description "Snapshot before system update" --vmstate 1
Step 4: Verify the Snapshot
Run the following command to confirm the snapshot has been created. Replace <vmid> with your VM ID:
qm listsnapshot <vmid>
Conclusion
By following this guidance, you can take snapshots of your virtual machines in Proxmox and roll them back to a previous working state whenever an update or configuration change causes unexpected problems, minimizing downtime and protecting your data during maintenance.
For any questions or assistance, feel free to contact our support team at support@ipserverone.com.