
Search Our Database
How to Configure High Availability (HA) in Proxmox
Introduction
High Availability (HA) in Proxmox Virtual Environment is a crucial feature that ensures continuous operation for your critical services. When a hardware failure occurs or a node goes offline unexpectedly, the HA manager automatically detects the issue and restarts the affected Virtual Machines (VMs) or Containers on another healthy node within the cluster. Setting up HA minimizes downtime and maintains service continuity without requiring manual intervention. This guide will show administrators how to configure HA for their Proxmox cluster through the web interface efficiently.
Prerequisite
- A running Proxmox VE cluster consisting of at least three nodes to maintain quorum.
- Shared storage (such as NFS, Ceph, or iSCSI) configured and accessible across all nodes in the cluster.
- Access to the Proxmox Web Interface with administrative privileges.
Step-by-step Guide
Step 1: Log In to Proxmox VE
Open your web browser, navigate to the Proxmox web interface (usually https://your-node-ip:8006), and log in using your administrator credentials.
Step 2: Add a Virtual Machine or Container to HA
You can assign your VMs or containers directly to the HA manager.
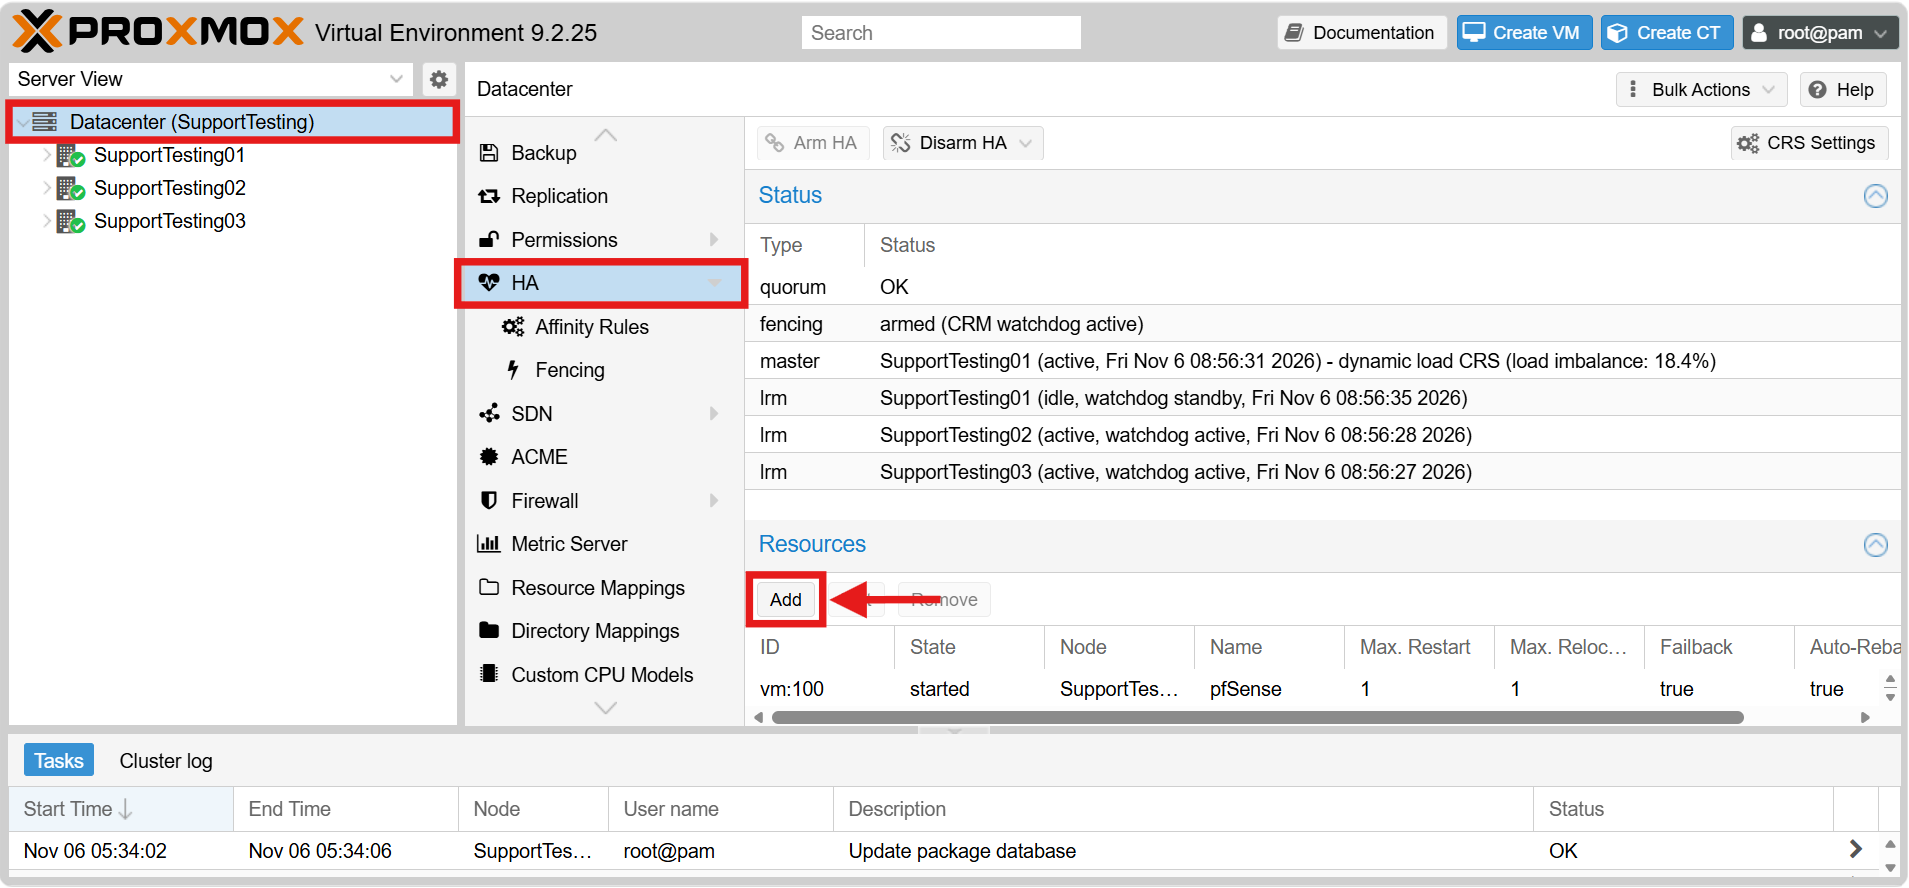
- In the left-hand navigation pane, select Datacenter. Click on HA from the middle menu. Locate the Resources section and click the Add button.
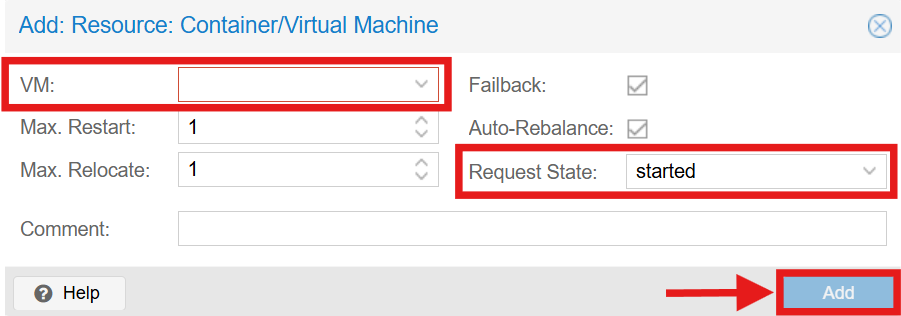
- In the VM dropdown menu, select the virtual machine or container you wish to make highly available.
- You can configure additional options here:
- Max. Restart: The maximum number of times the HA manager will attempt to restart the VM if it crashes (default is 1).
- Max. Relocate: The maximum number of times the system will try to move the VM to another node if the current one fails (default is 1).
- Request State: Leave the default state as started so the VM runs automatically.
- Click Add to save the configuration.
Step 3: Verify the HA Status in the Resources List
After adding the resource, verify that it is properly managed by the HA service.
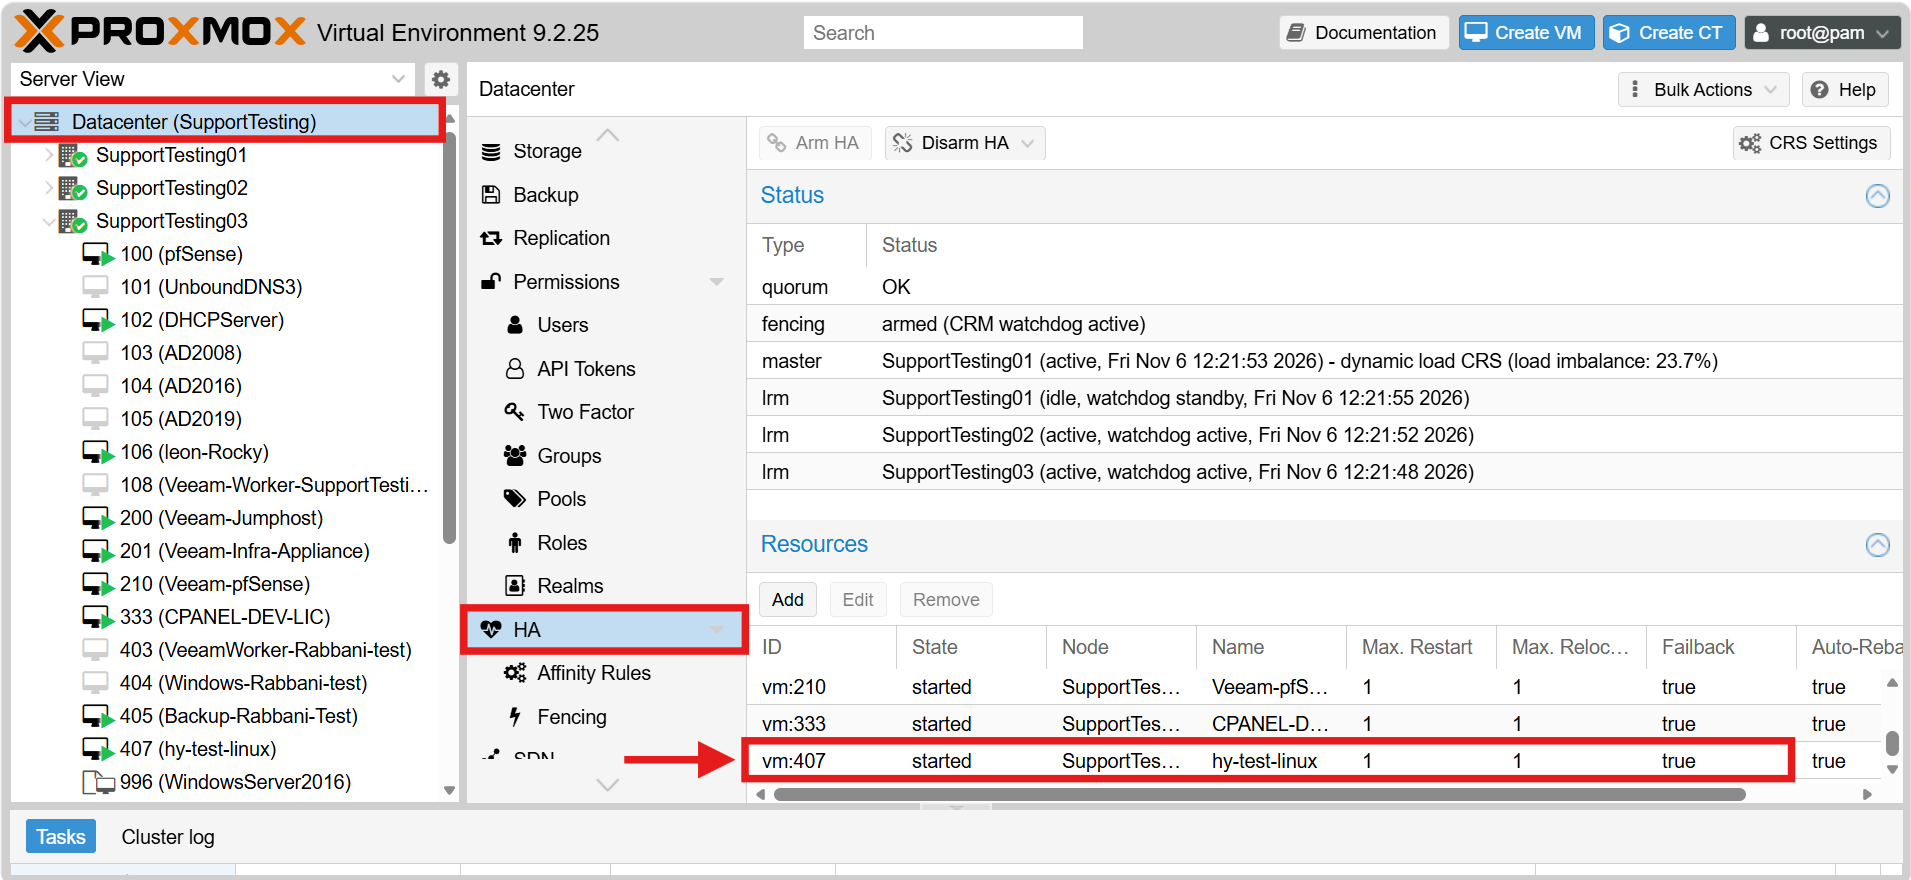
- Still within Datacenter > HA, monitor the Resources list.
- The State column should display started, indicating the VM is actively managed and protected by the High Availability cluster.
Conclusion
By following this guidance, you can successfully configure High Availability (HA) in your Proxmox environment, ensuring that your virtual machines and containers remain resilient against unexpected node failures.
If you require further assistance or encounter any issues during the configuration process, please feel free to contact us at support@ipserverone.com.