
Search Our Database
How to manage files and folders using File Manager in cPanel
Introduction
Managing website content directly on a server can be challenging for website administrators and domain owners needing immediate file adjustments. The File Manager in cPanel provides a centralized web-based interface that allows users to upload, create, edit, organize, set permissions for, and delete files or folders without requiring an external FTP client. Executing these operations correctly in your web hosting account ensures your website files remain securely structured, updated, and accessible. This guide explains how to perform all essential file and folder operations using cPanel File Manager.
Prerequisite
- Access to cPanel account with File Manager privileges
- Basic understanding of domain file structures (e.g., public_html directory)
Step-by-step guide
Step 1: Navigate to File Manager
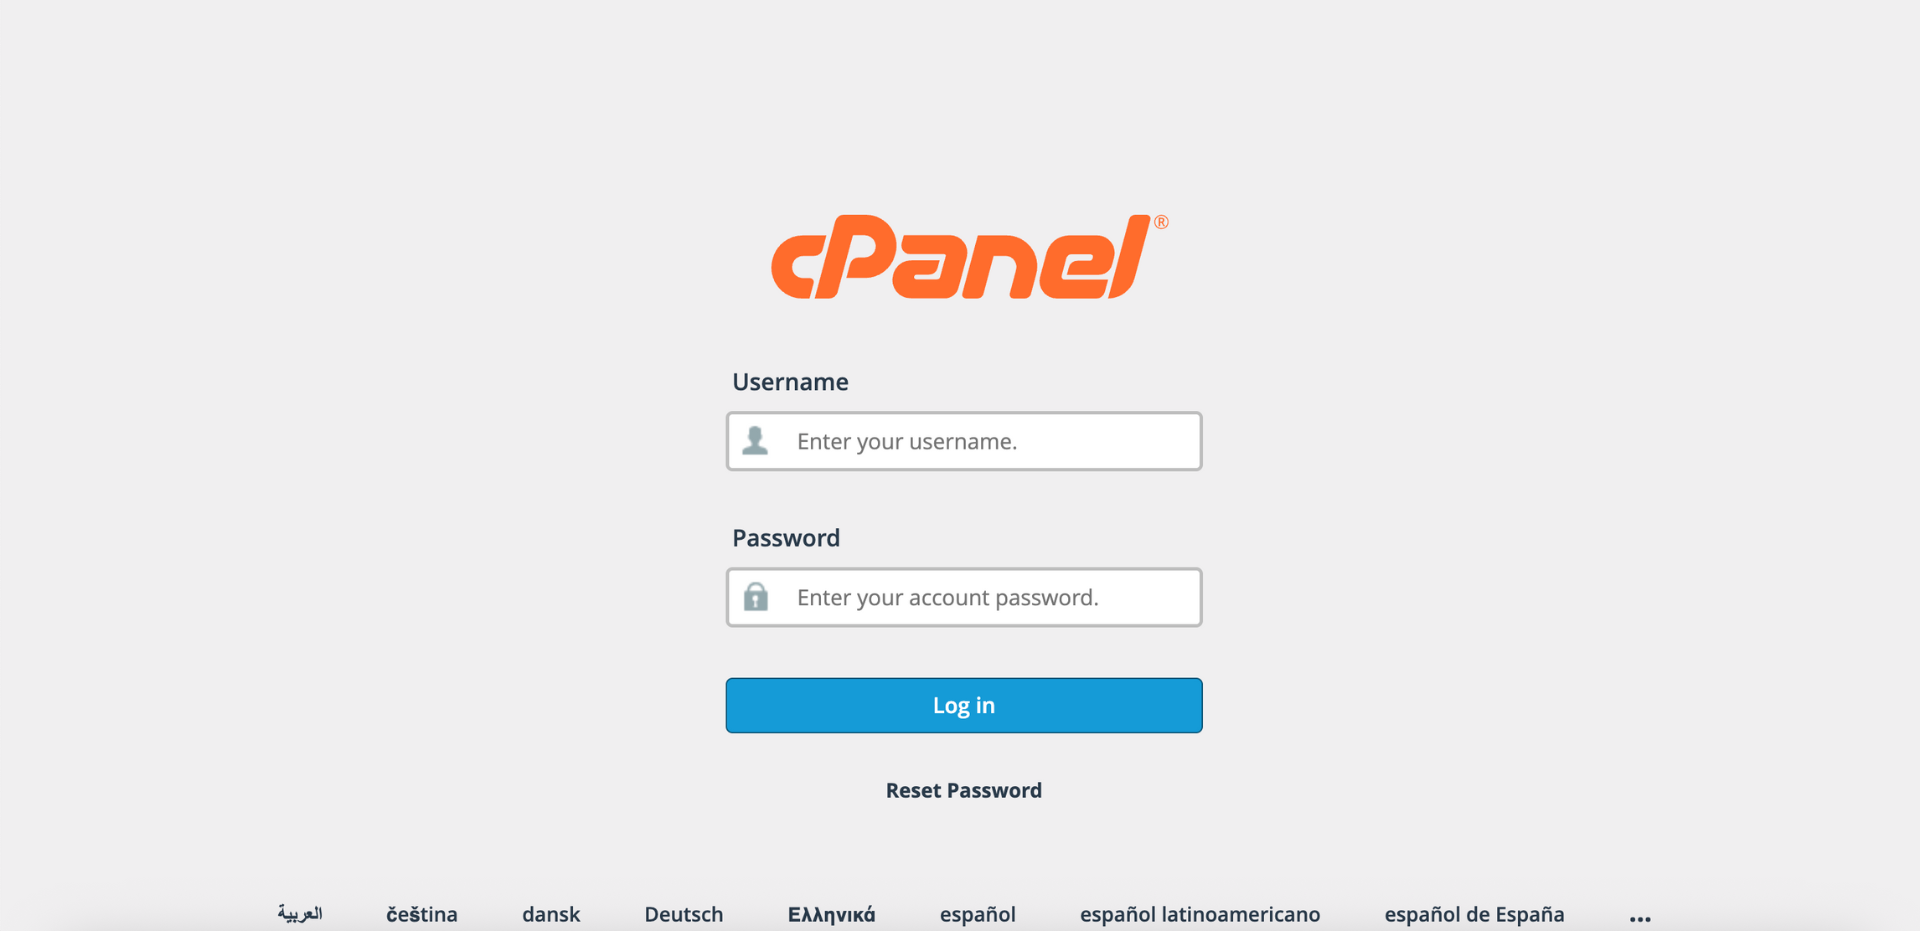
- Access and log in to your cPanel account using your username and password.
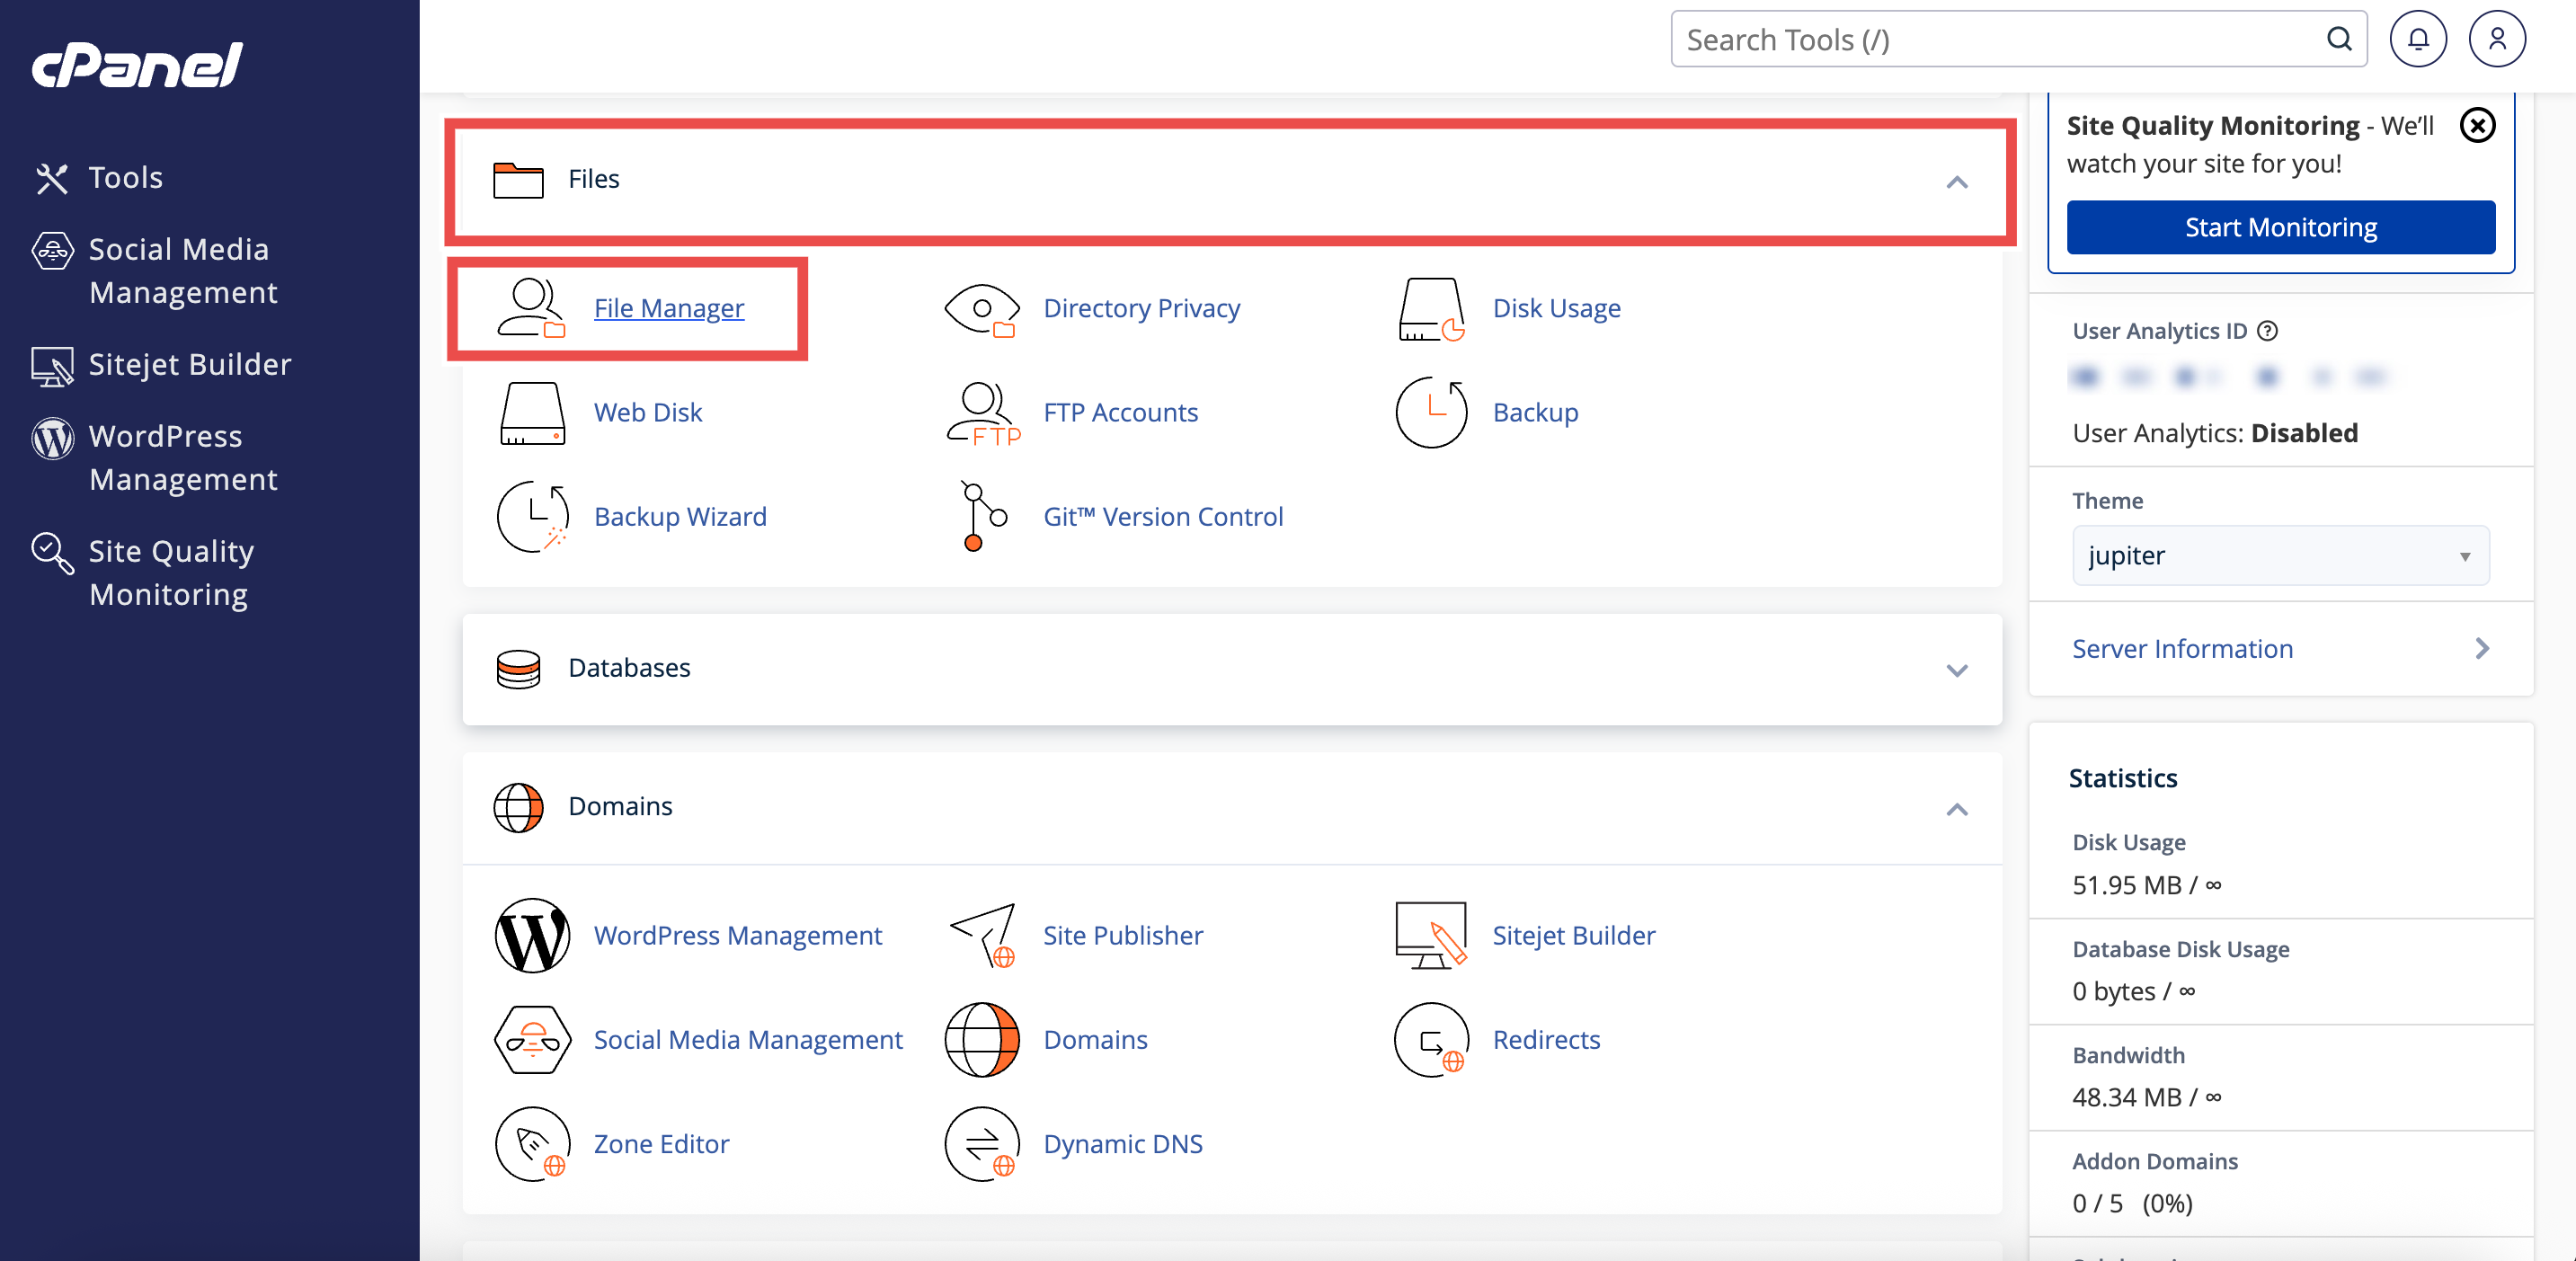
- In the Home page, under Files, click File Manager.
Step 2: Managing files and folders using File Manager
Change Default Settings in cPanel File Manager
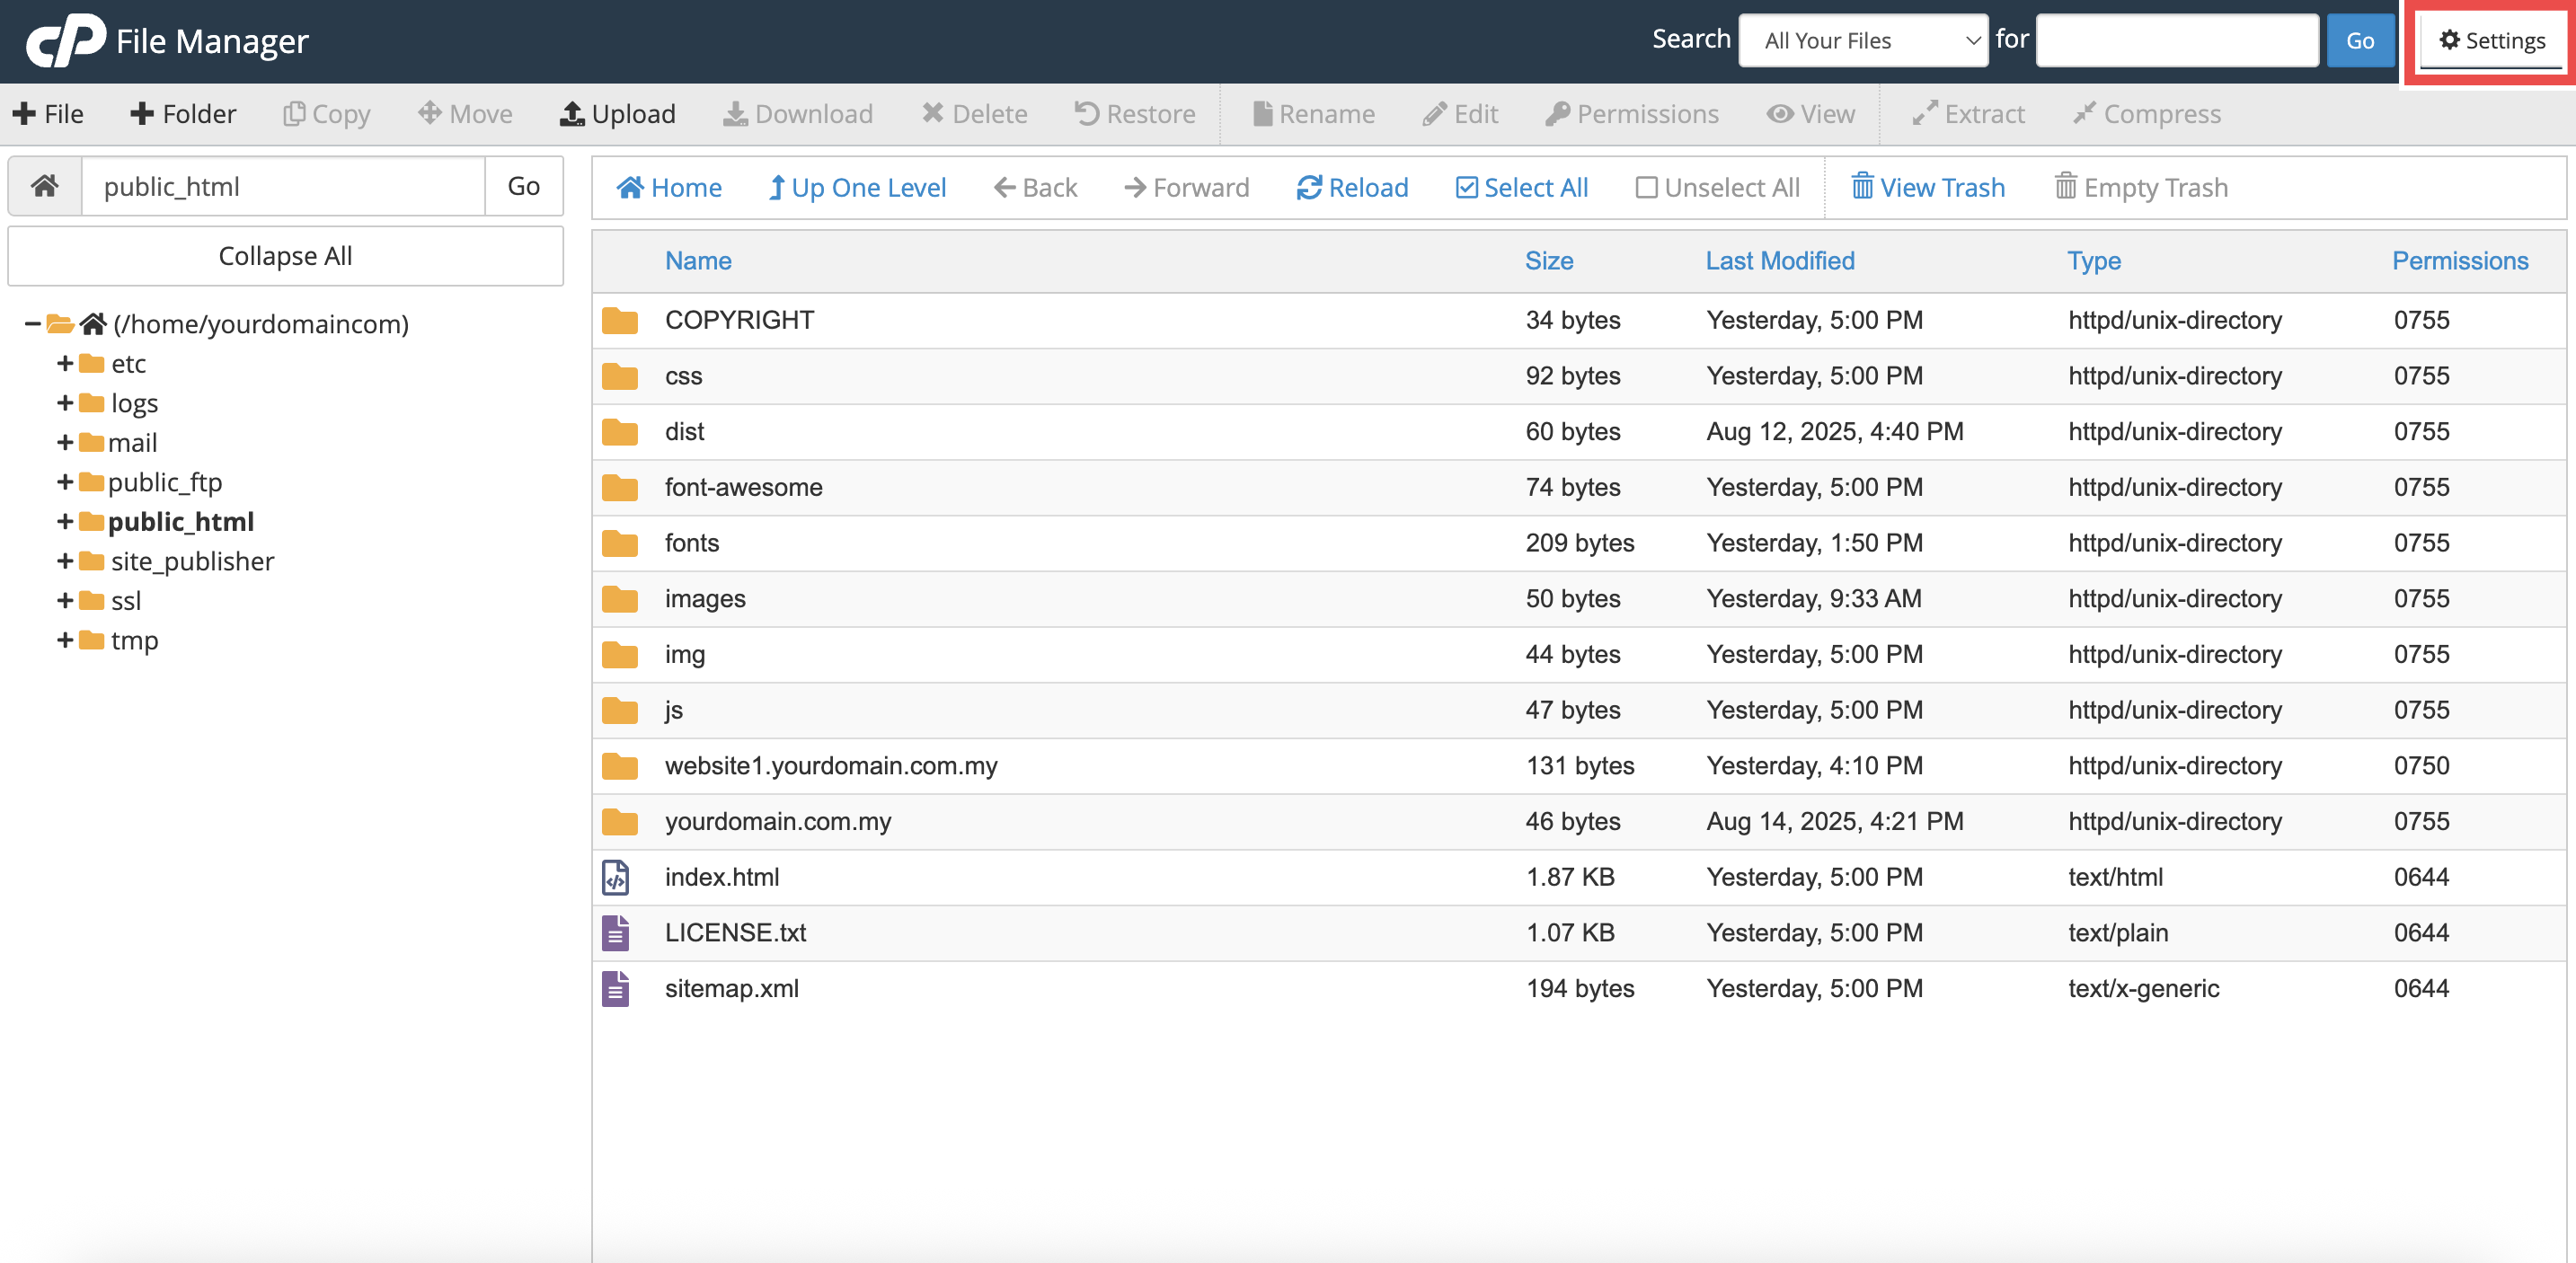
This method explains how to show hidden files (dotfiles) and configure the default starting directory.
- Click the Settings button located at the top-right corner.
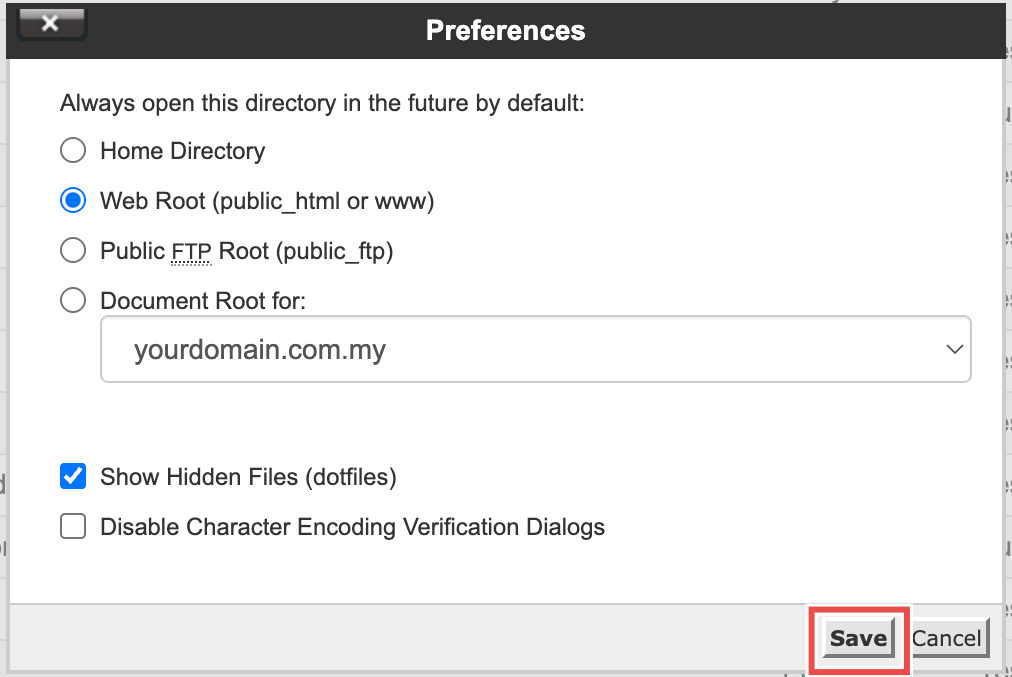
- Select your preferred default directory and check the box for Show Hidden Files (dotfiles).
- Home Directory: The main folder for your account.
- Web Root (public_html or www): The folder where your website files are stored.
- Public FTP Root (public_ftp): The folder for FTP files.
- Document Root for: Select the root folder for a specific domain.
- Show Hidden Files (dotfiles): Check this box to display hidden files. For example: .htaccess
- Disable Character Encoding Verification Dialogs: Check this box to skip encoding confirmation when editing files.
- Click Save.
Create Files and Folders in cPanel File Manager
This method covers how to generate new empty files or directory structures directly on the server.
- Navigate to the target directory (e.g., public_html).
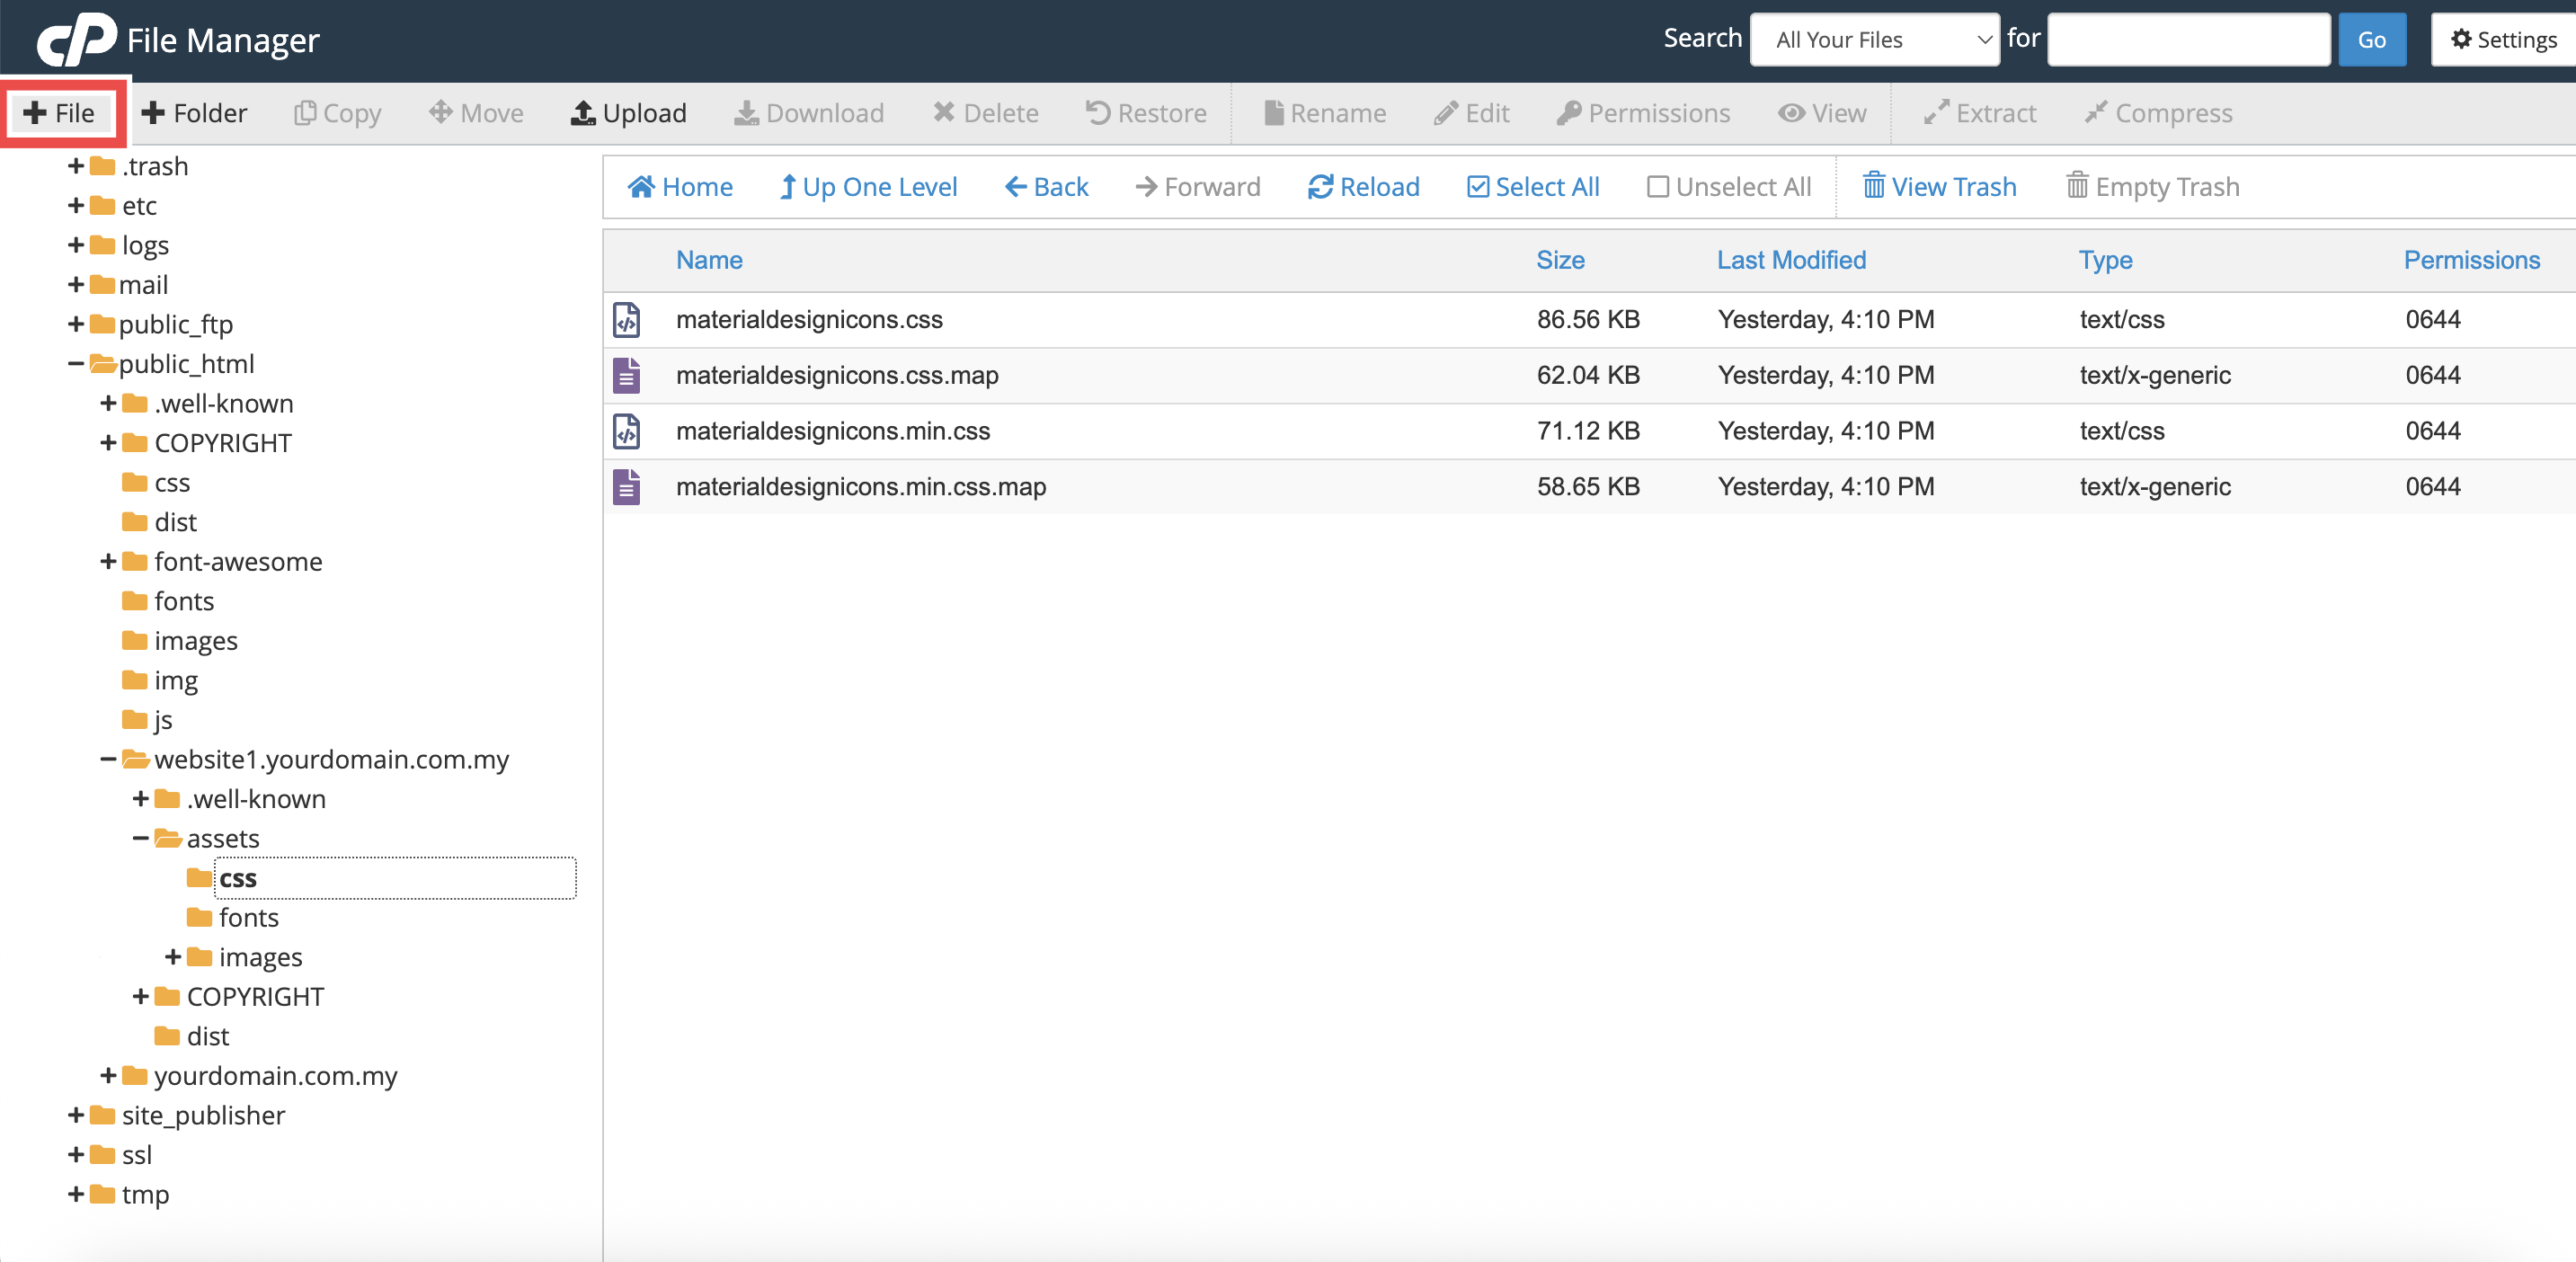
- To create a file, click the + File icon in the top toolbar, enter the new filename with extension (e.g., index.php), and click Create New File.
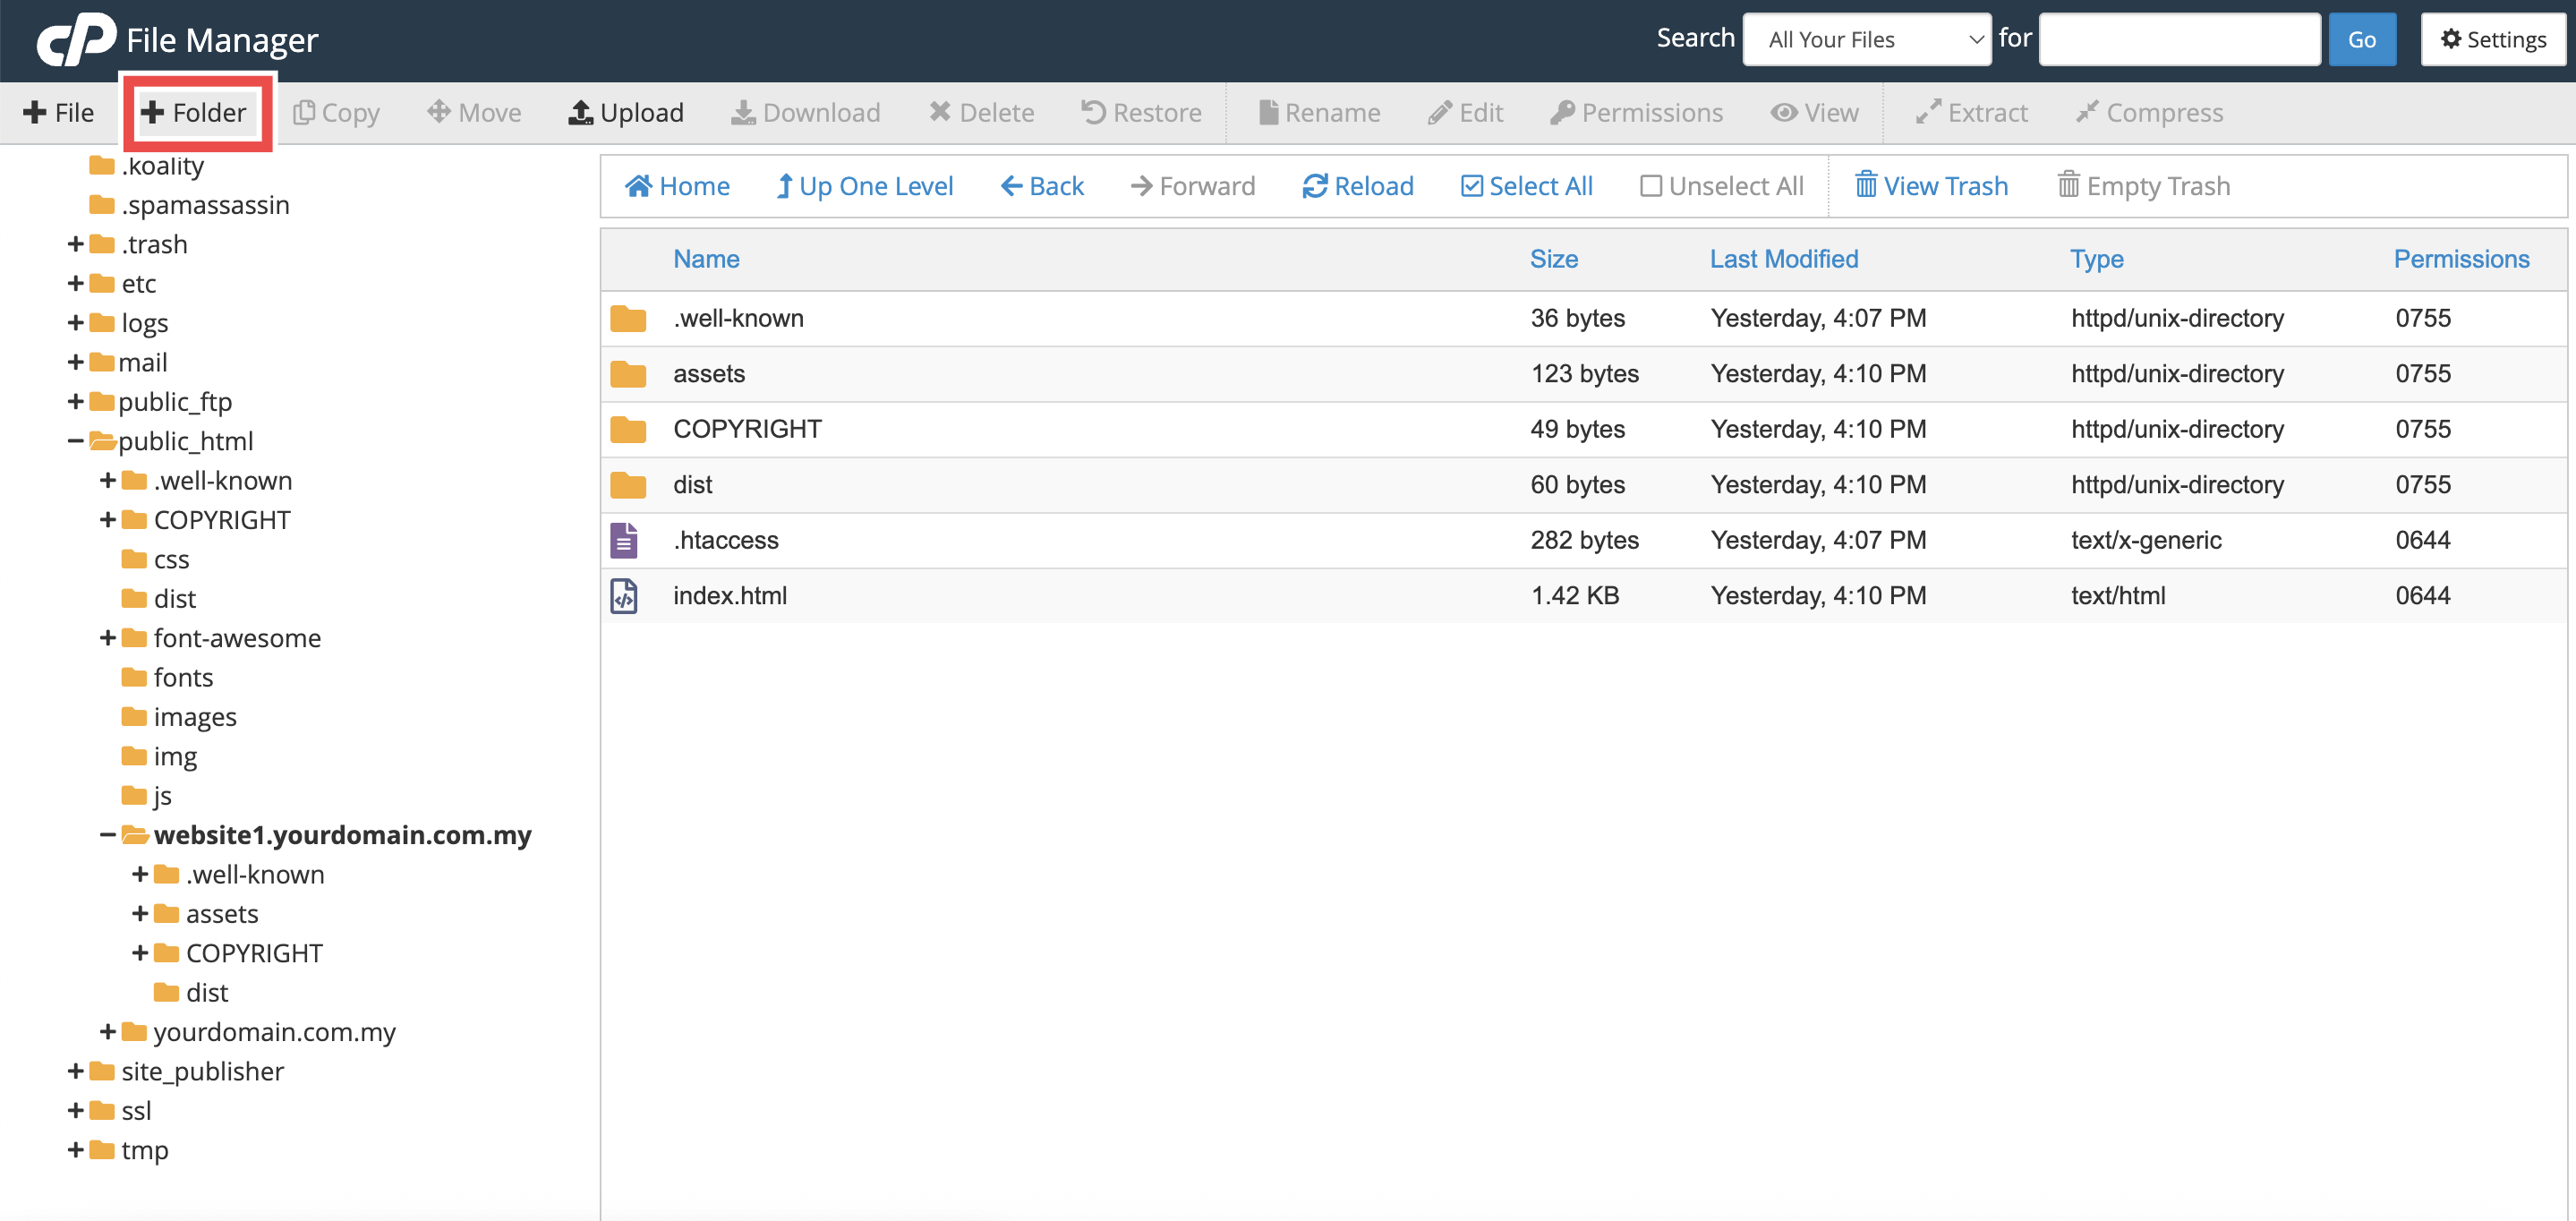
- To create a folder, click the + Folder icon, enter the folder name, and click Create New Folder.
Edit Files in cPanel File Manager
This method demonstrates how to edit a file directly in File Manager.
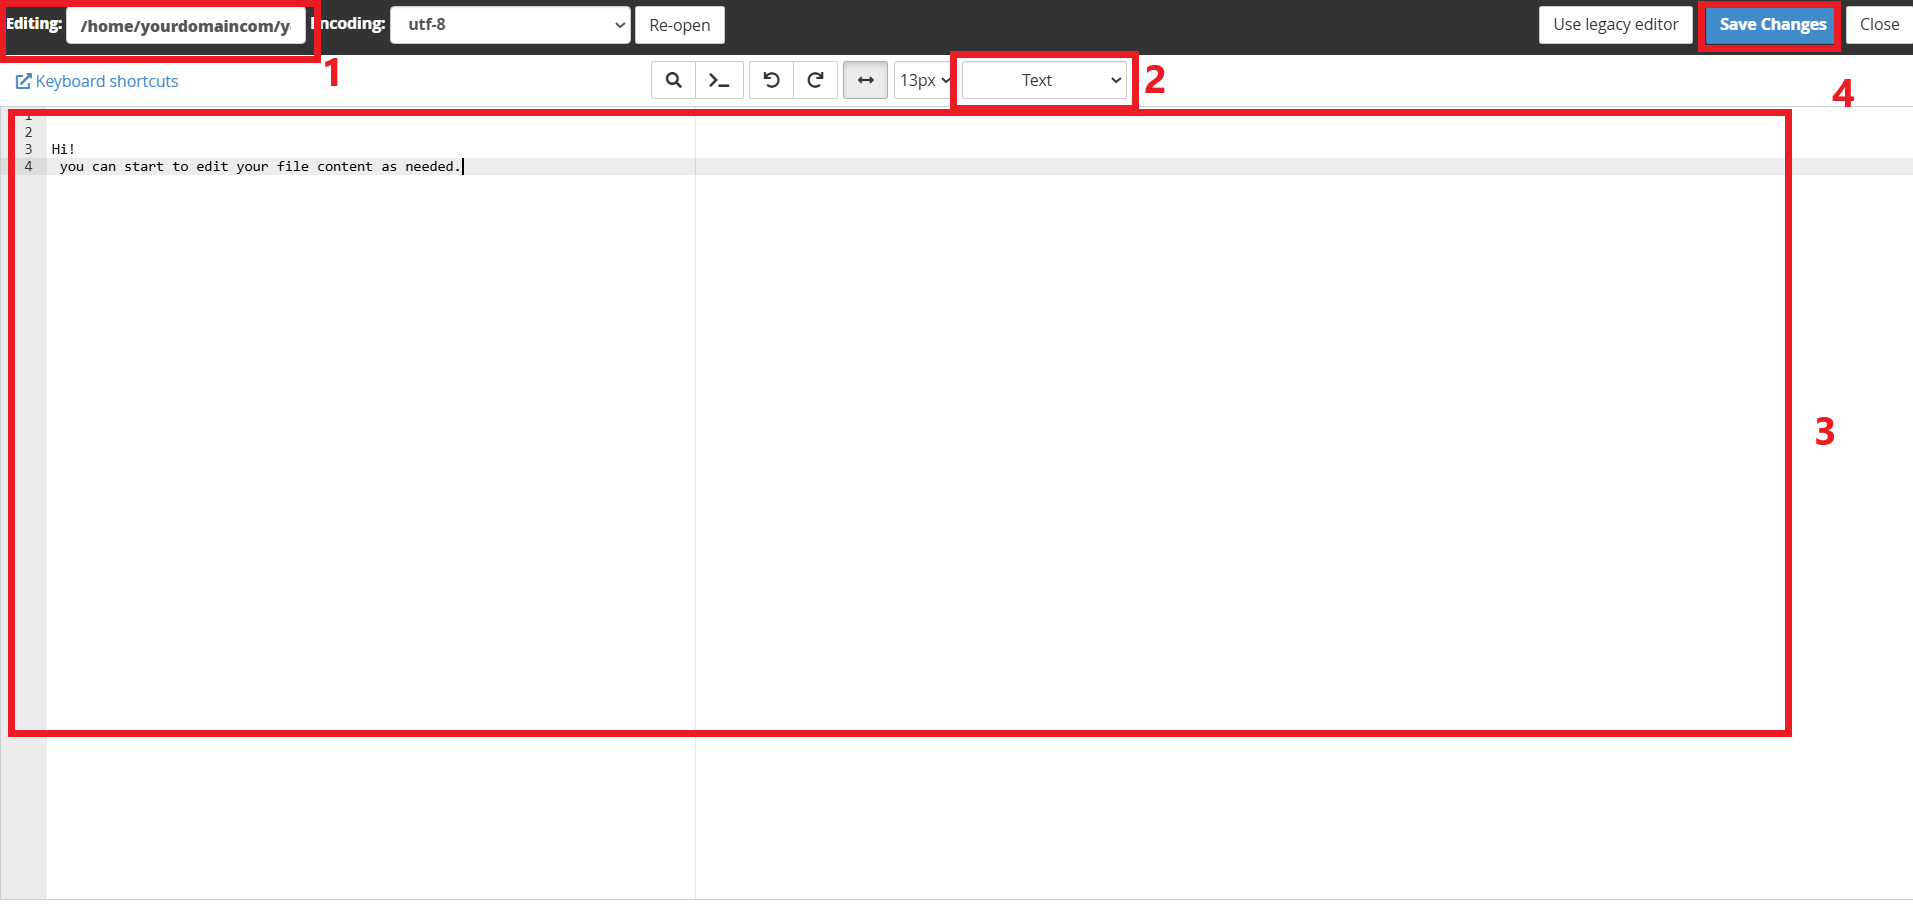
- In File Manager, locate a file, right-click it, and select Edit. The built-in editor will open and display:
- File location: The path of the file within your server.
- File format: Allows you to choose a format such as PHP, HTML, and other more.
- File context: The main area where you can edit the file’s content.
- Save Button: Click on the Save Changes button to save your edits.
- Make the required modifications and click Save Changes in the upper-right corner.
Upload Files in cPanel File Manager
This method demonstrates how to upload files from your device.
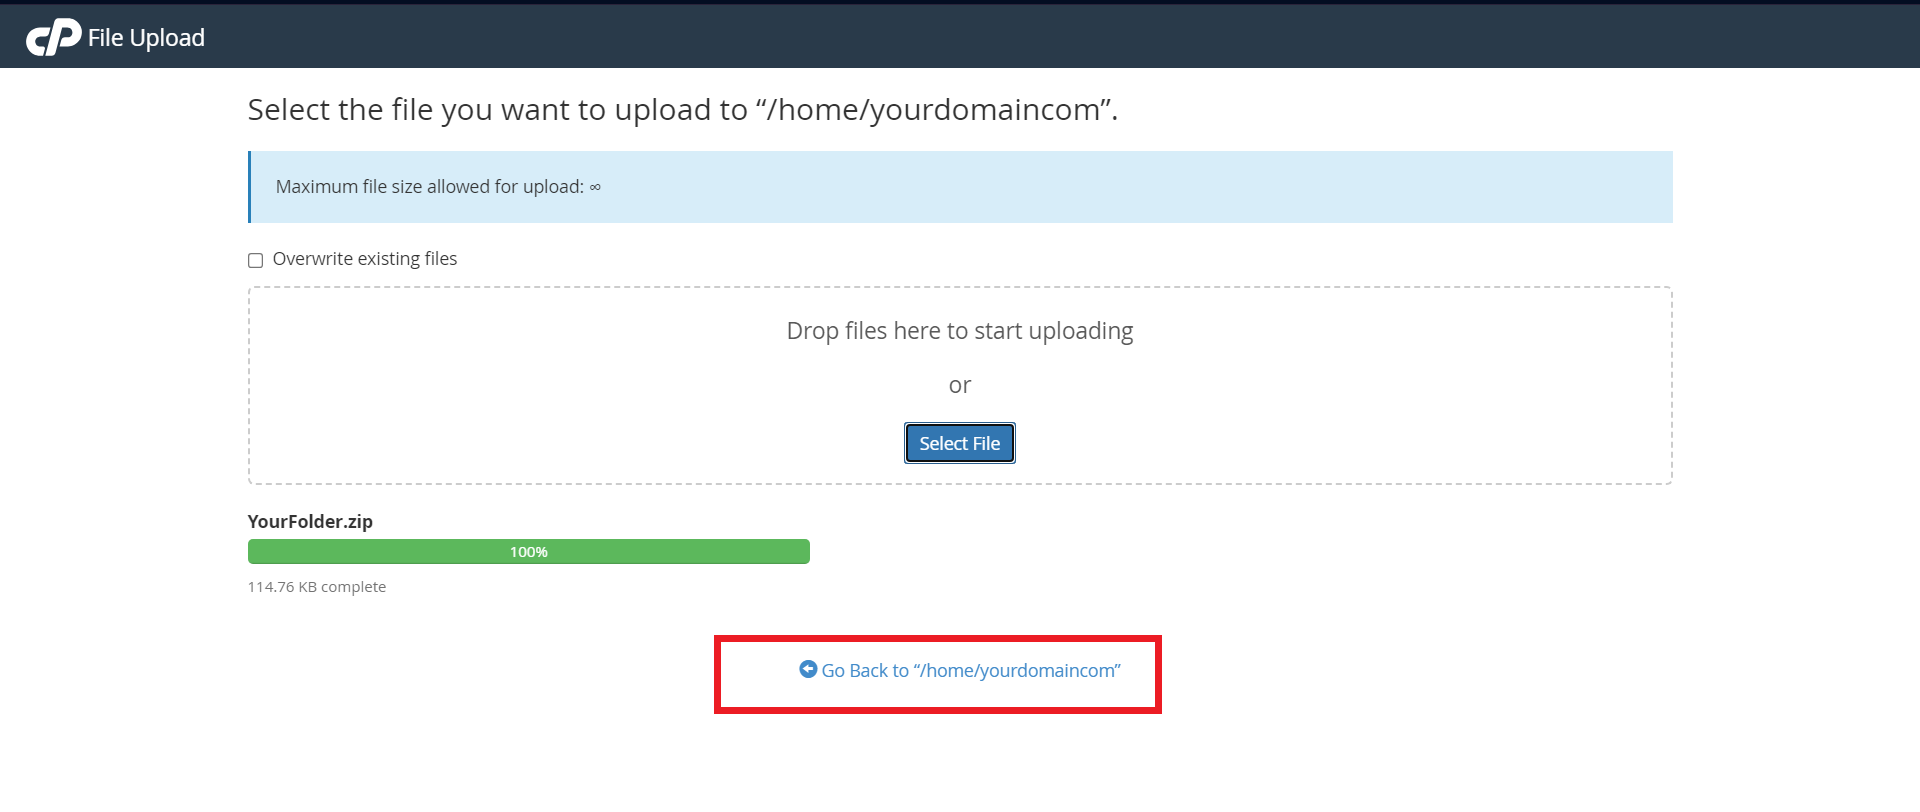
- Click the Upload button in the top menu.
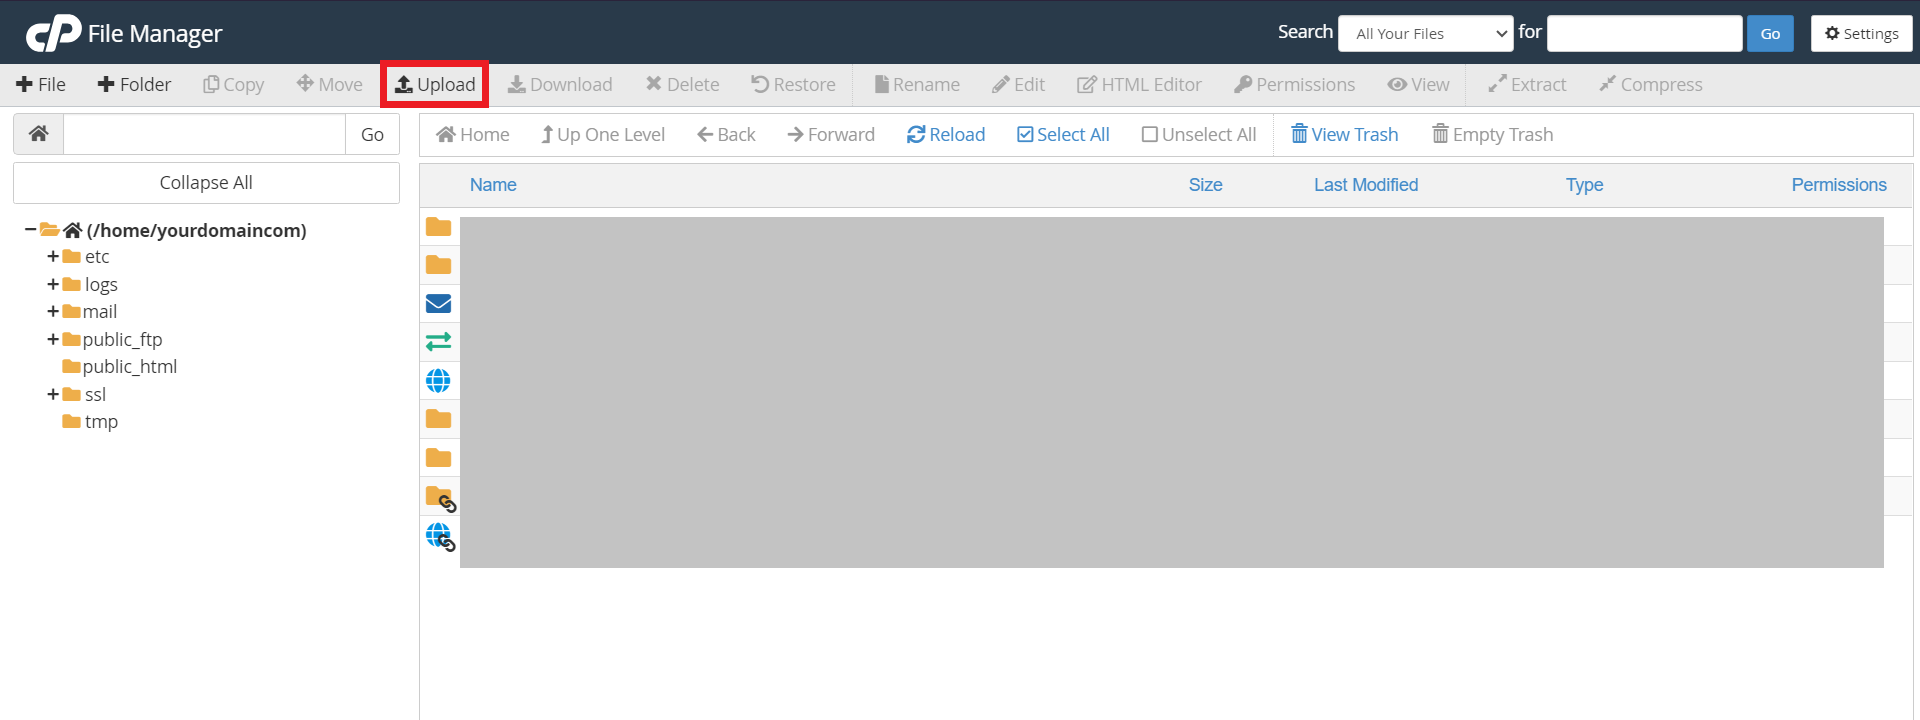
- Then drag and drop your file or click Select File.
Copying or Moving Files in cPanel File Manager
This method details how to copy or relocate items from directory to directory.
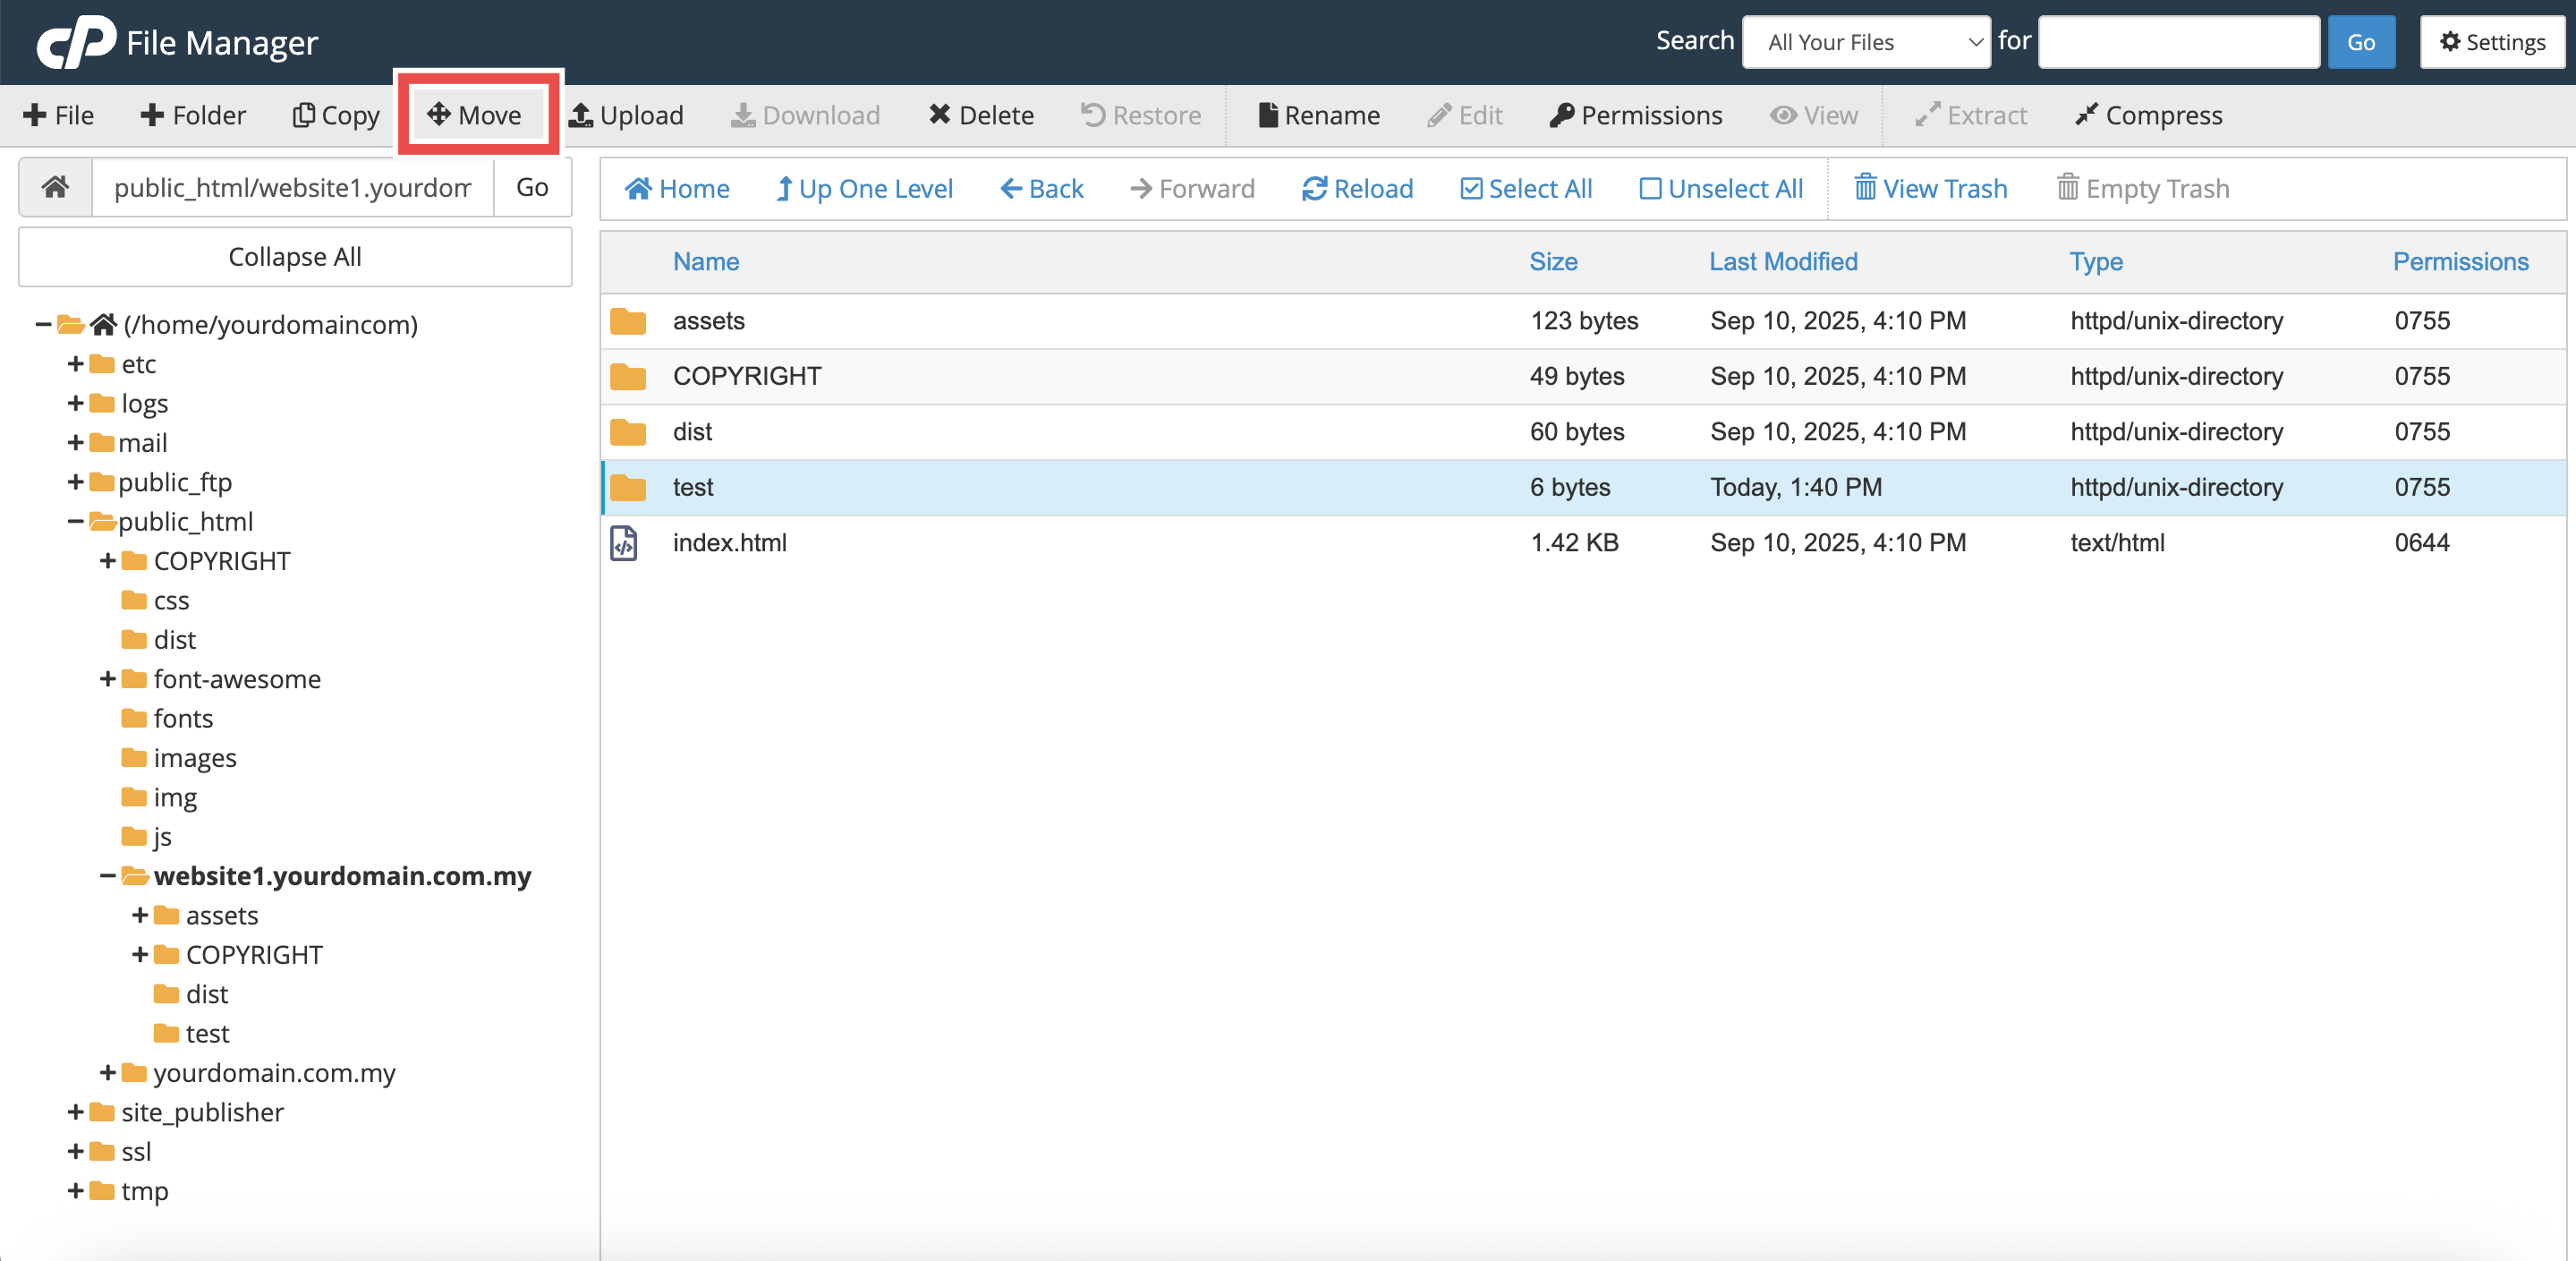
- Because the process is nearly identical for both, this step demonstrates moving an item as an example.
Select the item you want to move, click the Copy or Move button in the top toolbar.
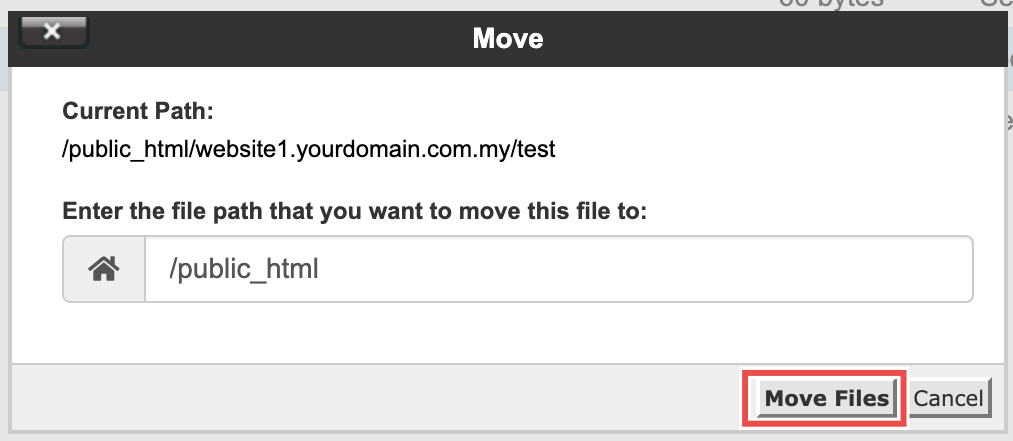
- Enter the destination path and click Copy Files or Move Files.
Manage Permissions in cPanel File Manager
This method details how to adjust file security permissions (e.g., 0644 or 0755).
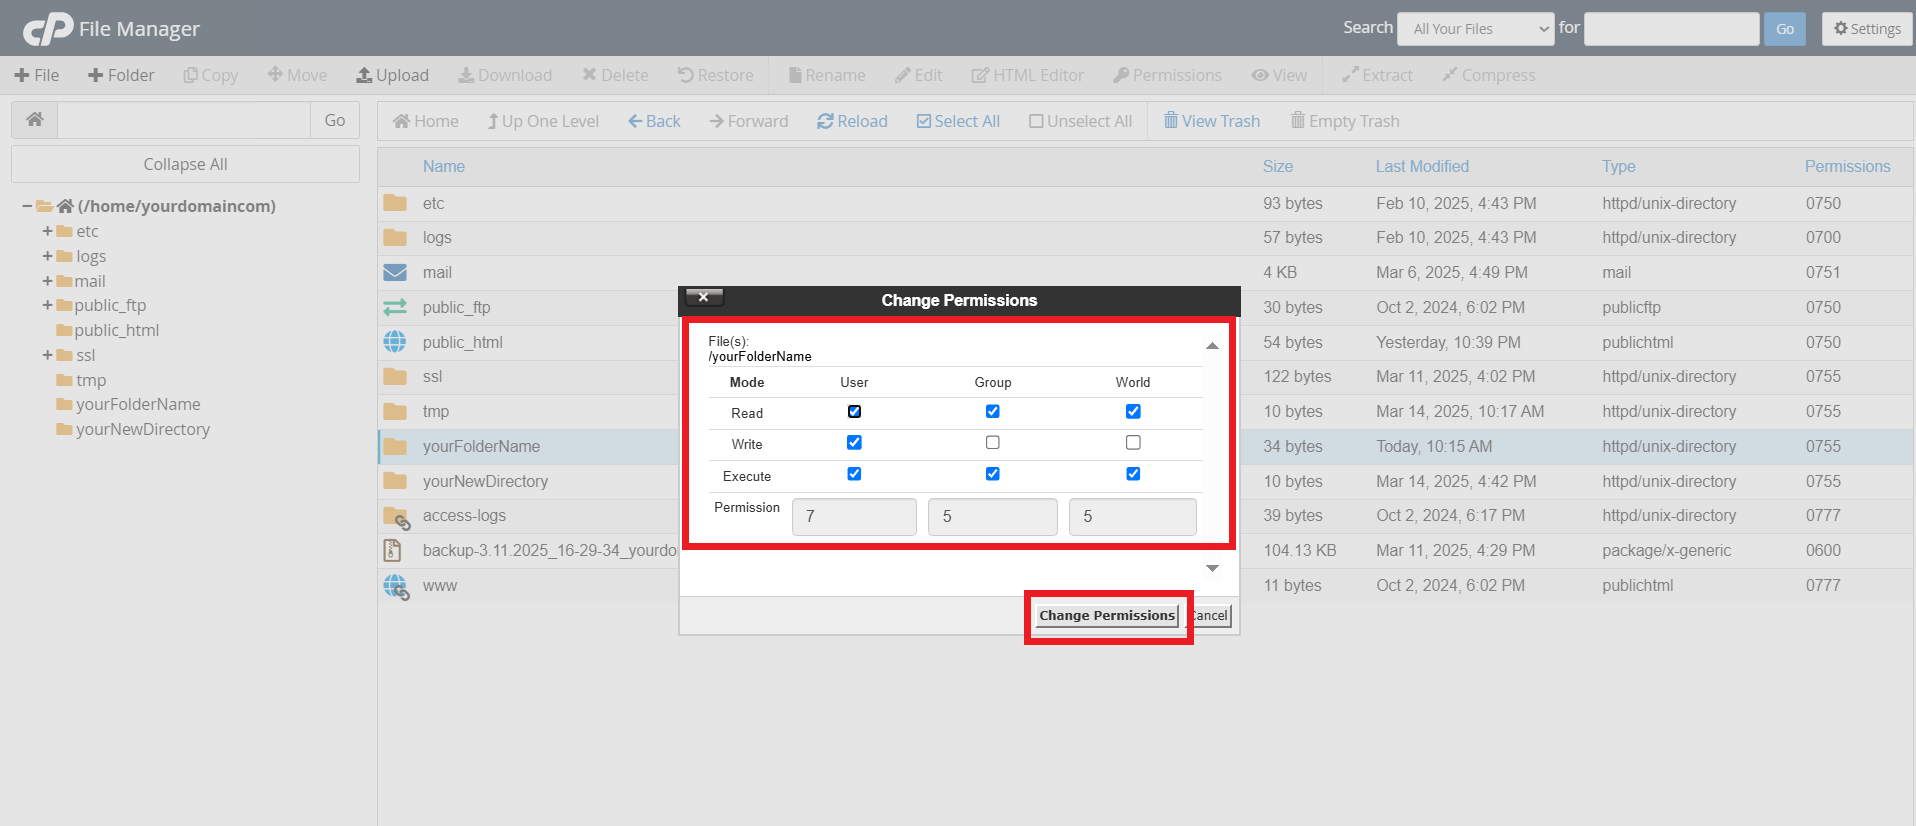
- To adjust permissions, right-click the file or folder and select Change Permissions.
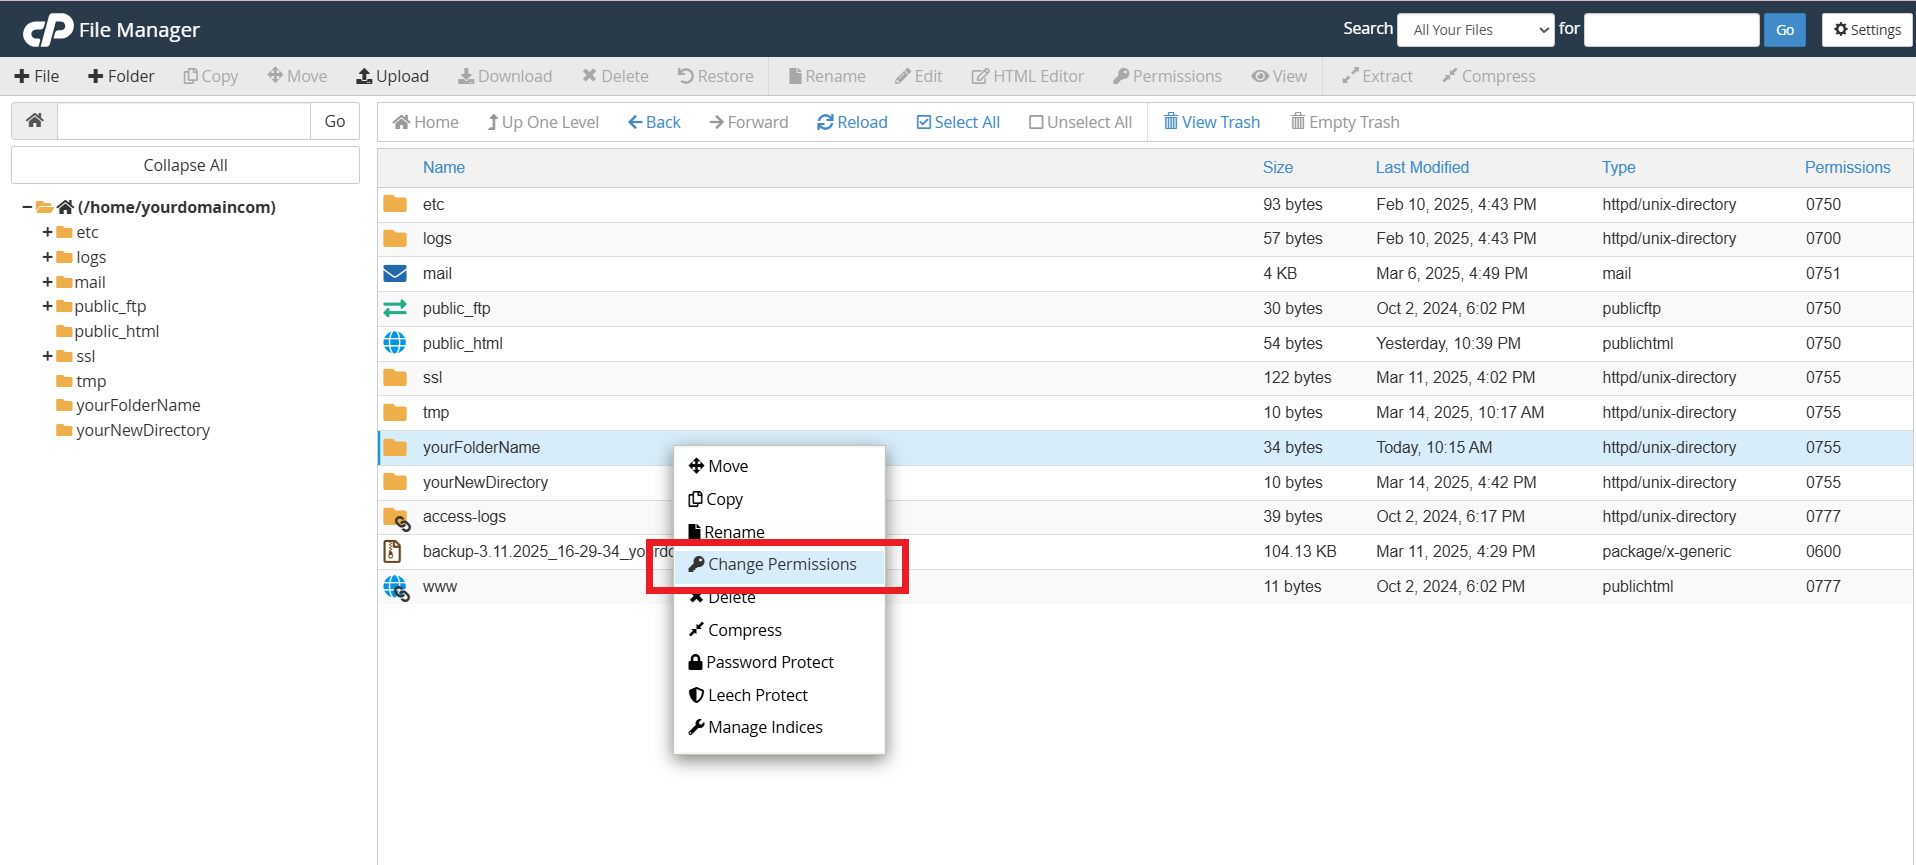
- Check or uncheck the User, Group, and World permissions checkboxes (or type numerical values like 0644 or 0755) and click Change Permissions.
Delete Files or Folders in cPanel File Manager
This method outlines how to safely remove unneeded files or folders.
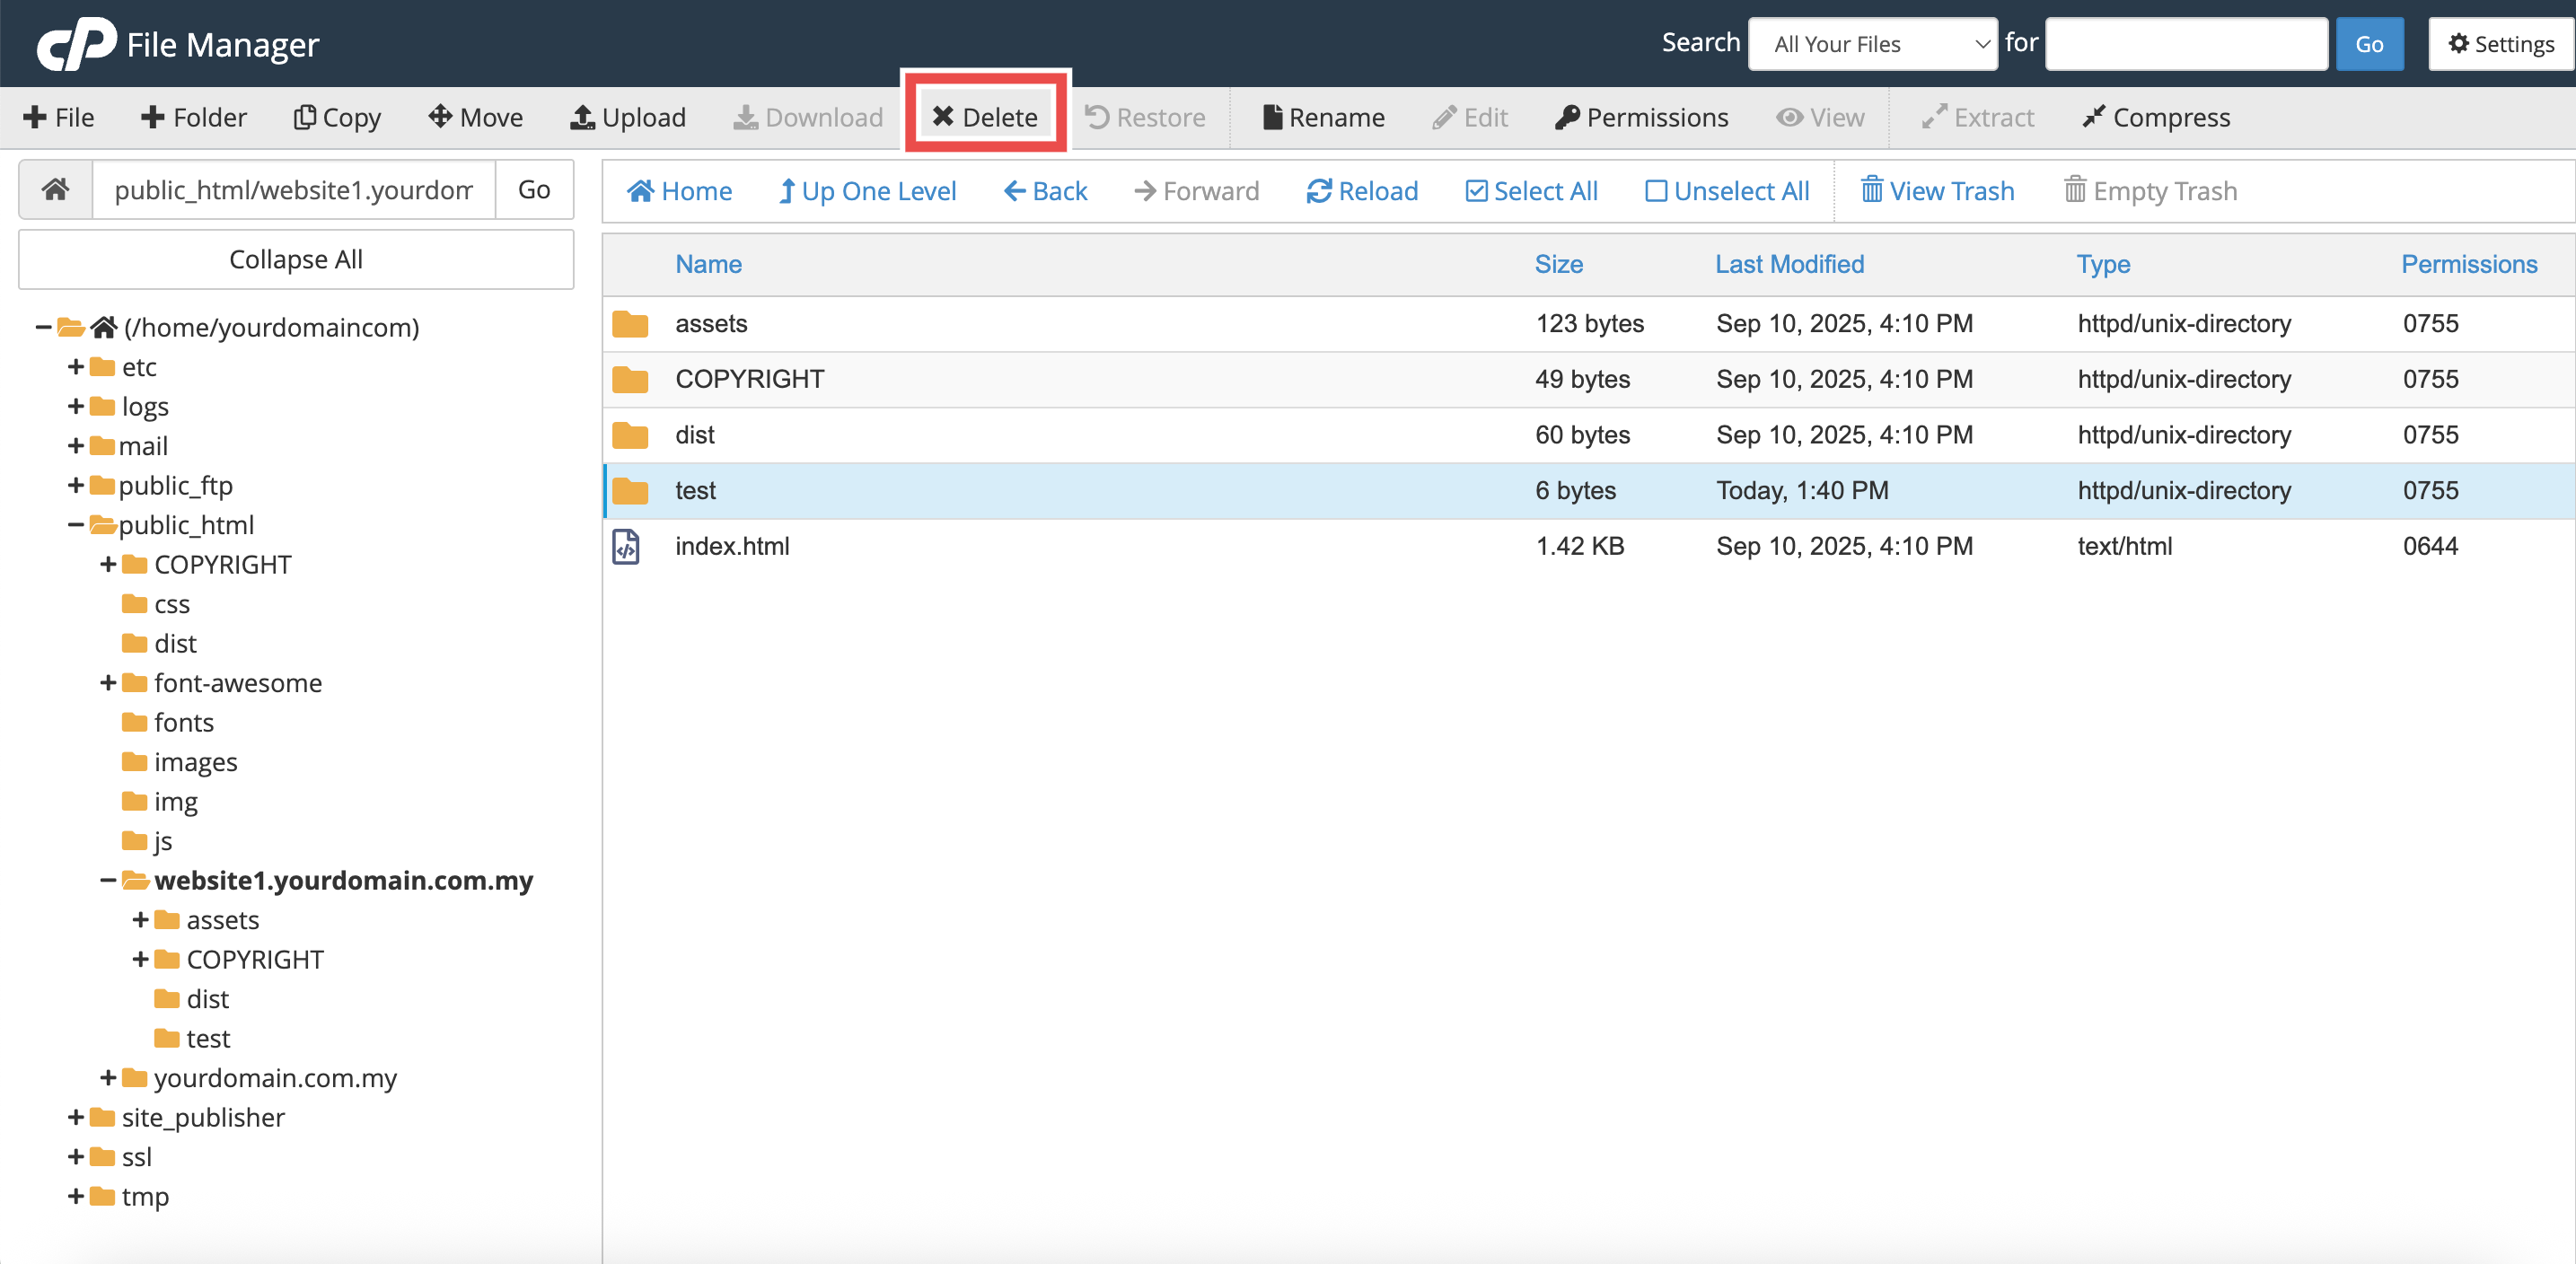
- Select the file or folder you want to delete and click the Delete button in the top toolbar.
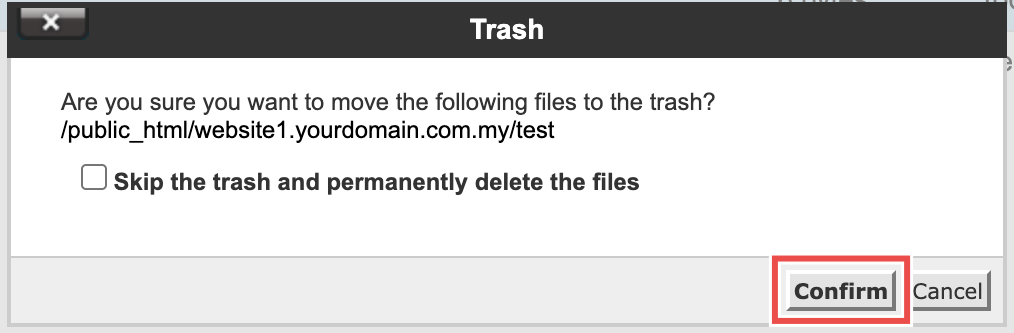
- Choose whether to skip the trash or send it to trash, then confirm by clicking Confirm.
Important Note ⚠️:
- In the Trash pop-up, you may see the option “Skip the trash and permanently delete the files.”
- If left unchecked, the file/folder will be moved to the Trash.
- If checked, the file/folder will be permanently deleted and cannot be recovered.
Restore Files or Folders in cPanel File Manager
This method outlines how to recover accidentally deleted items or folders from the Trash.
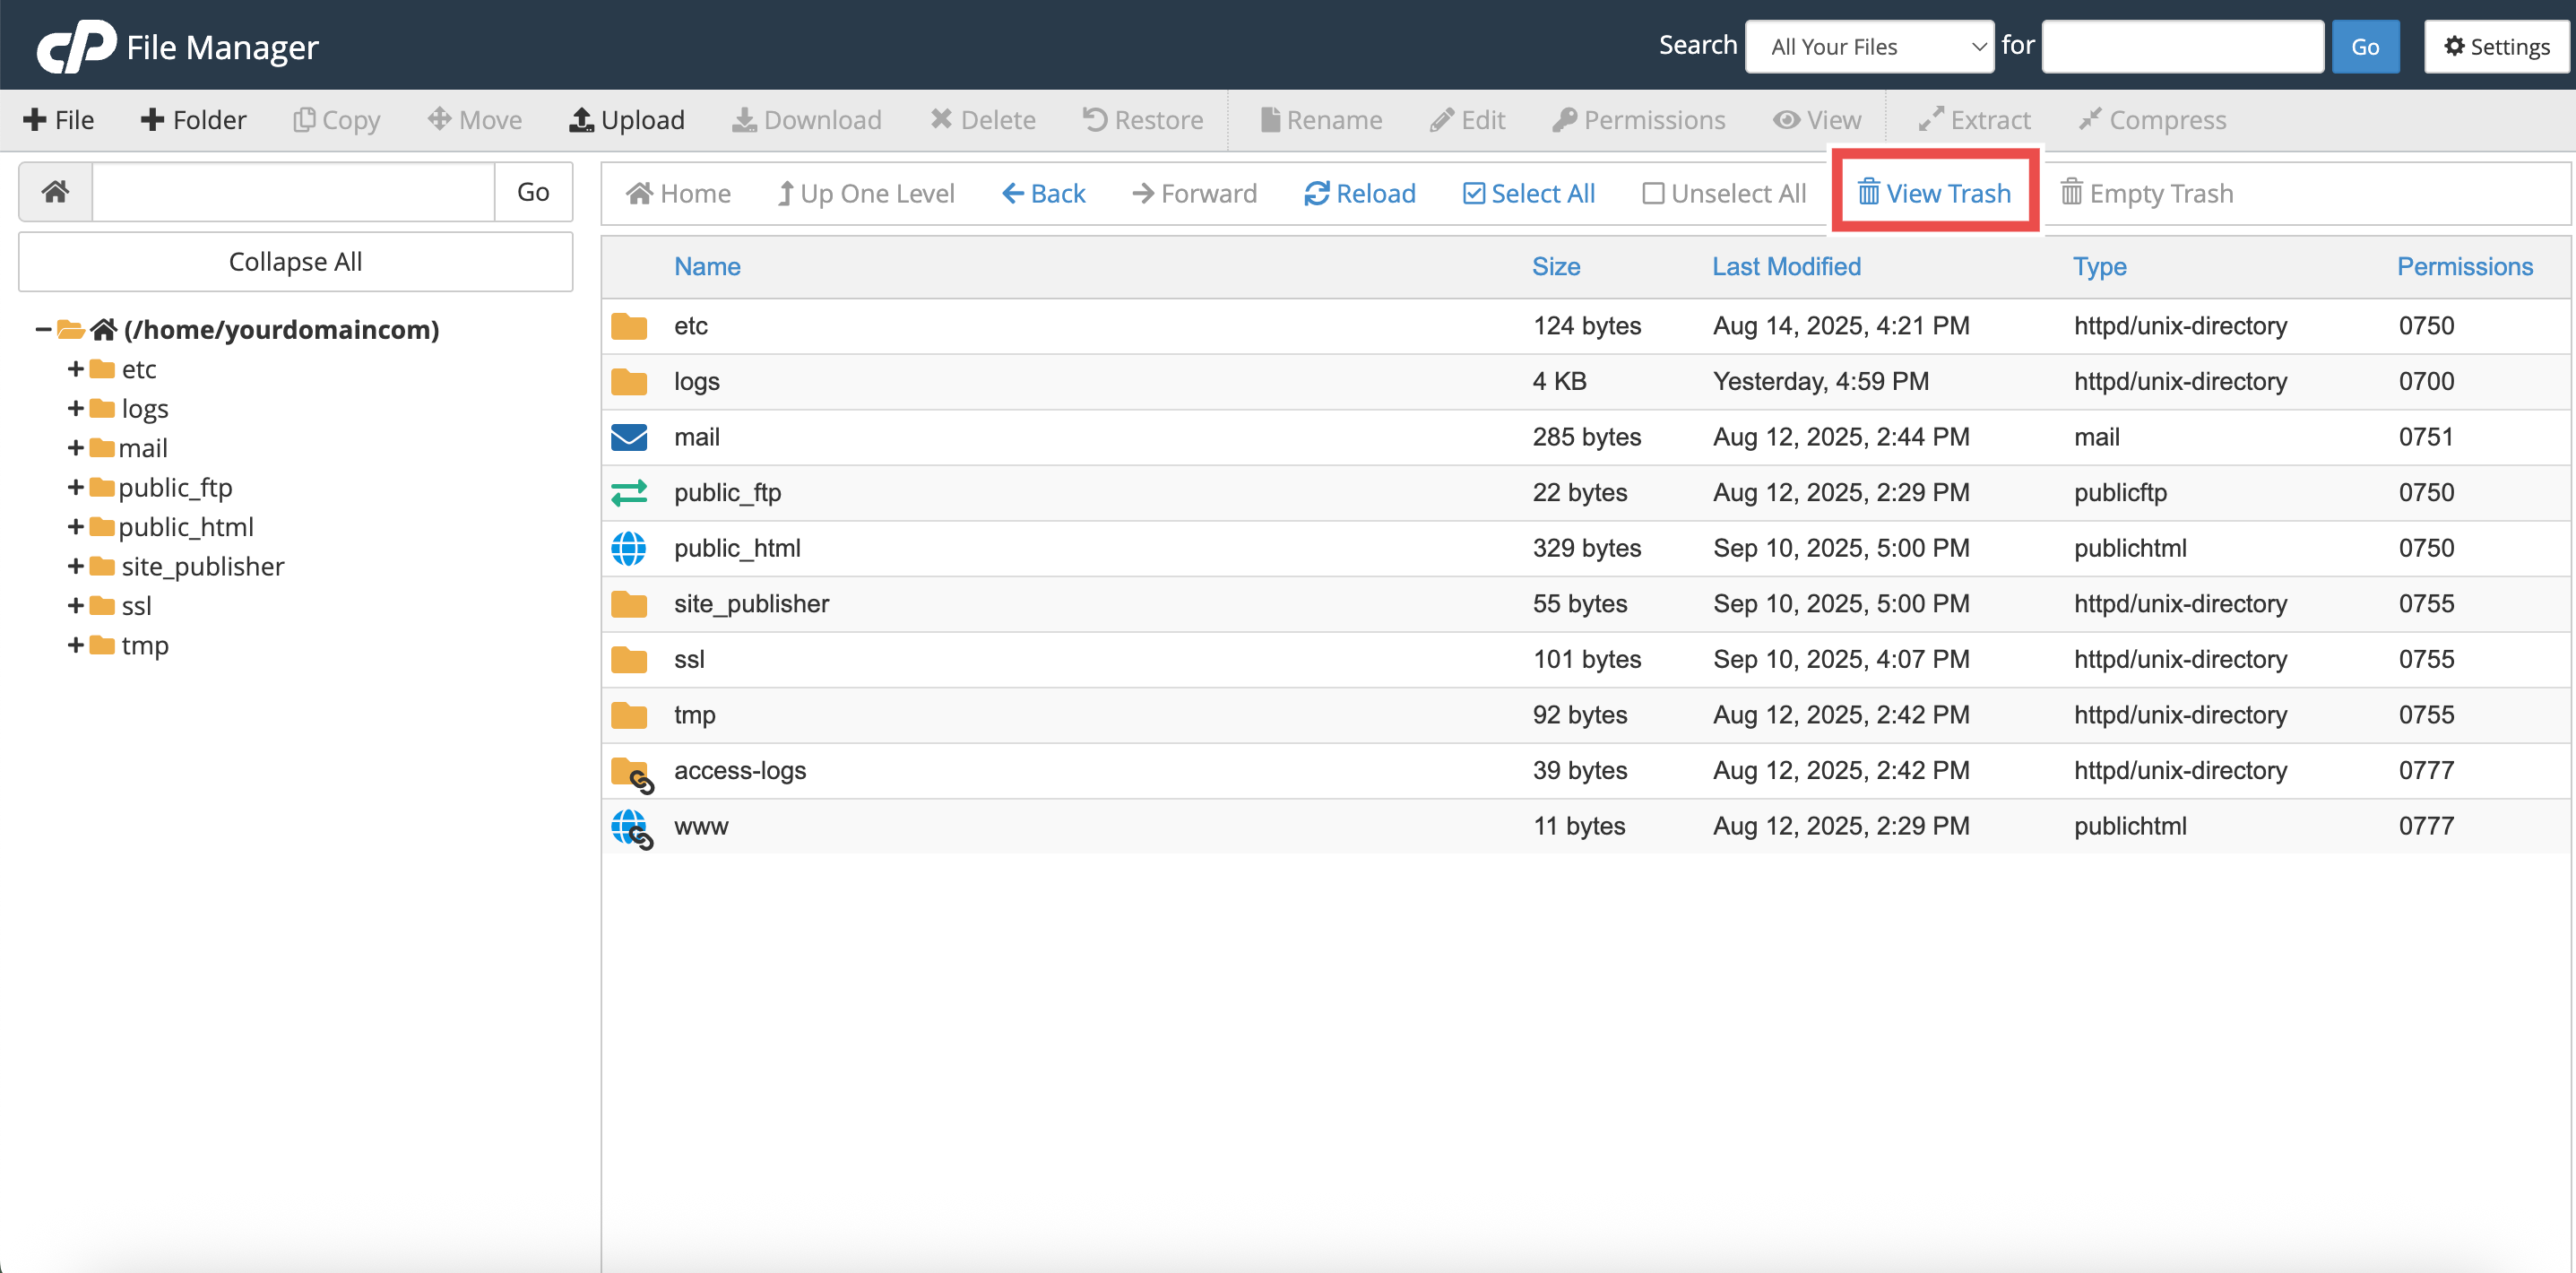
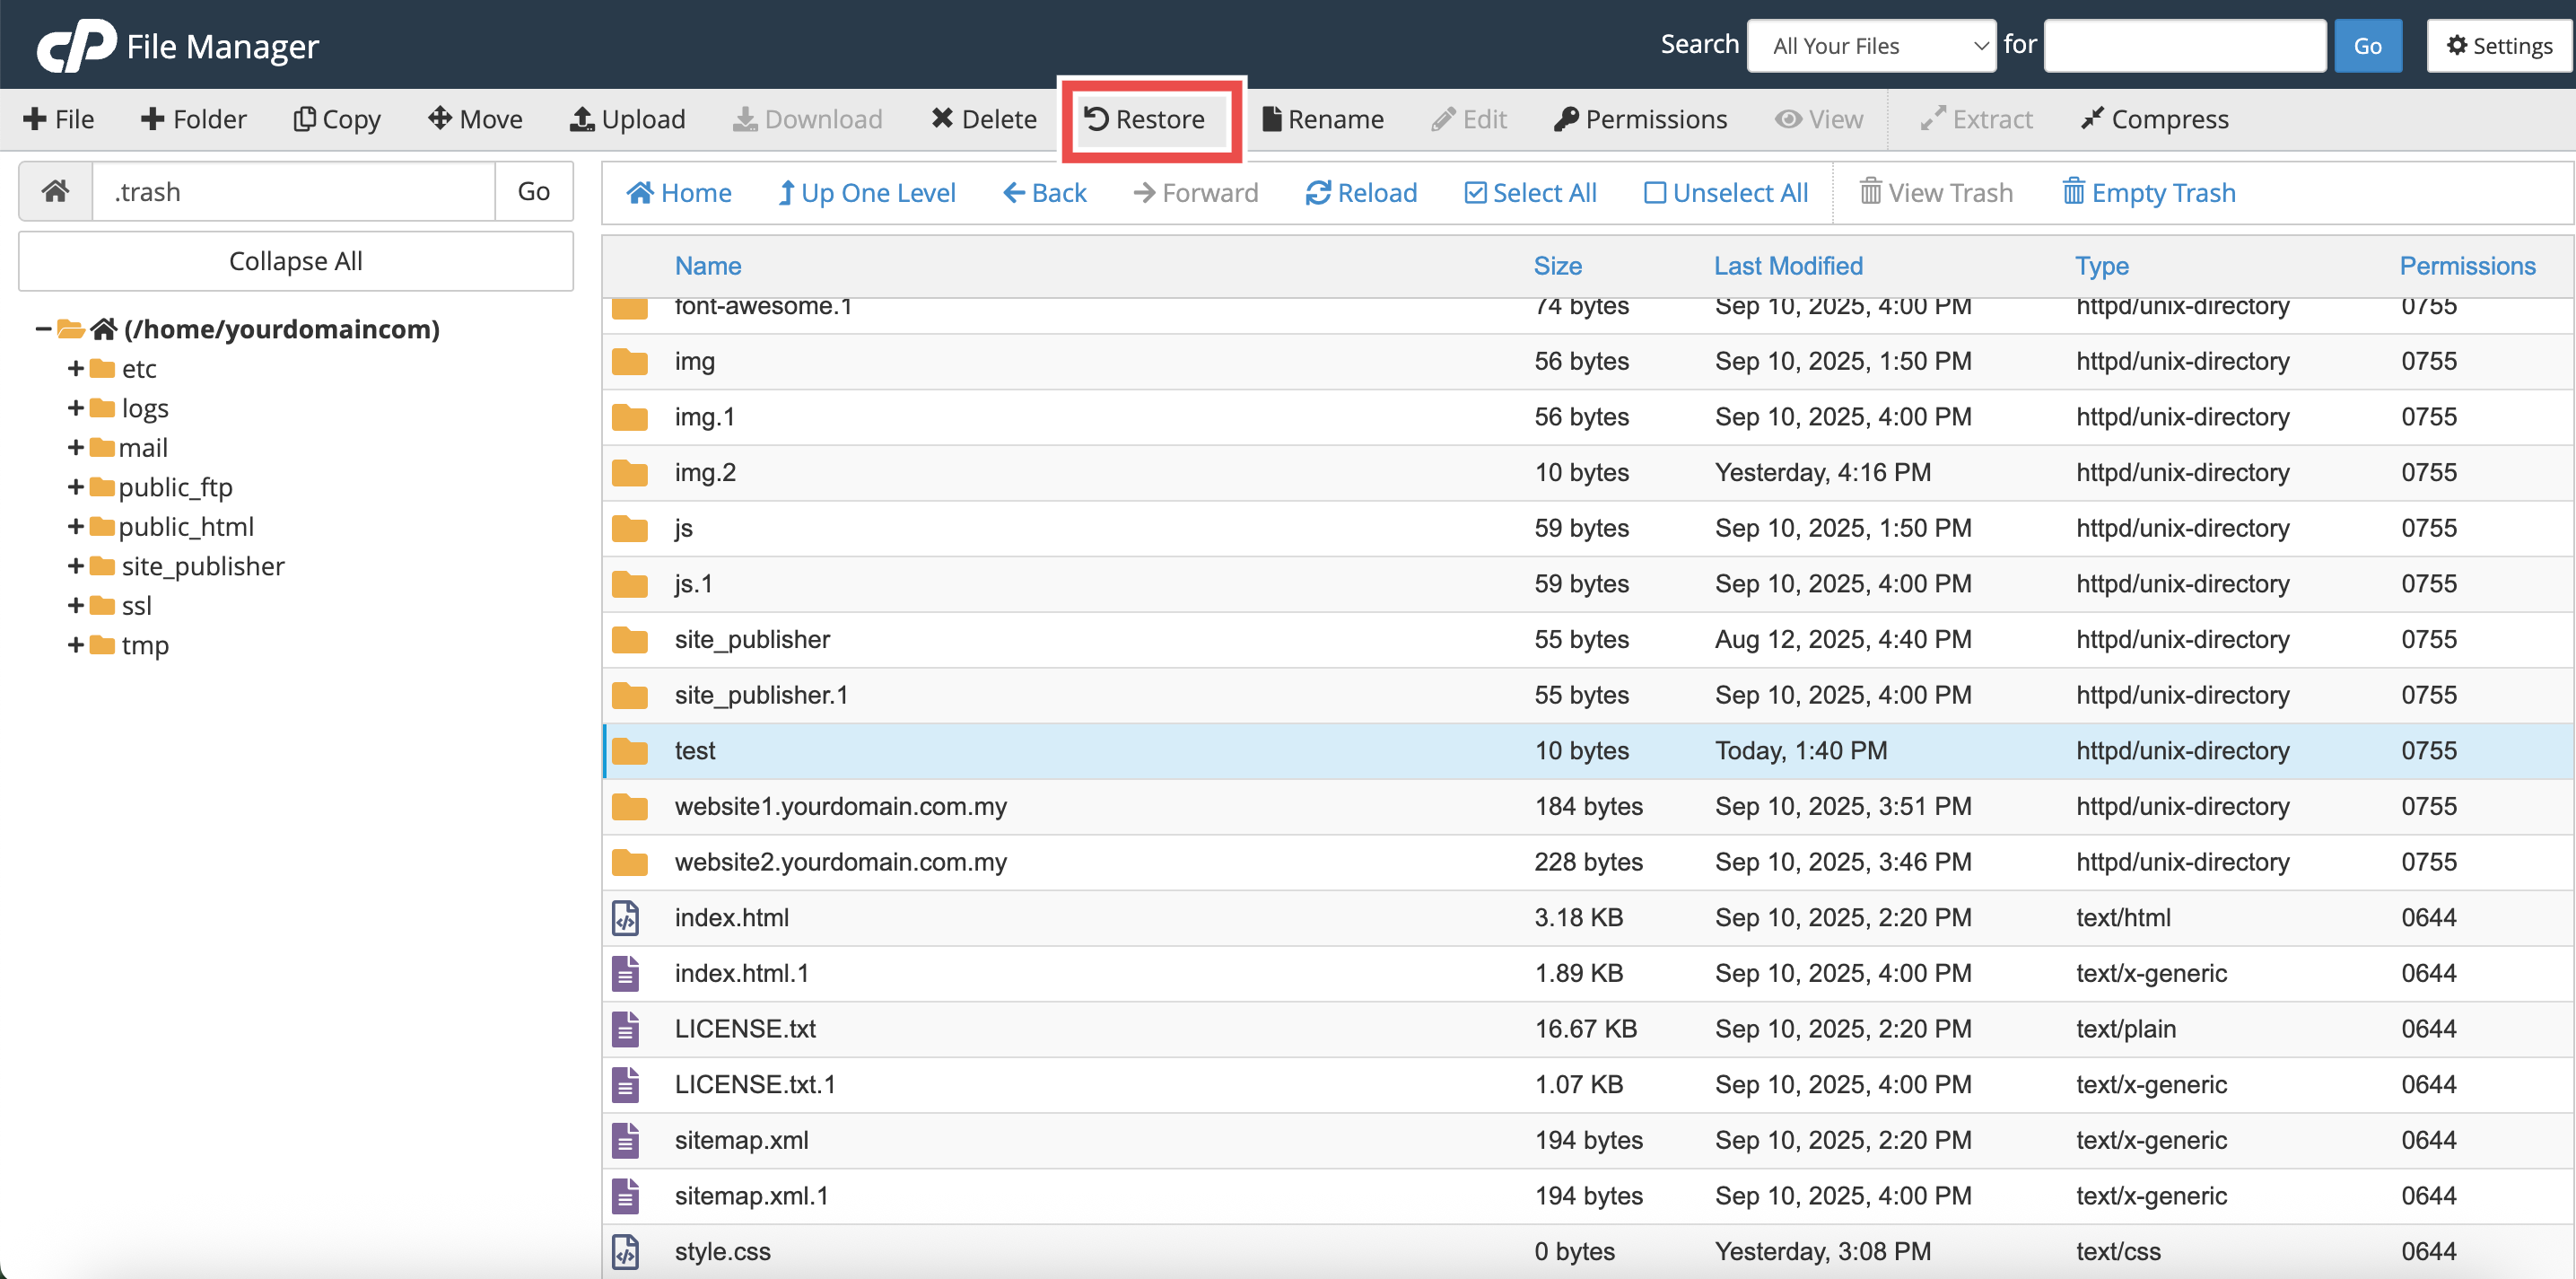
- To restore an item, click View Trash in the top toolbar.
- Select the deleted item, click Restore, and confirm by clicking Restore File(s).
Important Note ⚠️: If an item was permanently deleted and is not in the Trash, it cannot be recovered via File Manager.
Conclusion
By following this guidance, you can successfully create, upload, edit, move, permission, delete, and restore files and folders using cPanel File Manager to manage your website content efficiently.
For additional assistance or if you encounter any issues, please contact our support team at support@ipserverone.com.
Article updated on 18 August 2026 by Johnny