
Search Our Database
How to manage cPHulk Brute-Force Protection in WHM cPanel
Introduction
cPHulk Brute-Force Protection is a built-in security feature in cPanel/WHM that defends your server against brute-force attacks by blocking IP addresses after repeated failed login attempts. As a server administrator, managing cPHulk properly helps you balance security with accessibility — enabling protection, tuning its sensitivity, reviewing blocked IPs, and whitelisting trusted addresses. This guide explains how to manage cPHulk Brute-Force Protection through the WHM interface, covering enabling/disabling the feature, configuring settings, checking and unblocking IPs, and managing the whitelist and blacklist.
Prerequisite
- Access to the WHM control panel with root privileges
- Basic understanding of cPanel’s security settings
Step-by-Step Guide
cPHulk can be managed in several ways through WHM. Choose the method that suits your needs.
Step 1: Enable or Disable cPHulk Protection
- Log in to WHM at https://your-server-ip:2087 or https://your-server-hostname:2087 with your root username and root password.
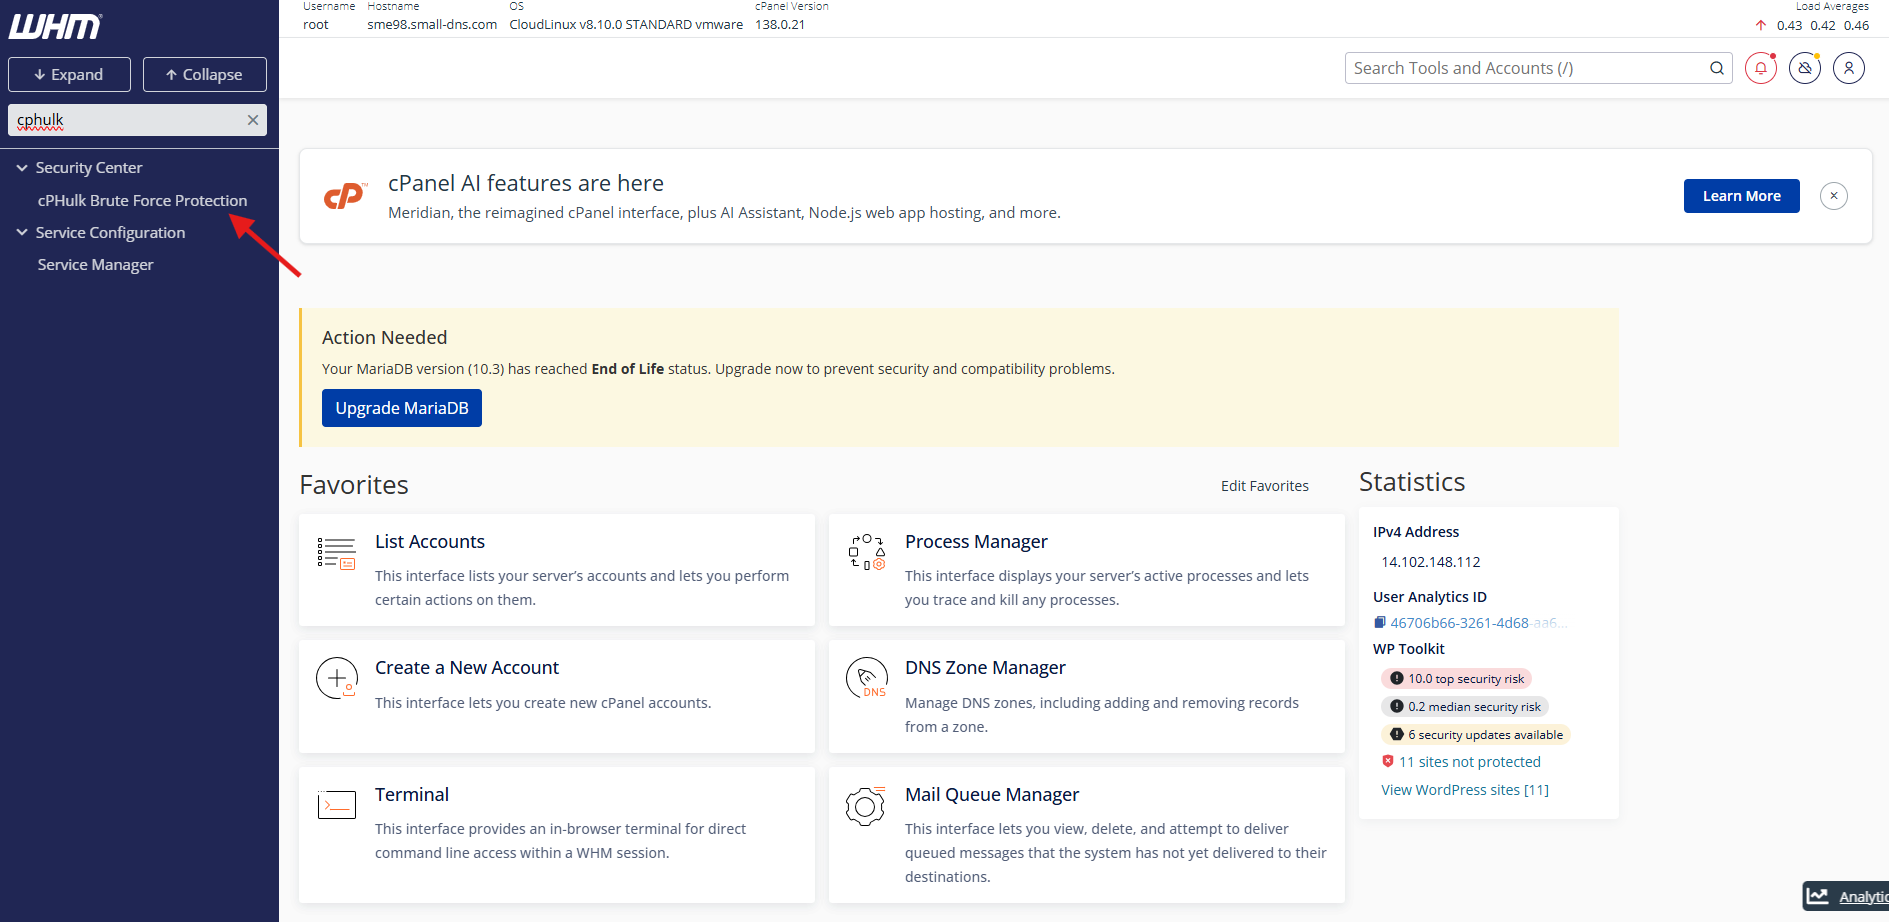
- Locate the Search Bar at the top-left corner, type cPHulk and select cPHulk Brute Force Protection from the dropdown menu.
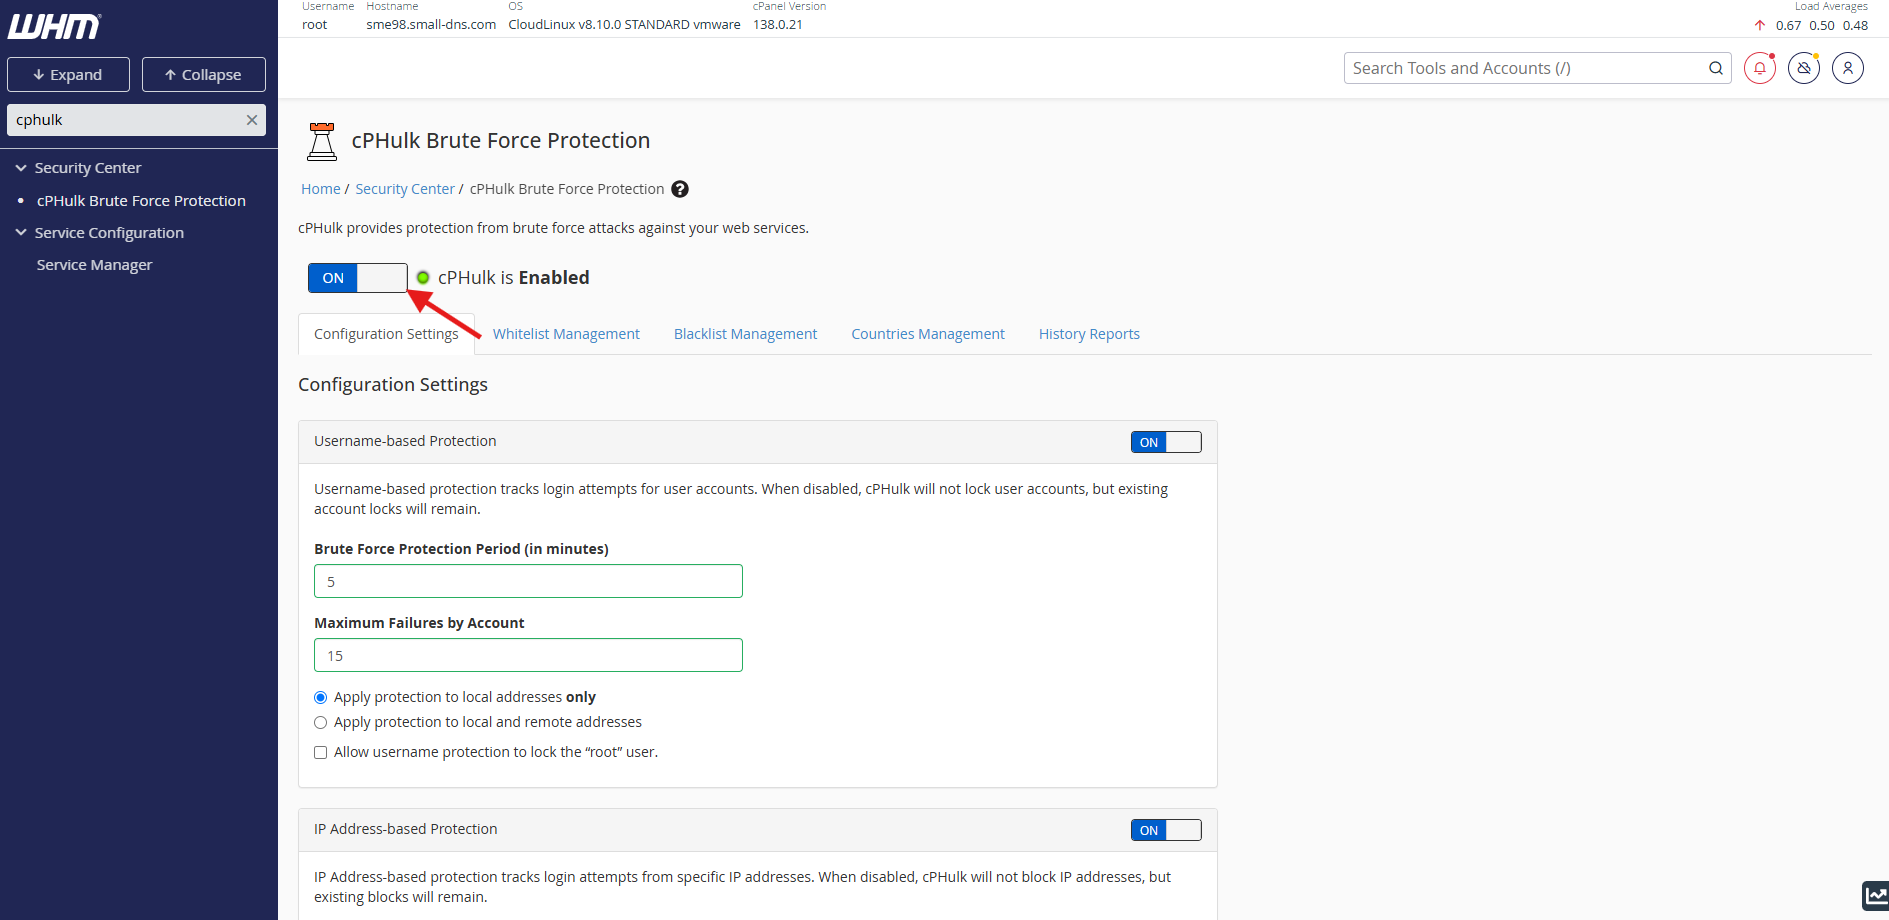
- Under the cPHulk Brute Force Protection interface, set cPHulk brute force protection to Enabled or Disabled.
Step 2: Configure cPHulk Protection Settings
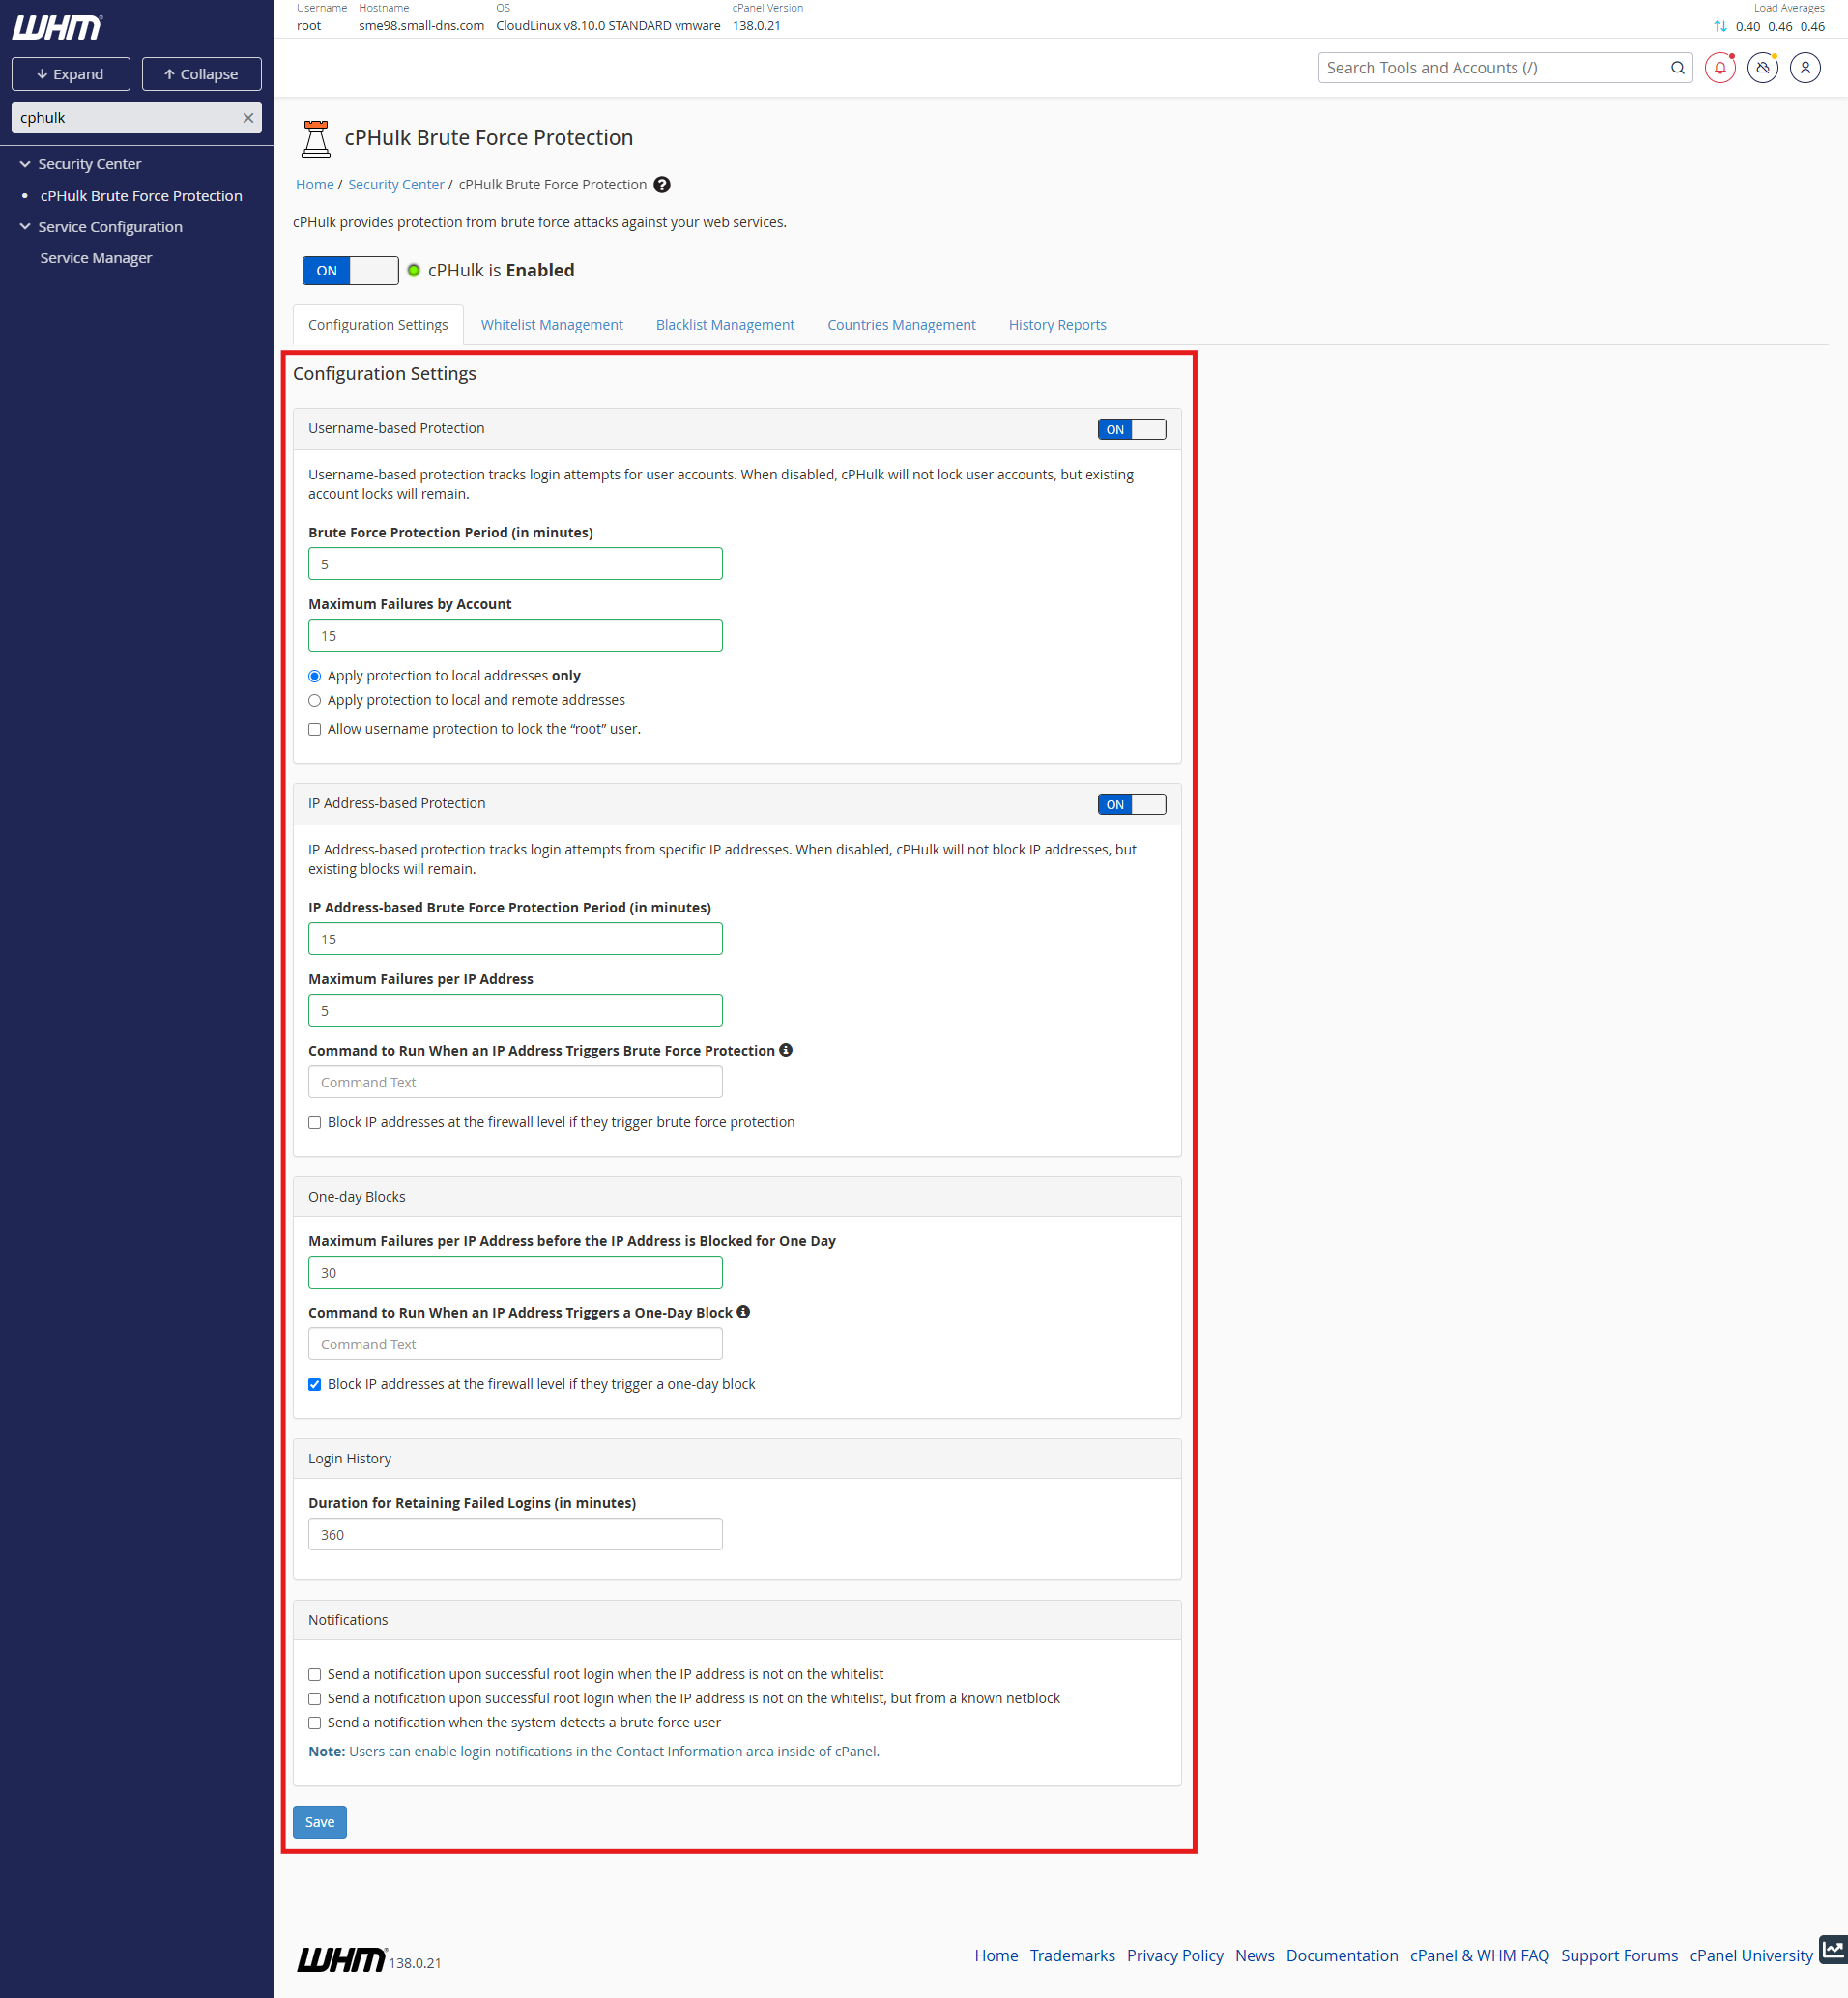
- In the cPHulk Brute Force Protection interface, navigate to the Configuration Settings tab.
- Adjust the key settings according to your needs:
- IP-Based Brute Force Protection Period — the time window in which failed login attempts are counted per IP.
- Brute Force Protection Period — how long an IP remains blocked after triggering a rule.
- Maximum Failures — the number of failed attempts allowed before an IP is blocked.
- Maximum Failures by Account — the number of failed attempts allowed before an account is locked.
- Click Save Changes.
Step 3: Check and Unblock Brute-Force Blocked IPs
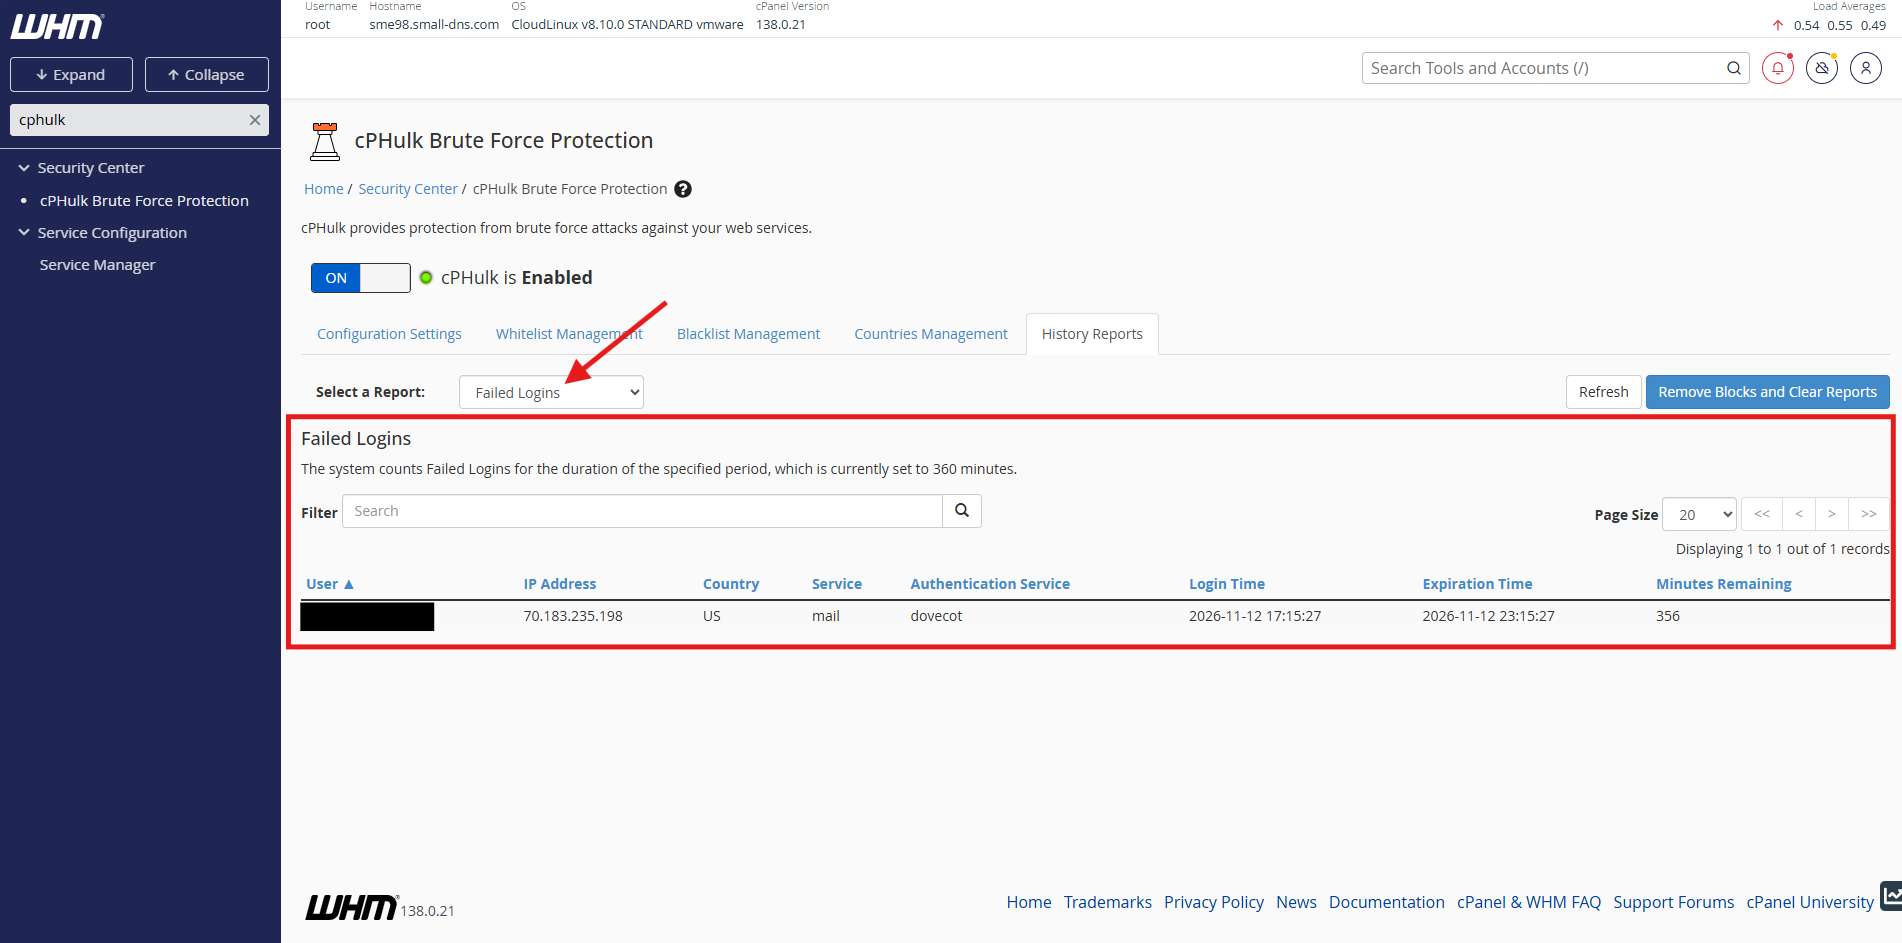
- In the cPHulk Brute Force Protection interface, navigate to History Reports.
- Review the list of IP addresses that have been blocked or are in the process of being blocked due to failed login attempts. You may select other reports from the dropdown menu.
- Search for the IP address you are looking for and verify if it is present in the list.
Step 4: Manage IP Whitelist and Blacklist
- In the cPHulk Brute Force Protection interface:
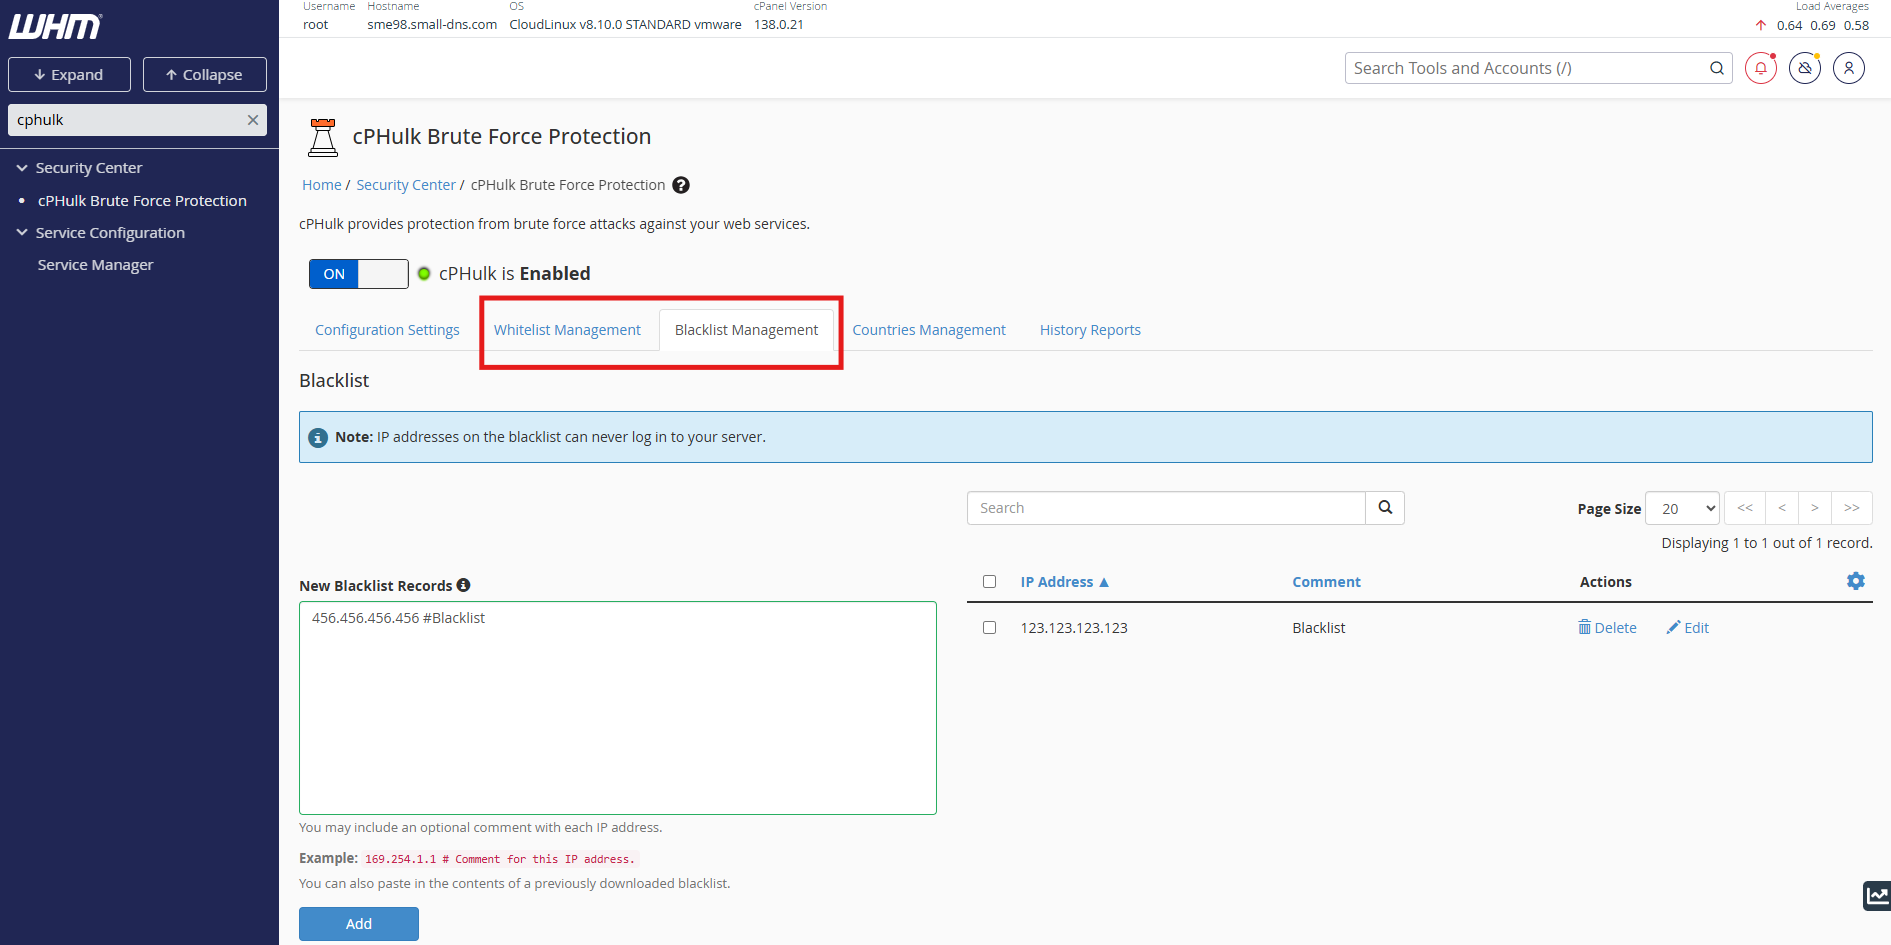
- Navigate to Whitelist Management and add trusted IP addresses so they are never blocked by cPHulk.
- Navigate to Blacklist Management and add IP addresses you want to block from logging in to your server.
- Use # to add an extra note to the IP and click Add to add the IP.
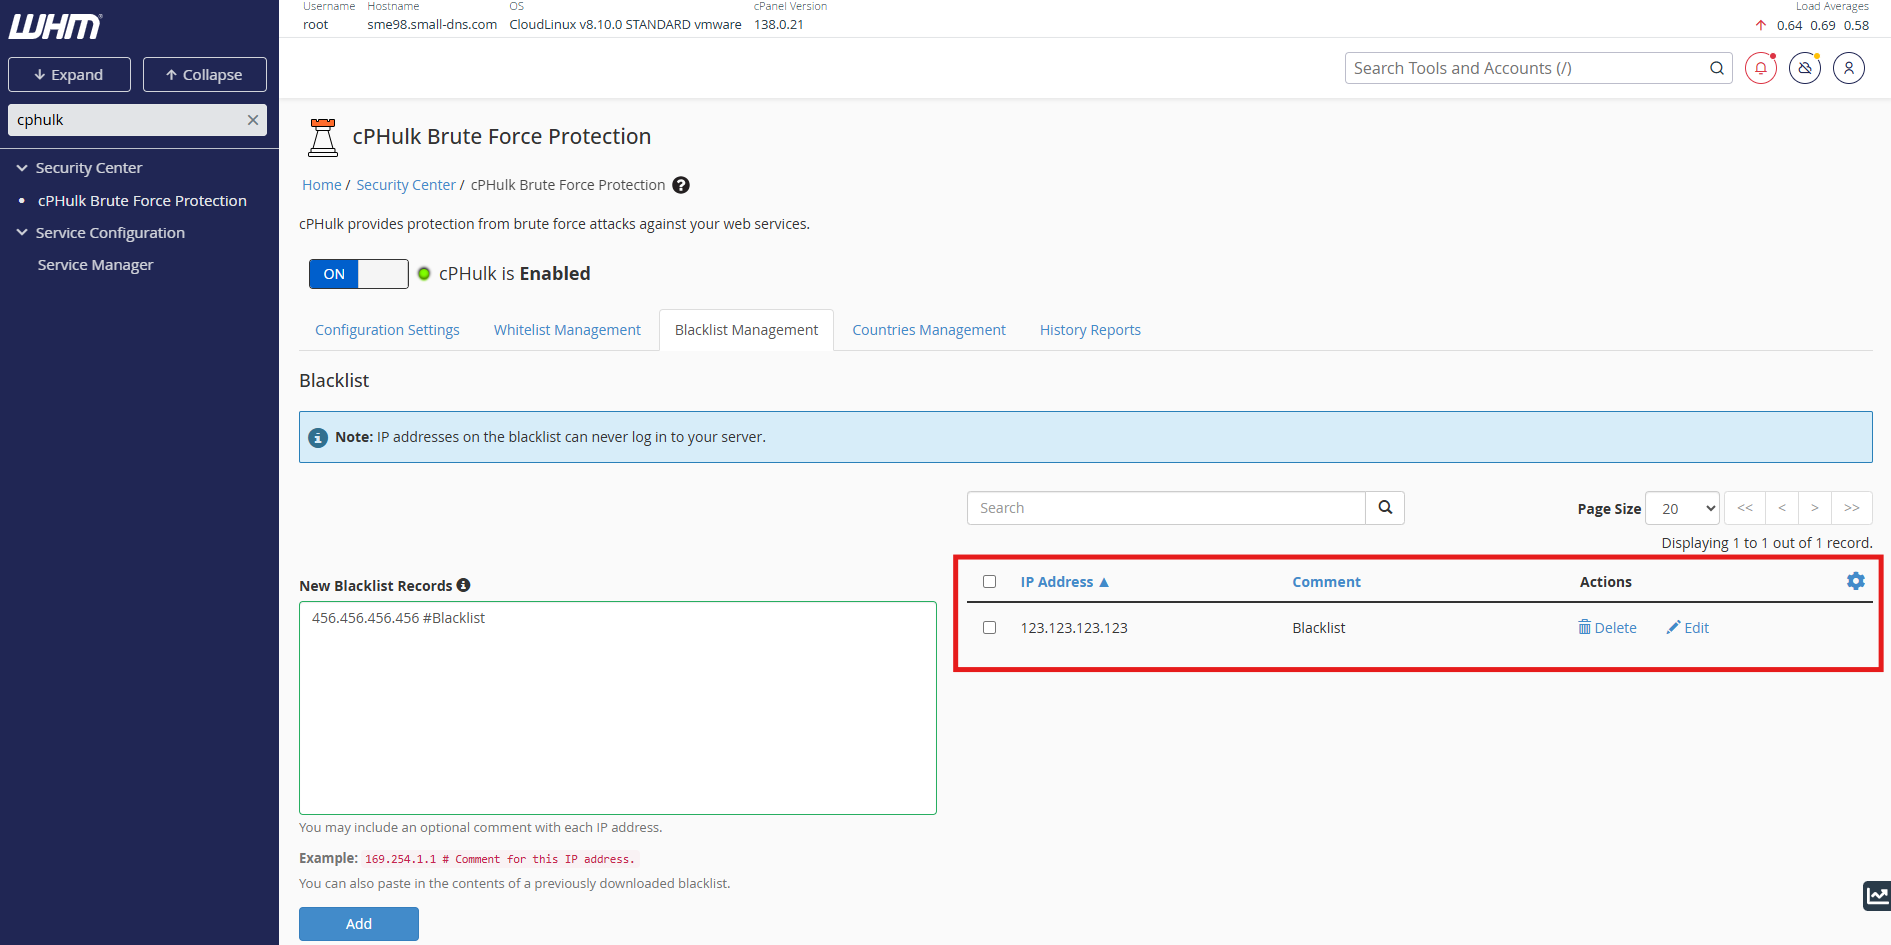
- Remove any IP address from either list using the provided options when it is no longer needed.
Conclusion
By following this guidance, you can manage cPHulk Brute-Force Protection in WHM effectively — enabling and disabling protection, tuning its settings, reviewing and unblocking IPs, and controlling the whitelist and blacklist. Regularly reviewing brute-force reports and adjusting cPHulk settings helps maintain a balance between security and accessibility for your server.
If you encounter any issues or require further assistance, please reach out to our support team at support@ipserverone.com.
Article updated on 12 November 2026 by Johnny