
Search Our Database
How to manage DNS Records in cPanel
Introduction
Managing DNS zone records is a crucial task for website administrators using cPanel to control how domain names direct traffic across the internet. Whether you need to add a new subdomain, modify an existing routing address, or clear out outdated entries, performing these actions correctly in cPanel ensures your domain’s services—such as website hosting and email routing—remain fully accessible and reliable. This guide will walk you through the procedures for adding, editing, and deleting DNS zone records using the cPanel Zone Editor interface.
Prerequisite
- Access to cPanel account with DNS Zone Editor privileges
- Basic knowledge of DNS record types (e.g., A, CNAME, MX, TXT)
Step-by-step guide
Step 1: Access to cPanel Zone Editor
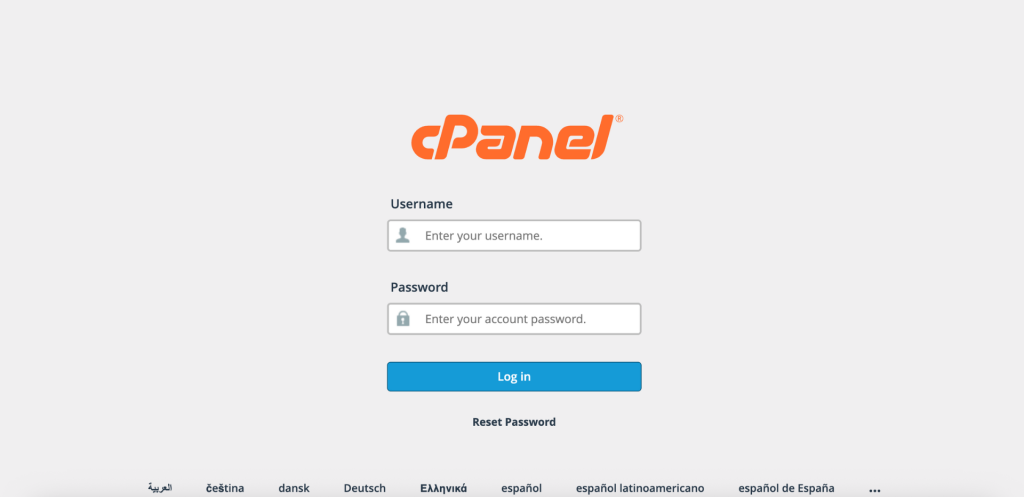
- Access and log in to your cPanel account using your username and password.
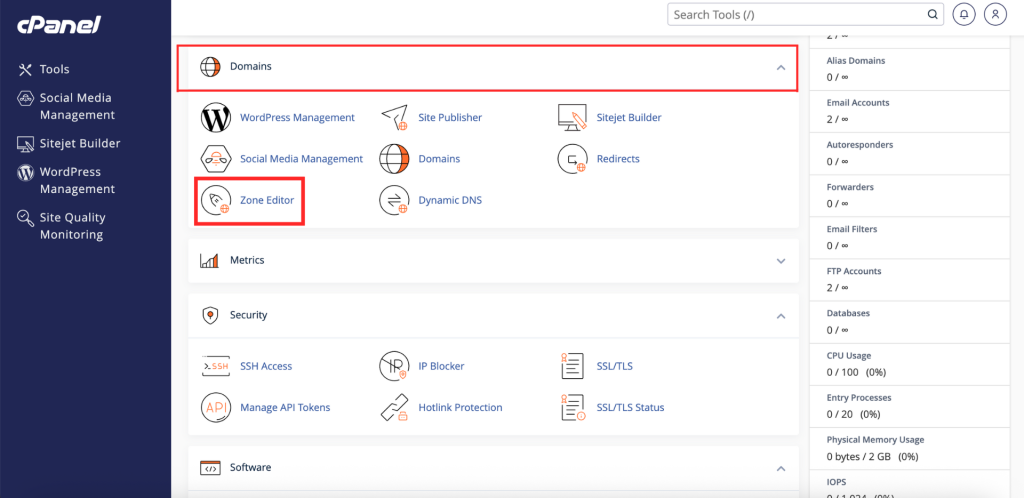
- In the Home page, under Domains, click Zone Editor.
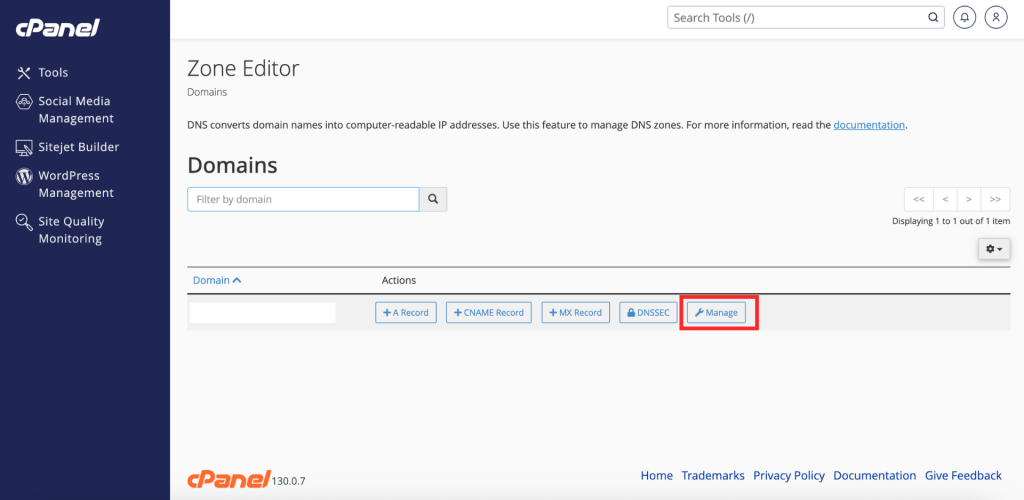
- In the Zone Editor list, click Manage on the right of the domain you want to update to open its DNS zone.
Step 2: Managing DNS Records
Add DNS Zone Record in cPanel
This method explains how to create new DNS records for your domain.
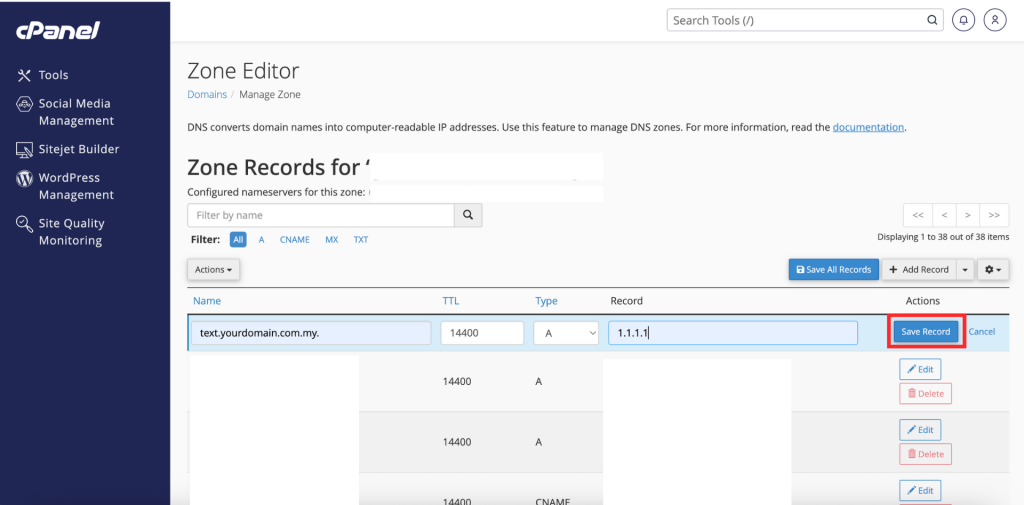
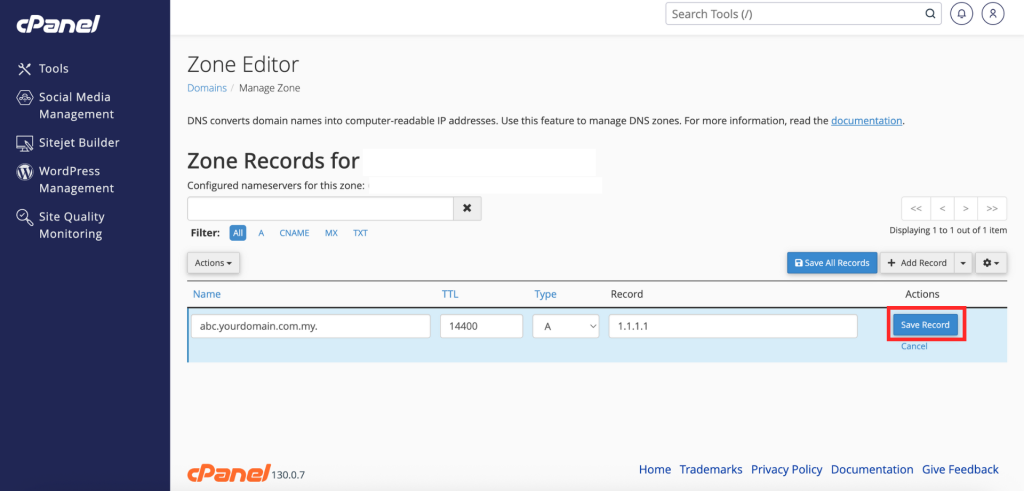
- Click on the + Add Record button or select the dropdown arrow to choose the desired record type.
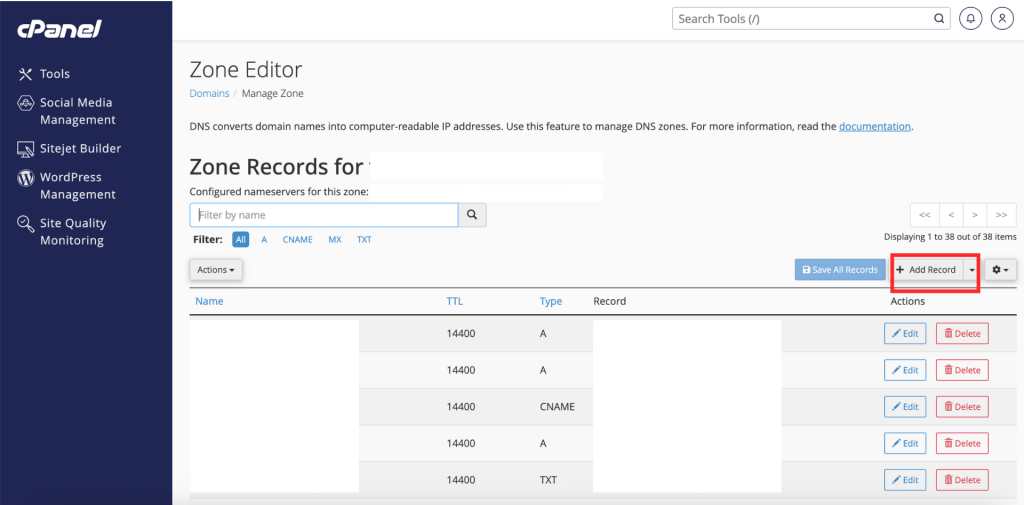
- Enter the required fields:
- Name: Enter the zone record name (e.g., subdomain or main domain).
- TTL: Enter the Time to Live value (default is usually 14400).
- Type: Select the record type (A, CNAME, TXT, etc.).
- Record: Enter the destination IP address or target host.
- Click Save Record.
Edit DNS Zone Record in cPanel
This method details how to modify existing records such as updating server IP addresses.
- Locate the specific DNS record you wish to modify.
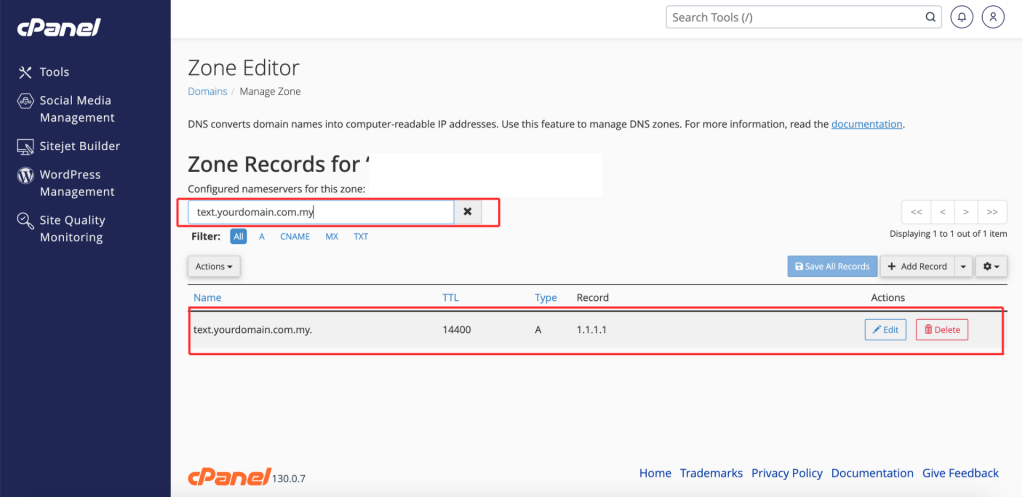
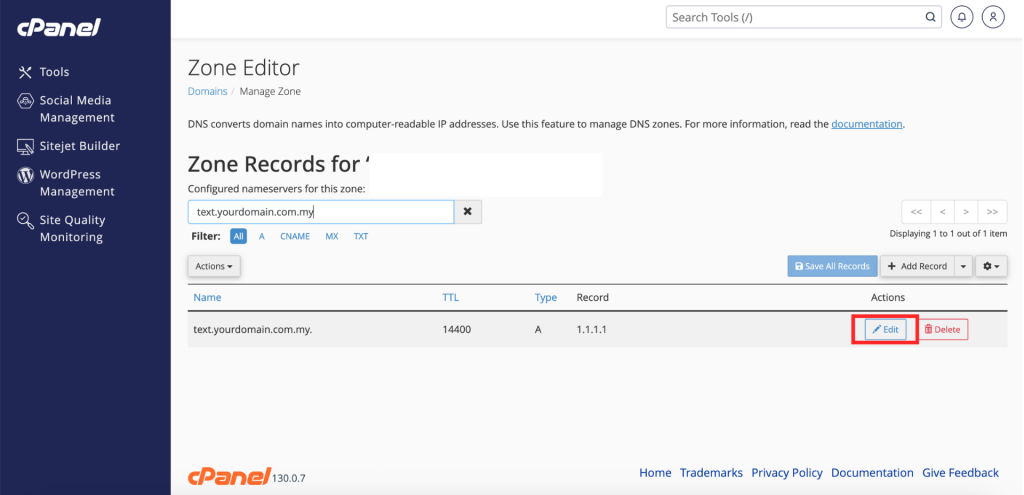
- Click the Edit button next to the record.
- Update the necessary information in the text fields (e.g., changing the destination IP or TTL).
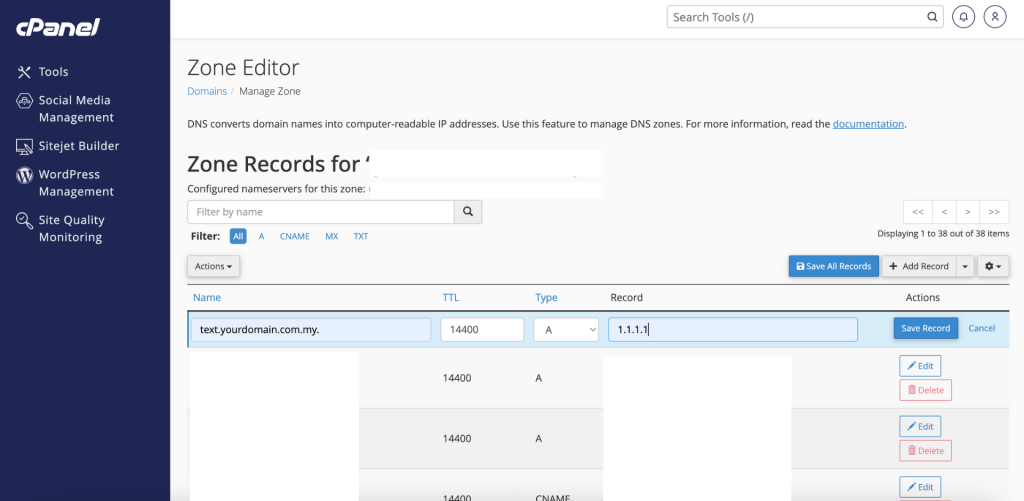
- Click Save Record to apply your changes.
Delete DNS Zone Record in cPanel
This method shows how to safely remove unneeded DNS records from your domain.
- Find the DNS record you want to remove.
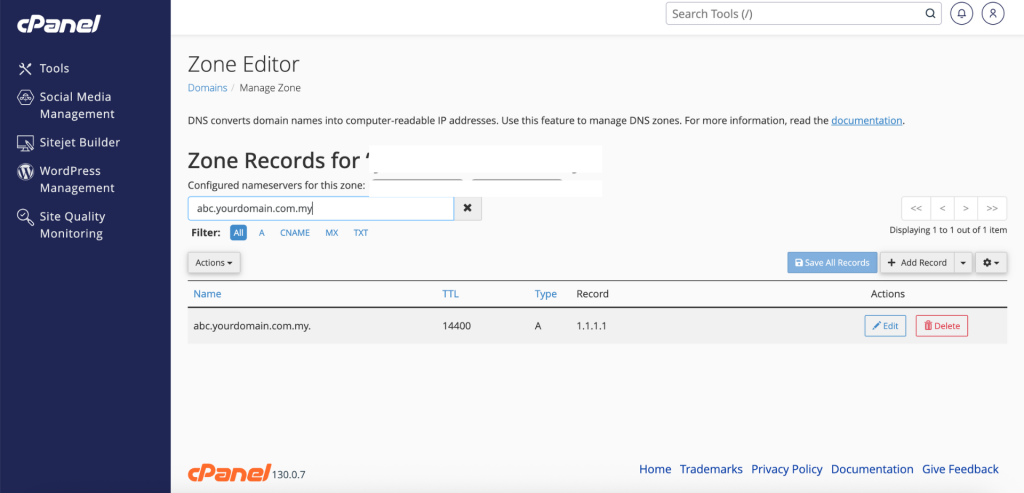
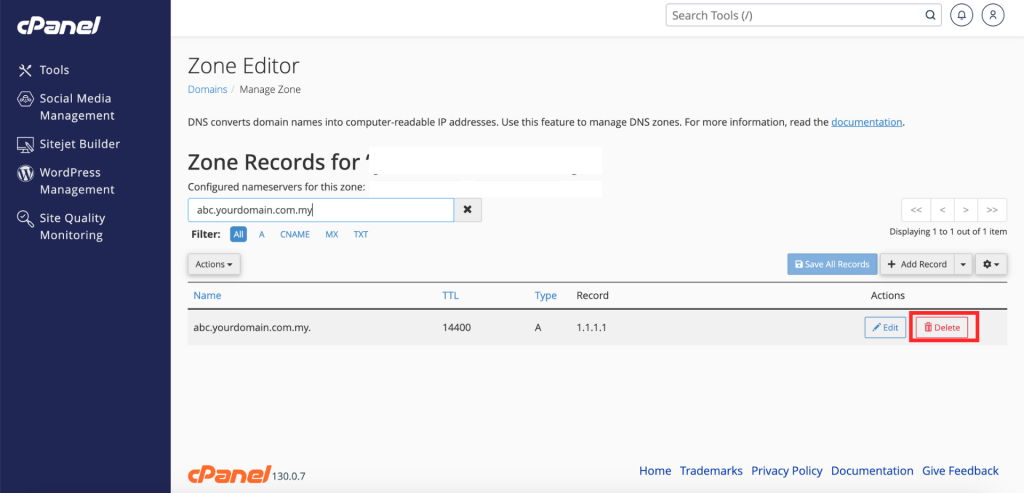
- Click the Delete button located on the right side of the entry.
Step 3: Verify the changes
- After editing the DNS records, you can verify whether the update has been applied using a DNS lookup tool – [DNS Lookup Tool].
Conclusion
By following this guidance, you can successfully manage, add, edit, or remove DNS zone records in cPanel to control your domain’s traffic and services effectively.
For additional assistance or if you encounter any issues, please contact our support team at support@ipserverone.com.
Article updated on 17 August 2026 by Johnny