
Search Our Database
How to Set Up SPF, DKIM, and DMARC Records for SmarterMail
Introduction
Email authentication is essential for protecting your domain from spoofing, phishing, and spam. When you configure SPF, DKIM, and DMARC records for your SmarterMail server, you ensure that receiving mail servers can verify emails genuinely originate from your authorized senders. Administrators need to implement these technologies within their DNS management panels to improve email deliverability and safeguard the domain’s reputation. By setting up these records, you minimize the risk of unauthorized use and ensure seamless, trustworthy communication for your organization.
Prerequisite
- Access to your domain’s DNS management panel.
- Access to SmarterMail with administrator privilege.
Step-by-step guide
Step 1: Set Up SPF Record
SPF allows domain owners to define which servers are permitted to send emails on their behalf.
- Go to your domain’s DNS manager.
- Add a new TXT record with the following values:
- Name/Host: @ or your domain name
- Type: TXT
- Value: v=spf1 a mx ip4:your_server_ip include:smartermail.example.com ~all
Step 2: Set Up DKIM Record
DKIM ensures the message has not been altered and verifies the sender’s domain.
- Enable DKIM in your SmarterMail interface.
- As a primary administrator:
- First, navigate to Manage > Domains and click on your target domain.
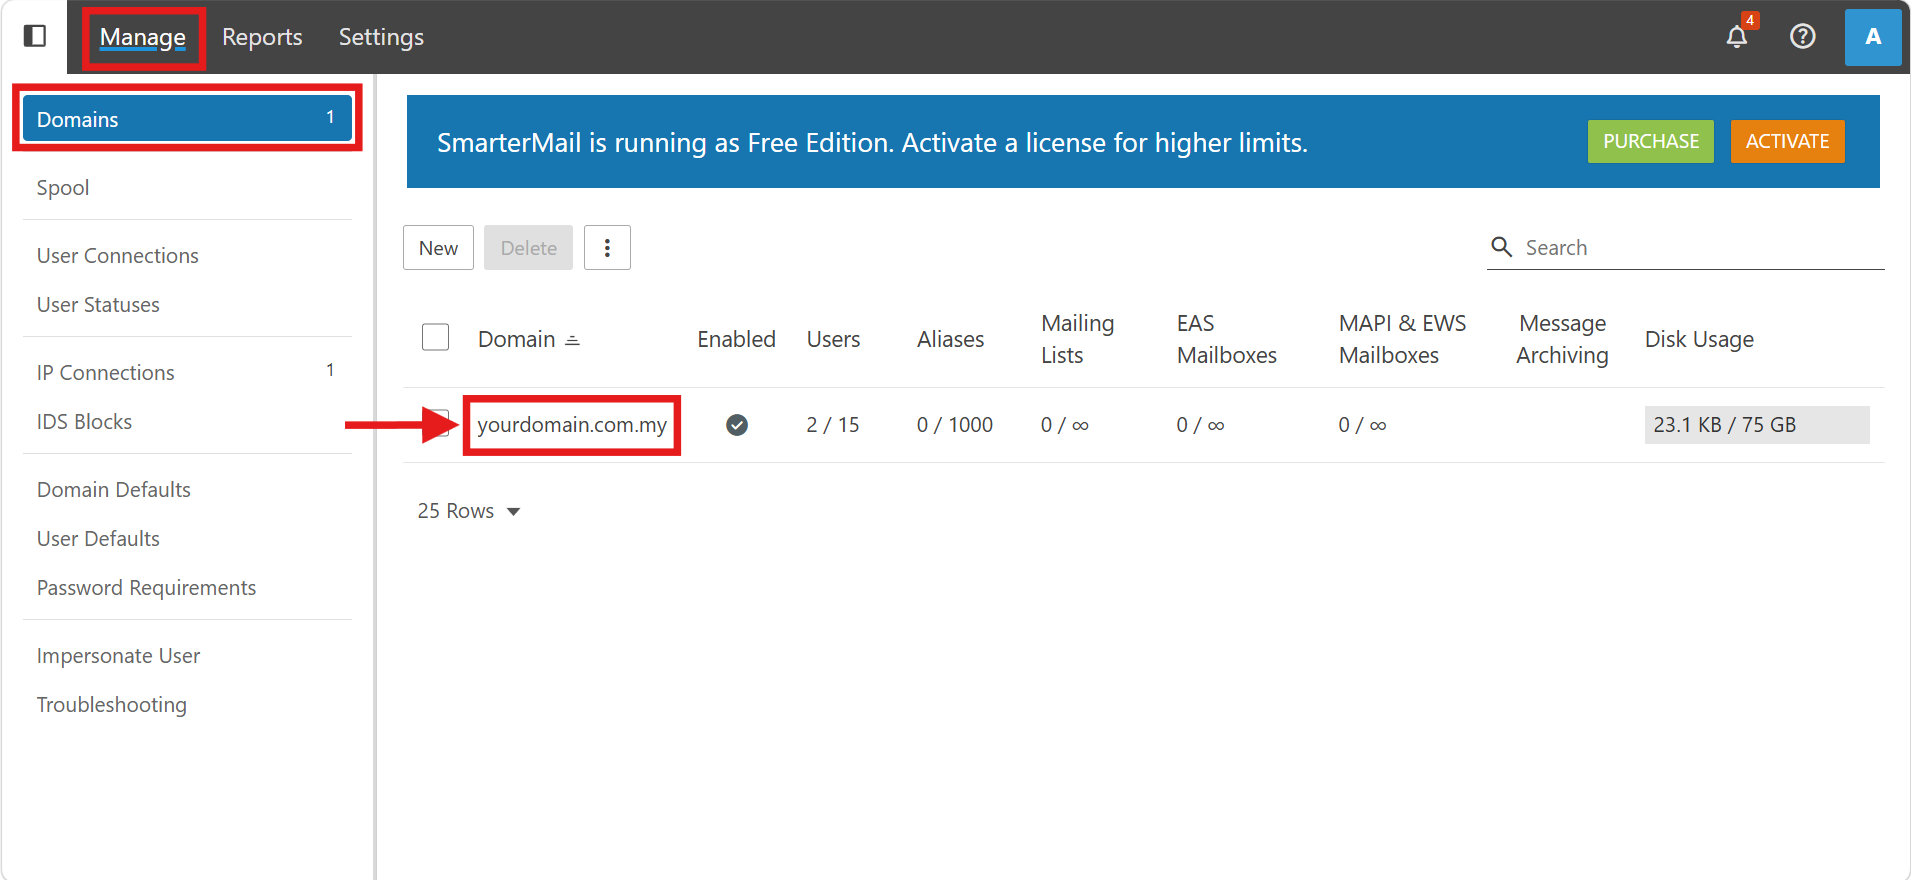
- Then, navigate to General tab, and click on Enable under Email Signing.
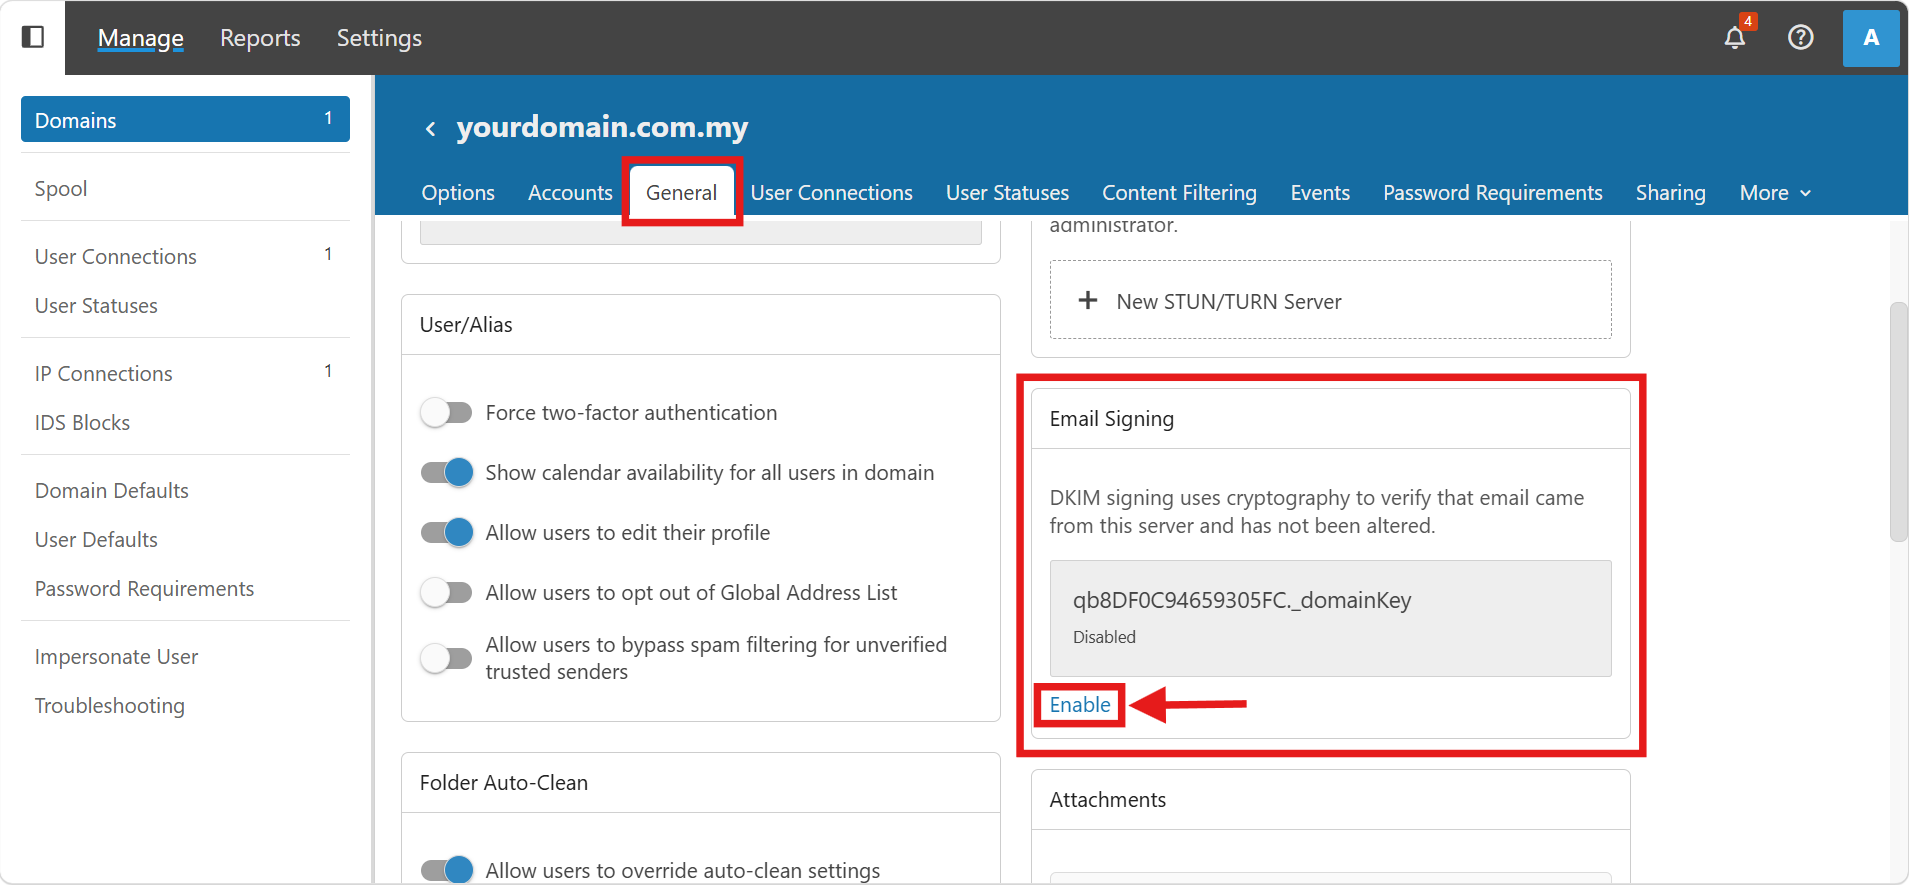
- First, navigate to Manage > Domains and click on your target domain.
- As a domain administrator:
-
- First, navigate to More > Domain Settings.
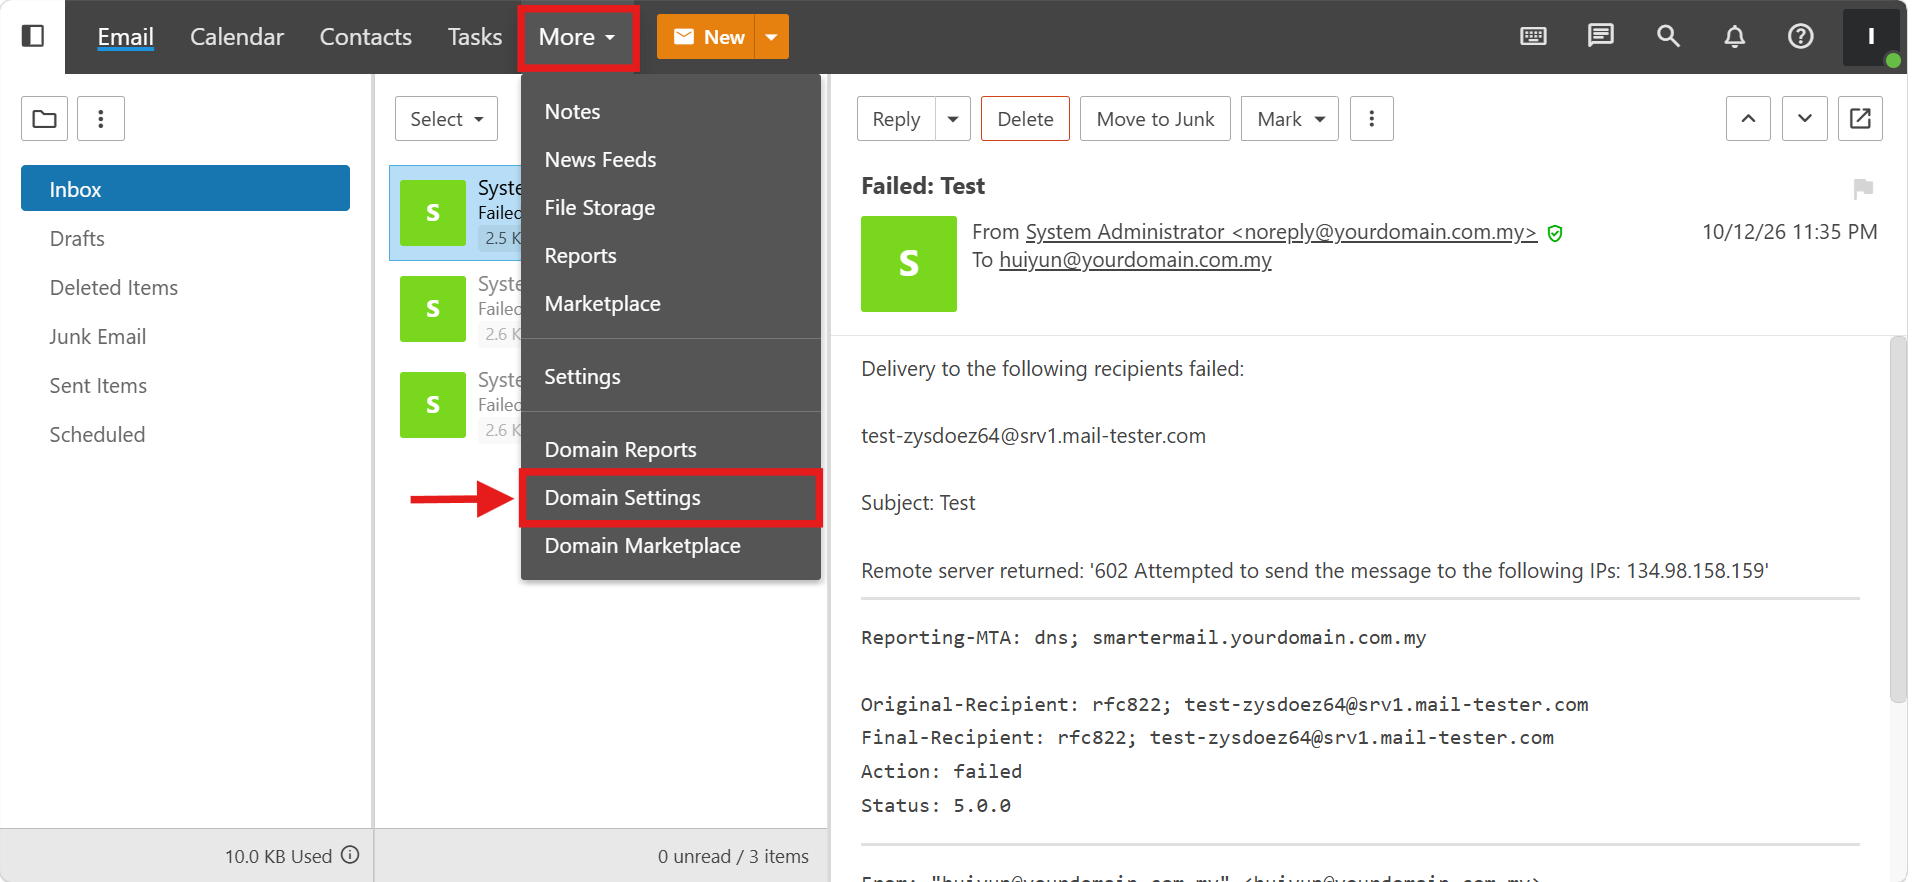
- First, navigate to More > Domain Settings.
- Then, navigate to General, and click on Enable under Email Signing.
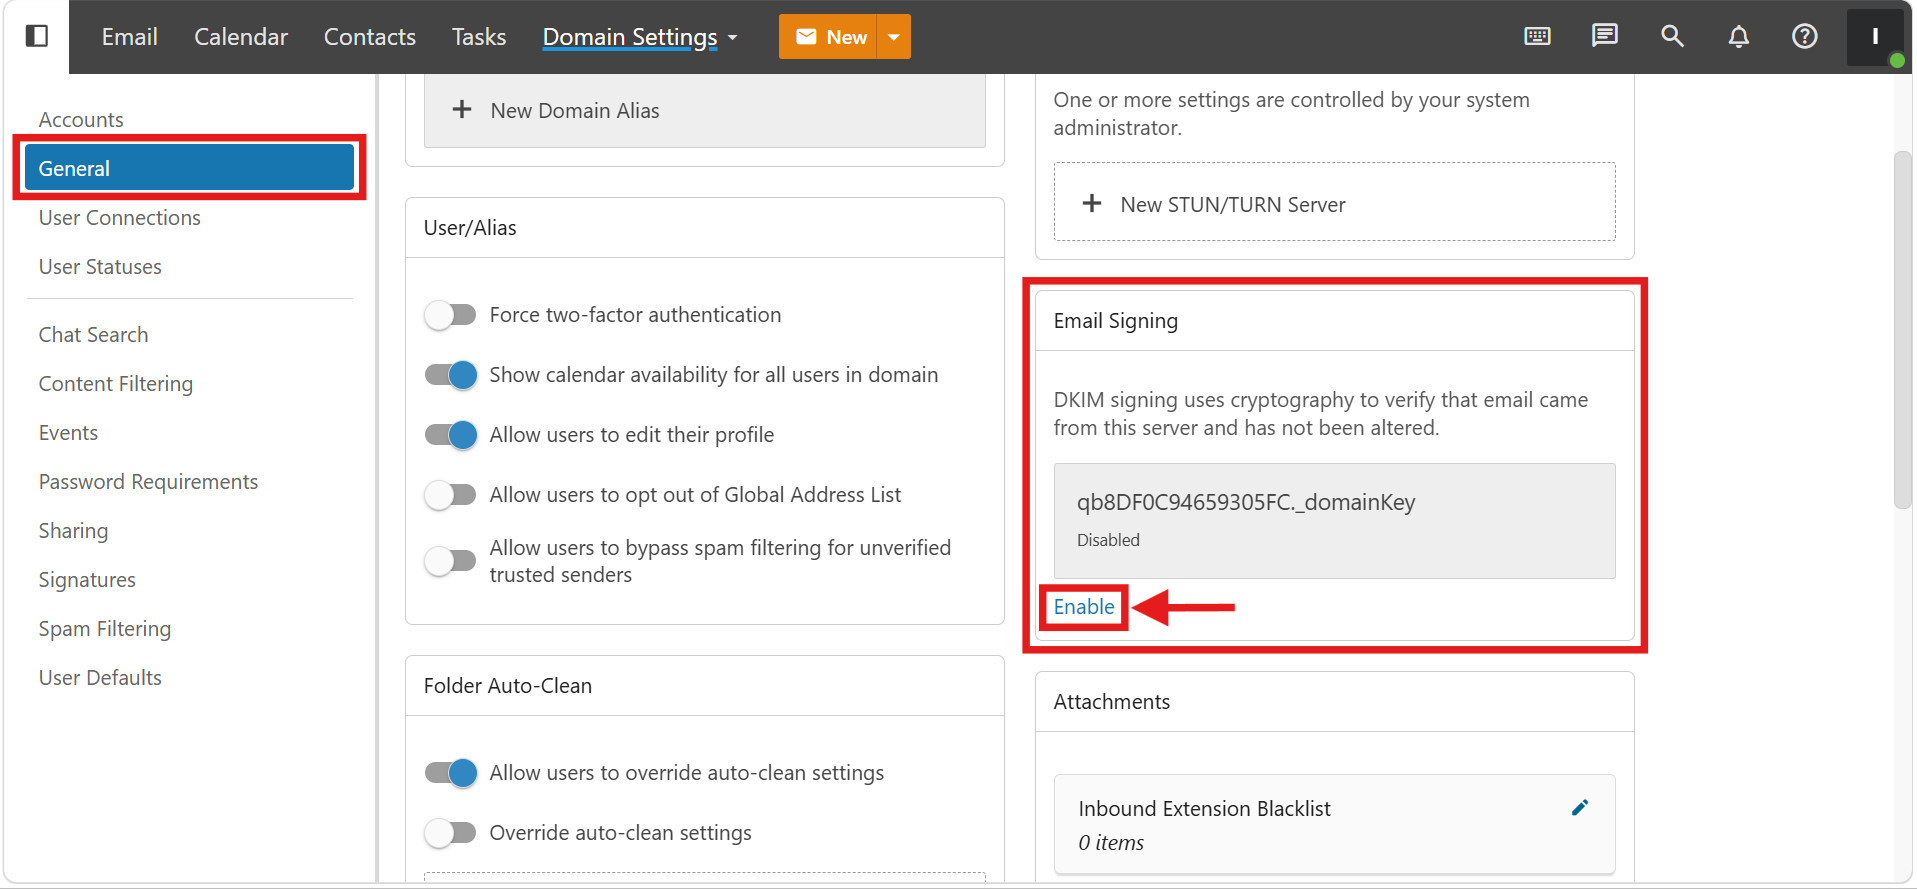
-
- As a primary administrator:
- The system will generate a public DKIM key and a corresponding TXT DNS record.
- Copy the DKIM DNS record and click on Save for first enable.
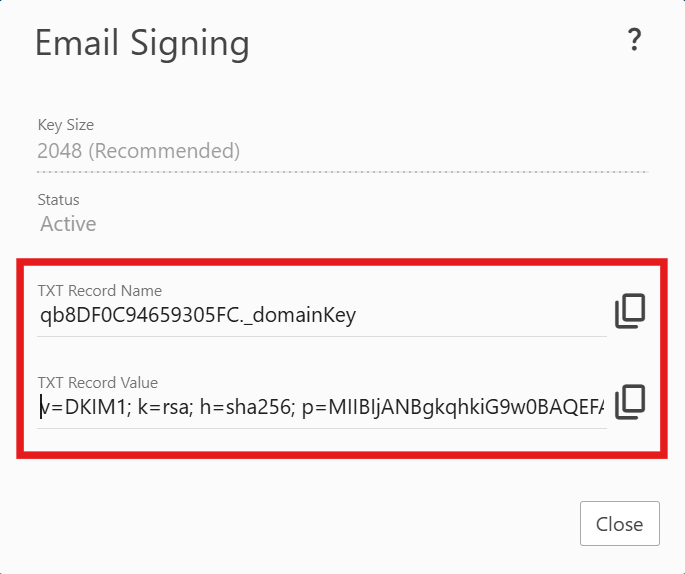
- Then, publish it in your DNS panel:
- Name/Host: xxx._domainkey
- Type: TXT
- Value: v=DKIM1; k=rsa; h=sha256; p=YOUR_PUBLIC_KEY
Step 3: Set Up DMARC Record
DMARC enforces the authentication results of SPF and DKIM and provides reporting insights.
- Add a new TXT record in your DNS panel with the following details:
- Name/Host: _dmarc
- Type: TXT
- Value: v=DMARC1; p=quarantine; rua=mailto:dmarc-reports@yourdomain.com; ruf=mailto:dmarc-failures@yourdomain.com; fo=1
Step 4: Verify Your DNS Records
After setting the records, verify they are correctly propagated.
- Use online tools like MXToolbox or Dmarcian to check your domain.
- Alternatively, you can use the command line to verify the SPF, DKIM, and DMARC records respectively:
dig txt yourdomain.com
dig txt xxx._domainkey.yourdomain.com
dig txt _dmarc.yourdomain.com
- Allow up to 24 hours for DNS changes to fully take effect globally.
Conclusion
By following this guidance, you can securely configure email authentication for your domain and ensure improved email deliverability. Enforcing these policies helps maintain a trustworthy environment and safeguards your organization against spoofing activities.
Should you have any inquiries about the guidelines, please feel free to open a ticket through your portal account or contact us at support@ipserverone.com. We’ll be happy to assist you further.