
Search Our Database
How to manage email folders in Roundcube Webmail
Introduction
Managing your email inbox efficiently requires a structured folder system to categorize, clean up, and track important messages. This guide demonstrates how users can seamlessly manage their digital correspondence by creating, modifying, and deleting custom email folders within the Roundcube Webmail interface. Whether you need to group client inquiries today, rename existing archives next week, or wipe out obsolete spam directories from your web browser, this walkthrough provides the necessary steps to keep your mailbox organized. By utilizing these native folder management tools, you can optimize your daily workflow and prevent important emails from getting lost in a cluttered inbox.
Prerequisite
-
Access to Roundcube Webmail account with valid login credentials
-
Basic knowledge of navigating webmail interfaces
Step-by-step guide
Step 1: Log in to Roundcube Webmail
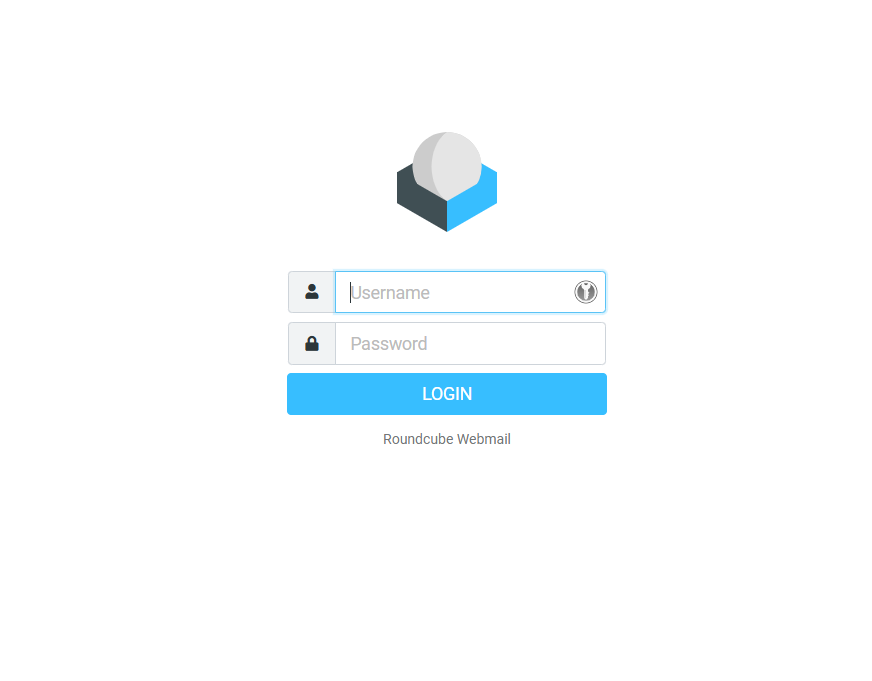
- Visit the webmail login page (e.g., https://webmail.yourdomain.com).
- Enter your email address and password, then click Login.
Step 2: Locate the Folders Section
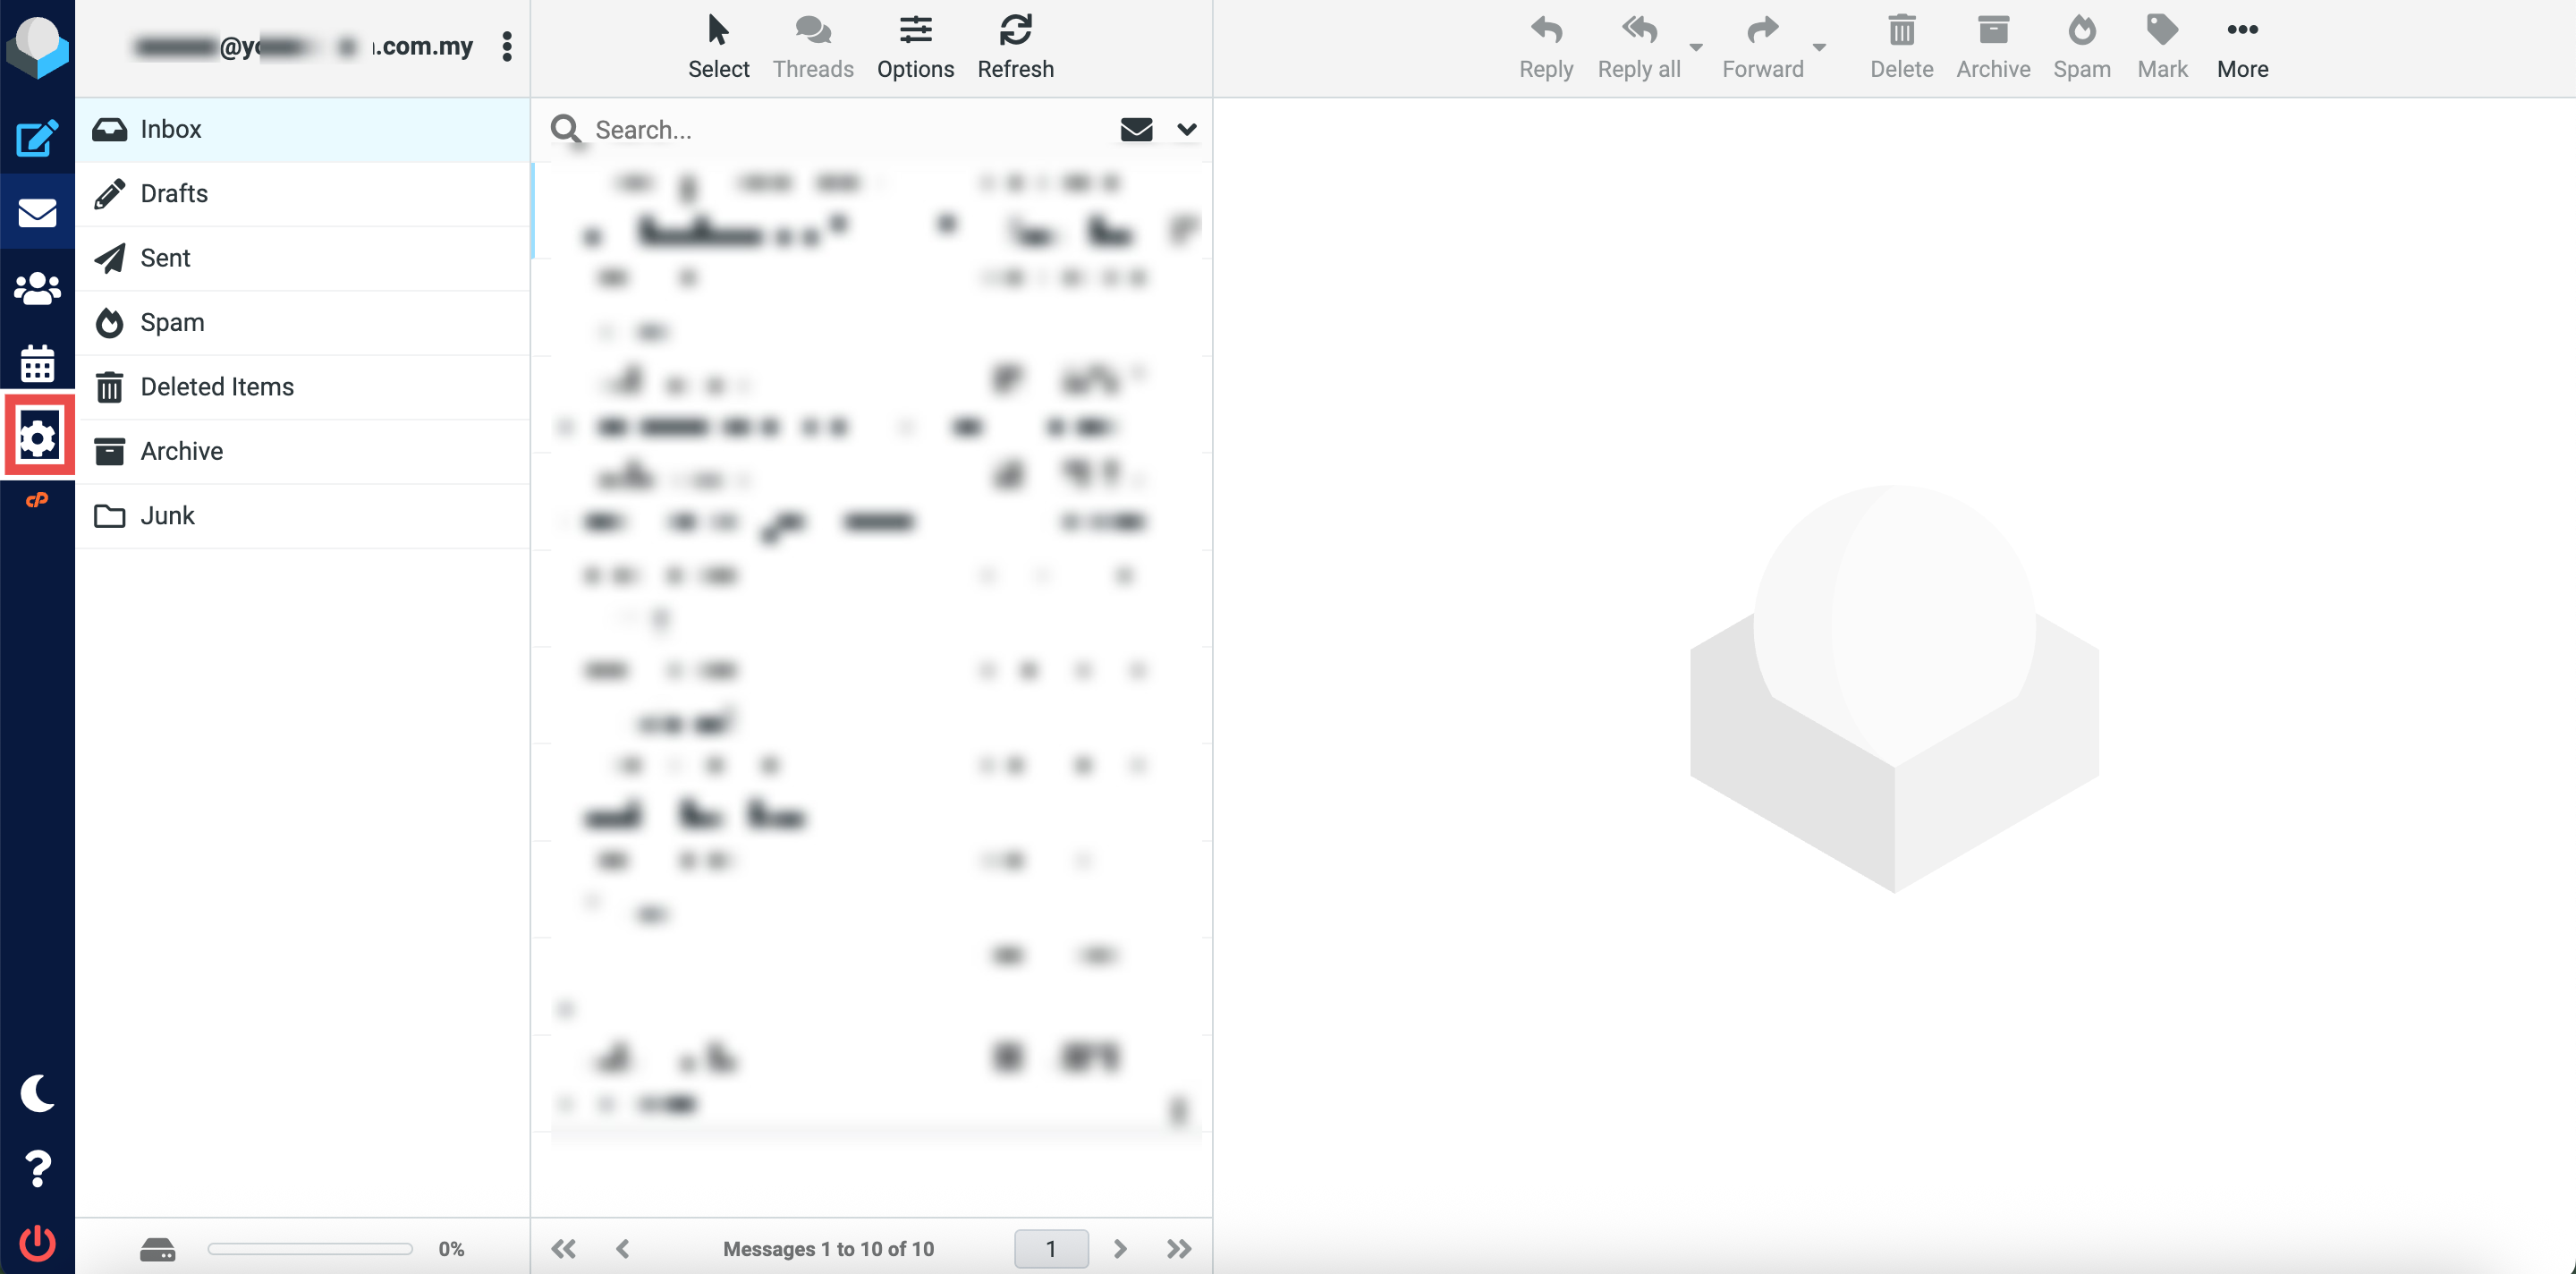
- In Roundcube Webmail, click the gear icon (Settings) in the left side of the page.
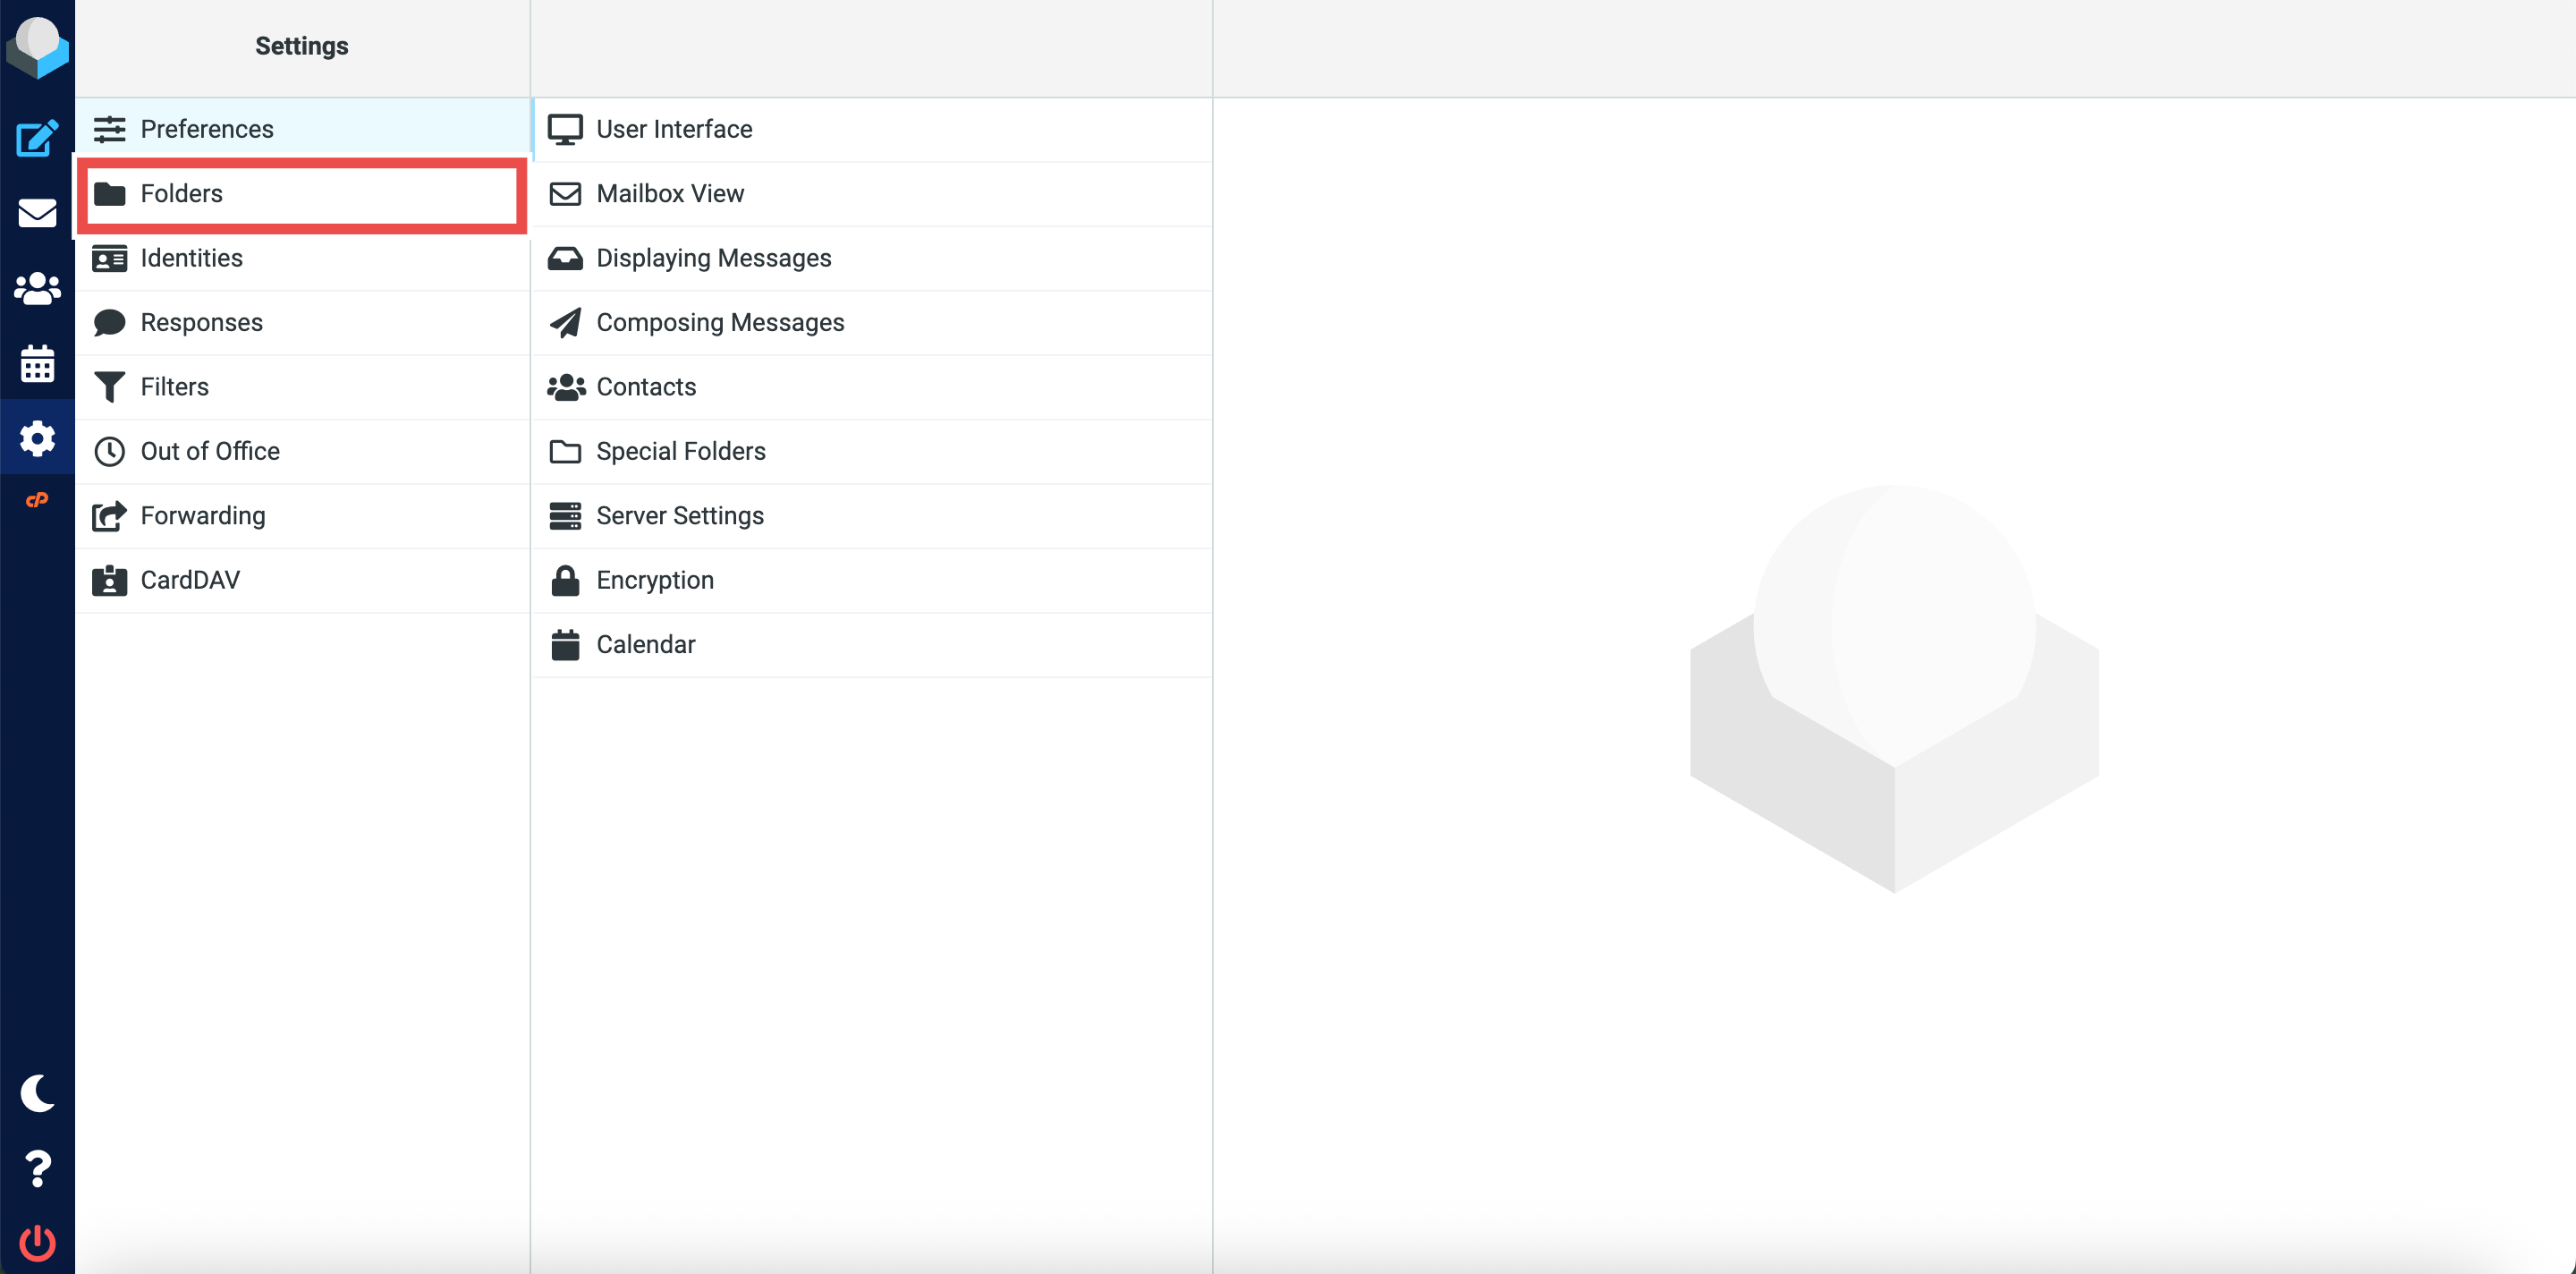
- From the left sidebar, select Folders.
Step 3: To manage email folders
⚠️ Important Note:
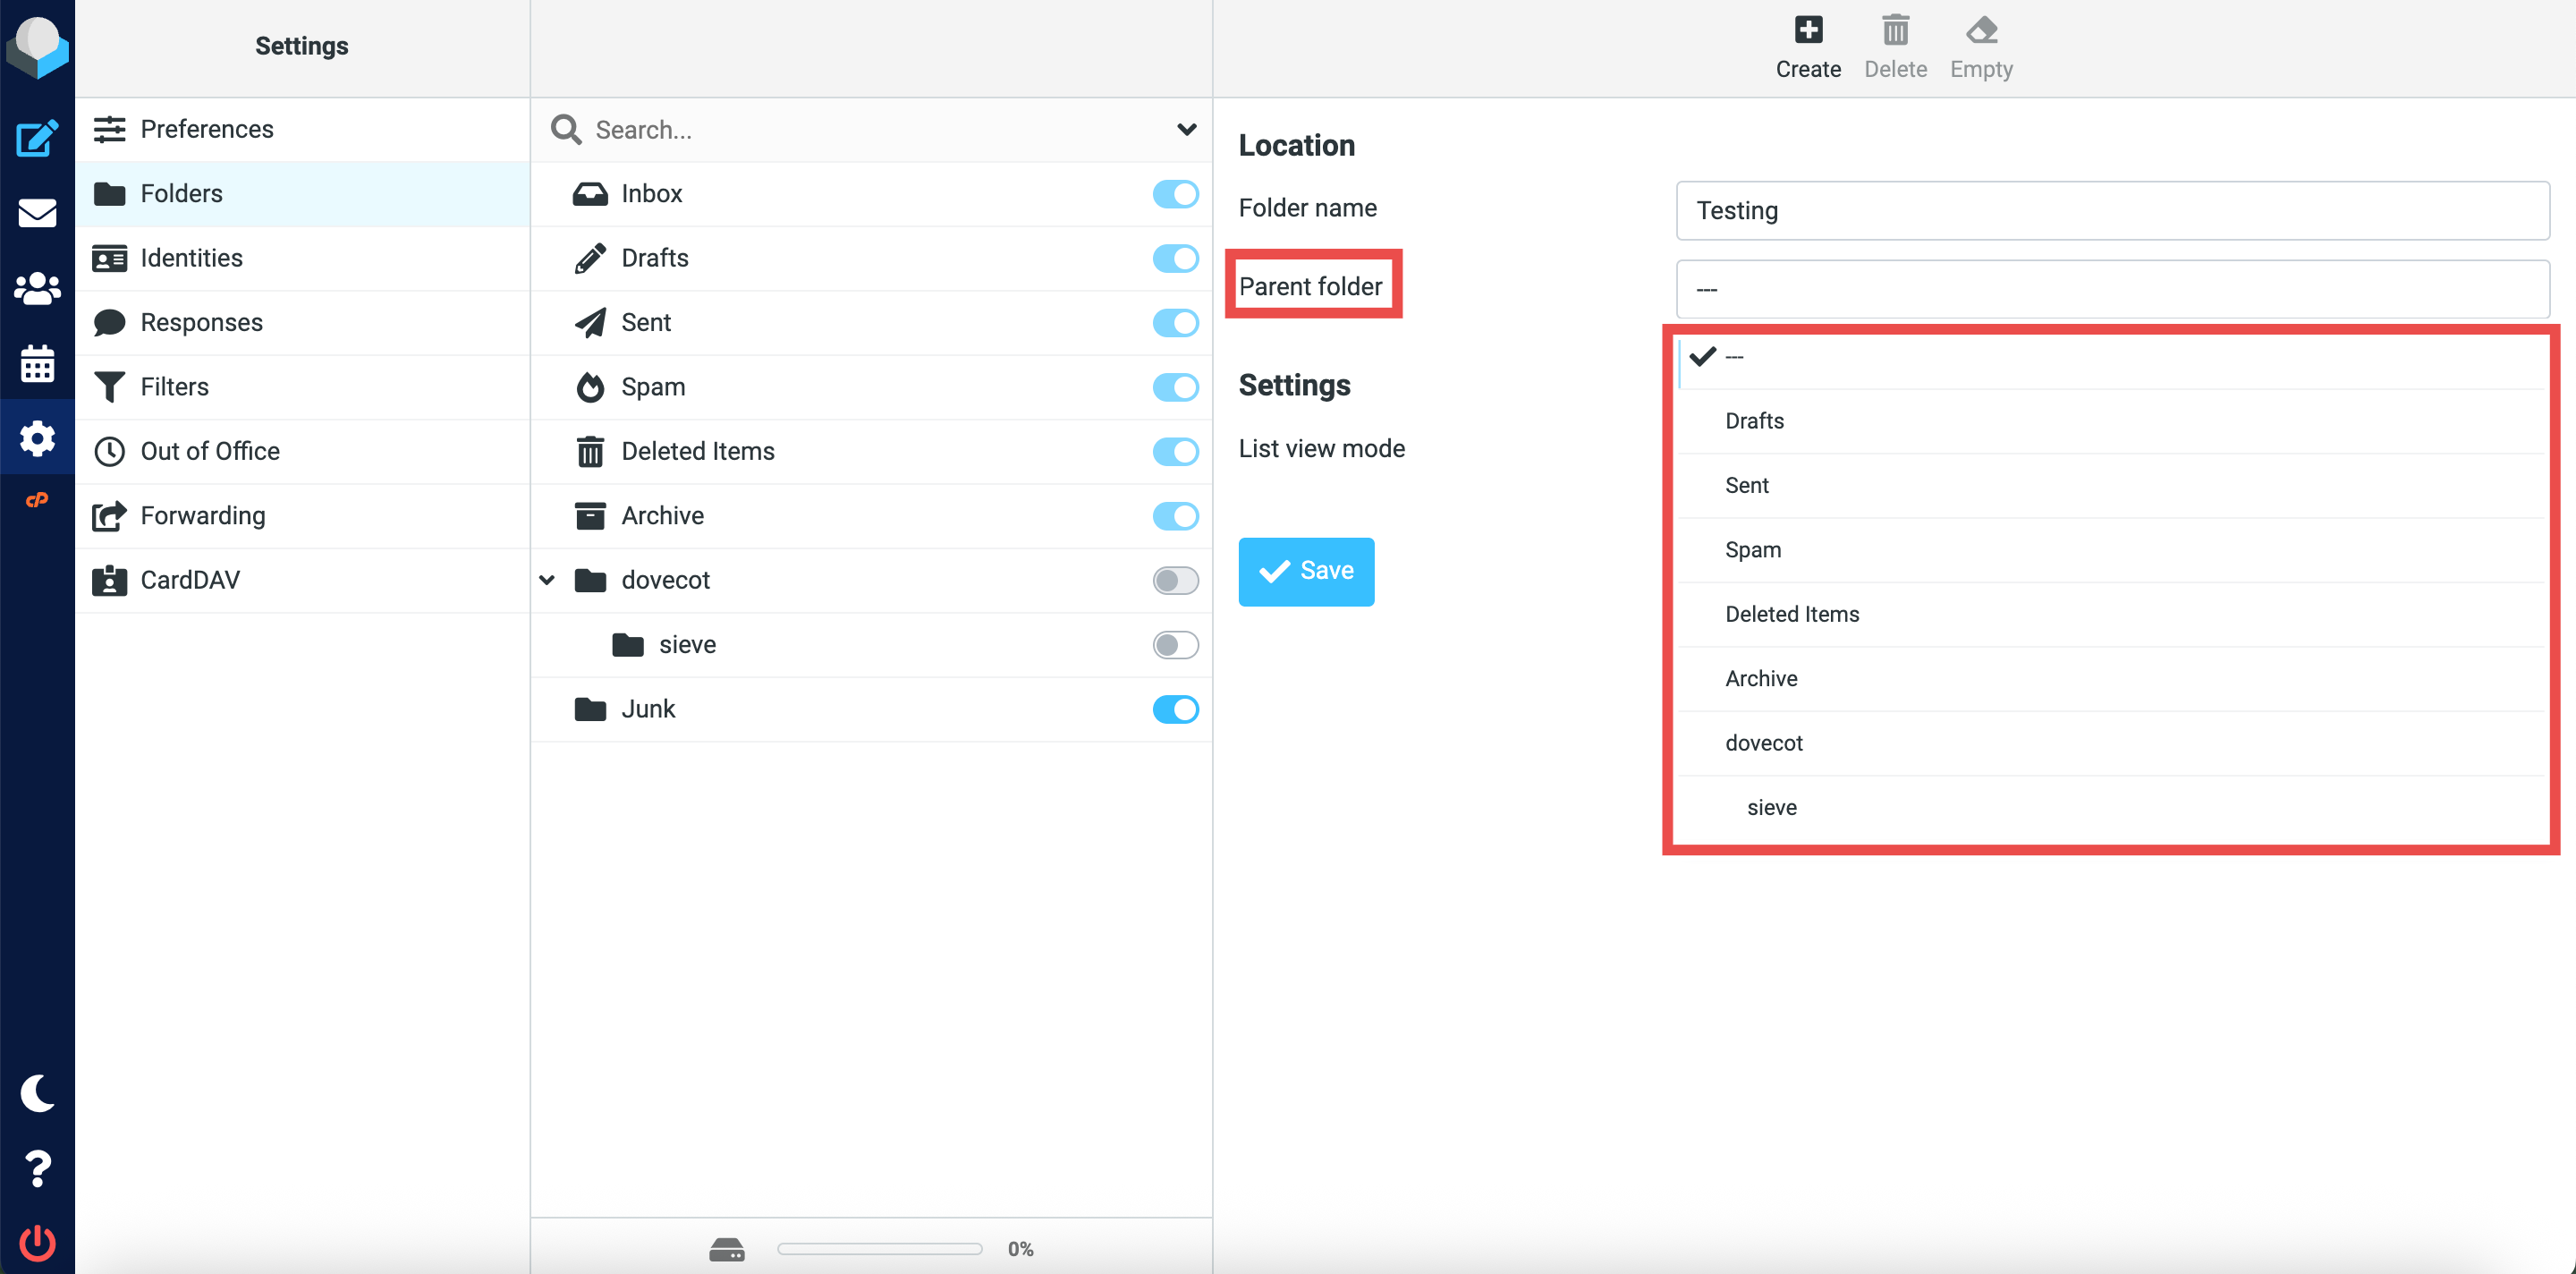
- Parent Folder:
- Select “—” to create the folder at the parent level, or choose an existing folder to create it as a subfolder.
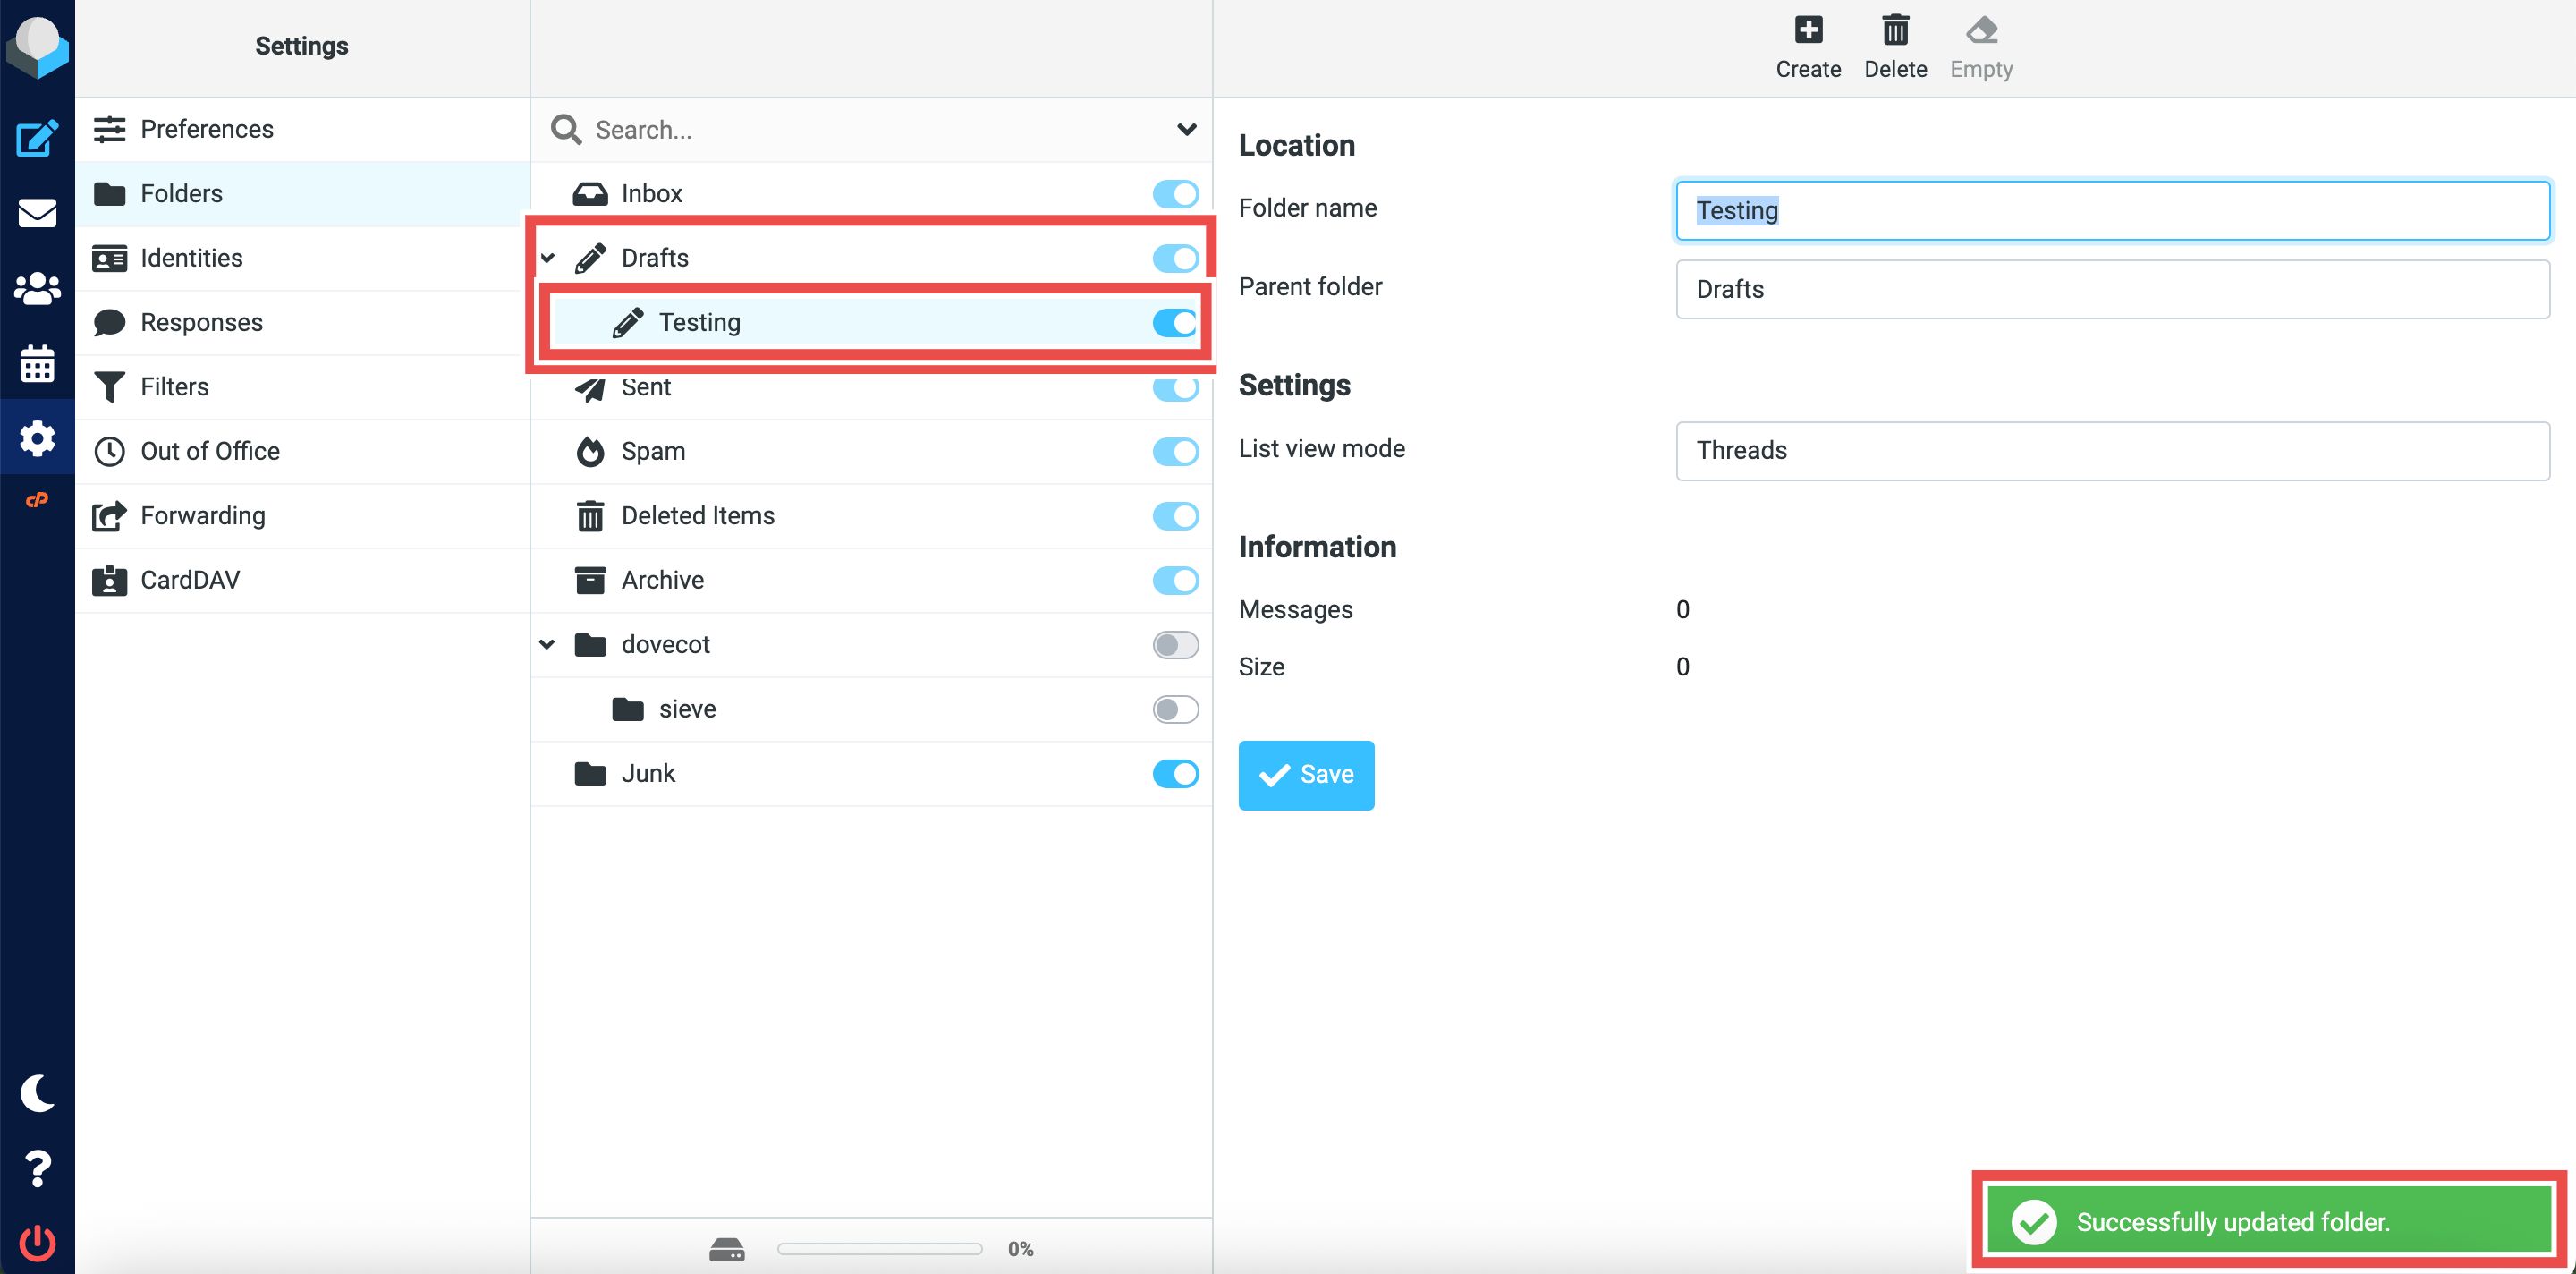
- For example, selecting “Drafts” as the parent will display your new folder as “Drafts/FolderName”.
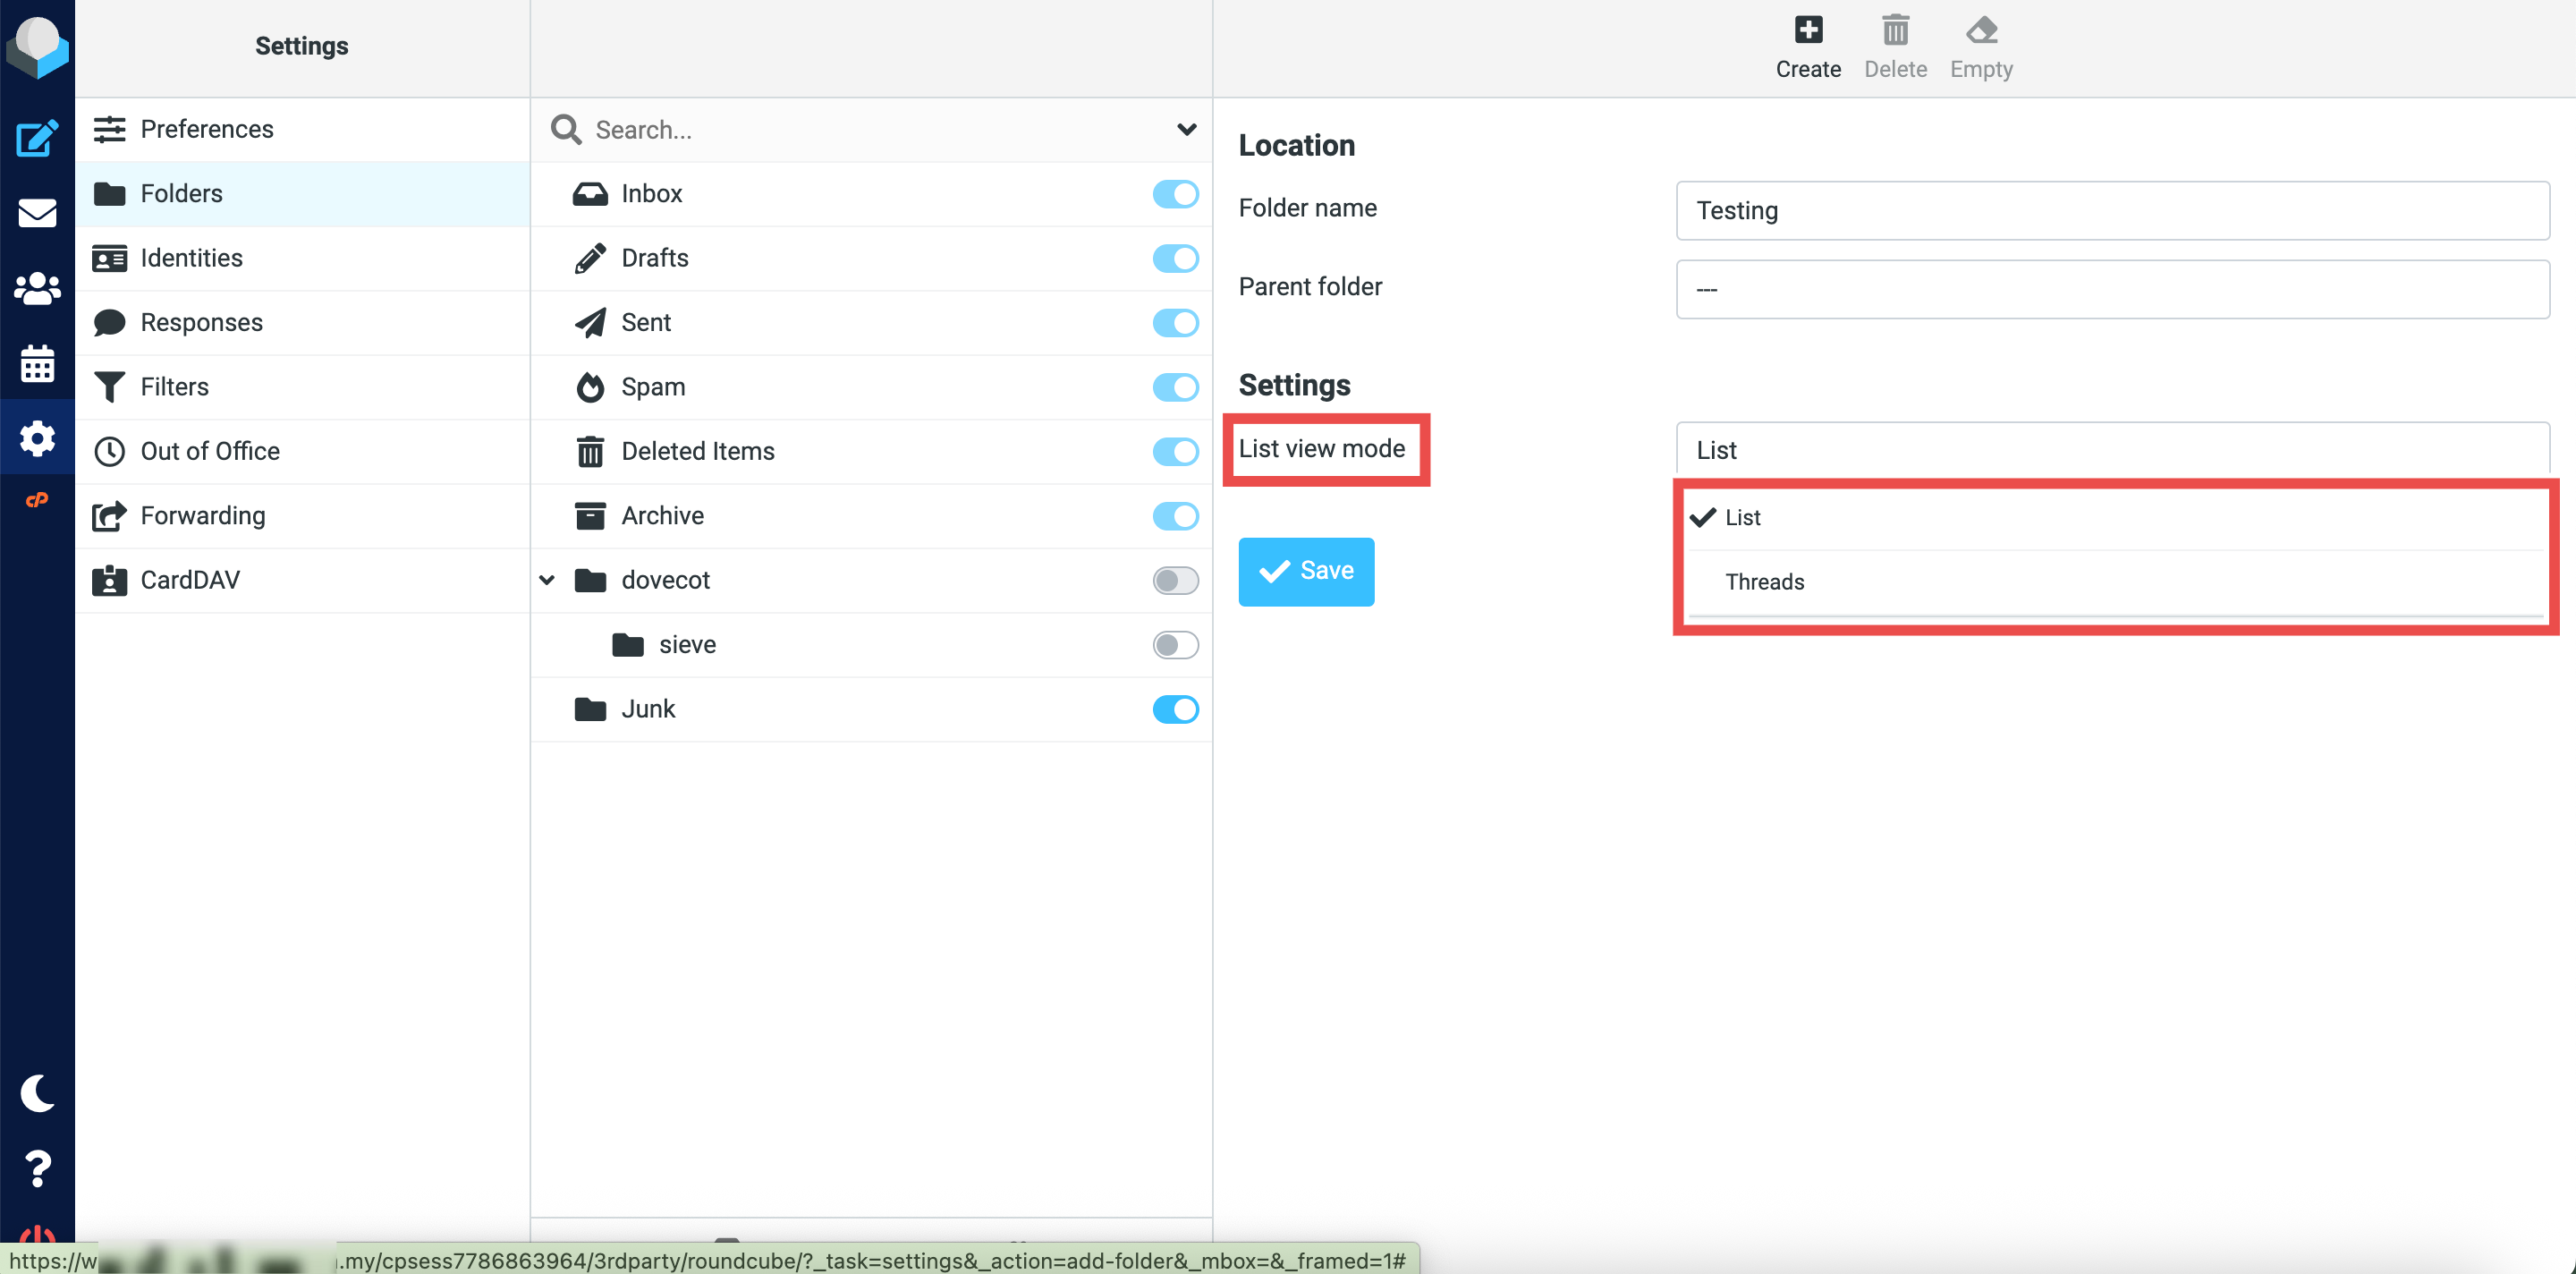
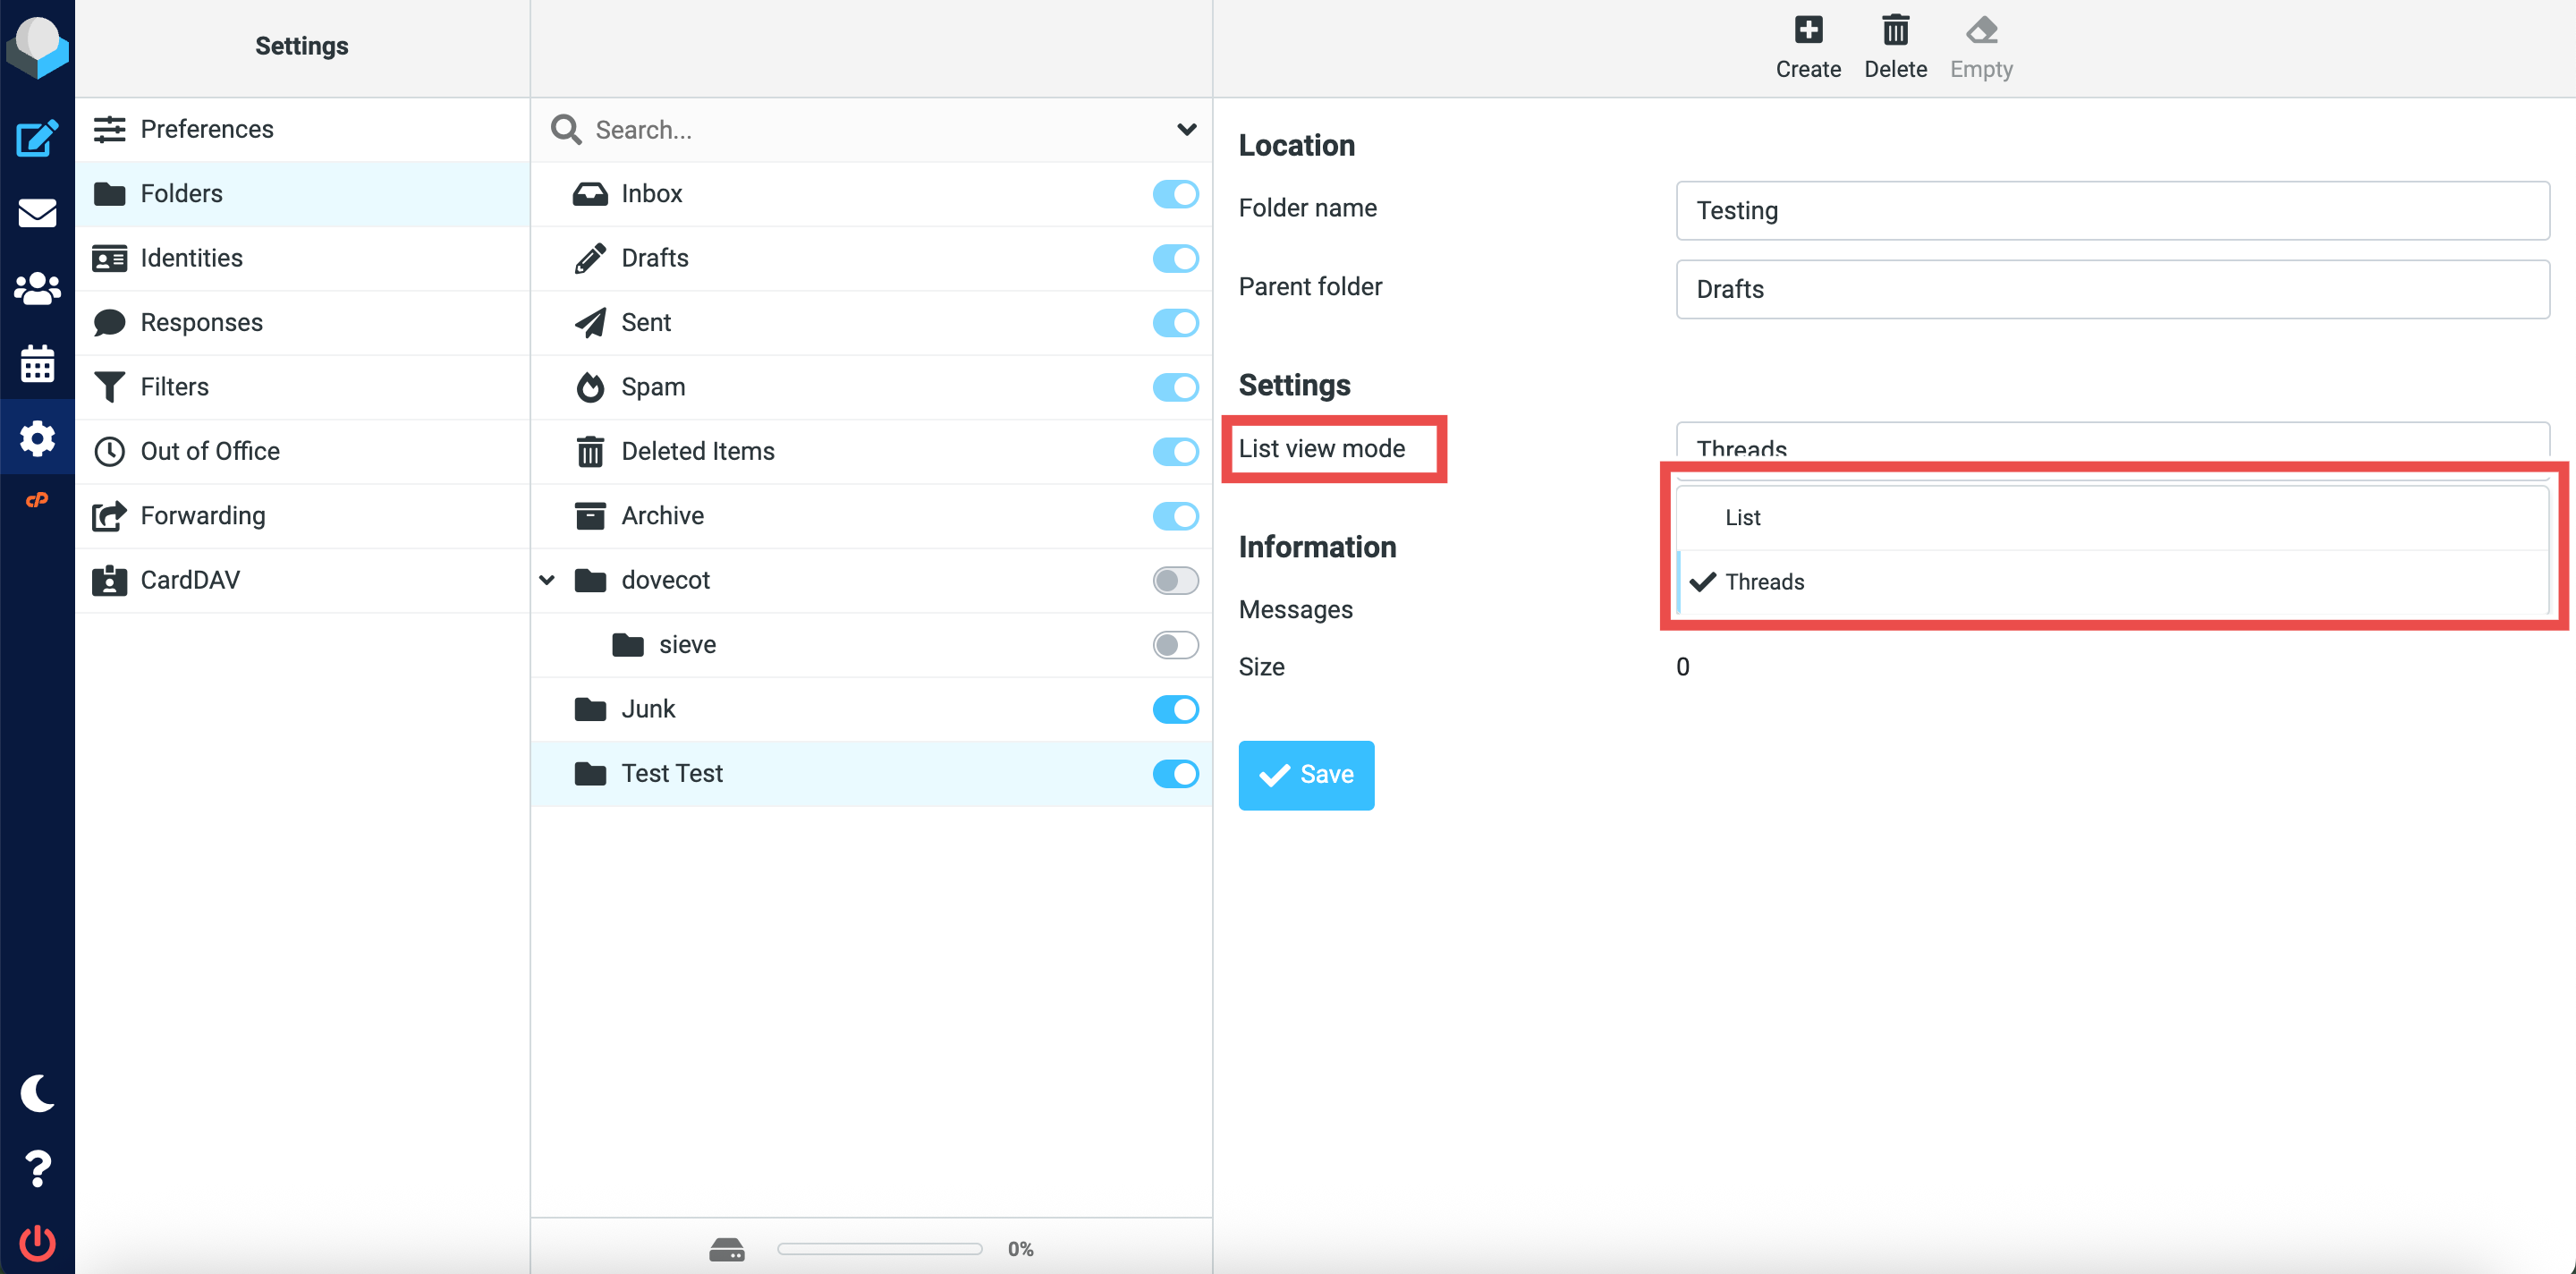
- Settings (List View Mode):
- List: Shows emails individually in chronological order (recommended for most folders).
- Threads: Groups related emails into conversation threads, useful for tracking ongoing discussions.
Creating custom email folders
Creating folders helps you sort incoming emails into specific categories for easier retrieval.
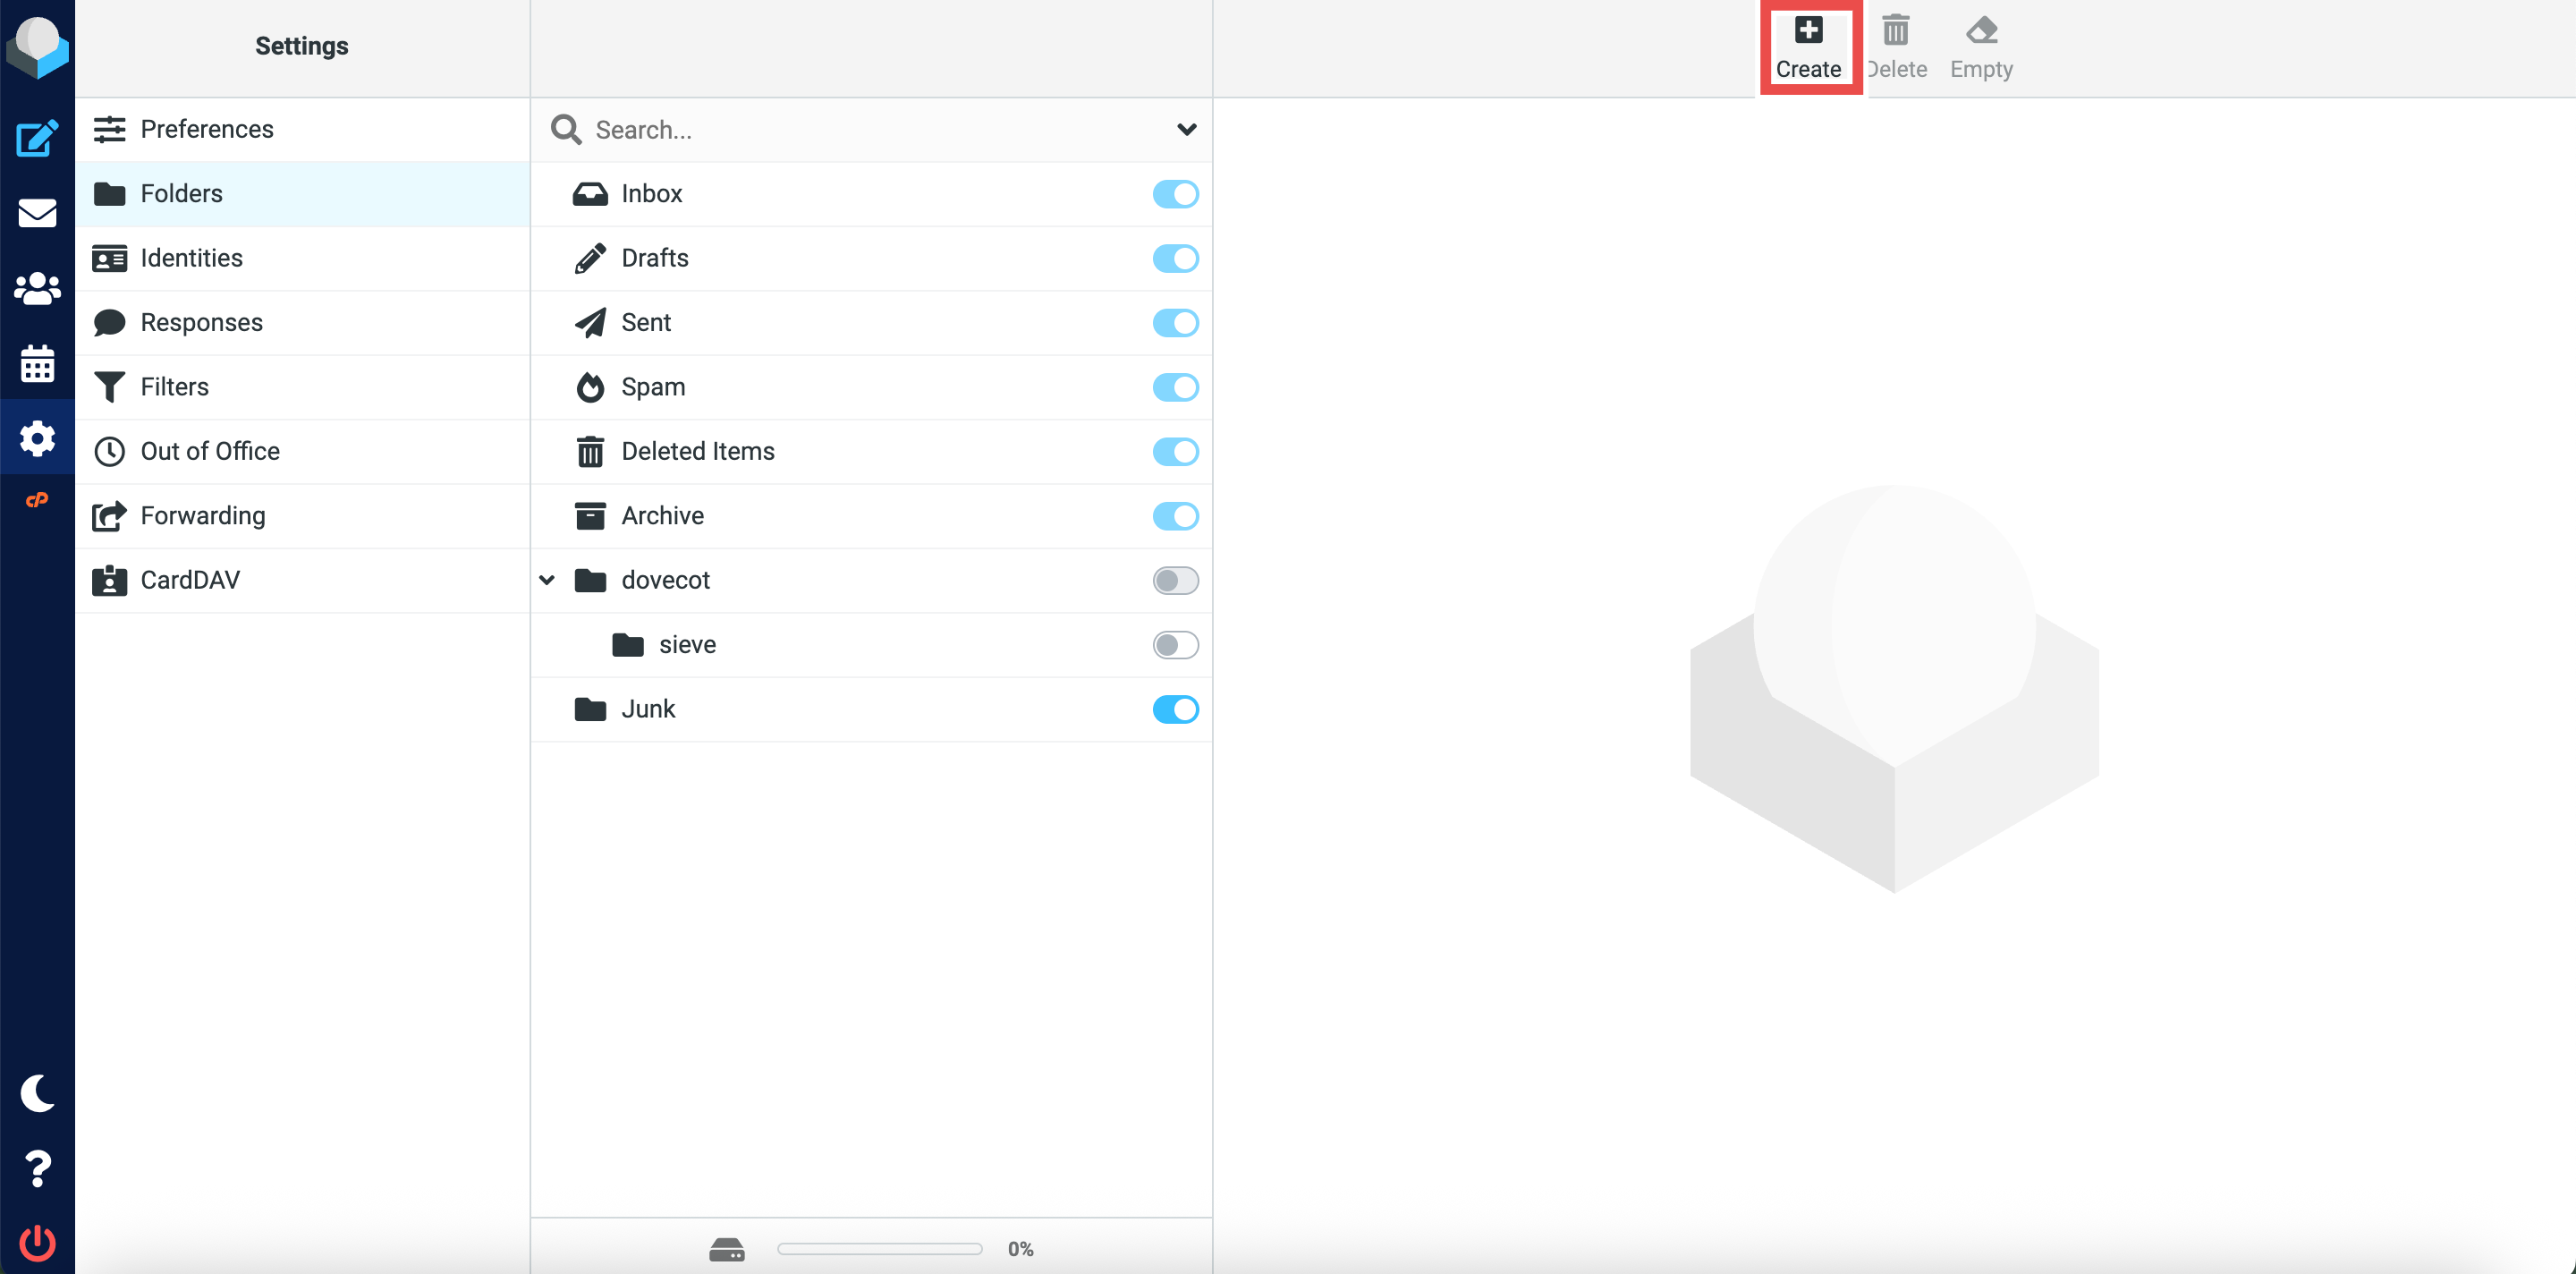
- At the top-right of the page, click the + icon or Create button.
- Enter your desired folder name in the Folder name field (e.g., “Clients”, “Projects”, “Invoices”).
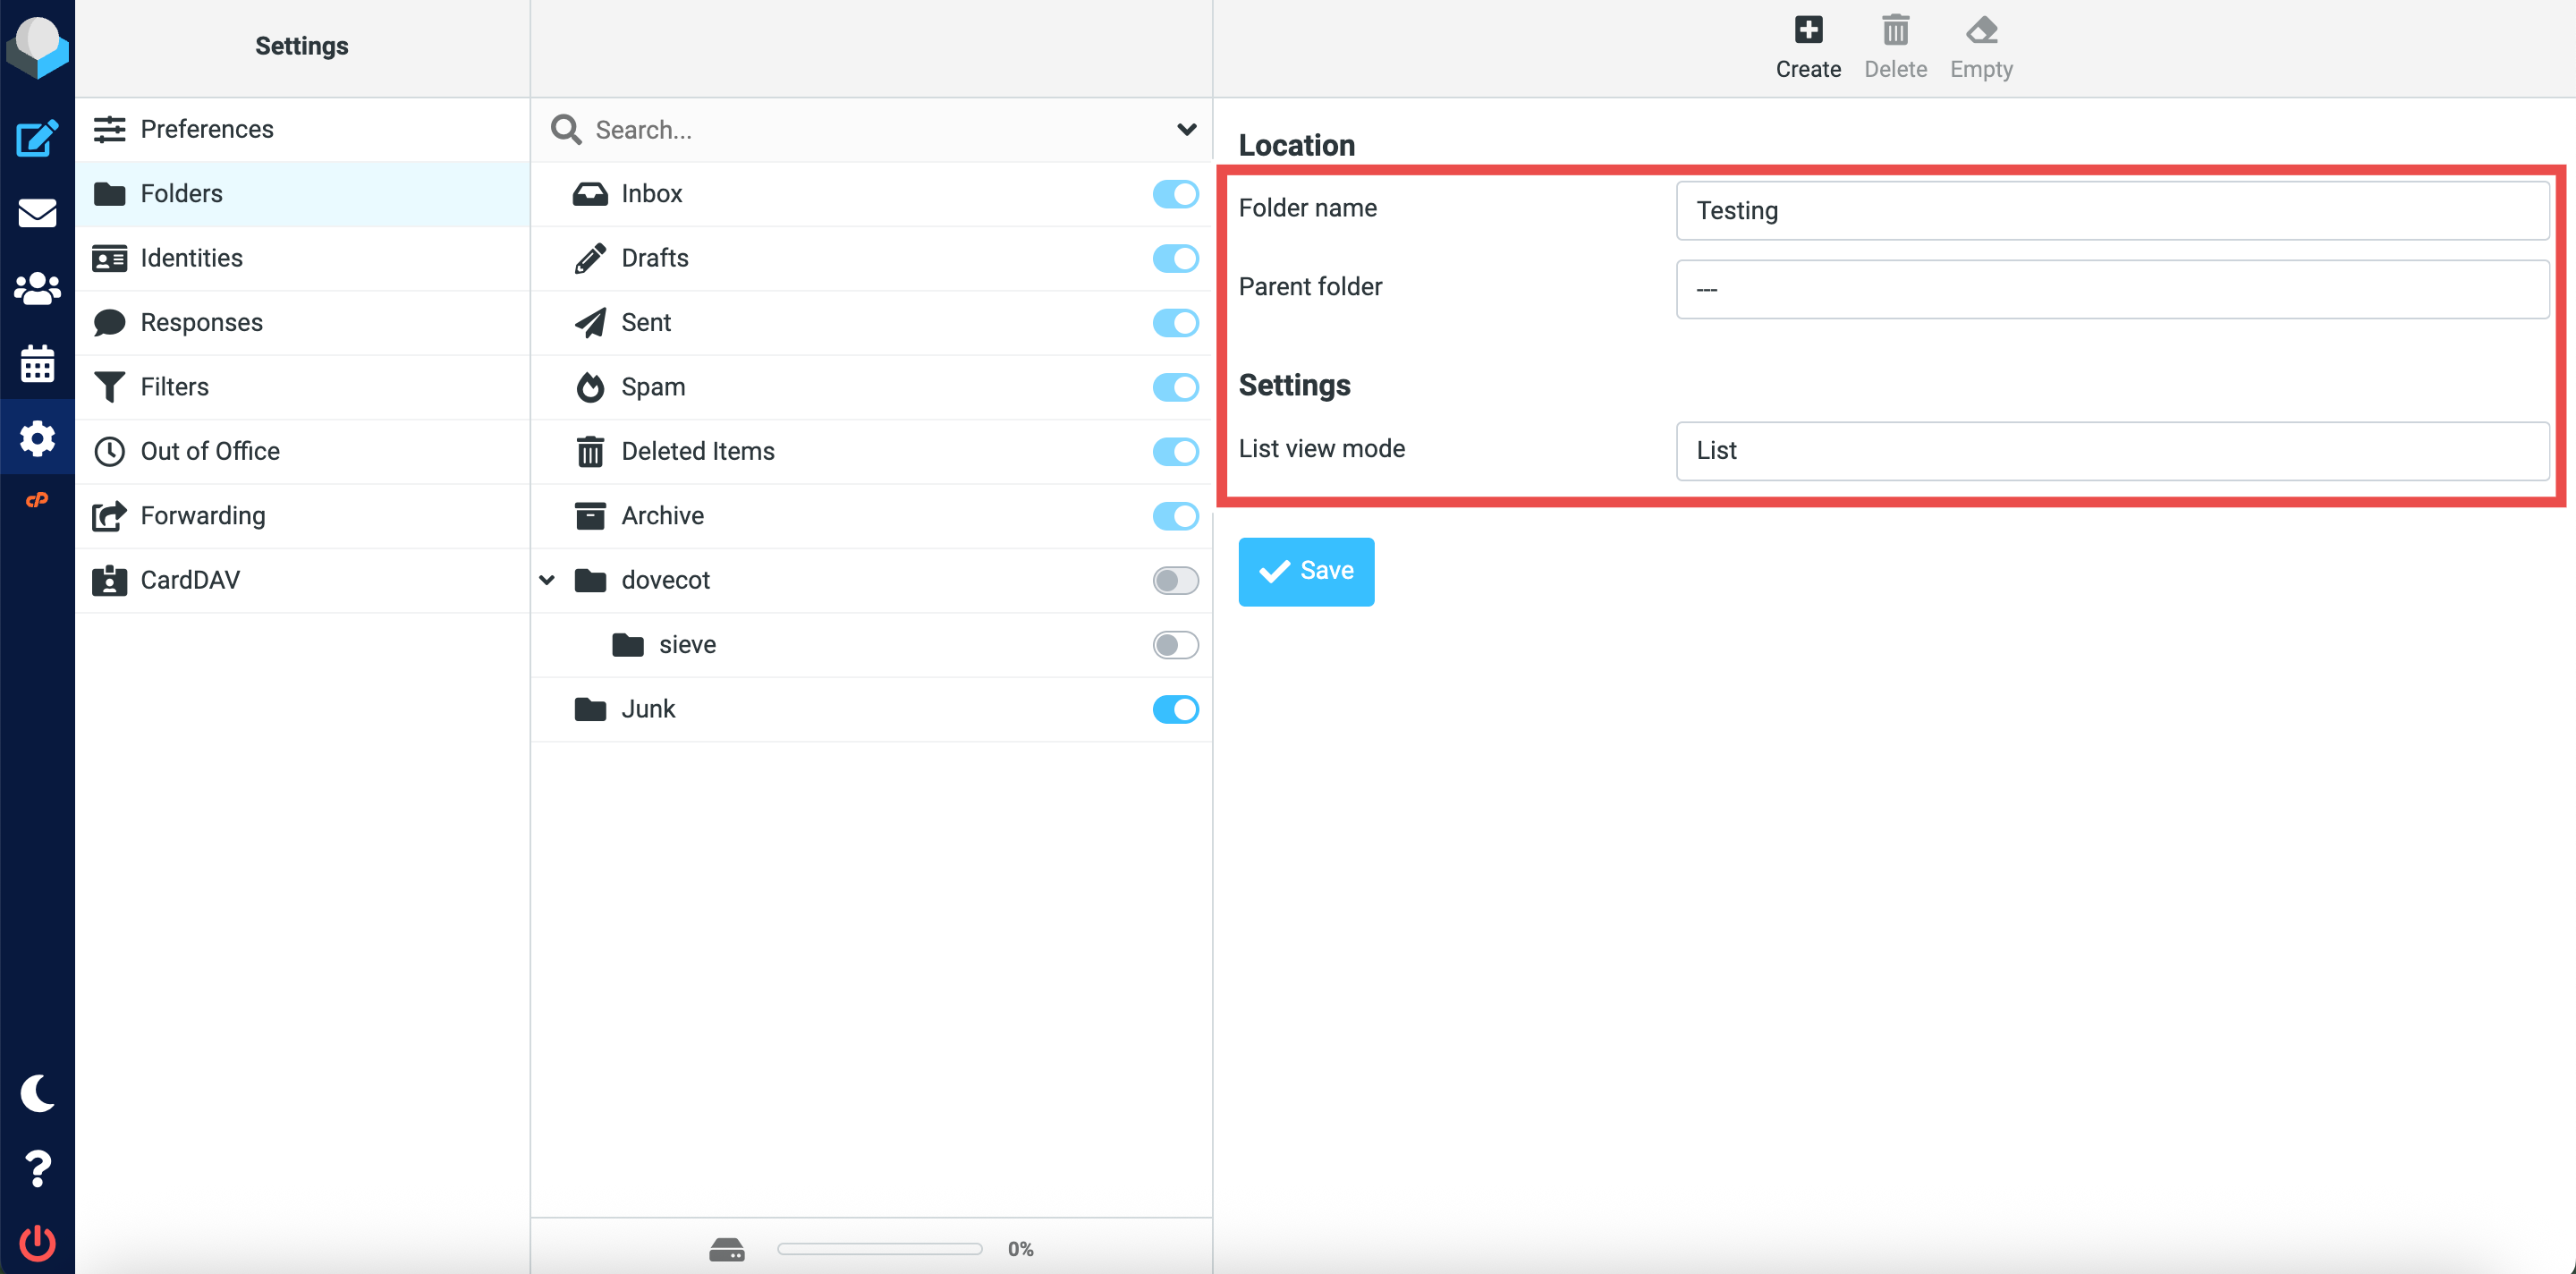
- Select the Parent Folder for the folder, or leave it empty and make it a new parent folder.
- Select the List View Mode you want for the folder.
- Click Save to create the folder.
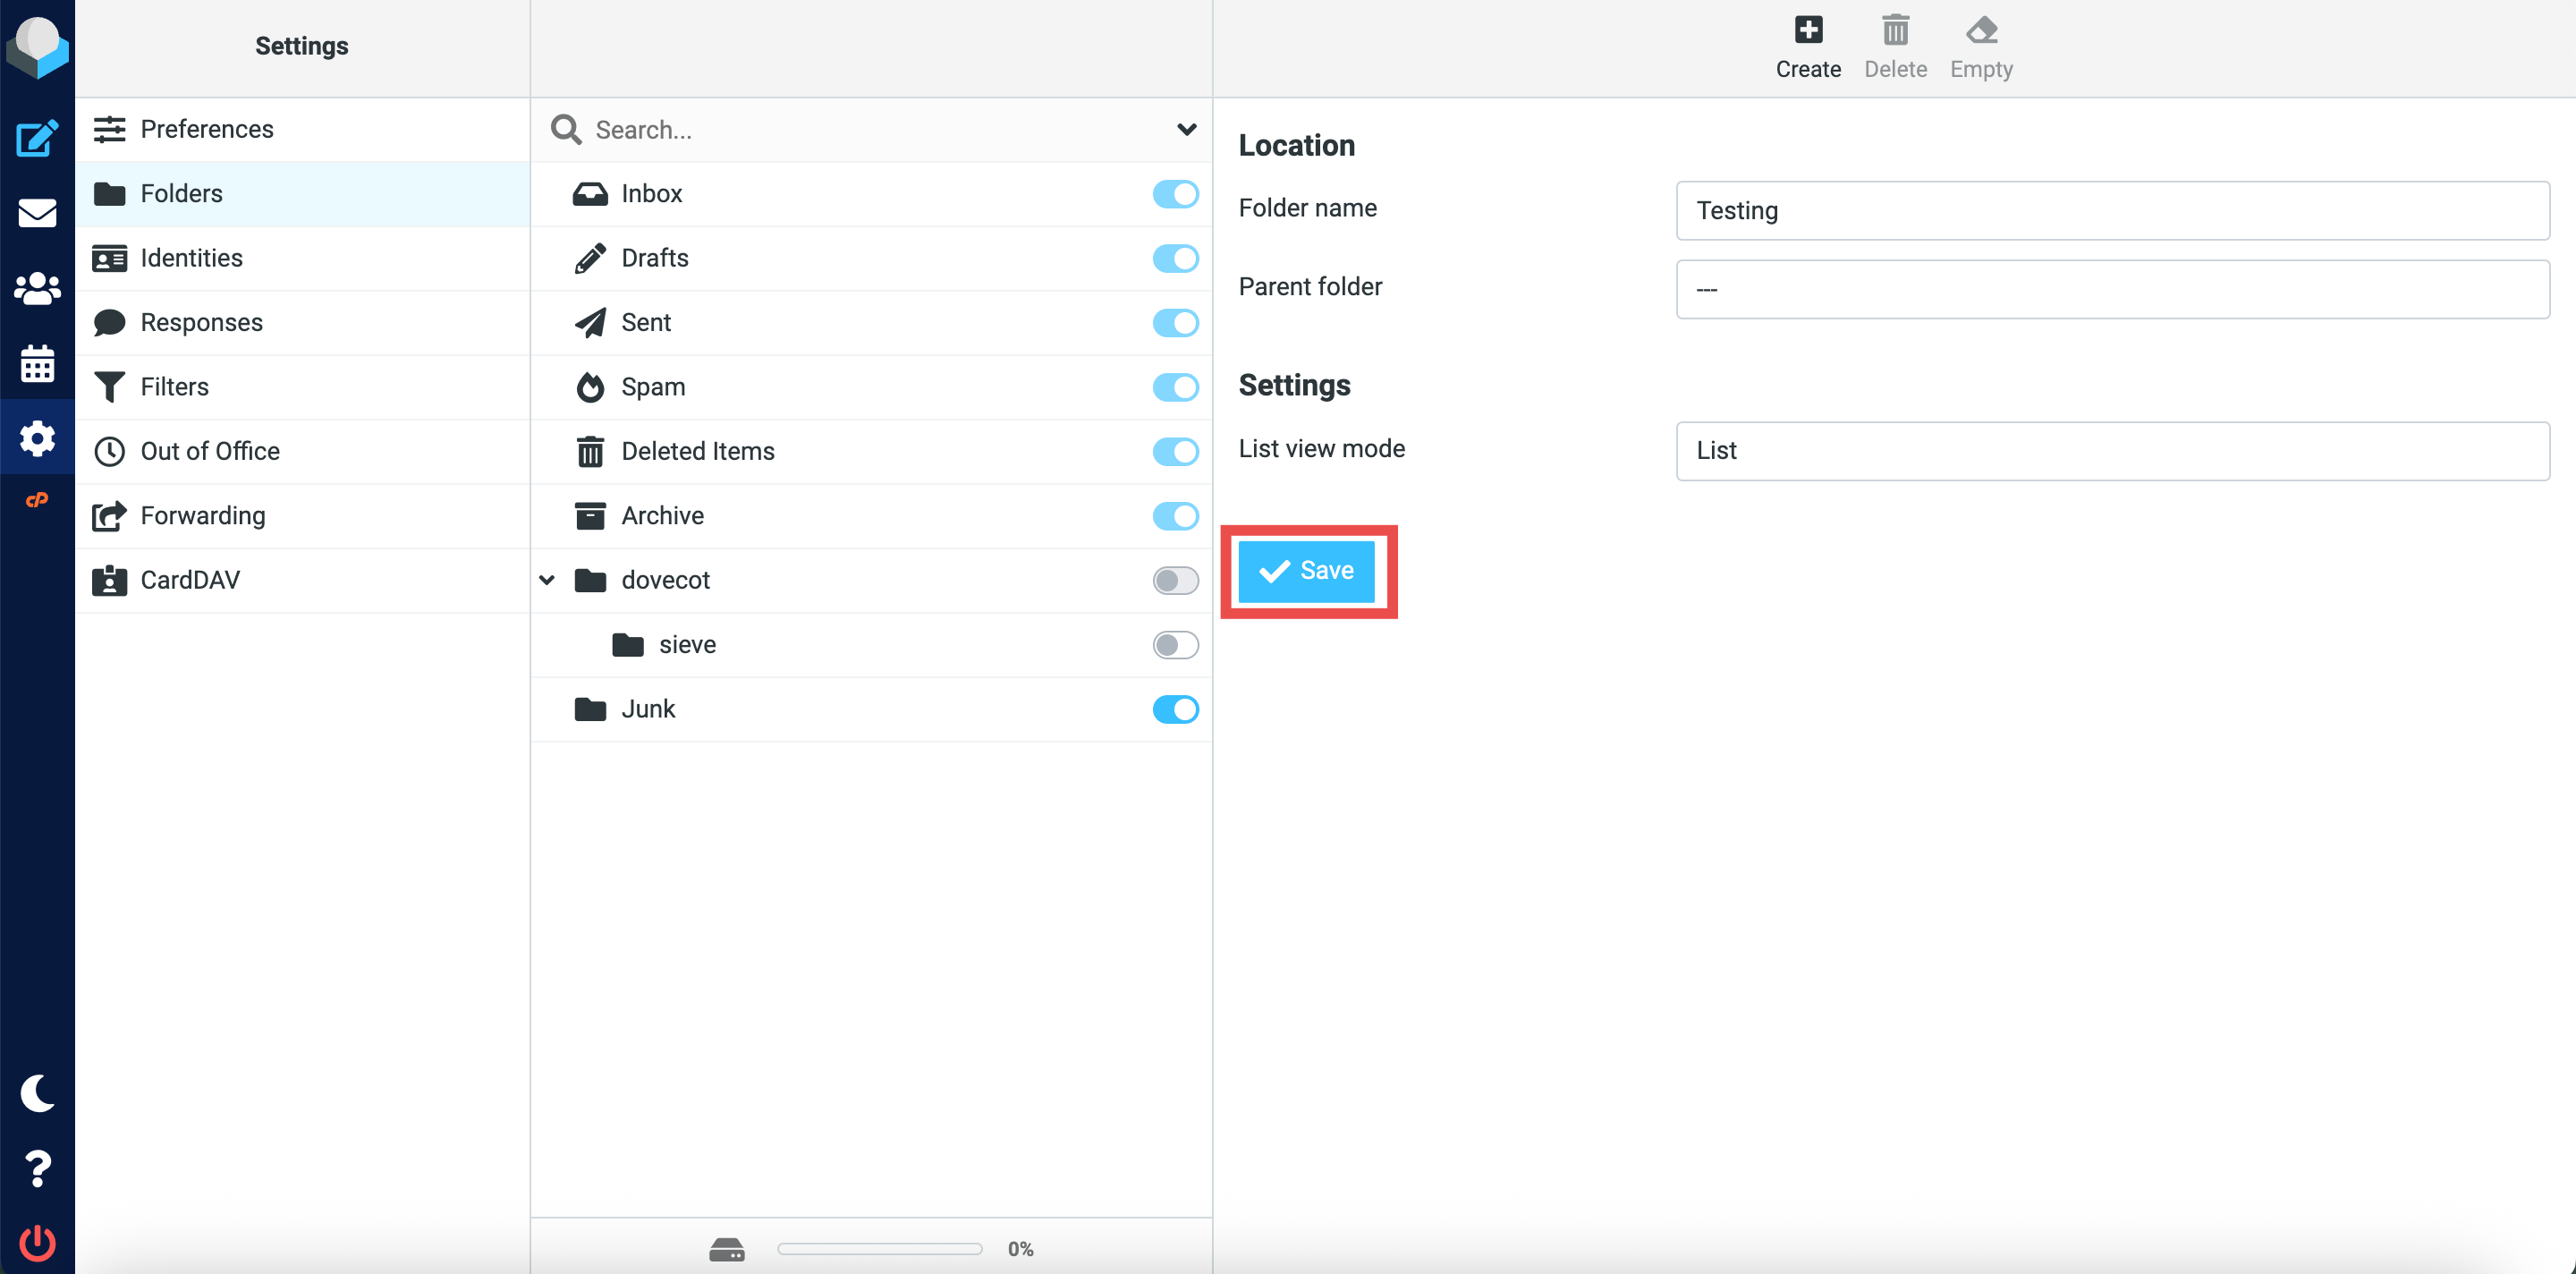
- Successful message will appear confirming the new folder is created successfully. The new folder will be displayed in the list.
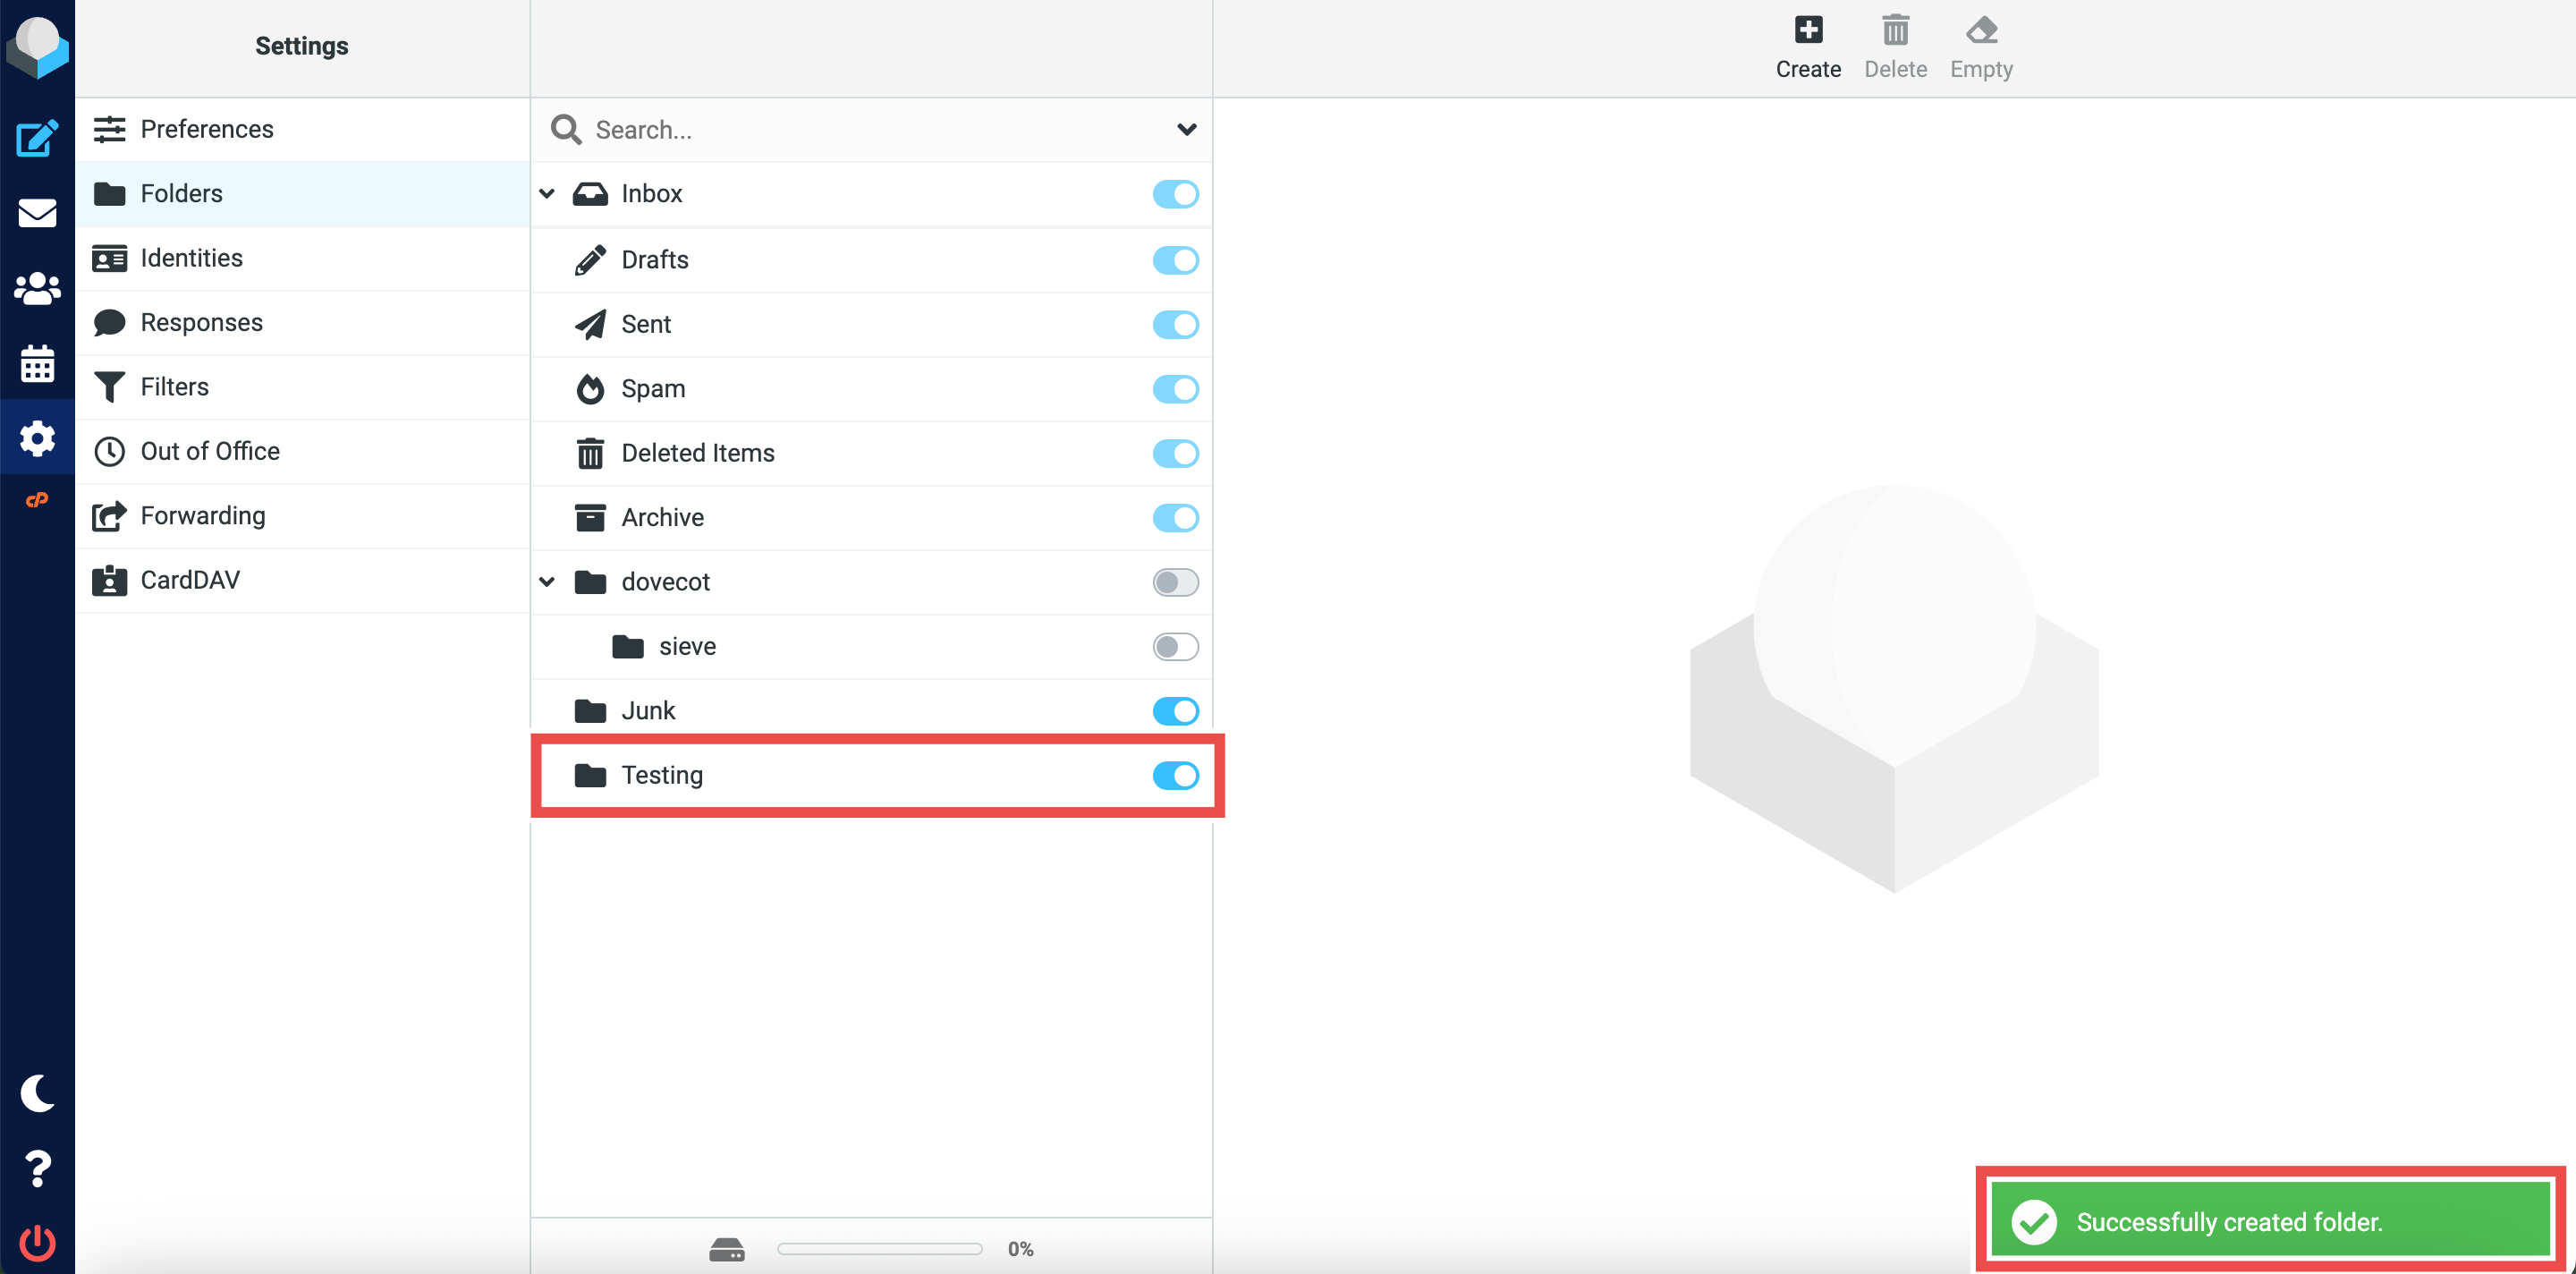
Modifying existing email folders
Modifying a folder allows you to rename it or relocate its position to maintain a clean directory structure.
- In the folder list, locate the folder you want to modify. Click on the folder name to select it.
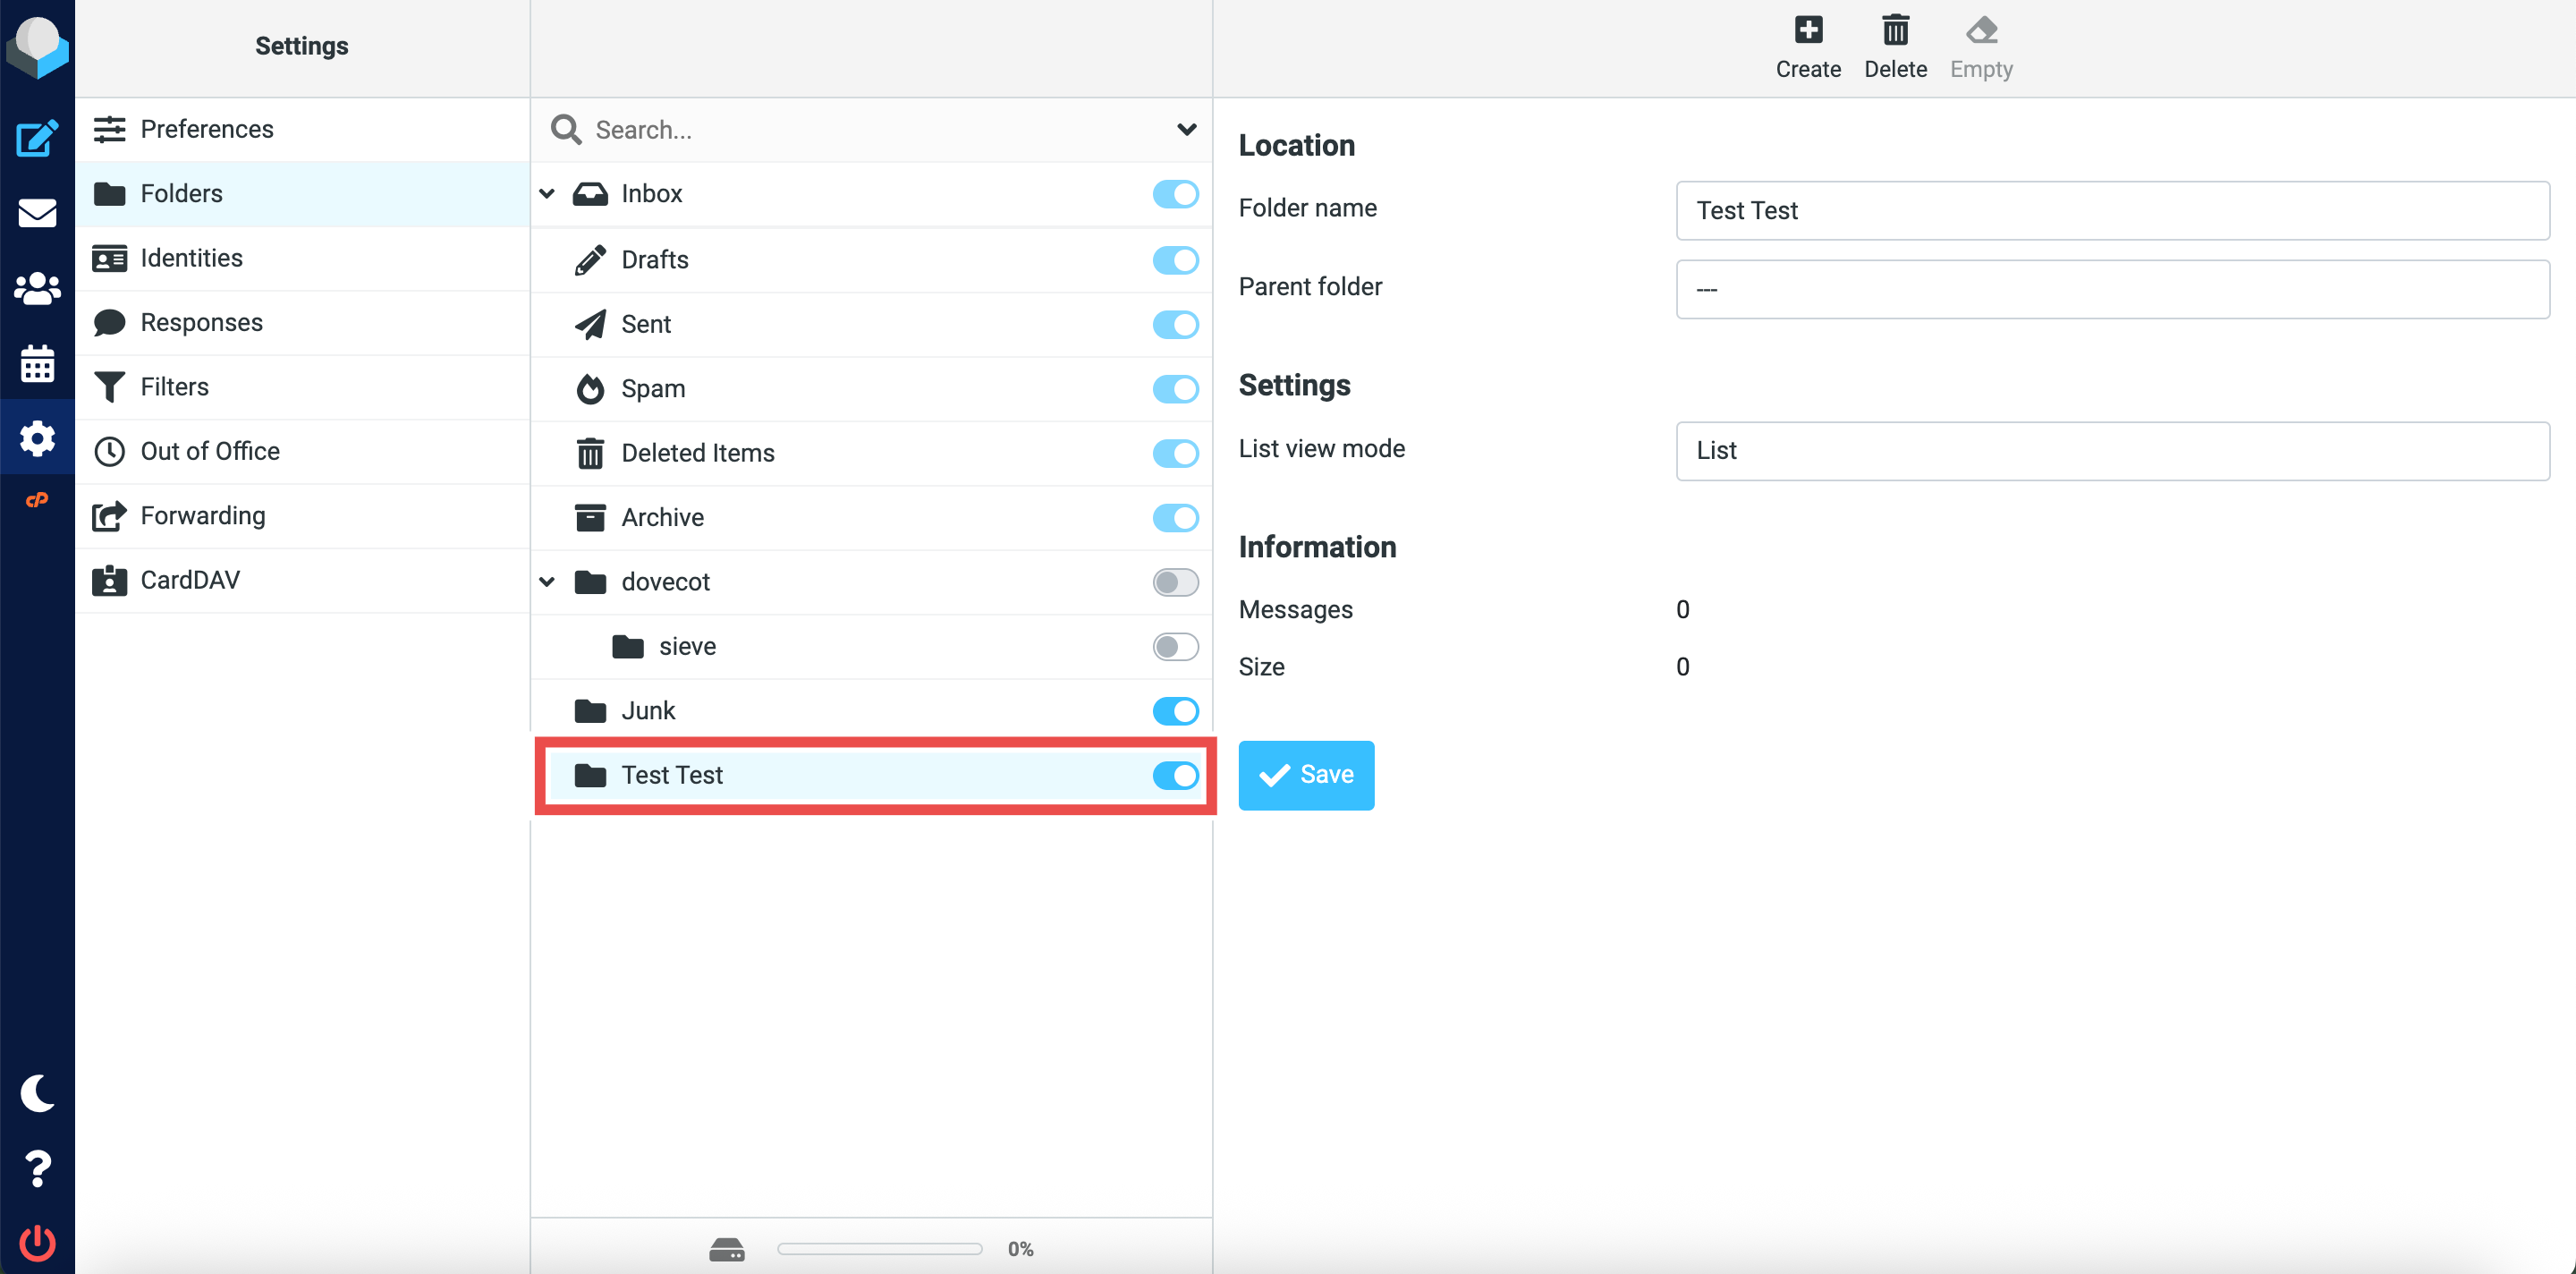
- Modify the folder name in the Folder name field as you desired (e.g., “Clients”, “Projects”, “Invoices”).
- Select the Parent Folder for the folder, or leave it empty and make it a new Parent folder.
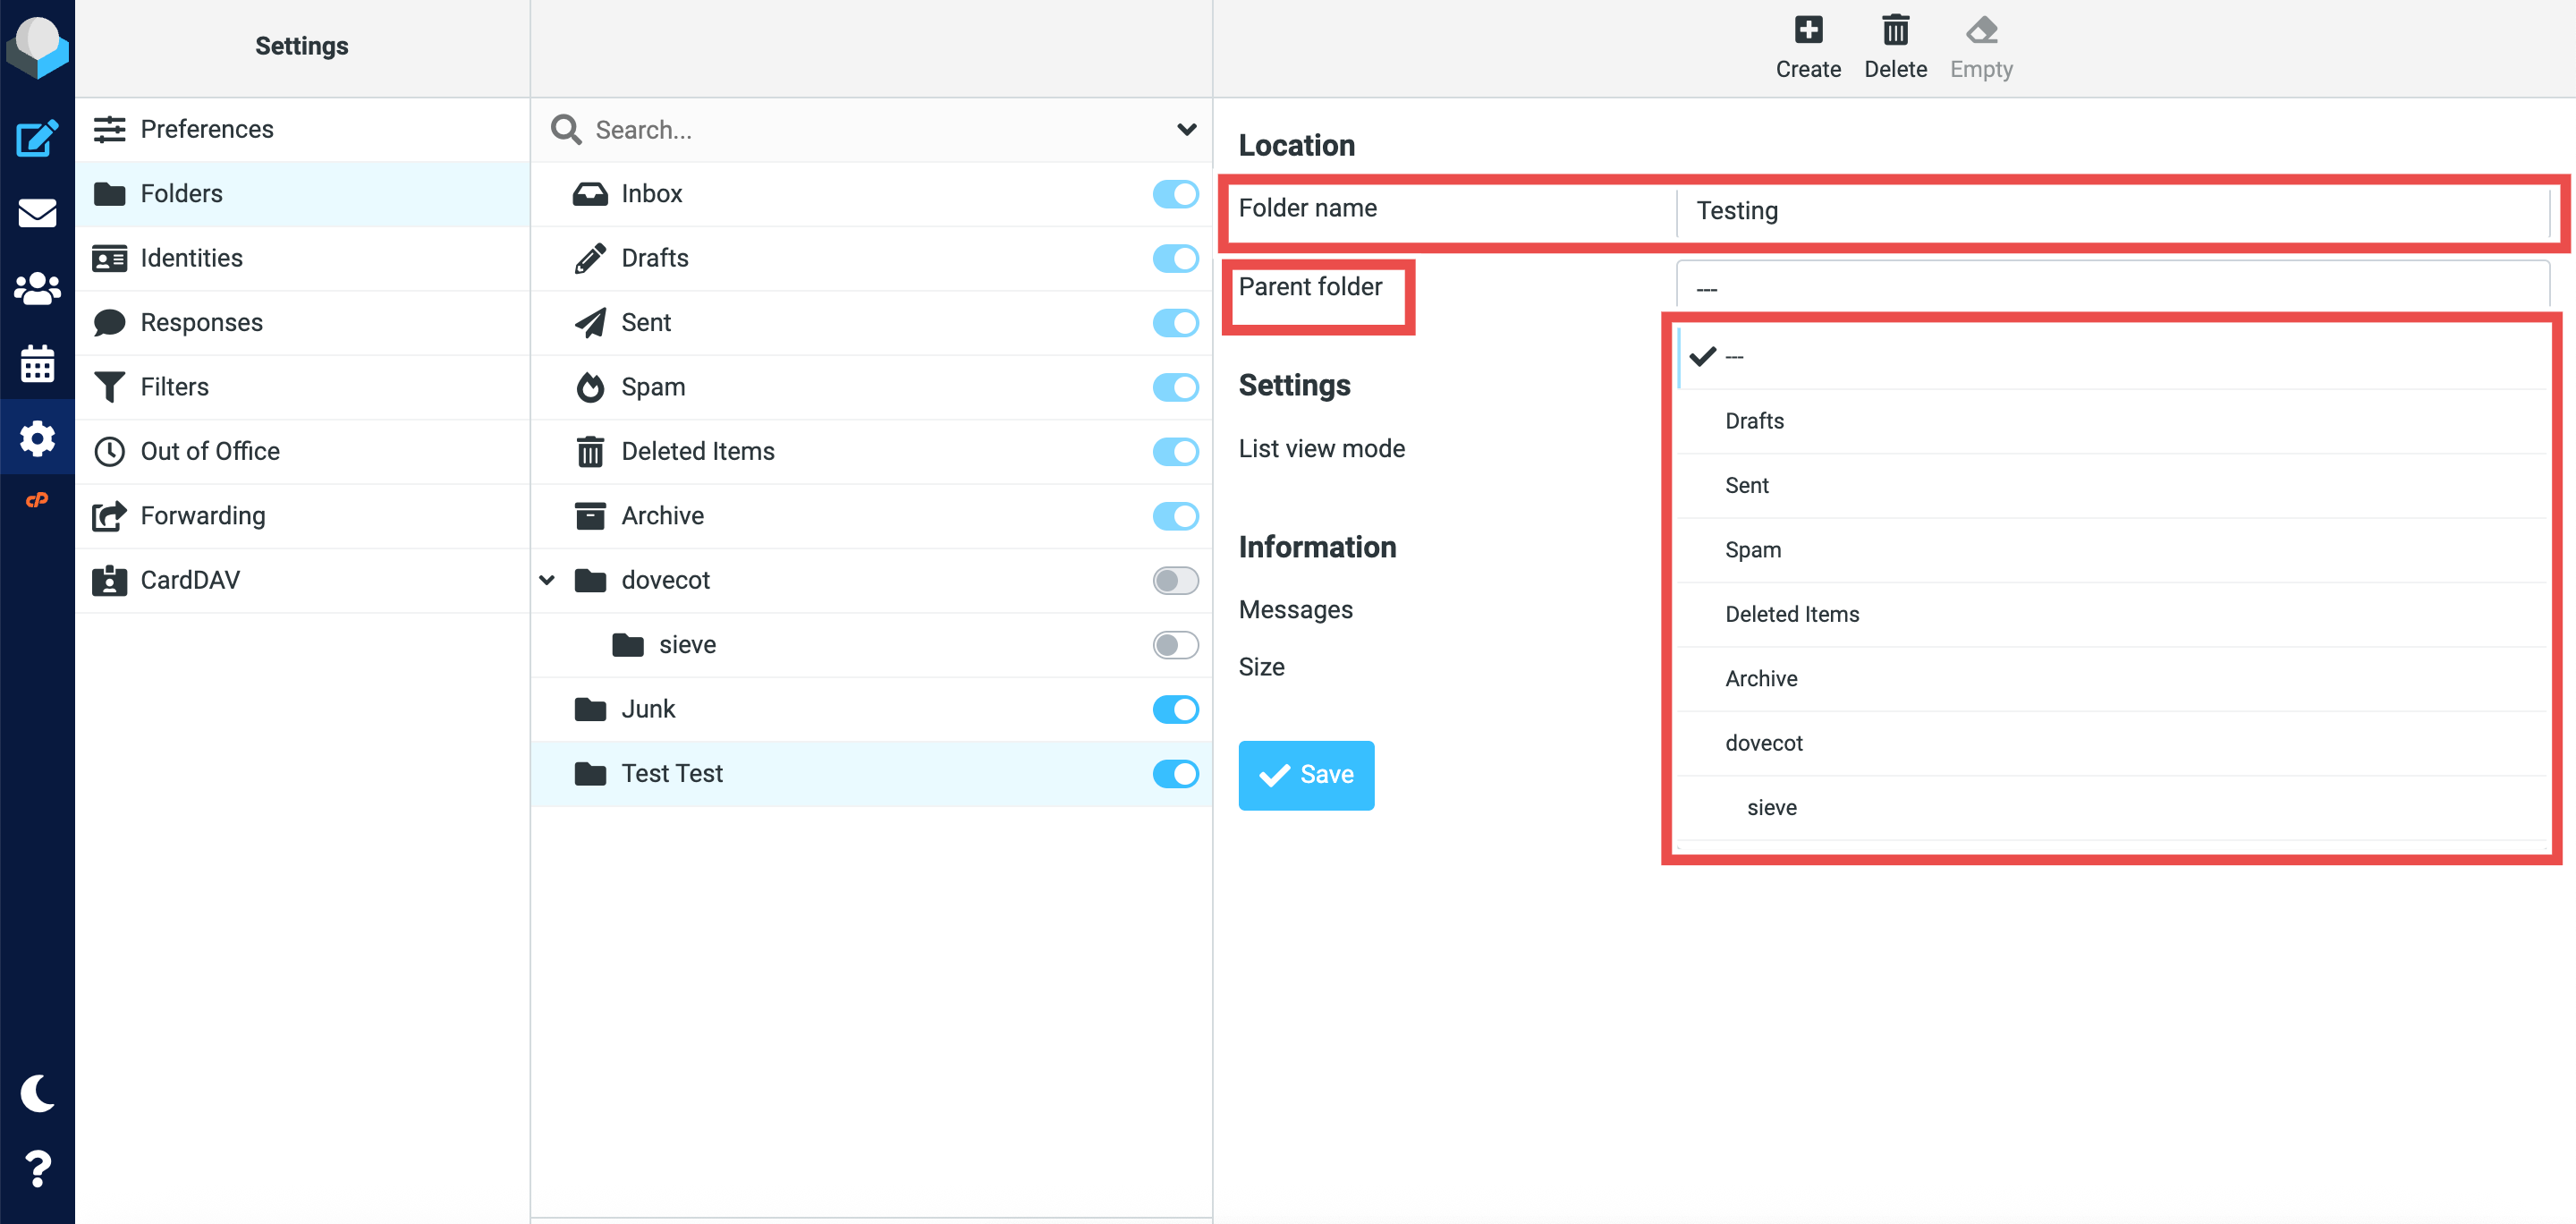
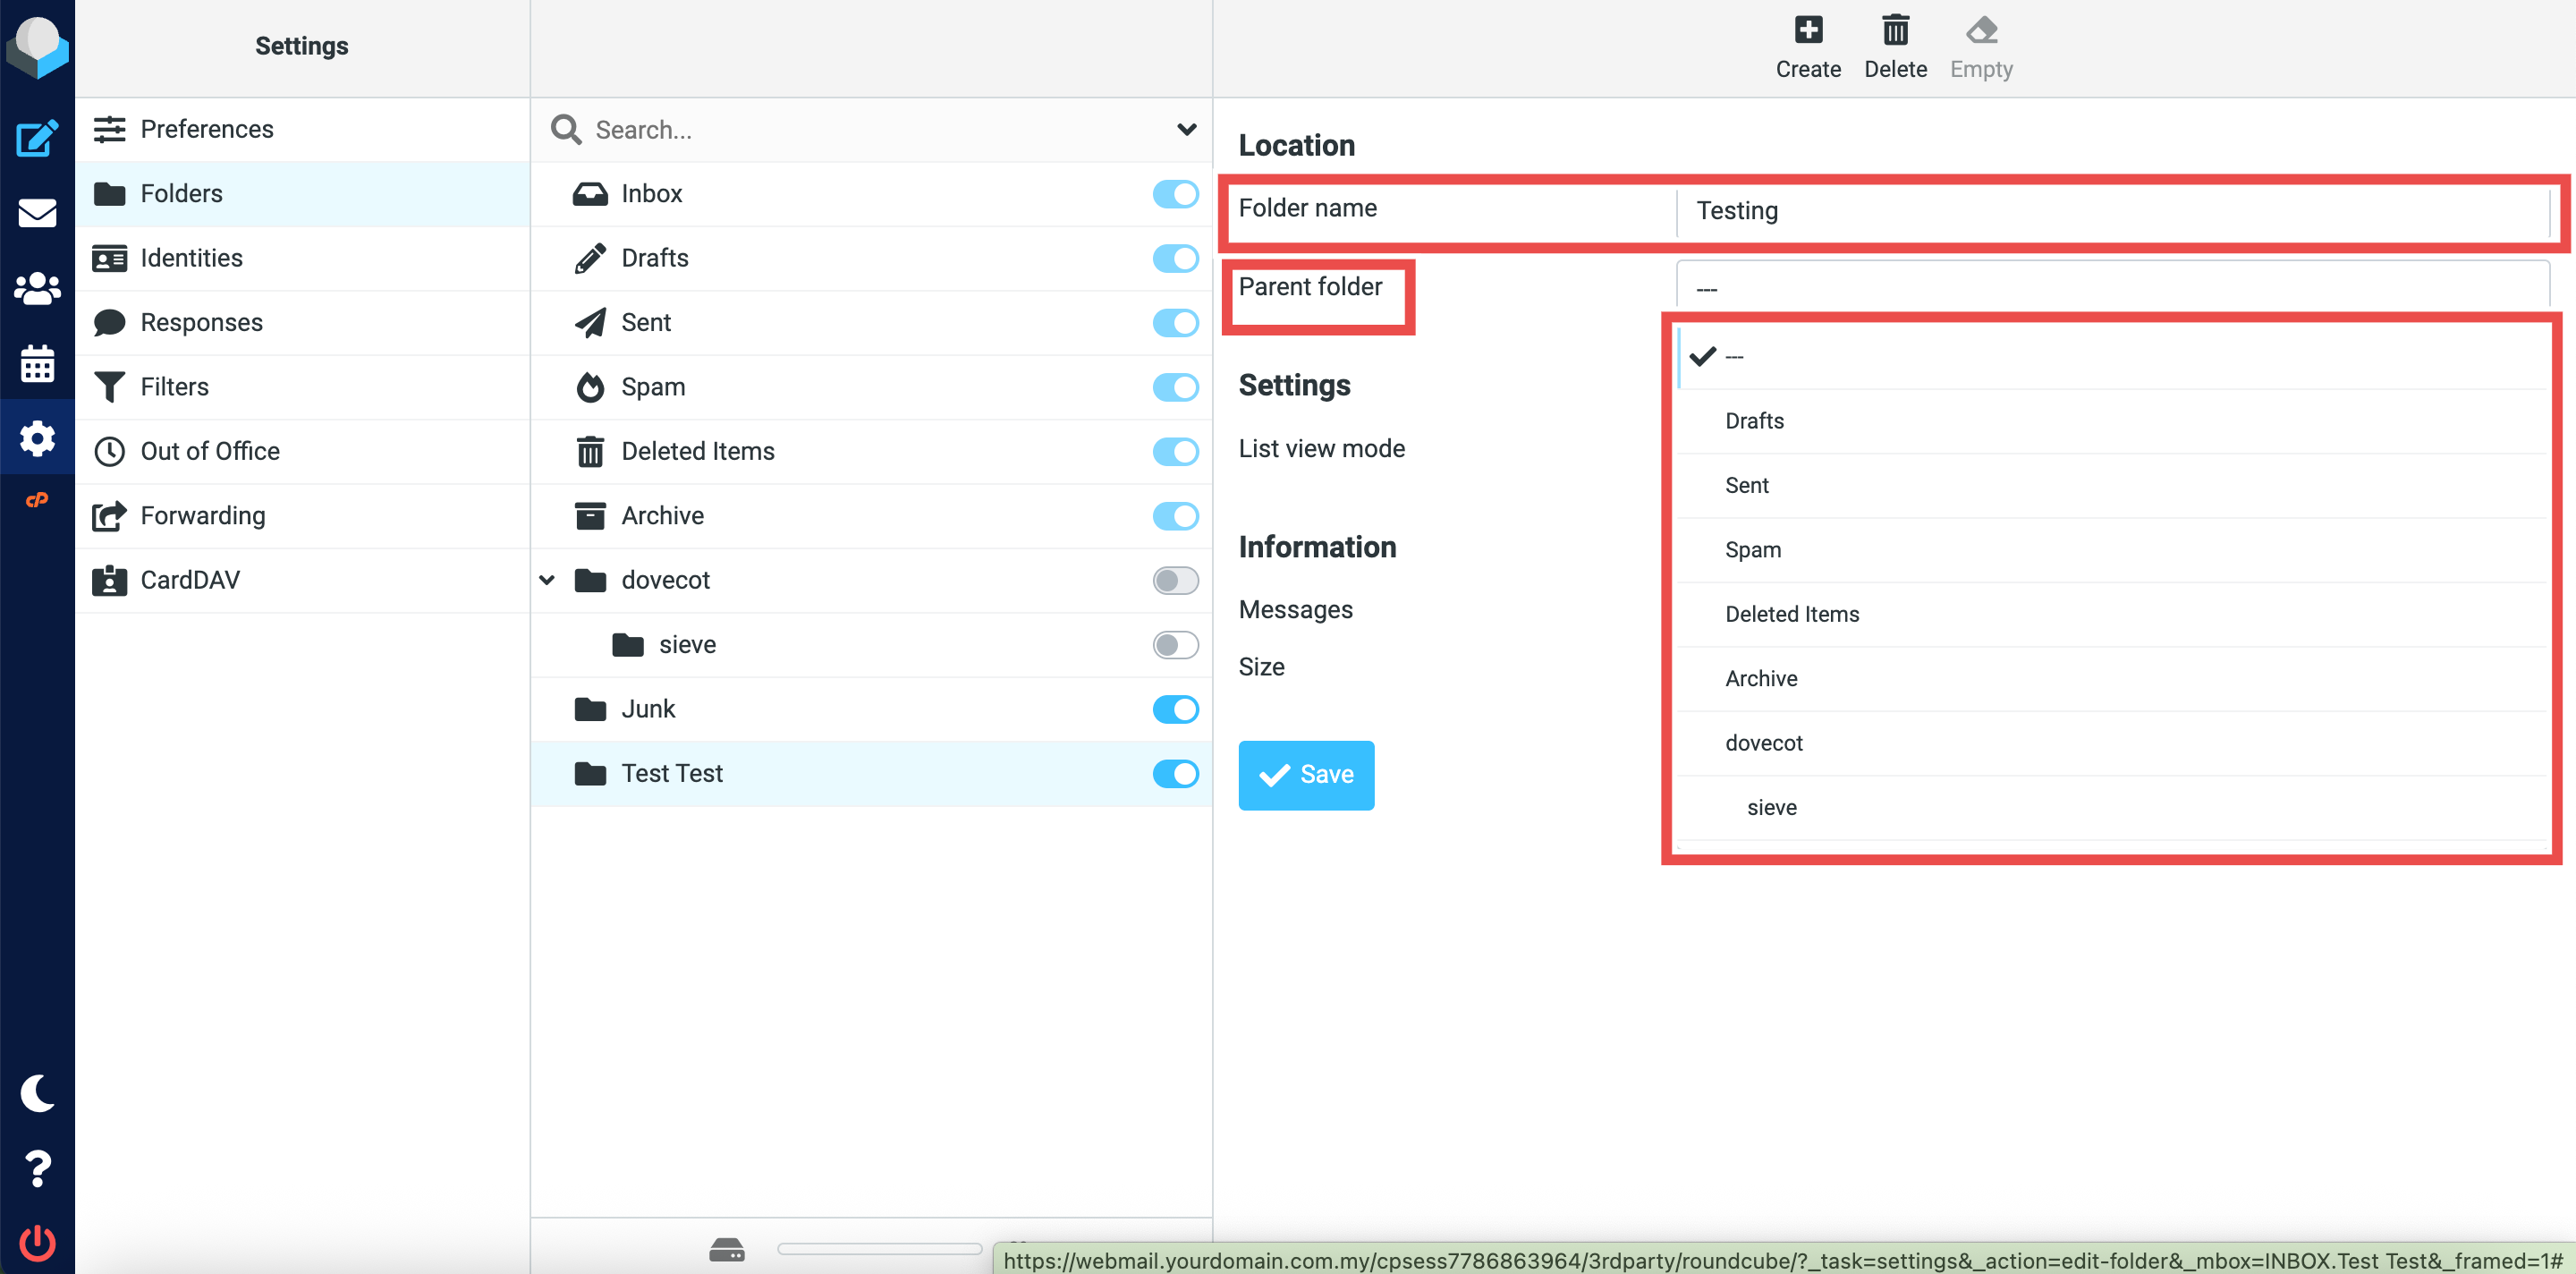
- Select the List View Mode you want for the folder you selected.
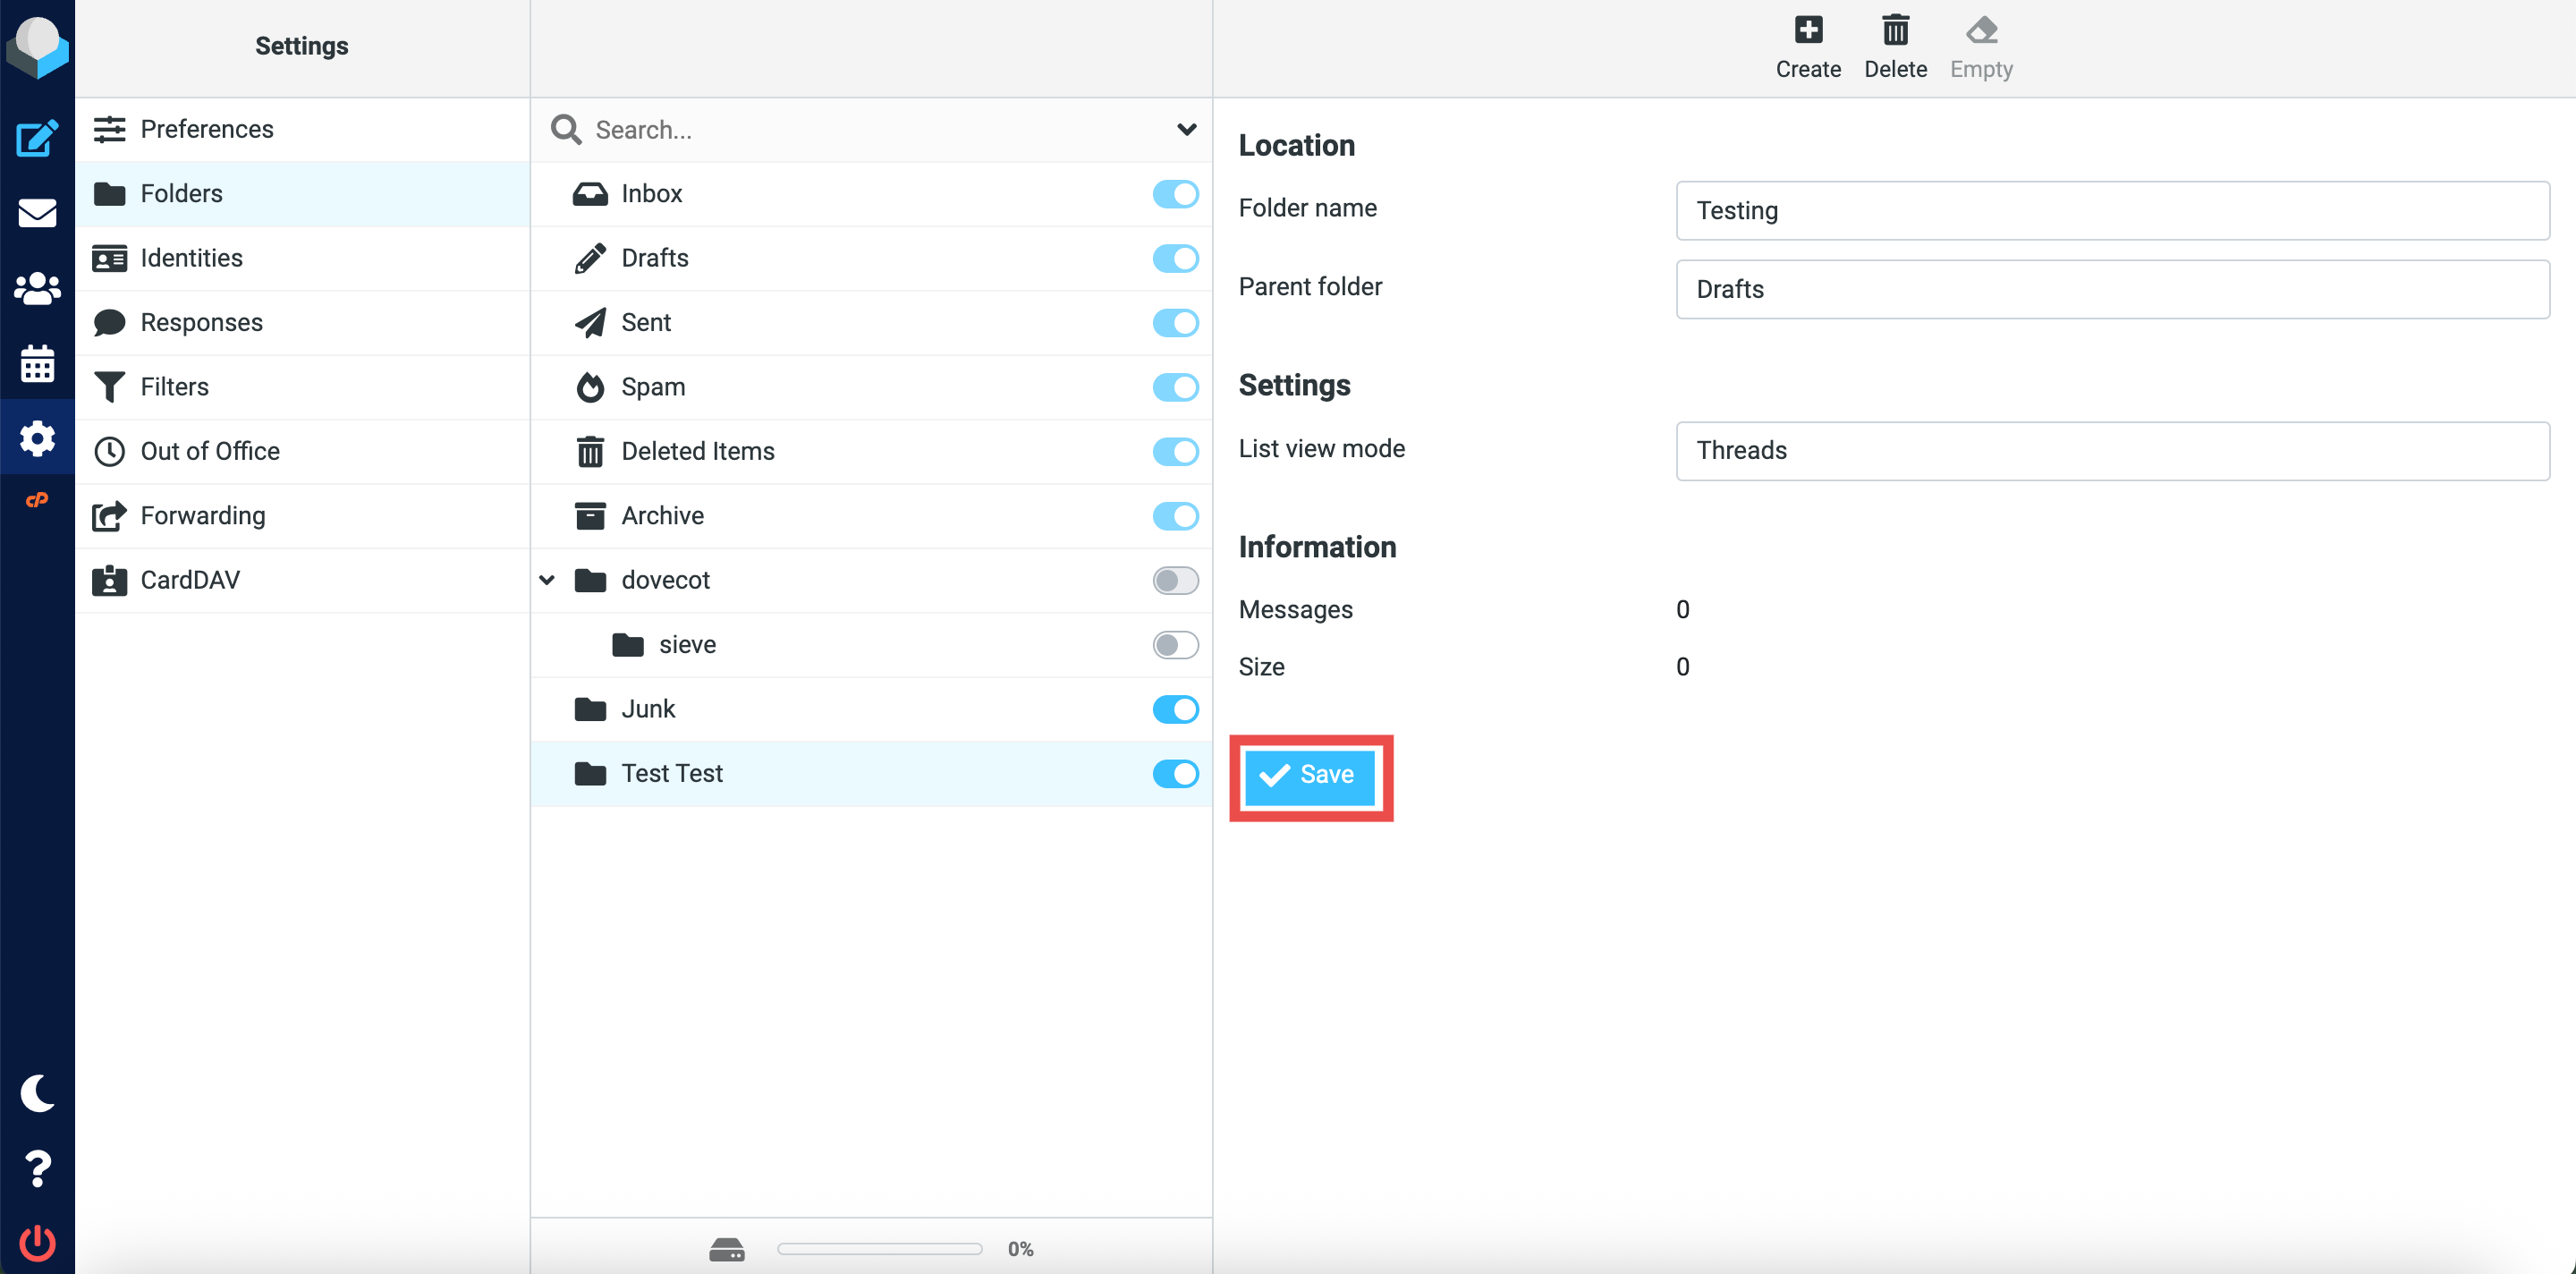
- Click Save to apply the modifications you made.
- Successful message will appear confirming the new folder is modified successfully.
Deleting unnecessary email folders
Deleting obsolete folders clears out clutter, though system-default directories like Inbox or Sent cannot be removed.
- In the folder list, locate the folder you want to delete.
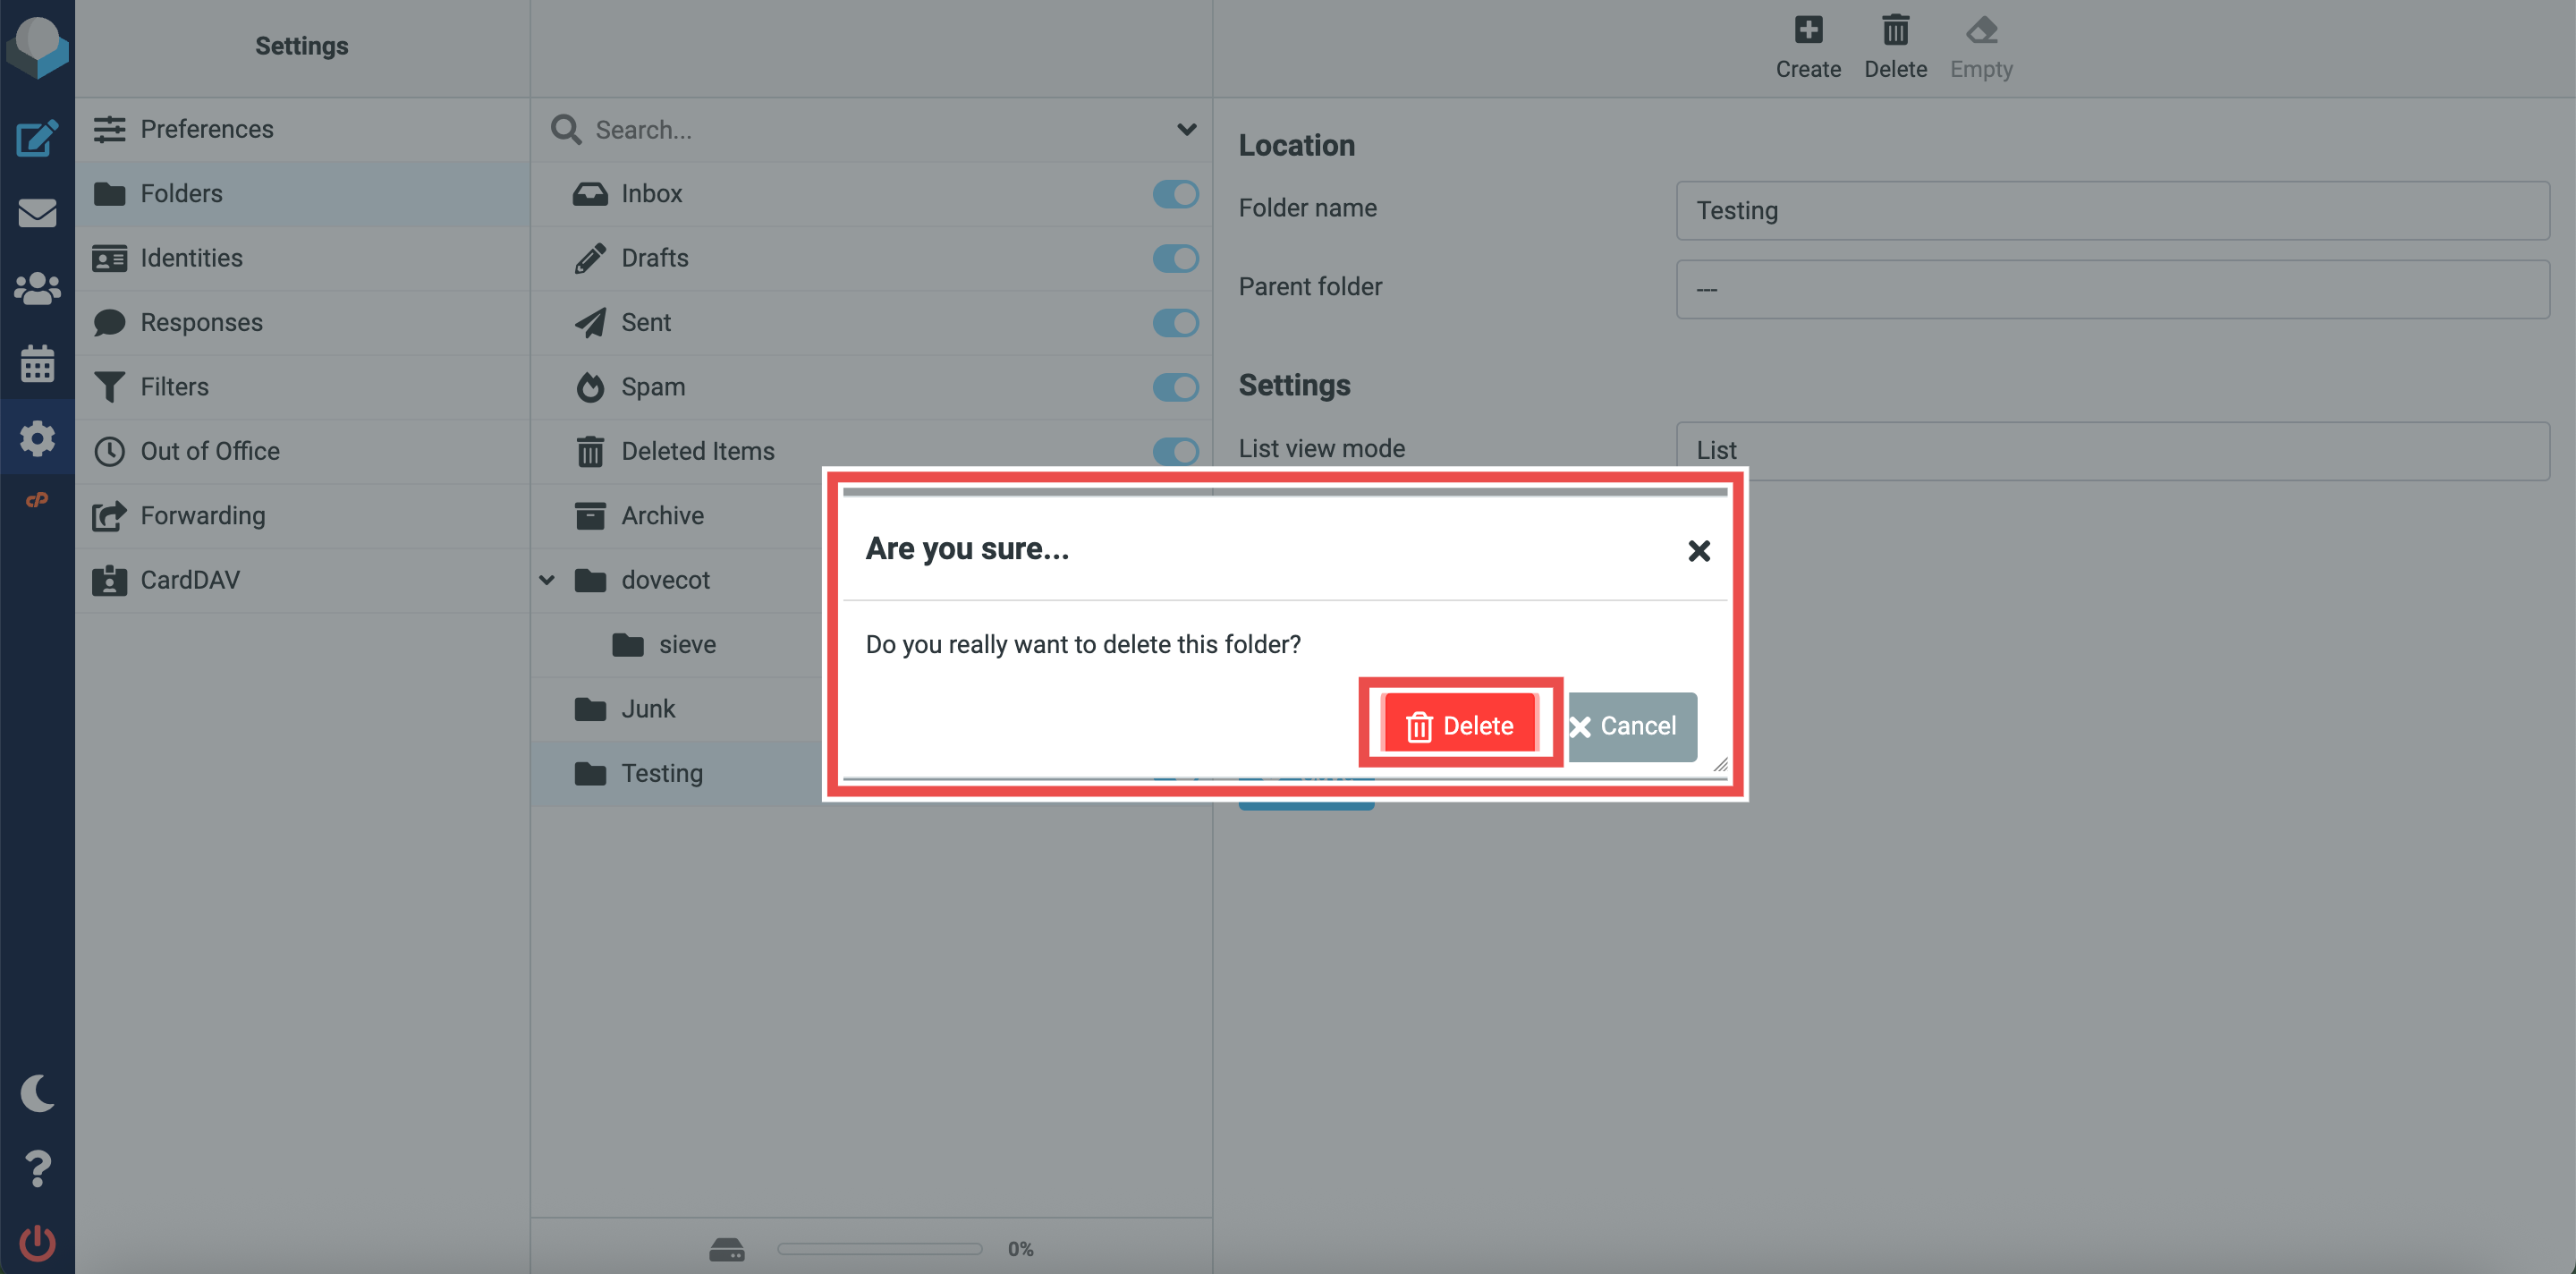
- Click on the folder name to select it and click Delete button (trash icon) at the top-right of the page.
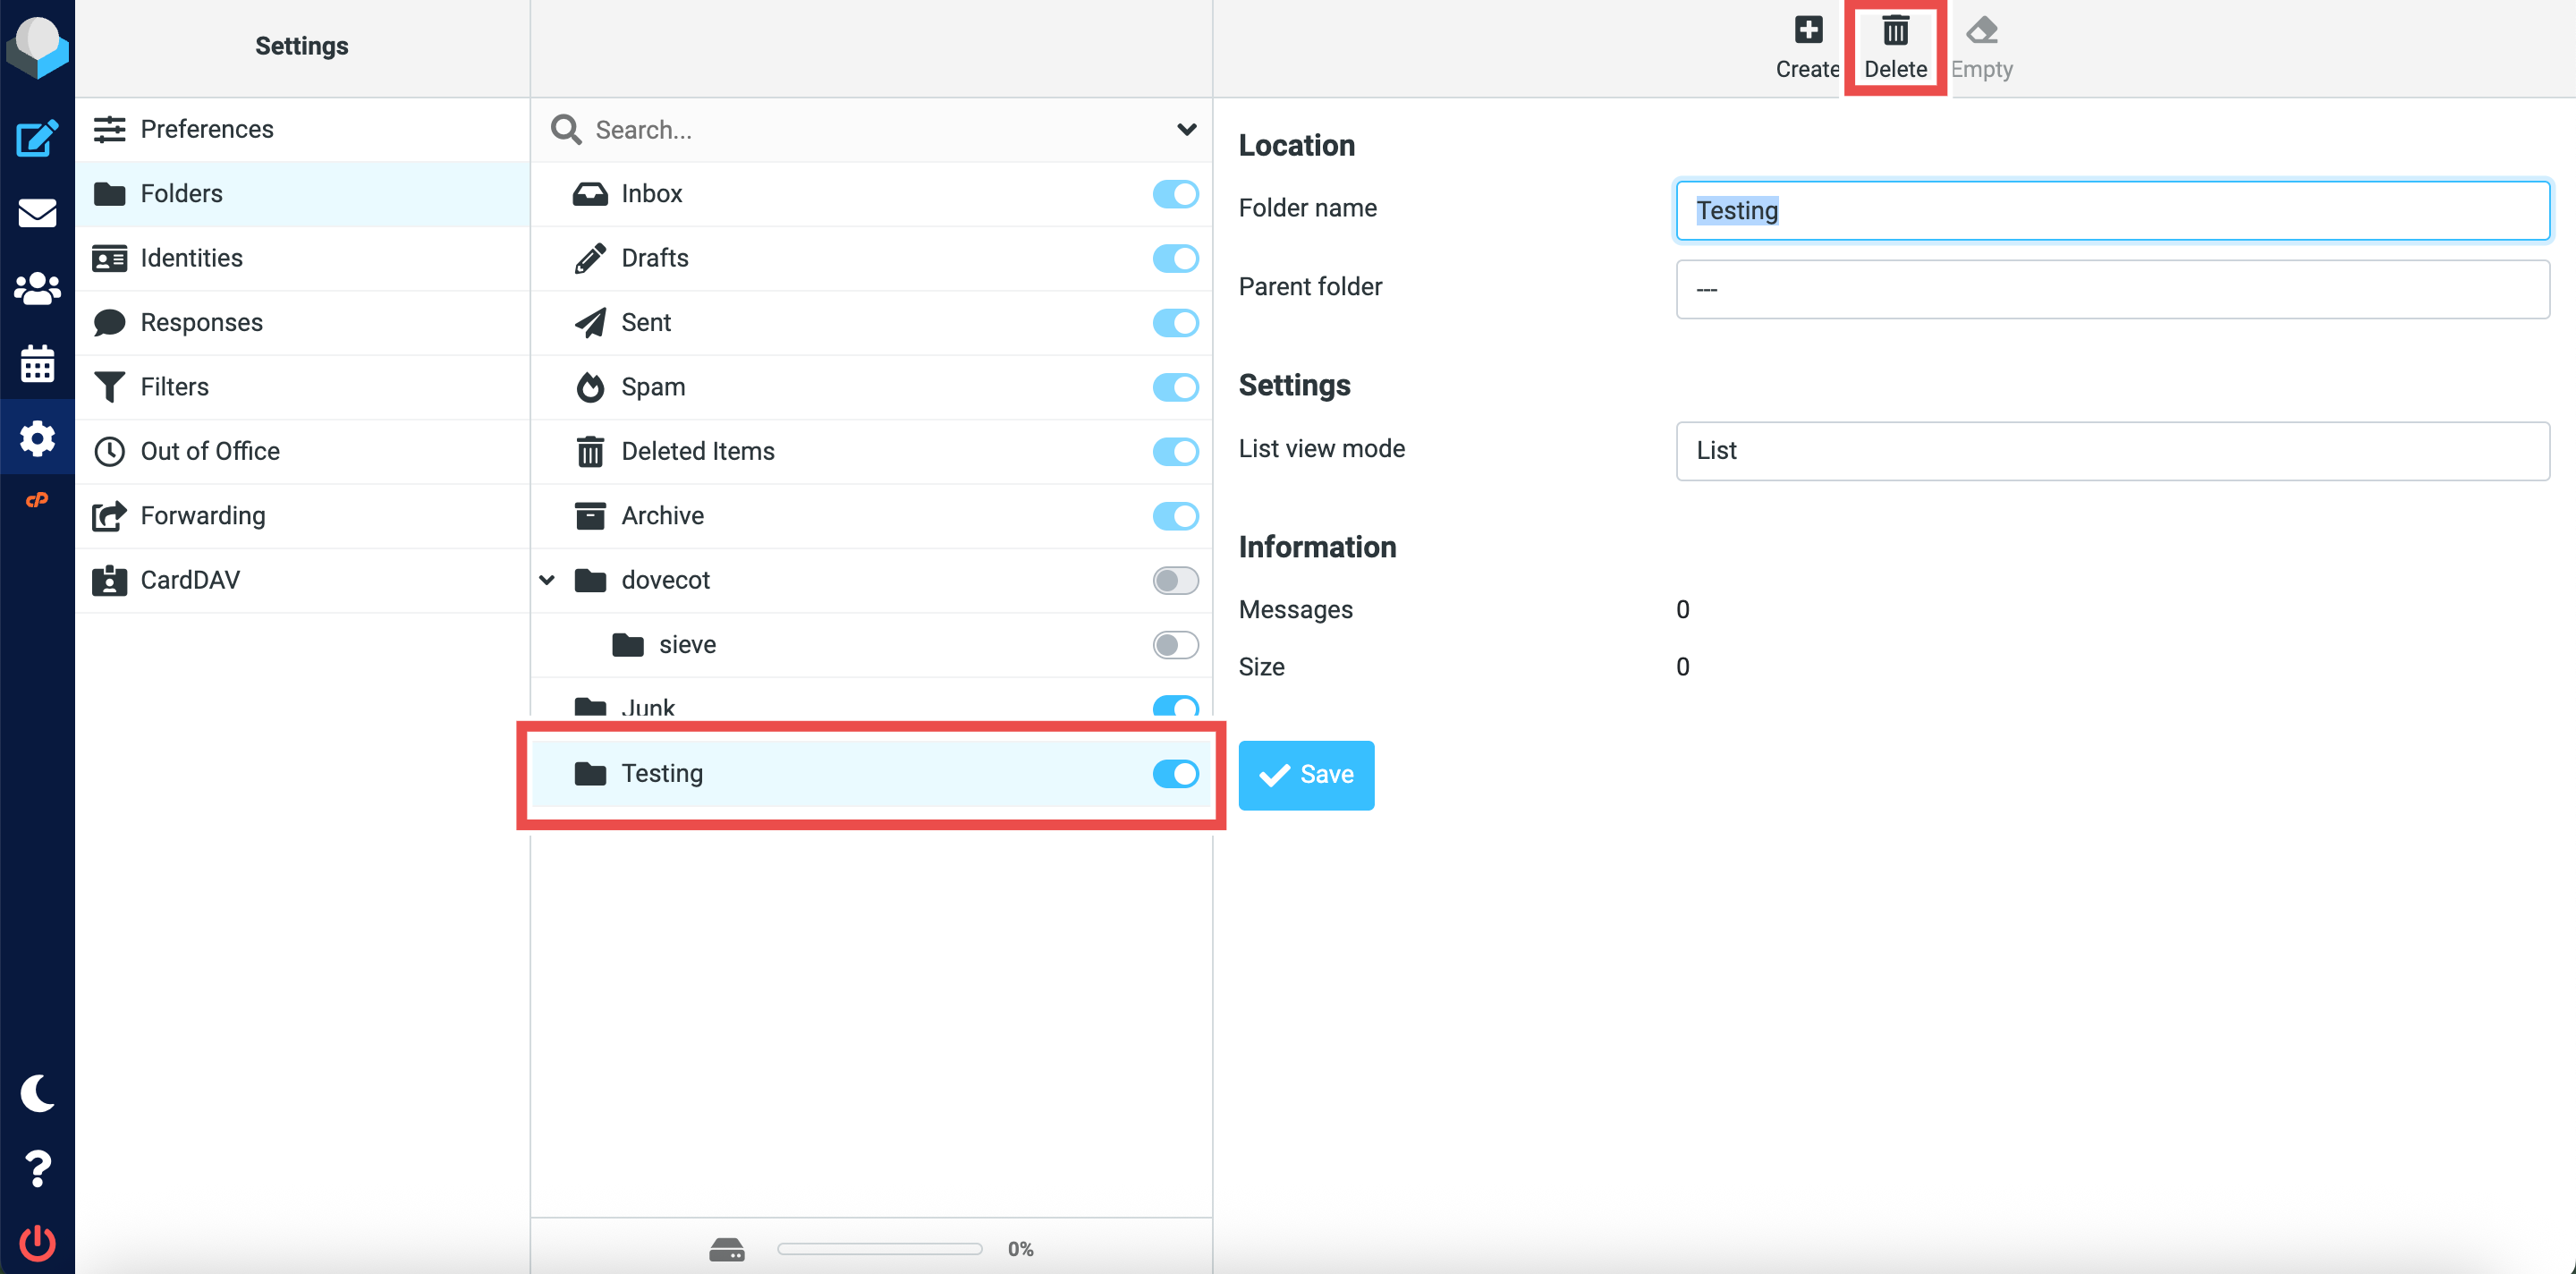
- A confirmation dialog will appear to confirm the deletion. Click Delete to permanently delete the folder and all emails it contains.
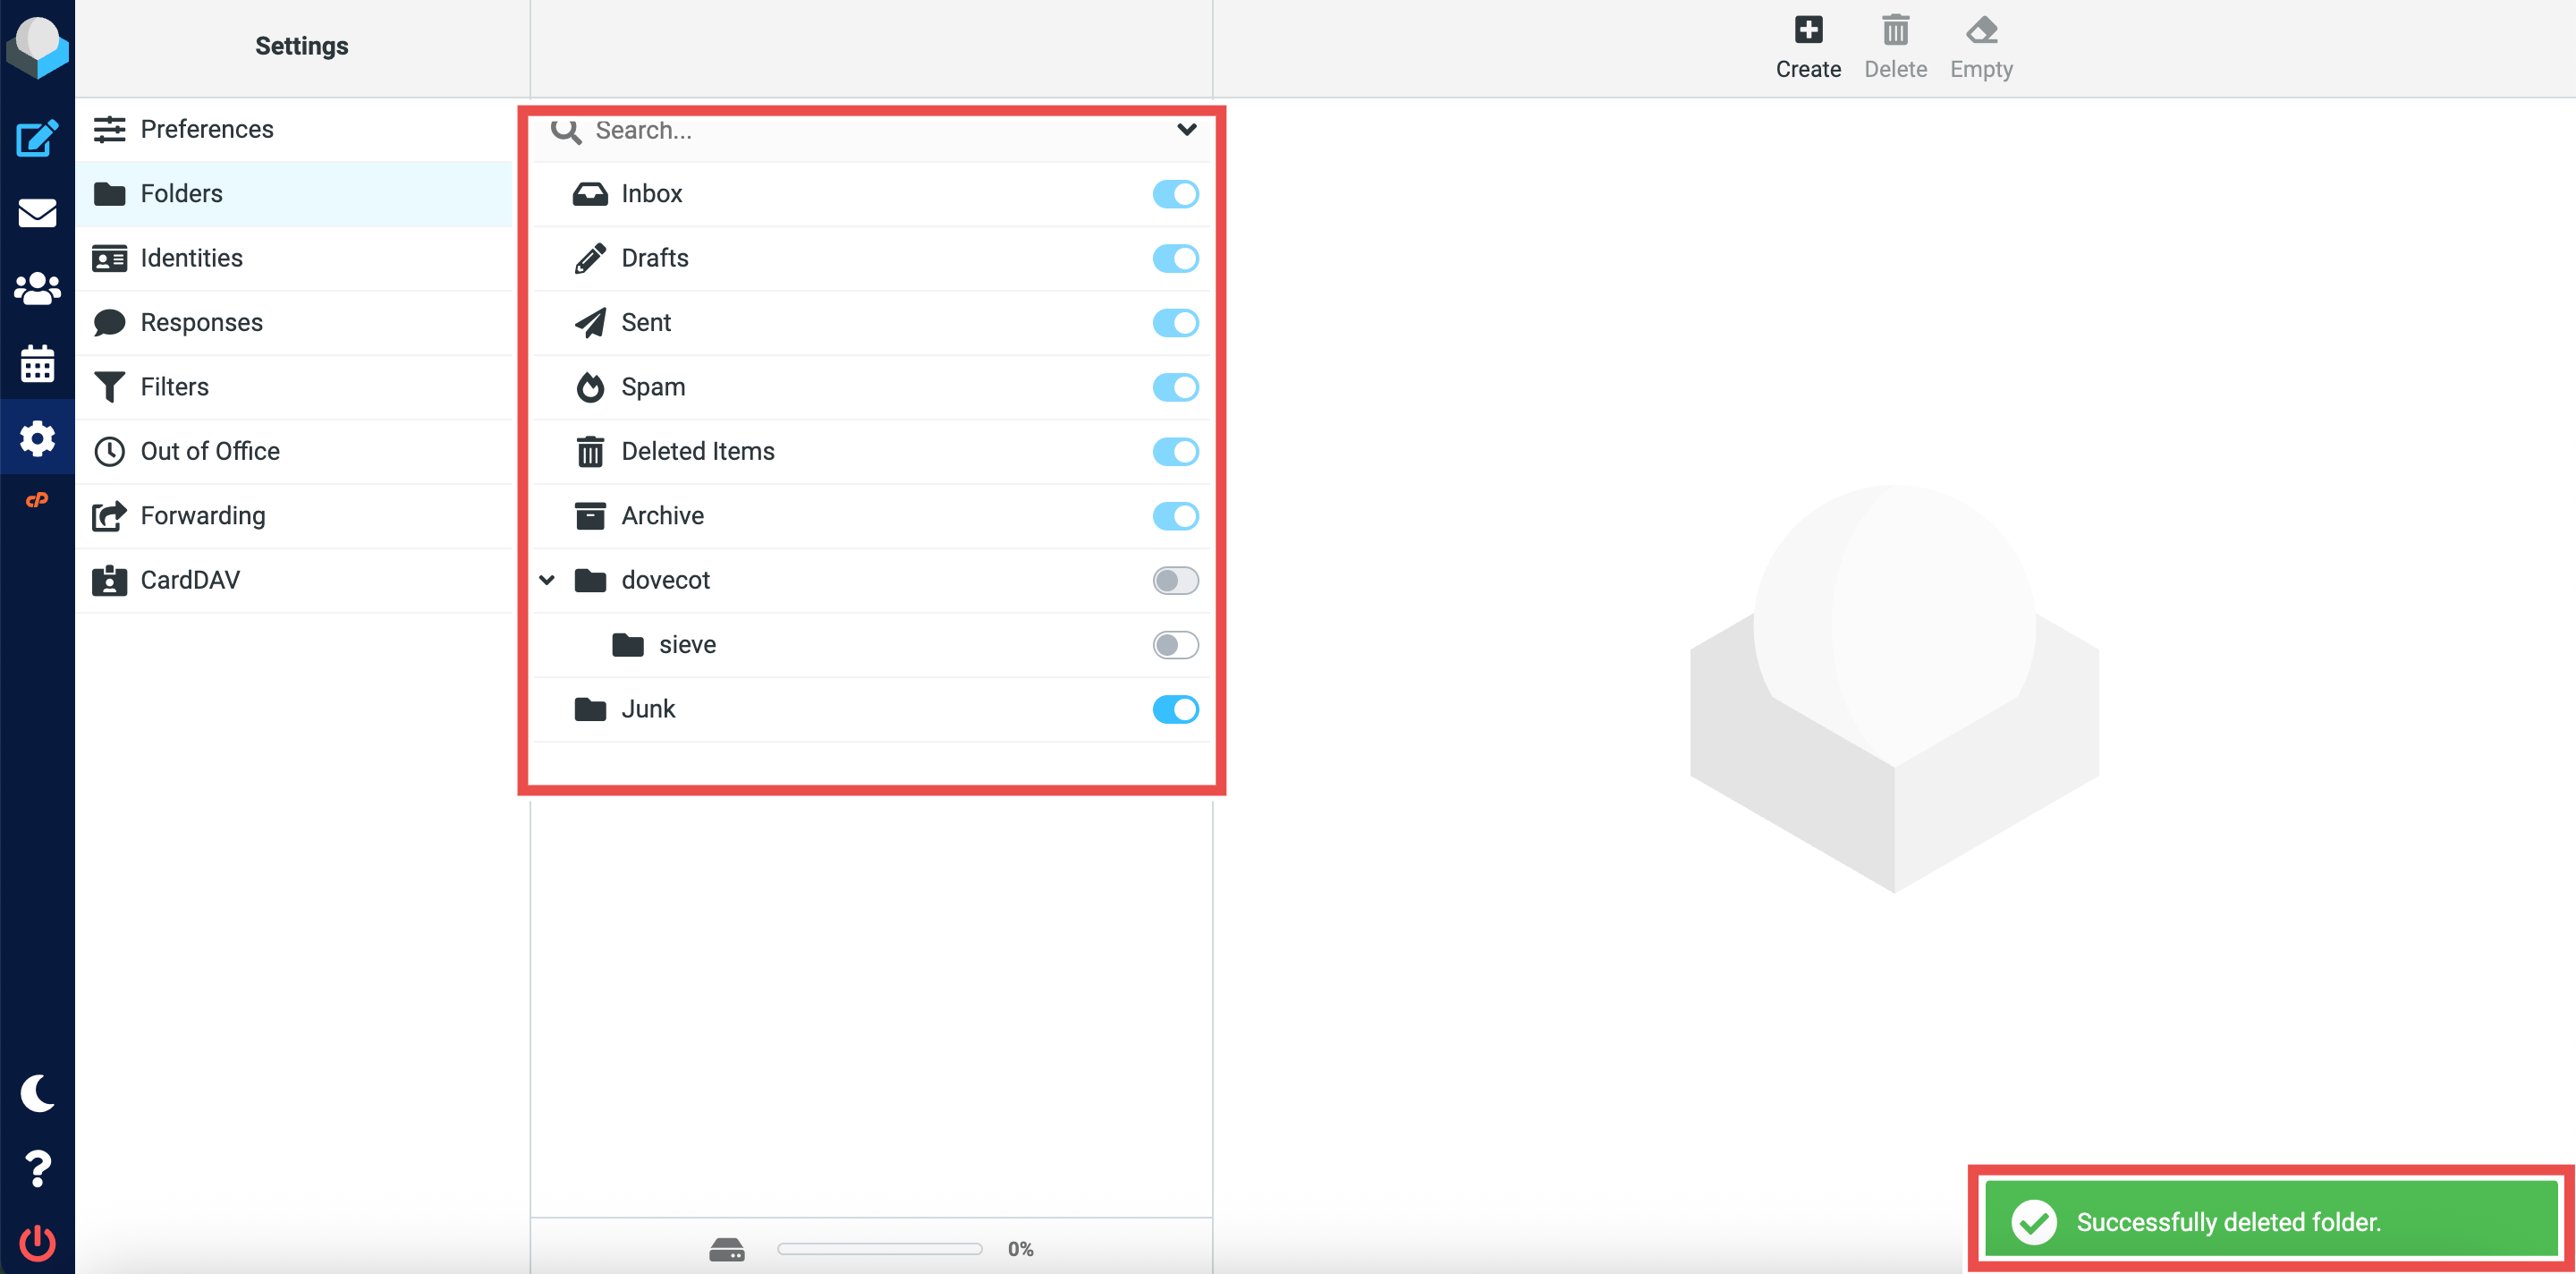
- Successful message will appear confirming the new folder is deleted successfully. The deleted folder and its contents will no longer appear in the list.
Conclusion
By following this guidance, you can successfully create, modify, and delete custom email folders in Roundcube Webmail to keep your inbox organized and structured.
For additional assistance or if you encounter any issues, please contact our support team at support@ipserverone.com.