
Search Our Database
How to update or changing nameserver for a domain via customer portal
Introduction
Managing domain nameservers is a fundamental part of controlling how internet traffic reaches your website, ensuring users can reliably access your online content. Nameservers hold DNS records that map your domain to an IP address, directing users to the correct server. With the IP ServerOne customer portal, updating or changing nameservers has been simplified, enabling users of all experience levels to make essential DNS adjustments with ease.
This guide provides a detailed walkthrough for accessing the IP ServerOne portal and changing your domain’s nameservers. The steps outlined here are designed to be clear and accessible for beginners, yet efficient enough for seasoned users who need to make quick updates. Updating nameservers may be necessary in situations such as switching hosting providers, enhancing DNS security, or optimizing DNS performance. This guide will ensure you have the knowledge to update these settings effectively, as well as cover important considerations such as DNS propagation time.
Prerequisites
- Access to the IP ServerOne Customer Portal with valid login credentials.
- An active IP ServerOne account.
- The new nameserver information (e.g., primary and secondary nameserver addresses).
- The DNS zone file preconfigured on the new nameserver (recommended to avoid downtime).
Step-by-Step Guide
Step 1: Log in to the Customer Portal
Log in to the IP ServerOne Customer Portal using your registered email and password.
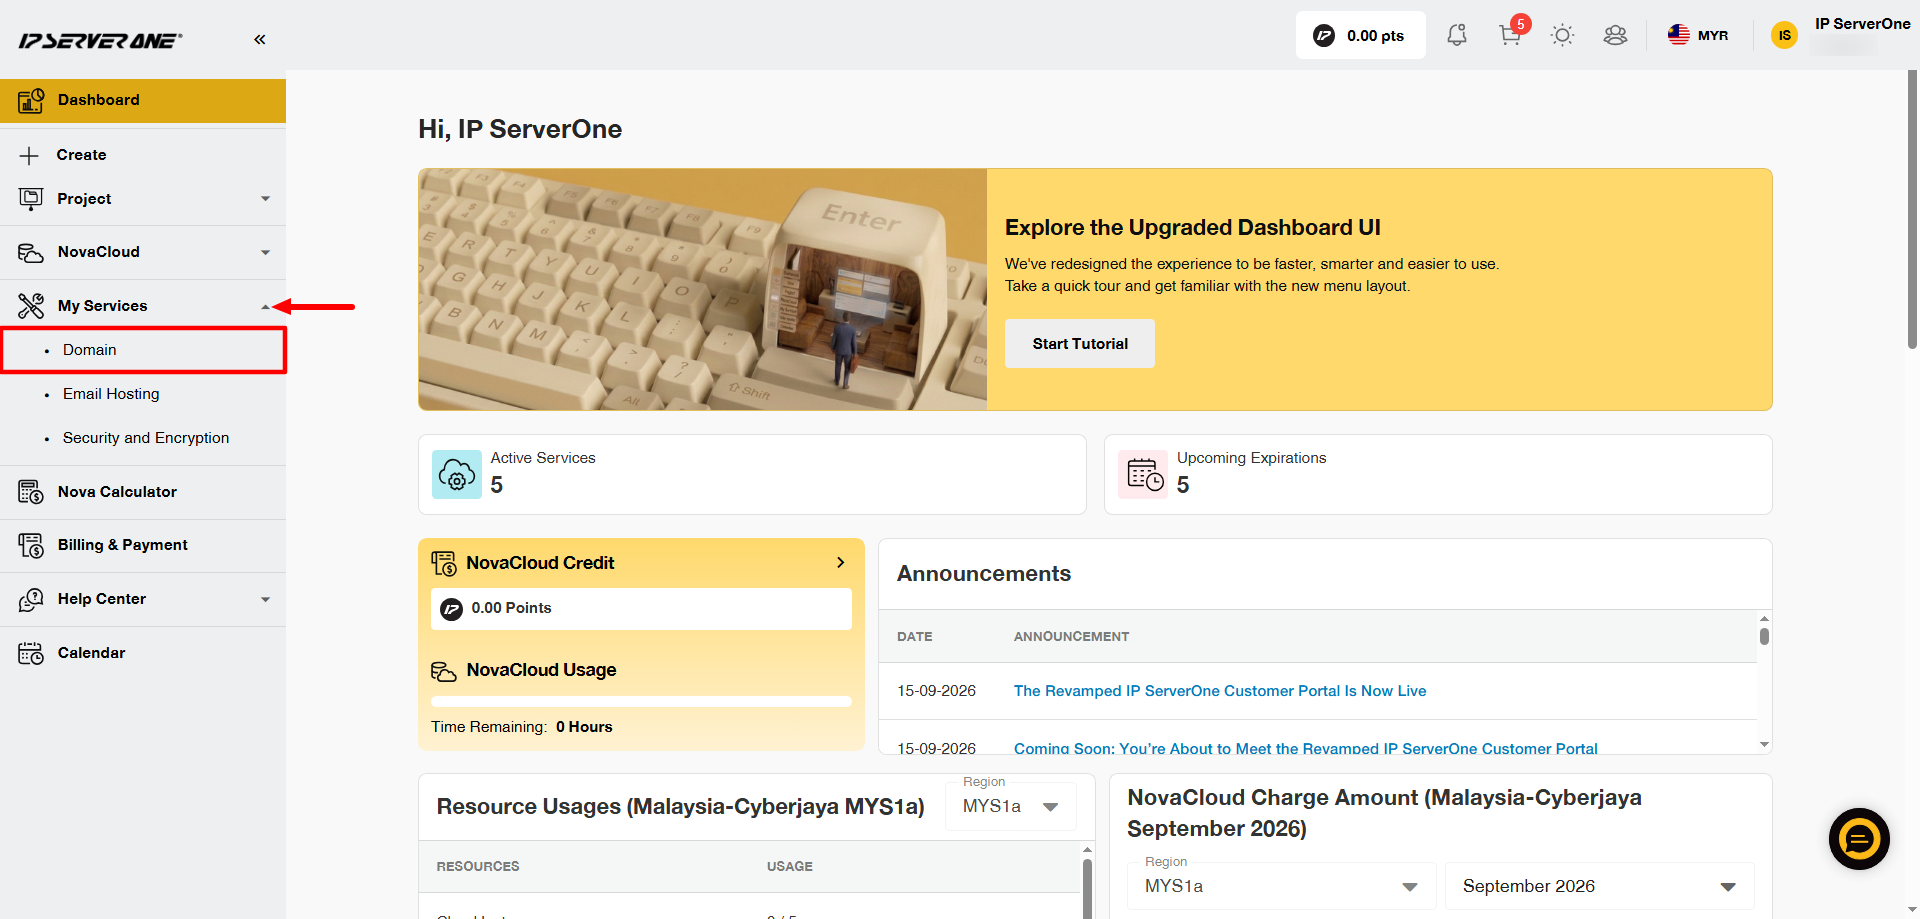
Step 2: Access “My Services” and Select “Domain”
From the left-hand menu, go to My Services and select Domain.
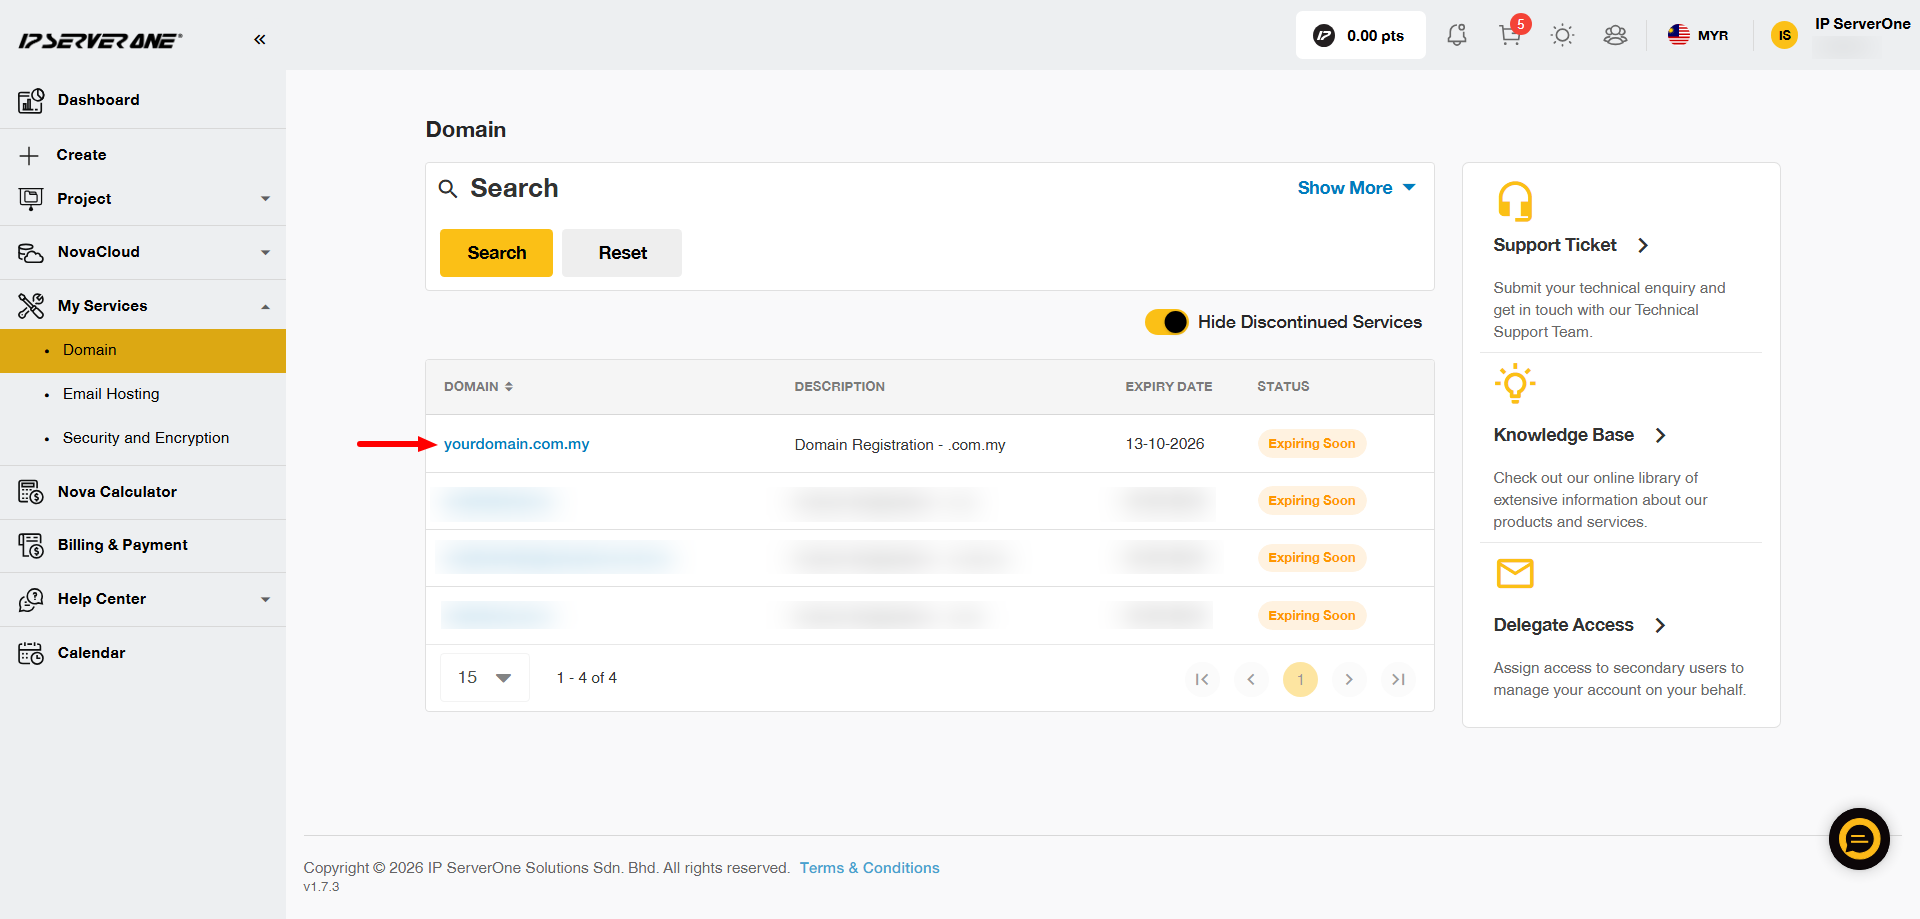
Step 3: Select the Domain to Modify
Click on the domain that you want to update.
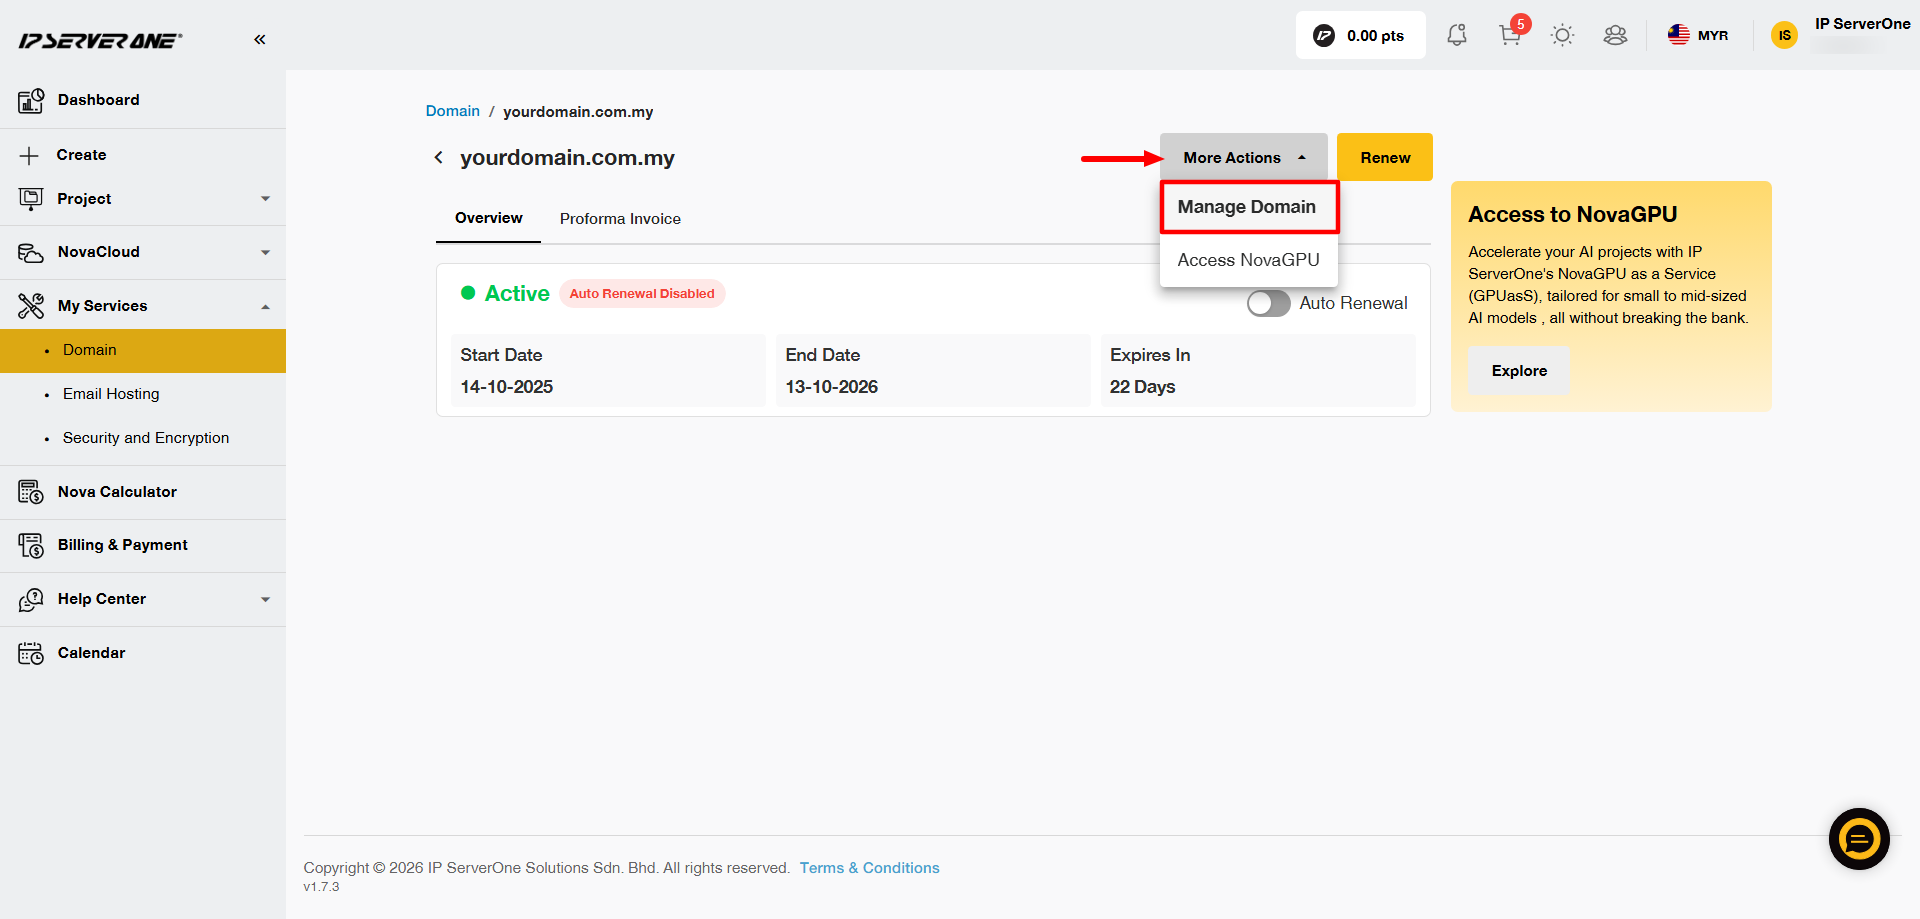
Click More Actions, then select Manage Domain.
Step 4: Open the “Name Server” Tab
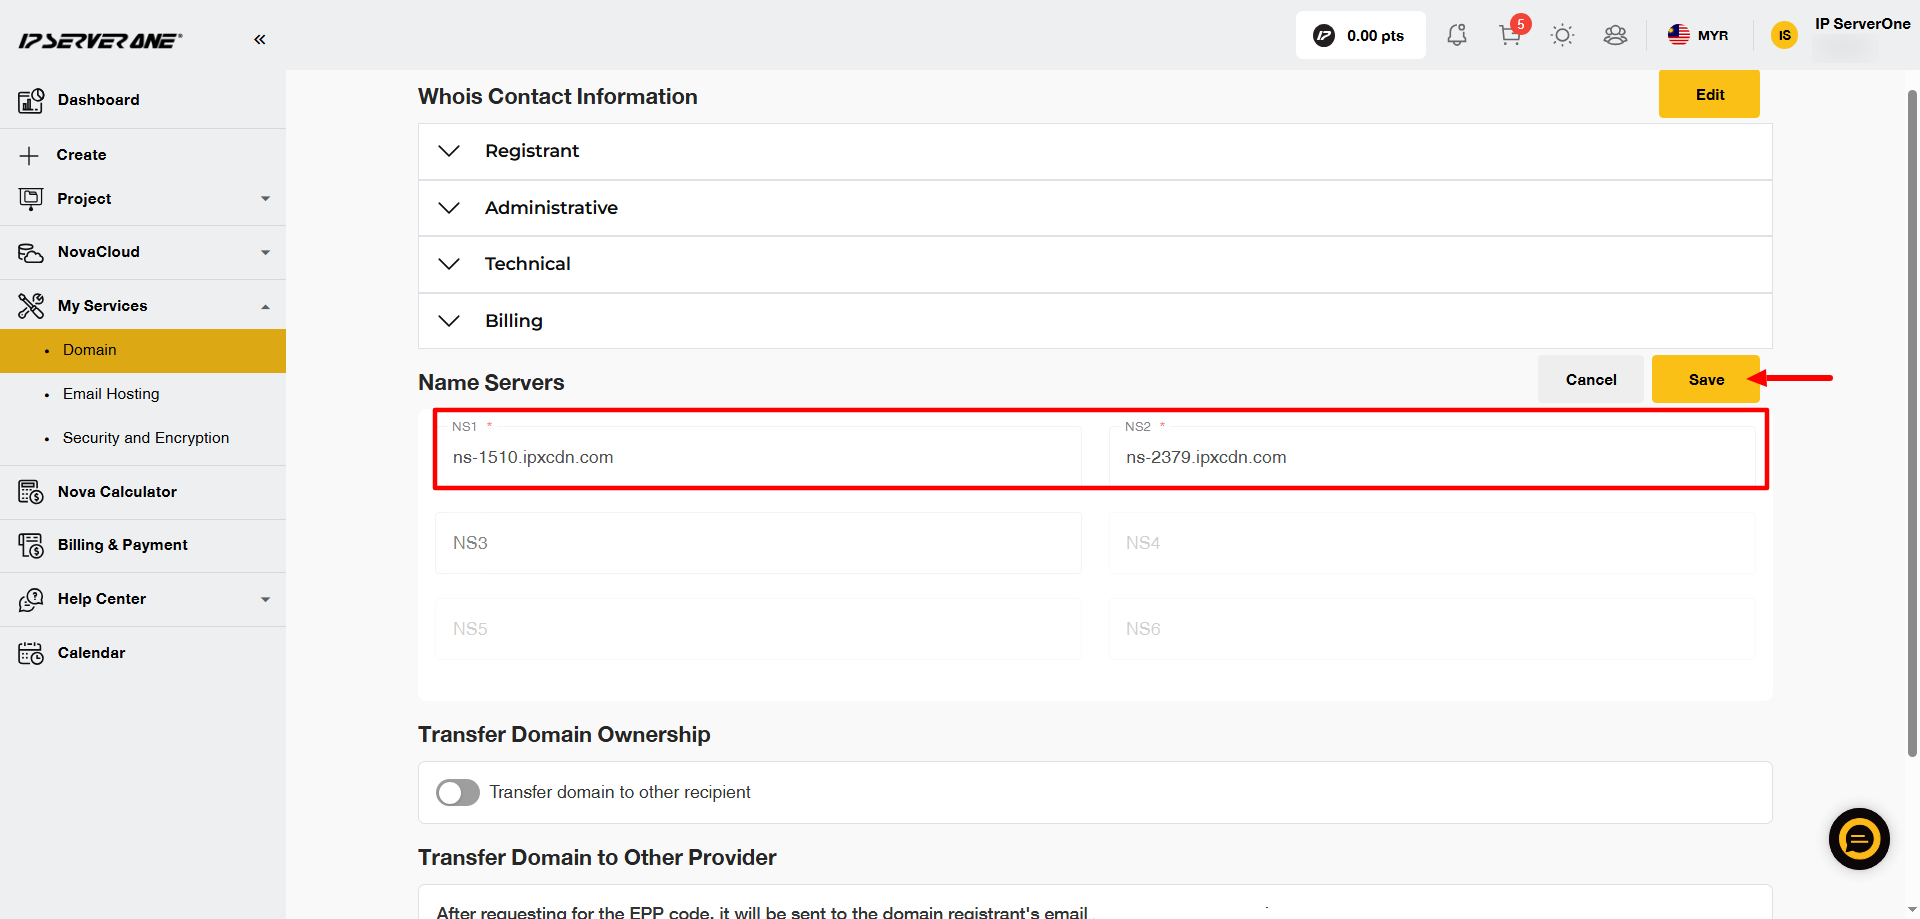
On the domain management page, go to the Name Server tab and click Edit. This section allows you to view and modify your current nameserver settings.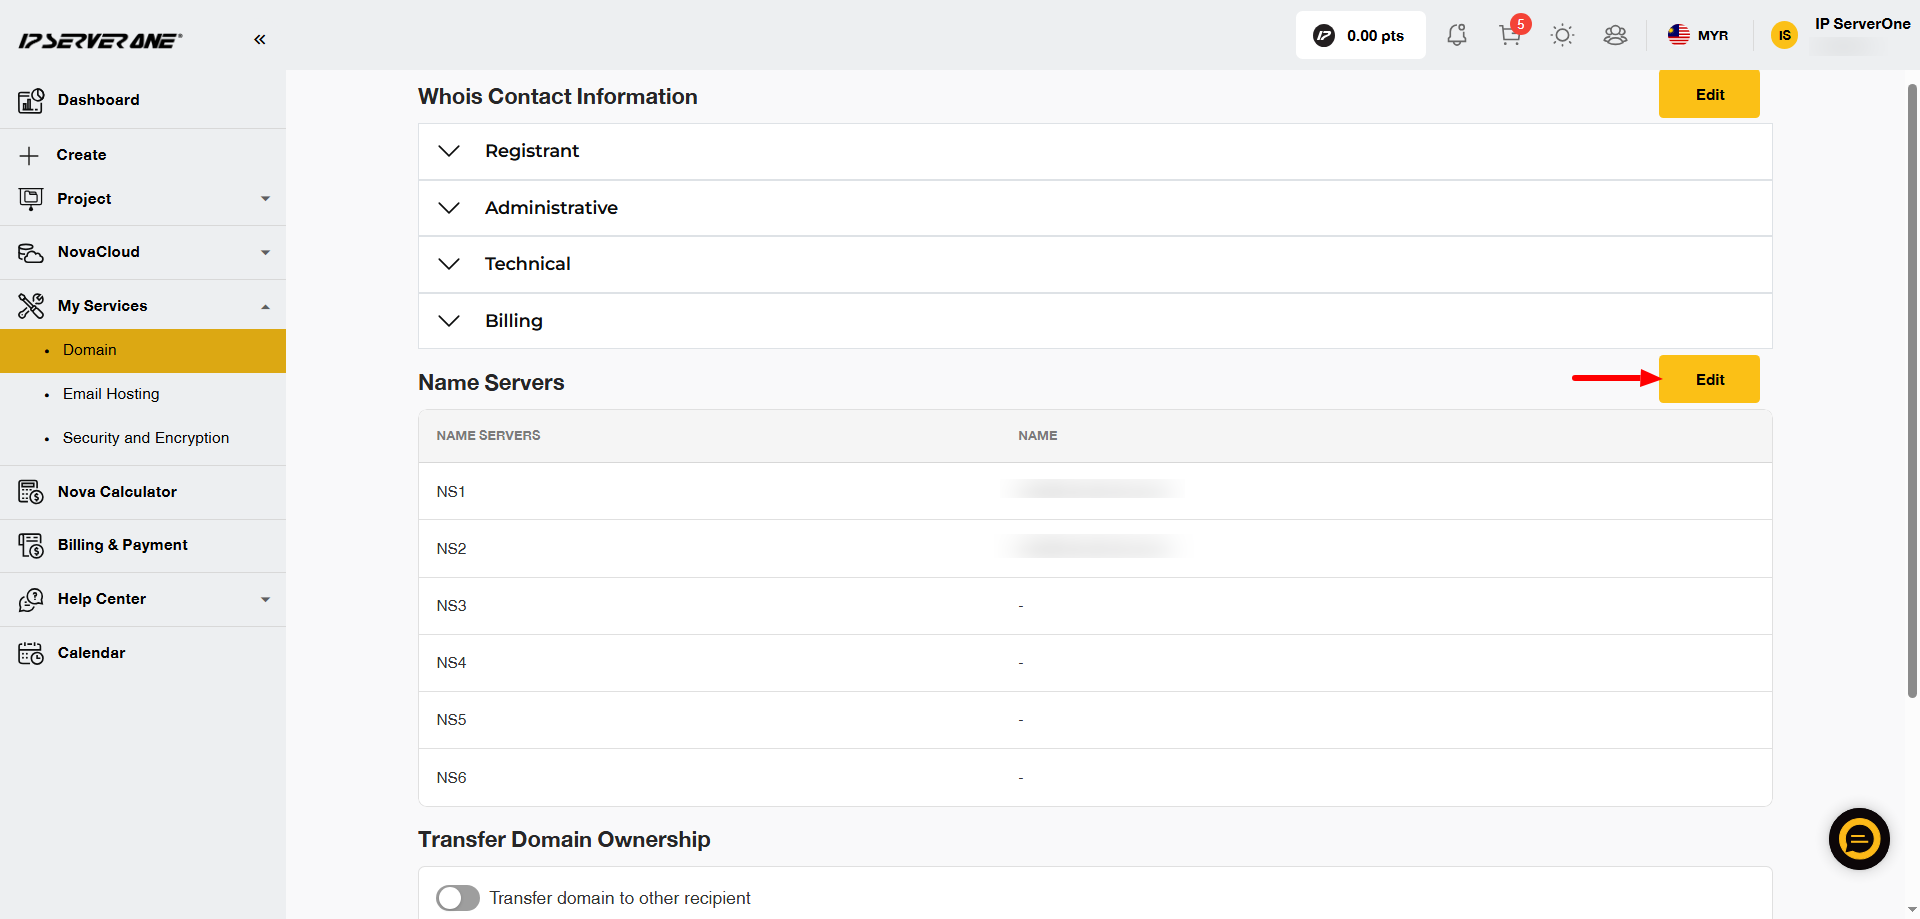
Step 5: Update the Nameserver Information
Enter the new primary and secondary nameserver addresses provided by your DNS hosting provider. Click Save to confirm the update.
Step 6: Verify the Changes
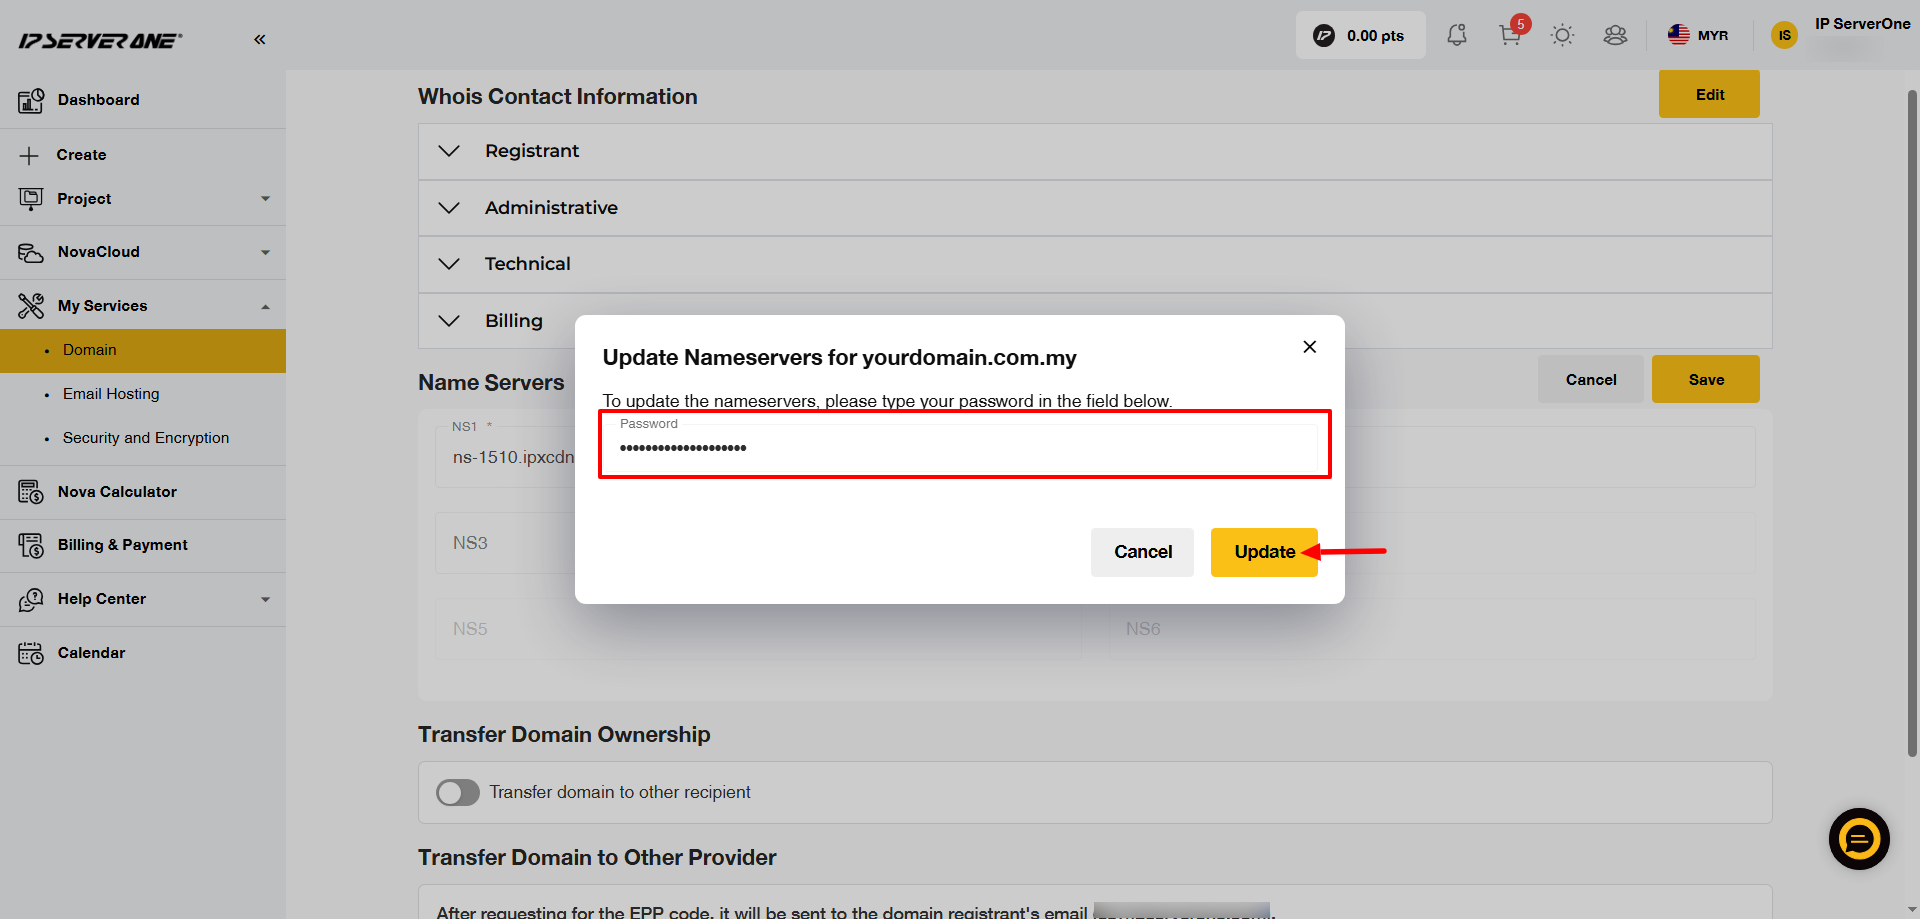
A verification window will appear, requesting your customer portal password to authorize the update. Enter your password and click Update. The system will immediately apply the new nameserver settings to the domain.
Step 7: Update Completed.
A confirmation pop-up will appear once the nameserver changes have been successfully updated.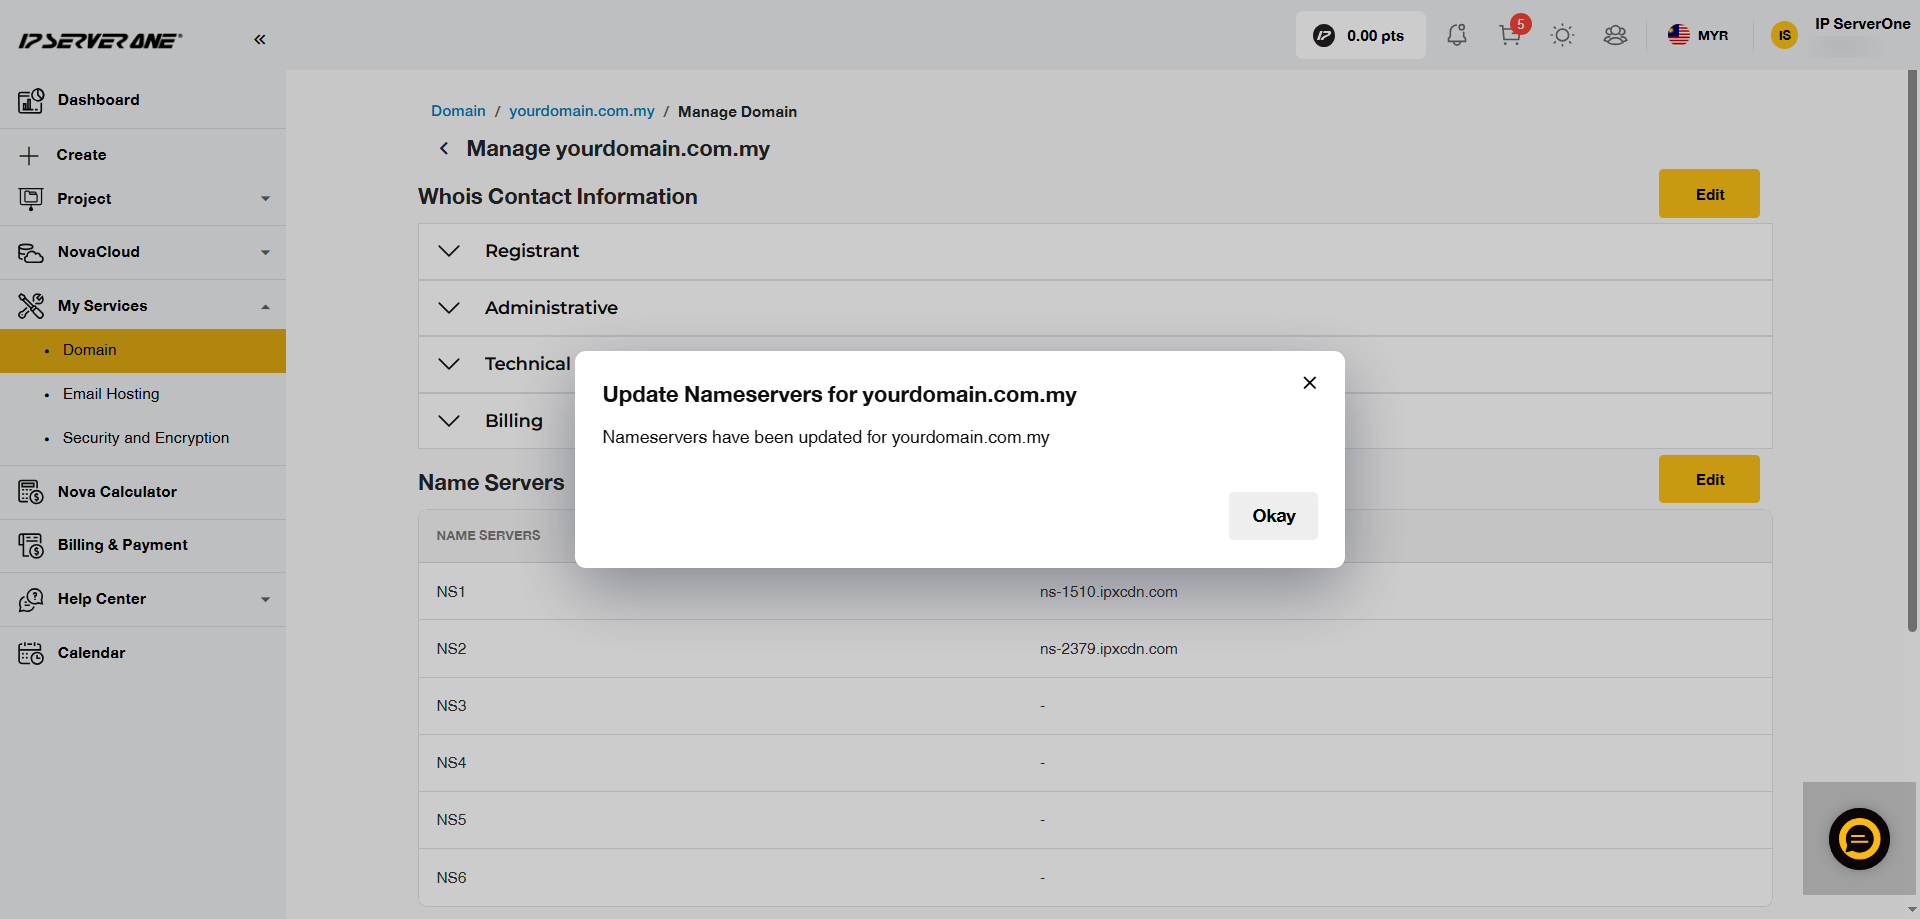
Conclusion
You have now successfully updated your domain’s nameserver settings through the IP ServerOne Customer Portal, enhancing your control over domain management. Nameserver changes will ensure that visitors are correctly routed to your domain’s new DNS settings.
Should you have any inquiries about the guidelines, please feel free to open a ticket through your portal account or contact us at support@ipserverone.com. We’ll be happy to assist you further.
Last edited by Nurul, 20 September 2026.