
Search Our Database
How to extend volume storage for Cloud Instances in Customer Portal
Introduction
Managing server capacity is essential for smooth business operations, especially as your data requirements grow over time. IPServerOne Customer Portal allows account owners and system administrators to seamlessly scale up cloud instance disk capacity directly through the management console. This feature enables you to expand your available storage on-demand without recreating your server or experiencing extended downtime. By following this guide, you can quickly increase your server storage to handle larger files, databases, and application data whenever your system reaches its capacity limits.
Prerequisites
- Access to the IPServerOne Customer Portal
- Portal user account with instances created or with privileges
- Basic knowledge of operating system disk partition management (Windows Disk Management or Linux LVM/parted)
Step-by-step guide:
Step 1: Access to instance managing site
- Login to the [Customer Portal].
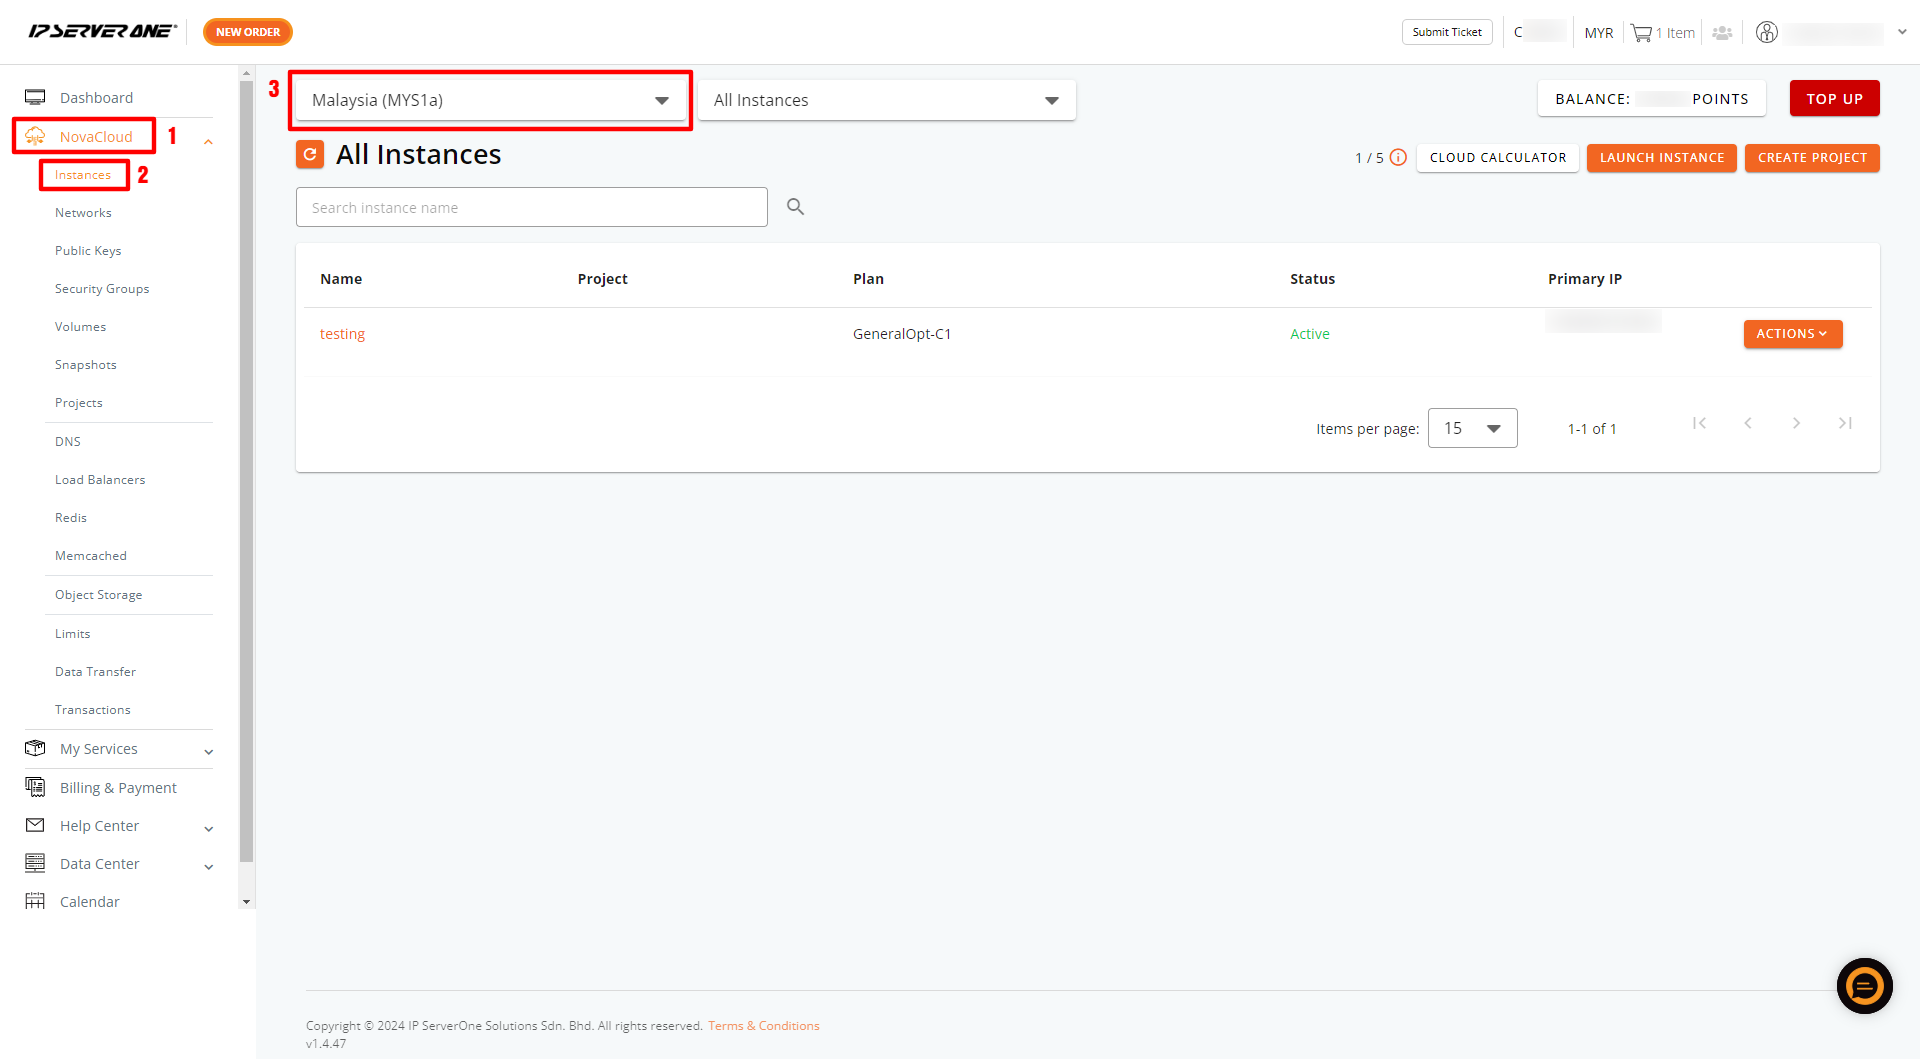
- Navigate to NovaCloud, and click the dropdown next to Instances.
- Select the region where your instance is hosted, then choose the instance you want to resize.
Step 2: Extending the volume storage
- Ensure your instance is stopped before proceeding with the volume extension.
- To stop the instance, select the instance, click the Actions dropdown, and then click the Stop button.
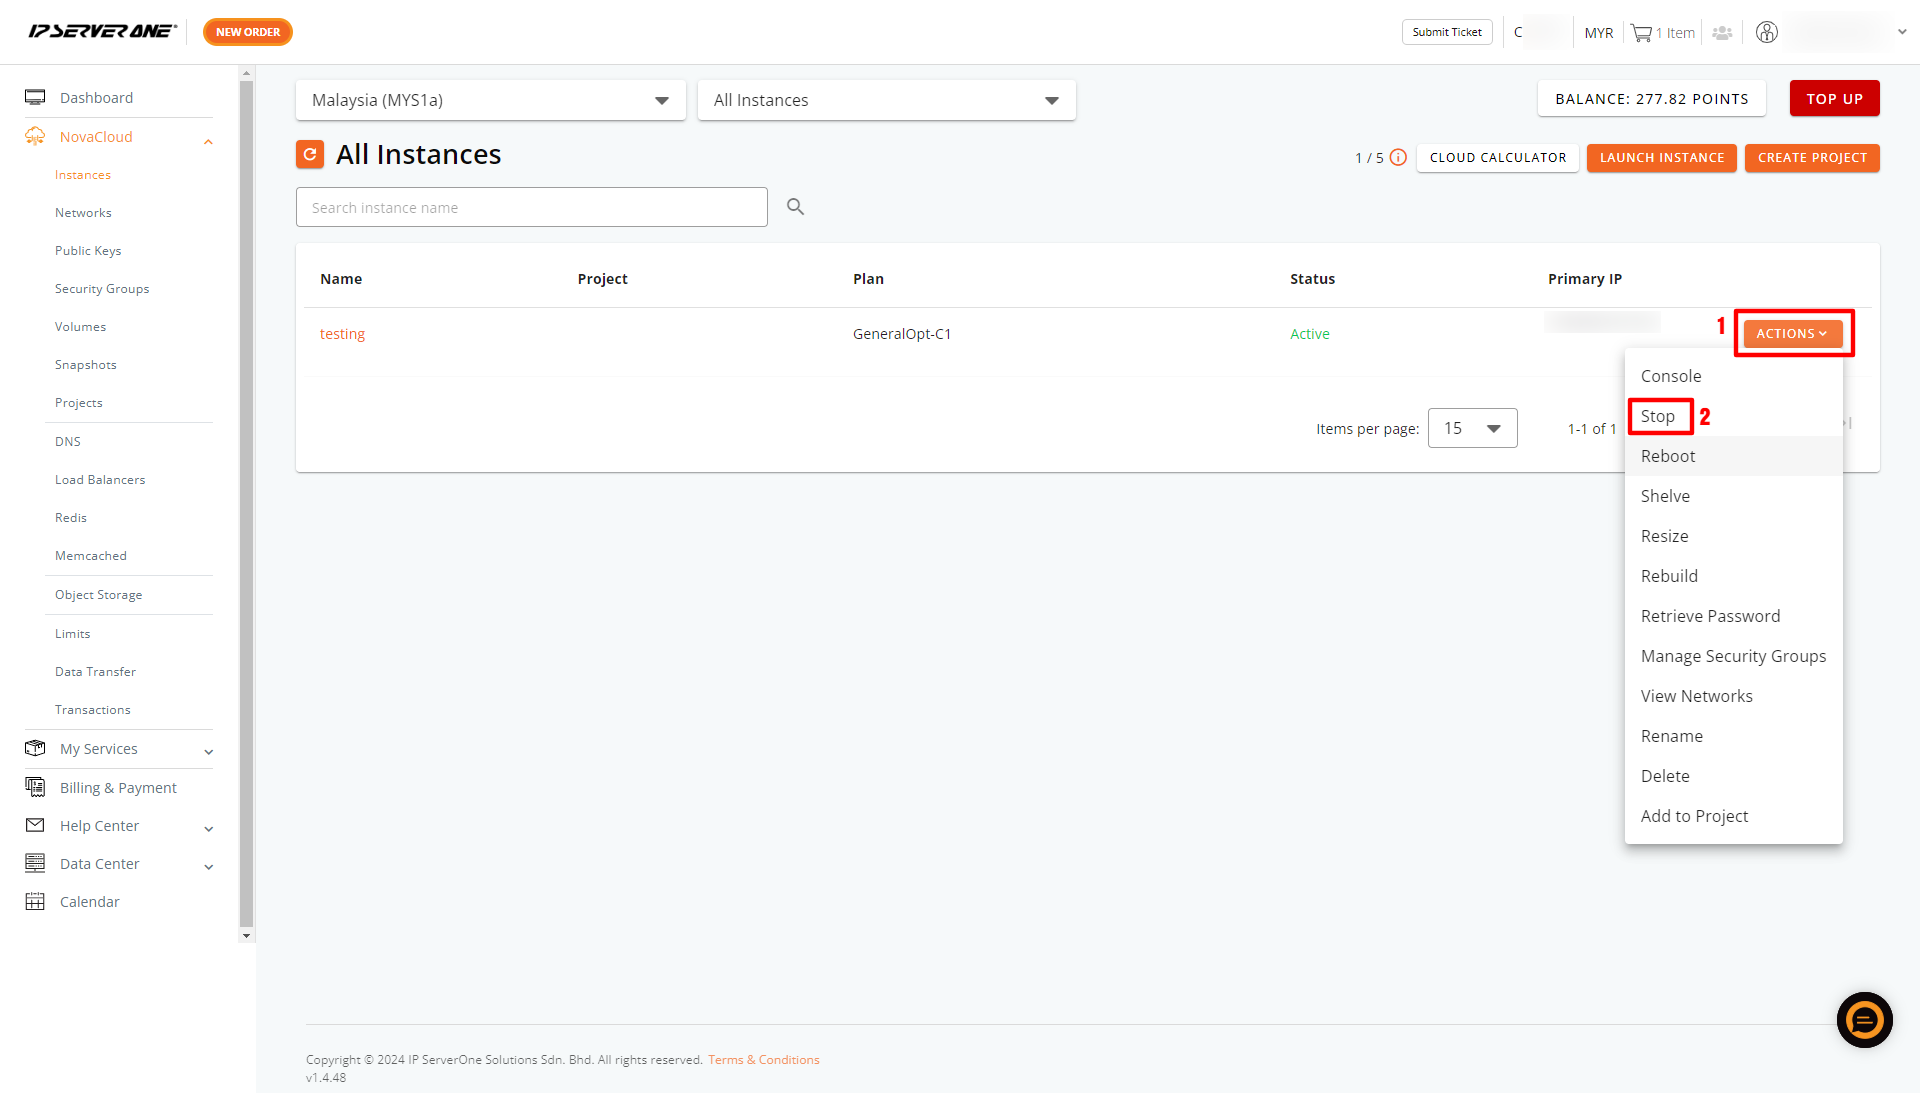
- Once the instance is stopped, you can proceed with extending its volume.
Important Note ⚠️: Kindly take note that the storage expansion is irreversible. Once the volume storage is extended, you were not allowed to reduce.
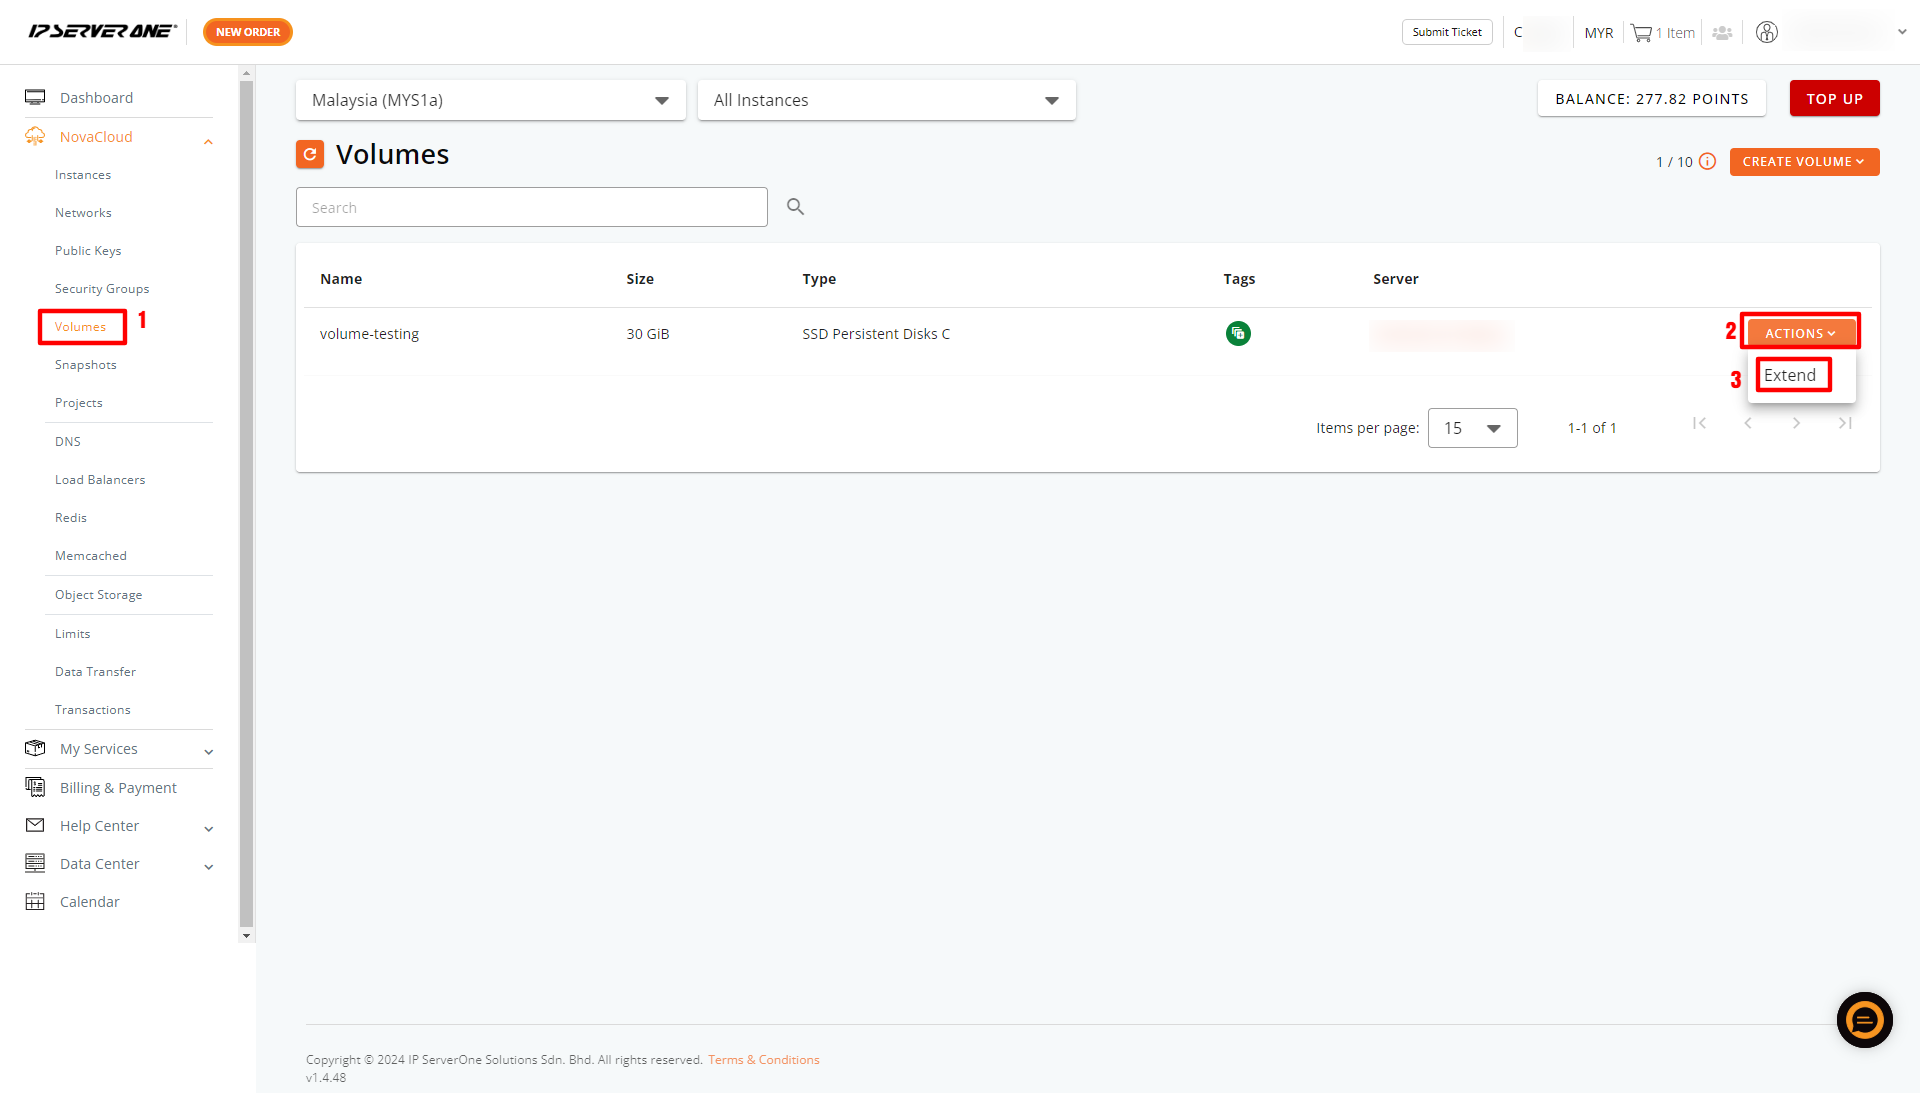
- Go to Volumes, locate your instance, and click the Actions button. From the dropdown, select Extend.
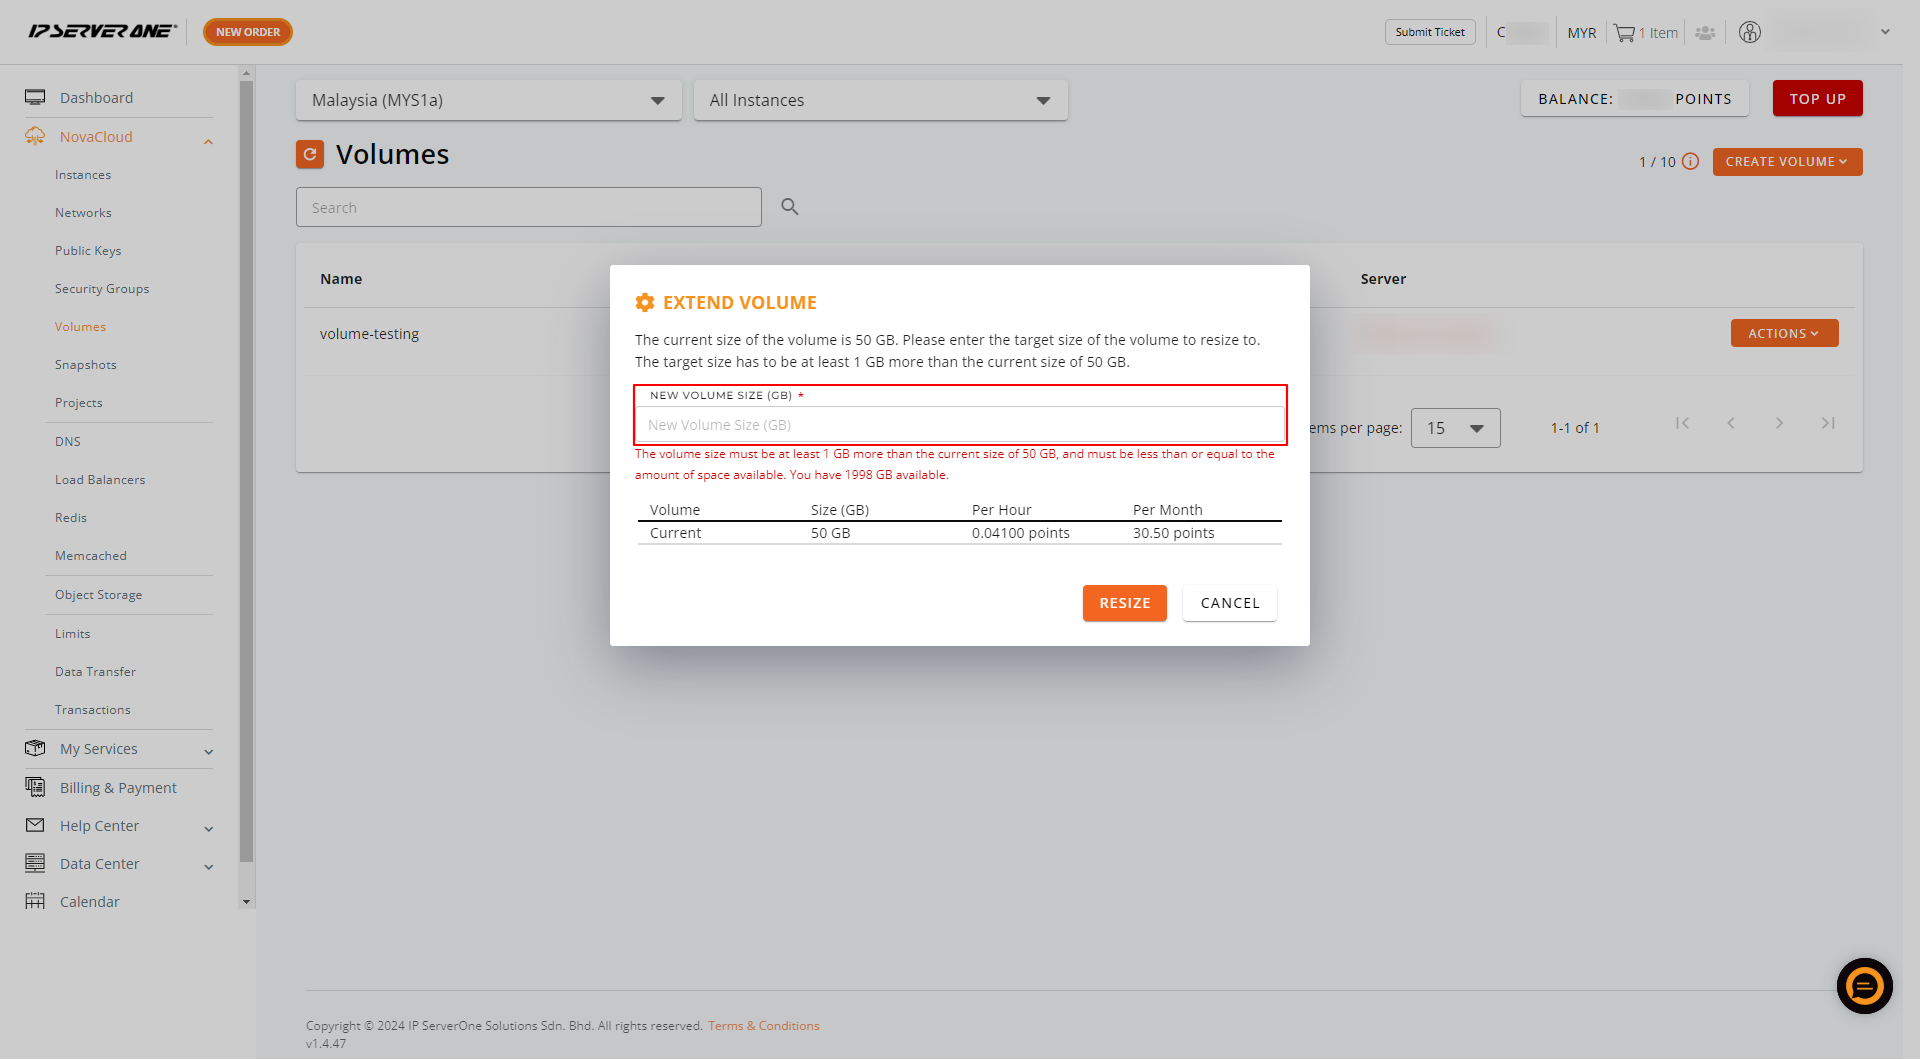
- Enter the desired volume size and click the Resize button. The changes will apply within 15 minutes.
Step 3: Extend the partition within the Operating System
- After the volume storage is extended, it needs to be extended in OS level. To extend the partition in the instance, refer to the guidance for extending partition below:
- For Linux Instances – [How to extend partition for Linux Server]
- For Windows Instances – [How to extend partition for Windows Server]
Conclusion
By following these steps, your instance’s volume will be successfully extended to the specified size, providing you with additional storage space. After resizing, it’s recommended to monitor your instance to ensure everything functions correctly.
For additional assistance or if you encounter any issues, please contact our support team at support@ipserverone.com.
Article updated on 27 July 2027 by Johnny