
Search Our Database
How to Configure Firewall Policy in FortiGate
Introduction
A Firewall Policy in FortiGate regulates incoming and outgoing network traffic based on configured security rules to protect internal network infrastructure from unauthorized external access. Network administrators configure firewall policies whenever new services or Virtual IPs are deployed to grant appropriate access to legitimate users while securing internal assets. This guide demonstrates how to properly set up and enable a standard IPv4 firewall policy using the FortiGate Web Management Console (GUI) in a standard corporate or hosting environment.
Prerequisite
- Access to FortiGate firewall with Administrator privileges
- Basic knowledge of IP routing, firewall interfaces, and network addresses
Step-by-step guide
Step 1: Access Firewall Policy Section
- Log in to your FortiGate Web Management Console.
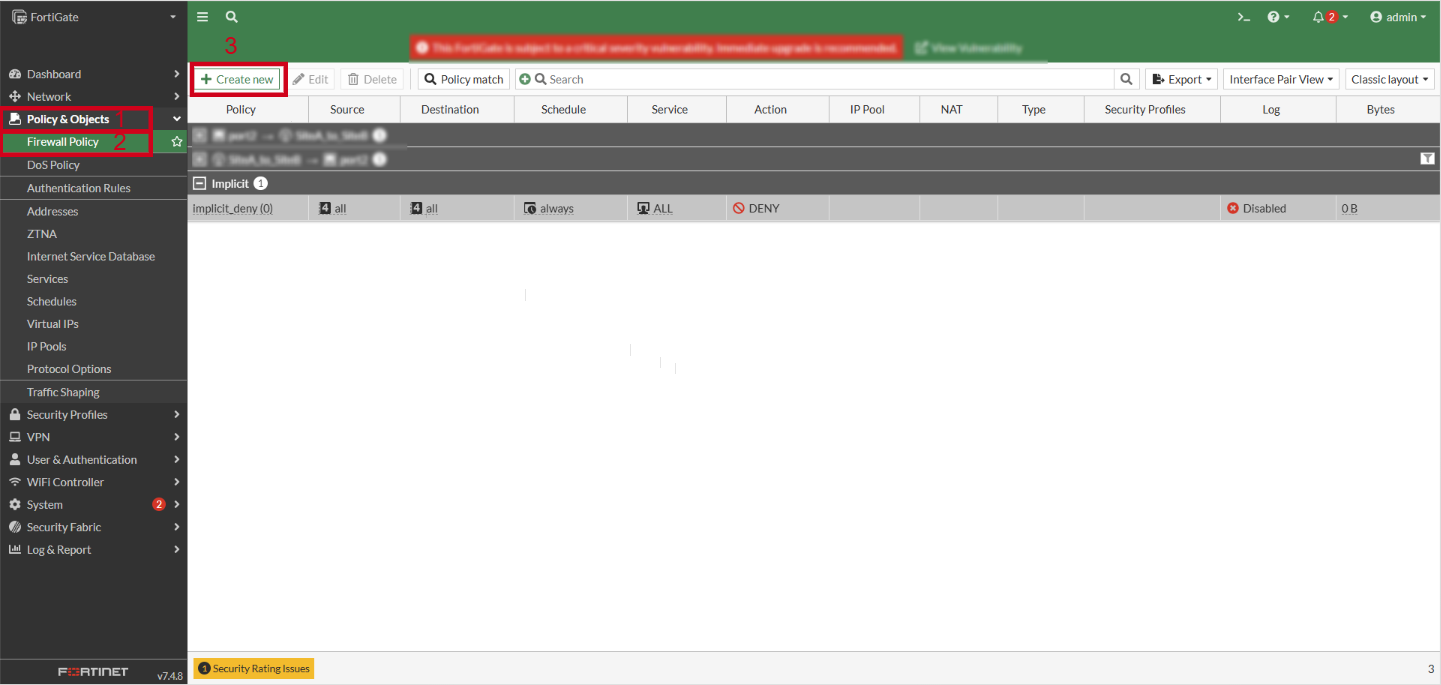
- On the left navigation menu, expand Policy & Objects and click Firewall Policy.
- Click Create New at the top of the policy list.
Step 2: Create and Configure the New Policy
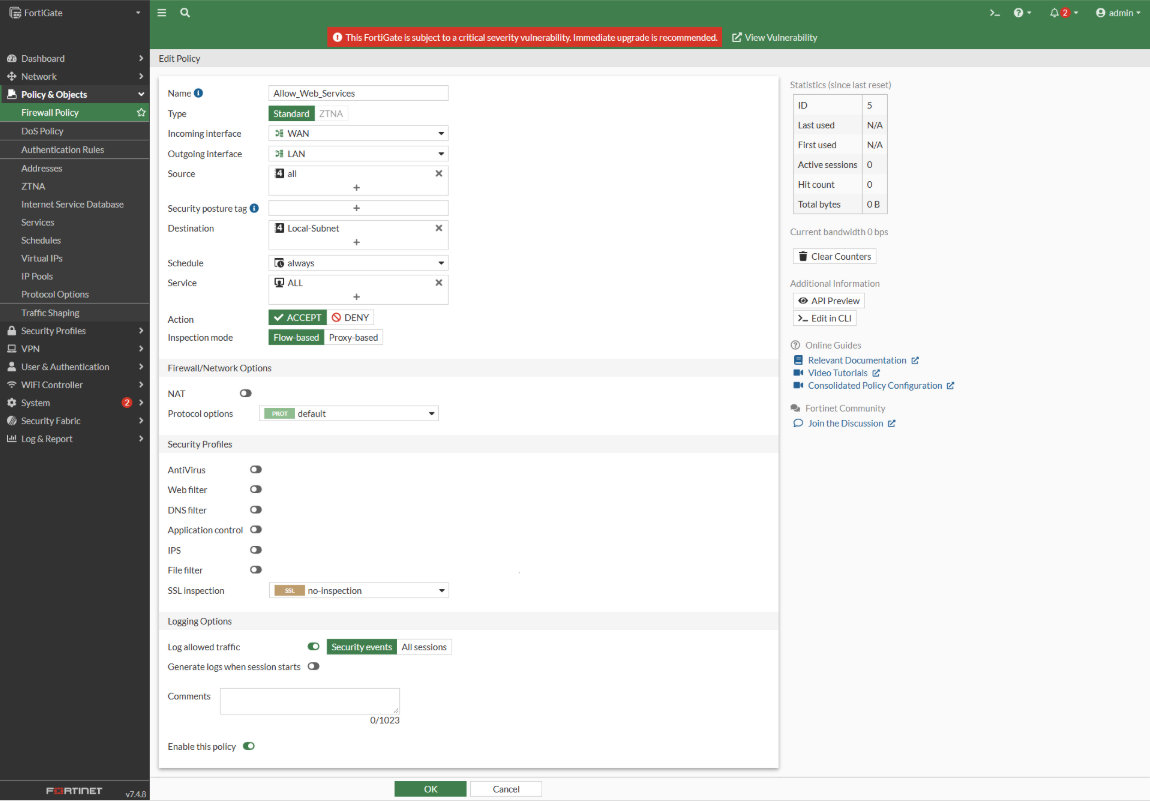
- Enter a descriptive Name for the policy (e.g., Allow_Web_Services).
- Set the Incoming Interface (e.g., WAN) and Outgoing Interface (e.g., LAN).
- Select Source (e.g., all) and Destination (e.g., Local-Subnet).
- Set Service to the required port/protocol (e.g., HTTP, HTTPS, or ALL).
- Set Action to ACCEPT.
- Ensure Enable this policy is toggled on.
- Click OK at the bottom to save the configuration.
Step 3: Verify Policy
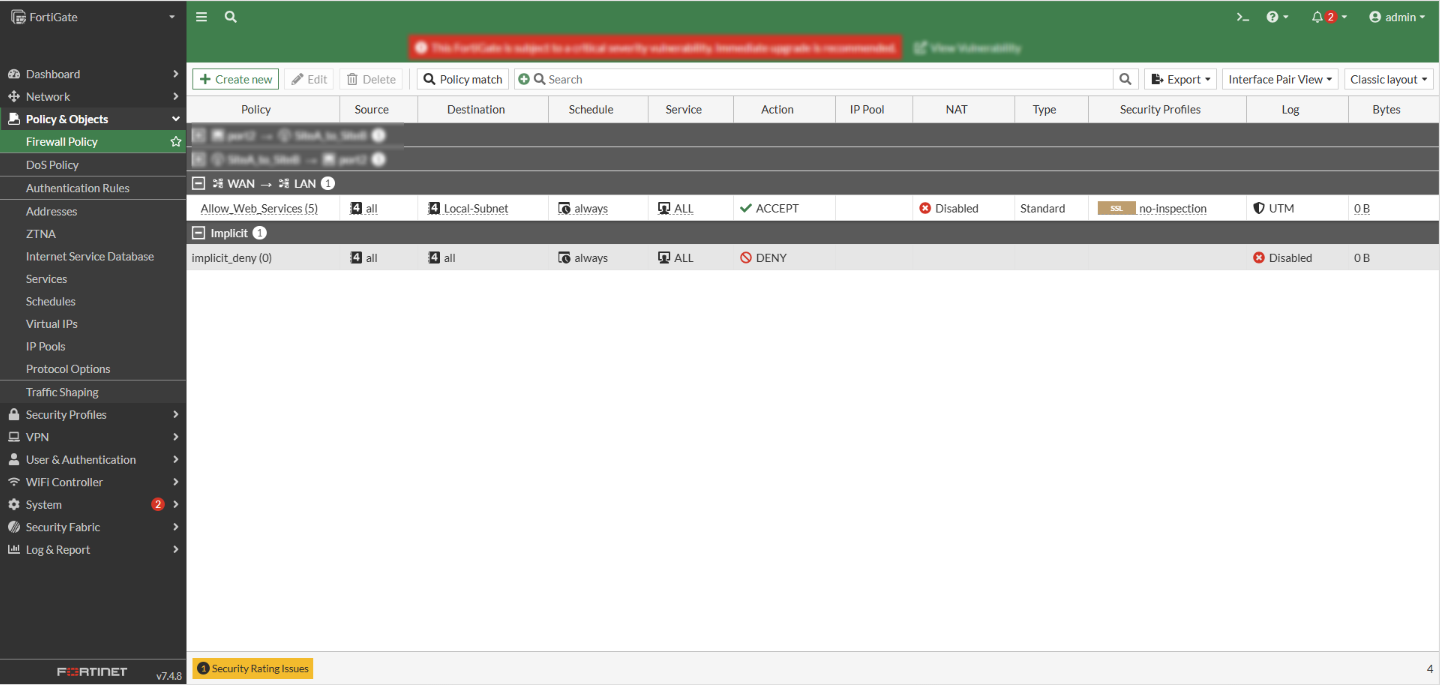
- Verify that the newly created policy appears active in the firewall policy list
Conclusion
By following this guidance, you can successfully configure firewall policy in FortiGate using GUI to control and secure network traffic flow to your internal services.
For additional assistance or if you encounter any issues, please contact our support team at support@ipserverone.com.