
Search Our Database
How To Manage User In Fortigate
Introduction
Managing user definitions and user groups in FortiGate via the Graphical User Interface (GUI) allows network administrators to create individual user accounts and consolidate them into administrative groups for identity-based access control. This setup is ideal for enterprise networks and branch offices requiring targeted security rules, department-based web filtering, or SSL VPN access policies. Network administrators can complete this configuration at any time directly through the FortiGate web console to ensure streamlined account management, precise policy enforcement, and enhanced network security across the organization.
Prerequisite
- Access to FortiGate GUI with Admin privilege
- Basic knowledge of IP networking and user authentication concepts
Step-by-step guide
Log in to FortiGate GUI
- Open a web browser and enter your FortiGate IP address.
- Enter your admin credentials and click Login.
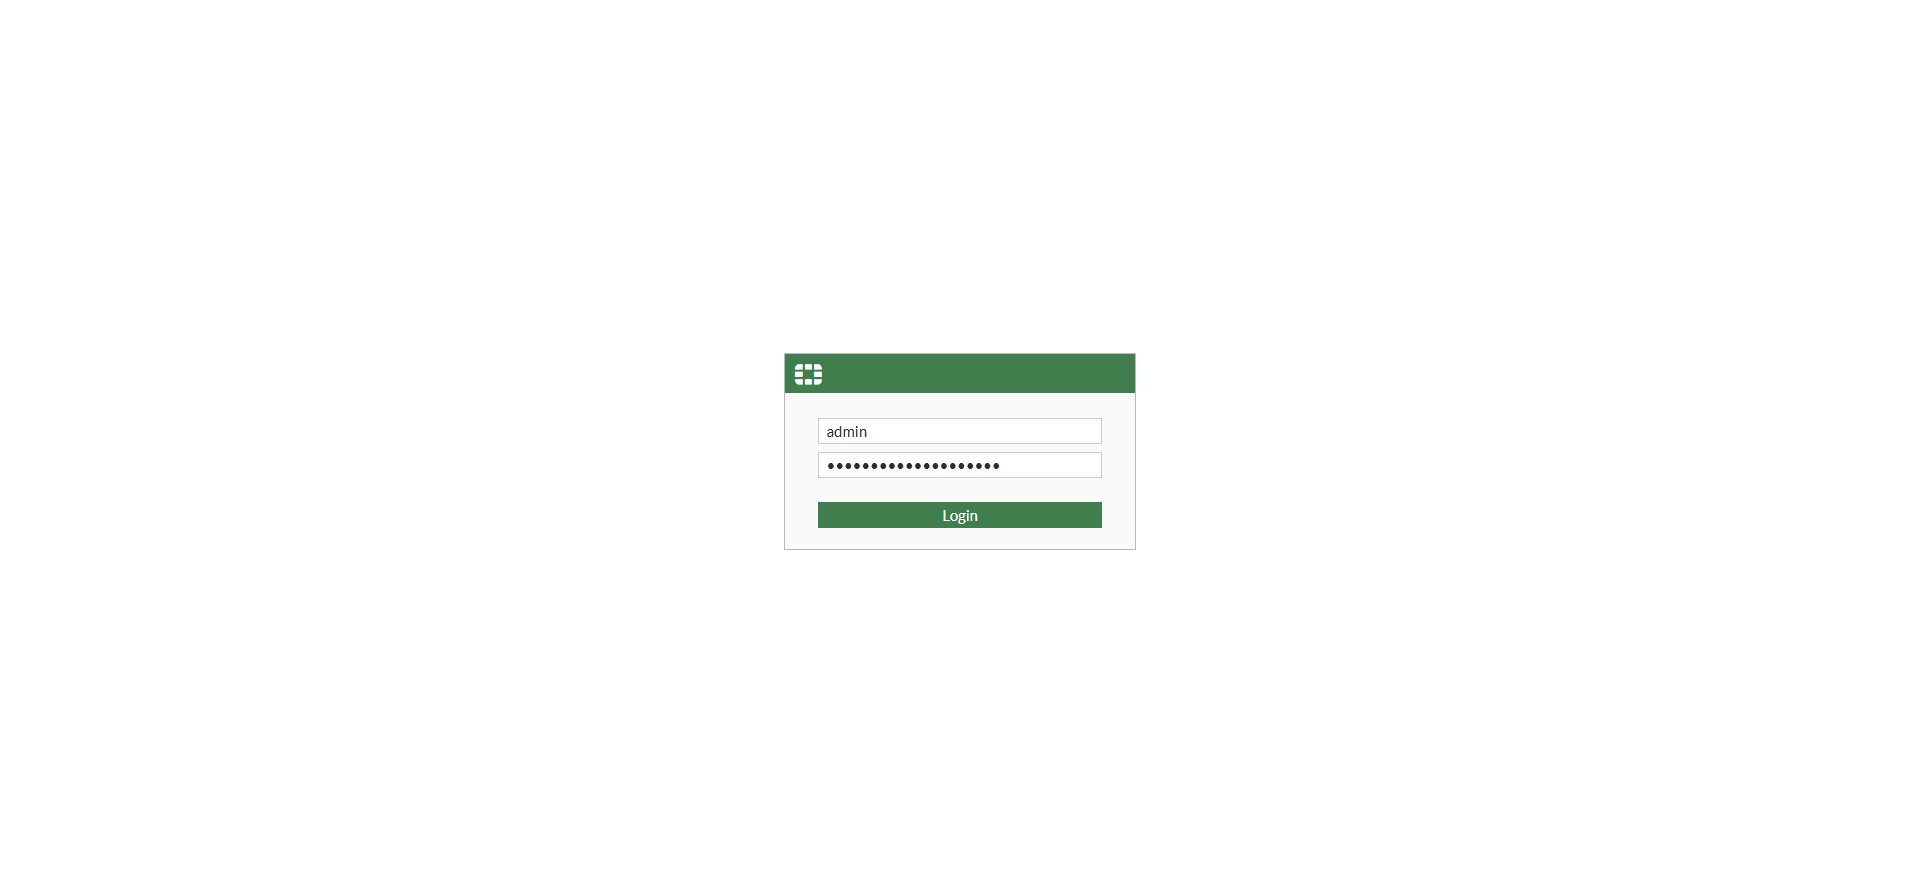
This guide demonstrates how to create user definition using Graphical User Interface (GUI).
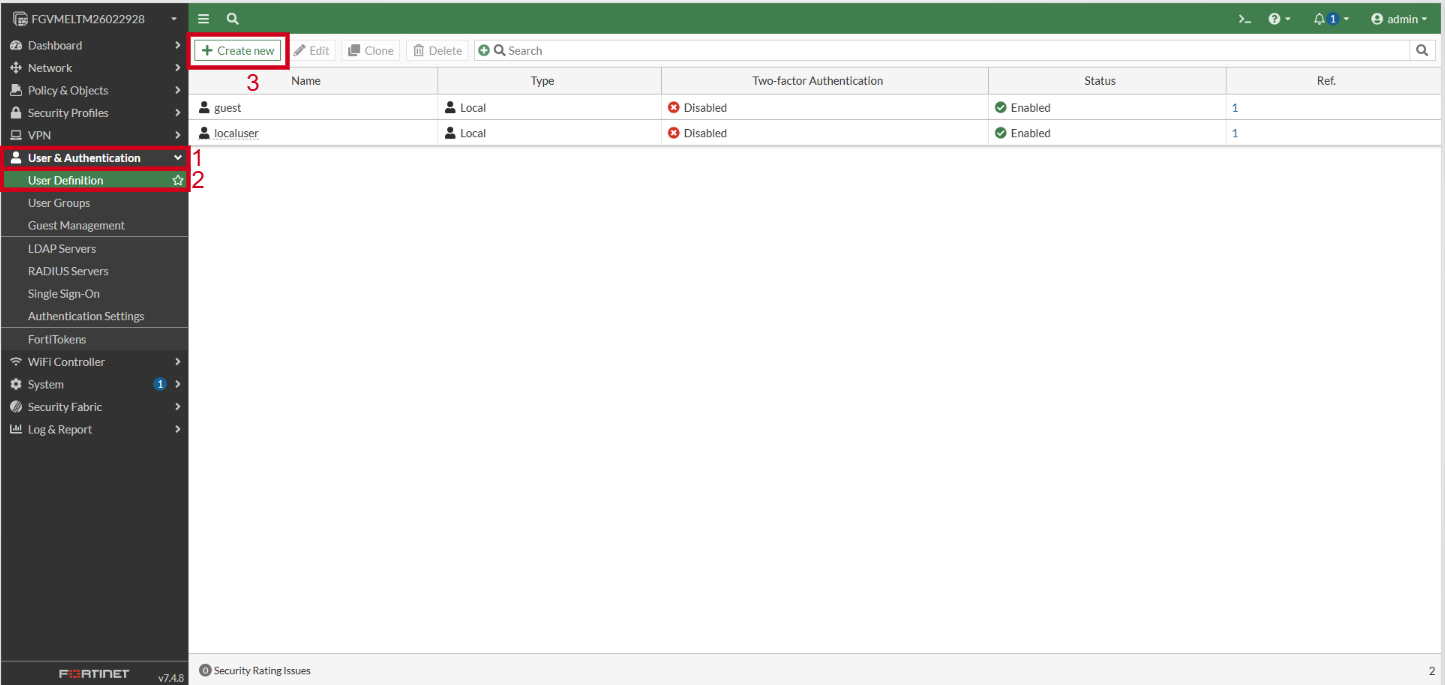
Step 1: Access User Definition settings
- Log in to your FortiGate GUI using administrator credentials.
- On the left navigation menu, click User & Authentication.
- Select User Definition from the options.
- Click Create New at the top menu bar to begin creating a new user account.
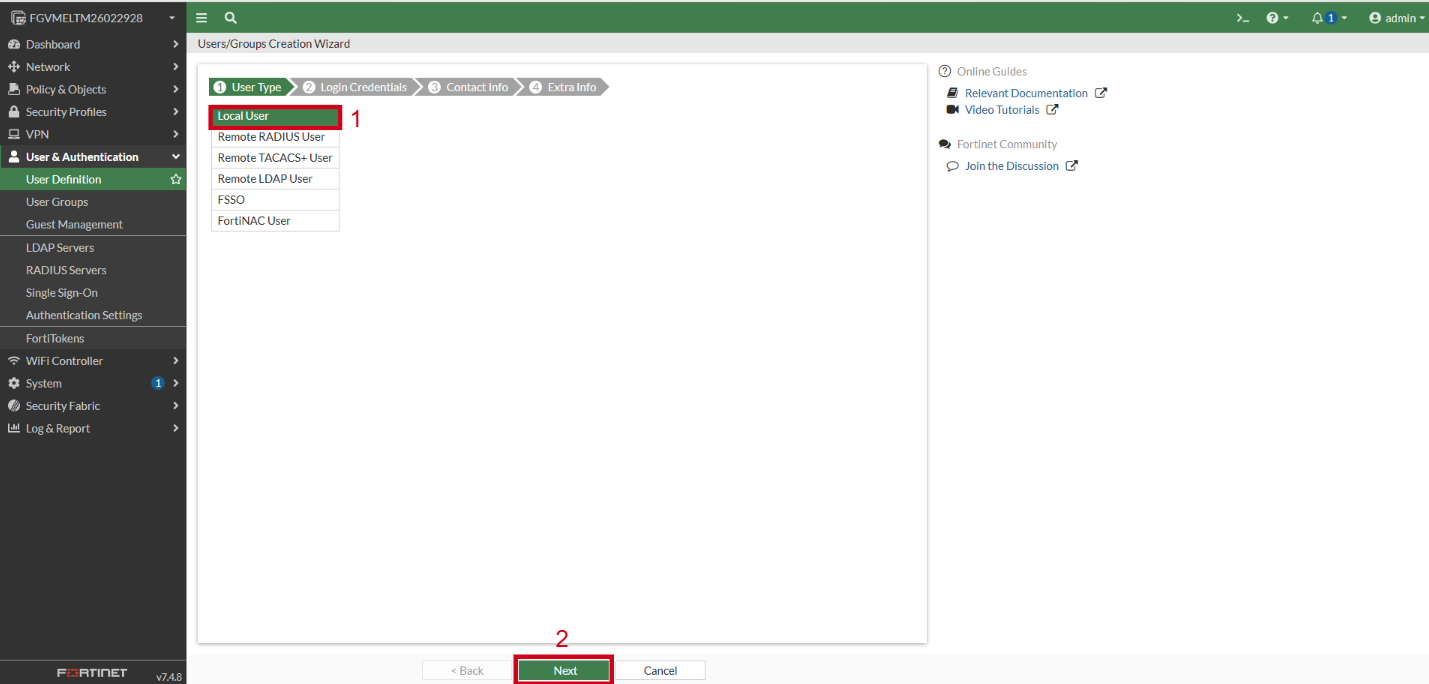
Step 2: Select user type
- Select Local User as the user type.
- Click Next to proceed to the credentials page.
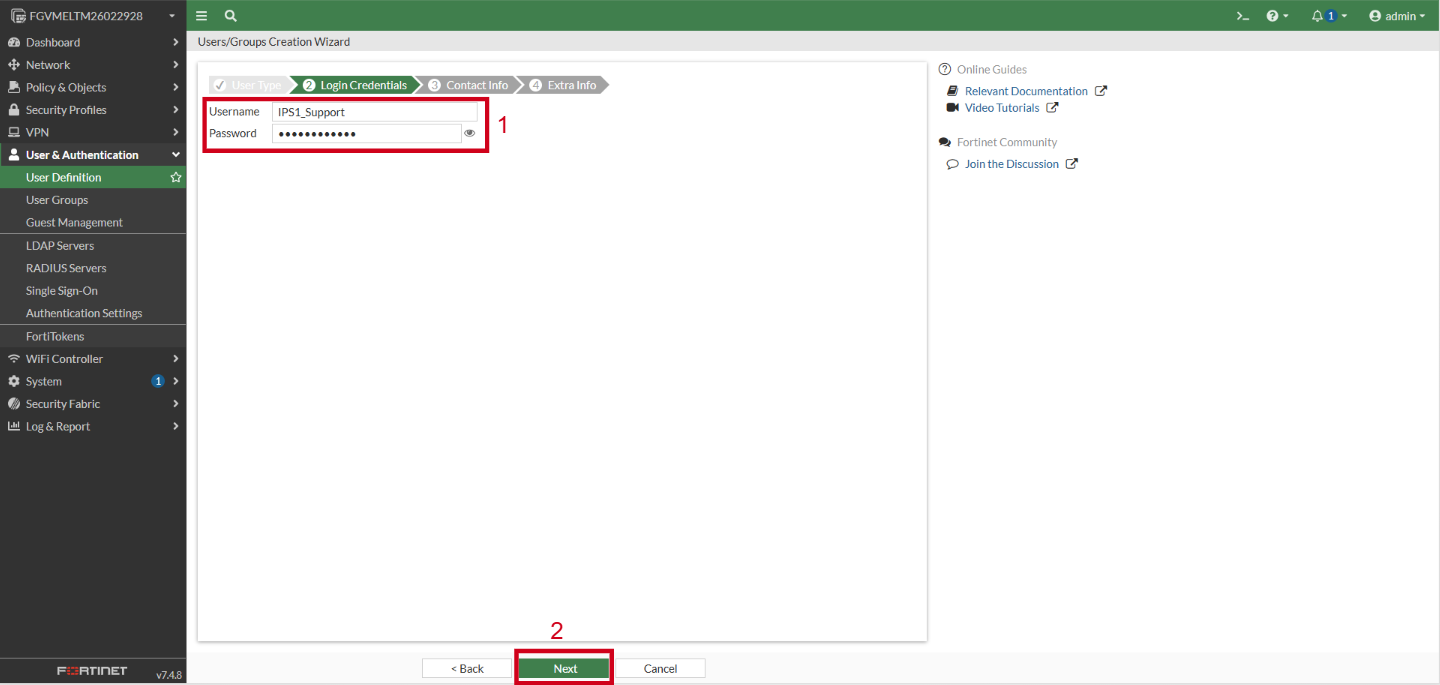
Step 3: Define user credentials
- Enter the desired Username in the provided field.
- Enter the Password for the account.
- Click Next to continue.
Step 4: Configure contact information and status
- Enter an Email Address if needed for two-factor authentication.
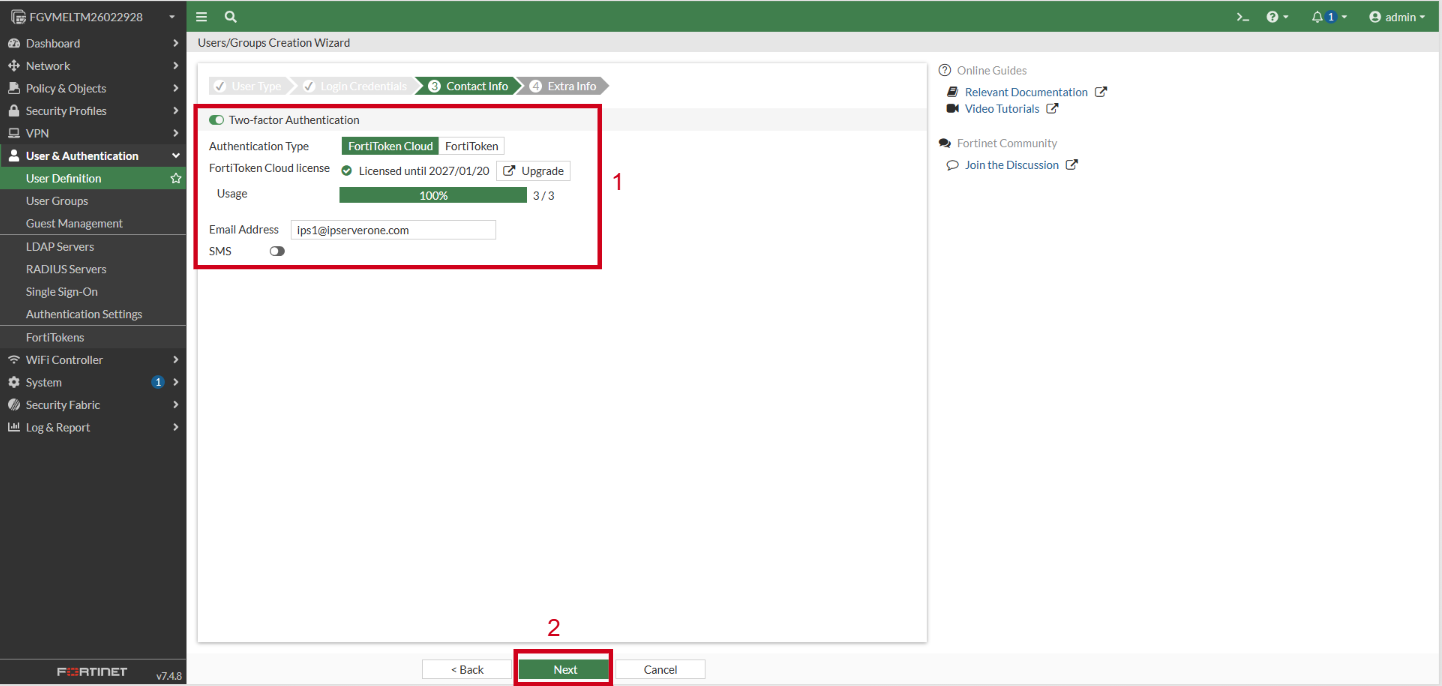
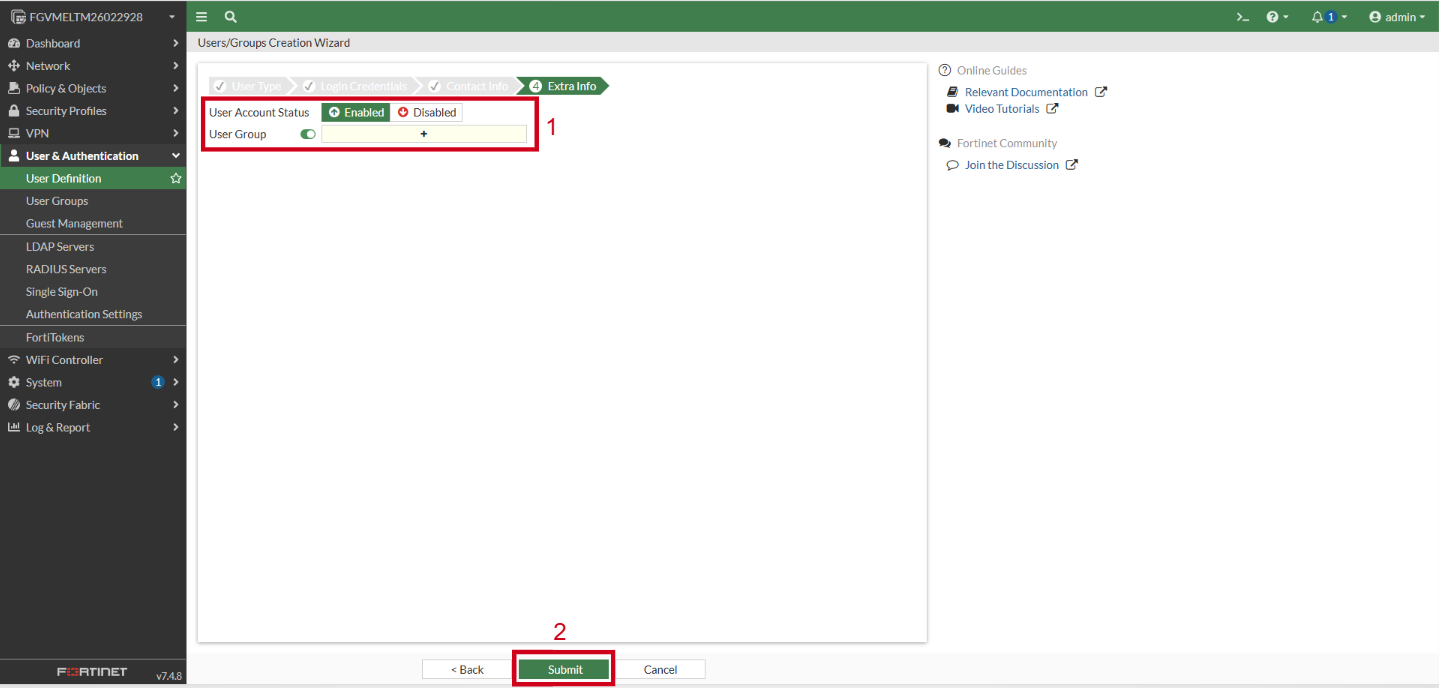
- Ensure the User Status switch is Enabled.
- Switch on the User Group toggle and select the user group if needed.
- Click Submit to complete the user creation process.
Step 5: Verify new user account
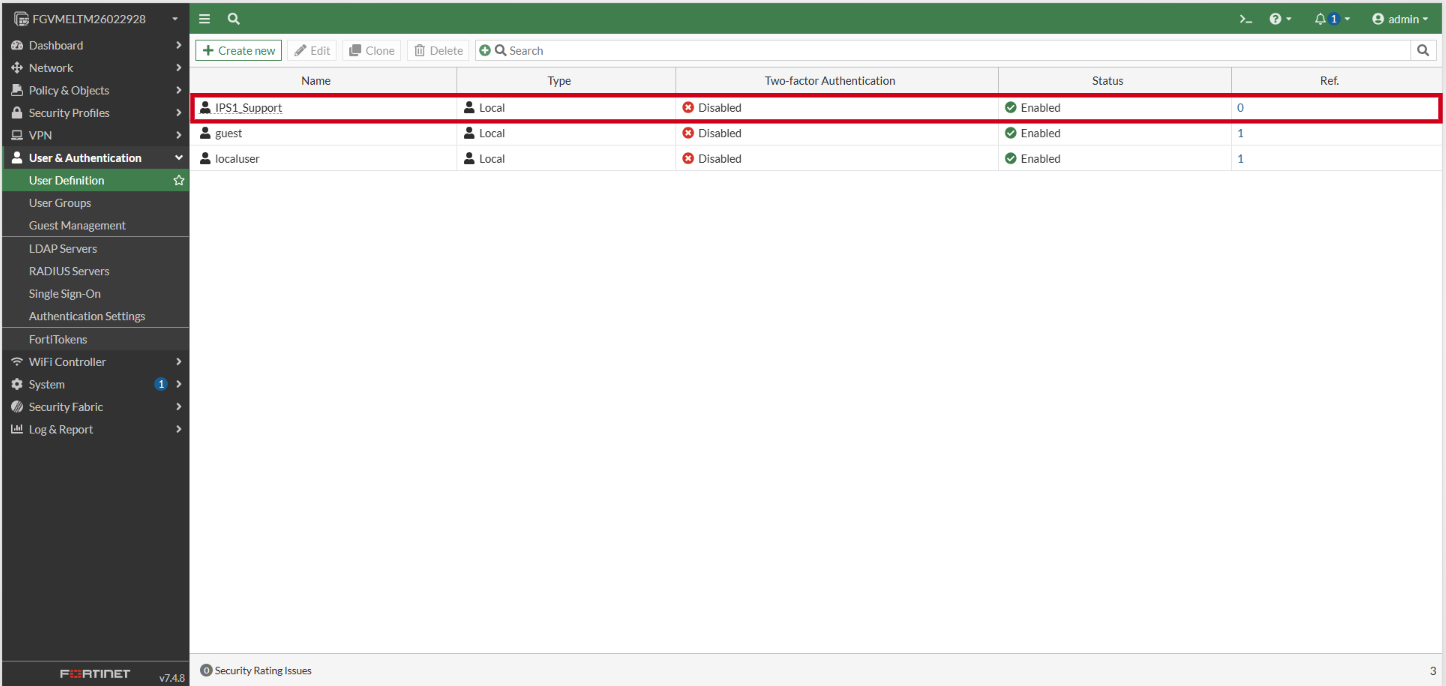
- Return to User & Authentication and select User Definition.
- Confirm that the newly created user account appears active in the user list.
This guide demonstrates how to create user definition using Command Line Interface (CLI).
- Open your preferred SSH client (such as PuTTY) or launch the CLI console from the FortiGate web interface.
- Method 1: Login via SSH Client. Refer the following KB: [How to login to your Linux Server via SSH]
- Method 2: Login via CLI console from the FortiGate web interface. Log into your FortiGate web interface and click on the CLI icon at the top right.
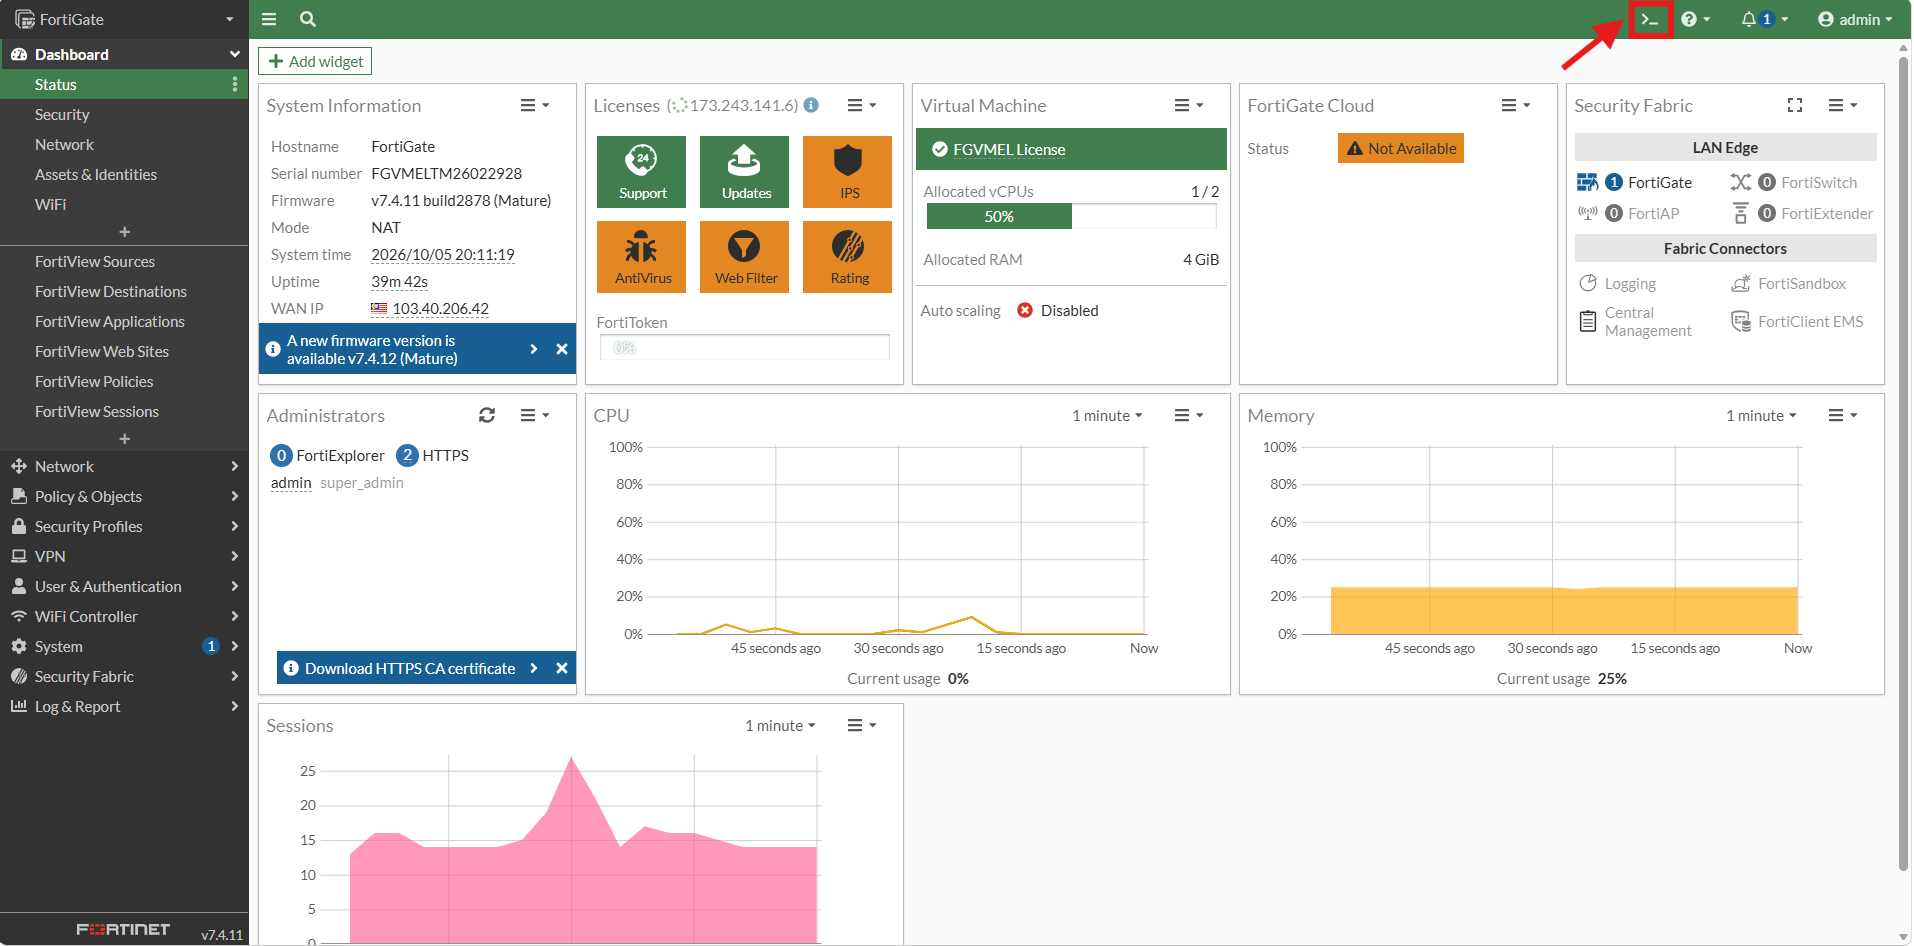
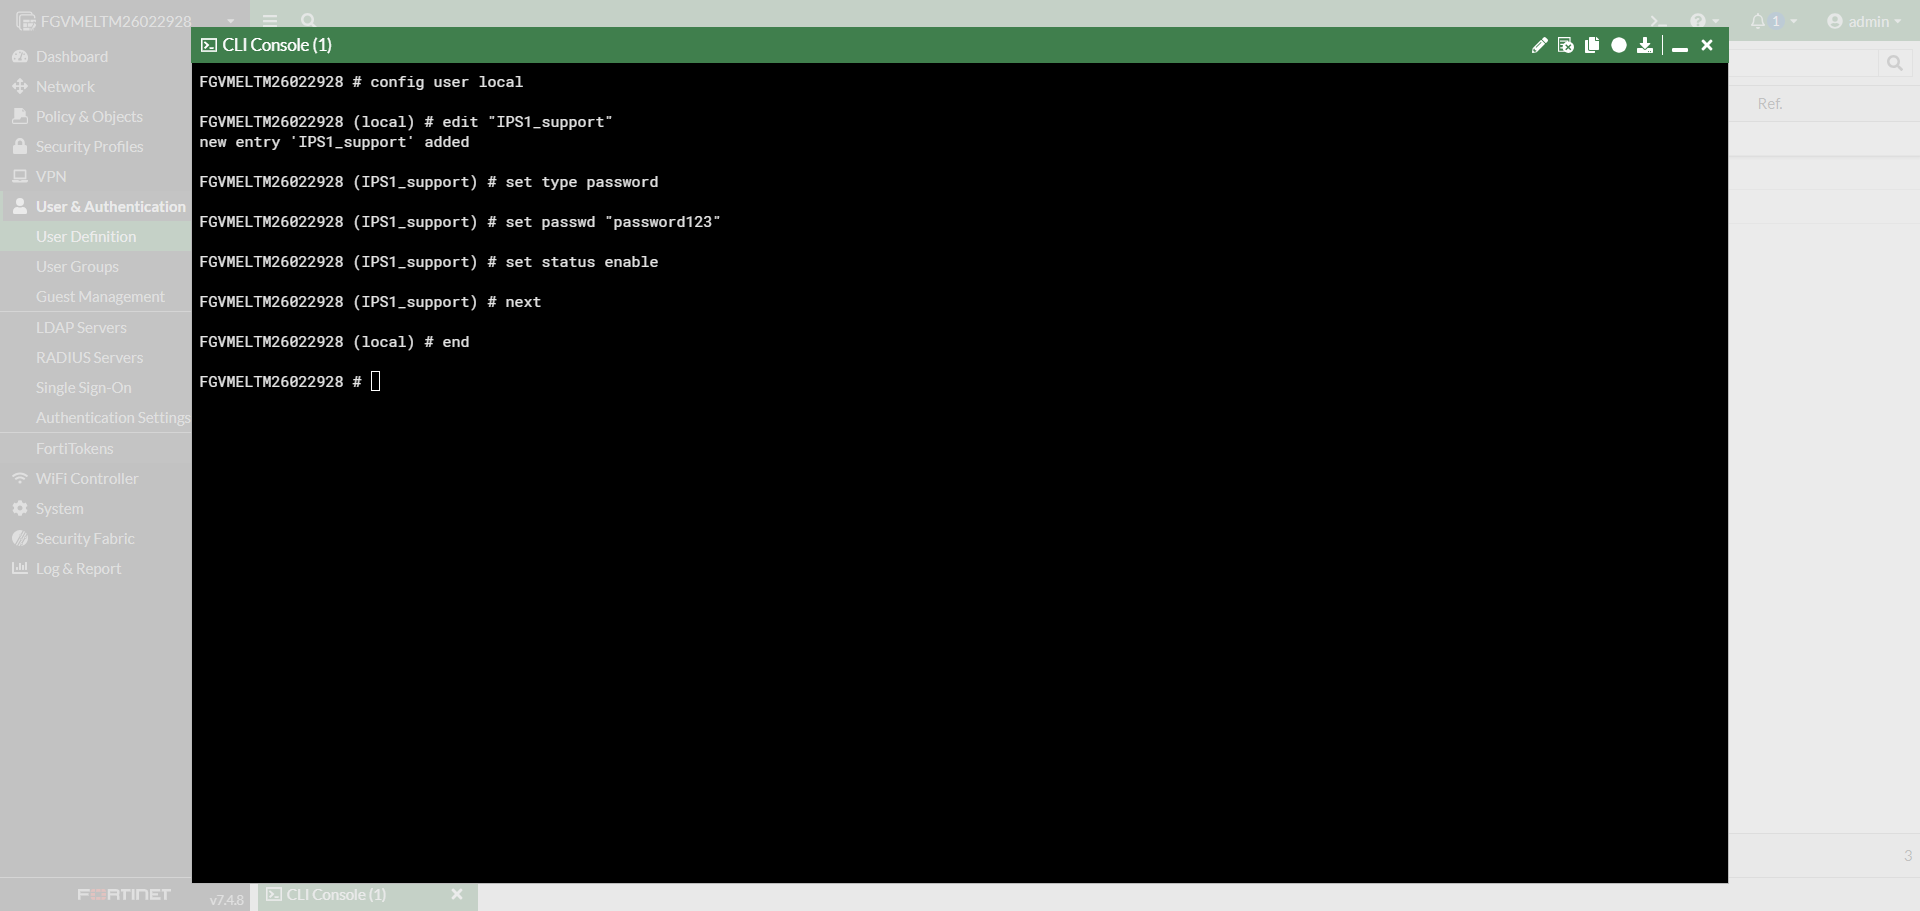
- Execute the following commands to create a local user account and set a password:
config user local
edit "IPS1_support"
set type password
set passwd "YourSecurePassword123"
set status enable
next
end
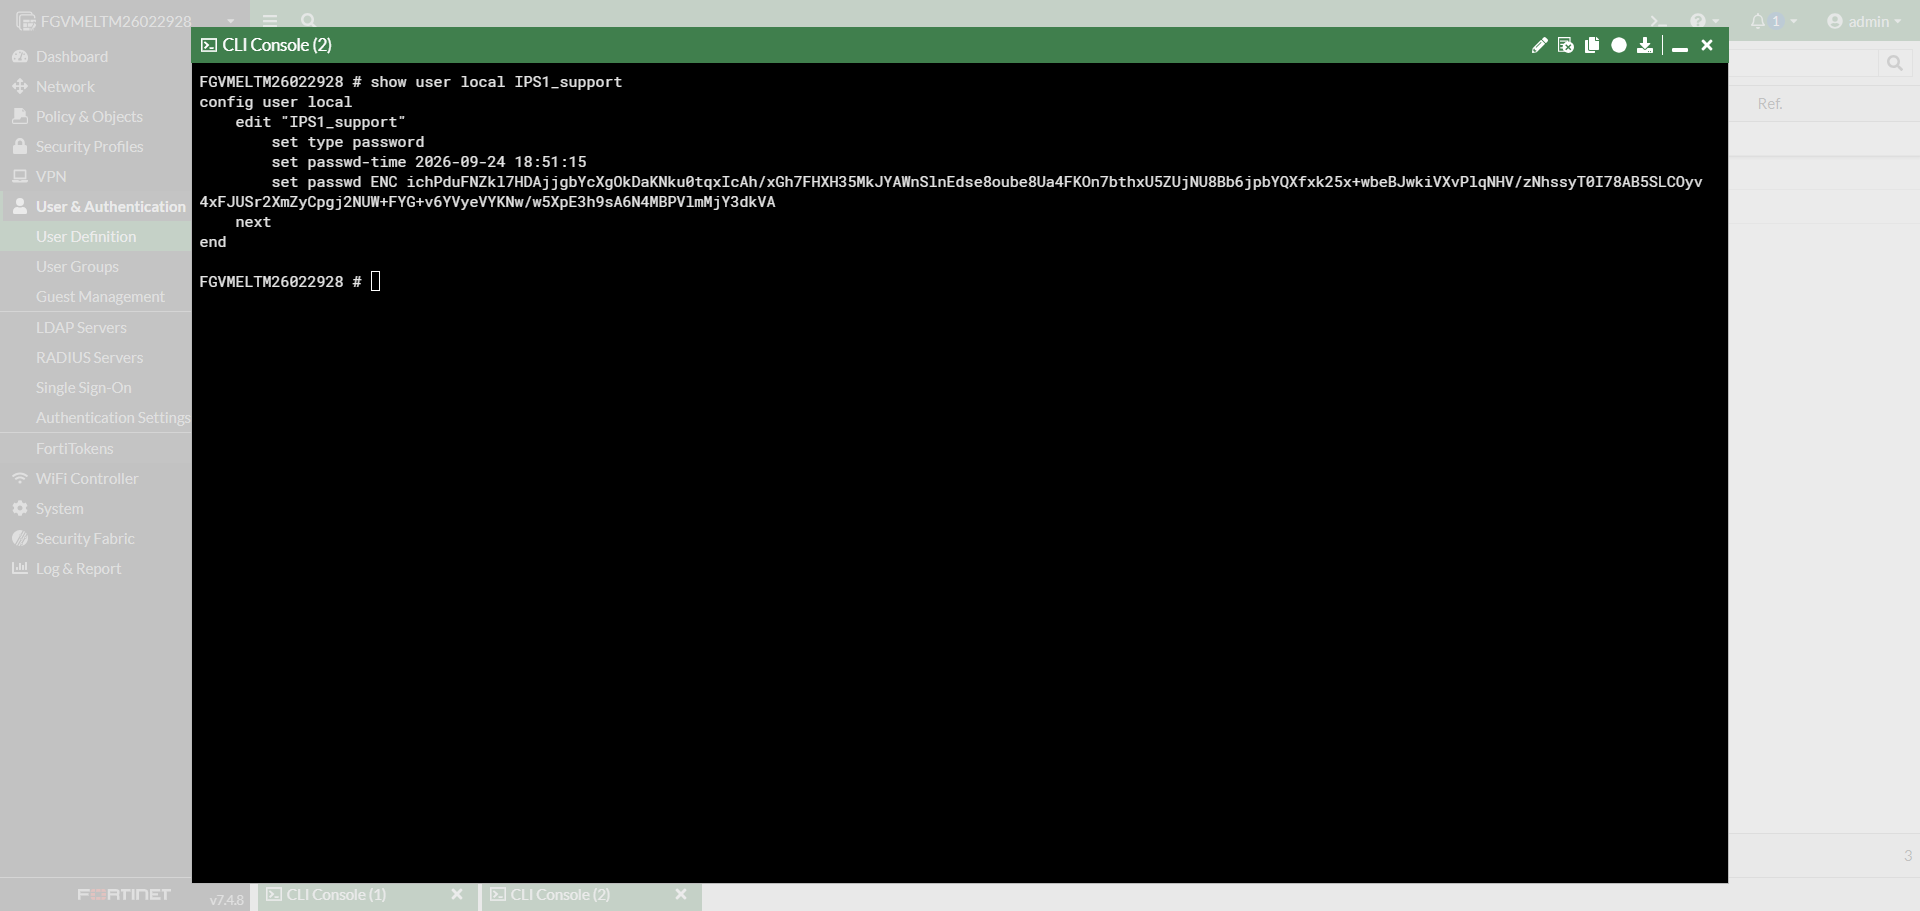
- Verify the newly created user account configuration by executing the following command:
show user local IPS1_support
This guide demonstrates how to create user group using Graphical User Interface (GUI).
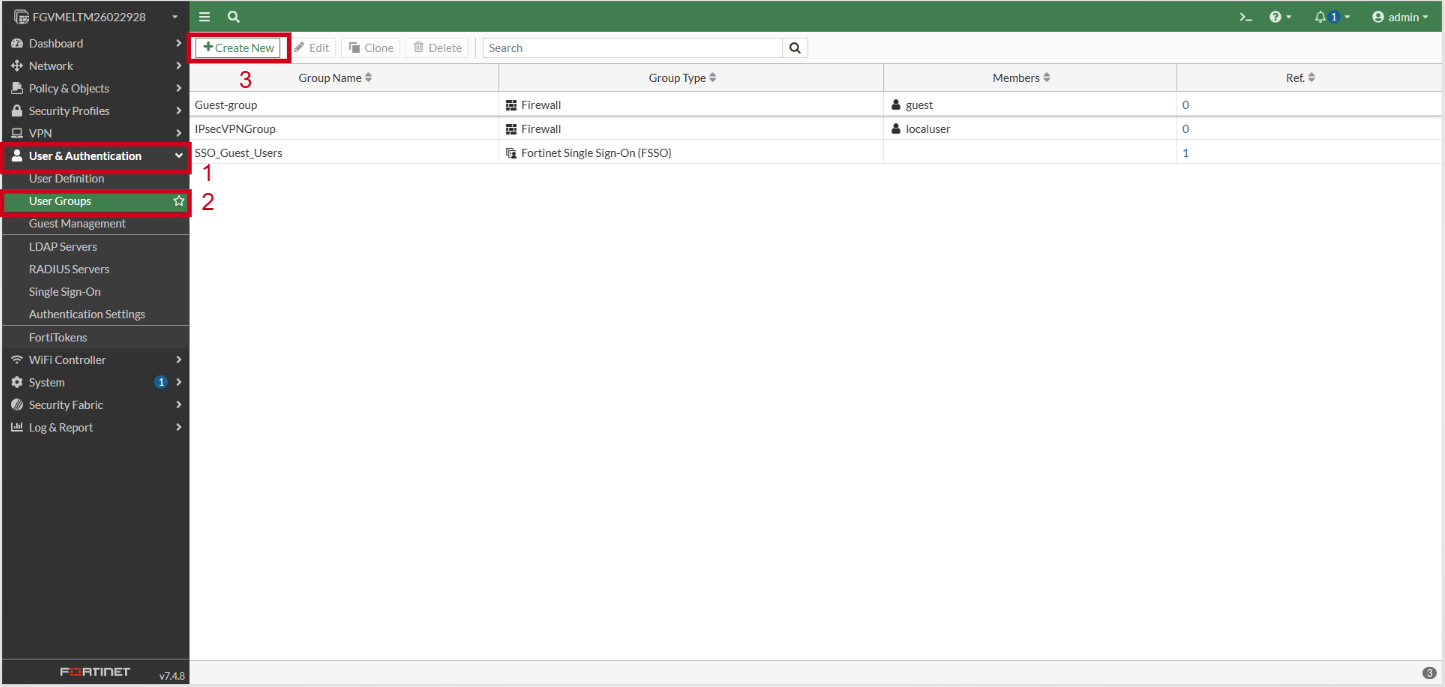
Step 1: Access User Groups settings
- Log in to your FortiGate GUI using administrator credentials.
- On the left navigation menu, click User & Authentication.
- Select User Groups from the expanded options.
- Click Create New at the top menu bar to add a new group entry.
Step 2: Configure group parameters and members
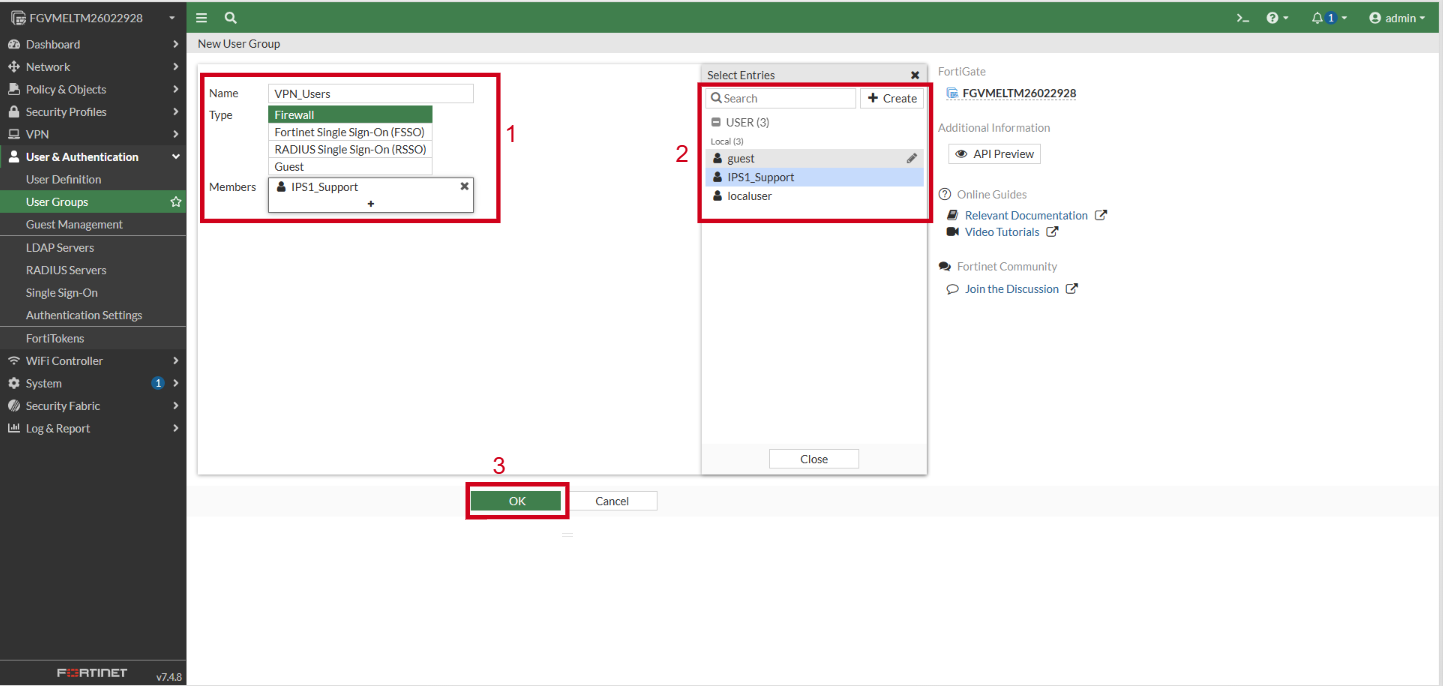
- In the Name field, enter a descriptive group name (e.g., VPN_Users or Marketing_Group).
- Set the Type to Firewall to create a local security group.
- Under Members, click the + icon to select existing local user accounts or remote servers.
- Select the target users from the side panel to add them to the group list.
- Click OK to save the user group configuration.
Step 3: Verify new user group
- Return to User & Authentication and select User Groups.
- Confirm that the newly created user group appears in the list with the correct member count.
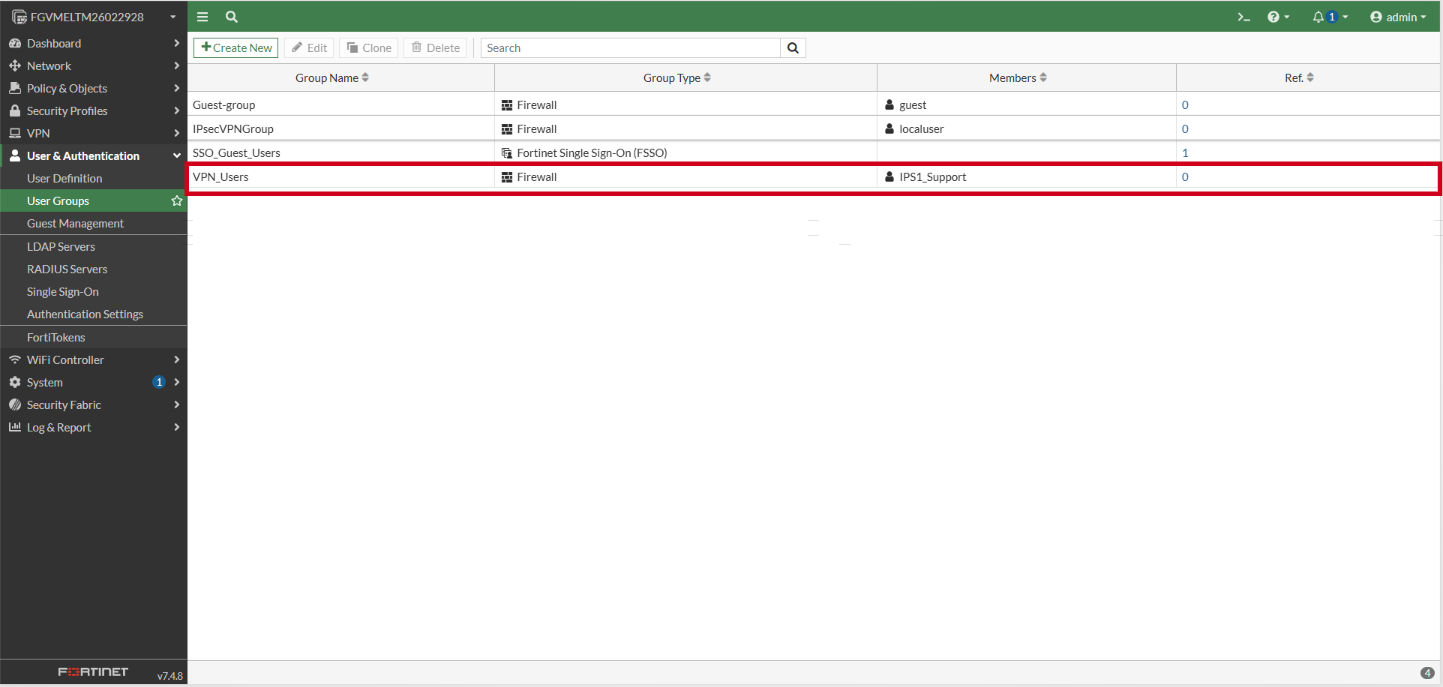
This guide demonstrates how to create user groups using Command Line Interface (CLI).
- Open your preferred SSH client (such as PuTTY) or launch the CLI console from the FortiGate web interface.
- Method 1: Login via SSH Client. Refer the following KB: [How to login to your Linux Server via SSH]
- Method 2: Login via CLI console from the FortiGate web interface. Log into your FortiGate web interface and click on the CLI icon at the top right.
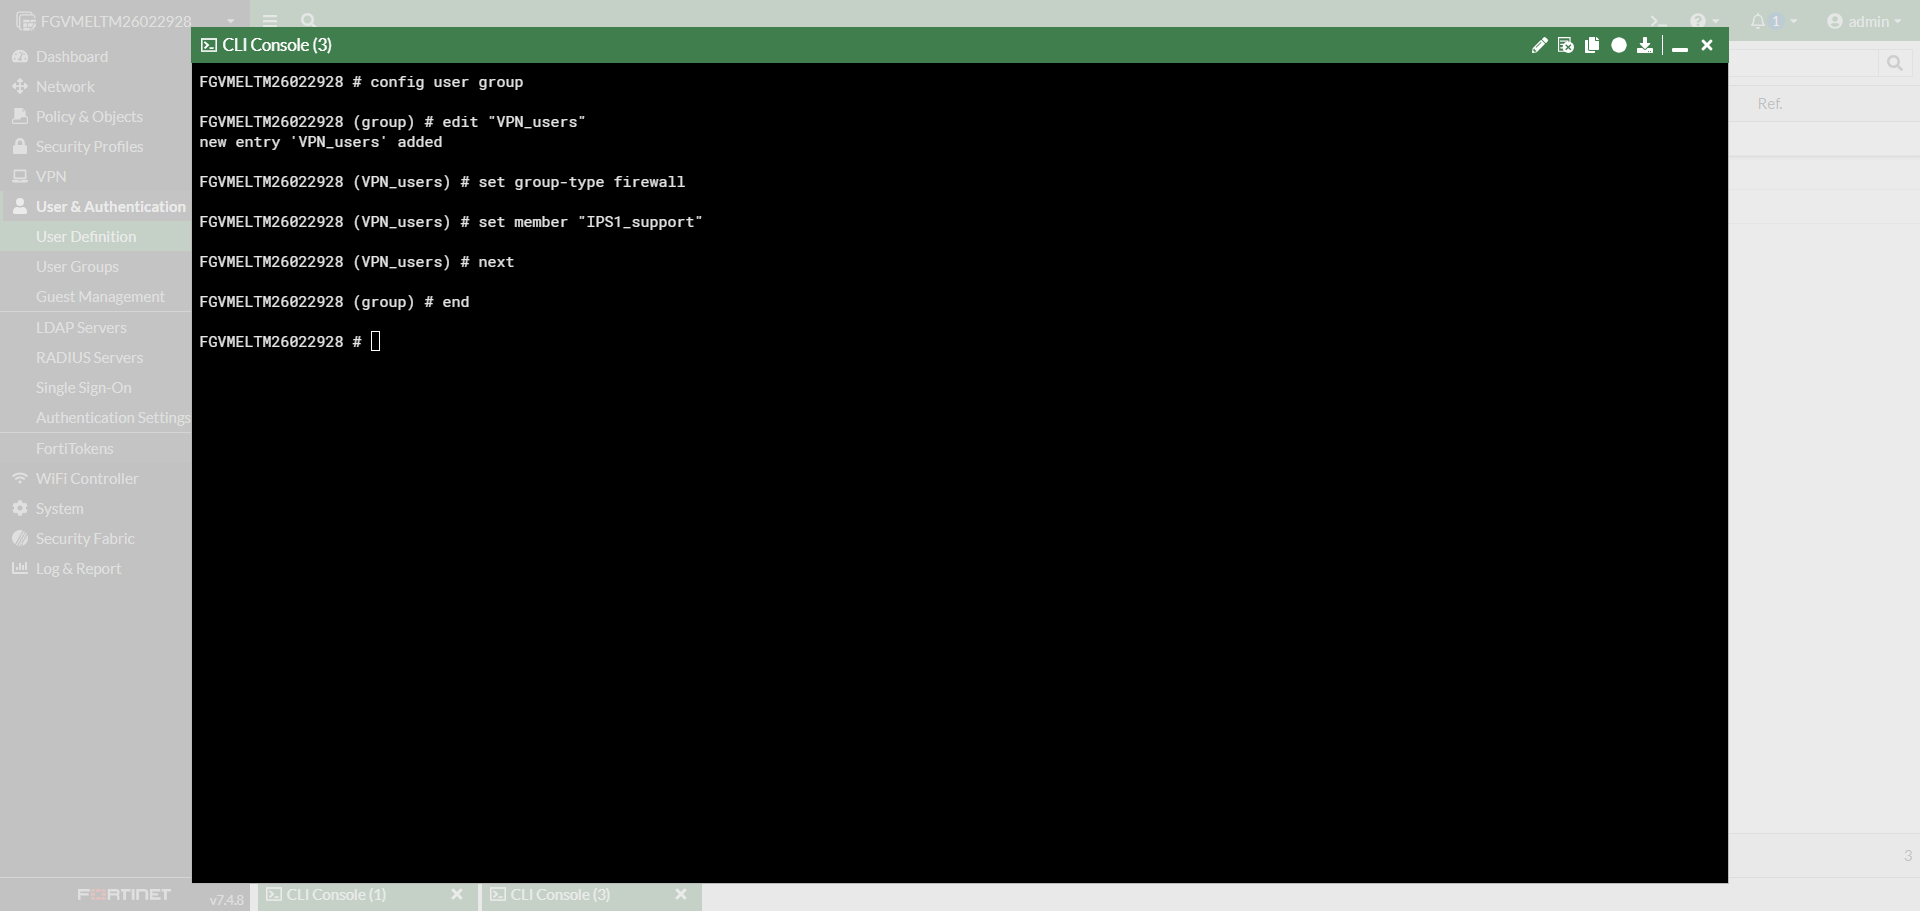
- Execute the following commands to create a user group and assign member accounts:
config user group
edit "VPN_users"
set group-type firewall
set member "IPS1_support"
next
end
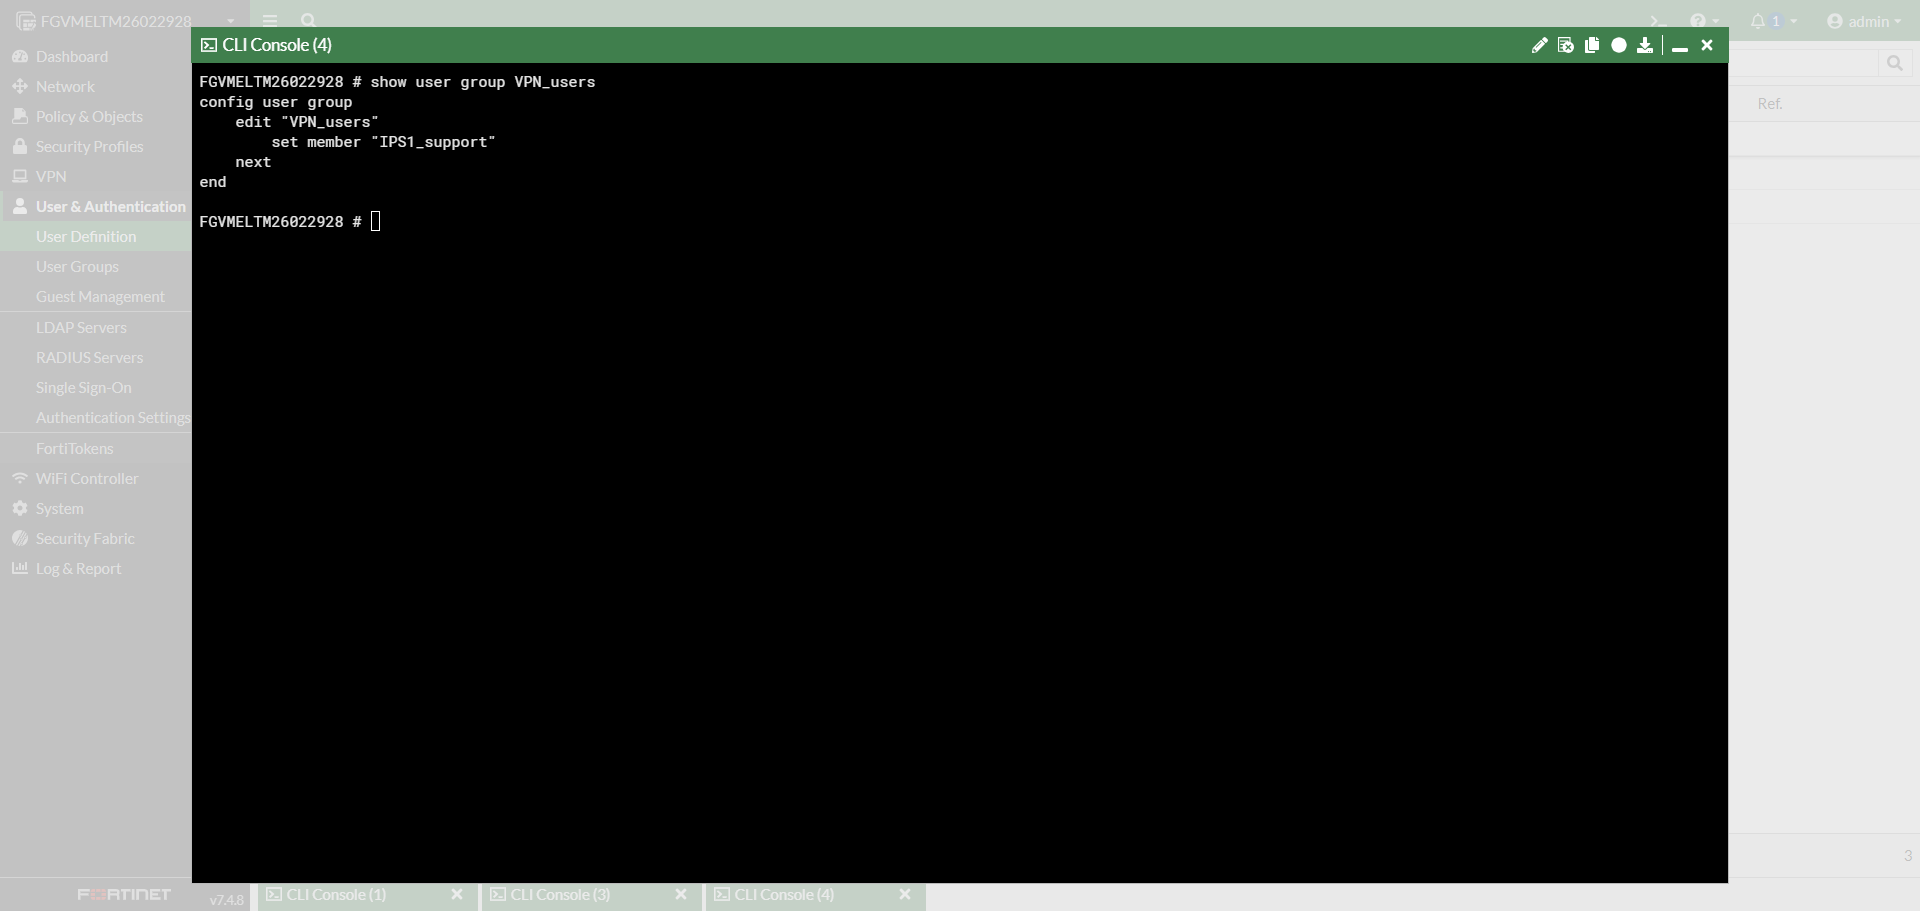
- Verify the user group configuration by executing the following command:
show user group VPN_Users
Conclusion
By following this guidance, you can successfully manage user definitions and user groups in FortiGate via GUI to manage network traffic routing effectively.
For additional assistance or if you encounter any issues, please contact our support team at support@ipserverone.com.