
Search Our Database
How to delete volume in Customer Portal
Introduction
Deleting a volume through the Customer Portal helps you manage your storage resources efficiently by removing volumes that are no longer needed. Volumes provide persistent storage for your cloud resources, but over time, unused volumes can accumulate and continue to incur charges. This guide will walk you through the process step-by-step, ensuring you can safely remove unwanted volumes within the Customer Portal environment.
Prerequisite
- Access to the Customer Portal where the volume is under
- An existing volume you wish to delete
- Ensure you have backed up any necessary data from the volume you intend to remove
- Ensure the volume is not attached to any NovaCloud instance
Important Note⚠️: This action is not reversible! Once a volume is deleted, it cannot be recovered. Kindly ensure the volume and its data are no longer needed before proceeding with the deletion.
Step-by-step guide
Step 1: Login to the Customer Portal
- Login to [IPServerOne Customer Portal].
Step 2: Navigate to the Volumes Section
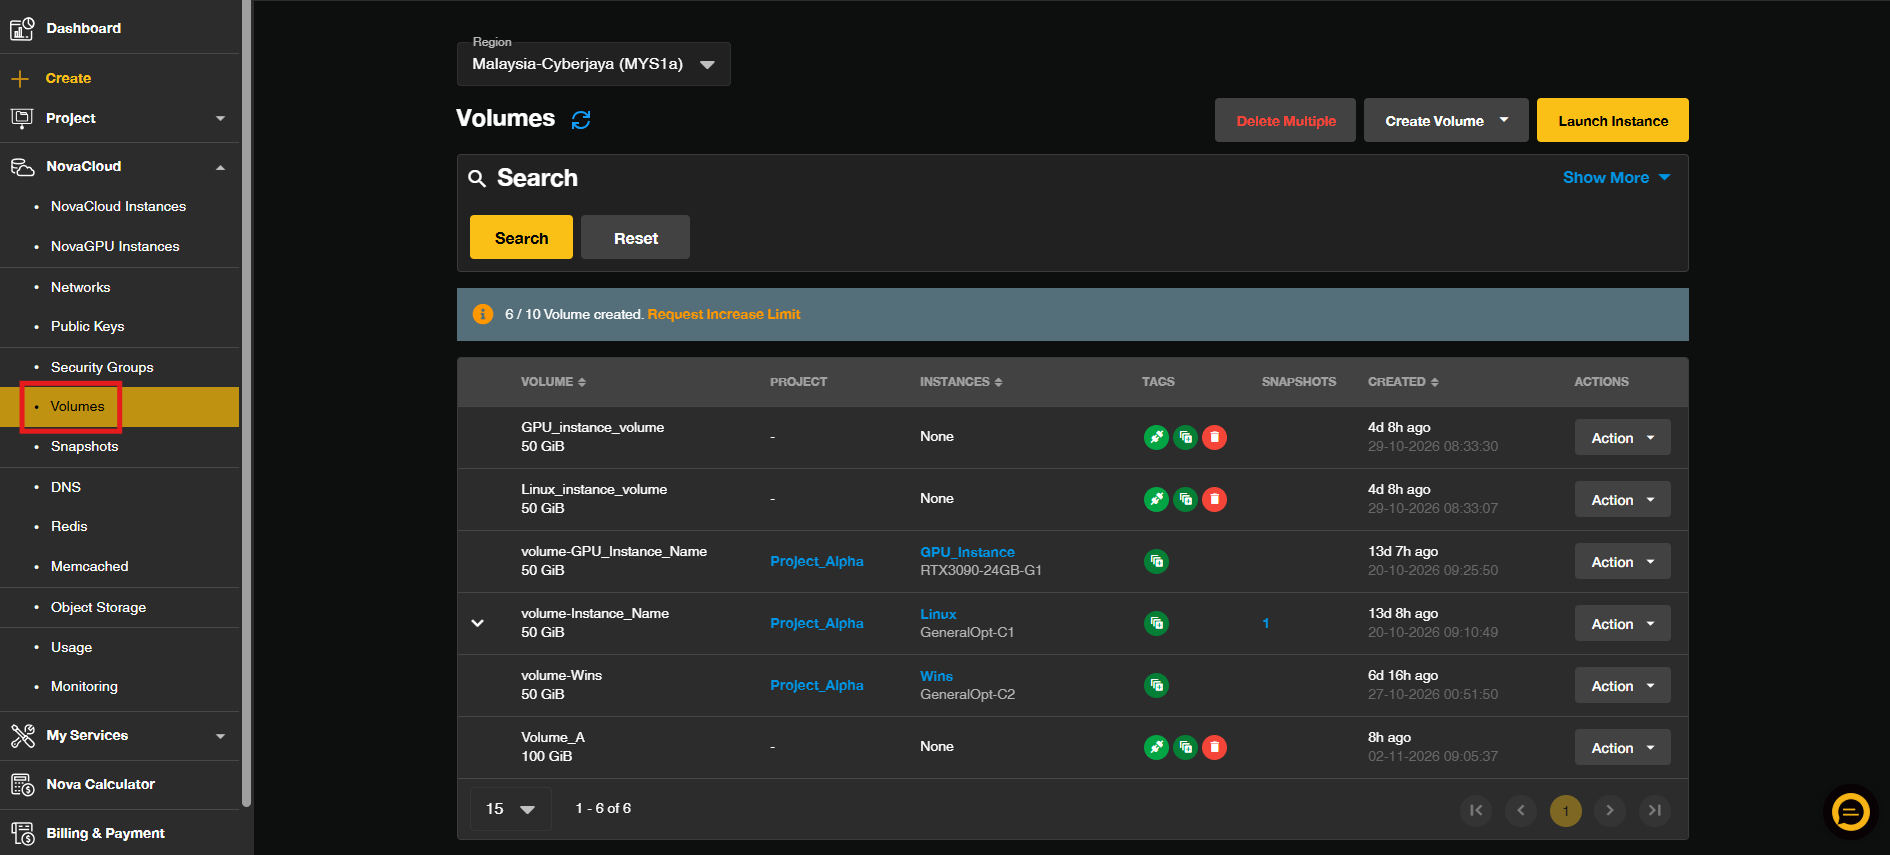
- In the Dashboard, click on the NovaCloud dropdown menu and select Volumes.
Step 3: Delete the Volume
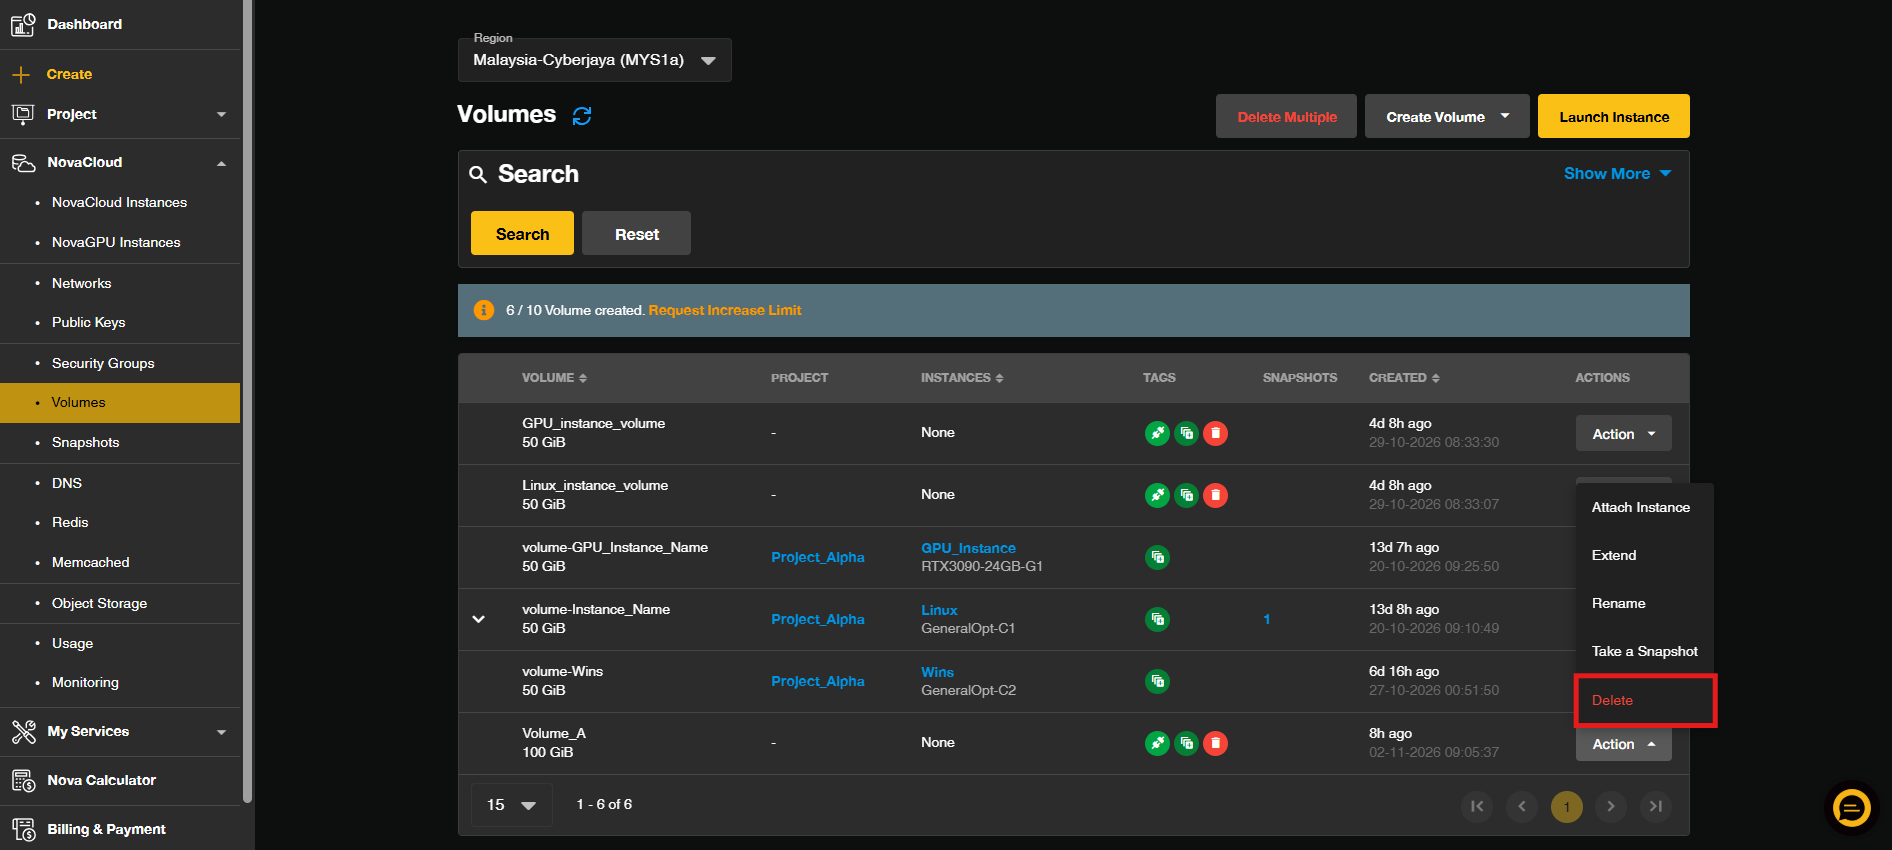
- Locate the volume you wish to delete from the list. Click on the Action dropdown next to the volume to reveal a dropdown menu, then select Delete.
Step 4: Action Confirmation
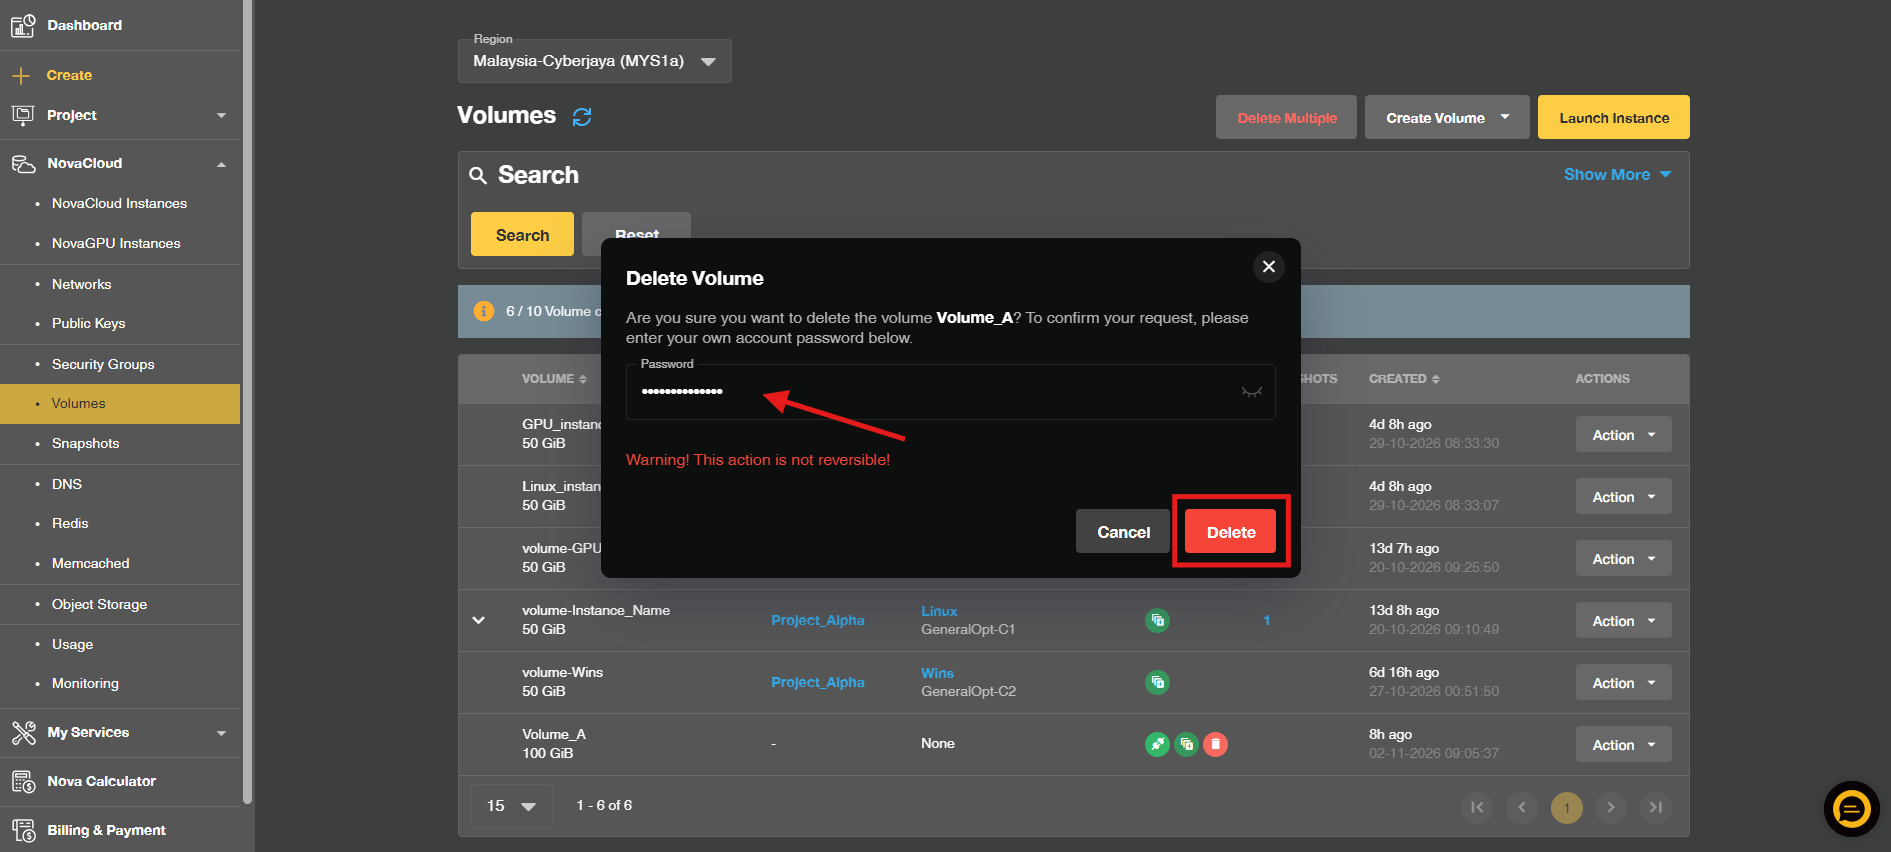
- Enter your account password then click on the Delete button on the pop-out windows.
- Your volume will now be deleted. Once the deletion is complete, the volume will be removed from the list and you will no longer be charged for it.
Conclusion
By following this guidance, you can delete unwanted volumes in the Customer Portal quickly and confidently, keeping your storage resources organized and avoiding unnecessary charges. Remember to verify that the volume is no longer needed before deletion, as this action is irreversible.
For any inquiries, feel free to reach out to our support team at support@ipserverone.com.
Article updated on 02 November 2026 by Johnny