
Search Our Database
How to create Cloud Instance snapshot in Customer Portal
Introduction
Creating a snapshot of your Cloud Instance through our Customer Portal is a simple yet essential task that every customer should know for protecting their data. A snapshot captures the state of your instance’s volume at a specific point in time, allowing you to restore your system to that exact state whenever needed. Whether you are preparing for a major system change, scheduling routine backups, or planning a migration to a new instance, this guide will walk you through the entire process step-by-step, ensuring you can easily create and manage snapshots within the Customer Portal environment.
Prerequisite
- Access to the Customer Portal where the Cloud Instance is under
- An existing volume attached to or detached from the Cloud Instance
Important Note⚠️: Kindly ensure your volume exists before creating a snapshot. Snapshots can be created from unattached volumes and volumes attached to a running instance.
Step-by-step guide
Step 1: Login to the Customer Portal
- Login to [IPServerOne Customer Portal].
Step 2: Navigate to the Cloud Instance section
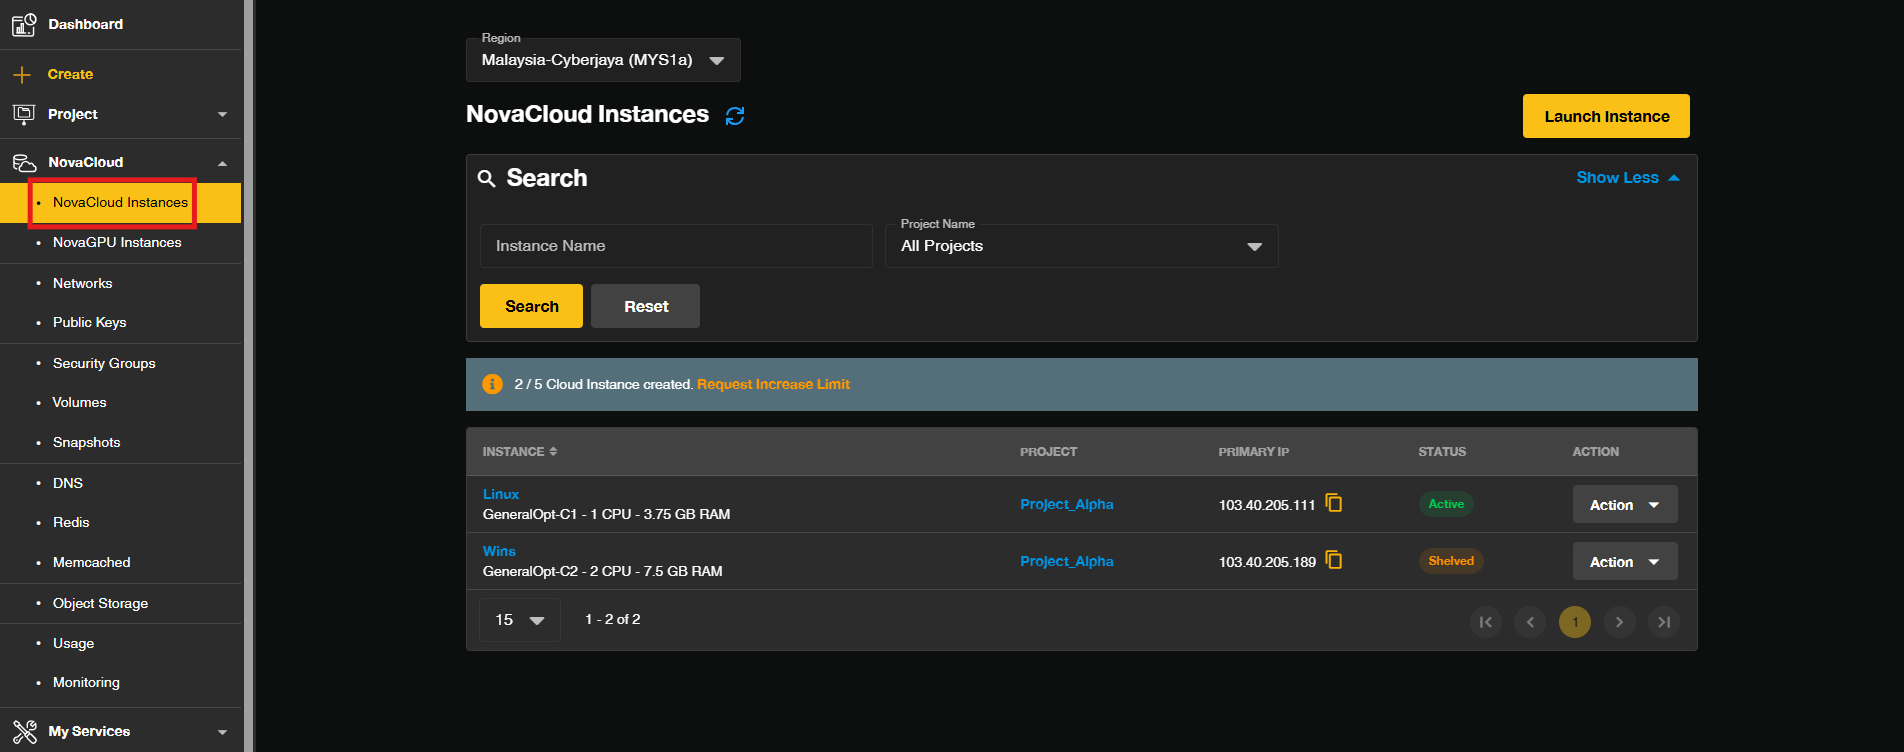
- In the Dashboard, click on the NovaCloud dropdown menu and select NovaCloud Instances.
Step 3: Select the Cloud Instance
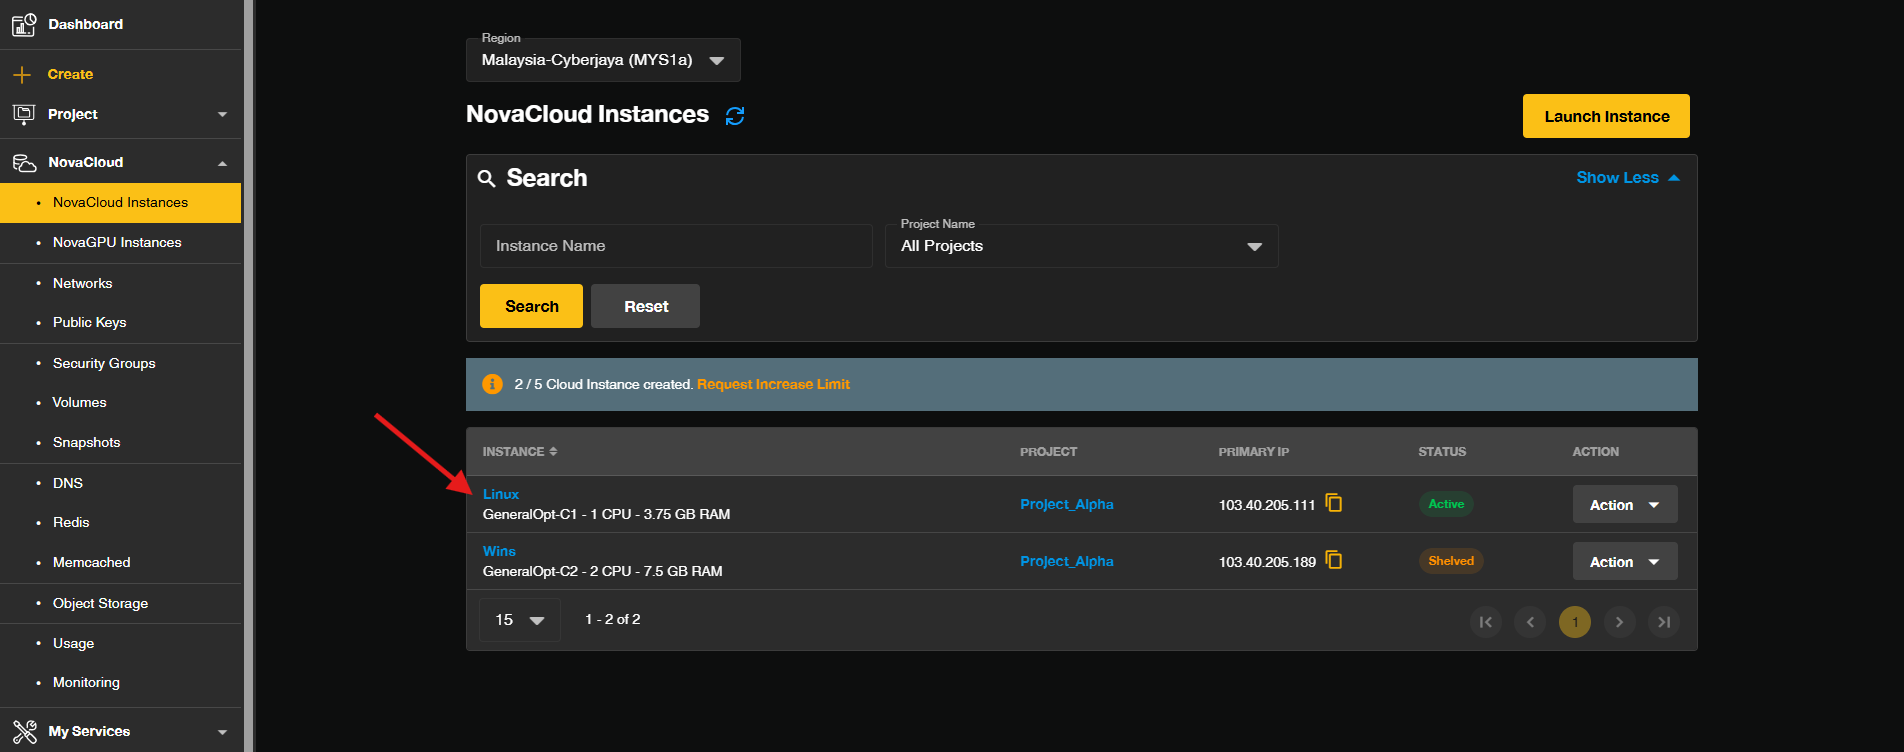
- Click on the Cloud Instance you wish to take snapshot.
Step 4: Navigate to snapshot section
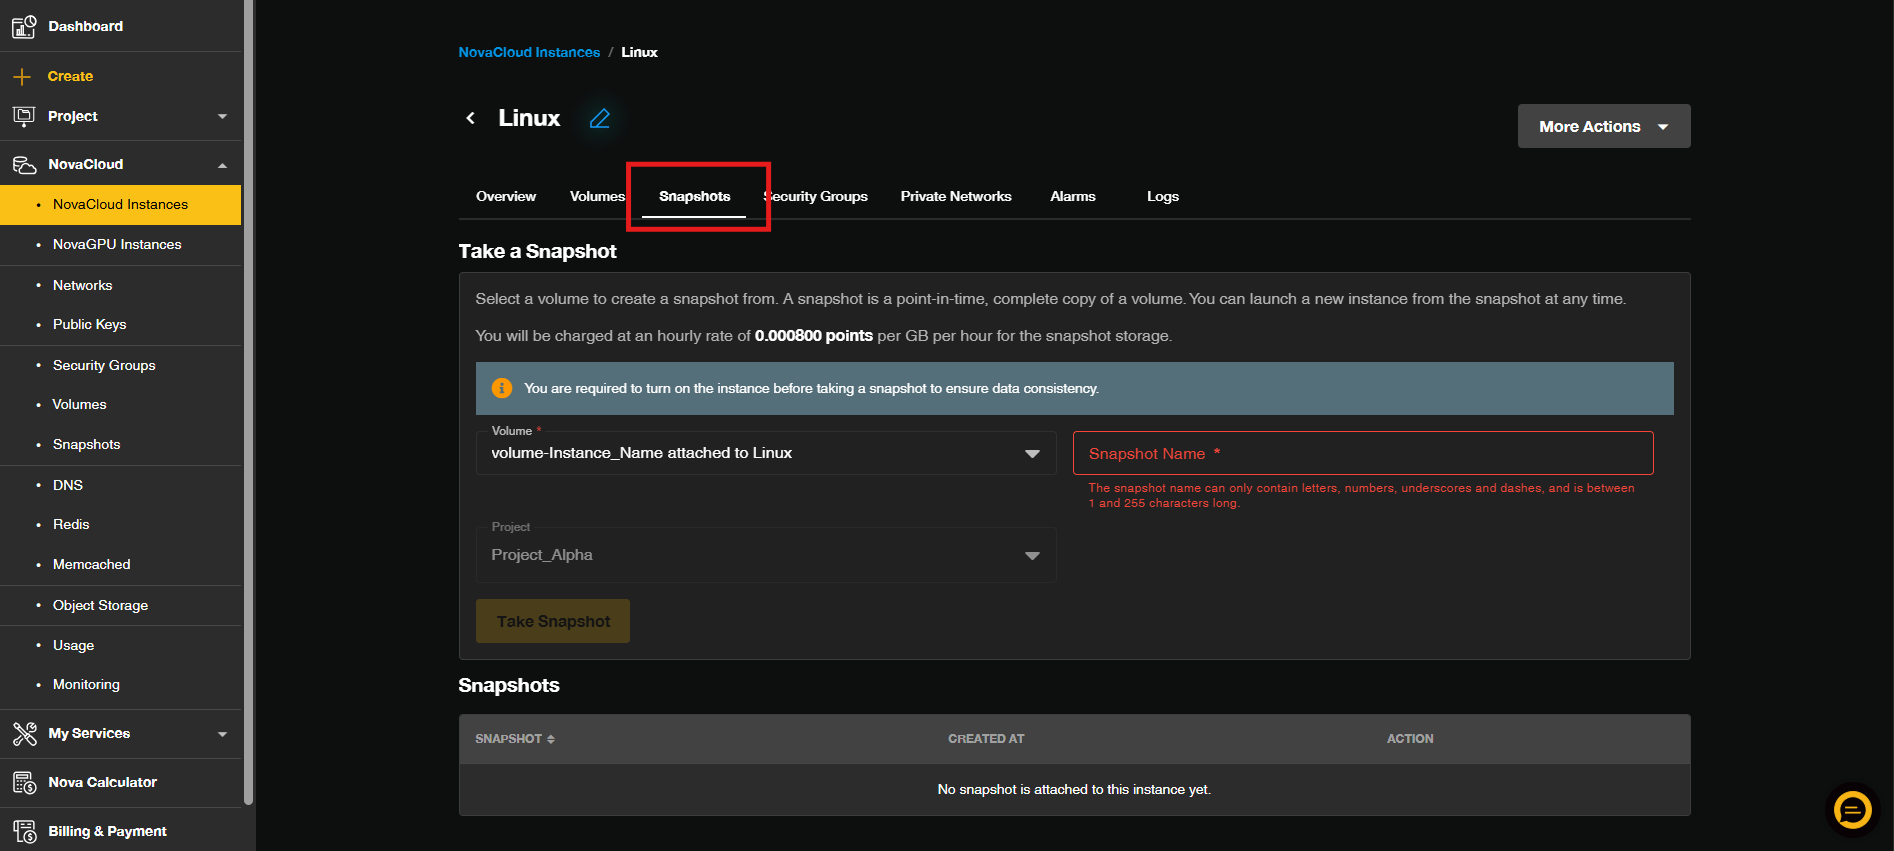
- Click on the Snapshots tab to switch into snapshot section.
Step 5: Create the Snapshot
- Enter a name for your snapshot, and it is advisable to include the date for easier identification. Then, choose the volume(s) from the existing list that you want to include in the snapshot.
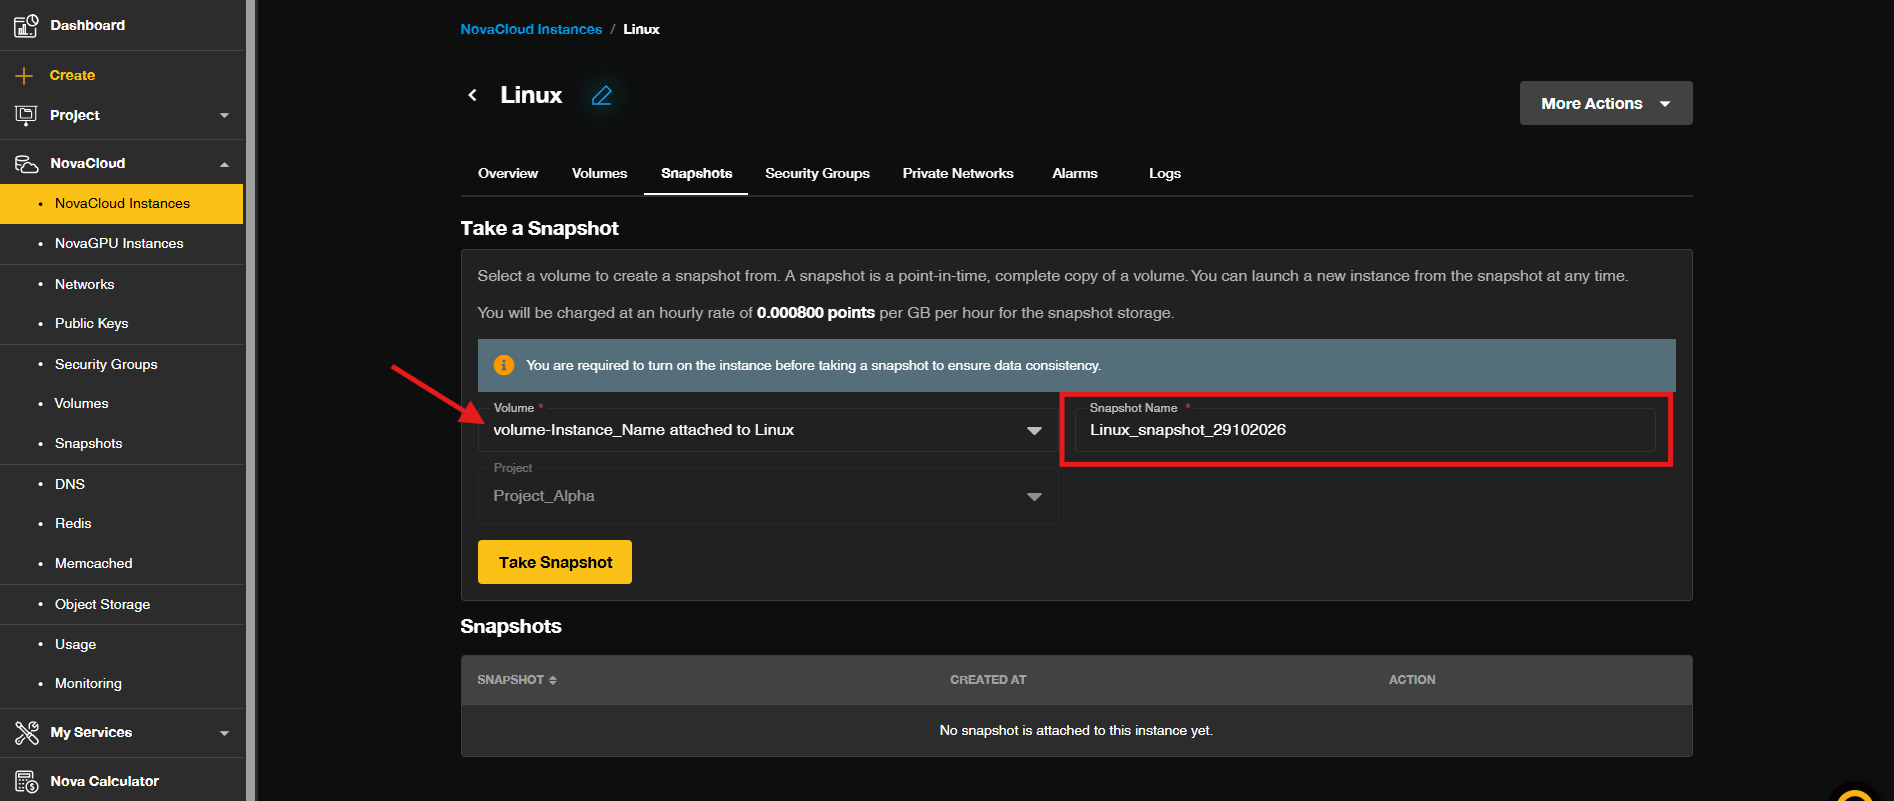
- Click on the Take Snapshot button to generate the snapshot.
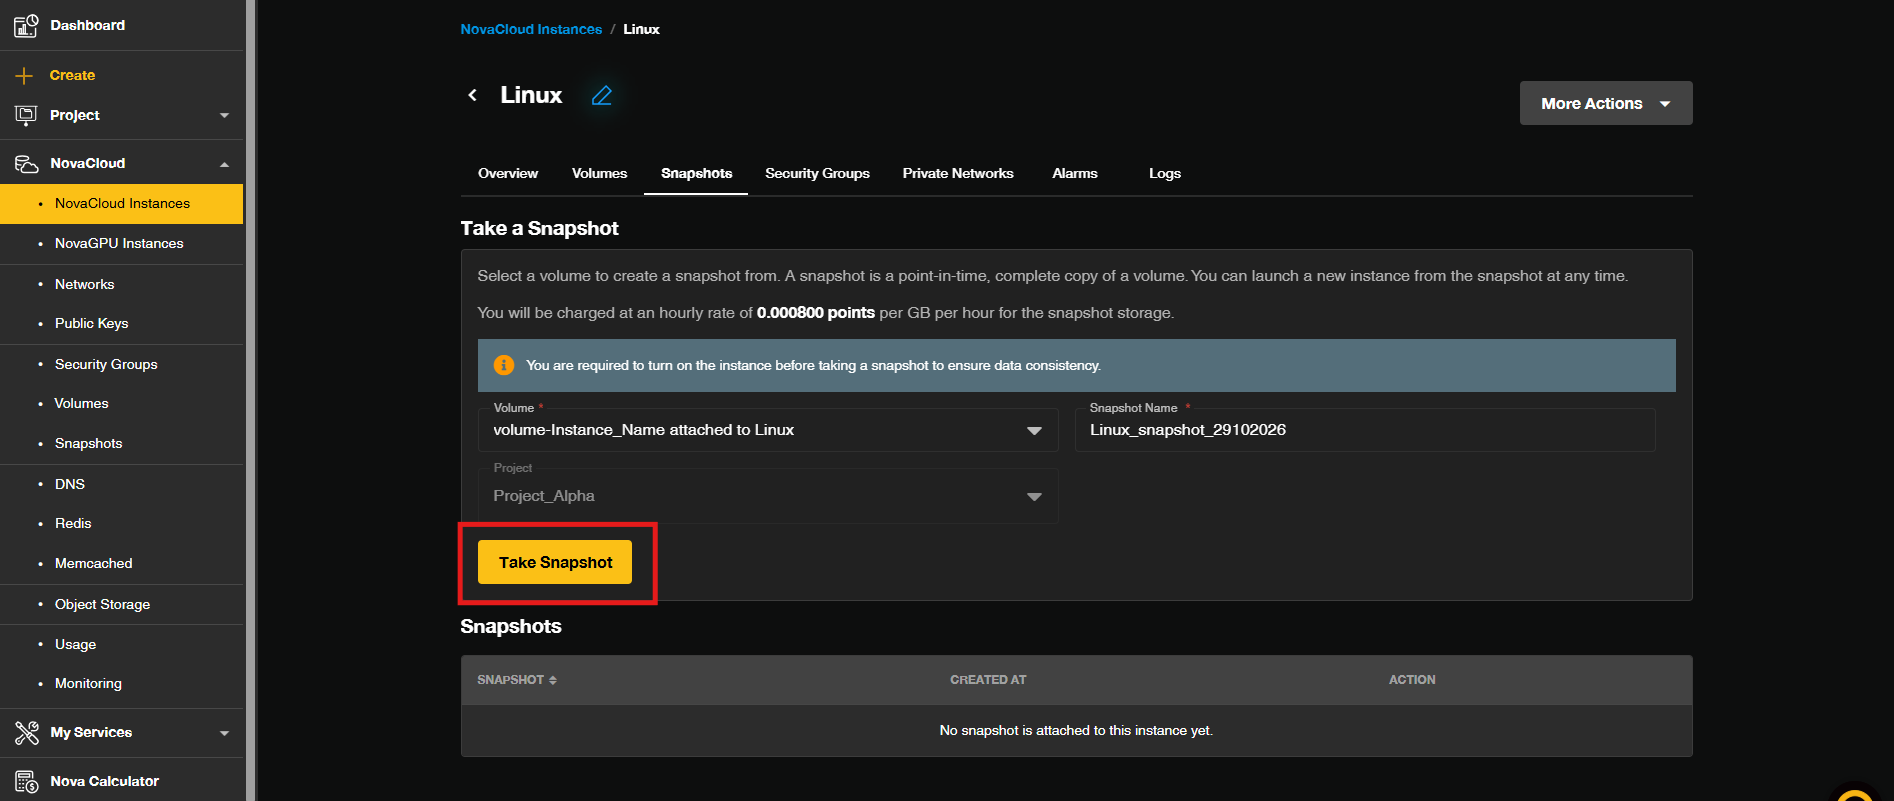
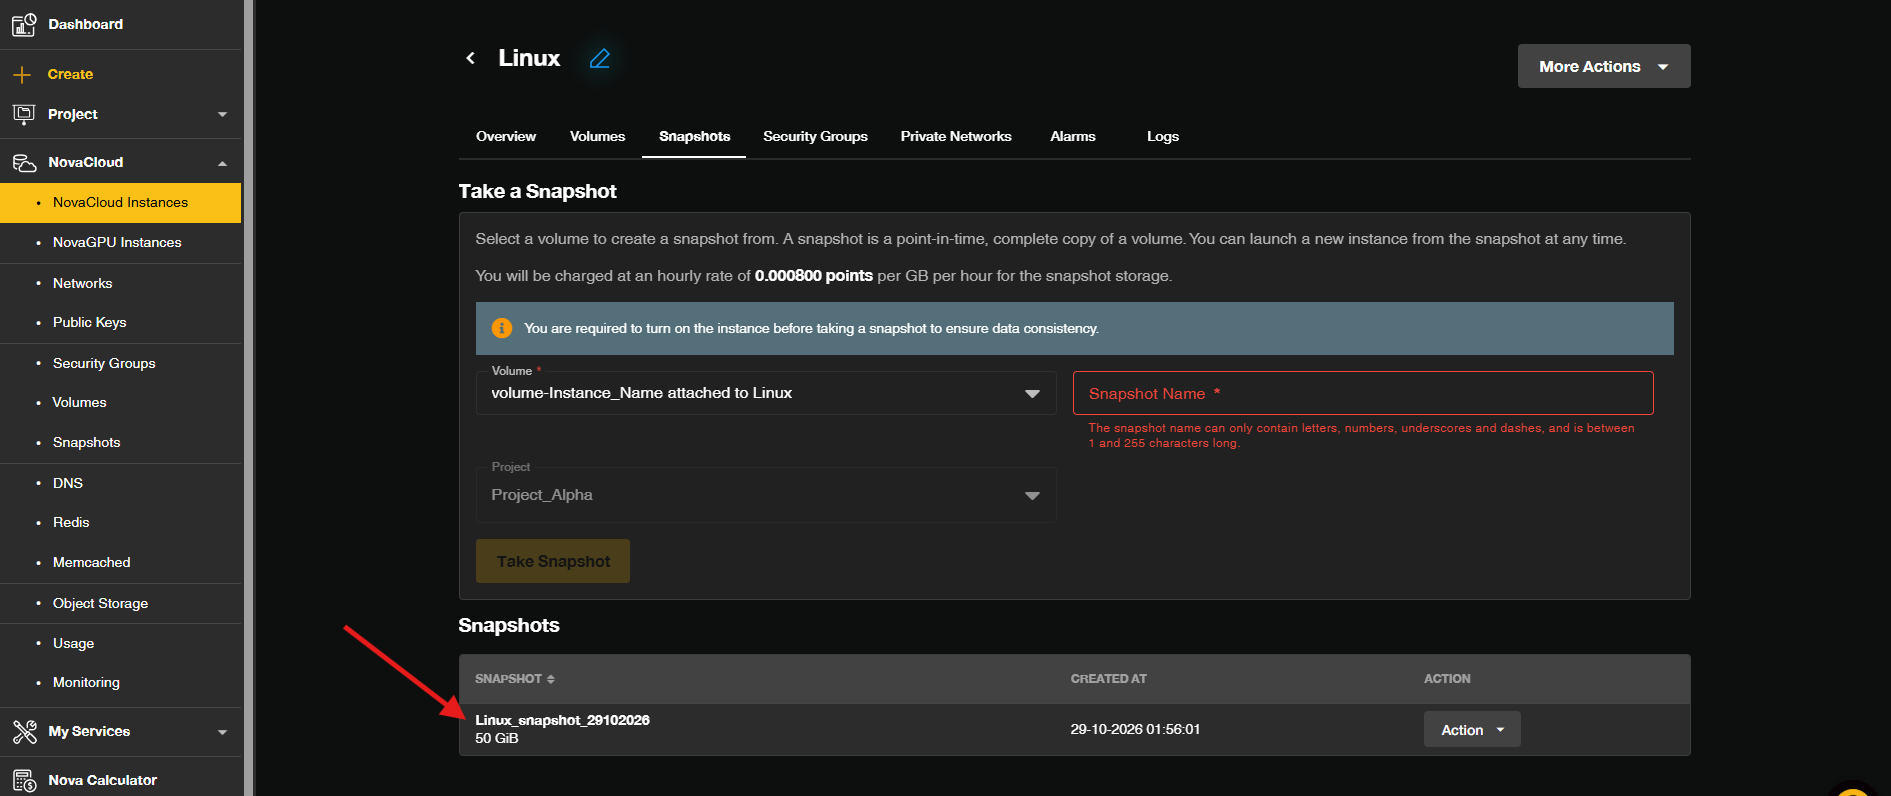
- Your snapshot will now be created. Depending on the size of the volume and the system’s performance, this process may take some time. Snapshots are useful for creating backups before making significant changes to your system or preparing for a migration, and they can be utilized to launch a new Cloud Instance.
Conclusion
By following this guidance, you can create a snapshot of your Cloud Instance in the Customer Portal quickly and confidently, ensuring your data is safely backed up and recoverable at any point in time.
For any inquiries, feel free to reach out to our support team at support@ipserverone.com.
Article updated on 29 October 2026 by Johnny