
Search Our Database
How to access Cloud Instance’s console via Customer Portal
Introduction
Accessing the console of your cloud instances is essential for direct interaction, troubleshooting, and managing software running on cloud instances. This guide provides step-by-step instructions for users of all experience levels to effortlessly access cloud instance console within NovaCloud via the IPServerOne Customer Portal.
Prerequisite
- Register and log in to your Customer Portal account.
- Active cloud instances deployed within your account.
Step-by-step Guide
Step 1: Navigate to Instances
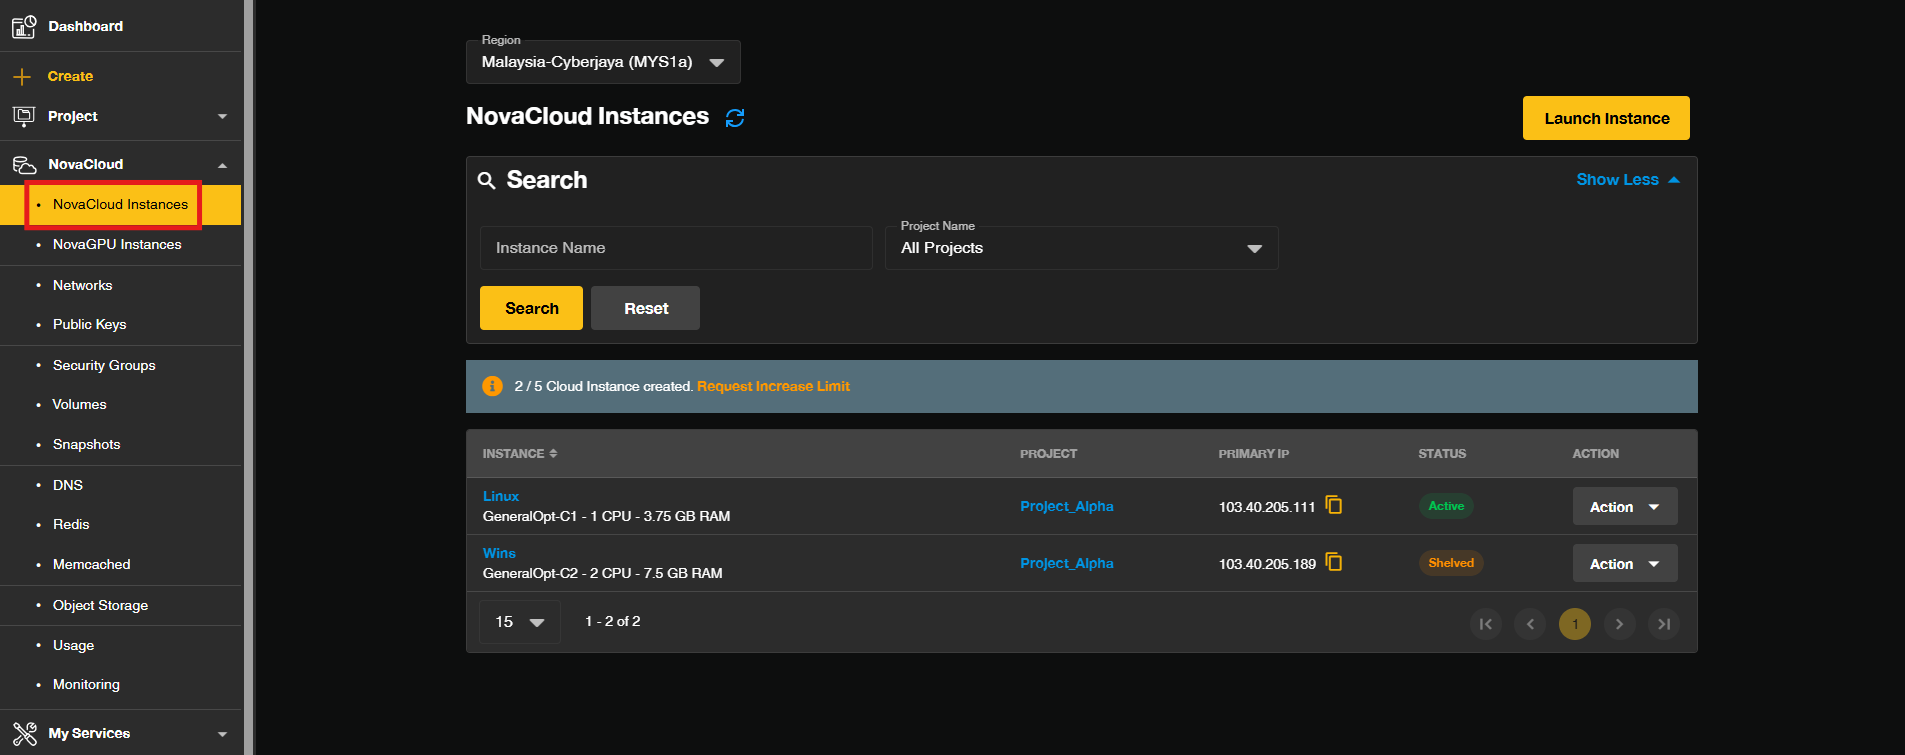
- Once logged in to [IPServerOne Customer Portal], select NovaCloud from the main menu and open the NovaCloud Instances section.
Step 2: Locate the Instance and Open the Actions Menu
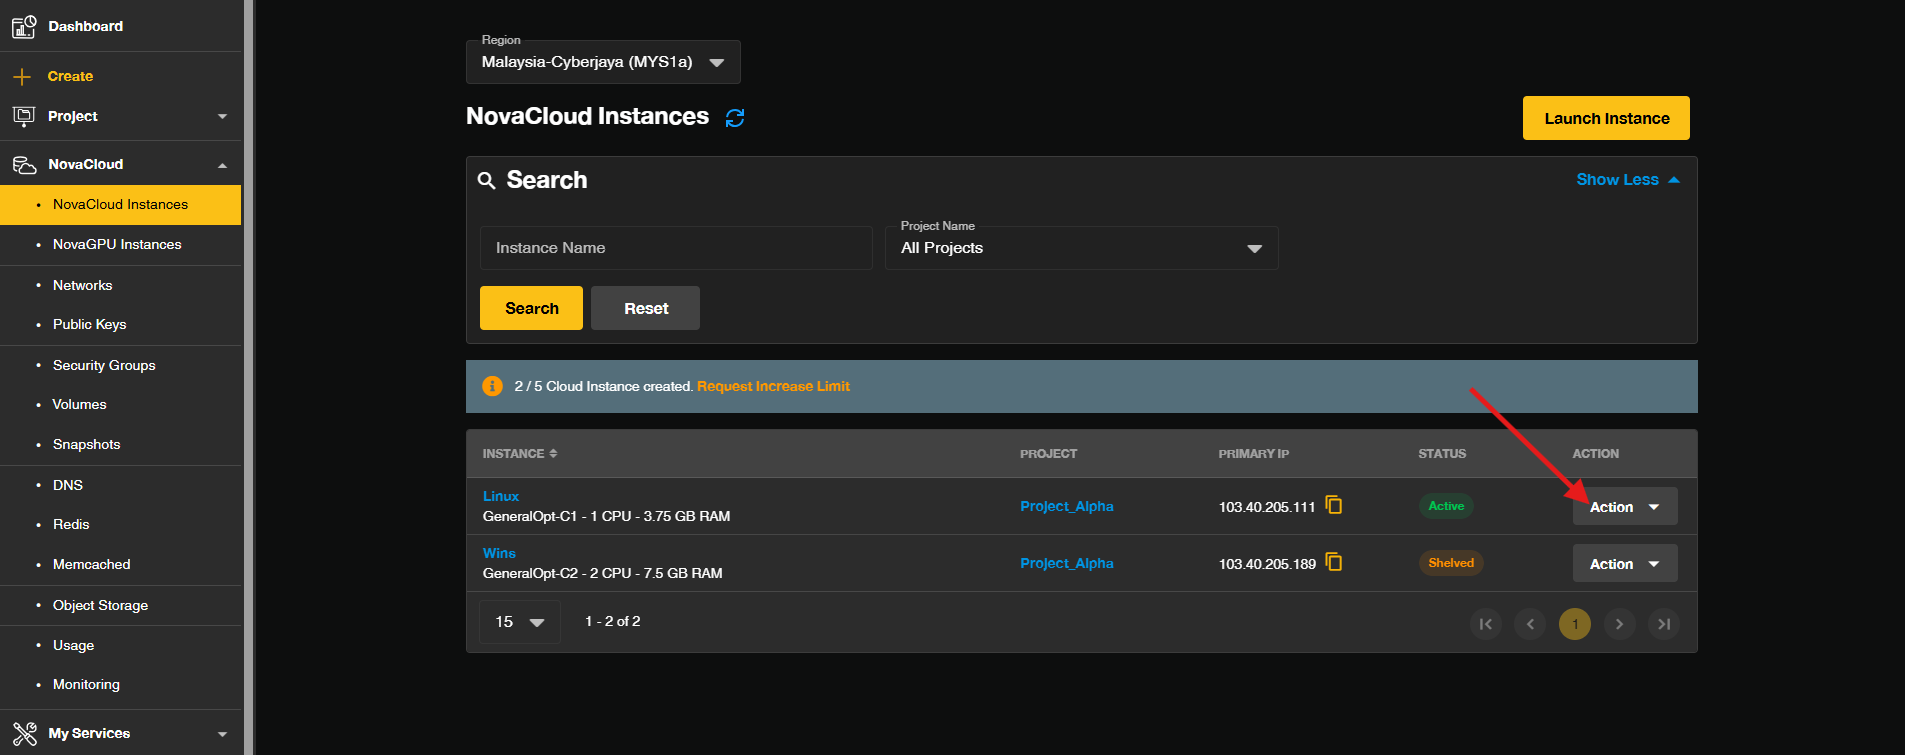
- In the cloud instances list section, locate the specific instance you wish to manage. Click on the Action dropdown associated with the instance to open a dropdown menu with available management options.
Step 3: Select the Console Option
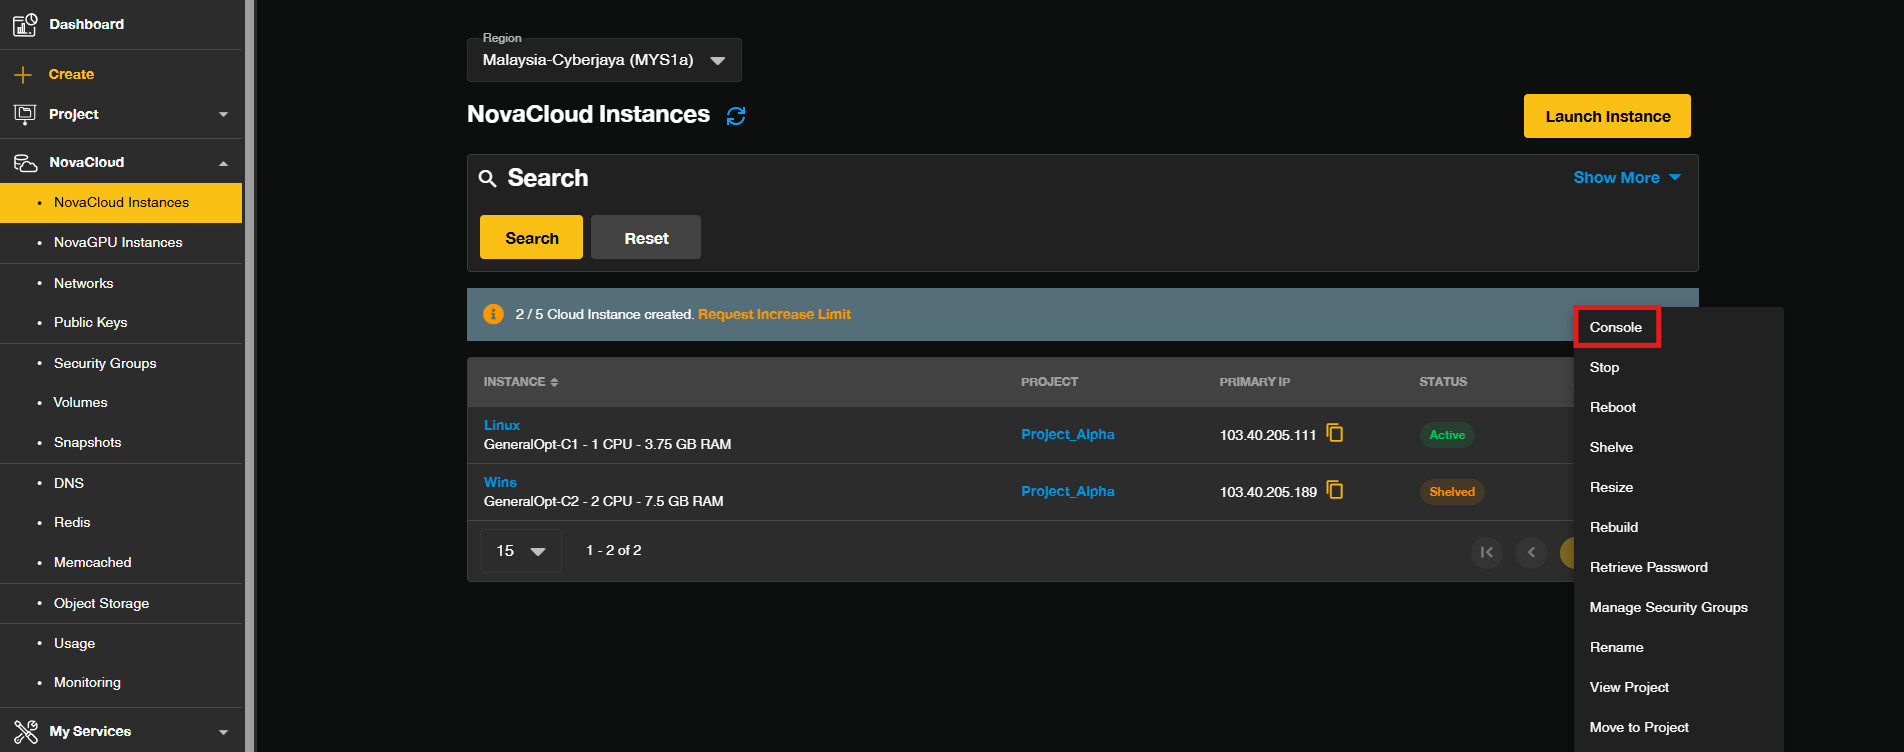
- From the Action dropdown, select Console. This will open the console screen for the selected instance, allowing direct interaction with the instance’s operating system.
Step 4: Activate the Console
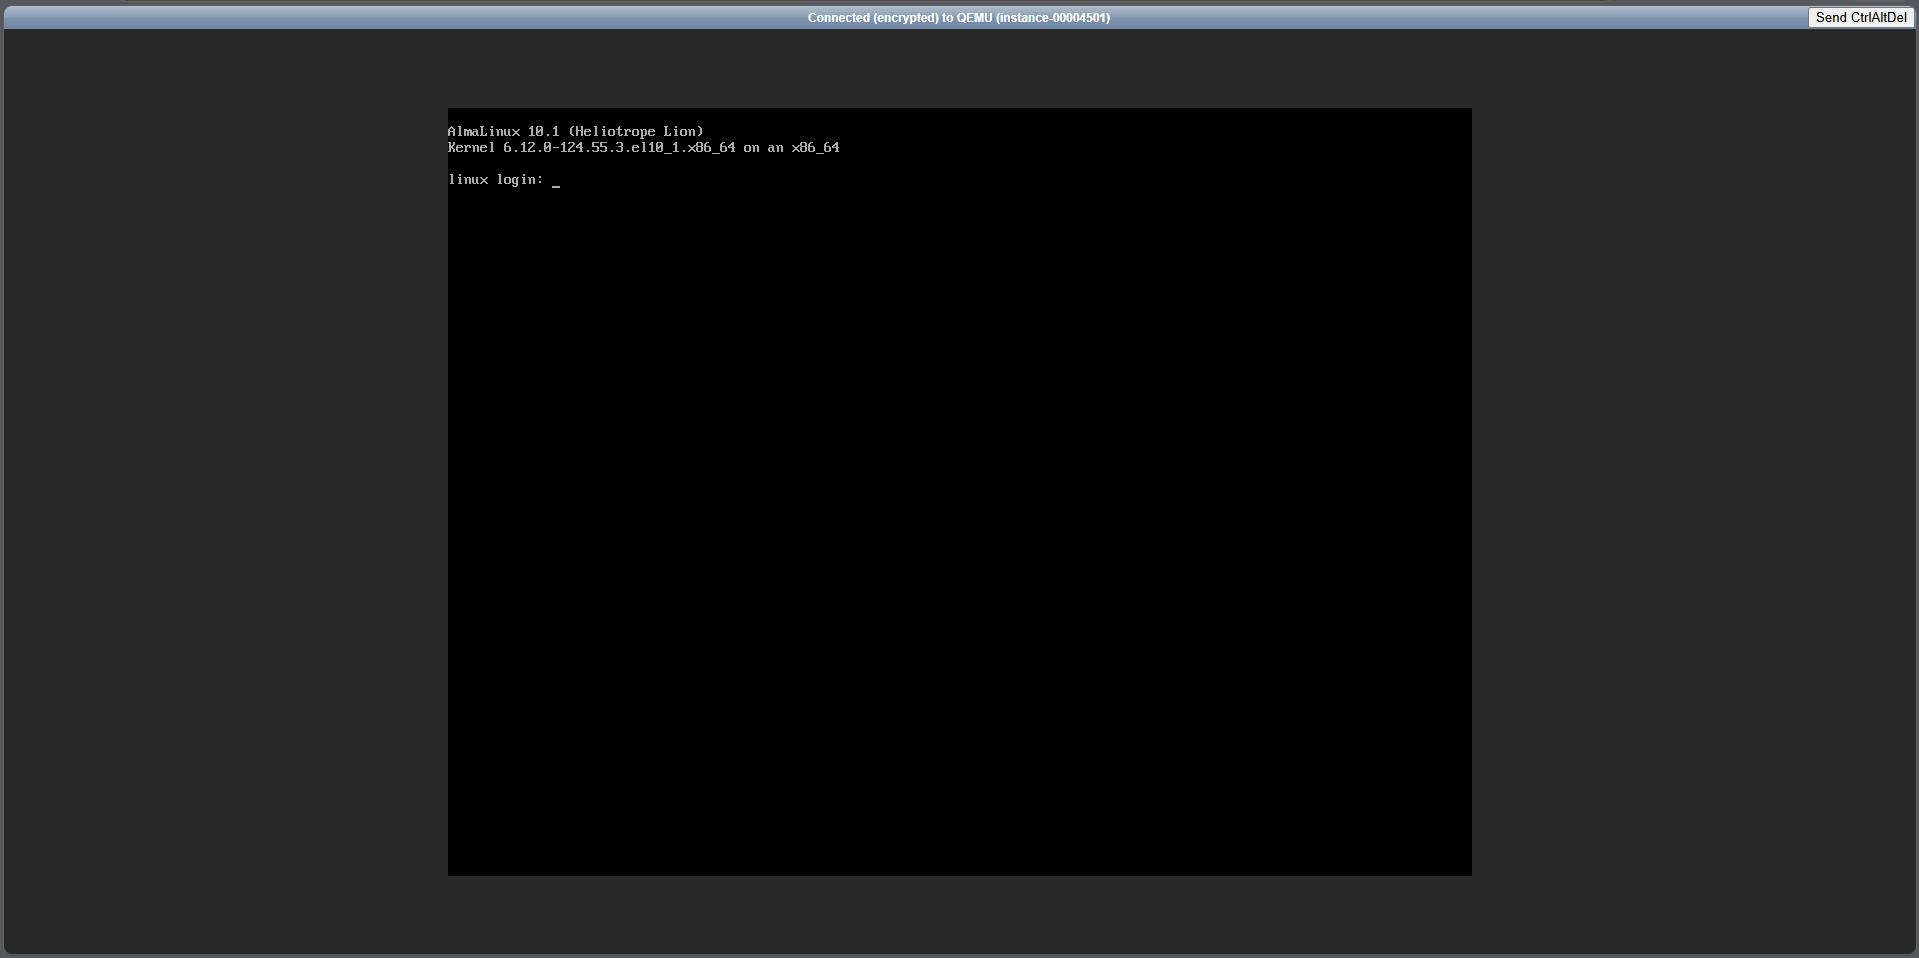
- In the console screen, click on the black screen area once to activate it. This ensures the console is ready to receive keyboard input, enabling you to start managing your instance directly.
Conclusion
By following this guidance, you can successfully access and interact with your cloud instance consoles efficiently for seamless management and troubleshooting.
If you have any questions or encounter any issues, please feel free to reach out to our support team at support@ipserverone.com.
Article updated on 28 October 2026 by Johnny