
Search Our Database
Configure Security Group in IPServerOne Customer Portal
Introduction
Managing security groups effectively within the IP ServerOne Customer Portal is essential for controlling inbound and outbound network traffic to your instances. When running applications and virtual services, administrators frequently need to configure security group rules, rename groups for better organization, or remove obsolete groups to maintain a clean environment. This guide walks you through the complete process of configuring, renaming, and deleting security groups for your server within the IP ServerOne Customer Portal.
Prerequisite
- Access to the IP ServerOne Customer Portal where your server instance is hosted.
- Appropriate permissions to manage NovaCloud networking and security configurations.
- Basic knowledge of server ports, protocols, and network traffic requirements.
Step-by-step Guide
Step 1: Navigating to Security Groups
- Log in to the [IPServerOne Customer Portal].
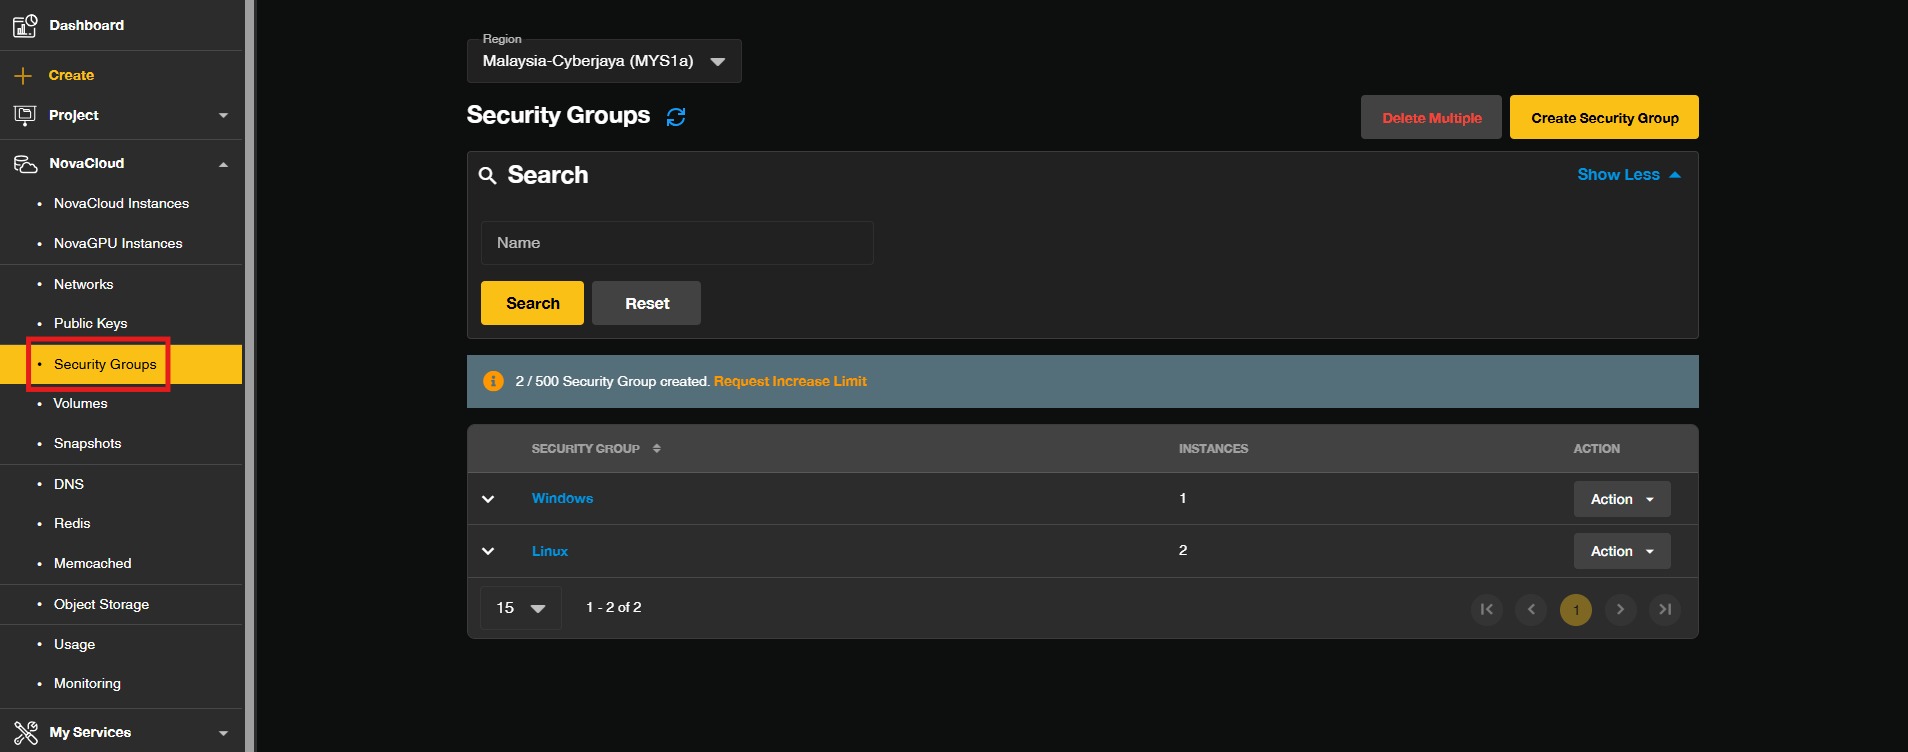
- From the left-hand navigation panel, click on NovaCloud to expand the drop-down menu and select Security Groups to view your existing security groups.
Step 2: Configuring and Adding Rules to a Security Group
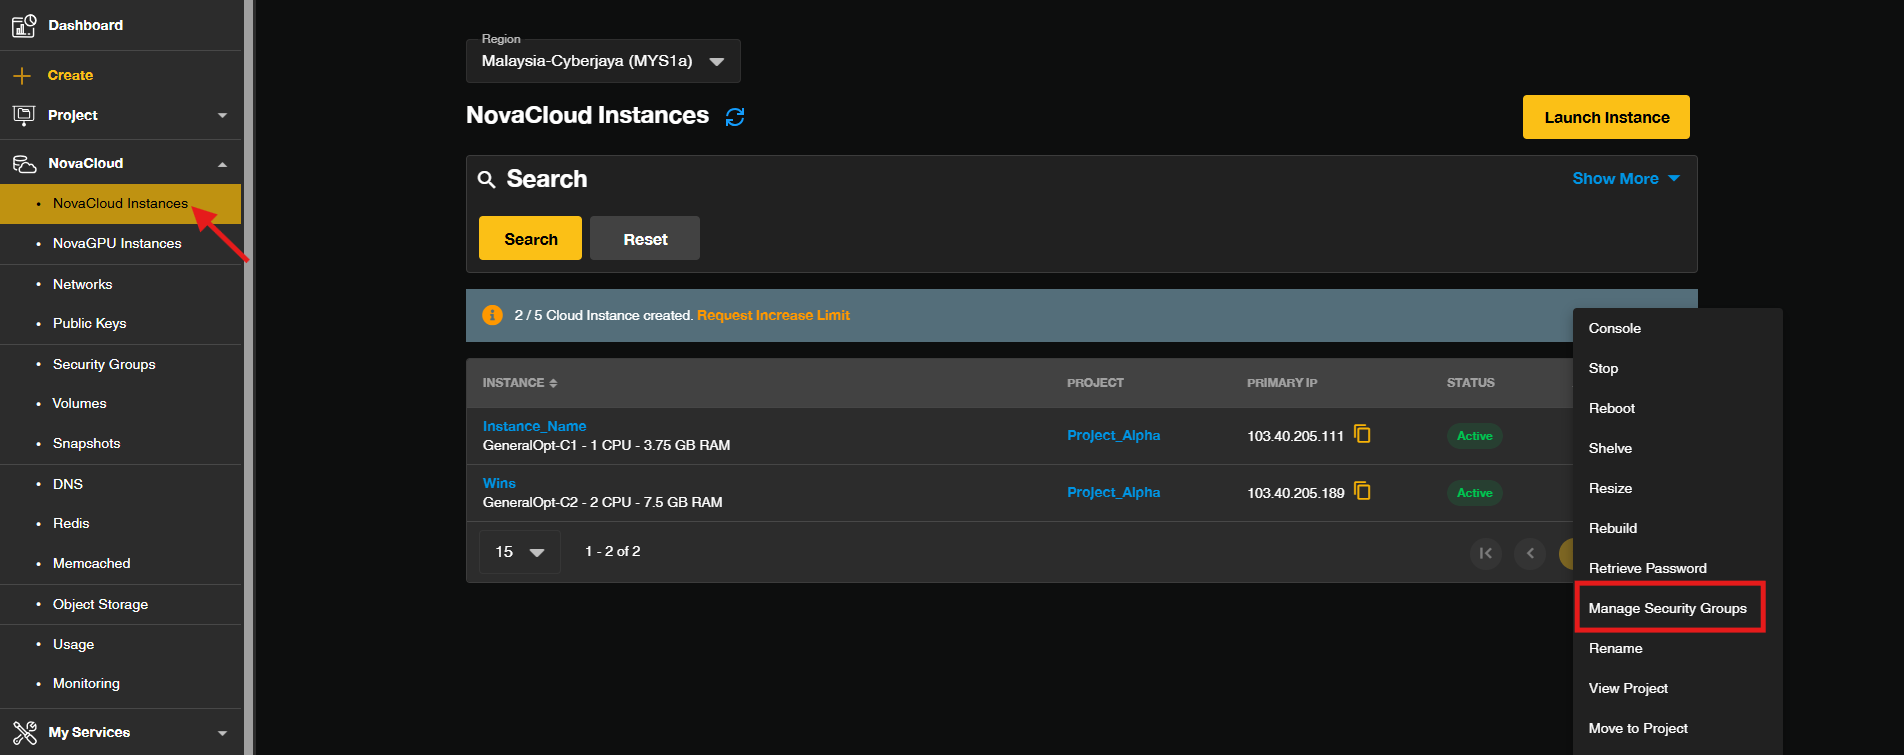
- Locate your instance from the dashboard by navigating to NovaCloud > Instances. Select your target instance name, or click on the actions menu and select Manage Security Groups.
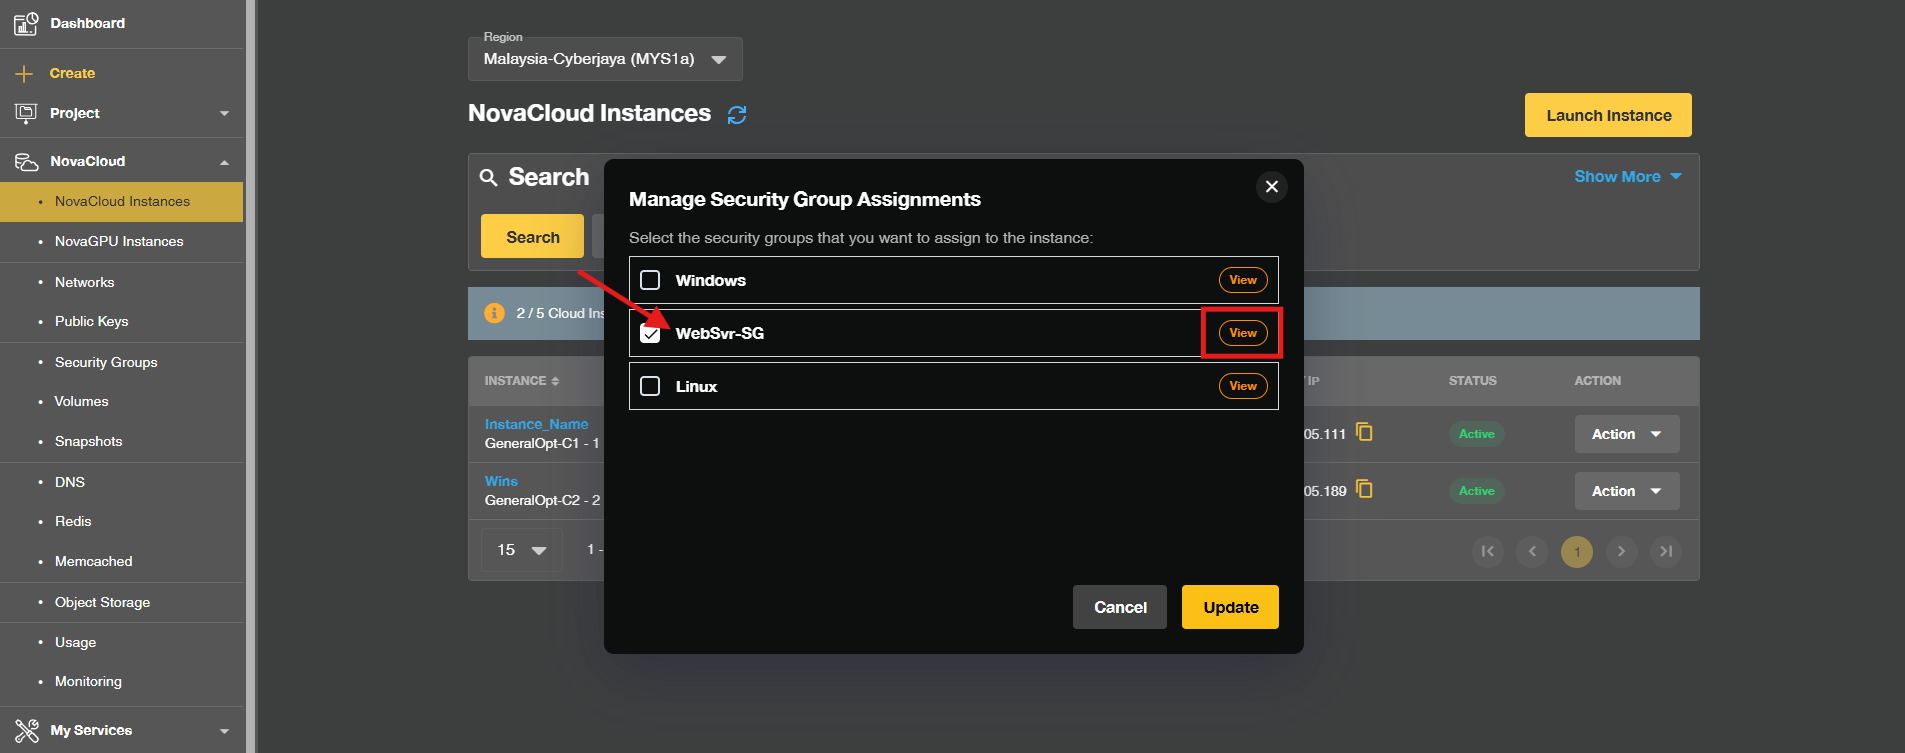
- Click View to access the assigned Security Group of your instance.
-
- If there is no Security Group assigned to the instance or you wish to create a new Security Group for the running instance.
To create new Security GroupClick on Create Security Group. Enter a descriptive name for your security group in the name field and click Create.Tips🖊️: Check the box to copy rules from an existing security group if needed.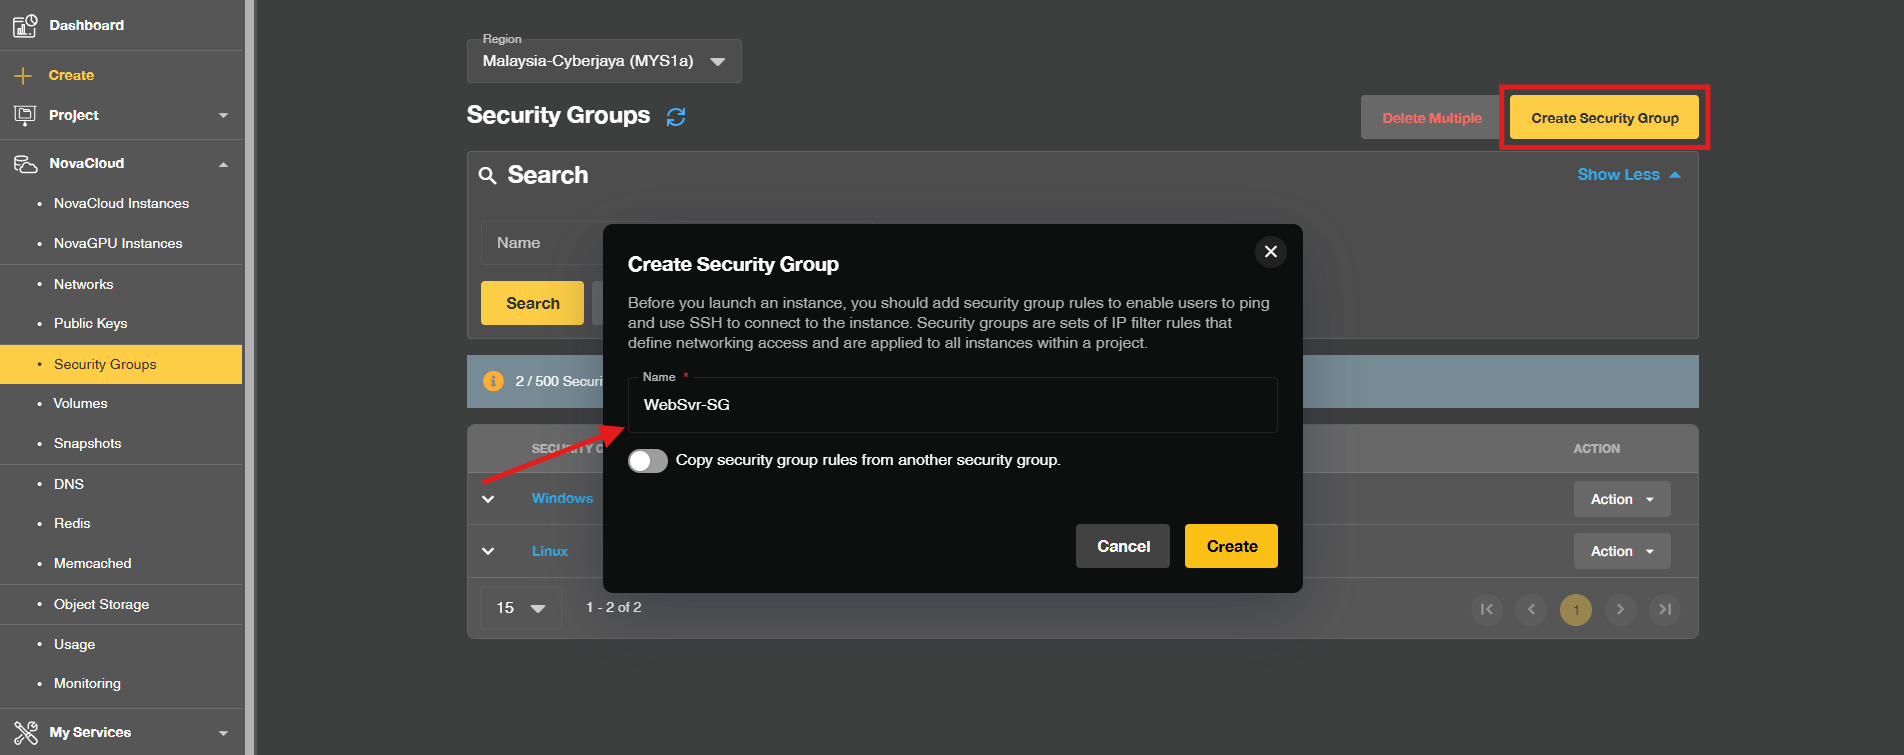
Click Skip for now to skip the assigning the Security Group to any instance.
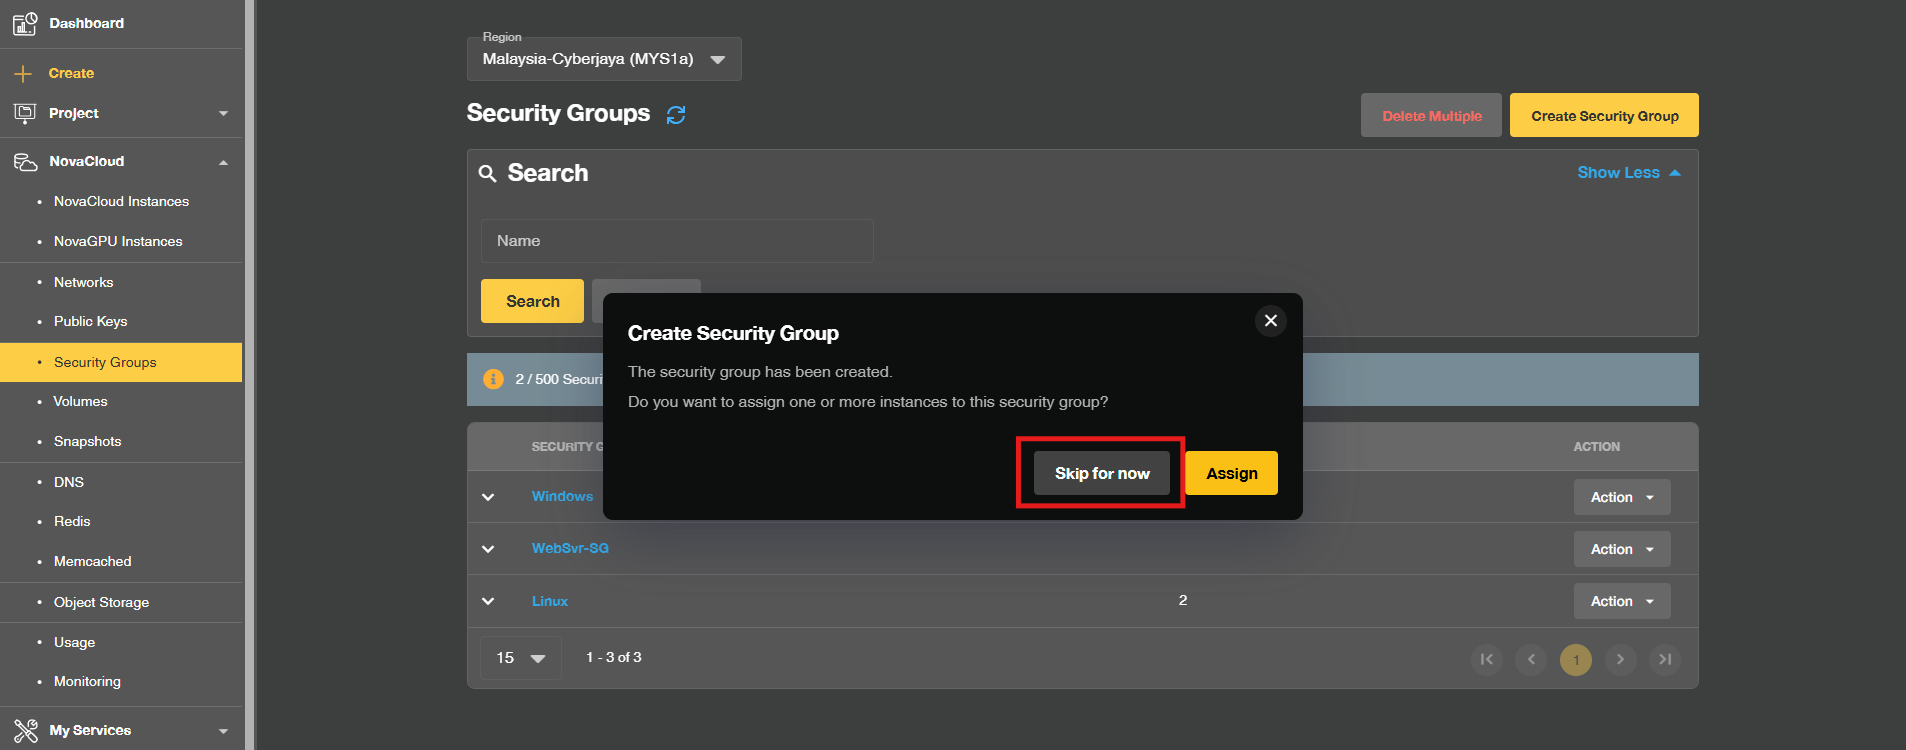
- If there is no Security Group assigned to the instance or you wish to create a new Security Group for the running instance.
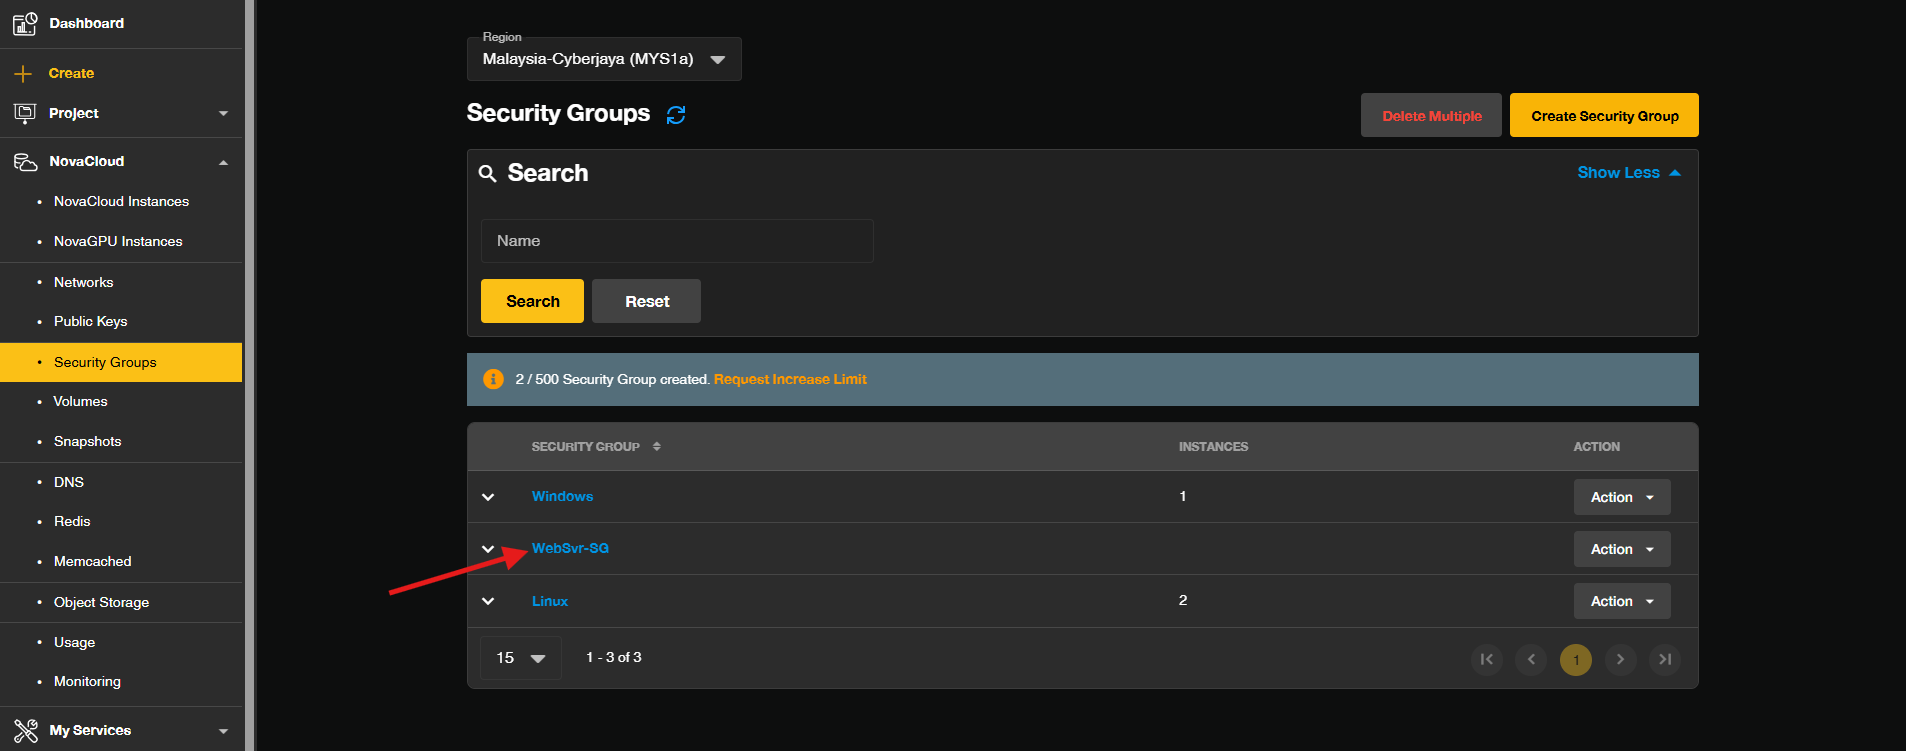
- Click on the name of the newly created security group to open its management view and proceed with adding rules.
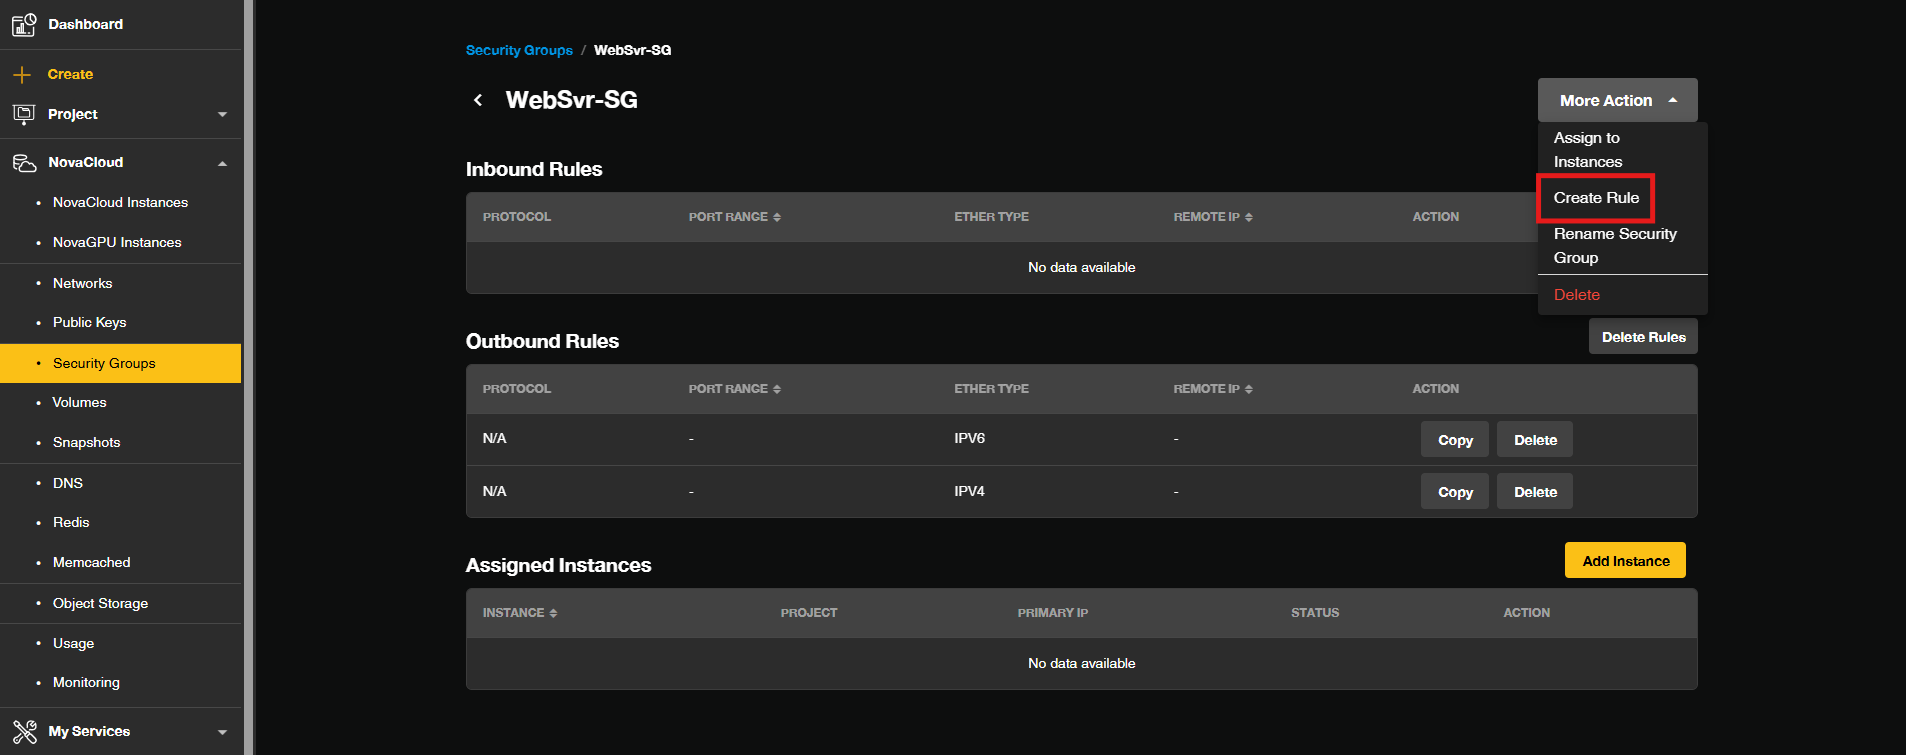
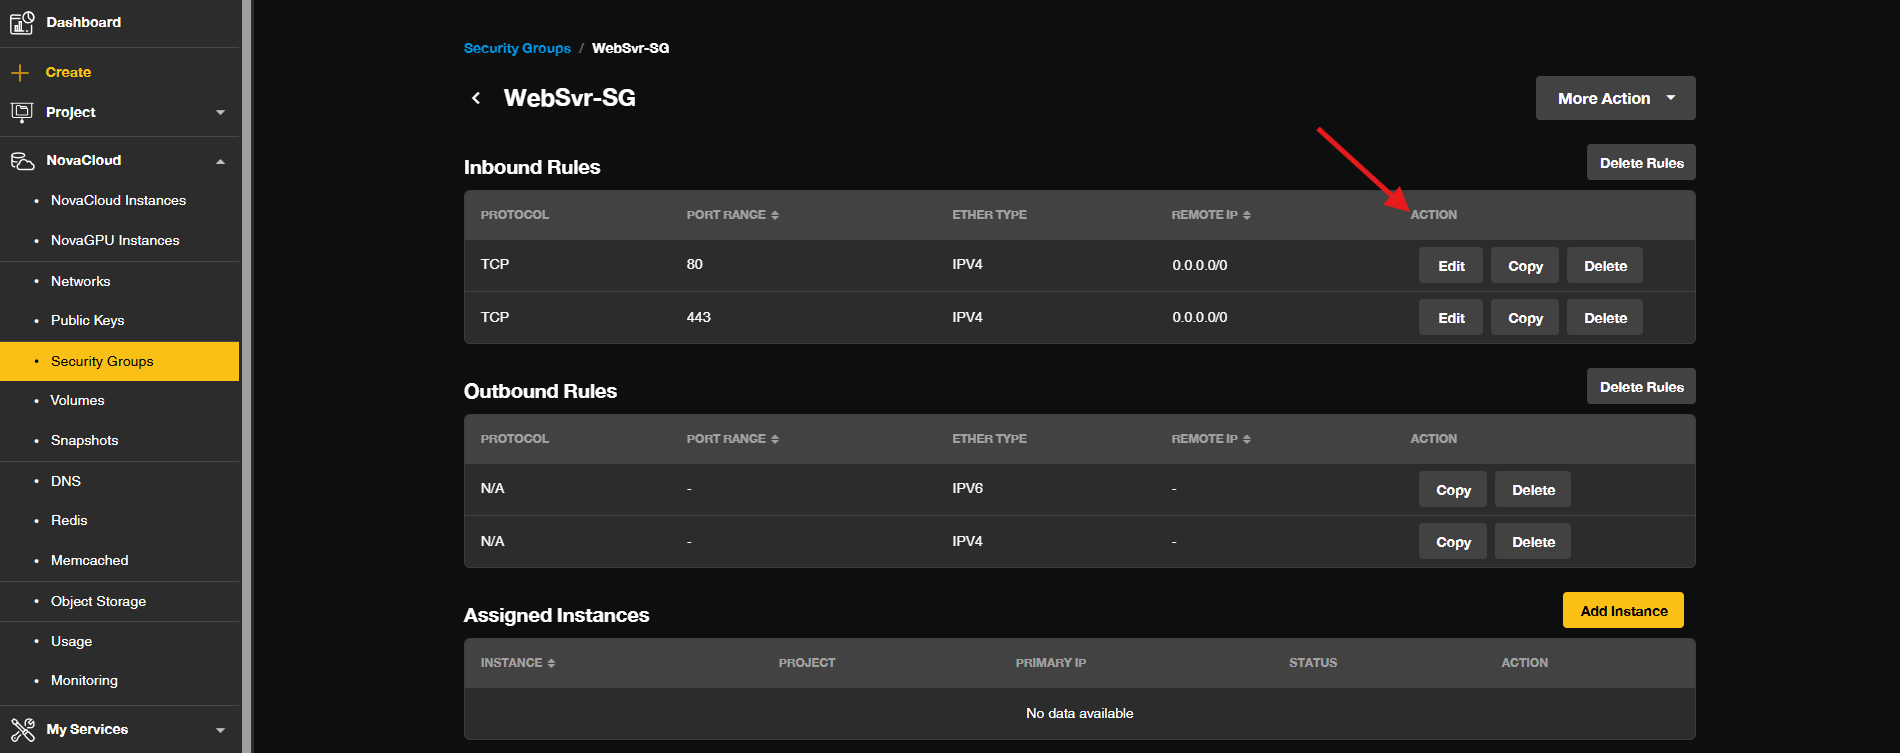
- Click on Create Rule to define traffic permissions.
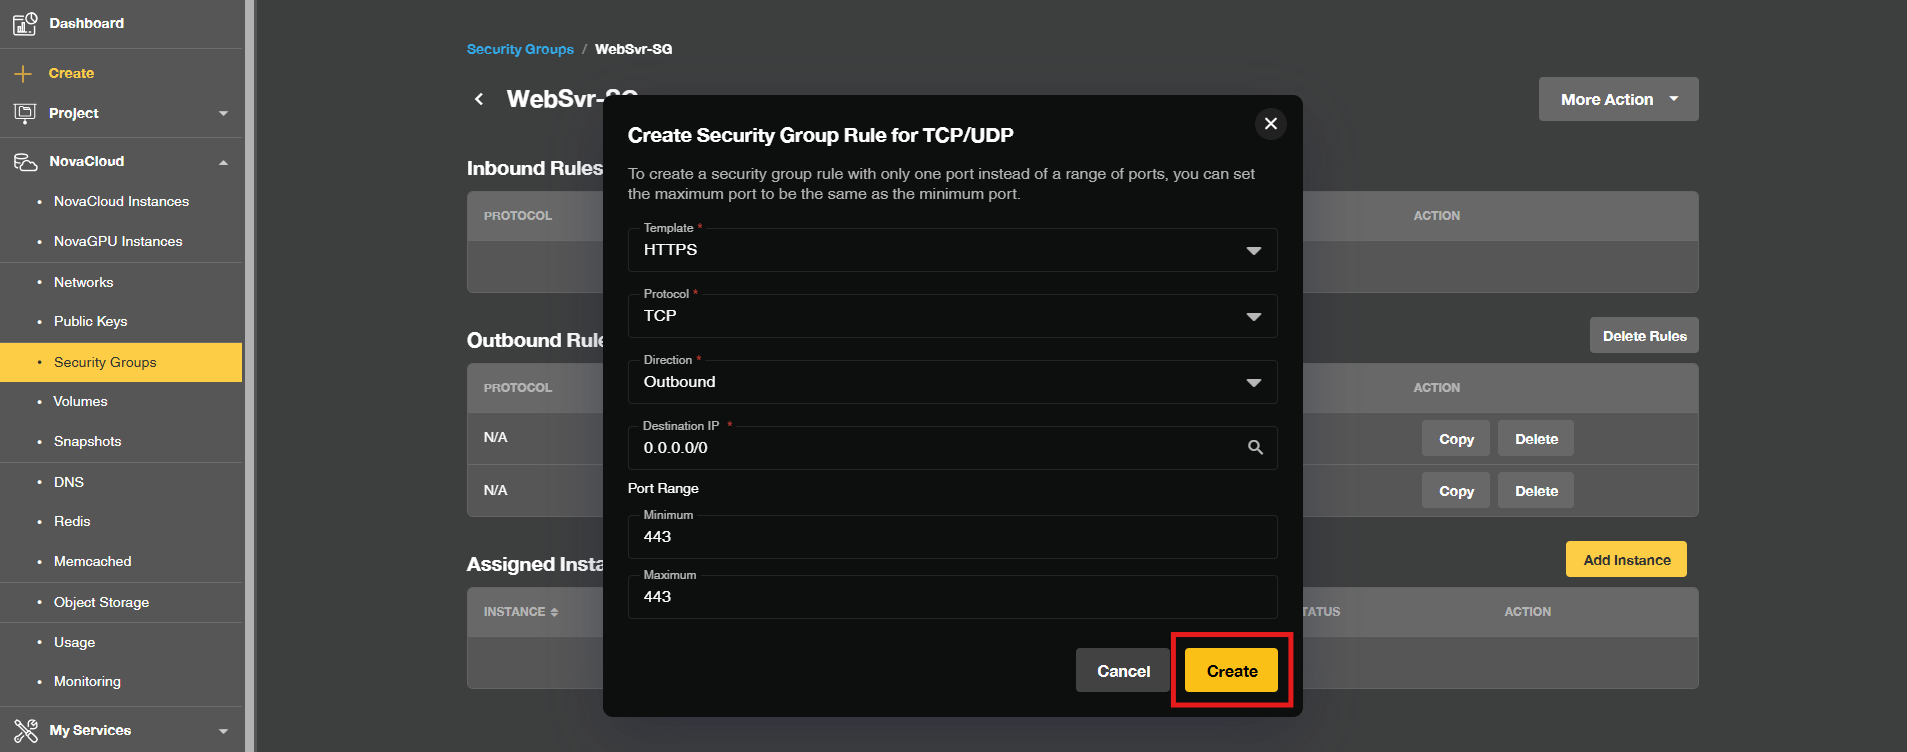
- Click Create to save the rule.
-> Template: Select a common template (such as HTTP, HTTPS, SSH, RDP) or choose Custom for custom ports.
-> Protocol: Choose the network protocol, typically TCP.
-> Direction: Set the direction to Incoming (or Outgoing depending on your configuration).
-> Source IP: Enter 0.0.0.0/0 for public access or a specific trusted IP/CIDR block.
-> Port Range: Enter the minimum and maximum port numbers for your service.
- You may edit or delete a rule while it was created with incorrectly parameter.
- Locate the rule within the security group, select the Edit or Delete to modify the parameters as needed or delete the rule from security group.
Step 3: Assigning the Security Group to Your Instance
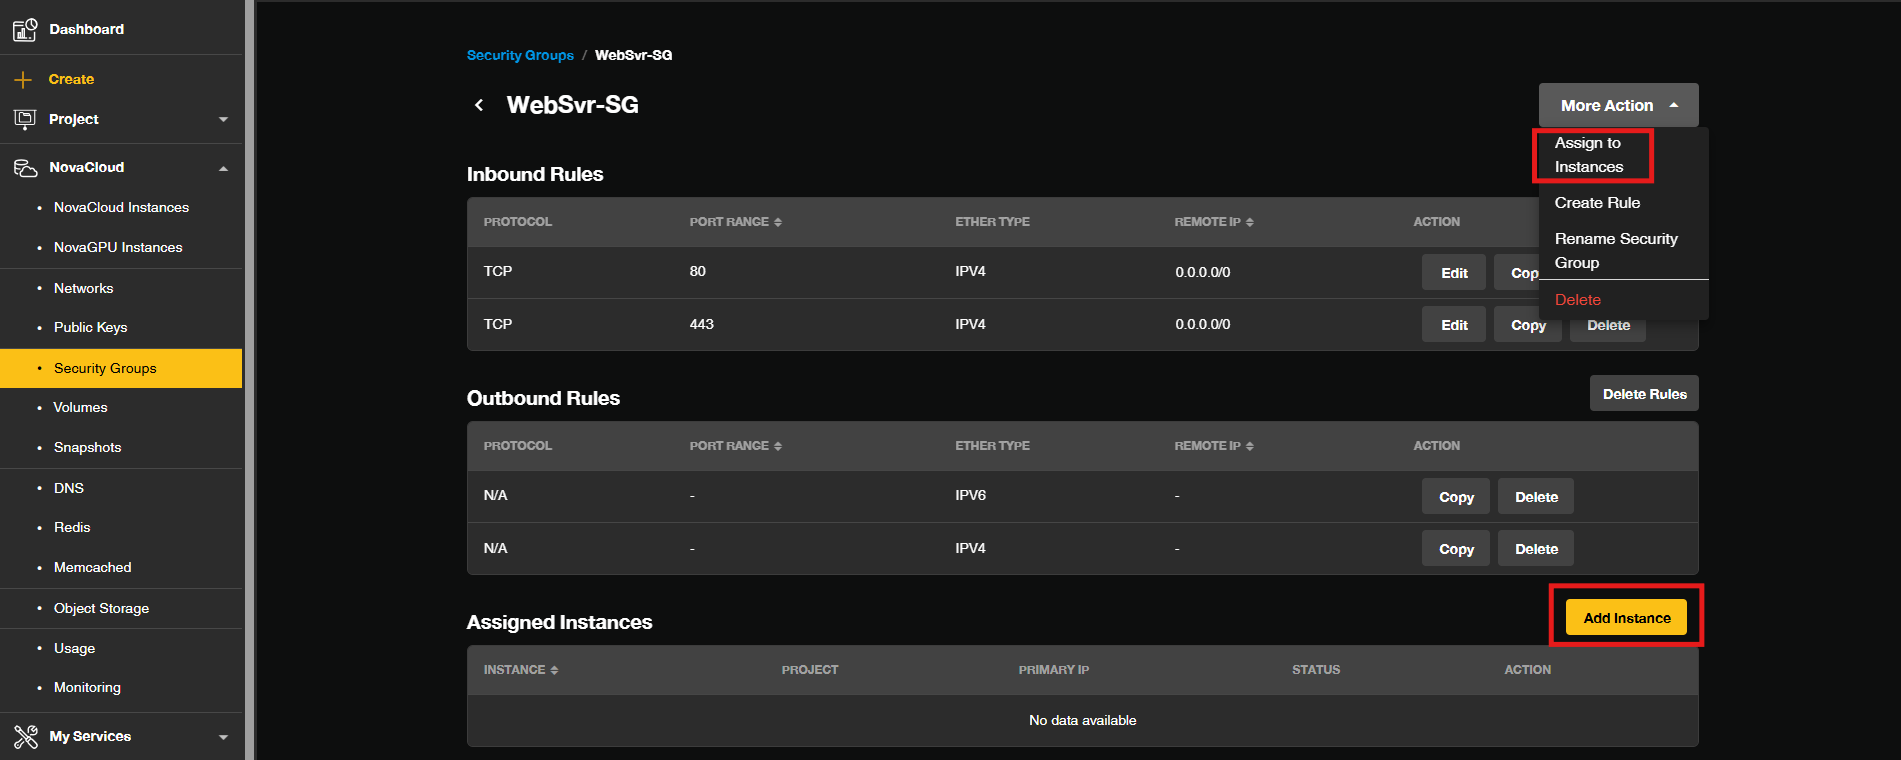
There are 2 ways to assign the security group to instances in Customer Portal, in security group managing site and instance managing site.
- Click Assign to Instances or Add Instance to assign the Security Group to your NovaCloud or NovaGPU.
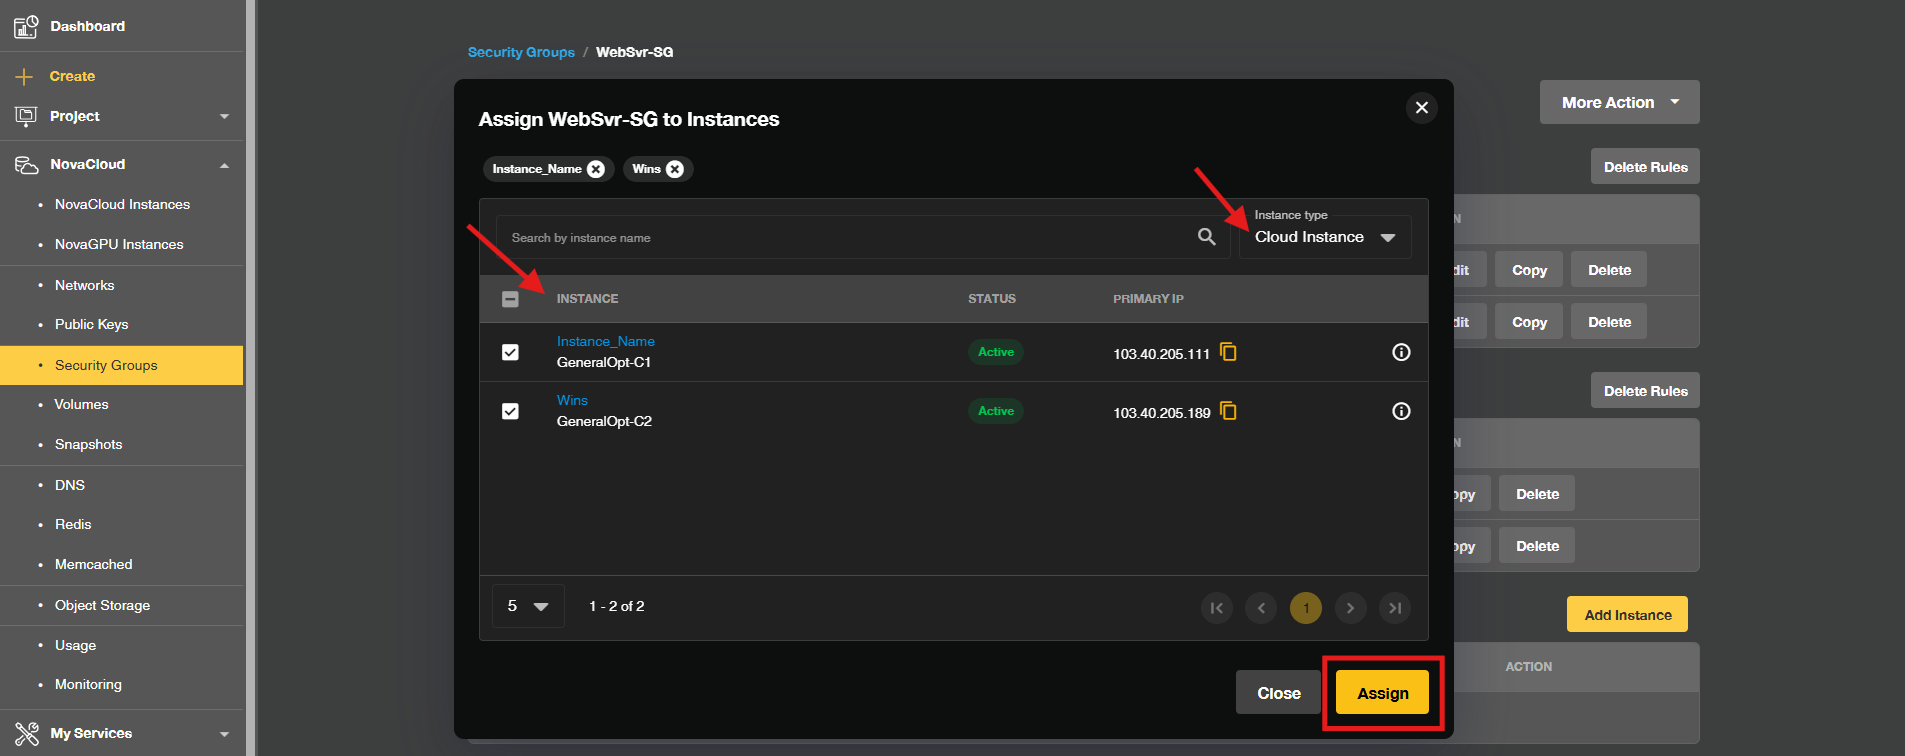
- Select the Instance type then check the Instance that you wish to assign the security group, then click Assign.
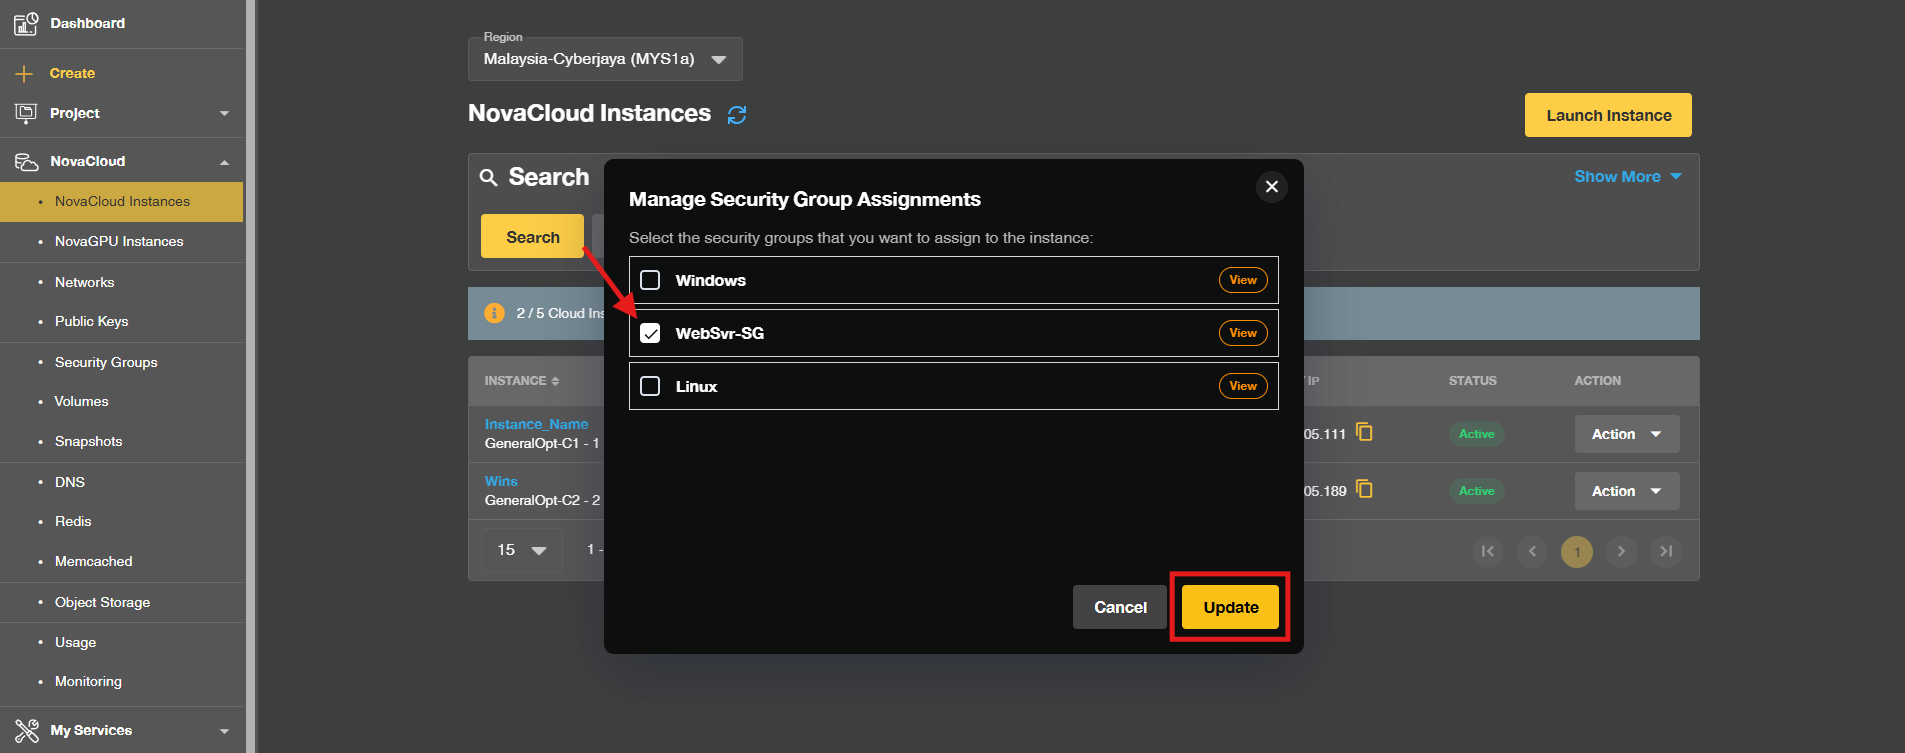
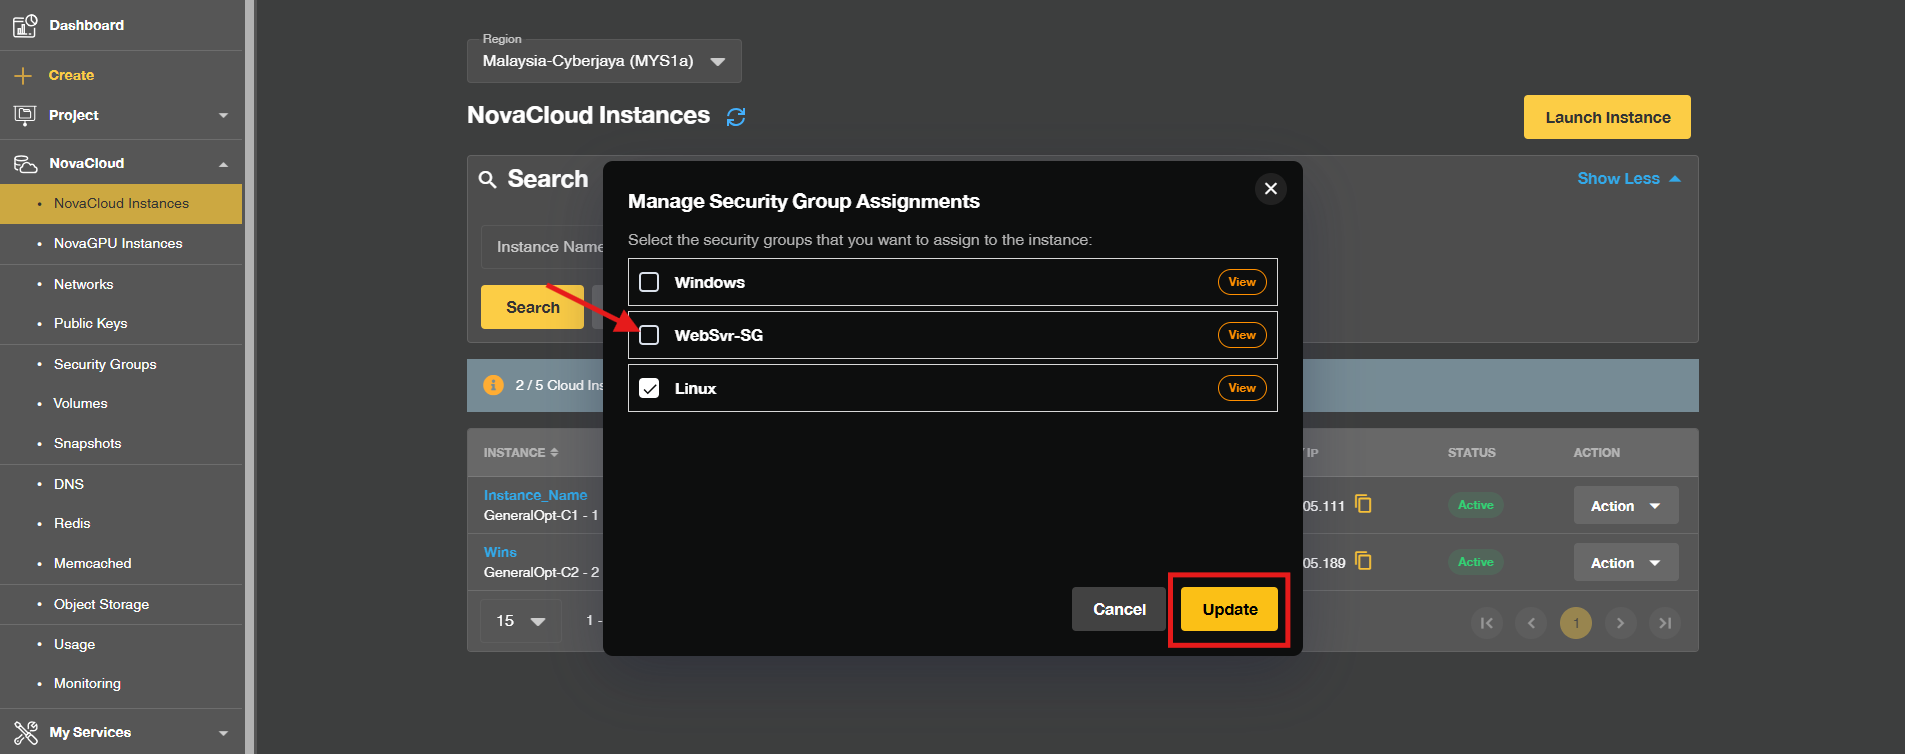
- Locate your instance from the dashboard by navigating to NovaCloud > Instances. Select your target instance name, or click on the actions menu and select Manage Security Groups.
- Assign the newly created security group to your instance and confirm by Update.
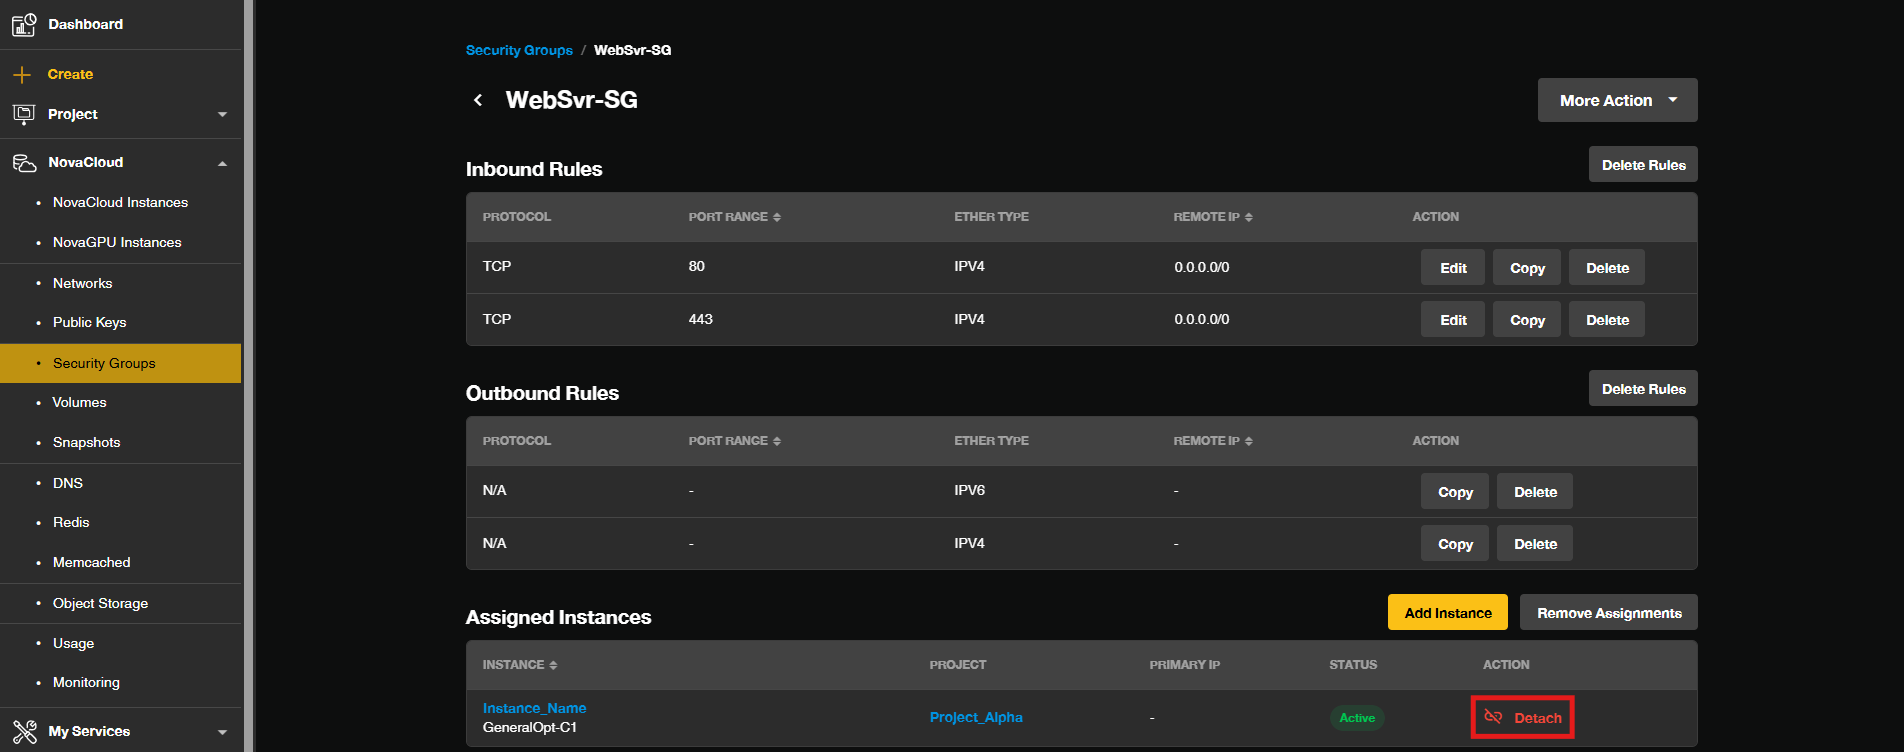
- To unassign the security group from the instances in security group managing site and instance managing site.
- In security group managing site, click on Detach to unassign the security group from instances.
- In instance managing site, uncheck the instances to unassign the security group then select Update.
Extra Step: Managing a Security Group
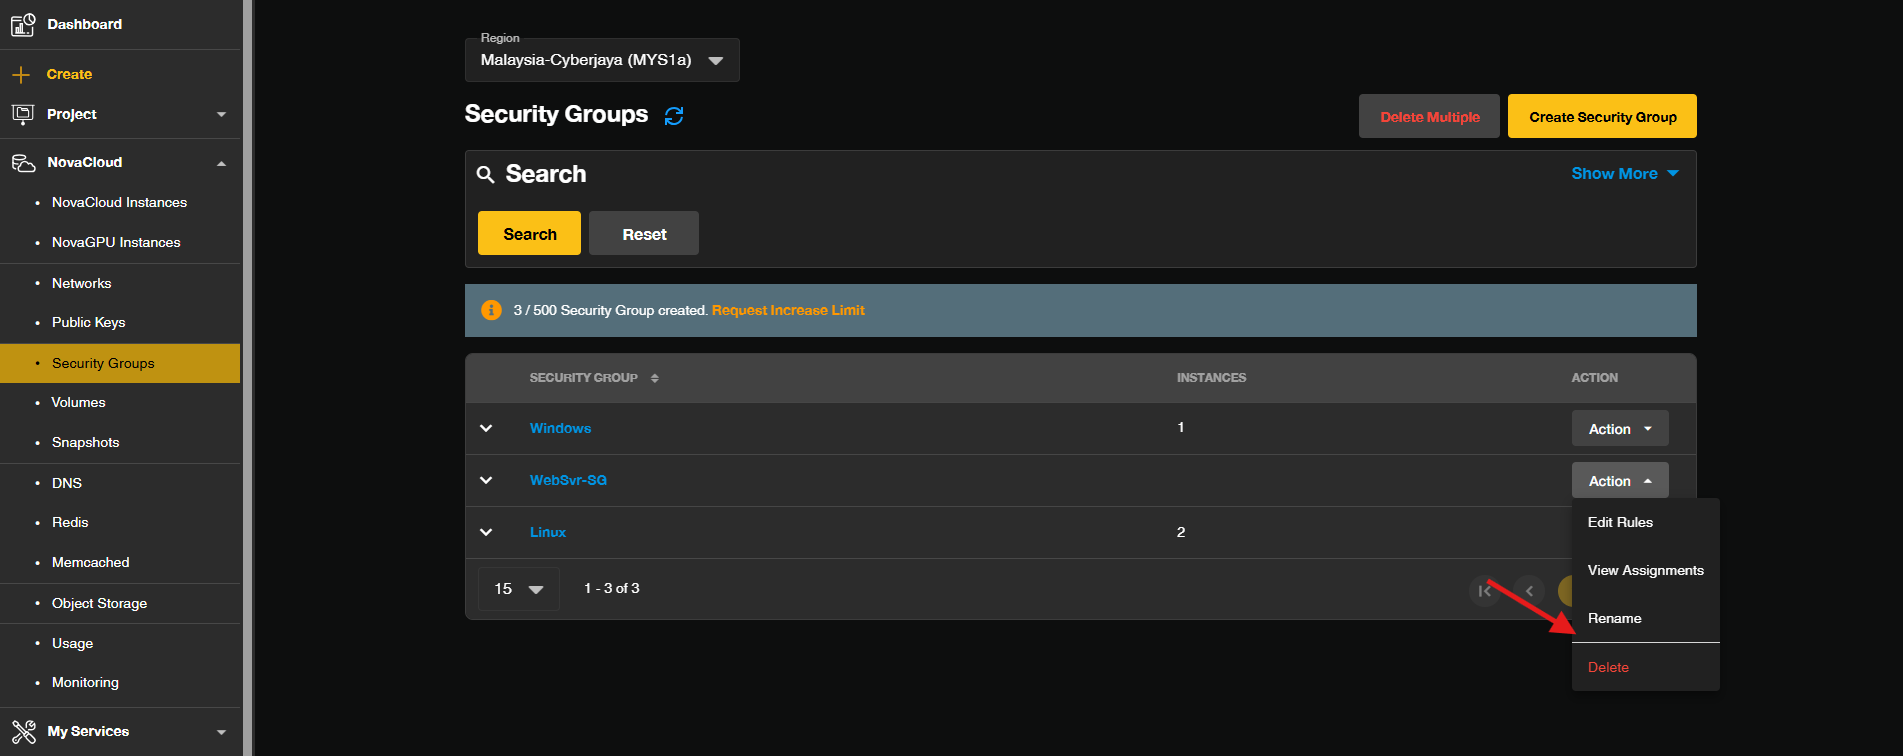
- To rename your security group to a new name or delete a security group that no longer in-use or assigned to any instances, click on Action drop-down then select either Rename or Delete.
Conclusion
By following this guidance, you can successfully configure, rename, and delete security groups within the IPServerOne Customer Portal to maintain secure, well-structured, and efficient network access control for your servers.
For additional assistance or if you encounter any issues, please contact our support team at support@ipserverone.com.
Article updated on 27 October 2026 by Johnny