
Search Our Database
How to Install and Configure a LAMP Stack on RHEL-Based Linux Servers
Introduction
A LAMP stack (Linux, Apache, MySQL/MariaDB, PHP) is a popular open-source web server platform used by developers and administrators to run dynamic websites and web applications. This guide explains how you can easily install and configure the essential LAMP components on RHEL-based Linux servers, such as AlmaLinux, Rocky Linux, or CentOS. You will typically perform this setup when initially provisioning your server to prepare it for web hosting. By following these straightforward instructions, you establish a robust and secure foundation to host your online projects directly from your server.
Prerequisite
- Access to the server via SSH with root or sudo privileges
- Basic understanding of navigating the command-line interface
Step-by-step Guide
Step 1: Enter Administrator Privileges
To avoid typing sudo before every command, switch to the root user account for the duration of this setup.
sudo su
Step 2: Verify SELinux status
First, check the current active state of SELinux on your server. If the status shows it is enforcing strict security policies, temporarily disable it by setting it to permissive mode to prevent permission conflicts during the installation and configuration of the LAMP stack.
To verify SELinux status:
sestatus
To temporarily disable it (if enabled):
setenforce 0
Step 3: Update Your System
Before installing new software, it is best practice to ensure your system packages are up to date.
dnf update -y
Step 4: Install and start Apache Web Server
Apache is the web server component that processes incoming requests and delivers web content to visitors.
- Install Apache:
dnf install httpd -y
- Start Apache and enable it to run automatically on system boot:
systemctl start httpd
systemctl enable httpd
- Install and configure the firewall to allow HTTP and HTTPS traffic:
dnf install firewalld -y
systemctl start firewalld
systemctl enable firewalld
firewall-cmd --permanent --zone=public --add-service=http
firewall-cmd --permanent --zone=public --add-service=https
firewall-cmd --reload
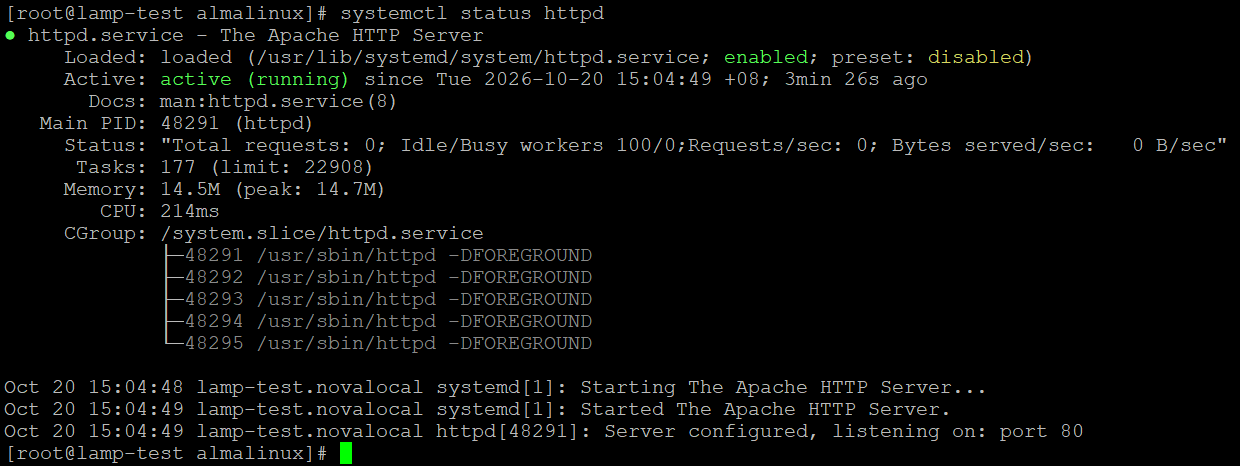
- Verify that Apache is running properly by checking its status.
systemctl status httpd
Expected Output: showing active (running).
Step 5: Install and secure MariaDB
MariaDB acts as the database management system to store and organize your website’s data.
- Install the MariaDB server:
dnf install mariadb-server mariadb -y
- Start and enable MariaDB:
systemctl start mariadb
systemctl enable mariadb
- Run the built-in security script to set a secure root password and remove default test databases.
mysql_secure_installation
-> Press Enter if asked for the current root password for none or type your desired password to set a new password.
-> Type ‘n’ for “Change the root password? [Y/n]” prompt.
-> Accept the defaults for the remaining prompts by pressing Enter.

Step 6: Install PHP Scripting Language
PHP processes dynamic content and connects to your database. You can install PHP using AlmaLinux’s native module streams (recommended for standard setups) or by adding the Remi repository (if you need the absolute latest versions of PHP).
- Enable PHP version. Choose ONE of the following methods:This method uses the built-in repositories to install stable, supported versions of PHP (like 8.1, 8.2, or 8.3).
Use this method if your web application strictly requires a newer version of PHP than what is provided by the native AlmaLinux repositories.
- Install PHP along with the essential extensions commonly required by modern web applications:
dnf install php php-cli php-common php-mysqlnd php-fpm php-gd php-opcache php-mbstring php-xml -y
- Restart Apache so it recognizes the newly installed PHP modules:
systemctl restart httpd
Step 7: Test Your LAMP Environment
Verify that Apache can correctly process PHP scripts.
- Create a test PHP file in the default web root directory:
dnf install nano -y
nano /var/www/html/info.php
- Paste the following line inside the file:
<?php phpinfo(); ?>
- Paste the following line inside the file:
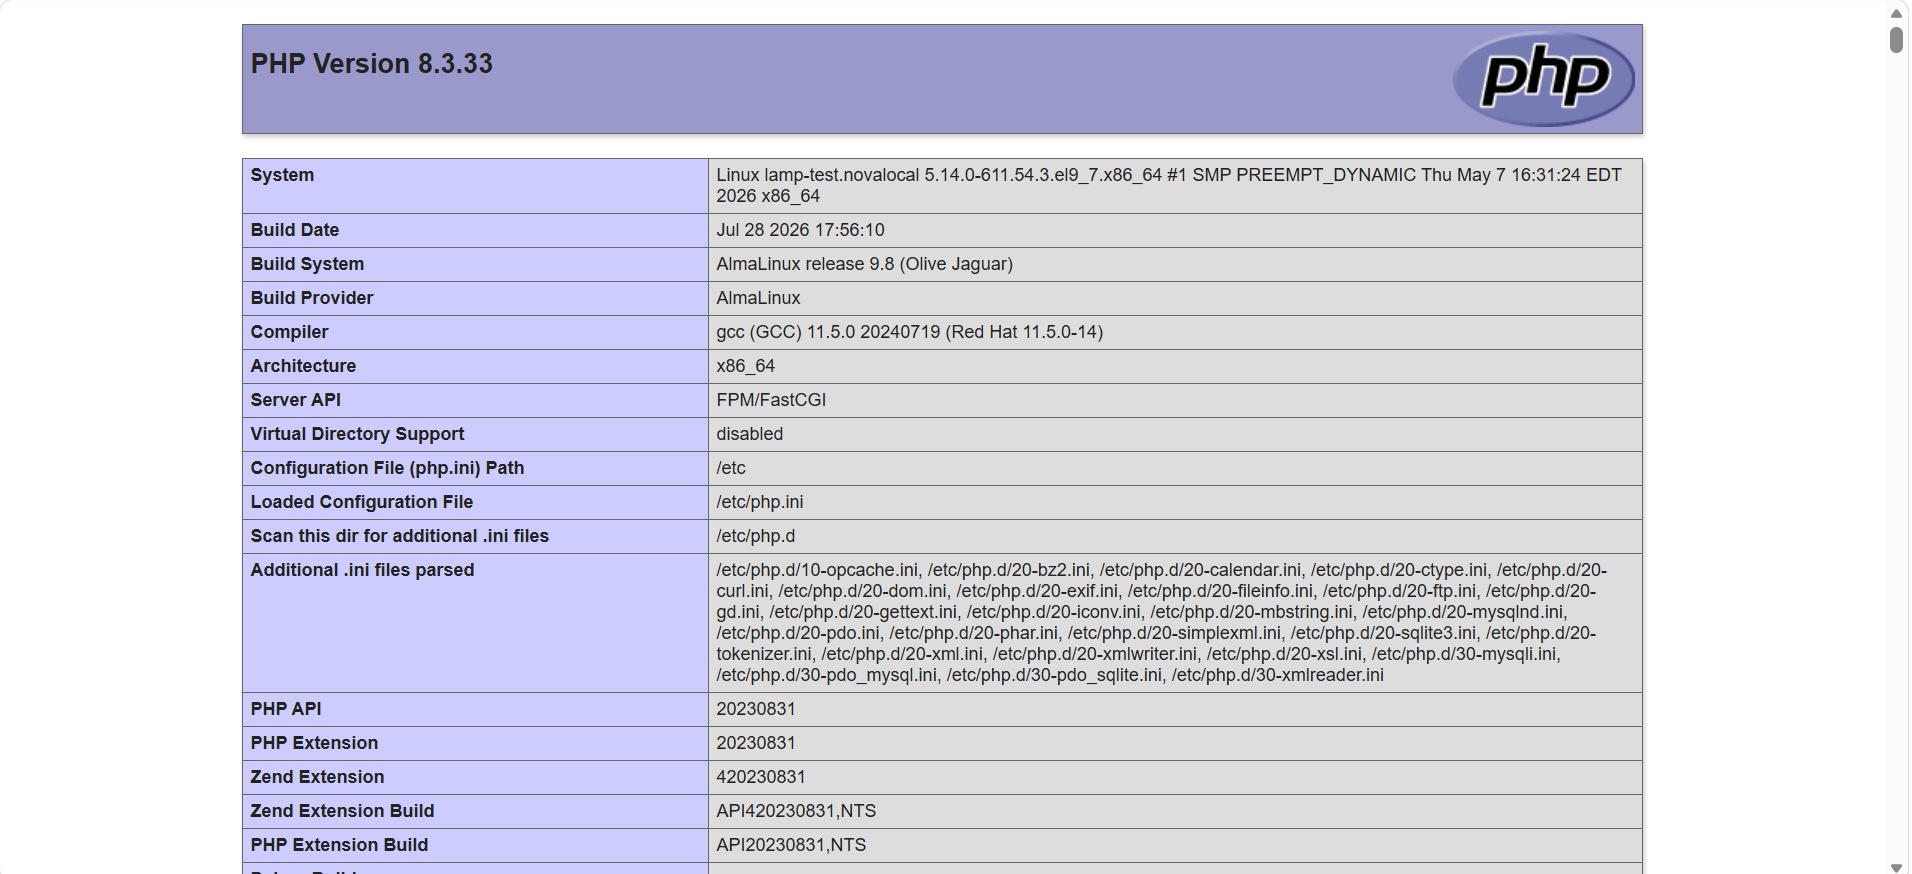
- Save and close the file (Ctrl + O > Enter > Ctrl + X). Open your web browser and go to http://YOUR_SERVER_IP/info.php. If you see a detailed PHP information page, your stack is functioning correctly.
Important Note ⚠️: Remove the test file when finished:
rm /var/www/html/info.php
Step 8: Create Your Website Directory & Virtual Host
For a custom domain, it is best practice to set up a dedicated directory structure rather than using the default /var/www/html/.
- Create a directory for your website (replace yourdomain.com with your actual domain):
mkdir -p /var/www/yourdomain.com
- Assign proper ownership and permissions:
chown -R apache:apache /var/www/yourdomain.com
chmod -R 755 /var/www/yourdomain.com
- Create a sample index page to verify your site directory:
nano /var/www/yourdomain.com/index.html
- Add some simple HTML code (Ctrl + O > Enter > Ctrl + X to save and exit):
<html>
 <head>
   <title>Welcome to My Website</title>
 </head>
 <body>
   <h1>Success! My LAMP website is up and running.</h1>
 </body>
</html>
- Add some simple HTML code (Ctrl + O > Enter > Ctrl + X to save and exit):
- Configure an Apache Virtual Host to point your domain name to this directory:
nano /etc/httpd/conf.d/yourdomain.com.conf
- Paste the following configuration block (ensure ServerName and ServerAlias match your actual domain):
<VirtualHost *:80>
    ServerName yourdomain.com
    ServerAlias www.yourdomain.com
    DocumentRoot /var/www/yourdomain.com

    <Directory /var/www/yourdomain.com>
        Options -Indexes +FollowSymLinks
        AllowOverride All
        Require all granted
    </Directory>

    ErrorLog /var/log/httpd/yourdomain.com_error.log
    CustomLog /var/log/httpd/yourdomain.com_access.log combined
</VirtualHost>
- Paste the following configuration block (ensure ServerName and ServerAlias match your actual domain):
- Test the Apache configuration for syntax errors and restart the service:
apachectl configtest
systemctl restart httpd
Step 9: Verify if Website is Running
Open your web browser and type your domain name (e.g. yourdomain.com) in search bar. Then, press Enter.
You must ensure a DNS record with following details is added.
Name / Host: @ (Note: If your DNS editor requires a domain name instead of @, enter your full domain name or leave it blank depending on the system)
Type: A
Value / Points to: <your server’s IP address>
Expected Output: showing the content in your index.html file.

Conclusion
By following this guidance, you can successfully set up a LAMP stack on your RHEL-based Linux server, providing a stable and secure foundation for hosting your dynamic websites and web applications.
For additional assistance or if you encounter any issues, please contact our support team at support@ipserverone.com.