
Search Our Database
How to Enable Built-in OpenSSH on Windows Server
Introduction
OpenSSH is a powerful, open-source tool used by system administrators and developers to securely connect and manage remote machines over an unsecured network. Since Windows 10 and Windows Server 2019, Microsoft has included OpenSSH as a built-in optional feature, allowing users to easily establish secure shell connections directly from their Windows environment without needing third-party applications. By enabling this built-in OpenSSH feature on your Windows system, you can quickly configure a secure server or client setup for efficient file transfers and remote command execution. This guide explains how you can enable the built-in OpenSSH feature on Windows effectively.
Prerequisite
- Access to the Windows system with Administrator privilege.
- Basic knowledge on navigating Windows Settings or PowerShell.
Step-by-step Guide
Step 1: Enable OpenSSH
Method 1: via Windows Settings
This method uses the built-in Windows Settings interface to install the OpenSSH Client and Server, which is ideal for users who prefer graphical menus.
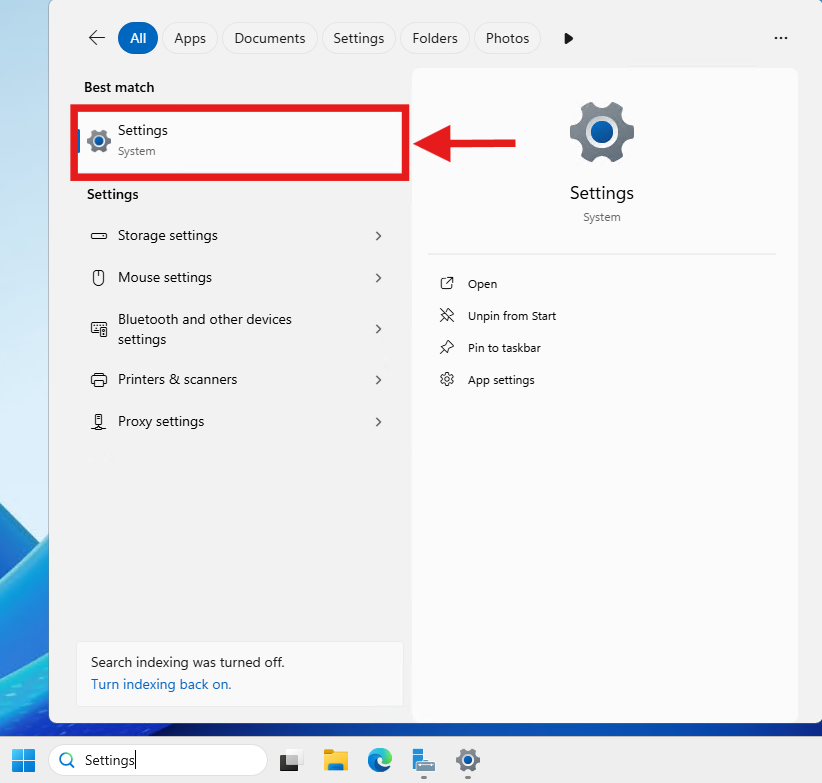
- Open the Start menu and select Settings.
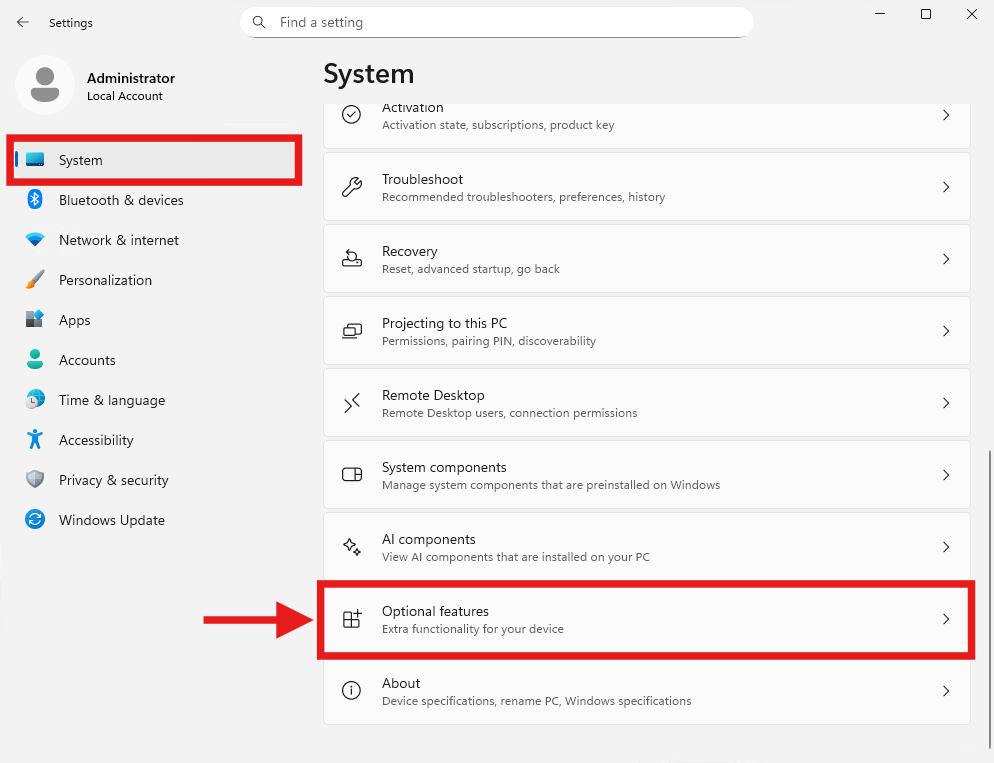
- Click on System in the left sidebar, then scroll down and click on Optional features.
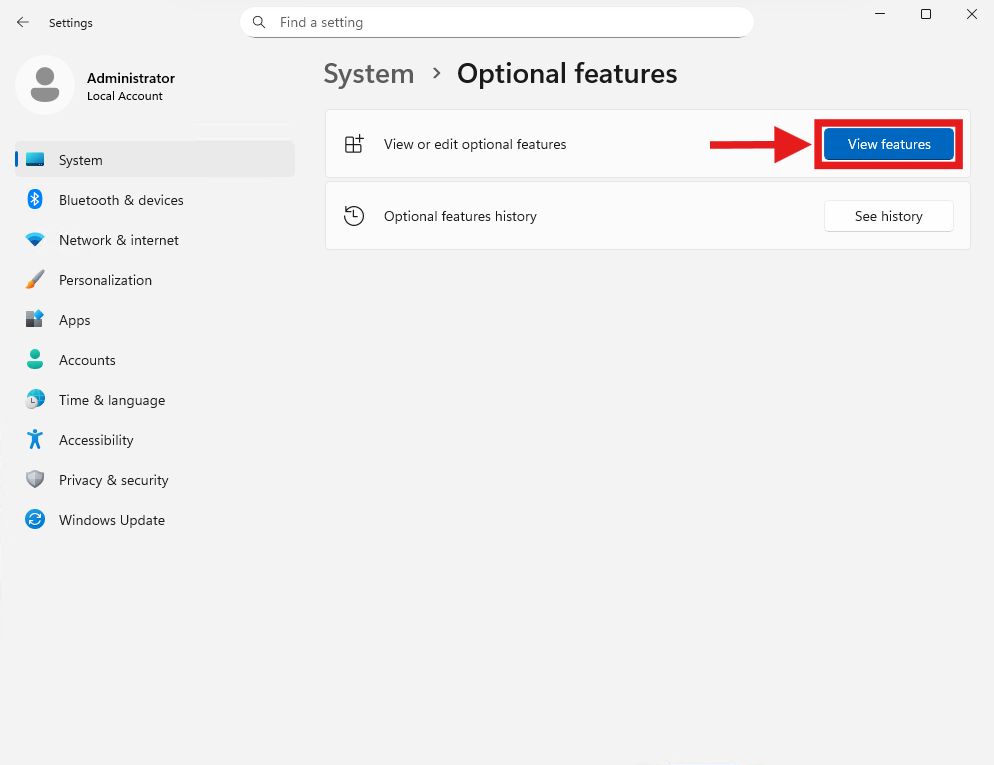
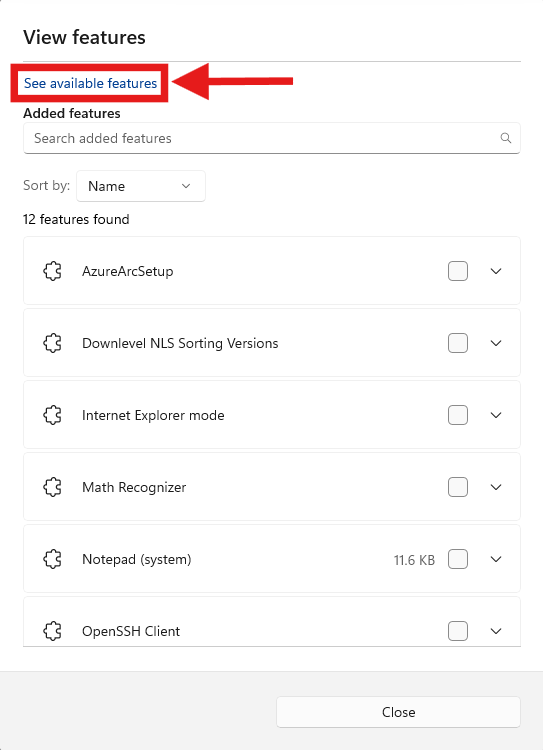
- Click on View features.
- To verify if both OpenSSH Server and OpenSSH Client features are there or not, type OpenSSH in the Search added features search bar. If a Remove button is shown instead of Add after clicking on the checkboxes, it means the features are already installed.
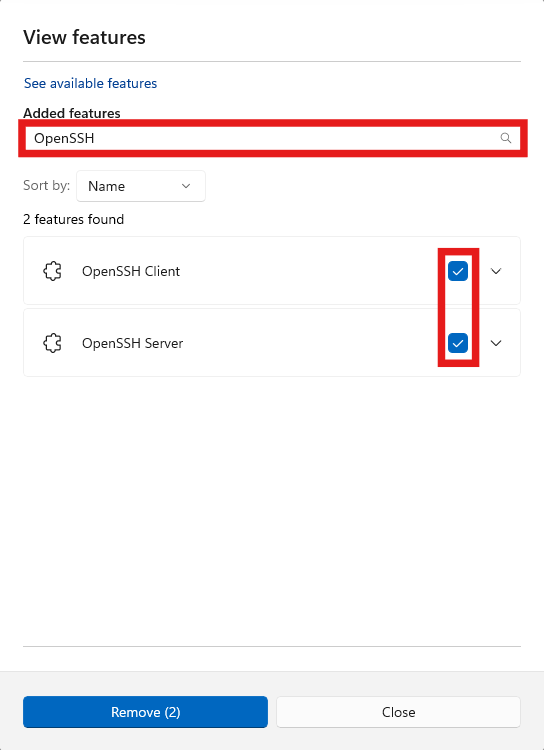 Tips 🖊️: If you have not yet installed both features, you need to click on See available features to view available features, then find OpenSSH Client and OpenSSH Server there, and Add them.
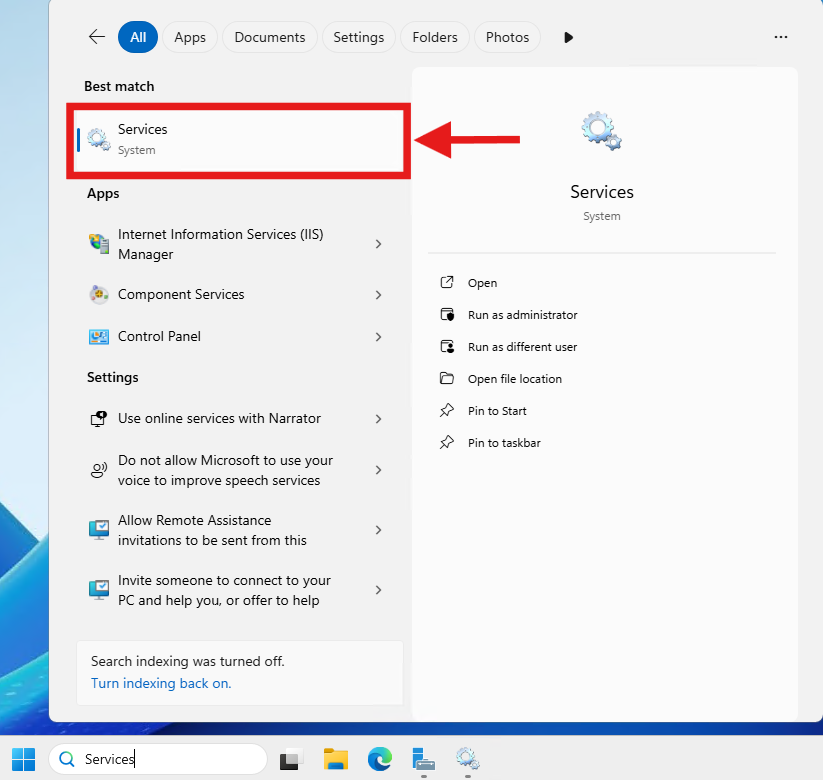
- Once installed, open the Start menu, type Services, and click the application to open it.
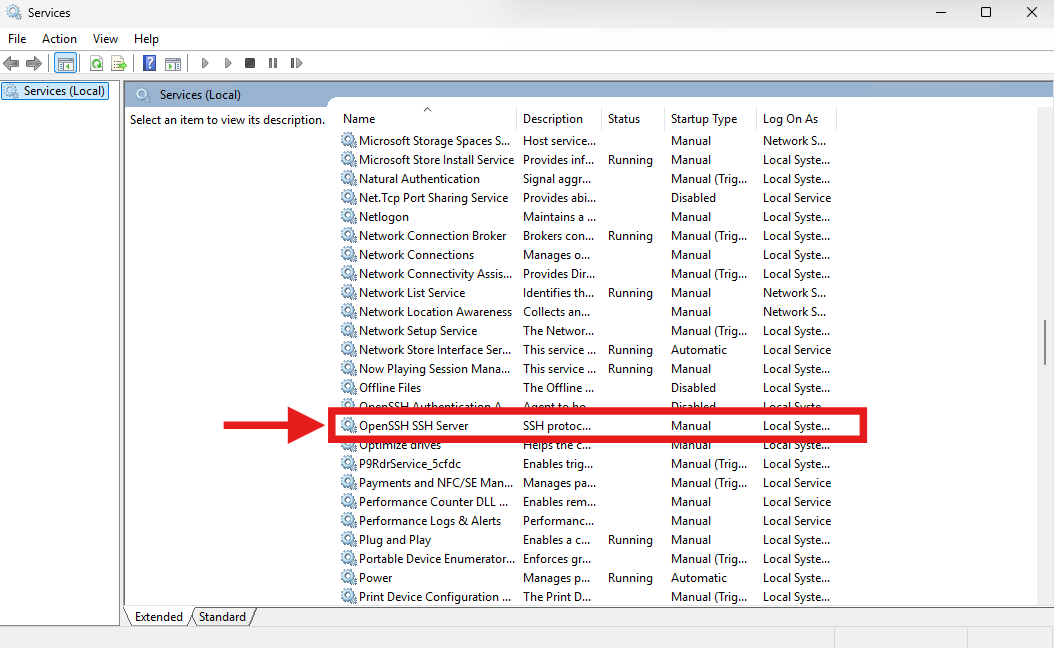
- Locate OpenSSH SSH Server in the list, double-click it.
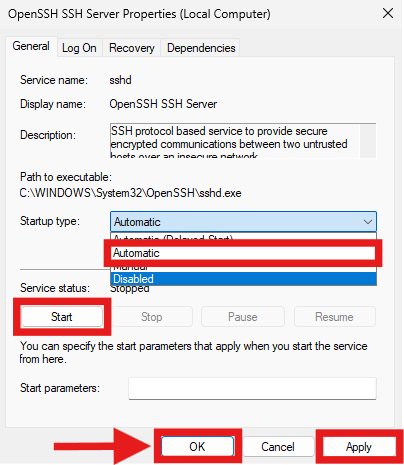
- Change the Startup type to Automatic and click Start.
- Click Apply, then OK to save the changes and ensure the service runs continuously.
Method 2: via PowerShell
This method uses PowerShell commands to quickly install and configure OpenSSH, which is best for advanced users who prefer the command-line interface.
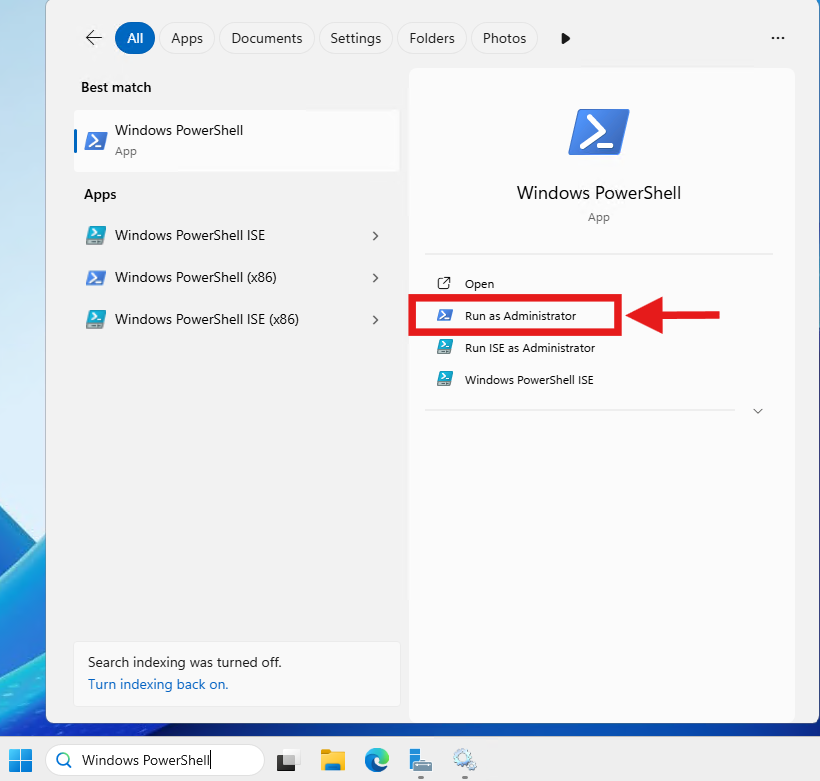
- Right-click the Start menu, type Windows PowerShell and select Run as Administrator.
- To install the OpenSSH Client and OpenSSH Server, type the following commands and press Enter after each:
Add-WindowsCapability -Online -Name OpenSSH.Client~~~~0.0.1.0
Add-WindowsCapability -Online -Name OpenSSH.Server~~~~0.0.1.0
- To start the OpenSSH service, run the following command:
Start-Service sshd
- To configure the service to start automatically upon system boot, enter this command:
Set-Service -Name sshd -StartupType 'Automatic'
- Finally, verify that the firewall rule is created by running the following command:
if (!(Get-NetFirewallRule -Name "OpenSSH-Server-In-TCP" -ErrorAction SilentlyContinue)) { New-NetFirewallRule -Name 'OpenSSH-Server-In-TCP' -DisplayName 'OpenSSH Server (sshd)' -Enabled True -Direction Inbound -Protocol TCP -Action Allow -LocalPort 22 }
Step 2: Perform Verification
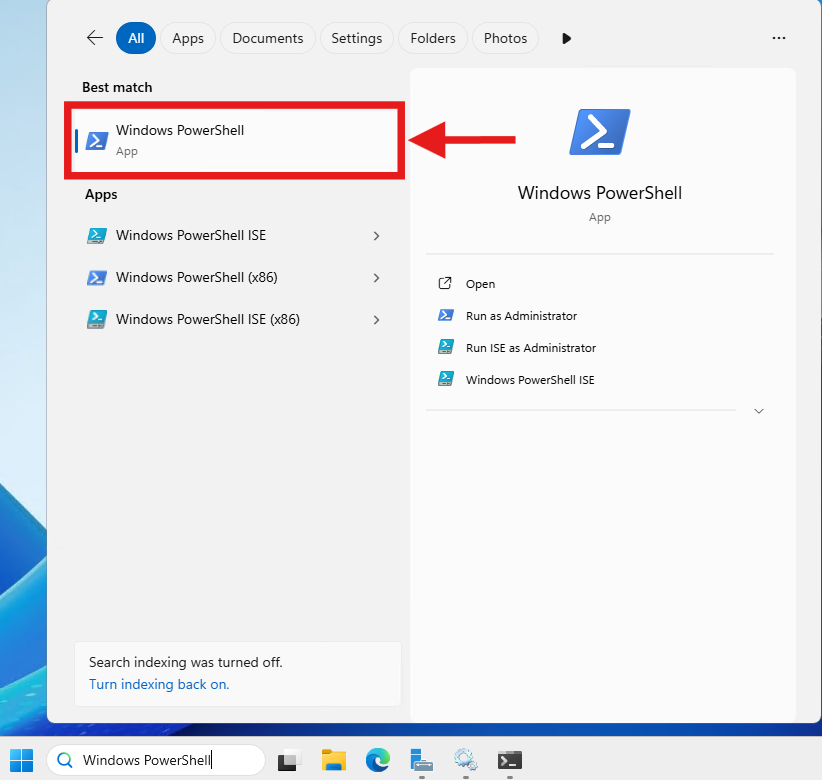
- Open Windows PowerShell.
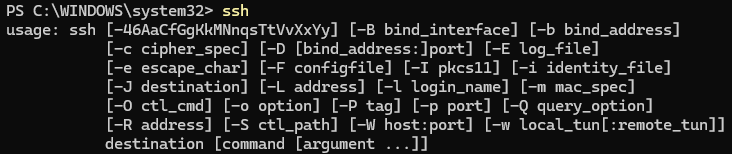
- To verify the OpenSSH Client is working, type the following command and press Enter:
ssh
Expected Output: You should see the command usage options displayed.
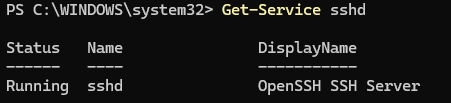
- To verify the OpenSSH Server is active, run this command:
Get-Service sshd
Expected Output: The status should display as “Running”.
- To ensure the server is actively listening for incoming SSH connections (Port 22 is open), run the following command:
netstat -an | findstr :22
Expected Output: You should see an output containing LISTENING, which confirms the port is open and ready for remote connections.

Conclusion
By following this guidance, you can successfully enable and configure the built-in OpenSSH feature on your Windows system. This allows you to securely manage servers and perform encrypted remote connections directly from your native environment.
If you need further assistance, please contact our support team at support@ipserverone.com.