
Search Our Database
How to Set Up Cisco Duo for Multi-Factor Authentication on Windows Server
Introduction
Securing remote access to your server is critical for protecting sensitive data and infrastructure. Administrators can set up Cisco Duo Multi-Factor Authentication (MFA) on their Windows Server to add an extra layer of security beyond traditional passwords. By implementing Duo MFA, organizations ensure that only verified users can log in, significantly reducing the risk of unauthorized access. This guide explains how to set up your cloud-hosted Duo Admin account and configure the Duo Authentication for Windows Logon application to safeguard your server environment against compromised credentials.
Prerequisite
- Administrative access to the target Windows Server.
- An active internet connection to communicate with the Duo service over HTTPS (port 443).
- Ensure the system time on your Windows Server is correct before proceeding.
Step-by-step Guide
Step 1: Sign Up for a Duo Account
Navigate to the [Cisco Duo signup page] in your web browser and create a new administrator account. Verify your email address and follow the prompts to secure your own login.
Step 2: Access the Duo Admin Panel
Log in to the cloud-hosted Duo Admin Panel using the administrative credentials you just created.
Step 3: Add Microsoft RDP
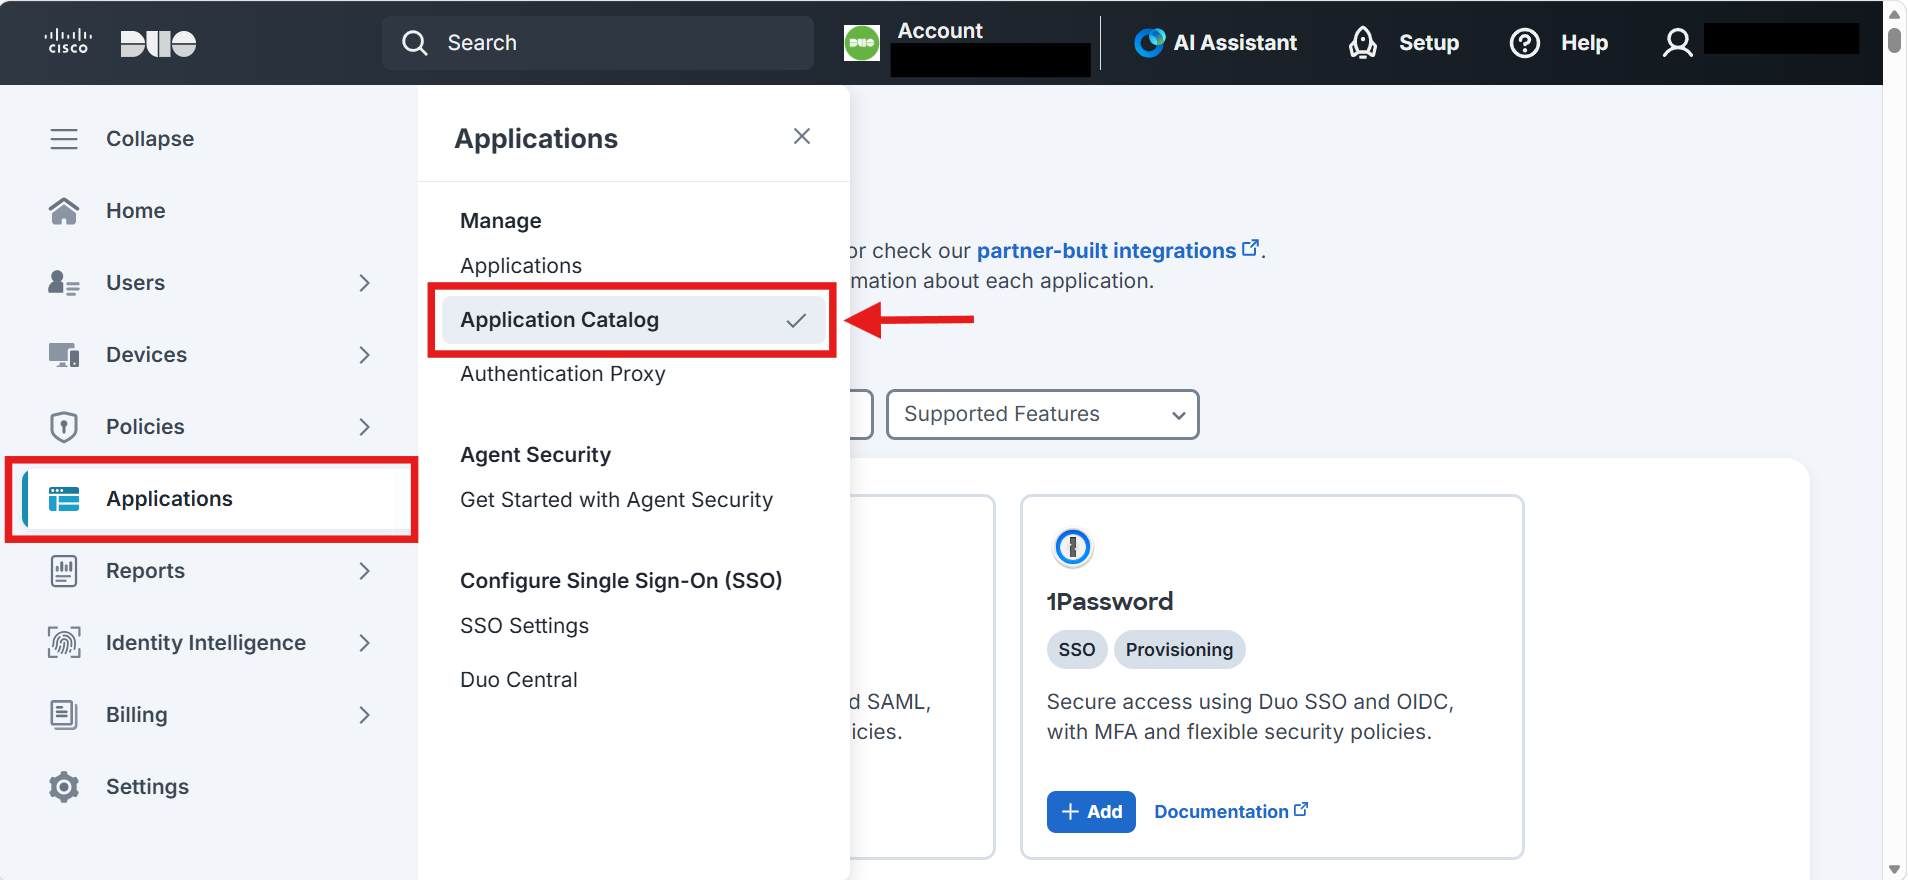
- In the left sidebar, navigate to Applications > Application Catalog.
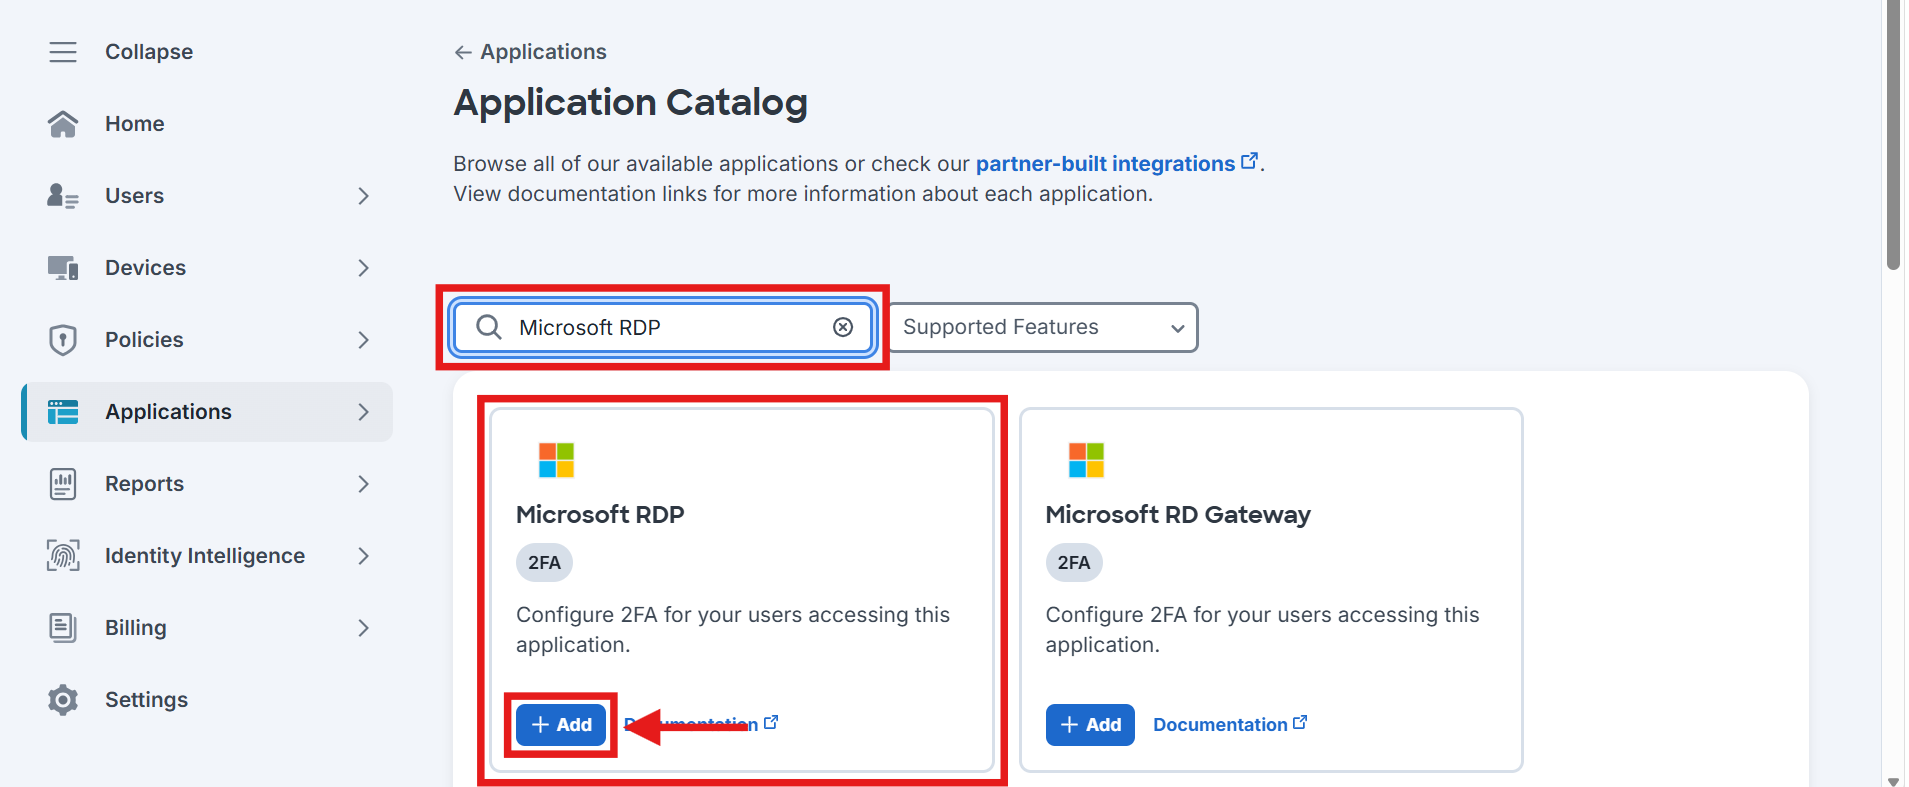
- Locate the entry for Microsoft RDP with the “2FA” label and click the + Add button to create the application.
Step 4: Add User and Get User Enrolled
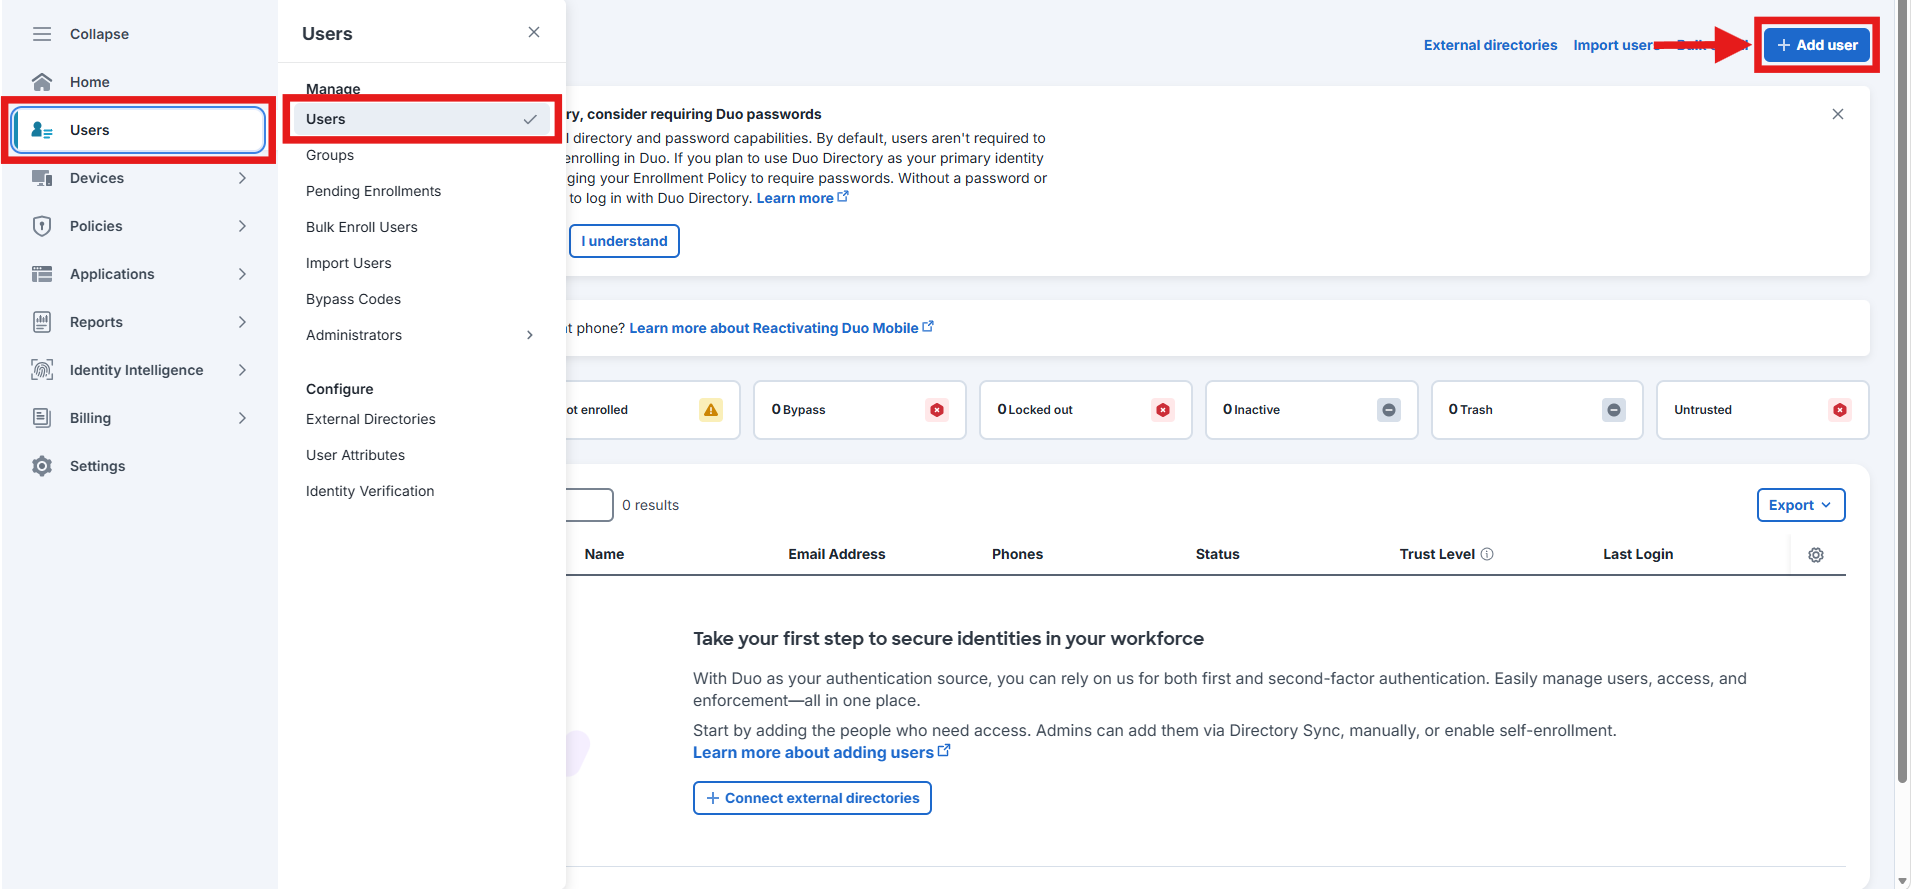
- In the left sidebar, navigate to Users > Users, then click on + Add user.
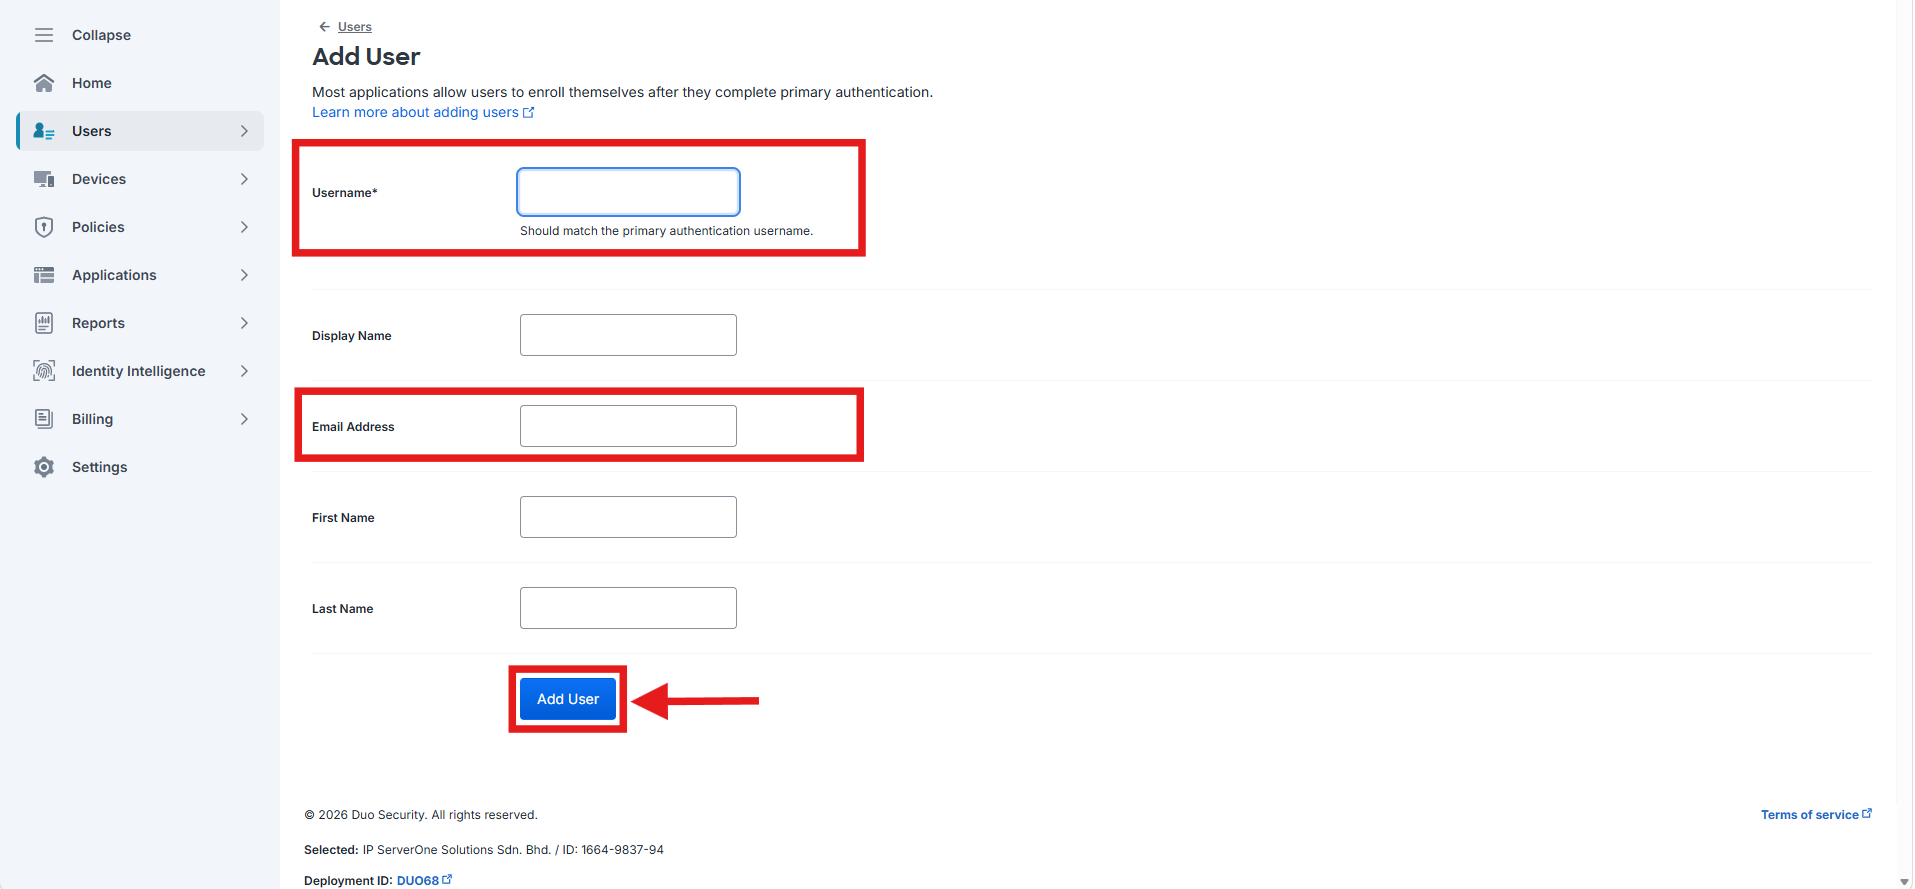
- Fill in the Username (must be identical to the Windows server username) and Email Address (to receive enrollment link). Then, click on Add User.
- Click on Send email and then Save Changes.
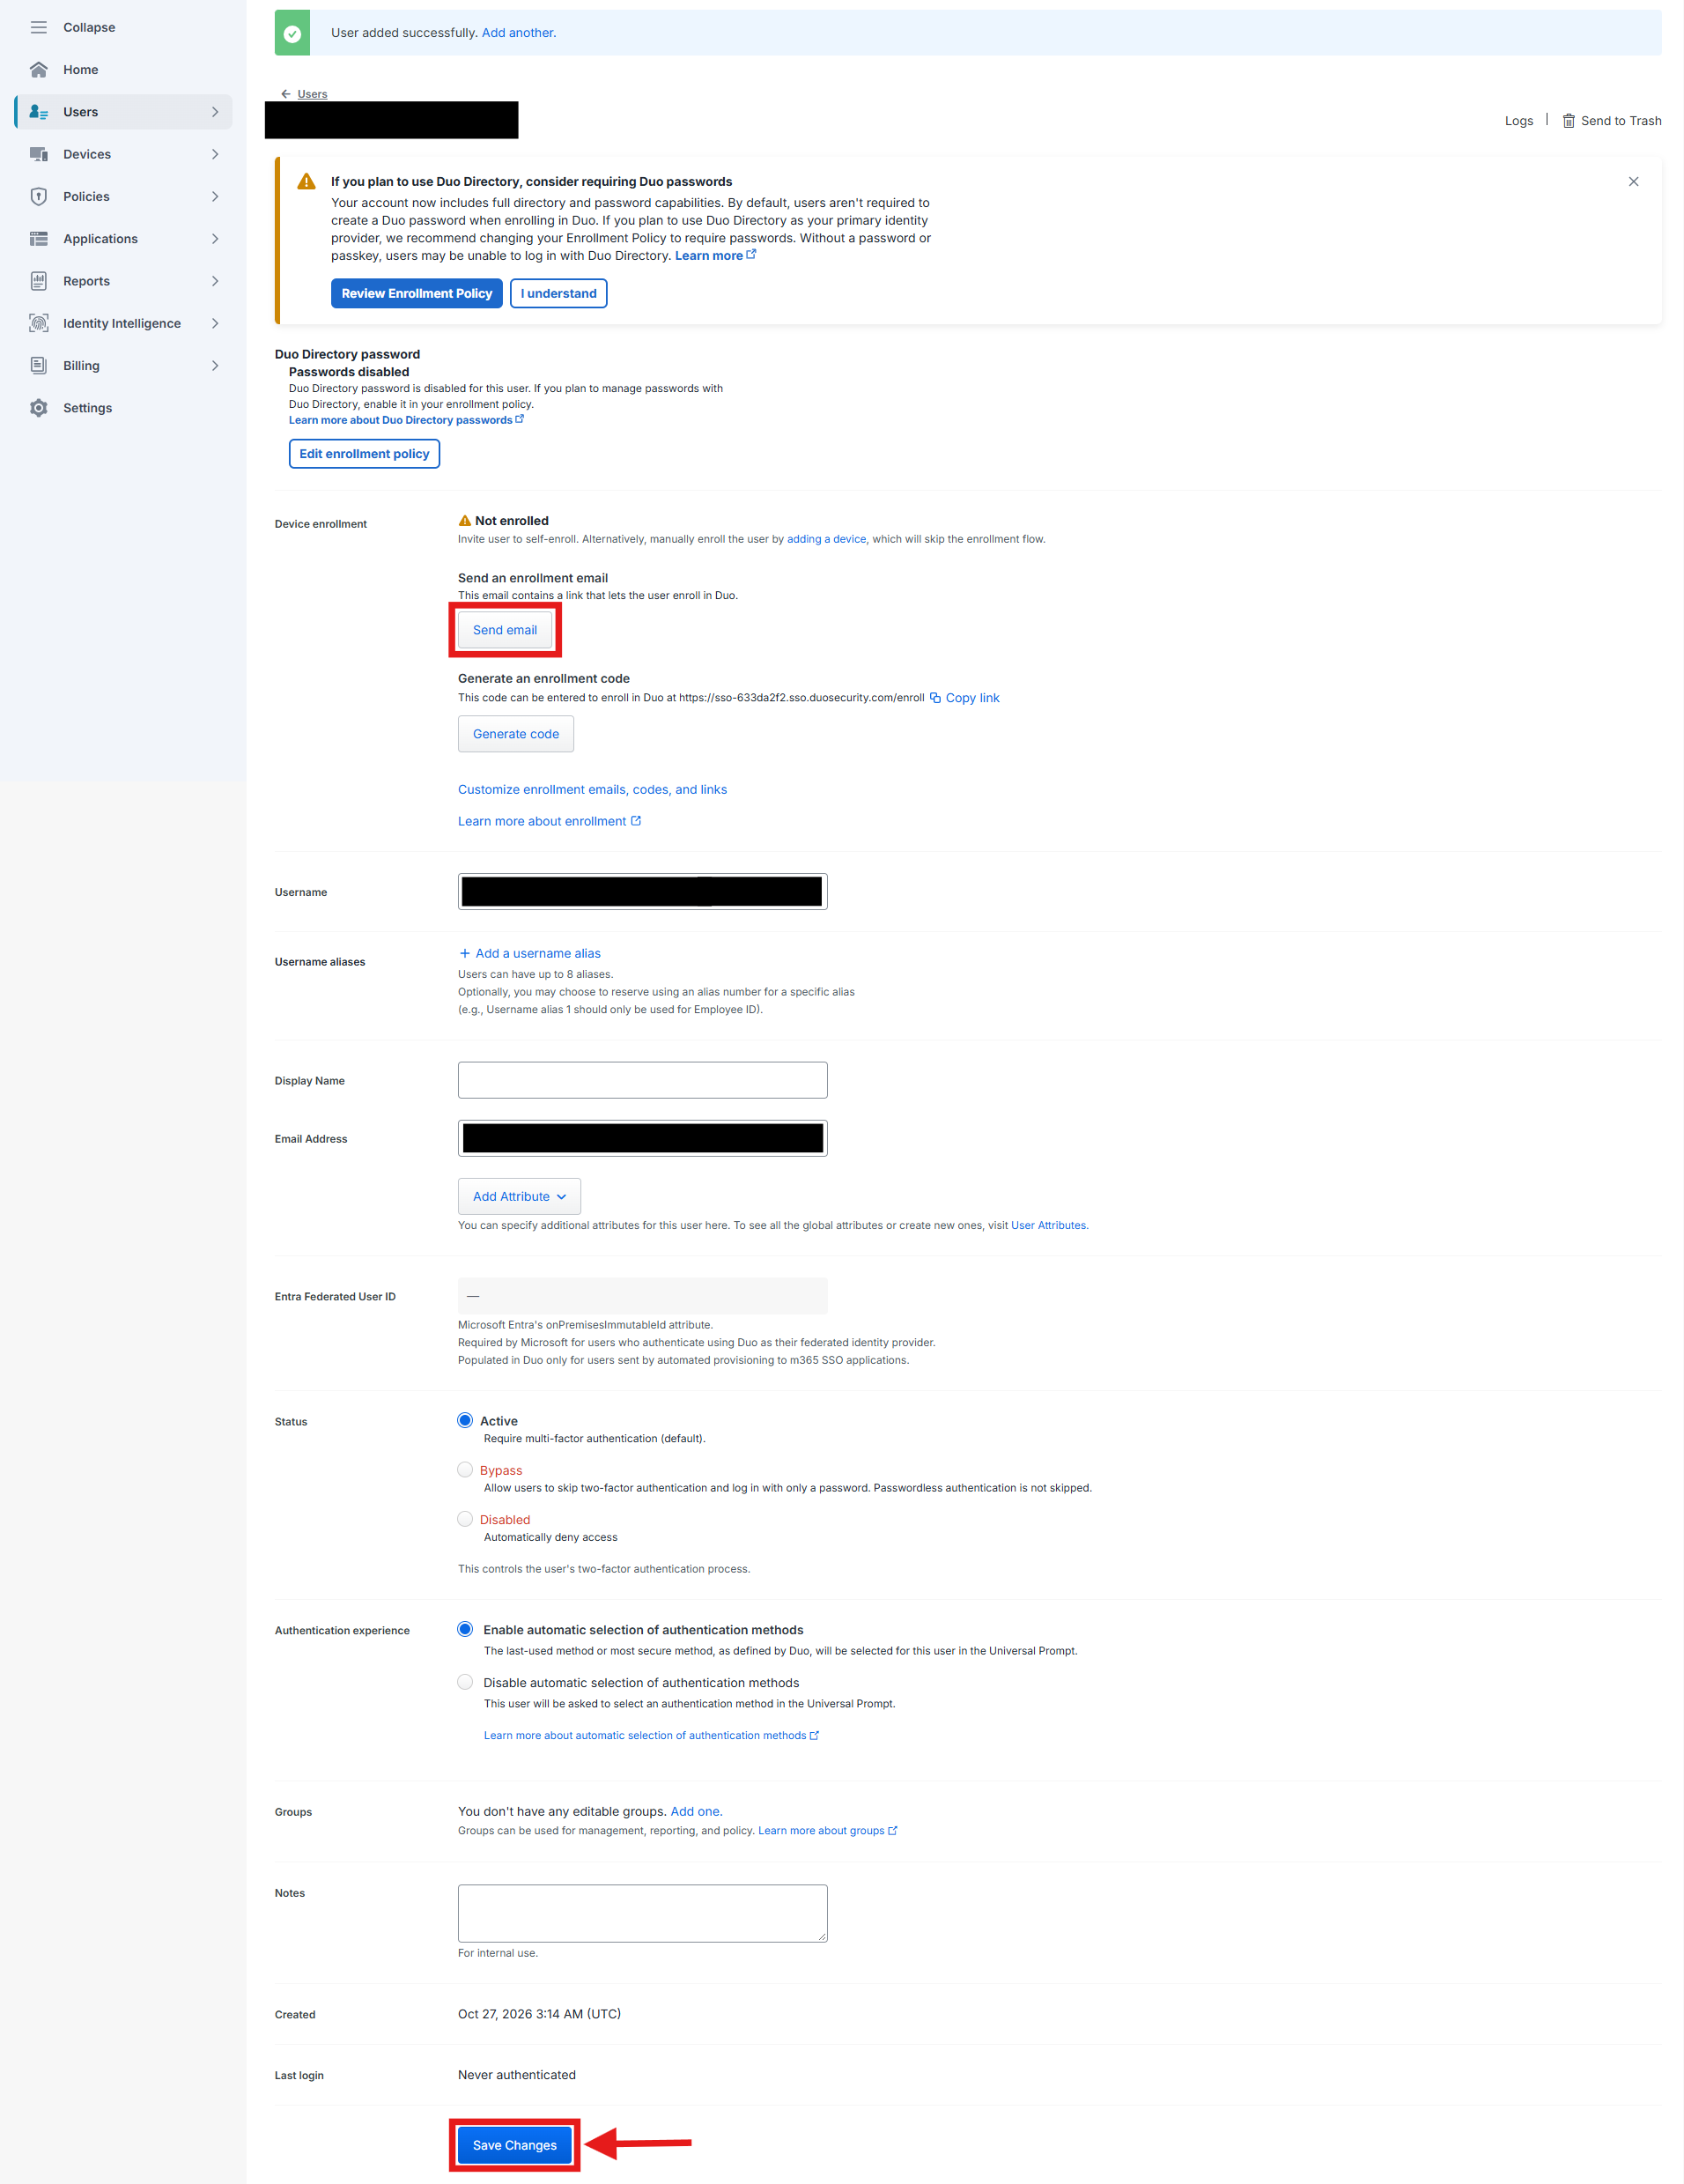
- Once the Send email button is pressed, the user will receive an email titled “Duo Security Enrollment” in their mailbox (based on the email address entered in the previous step).
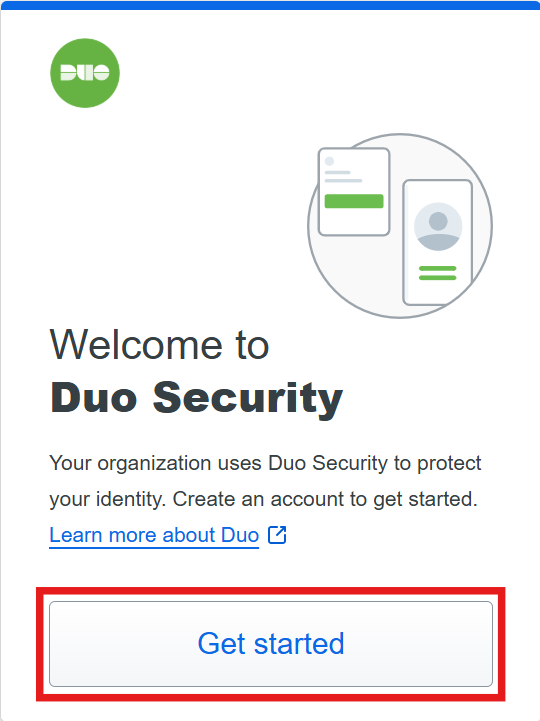
- Click on the first link and the prompt as shown below will come up. Click on Get Started.
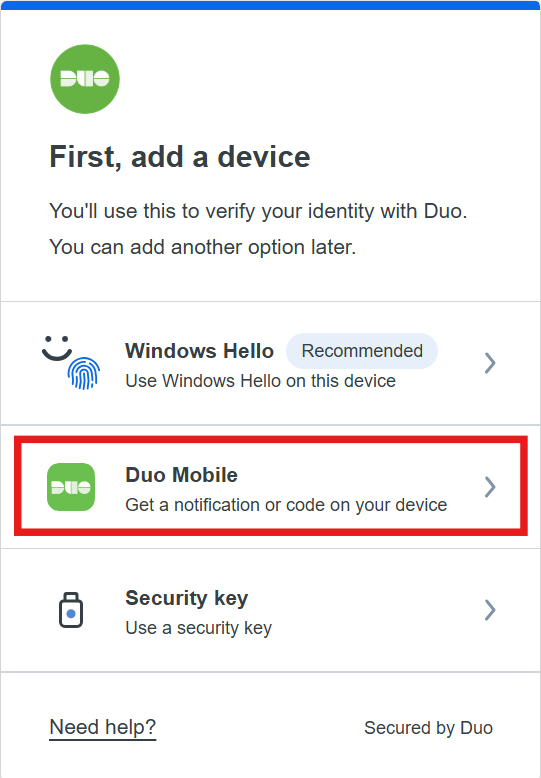
- Then, click on Duo Mobile.
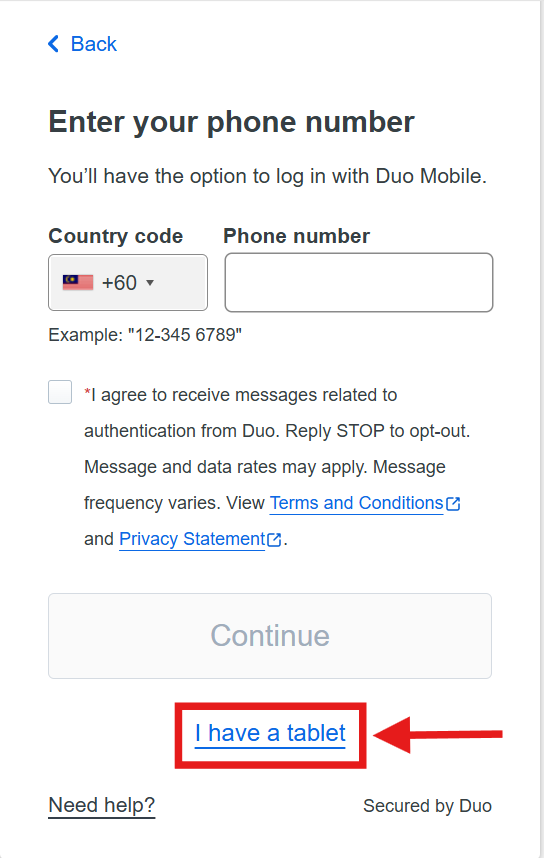
- Click on the I have a tablet link.
- Click Next once you have Duo Mobile downloaded.
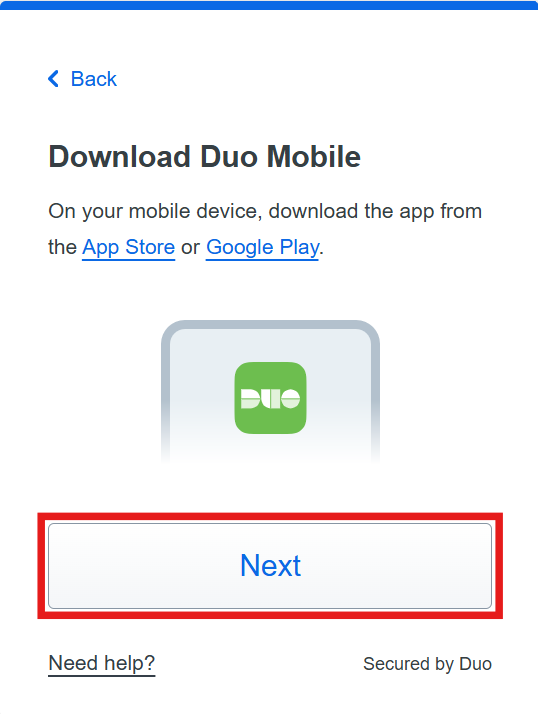
- Once Duo Mobile is downloaded, click on the + Add button under Accounts and click on Use QR code in Duo Mobile app.
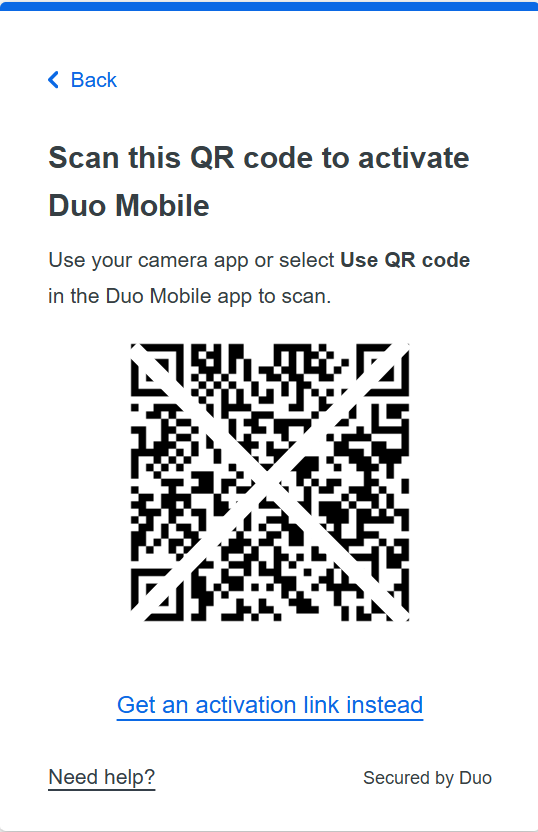
- Use it to scan the QR code shown in the next prompt.
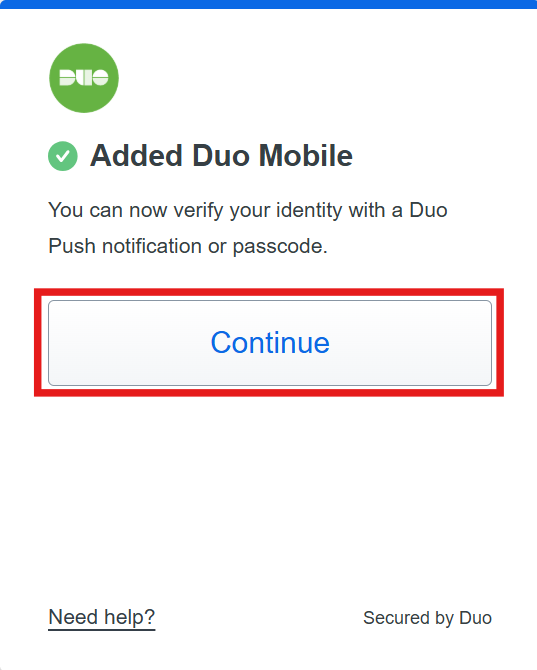
- Once it’s added, an Added Duo Mobile prompt will appear. Press Continue to have the user enrolled.
Step 5: Configure a Policy and Apply it to Microsoft RDP Application
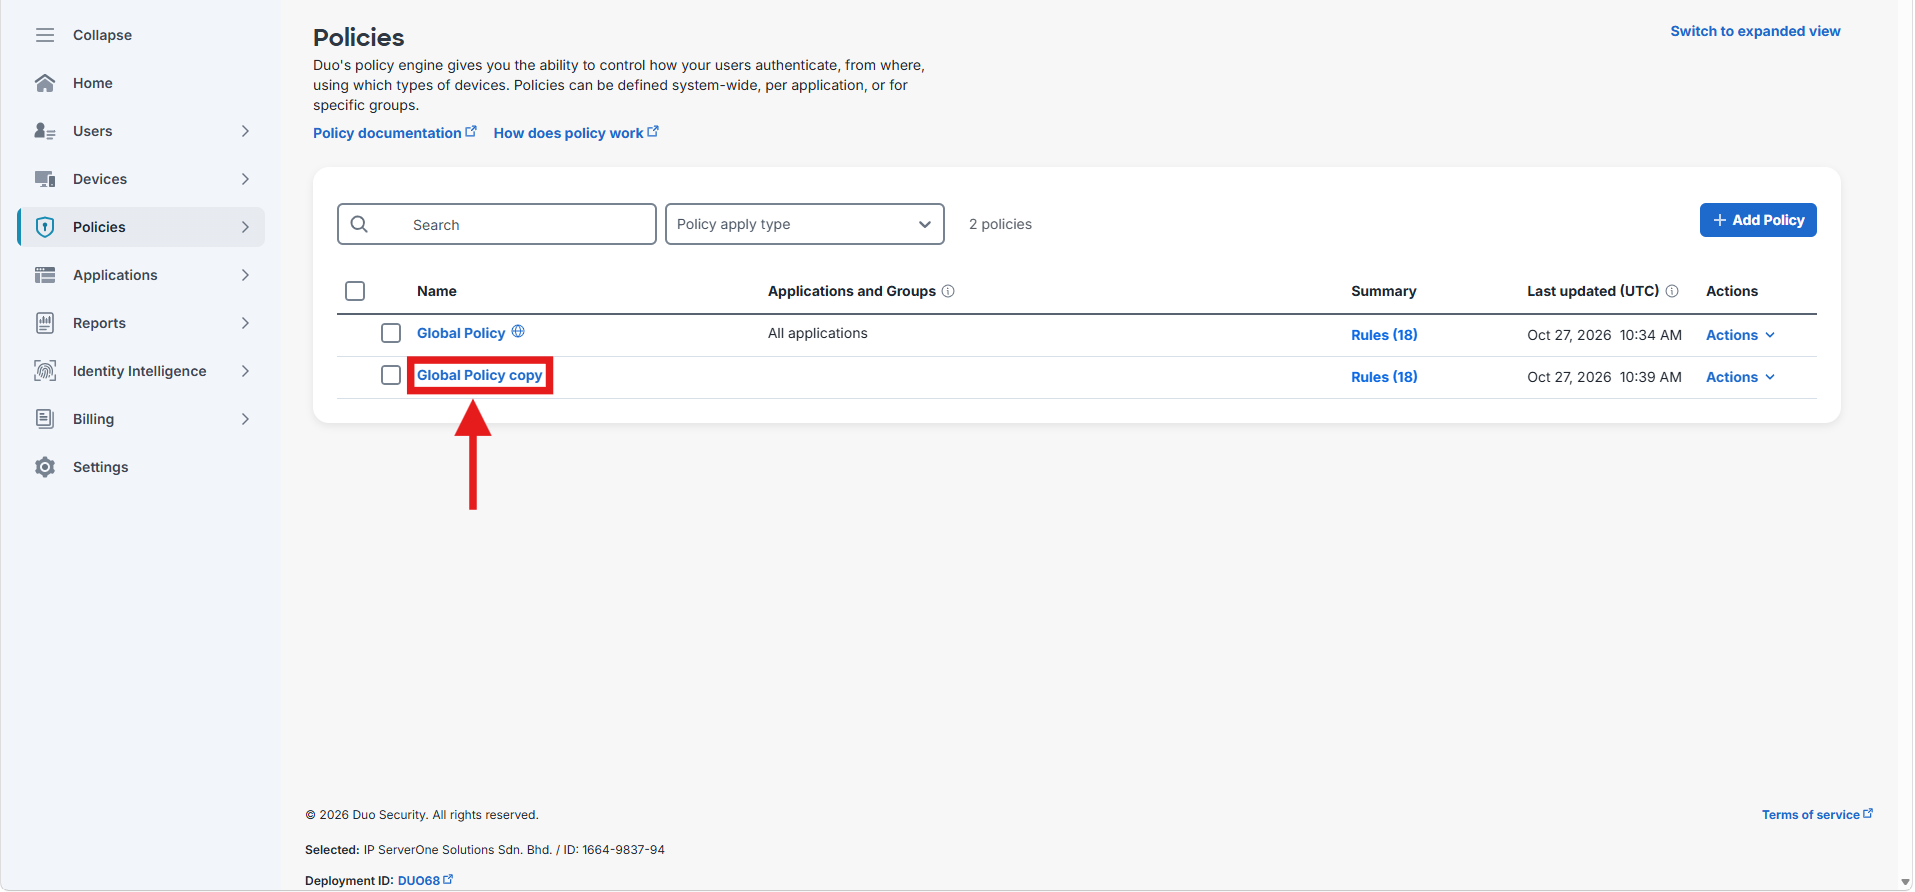
- To make things simple, you may duplicate the Global Policy at Policies > Policies, tick on the checkbox in front of the Global Policy and click on Duplicate.
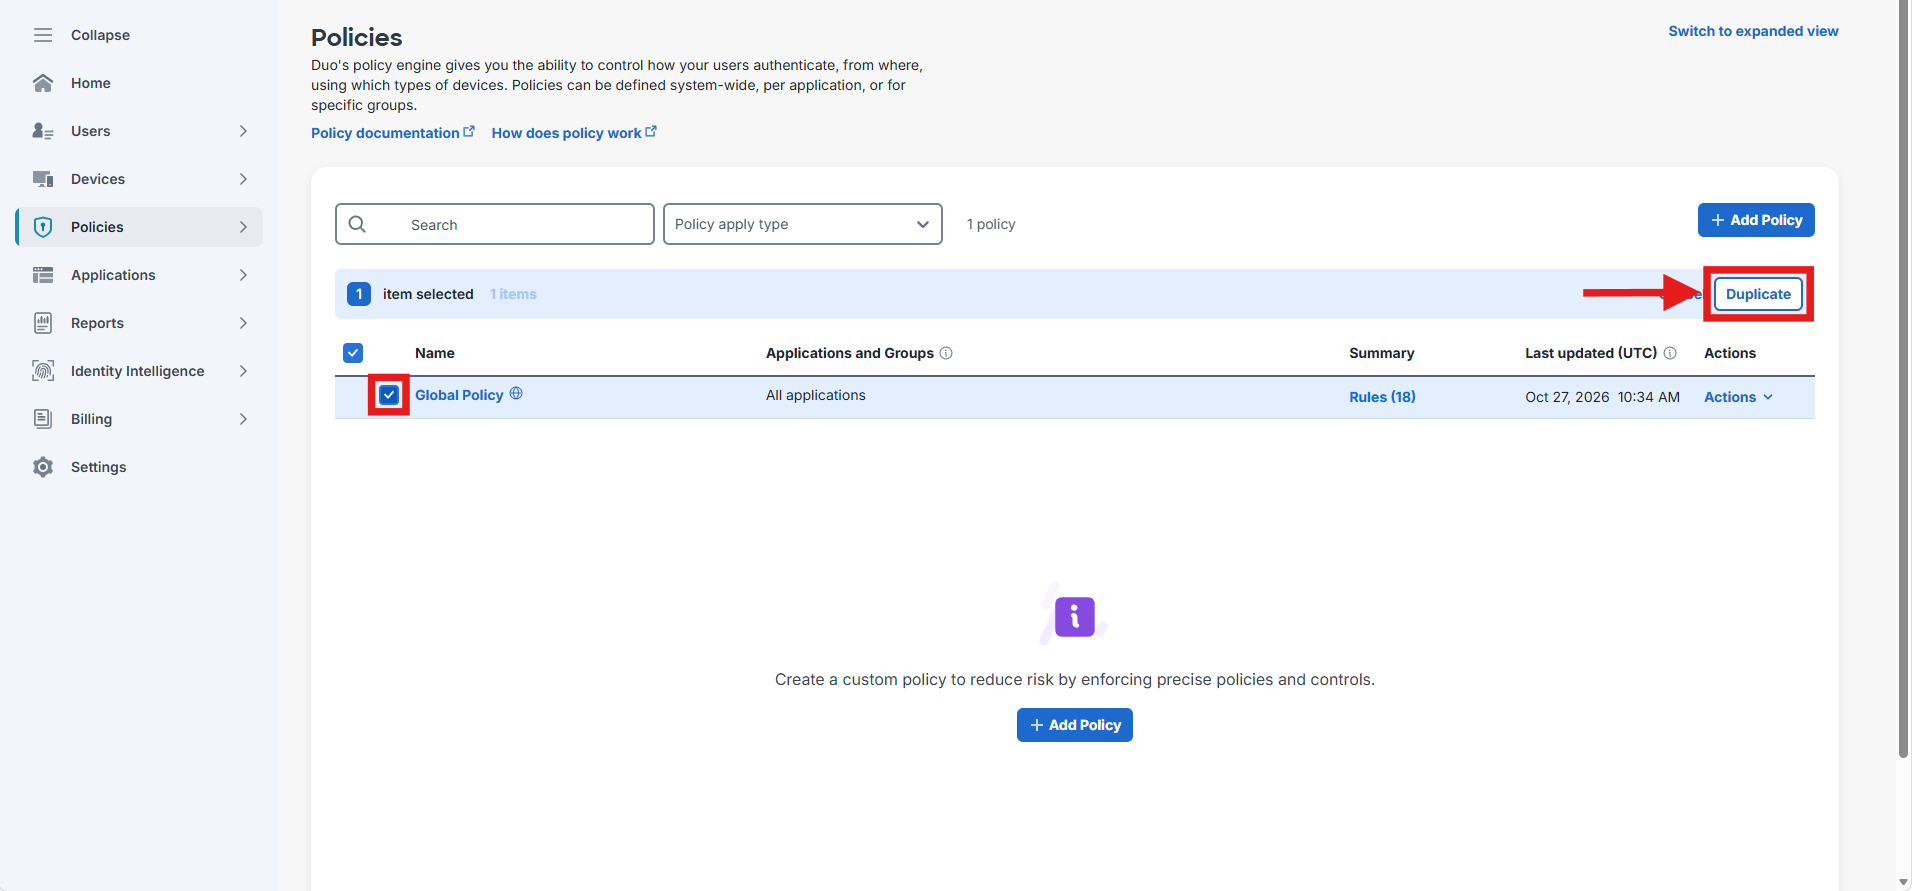
- Then, click on the Global Policy copy to edit it.
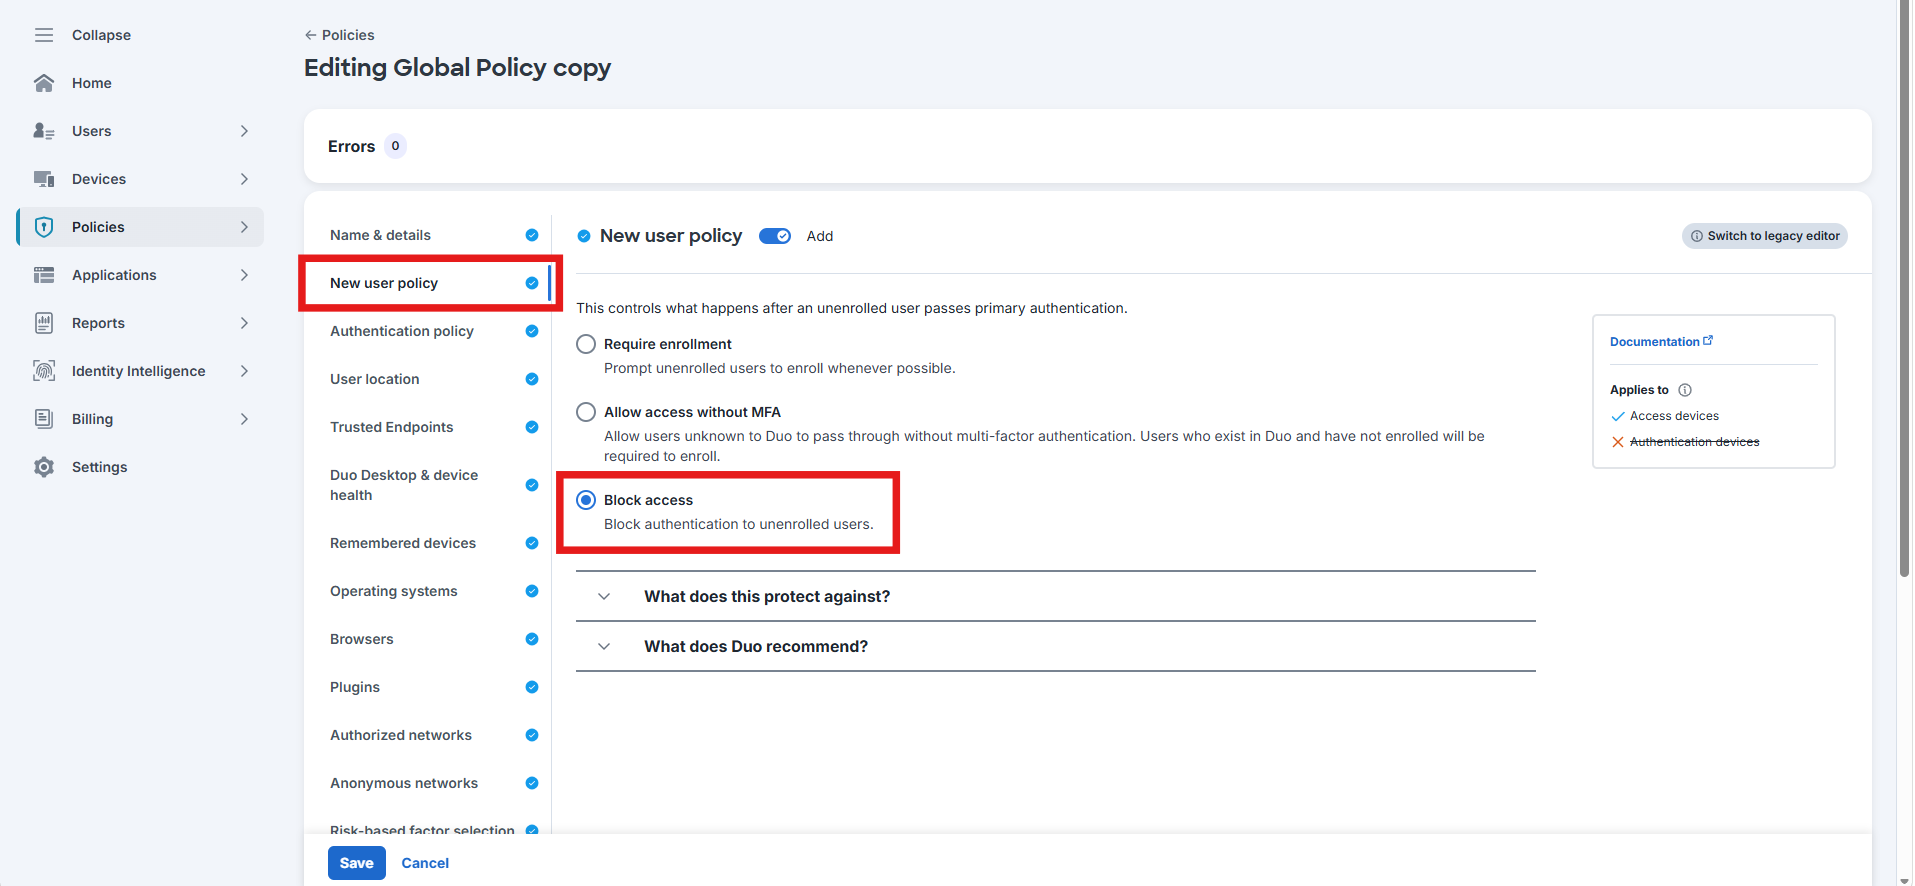
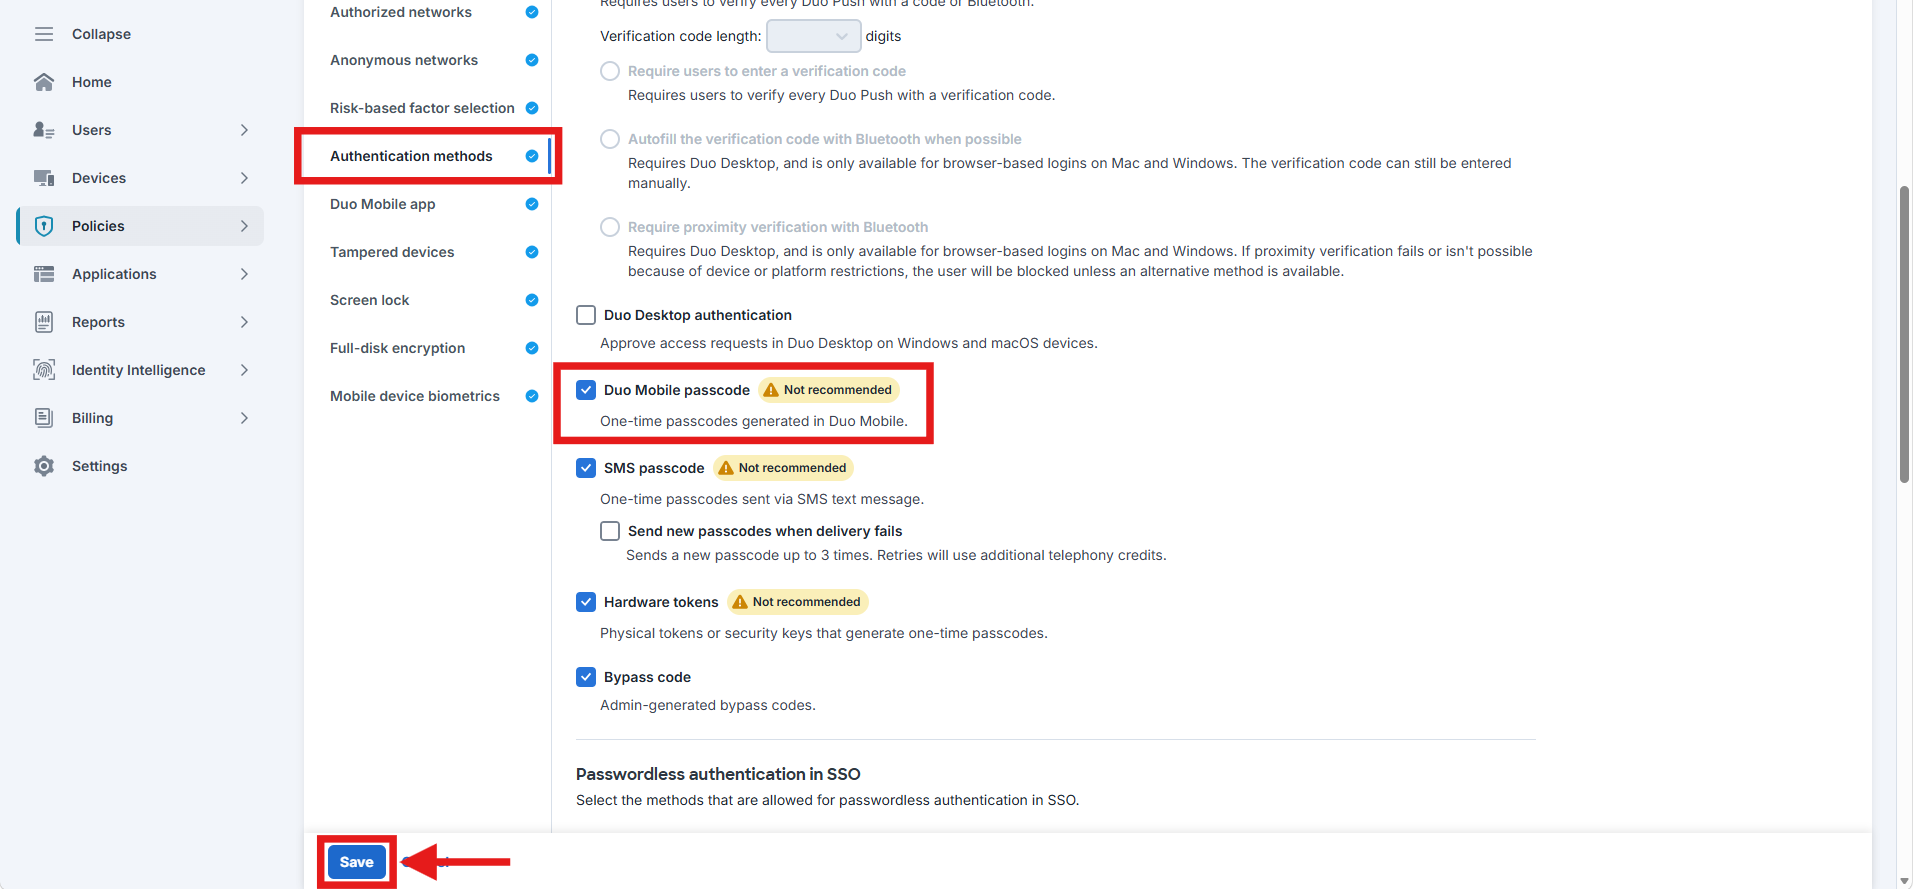
- Choose Block access under New user policy and tick the checkbox of Duo Mobile passcode under Authentication methods if you want to use a 6-digit passcode as an alternative to Duo Push during login. Then, click on the Save button at bottom left.
Tips 🖊️: It is recommended to set the New User Policy for your Microsoft RDP application to “Block Access” to ensure no unenrolled user can complete Duo enrollment via this application.
- Lastly, apply the policy to the RDP application.
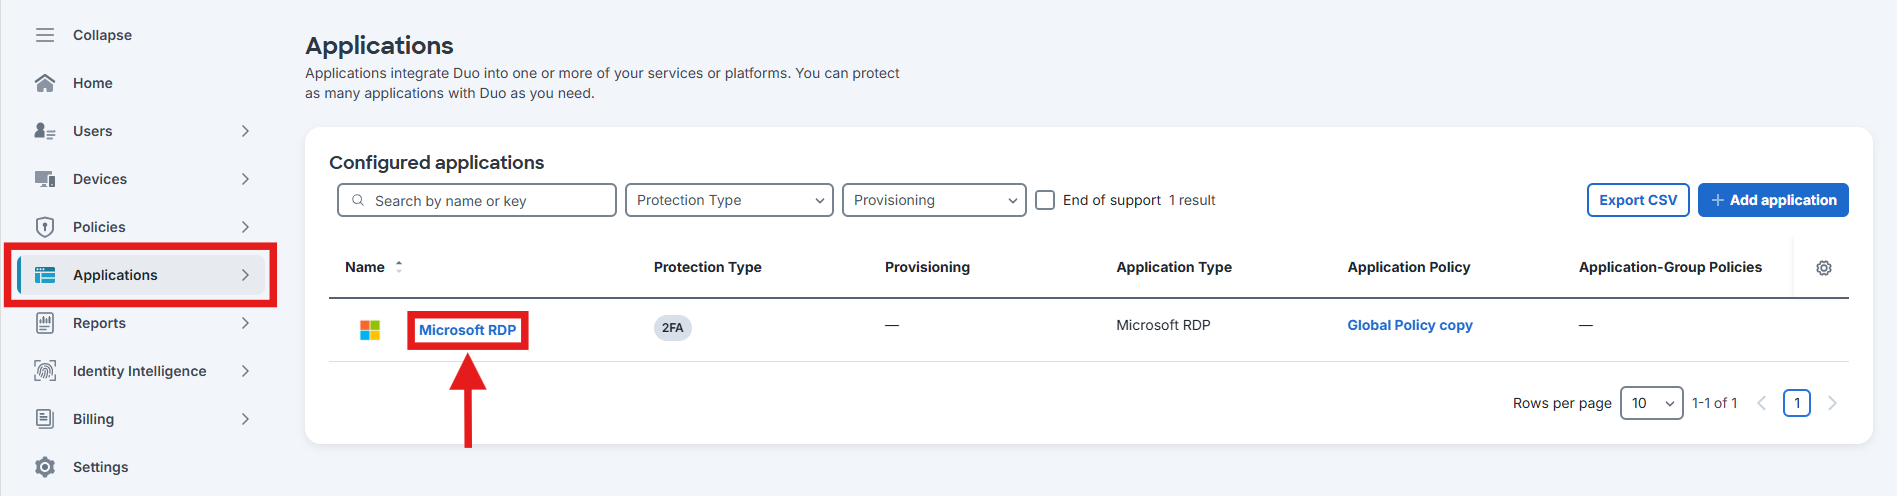
- First, navigate to Applications > Applications and click on Microsoft RDP to edit it.
- Next, scroll to Policy section and click on Apply a policy to all users.
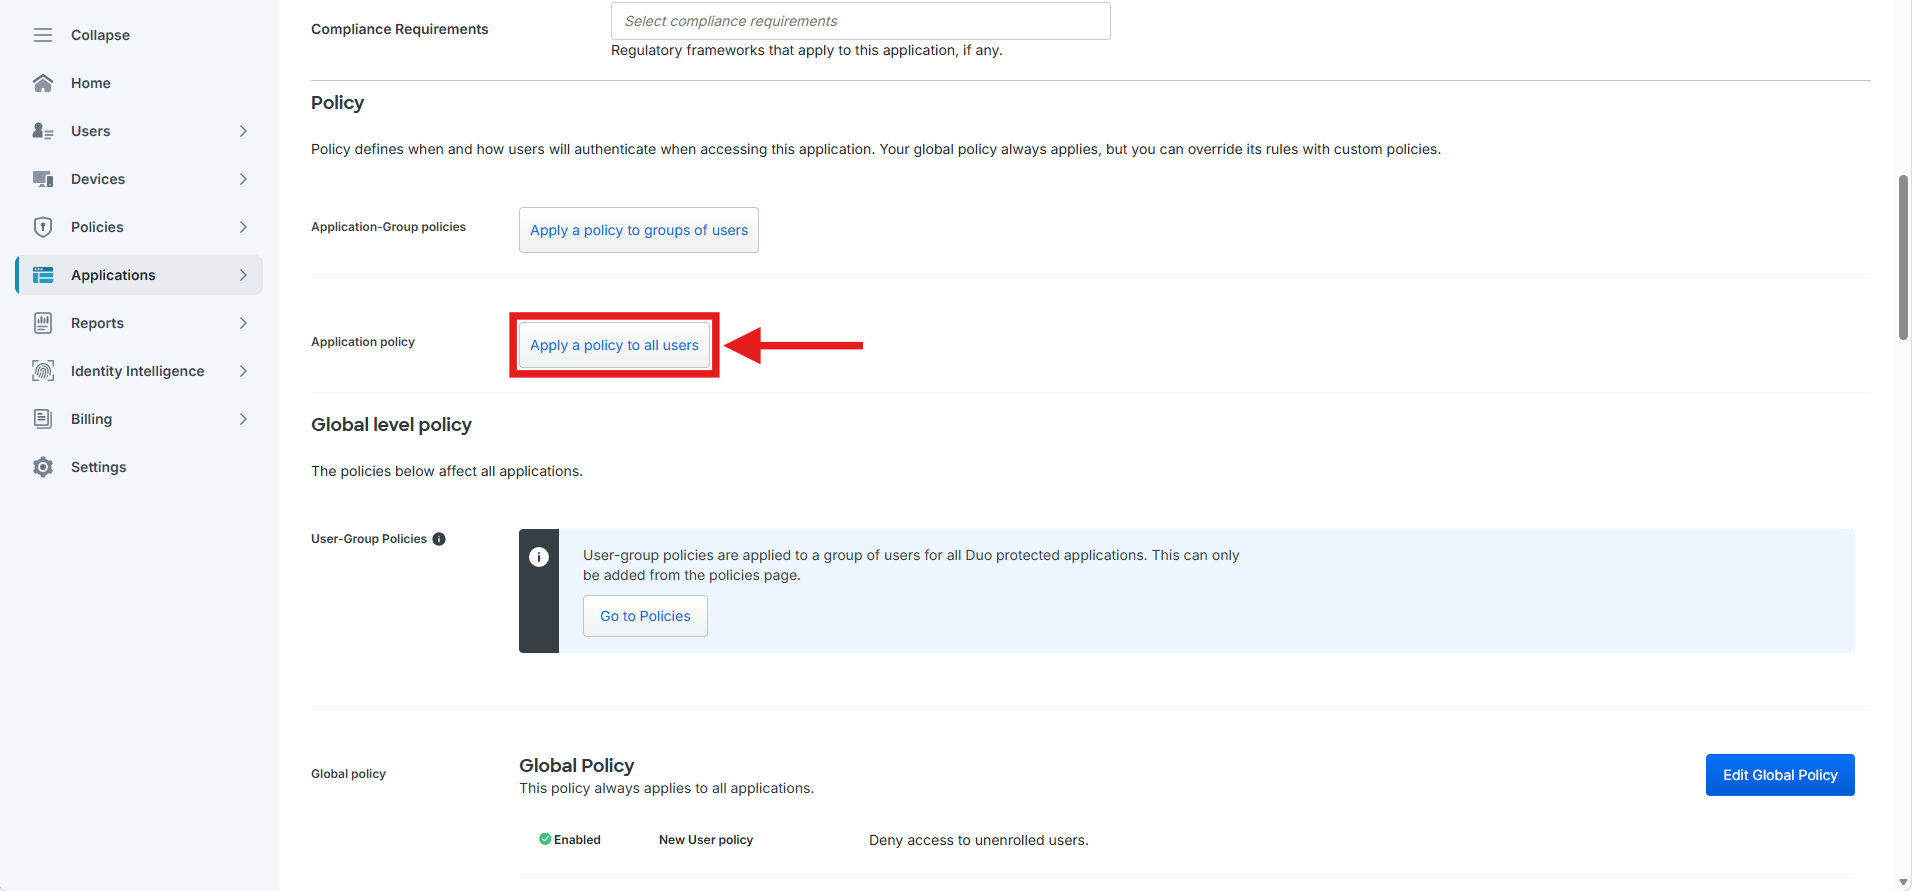
- Then, select the Global Policy copy under the Policy dropdown and click on Apply Policy.
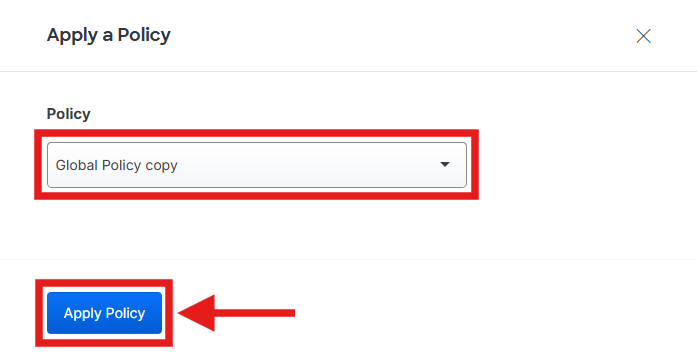
- Don’t forget to click on Save button at the very bottom once done.
- First, navigate to Applications > Applications and click on Microsoft RDP to edit it.
Step 6: Retrieve Integration Details
Note down your Integration key, Secret key, and API hostname from the Application page > Details section. You will need this information during the server installation.
Step 7: Download the Server Installer
On your Windows Server, download the Duo Authentication for Windows Logon installer package from the [official Duo repository]. Click Download under Current Release.
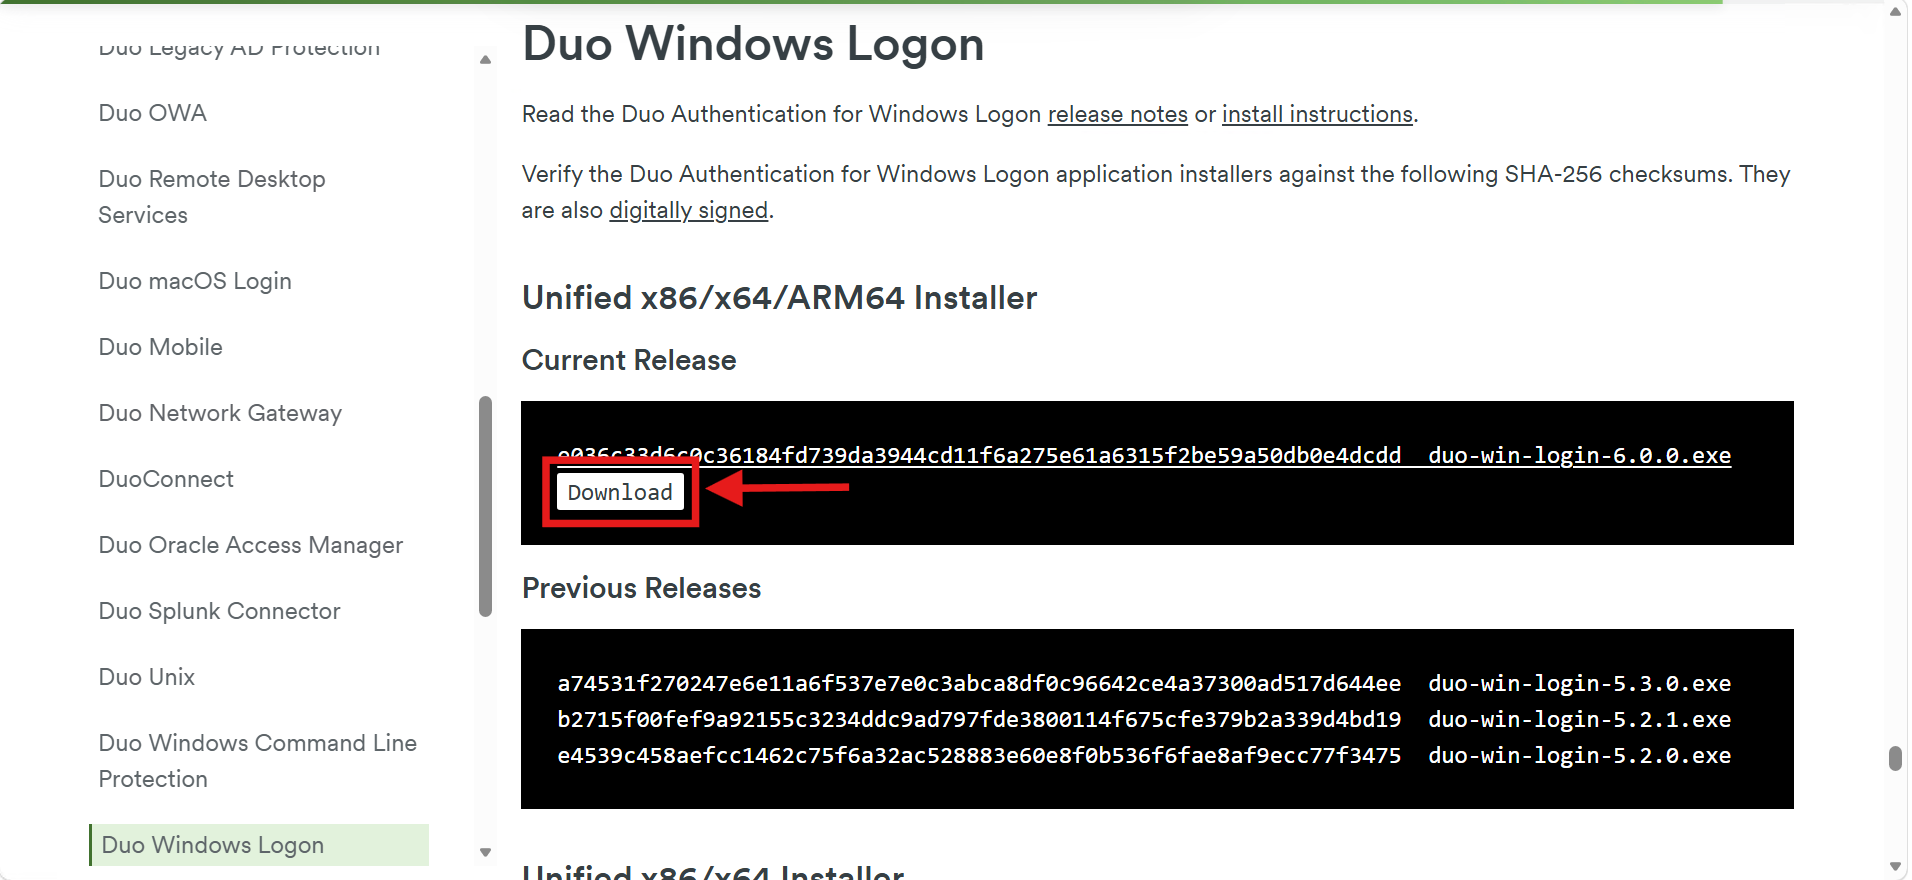
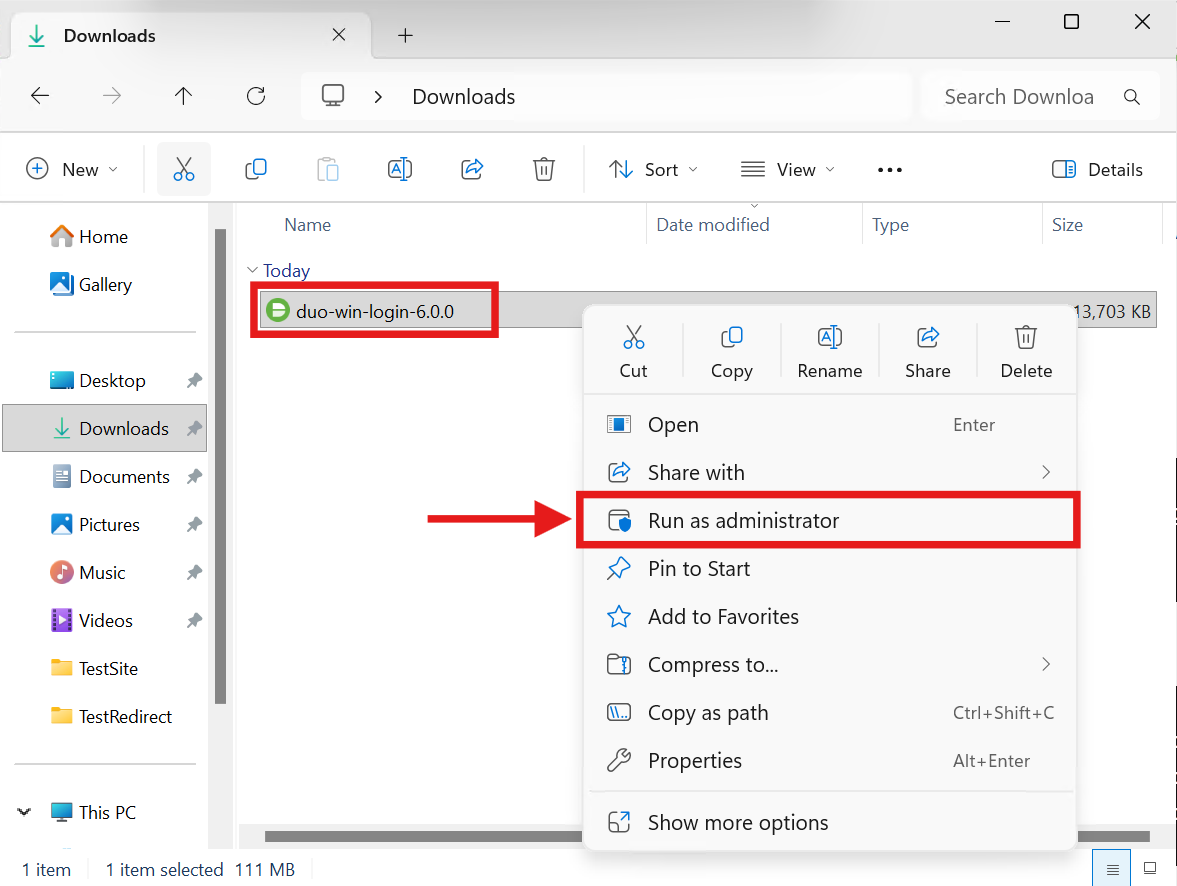
Step 8: Run the Setup
Run the installer with administrative privileges. Ensure your system time is accurate before starting.
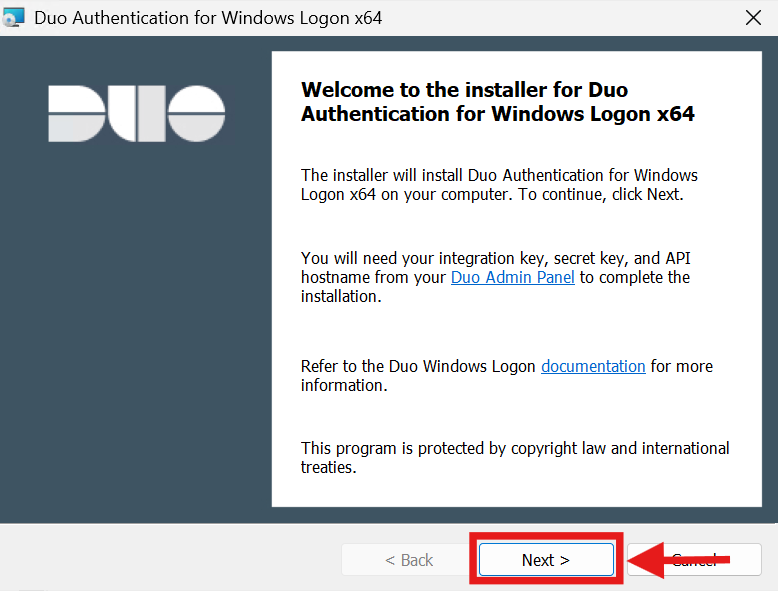
Step 9: Start the Installation
Click Next > for the first prompt.
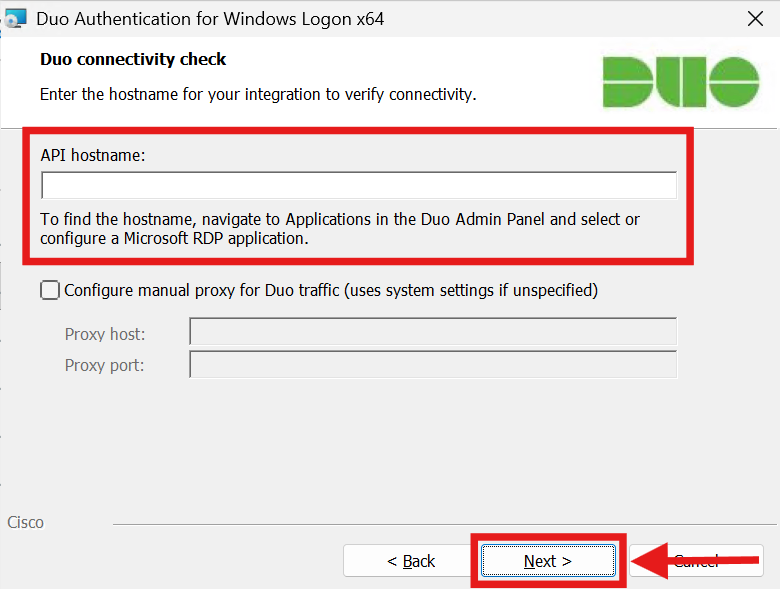
Step 10: Enter API Hostname
When prompted, enter your API Hostname and click Next >. The installer will verify connectivity to the Duo service over port 443.
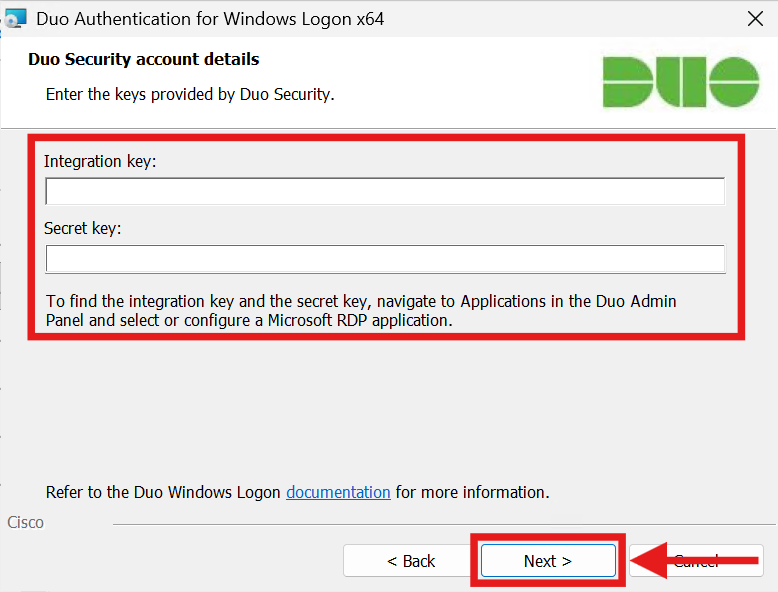
Step 11: Enter Keys
Enter your Integration key and Secret key, then click Next >.
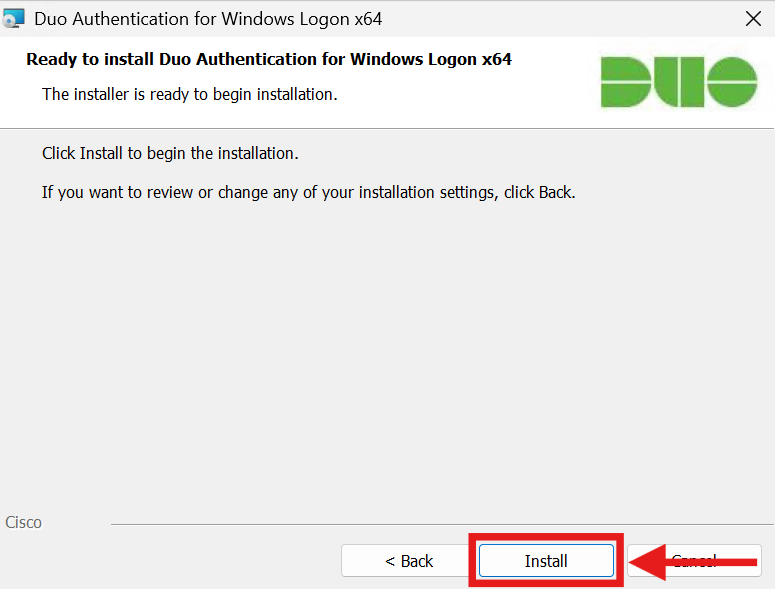
Step 12: Complete Installation
Click Next > to have default settings for the remaining prompts and click Install to finish the setup. You may need to restart the Windows Server for the authentication hooks to fully apply.
Step 13: Verification
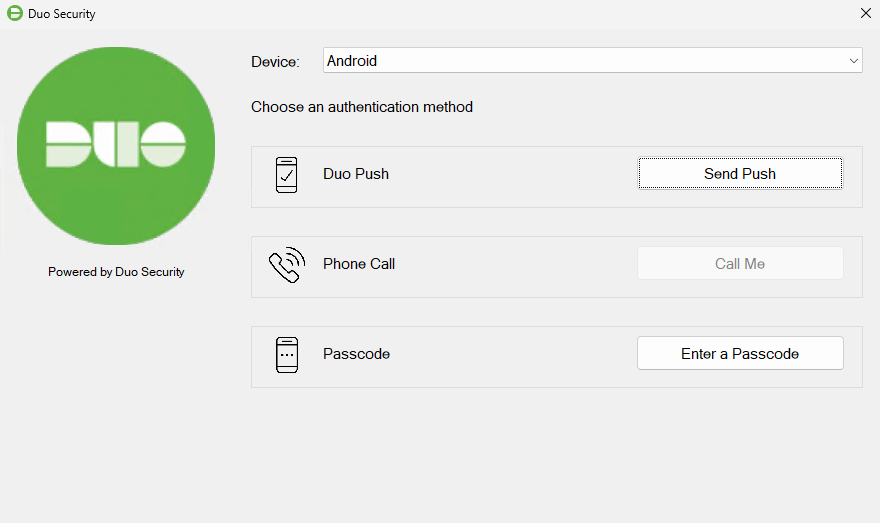
Login to your Windows server. A Duo Security pop-up window will appear after the user enters their password.
Conclusion
By following this guidance, you can successfully configure your cloud-based Duo Admin Panel and implement Cisco Duo Multi-Factor Authentication on your Windows Server, ensuring enhanced login security for your remote desktop sessions and local access.
For further assistance or inquiries, please contact our support team at support@ipserverone.com.