
Search Our Database
How to create volume in Customer Portal
Introduction
Creating a dedicated persistent Volume is the foundational step necessary to support project-specific persistence and flexible deployment strategies across your cloud infrastructure. This process, executed entirely within the IP ServerOne Customer Portal, ensures data integrity and scalability by preparing storage that can be repurposed for multiple resource types. Depending on your needs, you can create an empty volume for fresh storage, or pre-populate the volume with data by creating it from a snapshot or from an image source. This guide provides a professional walkthrough of the steps required to navigate the NovaCloud Volumes section and successfully initiate the creation of a new, billed storage resource.
Prerequisites
- Active account access to the IPServerOne Customer Portal with appropriate permissions
- Sufficient resource allocation (vCPU, RAM, and storage) within your Novacloud project
- Sufficient account cloud credit
Step-by-step Guide
Step 1: Login to the Customer Portal
- Login to [IPServerOne Customer Portal].
Step 2: Navigate to the snapshot section
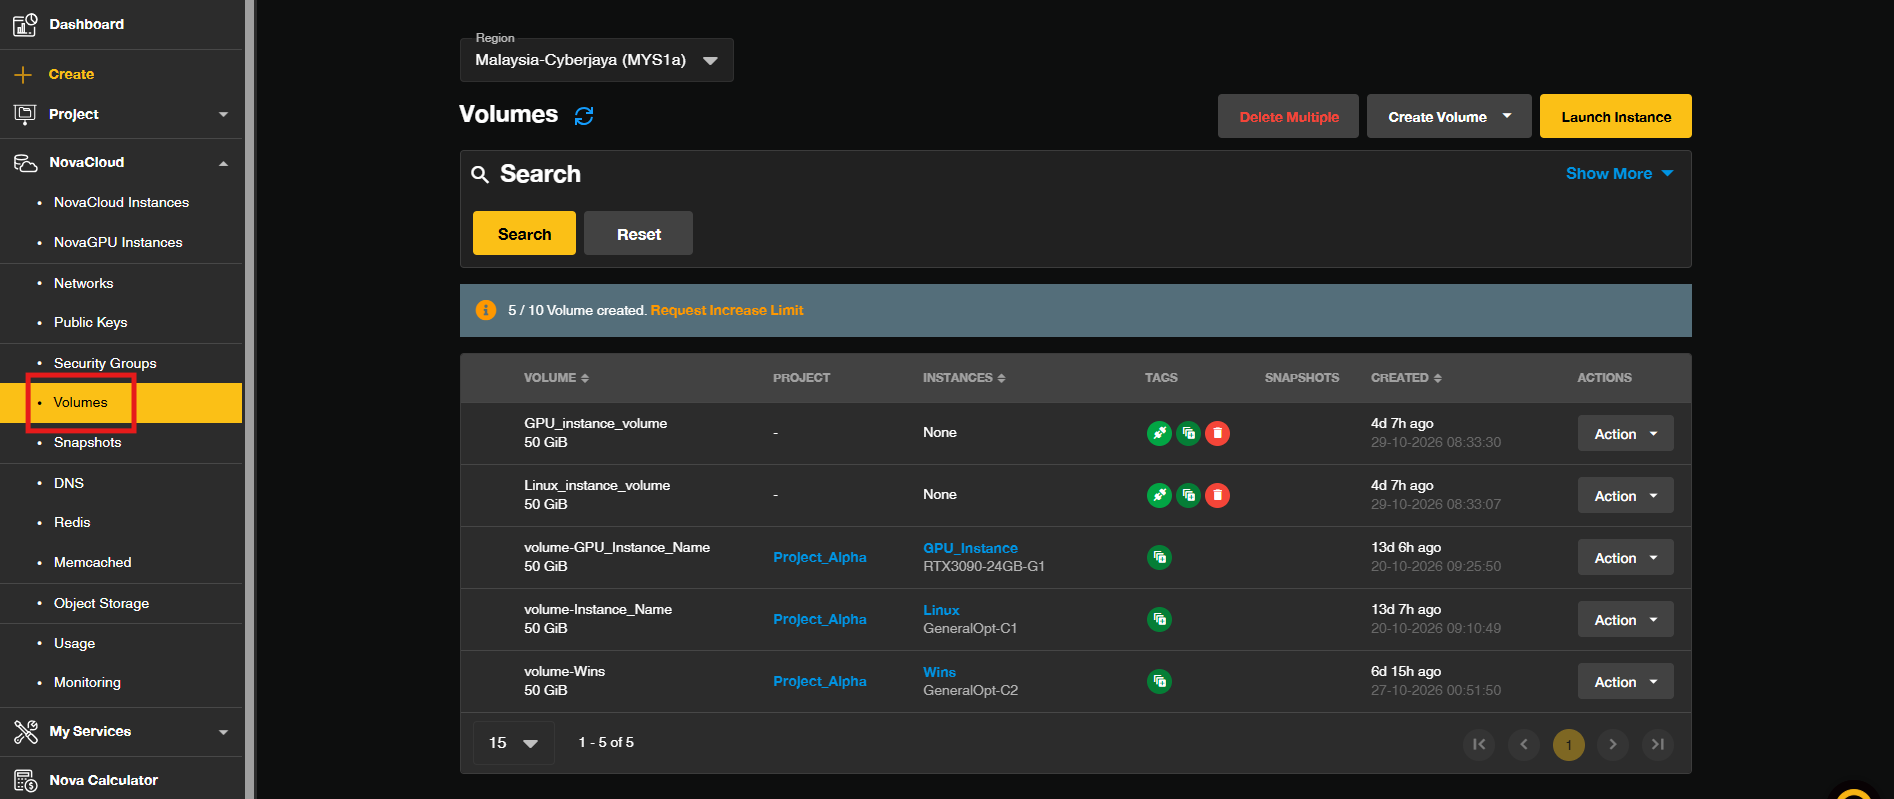
- In the NovaCloud sub-menu, click on the NovaCloud dropdown menu and select Volume.
Step 3: Initiate volume creation
- On the Volumes page, initiate the provisioning process by clicking the Create Volume button.
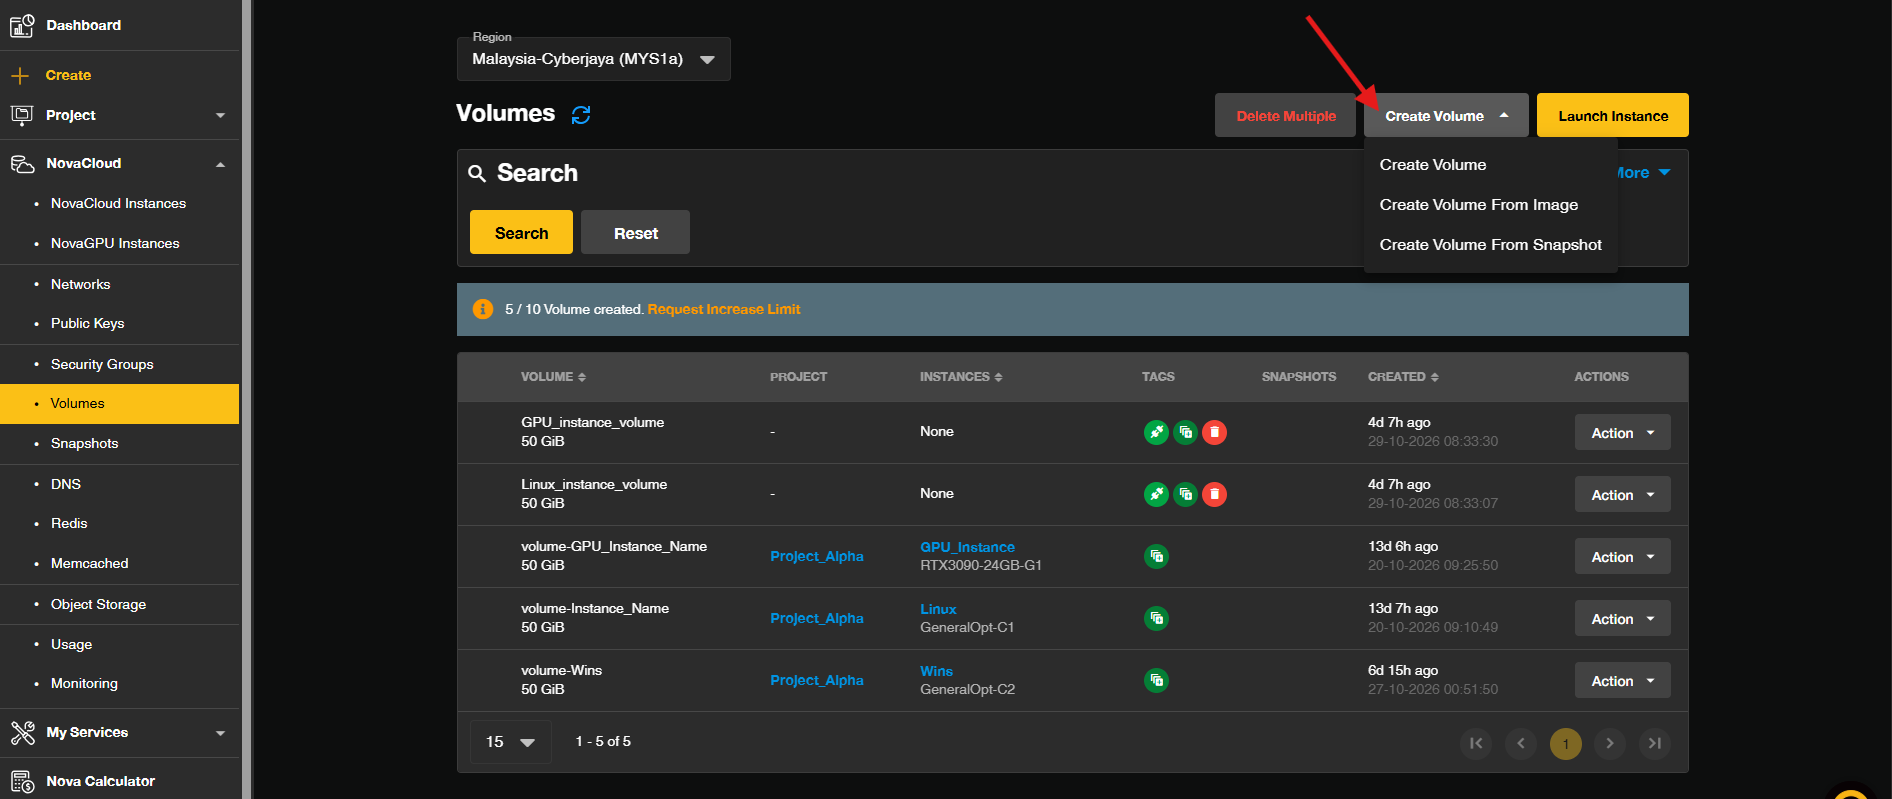
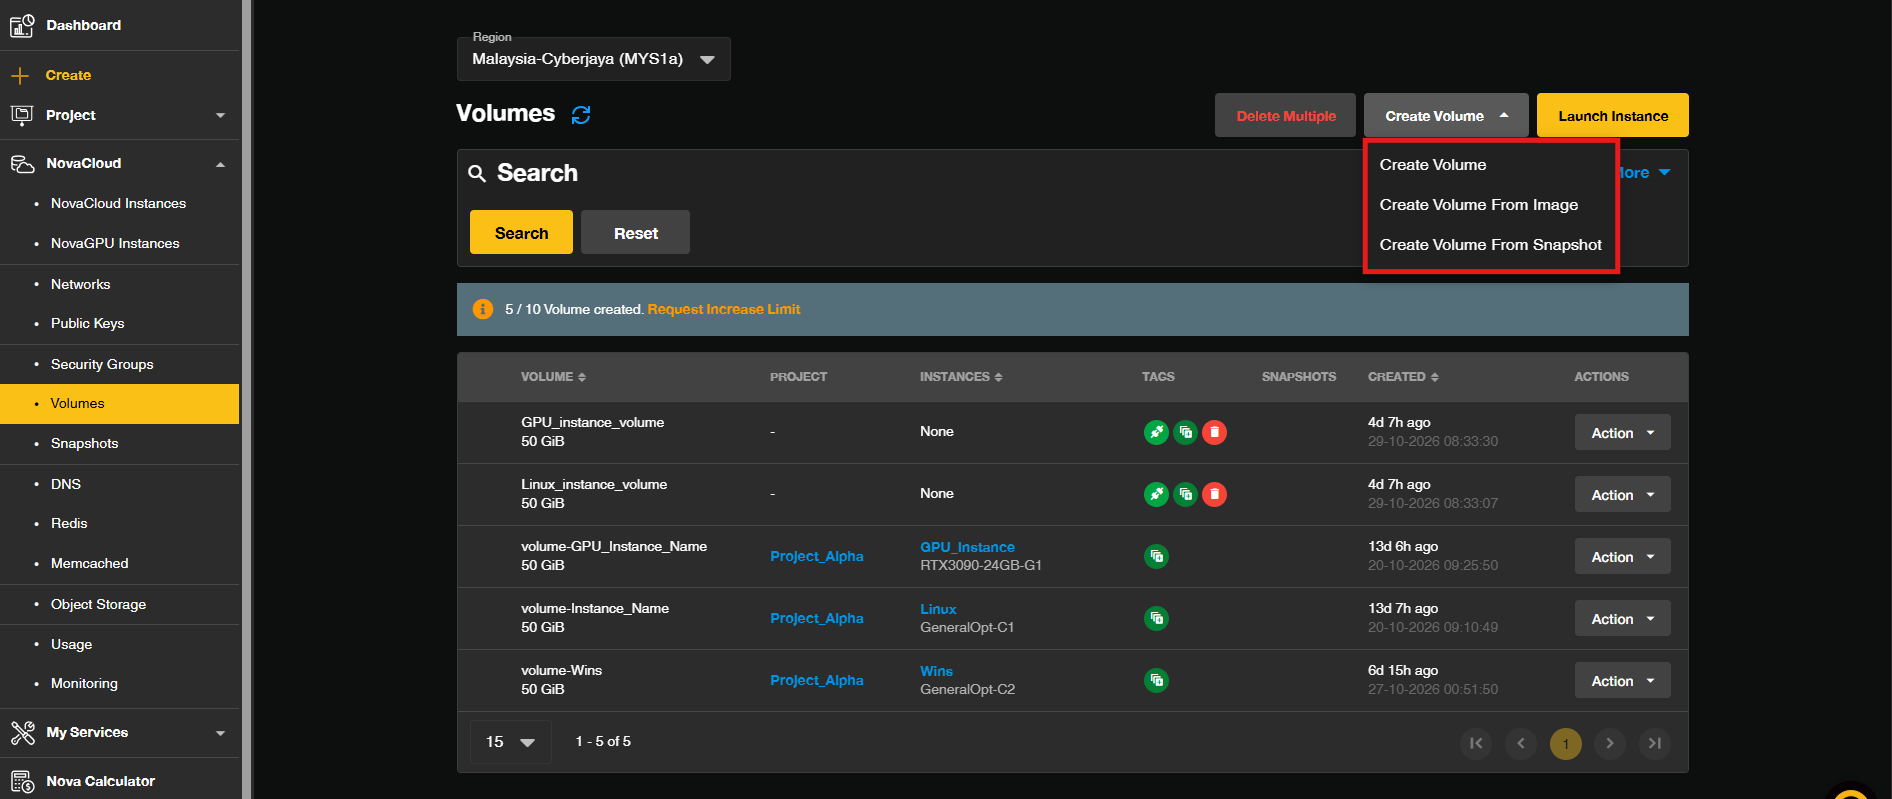
- From the option, select your preferred way to provision the volume.
Important Note ⚠️:
• The volume name can only contain letters, numbers, underscores and dashes, and is between 1 and 60 characters long.
• The volume needs to be at least 10 GB and no more than 1000 GB in size.
Step 4: Volume creation
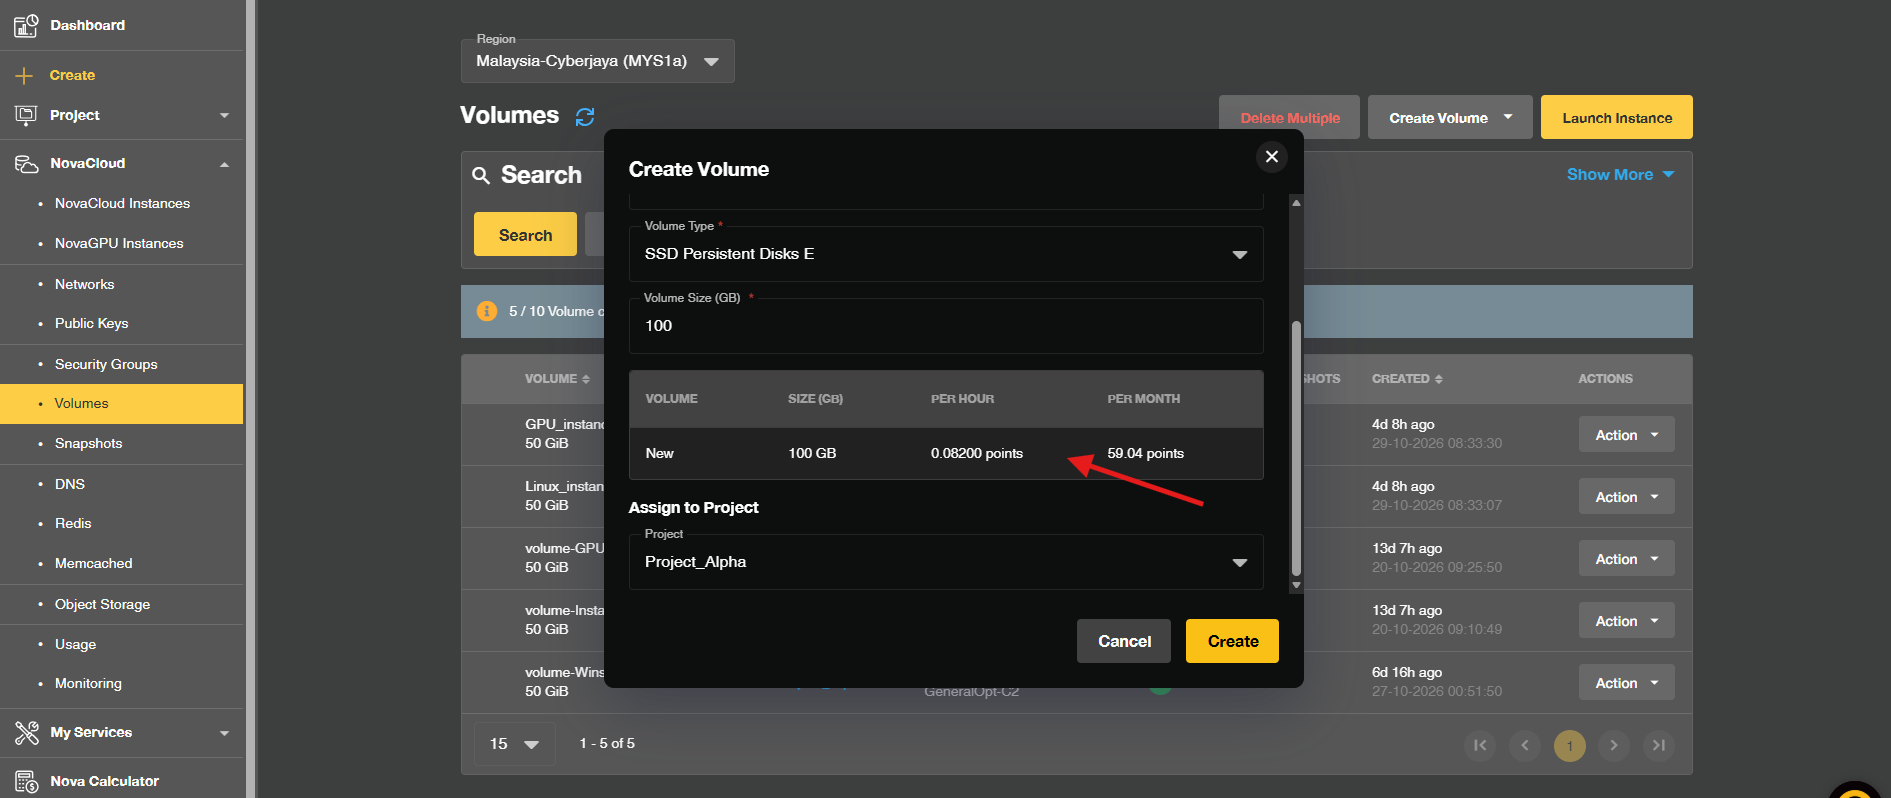
Create Volume: Create an empty volume for various reasons, but it will NOT be bootable.
- Enter the Volume Name and Volume Size for the volume.
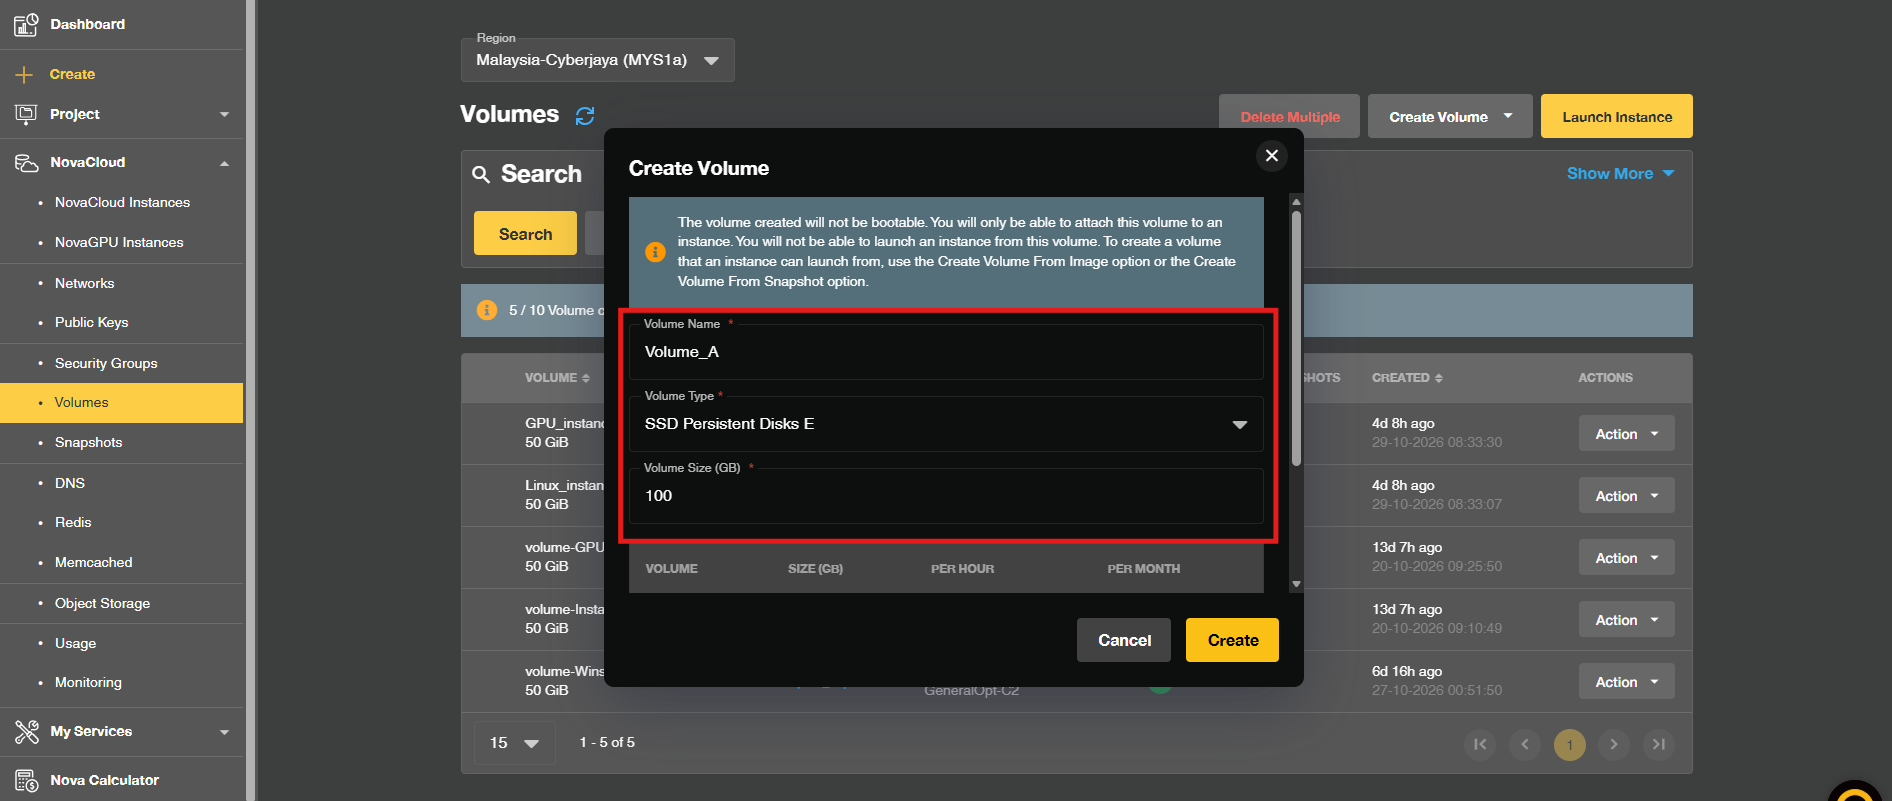
- Review the usage of the volume then click Create to create the volume.
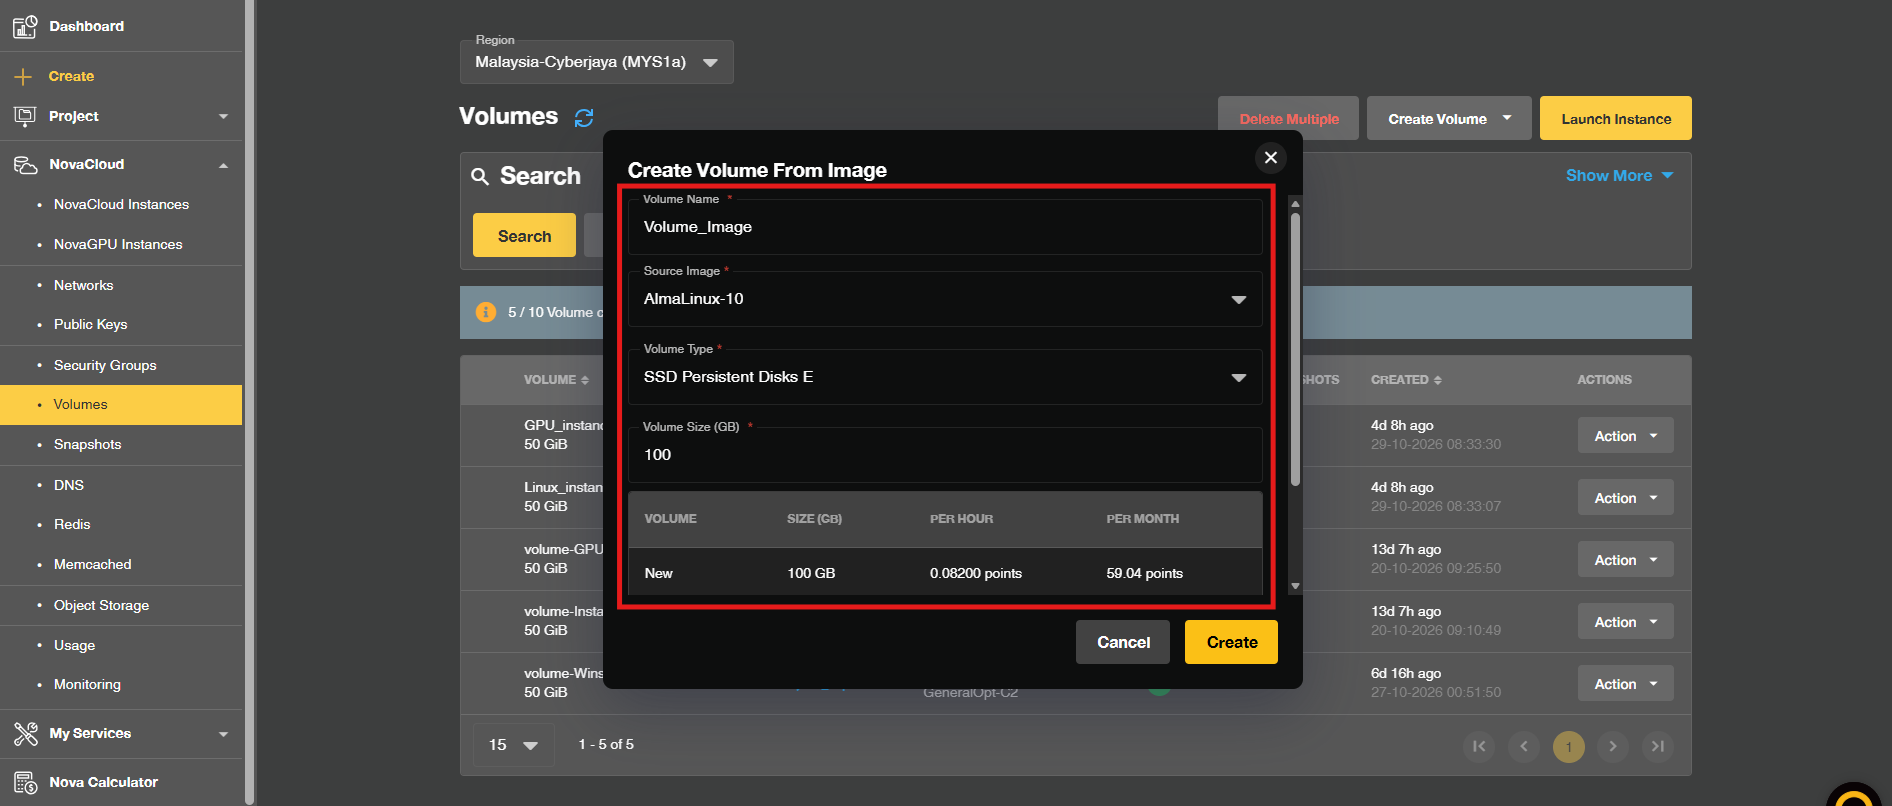
Create Volume From Image: Provisions a volume with a standardized operating system or foundational data.
- Enter the Volume Name, Image and Volume Size for the volume. Review the usage of the volume then click Create to create the volume.
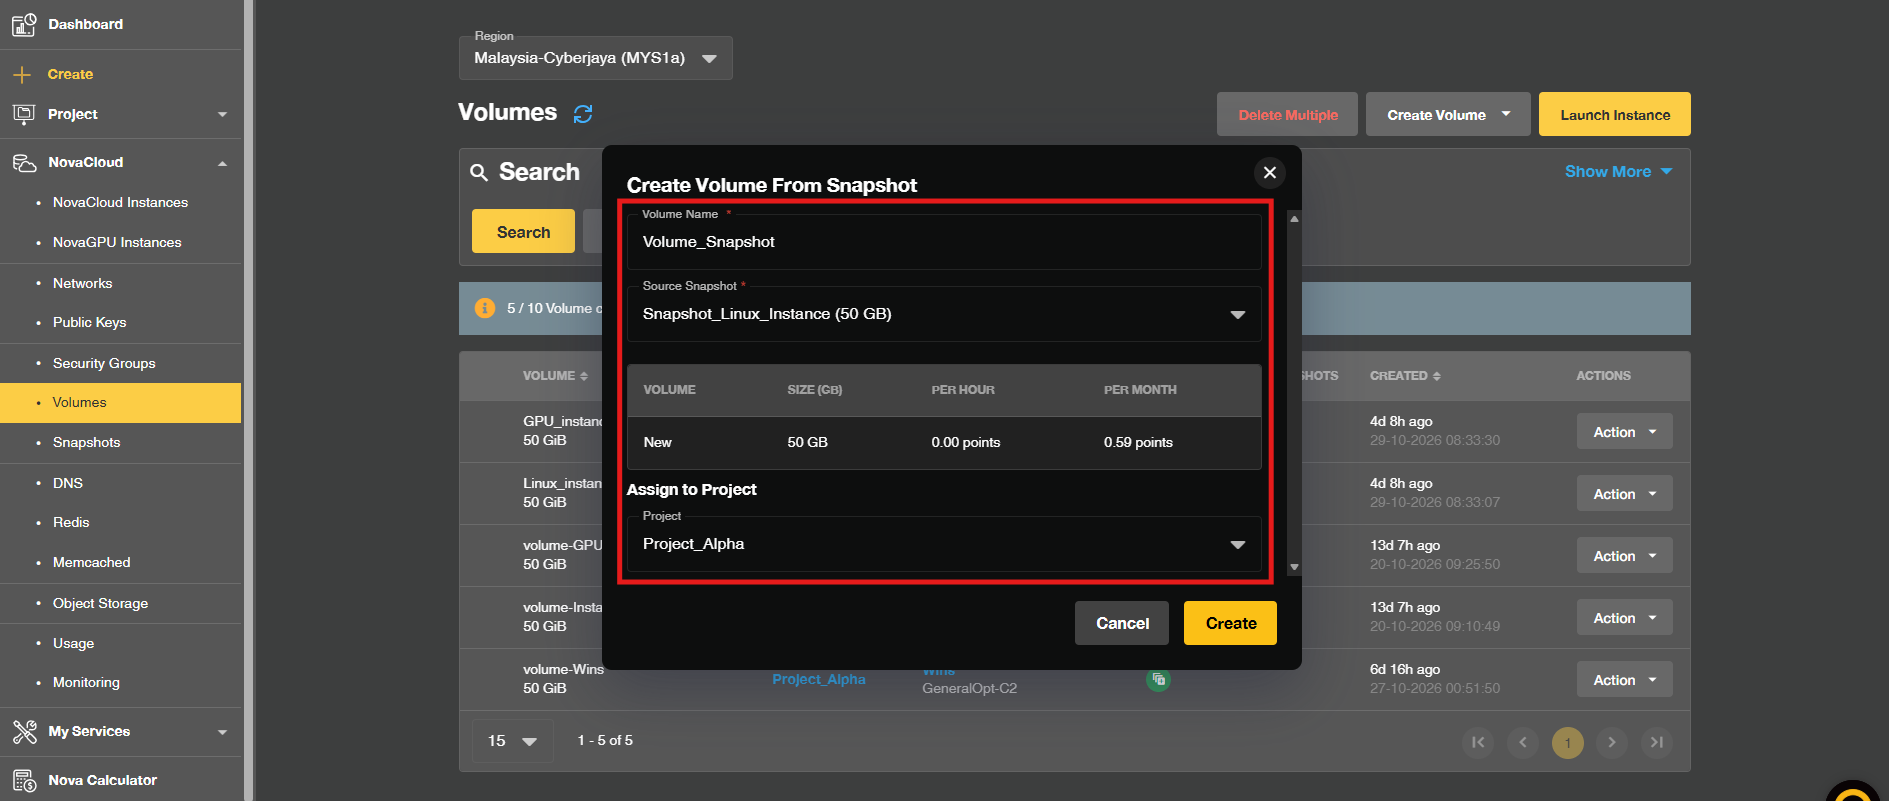
Create Volume From Snapshot: Restores a volume identical to a specific point-in-time recovery state.
- Enter the Volume Name and Snapshot for the volume. Review the usage of the volume then click Create to create the volume.
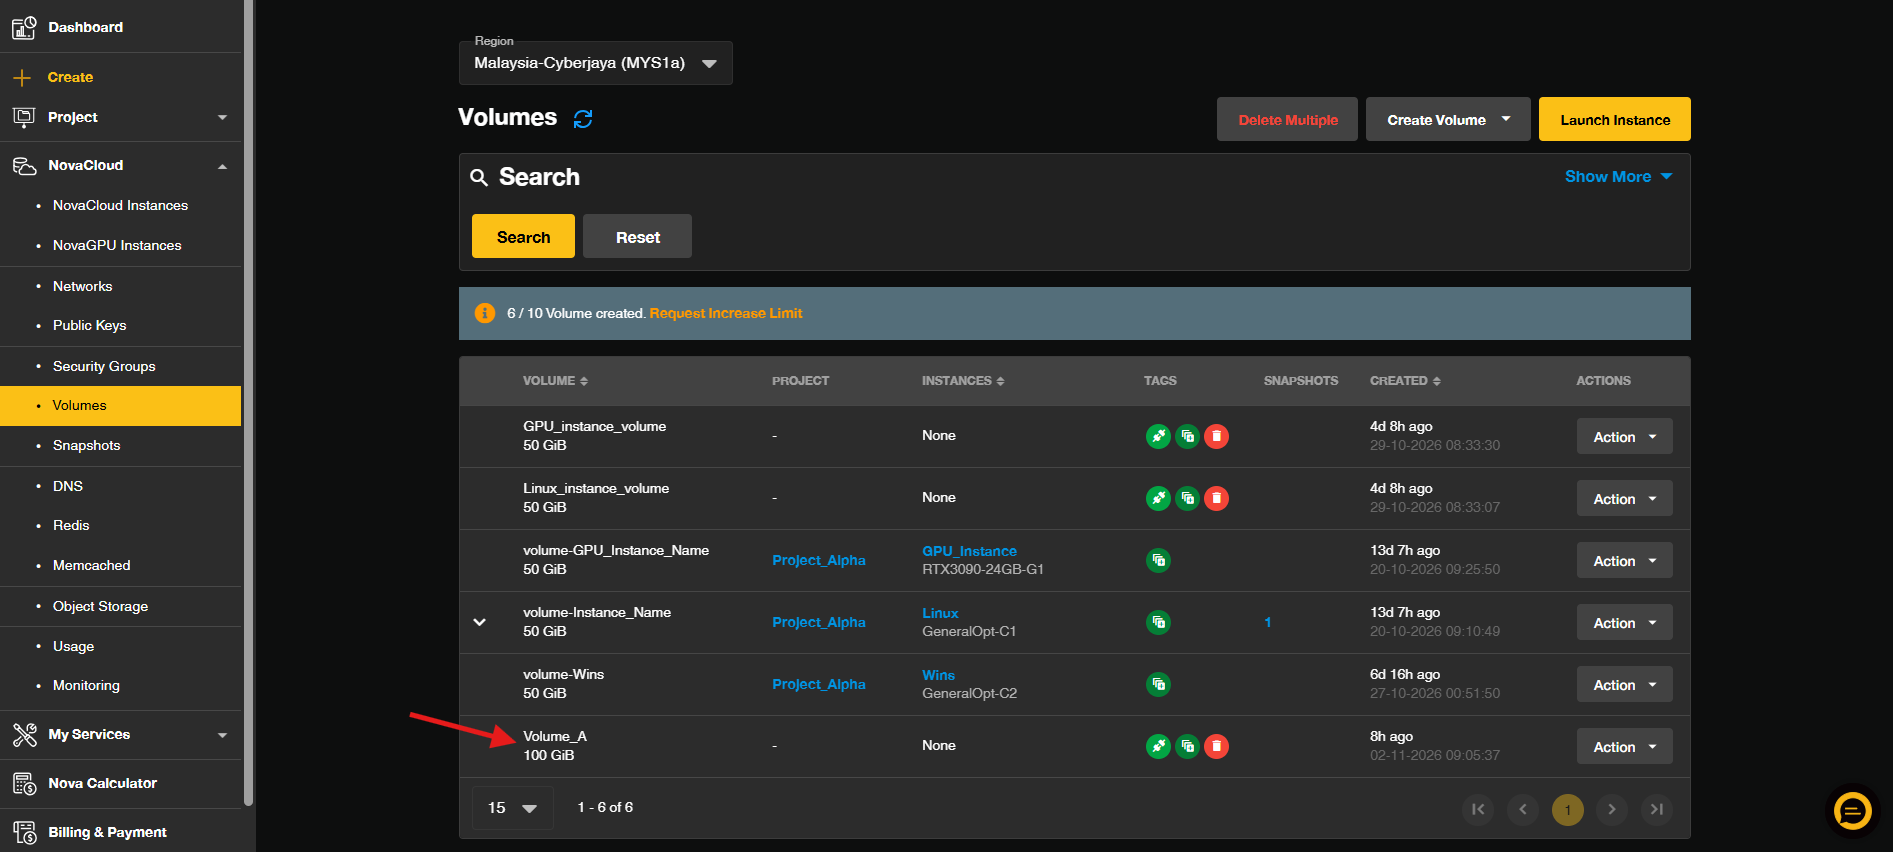
- Verify that your newly created volume appears in the list, confirming the initiation of the provisioning process.
Conclusion
By following the steps outlined in this guide, you have successfully utilized the IP ServerOne Customer Portal to provision a new storage volume. This critical step establishes the foundation for your cloud storage needs, and the volume is now ready to be utilized as a source for launching various compute resources, including Cloud Instances (NovaCloud) and GPU Instances (NovaGPU).
Remember that billing commences immediately upon the creation of the volume, and charges are applied on an hourly basis for as long as the volume exists in the portal, even if it is not attached to a cloud instance.
If you encounter any difficulties during the provisioning process or have questions regarding your cloud storage, please reach out to the technical support team at support@ipserverone.com.
Article updated on 02 November 2026 by Johnny