
Search Our Database
How to manage/update/add the DNS records via IPServerOne Customer Portal
Introduction
Users or administrators of IP ServerOne can efficiently manage, update, and add DNS records through the customer portal by following the provided steps to ensure accurate domain configurations whenever changes are needed. However, it is important to verify that all domain names in the DNS plans are directed to the correct nameservers per below:
NS1: ns-1510.ipxcdn.com, NS2: ns-2379.ipxcdn.com
NS3: ns-3196.ipxcdn.com, NS4: ns-4218.ipxcdn.com
IPServerOne offers 4 types of DNS hosting plans:
- Free DNS hosting – Supports 2 DNS records per domain (excluding NS and SOA)
- Standard DNS hosting – Supports 30 DNS records per domain (excluding NS and SOA)
- Premium DNS Hosting – Supports 50 DNS records per domain (excluding NS and SOA)
- Premium Plus DNS Hosting – Supports 300 DNS records per domain (excluding NS and SOA)
Prerequisite
- Access to customer portal where DNS hosting is under
- Knowledge of DNS records
Step-by-step guide:
- Login to the IP ServerOne customer portal at [Customer Portal]
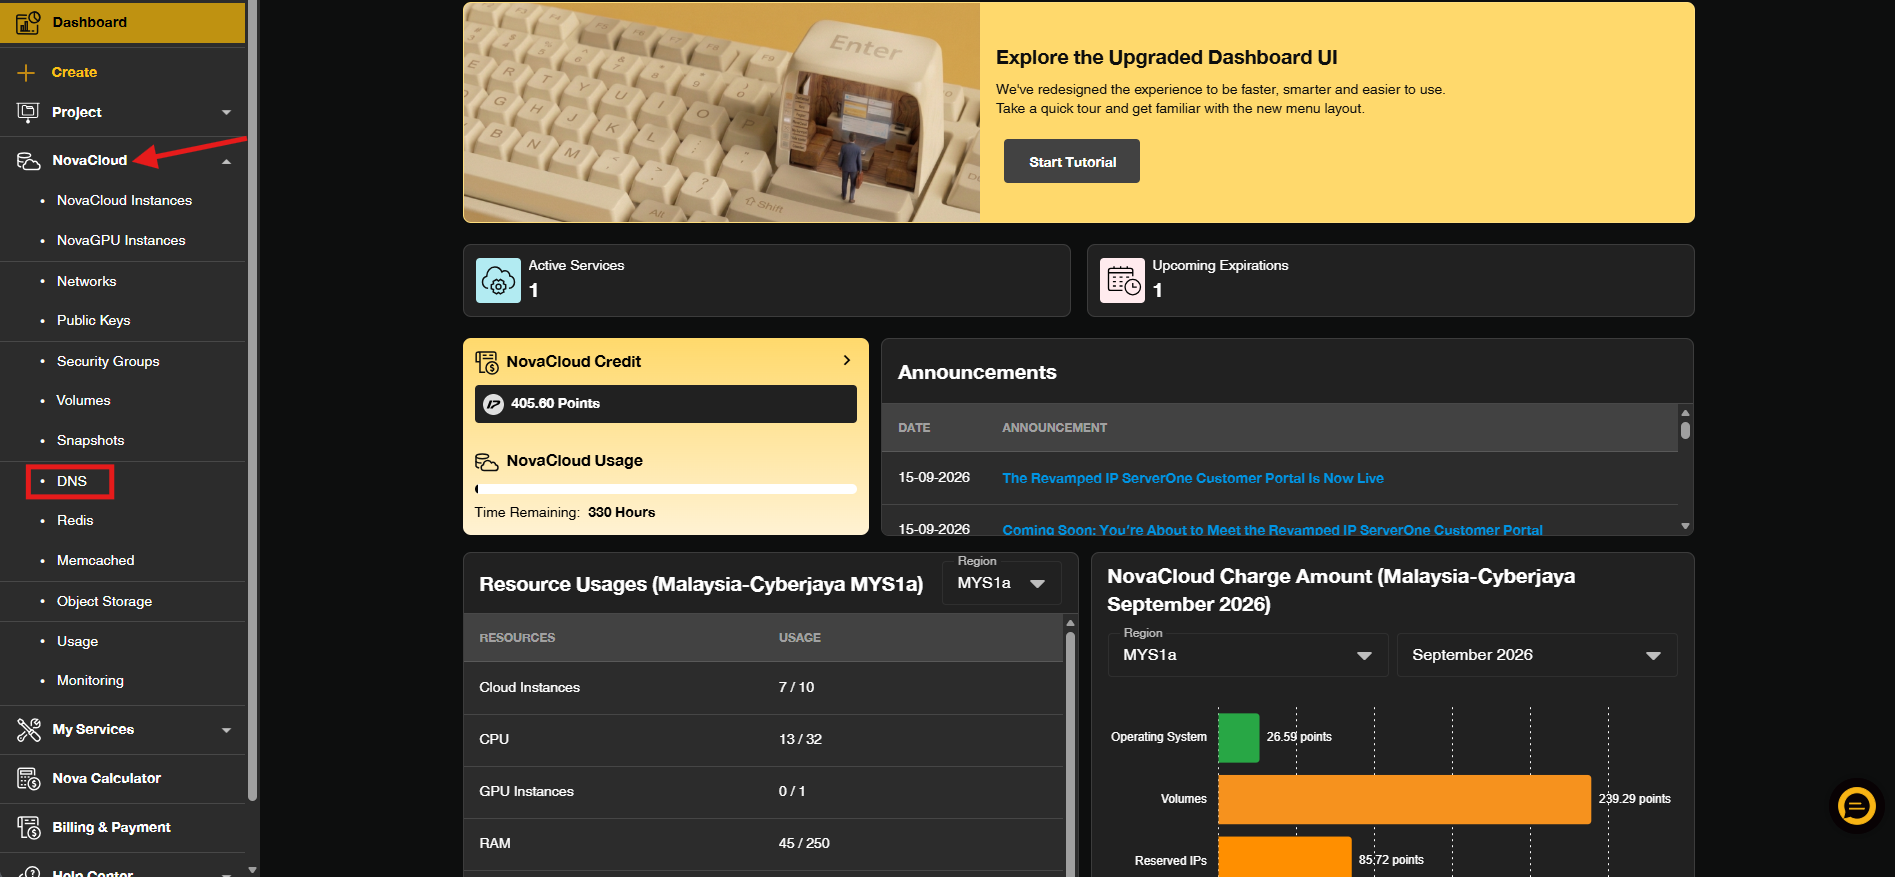
- Once logged in, click on NovaCloud dropdown menu on the left panel then clicks on DNS
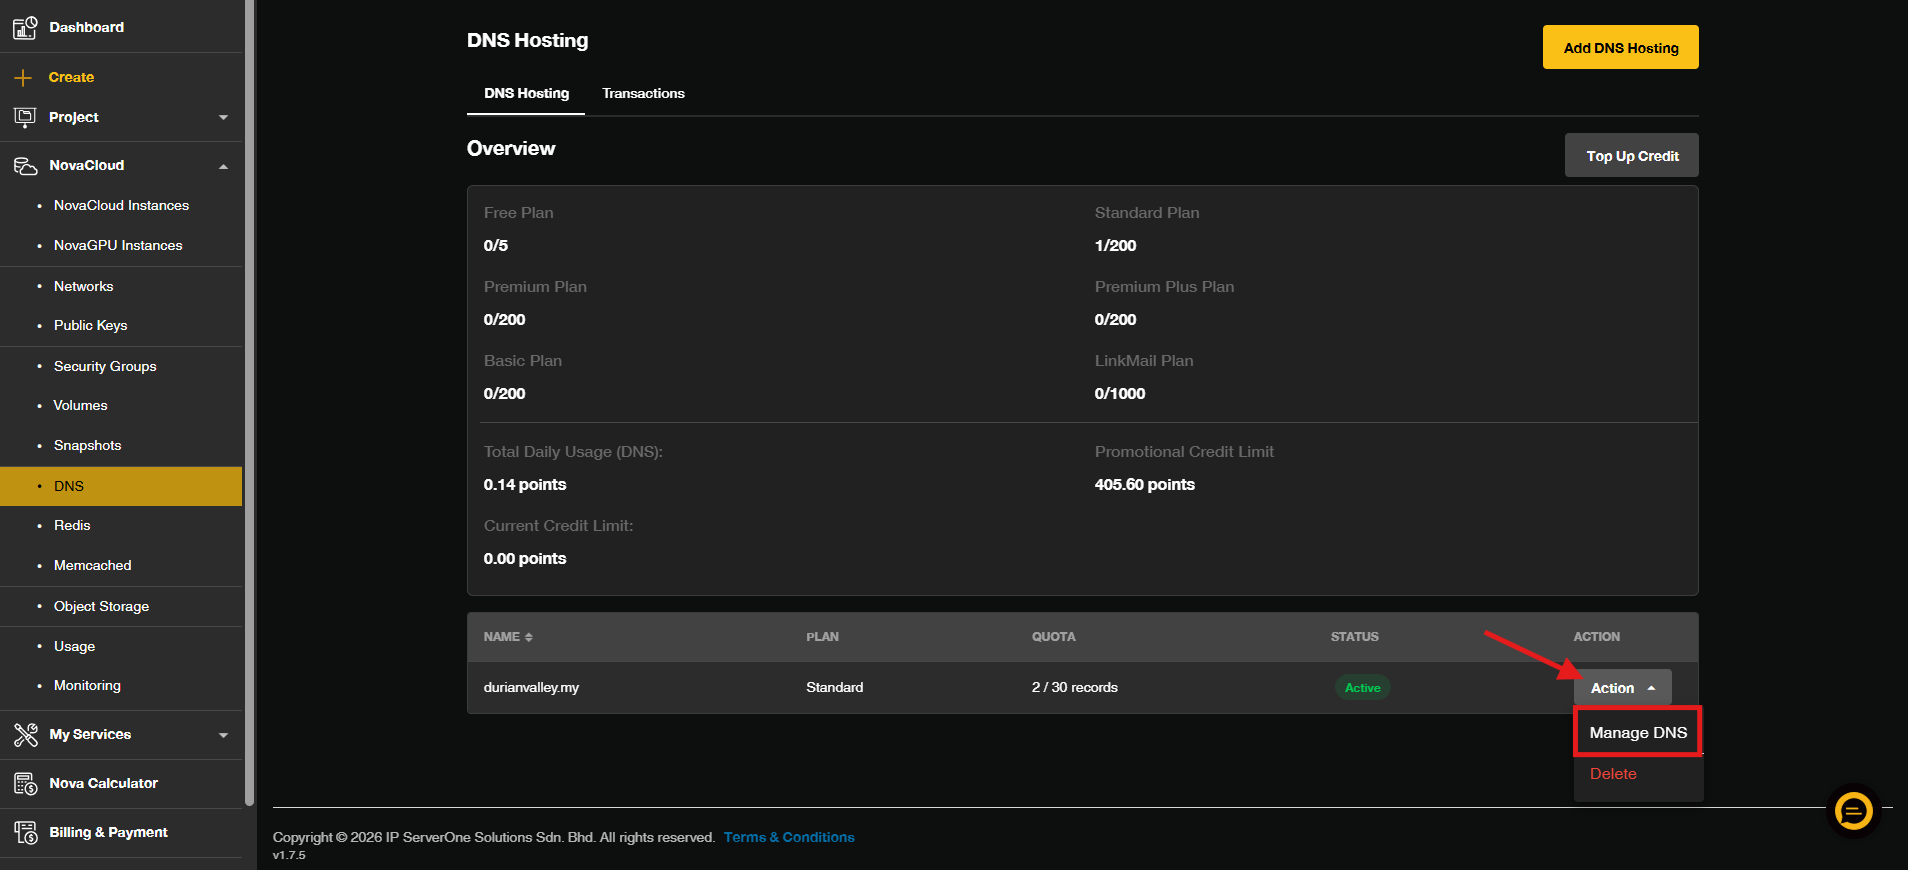
- The list of domain names DNS plans will appear
Kindly proceed to click on Action dropdown menu on the selected domain then clicks Manage DNS to start
- To manage the DNS records:
- To add: Click on Add Records to add DNS records for the domain
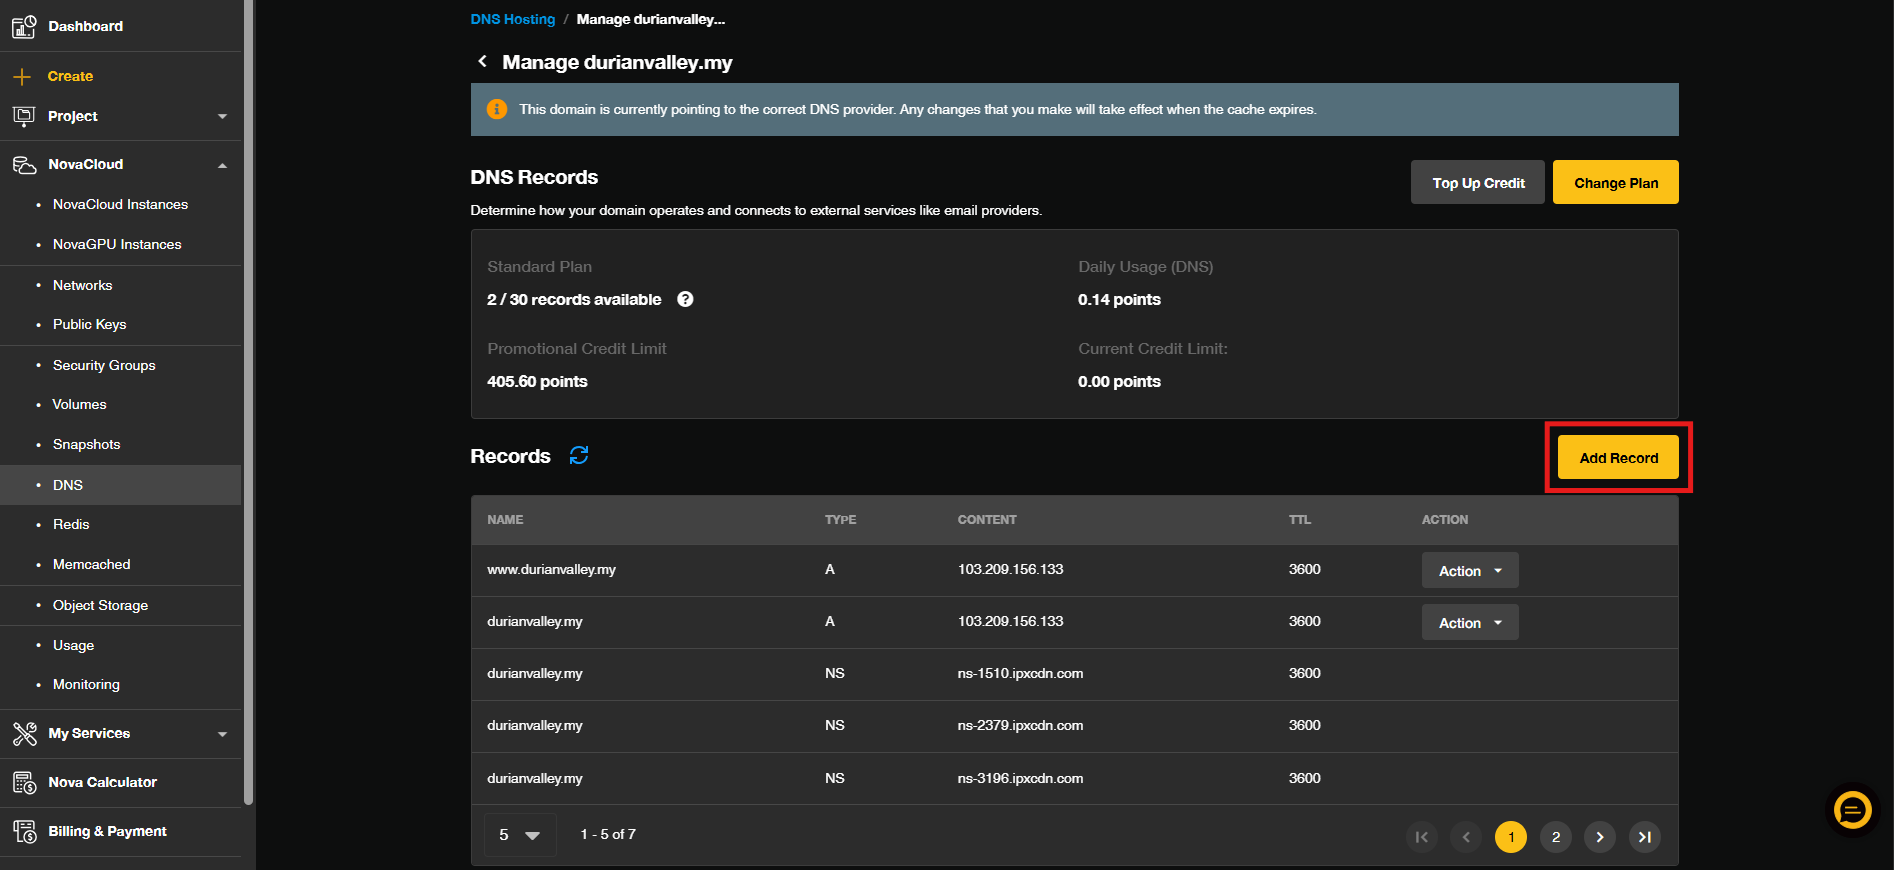
- To add: Click on Add Records to add DNS records for the domain
-
- To edit: Click on Action dropdown menu then clicks Edit
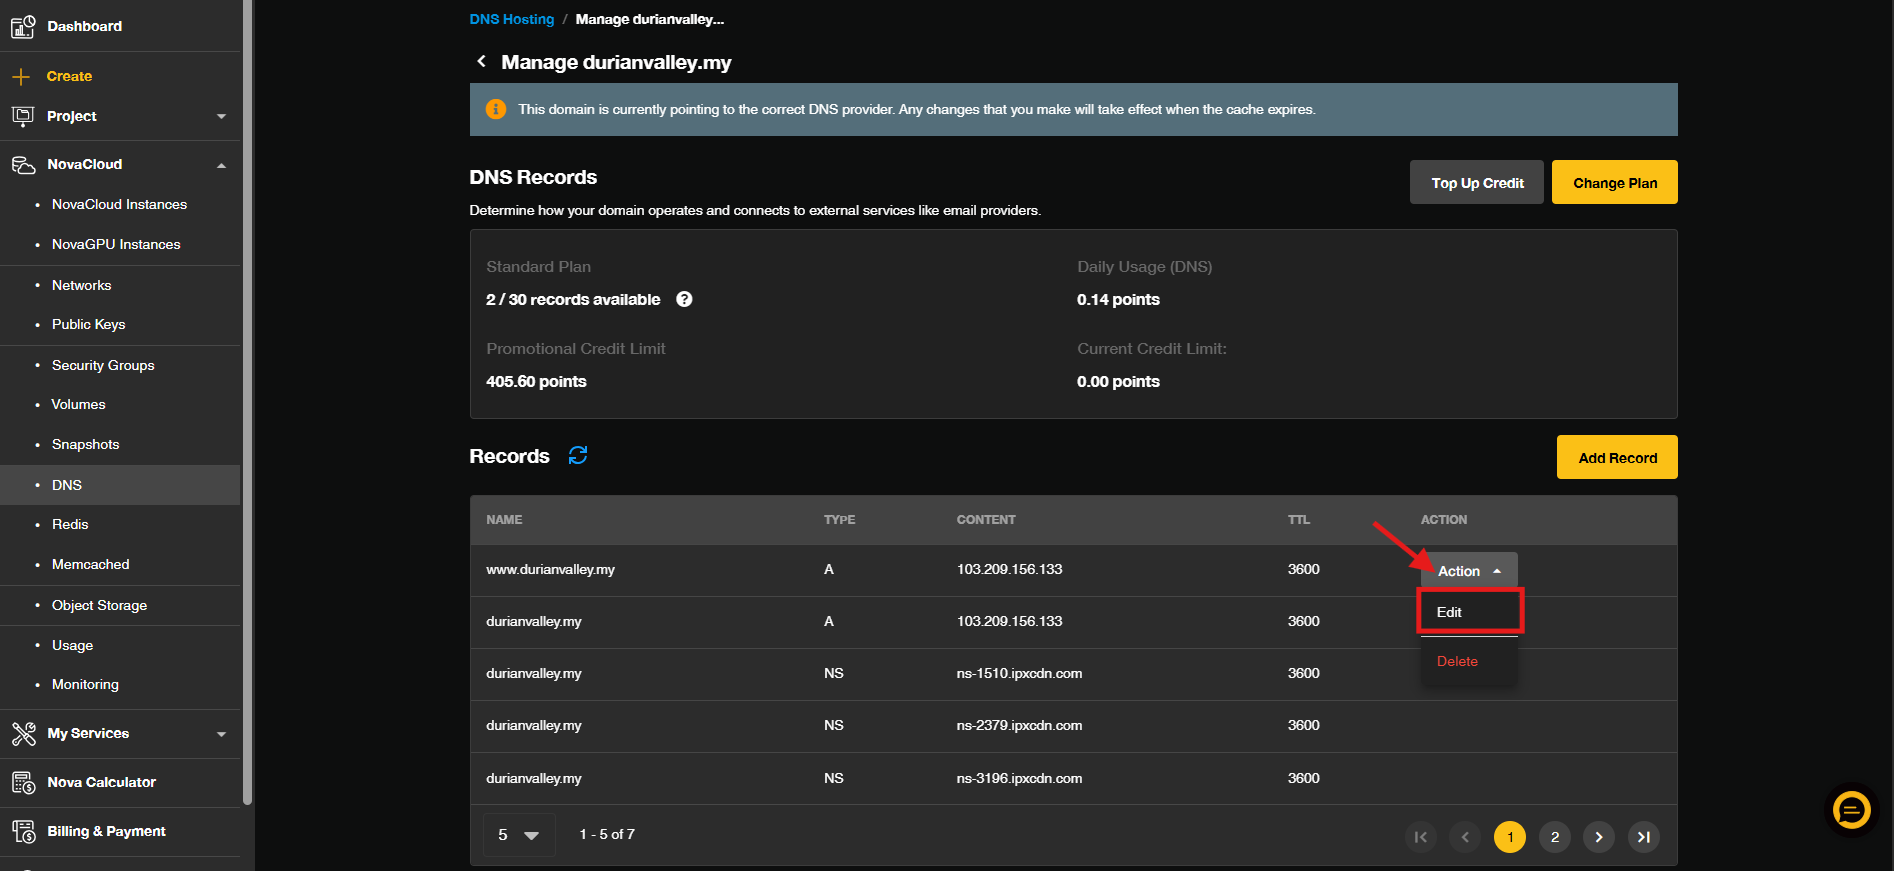
- To edit: Click on Action dropdown menu then clicks Edit
-
- To delete: Click on Action dropdown menu then clicks Delete
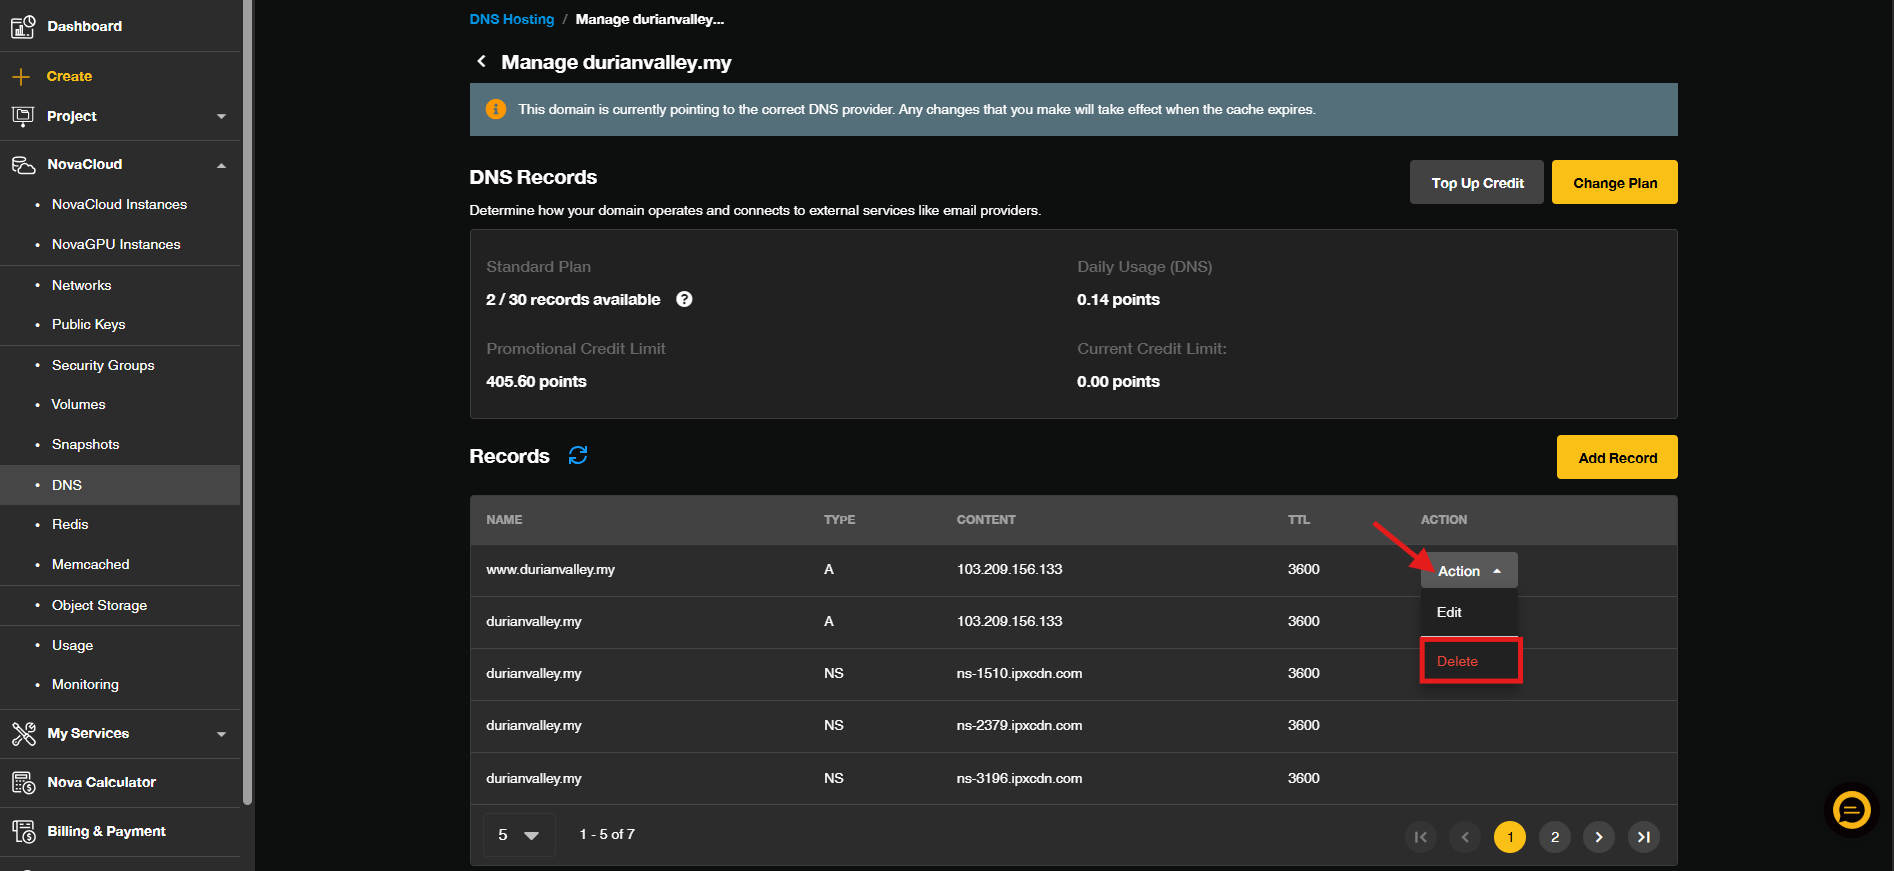
- To delete: Click on Action dropdown menu then clicks Delete
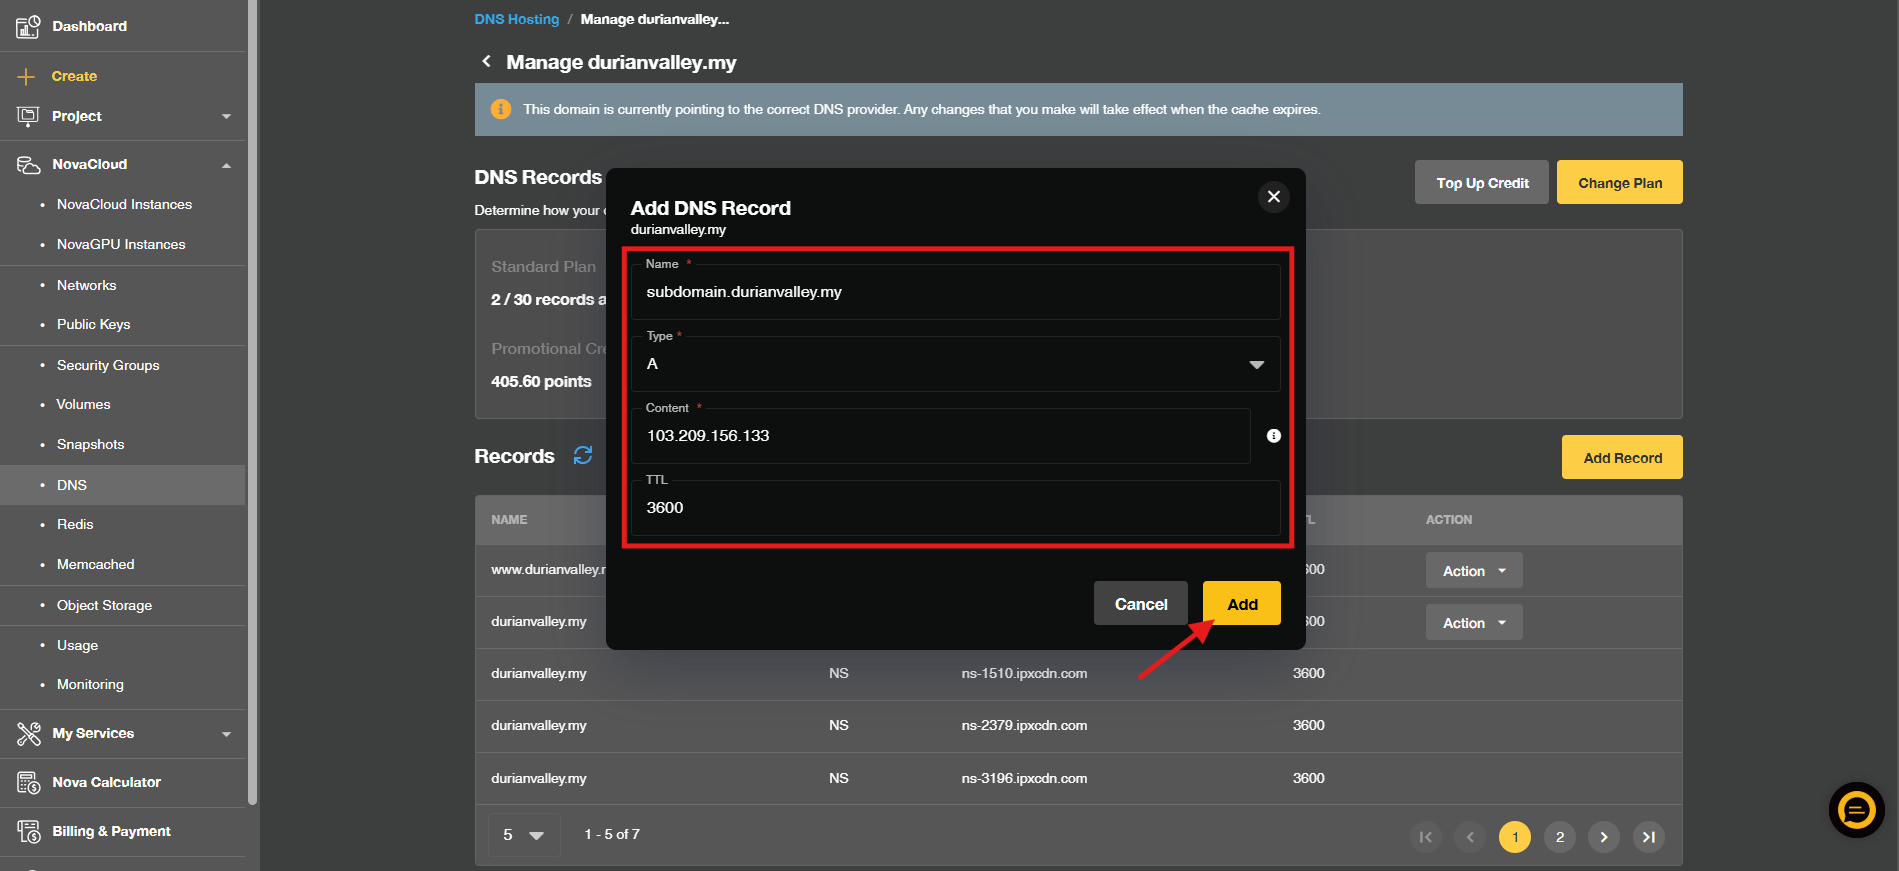
- While adding or editing a DNS record, a pop-up window will be shown, and you may enter the Name, Content and Type
Then click Add to add the new DNS record; click Save to update the info for the existing DNS record
Type of DNS Record
There are several records that you will be able to add:
-
- A record – The ‘A’ stands for ‘address’. This is the most fundamental type of DNS record, as it indicates the IP address of a given domain
- AAAA record – Similar to A record, but is used to resolve a hostname corresponding to an IPv6 address
- CNAME record – A CNAME record can map the web address www.example.com to the actual website for the domain example.com
- MX record – Tells the world which mail servers accept incoming mail for your domain and where emails sent to your domain should be routed. If your MX records are not pointed to the correct location, you will not receive any email. You can add multiple MX records
- NS record – Also known as a Nameserver record
- TXT record – Contains text information for sources outside your domain. You can use TXT records for various purposes:
– To verify domain ownership
– To ensure email security such as SPF records, DKIM records, DMARC records - ALIAS record – Similar to CNAME, but allows other DNS records on the same hostname, making it possible to apply ALIAS at the root domain (DNS zone apex).
Please refer to this guide when adding DNS records:
| Name | Type | Content | TTL |
|---|---|---|---|
| Enter: @ or domain name, e.g., www.domain.com |
A | (Enter IP address) e.g., 123.456.7.89 |
300 |
| Enter: @ or domain name, e.g., www.domain.com |
AAAA | (Enter IPv6 address) e.g., 1234:5678:90ab:cdef:0123:4567:89ab:cdef |
300 |
| Enter: domain.com e.g., domain.com |
CNAME | (Enter hostname) e.g., example.com |
300 |
| Enter: domain.com | MX | (Enter mail server) e.g., mail.example.com |
300 |
| Enter: domain.com | TXT | (Enter value) e.g., “v=spf1 include:example.com ~all” |
300 |
Conclusion
By following these steps, users can manage their DNS records effectively through the IP ServerOne customer portal. It is crucial to understand the various types of DNS records and their functions to ensure proper website and email operation.
For additional assistance or if you encounter any issues, please contact our support team at support@ipserverone.com.
Article updated on 23 September 2026 by Johnny H.