
Search Our Database
How to extend partition for Windows Server
Introduction
Running out of disk storage on your Windows Server can cause critical applications to stall and degrade overall system performance. System administrators and IT teams need a quick, reliable way to allocate additional drive space to existing volumes without disrupting operations or losing data. Disk Management in Windows Server provides an intuitive graphical tool to perform this expansion seamlessly. By following this guide, you will learn how to safely extend your server’s disk partition using unallocated storage space in just a few quick steps.
Prerequisite
- Access to Windows Server with Administrator login
- Basic knowledge of Windows Disk Management
Step-by-step guide
Step 1: Open Disk Management
- Log in to your Windows Server.
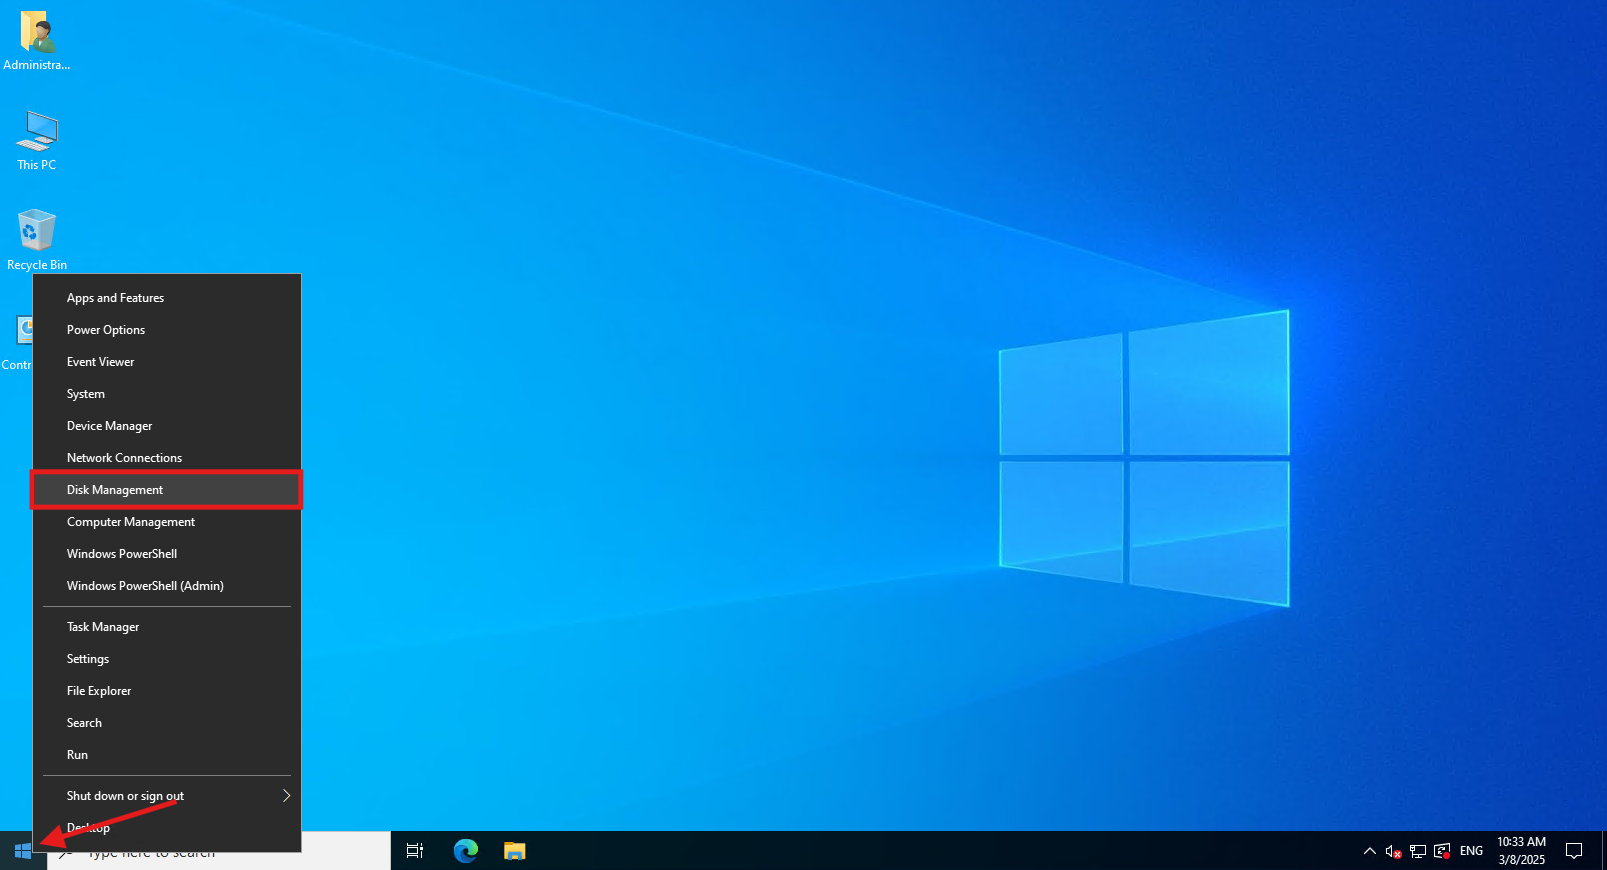
- Right-click the Start Button and select Disk Management.
Step 2: Initiate Volume Extension
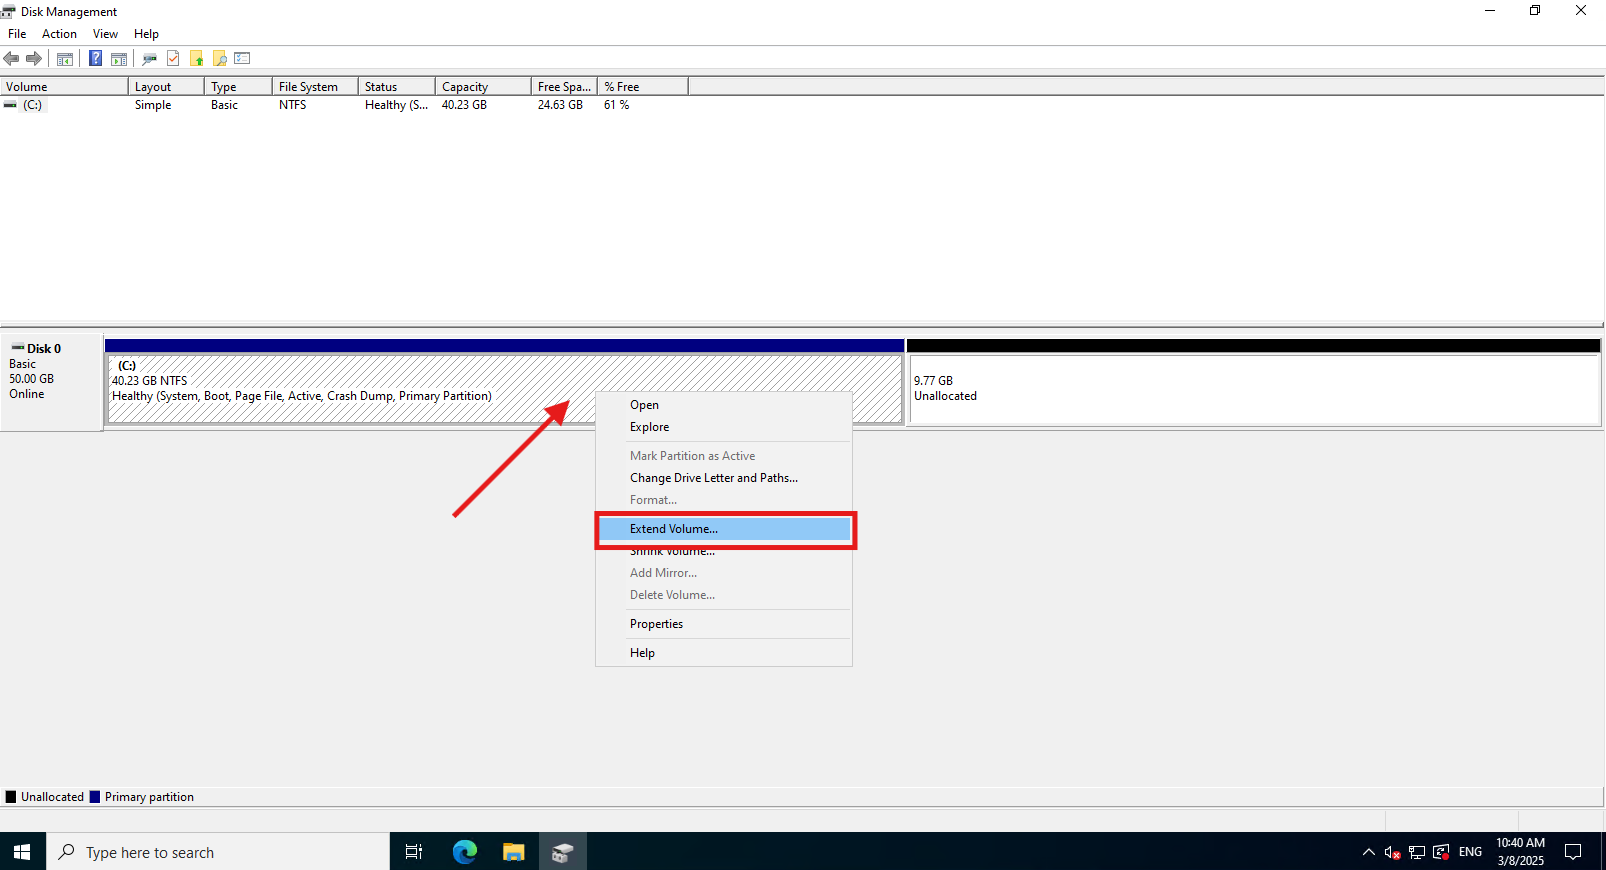
- Locate the target volume that has unallocated space adjacent to it.
- Right-click the volume you wish to extend and click Extend Volume.
Step 3: Specify Allocation Size
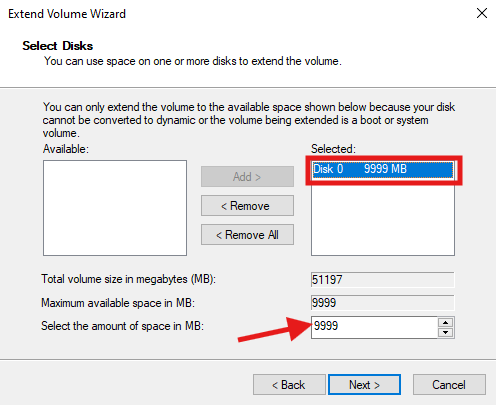
- On the Extend Volume Wizard pop-up, click Next.
- Windows will automatically select all available unallocated space by default. If you prefer to extend by a smaller amount, specify the size in MB.
- Click Next.
Step 4: Finalize Extension and Verify
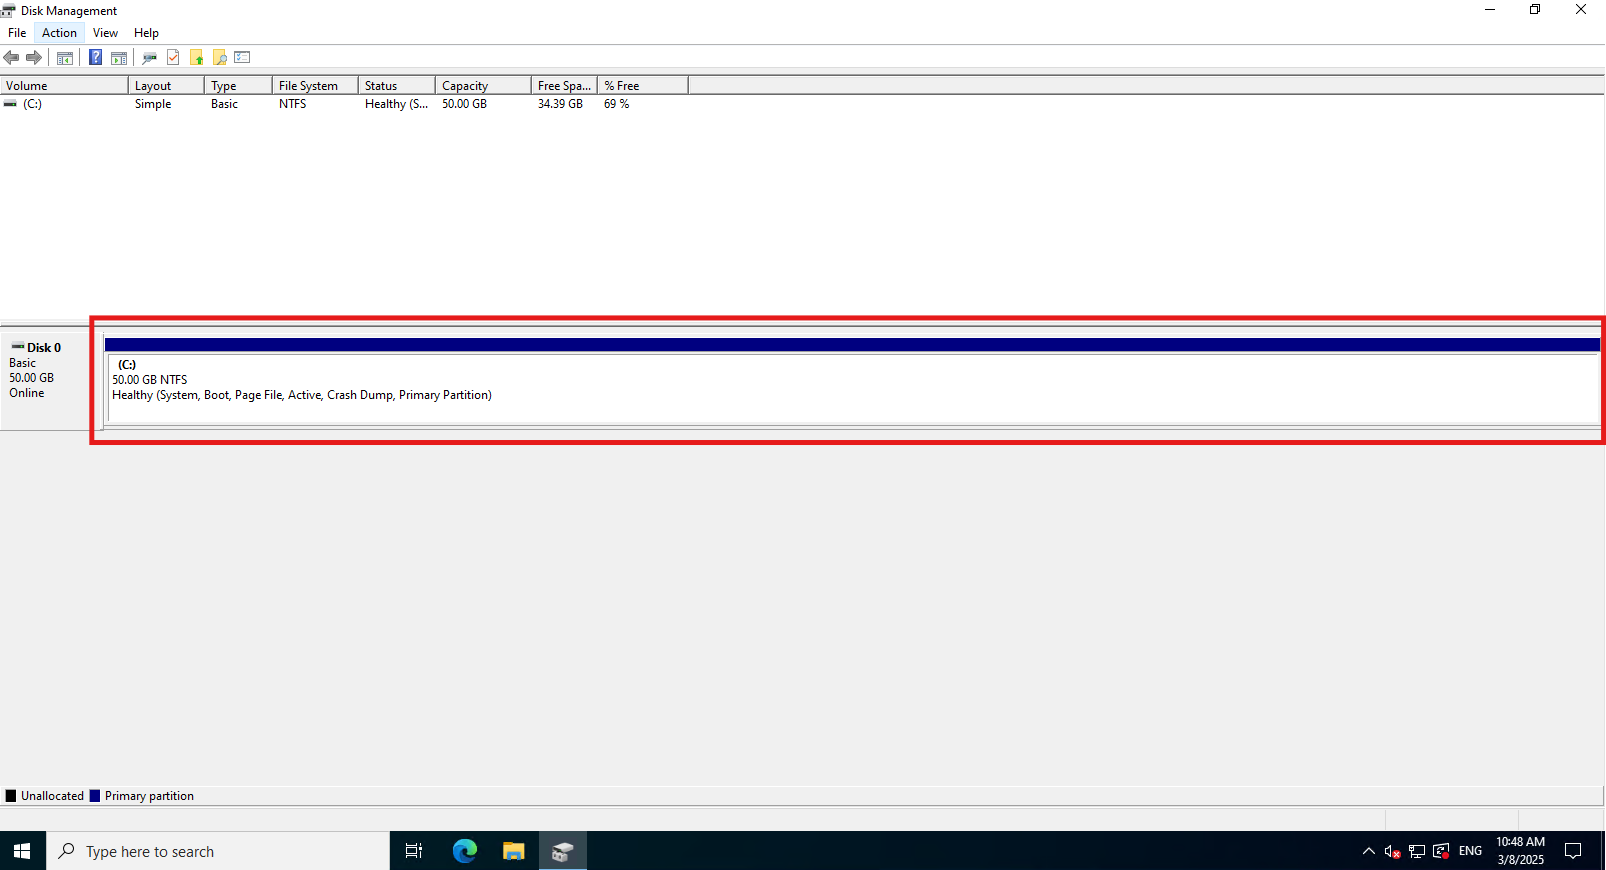
- Click Finish to complete the wizard.
- Confirm in the Disk Management console that the unallocated space has been absorbed into the extended volume.
Conclusion
By following this guidance, you can successfully extend the volume in Windows Server to allow you to have more space to save your data.
For additional assistance or if you encounter any issues, please contact our support team at support@ipserverone.com.
Article updated on 27 July 2027 by Johnny