
Search Our Database
How to Perform Hostname Redirect in Windows IIS
Introduction
This guide provides instructions on how to redirect traffic from one hostname (e.g., test.yourdomain.com.my) to another hostname (e.g., test.dedicatedhosting.com.my) using Internet Information Services (IIS) on a Windows server. This ensures visitors accessing the old hostname are seamlessly routed to the new destination. The guide also covers how to install the required HTTP Redirection feature if it is not already available.
Prerequisite
- Access to the Windows Server with Administrator privileges.
- Internet Information Services (IIS) installed.
Step-by-step guide
Step 1: Install HTTP Redirection Feature
If the HTTP Redirection feature is not yet installed on your server, you can enable it through the Server Manager interface.
- Open Server Manager on your Windows server.
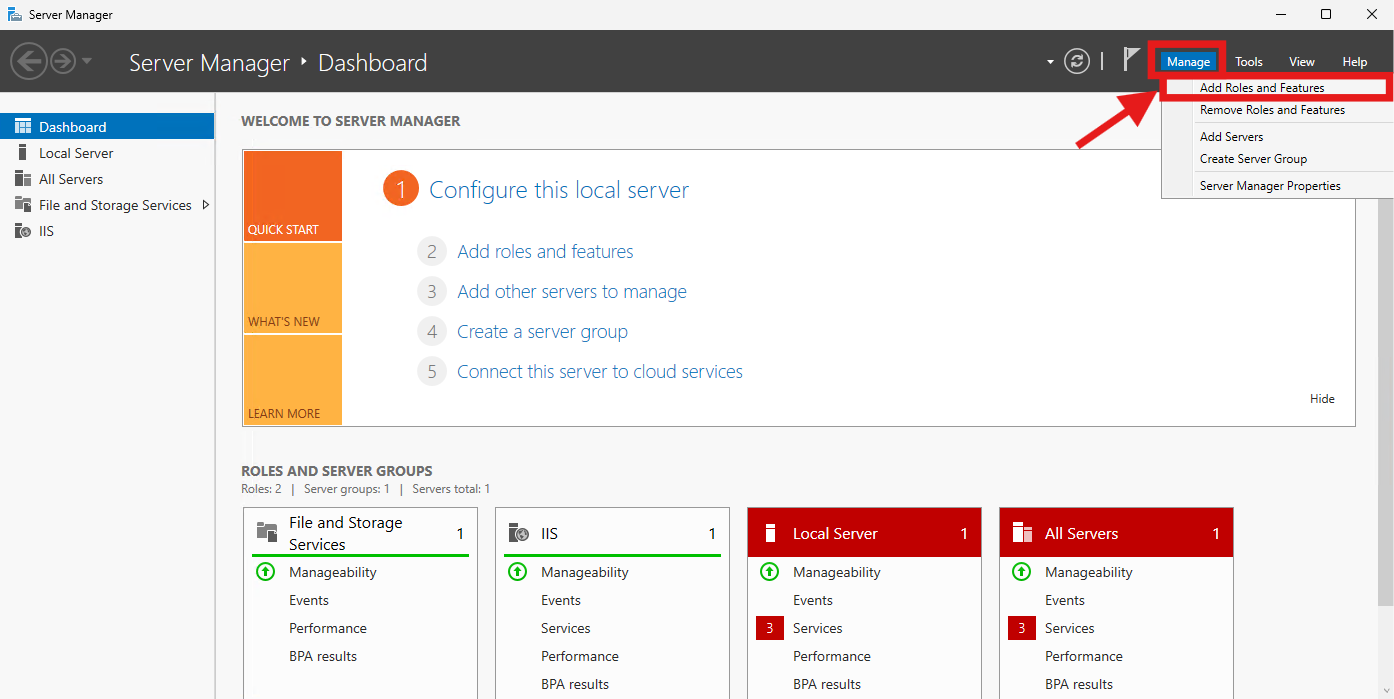
- Click on Manage in the top-right corner and select Add Roles and Features.
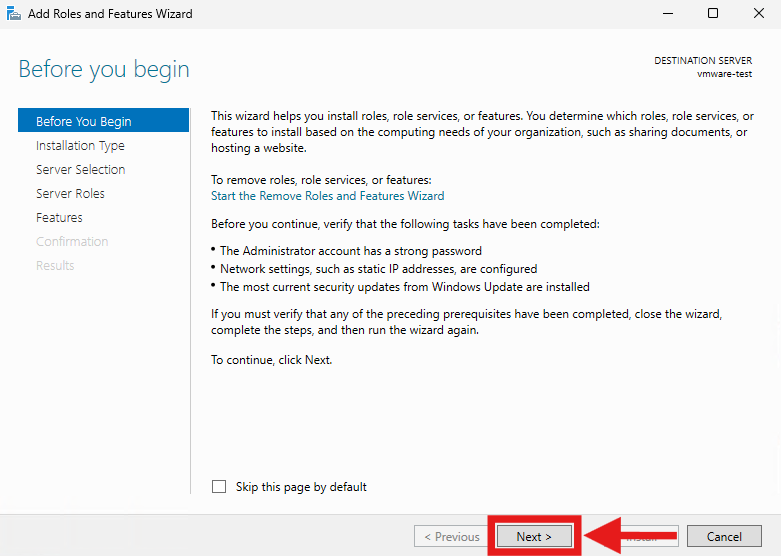
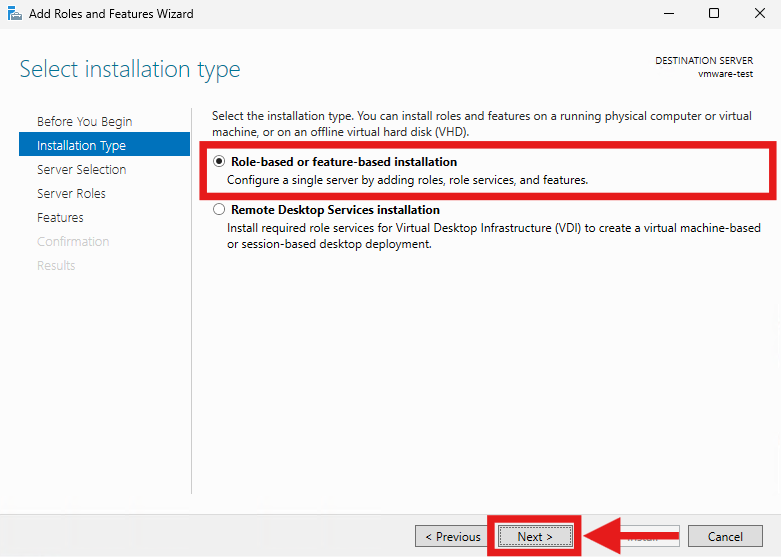
- Click Next on the Before You Begin and Installation Type screen.
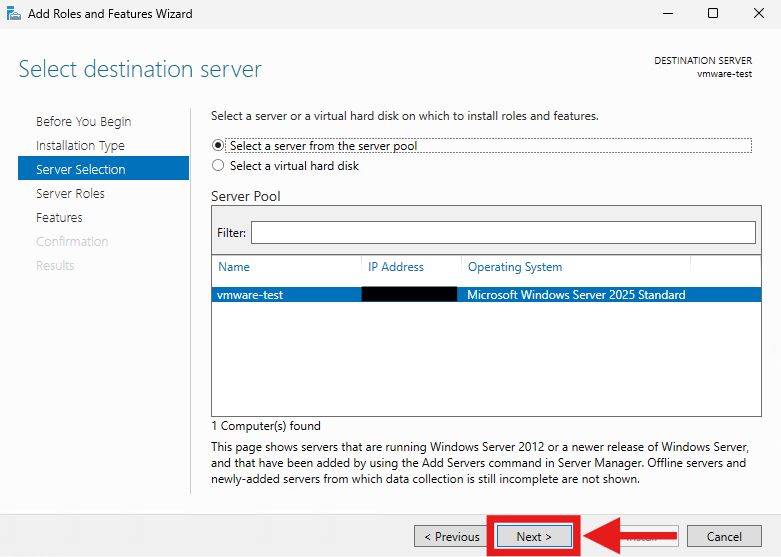
- On the Server Selection screen, select the specific destination server from your server pool and click Next. In this example, since there is only one server available, it is being selected.
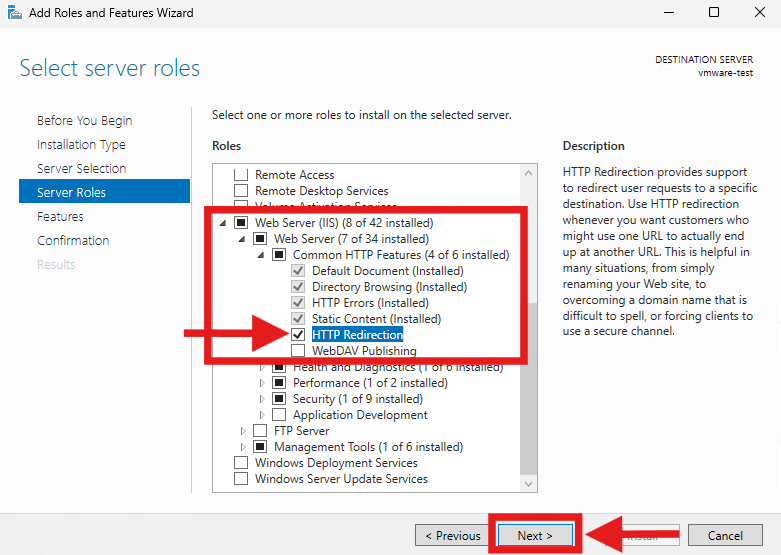
- You will then arrive at the Server Roles section. Expand Web Server (IIS) > Web Server > Common HTTP Features. Check the box for HTTP Redirection and click Next.
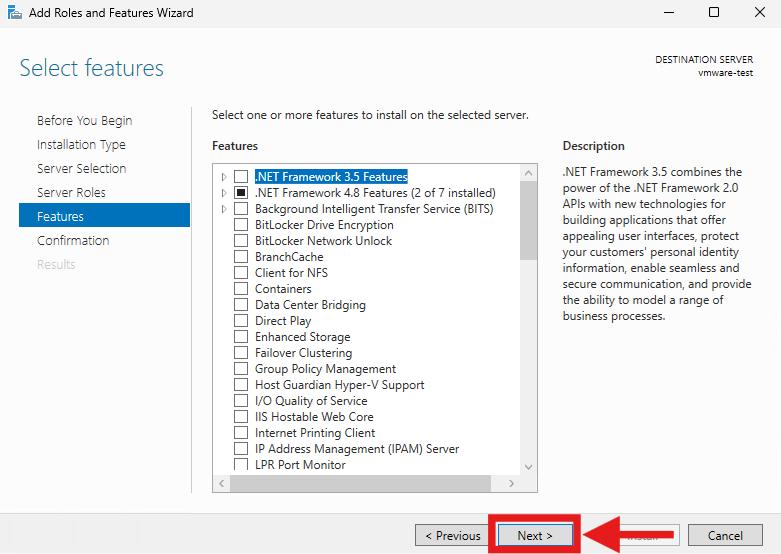
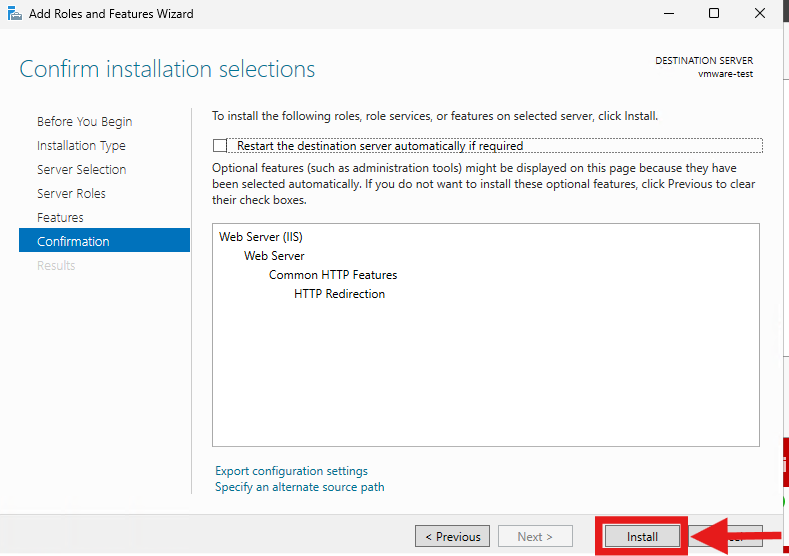
- Click Next until you reach the confirmation page, then click Install.
Alternatively, you can install the HTTP Redirection feature quickly using a PowerShell command.
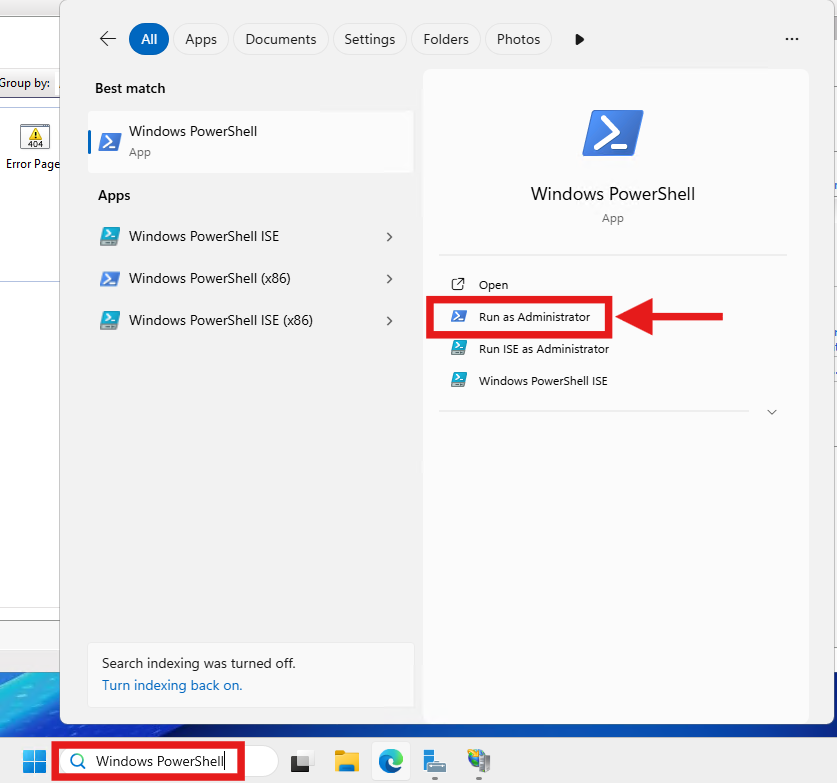
- Open Windows PowerShell as an Administrator.
- Type the following command and press Enter:
Install-WindowsFeature Web-Http-Redirect
- Wait for the installation process to complete successfully.
Expected Output:

Step 2: Configure Redirect
This method involves configuring the hostname redirect directly through the IIS Manager interface.
- Open Internet Information Services (IIS) Manager.
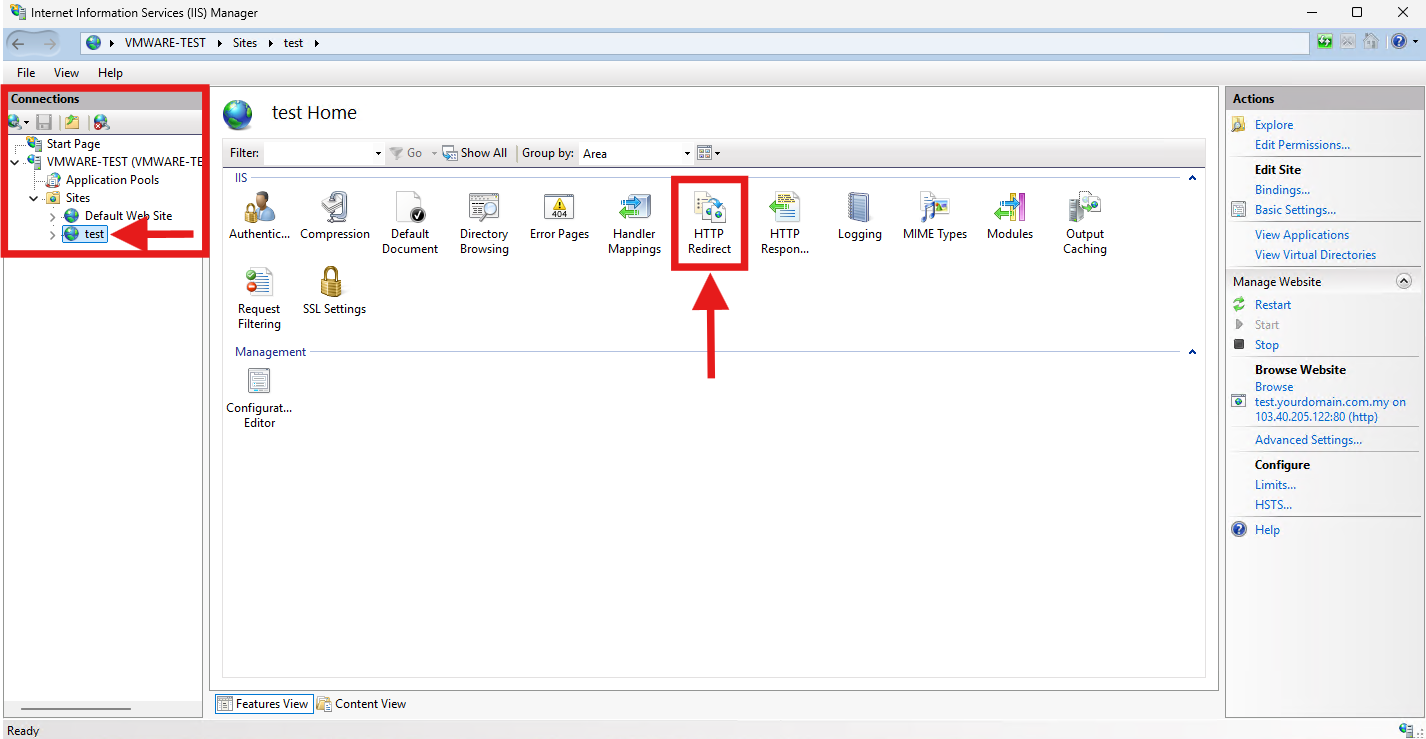
- In the Connections pane on the left, expand the server node, expand Sites, and select the site associated with the original hostname (e.g., test.yourdomain.com.my).
- In the middle pane (Features View), double-click the HTTP Redirect feature icon.
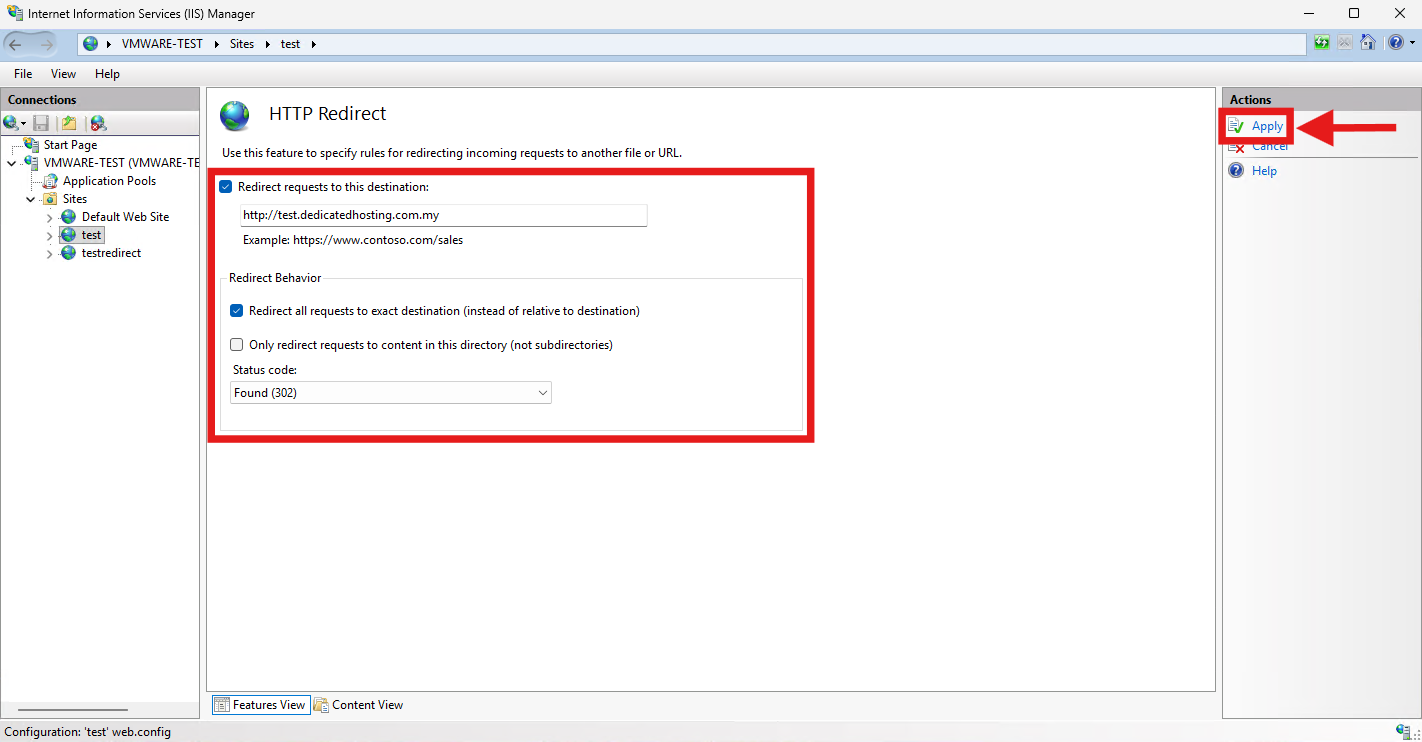
- Check the box that says Redirect requests to this destination.
- In the text box provided, enter the new destination URL (e.g., http://test.dedicatedhosting.com.my).
- Under the Redirect Behavior section, configure the options as needed (e.g., check “Redirect all requests to exact destination” if you want all sub-paths to go to the root of the new domain, or leave it unchecked to preserve the path structure).
- In the Status code dropdown menu, select the appropriate redirect type based on your needs:
- Found (302): A standard temporary redirect. Tells browsers to go to the new URL for now, but continue checking the original URL in the future.
- Permanent (301): Tells search engines and browsers the site has moved permanently. This is best for SEO as it passes ranking to the new URL.
- Temporary (307): A modern temporary redirect that ensures the HTTP request method (e.g., GET or POST) does not change when redirected.
- Permanent Redirect (308): A modern permanent redirect that also ensures the HTTP request method is preserved during the redirect.
- In the Actions pane on the right, click Apply to save the changes.
This method configures the redirect by directly modifying the web.config file in the root directory of the site being redirected.
Step 3: Verify Redirect
Open web browser and type your original URL (In this case, test.yourdomain.com.my) in search bar.
Expected Output: Showing the new destination’s URL and page content. (In this example, test.dedicatedhosting.com.my)

Conclusion
By following this guidance, you can successfully redirect traffic from one hostname to another using Windows IIS, ensuring a smooth transition for your users.
If you face any difficulties in the setup, please don’t hesitate to contact our support team at support@ipserverone.com.