
Search Our Database
How to manage email accounts in cPanel
Introduction
The Email Accounts interface in cPanel is the central place to manage the email addresses on your domains — viewing mailbox usage, opening an account’s management page, adjusting storage quotas, and removing accounts that are no longer needed. This guide shows cPanel users how to navigate the Email Accounts interface, change an email account’s storage quota, and delete an account. For other account tasks, see the dedicated guides linked in this article.
Prerequisite
- Access to your cPanel login page.
- A domain already configured in cPanel for email.
Step-by-Step Guide
Step 1: Log in to cPanel
- Access and log in to your cPanel account using your username and password.

Step 2: Open Email Accounts
- In the Home page, under the Email section, click Email Accounts.
- The Email Accounts table lists every mailbox on your account with its current storage usage.


Step 3: Open an Account’s Management Page
- Locate the email account you want to manage. You can use the Search bar to find a specific account quickly. Click Manage next to the email address.

- From the Manage Email Account page, you can perform any of the account tasks listed in the next step.


Step 4: Perform an Account Task
- Creating a new email account: see [How to Create an Email Account in cPanel].
- Suspending or unsuspending the account: see [Managing Email Account Restrictions in cPanel].
- Change the Account Password: see Step 5 below.
- Changing the storage quota or setting unlimited storage: follow Step 6 below.
- Deleting the account: follow Step 7 below.
Step 5: Change the Account Password
- Enter a new secure password in the password field, or click Generate to create a strong, random password.
- Click Update Email Settings to apply the changes. This is recommended whenever you unsuspend an account that was suspended due to compromise.

Step 6: Change the Storage Quota
- In the Allocated Storage Space section, locate the storage quota settings. Enter the new mailbox size in the storage field. Increasing the quota gives the mailbox room to store more emails without hitting its limit.

- Select the Unlimited option in the storage field. This removes all storage quota restrictions for the email account, allowing it to store emails without size limitations.
Important Note⚠️: The Unlimited individual account quotas are still constrained by your overall cPanel account storage limits.

- Click Update Email Settings to apply the changes.

- A pop-up window will appear indicating your changes were applied successfully. You may check the email account details to verify that the storage quota displays the new value or unlimited.

Step 7: Delete an Email Account
- If an email account is no longer needed, you can permanently remove it from the Email Accounts interface. Deletion cannot be undone, so complete the steps below carefully.
- Before deleting, back up any important messages using your email client, and update or remove the address from websites, forms, and online accounts that use it. Once deleted, all associated emails and configurations are permanently lost.
- Click Manage next to the account, scroll down to Delete Email Account, and click Delete Email Account.
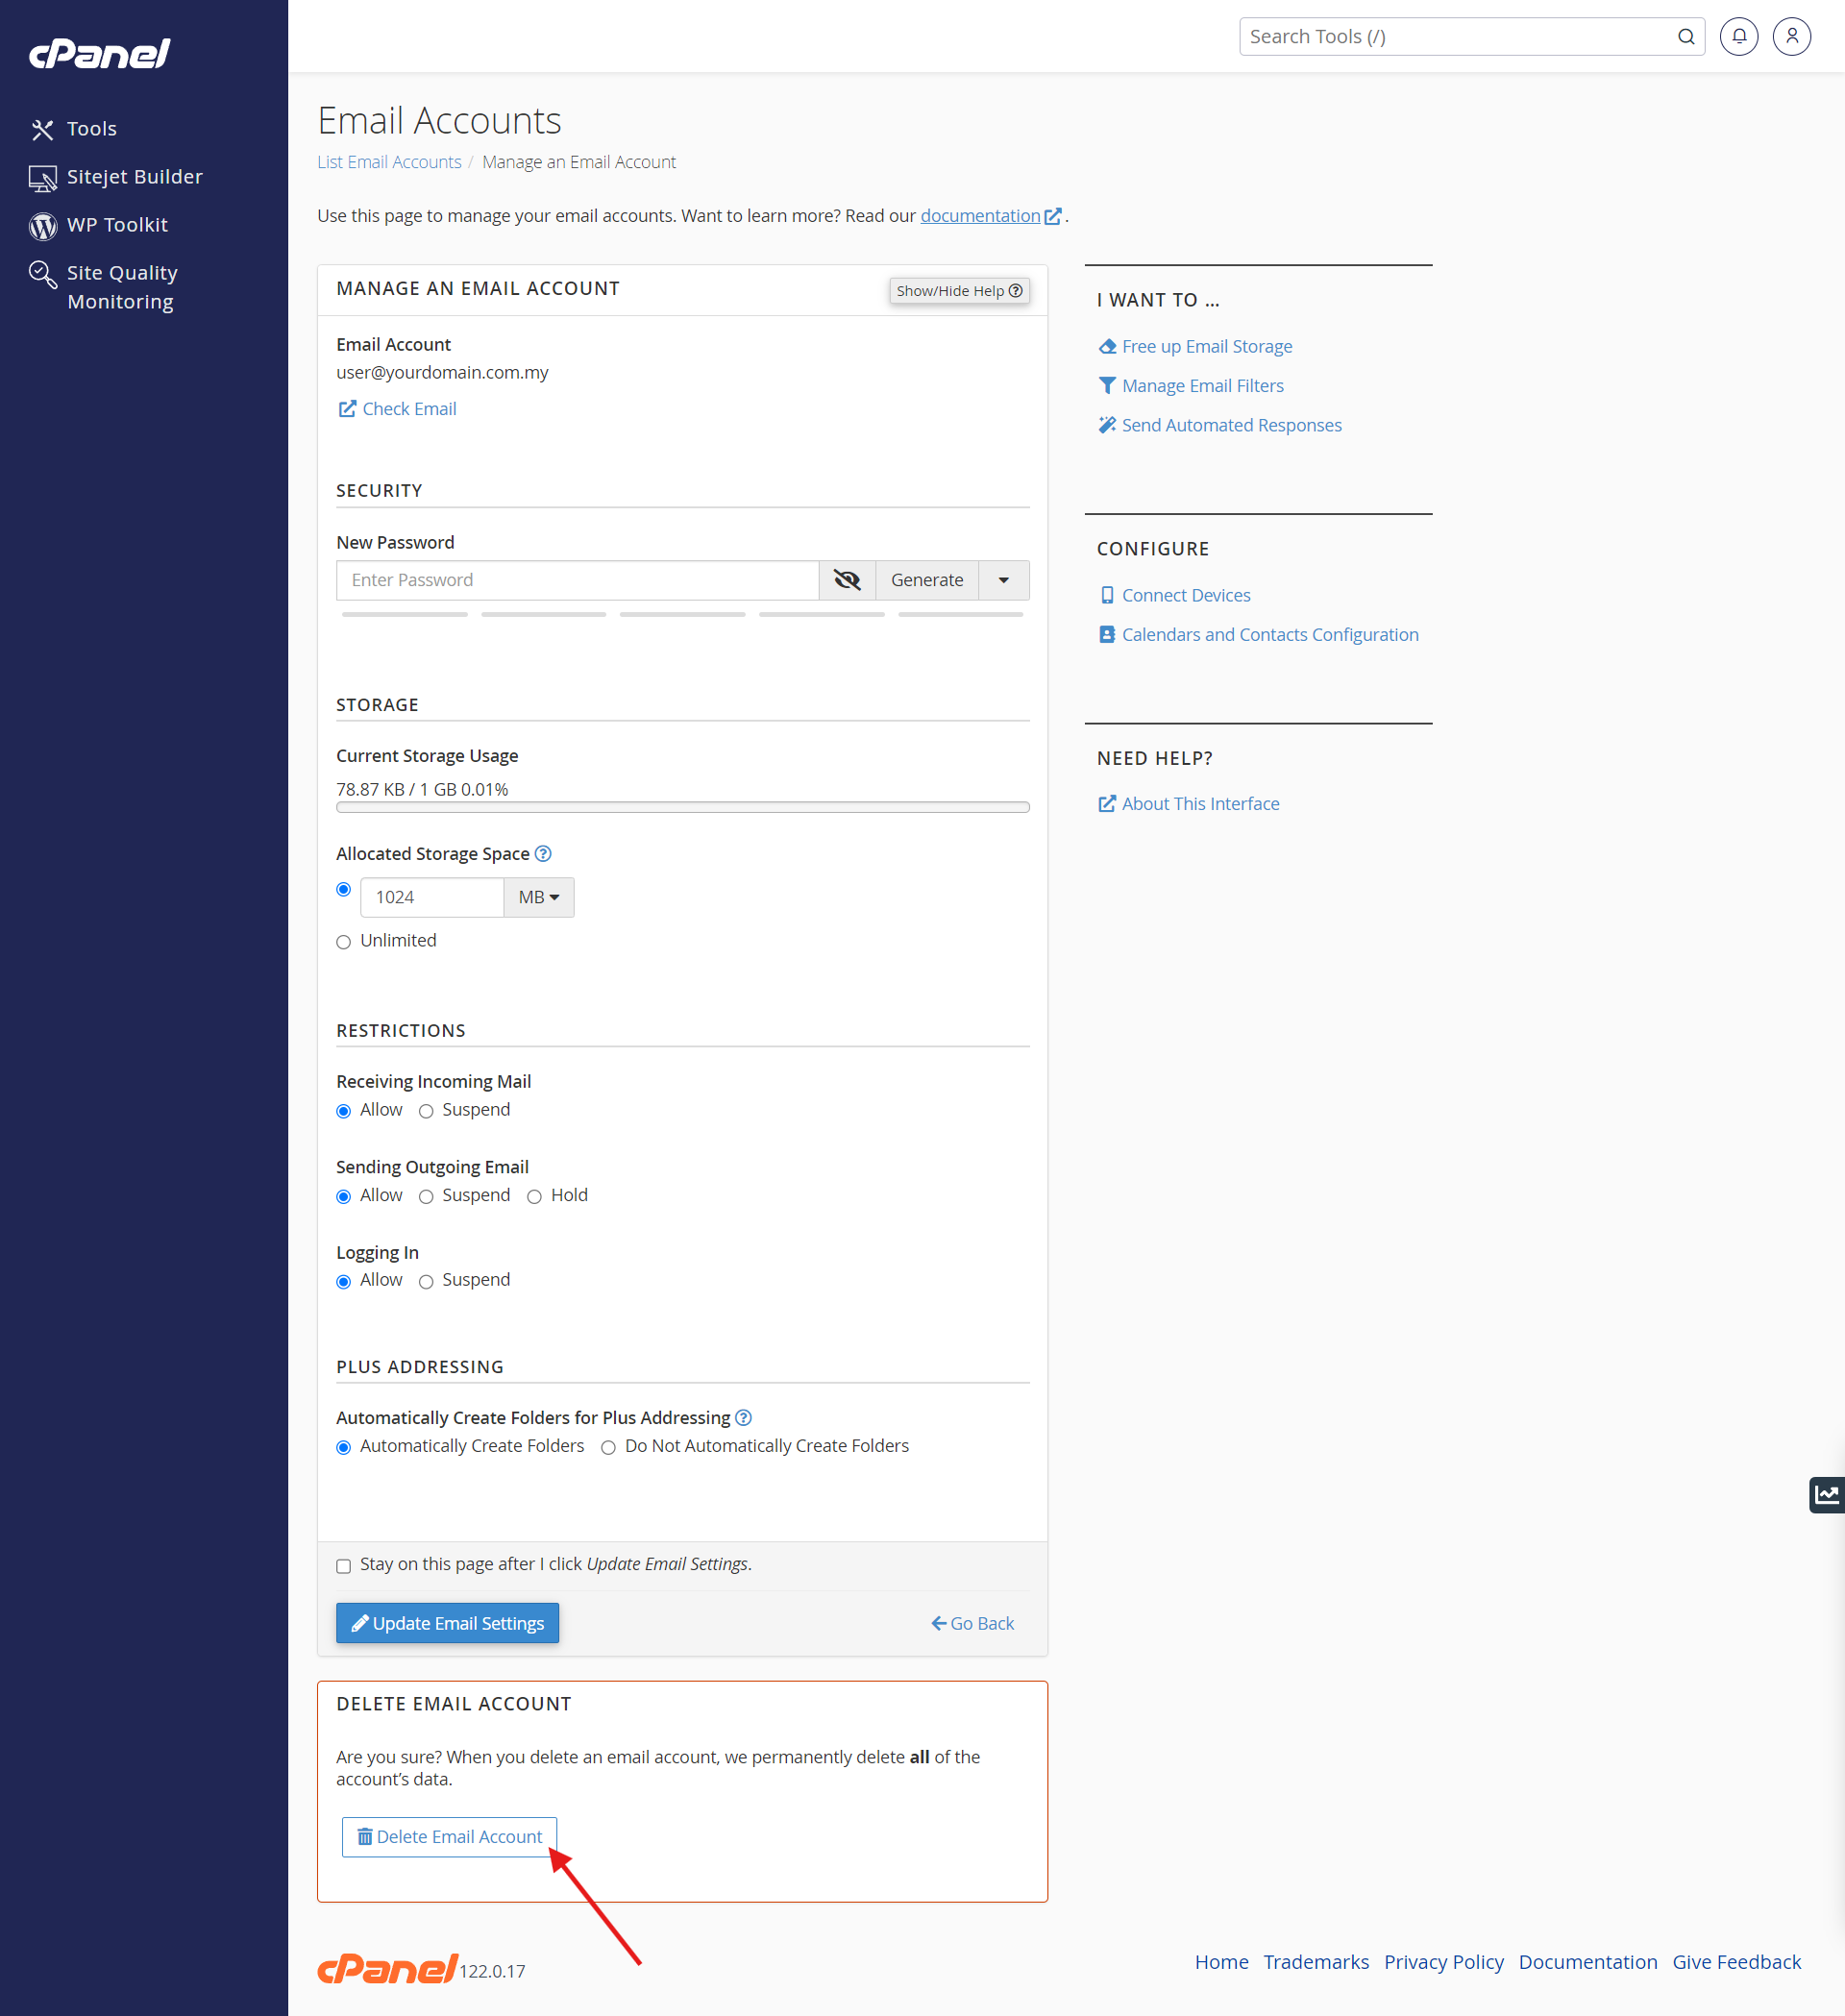
- Confirm your decision by clicking Delete.

- A Success message will appear, and the account will no longer be listed in the Email Accounts table.

Conclusion
By following this guidance, you can navigate the Email Accounts interface in cPanel, change storage quotas, and delete accounts that are no longer needed. Regularly reviewing your email accounts helps keep your domain’s email services organized and secure.
If you encounter any issues or require further assistance, please reach out to our support team at support@ipserverone.com.
Article updated on 17 November 2026 by Johnny