
Search Our Database
How to Create an Outbound Rule in Windows Defender Firewall on Windows Server
Introduction
Windows Defender Firewall helps protect your Windows Server by controlling incoming and outgoing network traffic. An outbound rule allows or blocks connections initiated by your Windows Server to another computer or service. This guide will show you how to create an outbound rule in Windows Defender Firewall using TCP port 8080 as an example.
Applicable Operating Systems:
- Windows Server 2025
- Windows Server 2022
- Windows Server 2019
Prerequisite
- Access to Windows Server with administrator privileges
- Basic knowledge of Windows Server management
- The protocol and destination port you want to allow or block
- For connection testing, a reachable destination server with a service listening on the selected port
Step-by-step Guide
Step 1: Log In to Your Windows Server
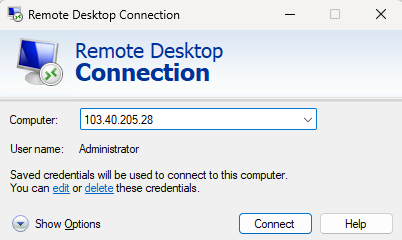
- Open Remote Desktop Connection on your local Windows computer.
- Enter your Windows Server’s Public IPv4 Address and click Connect.
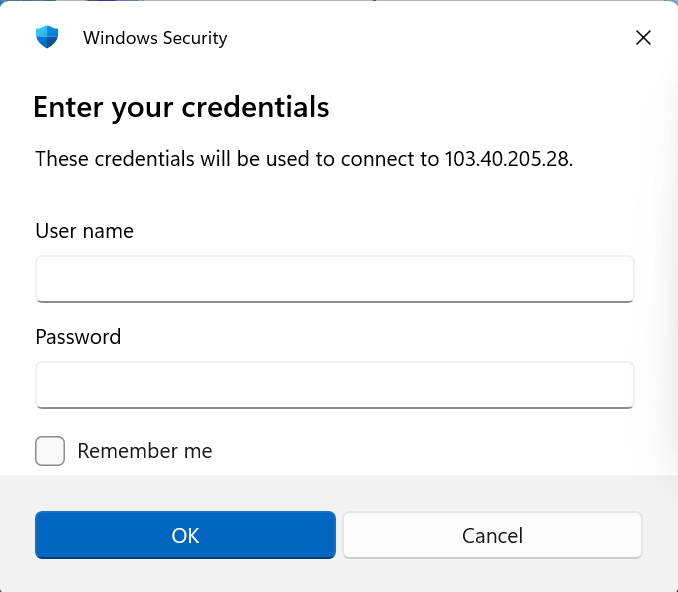
- Enter your administrator credentials to log in.
Step 2: Open Windows Defender Firewall
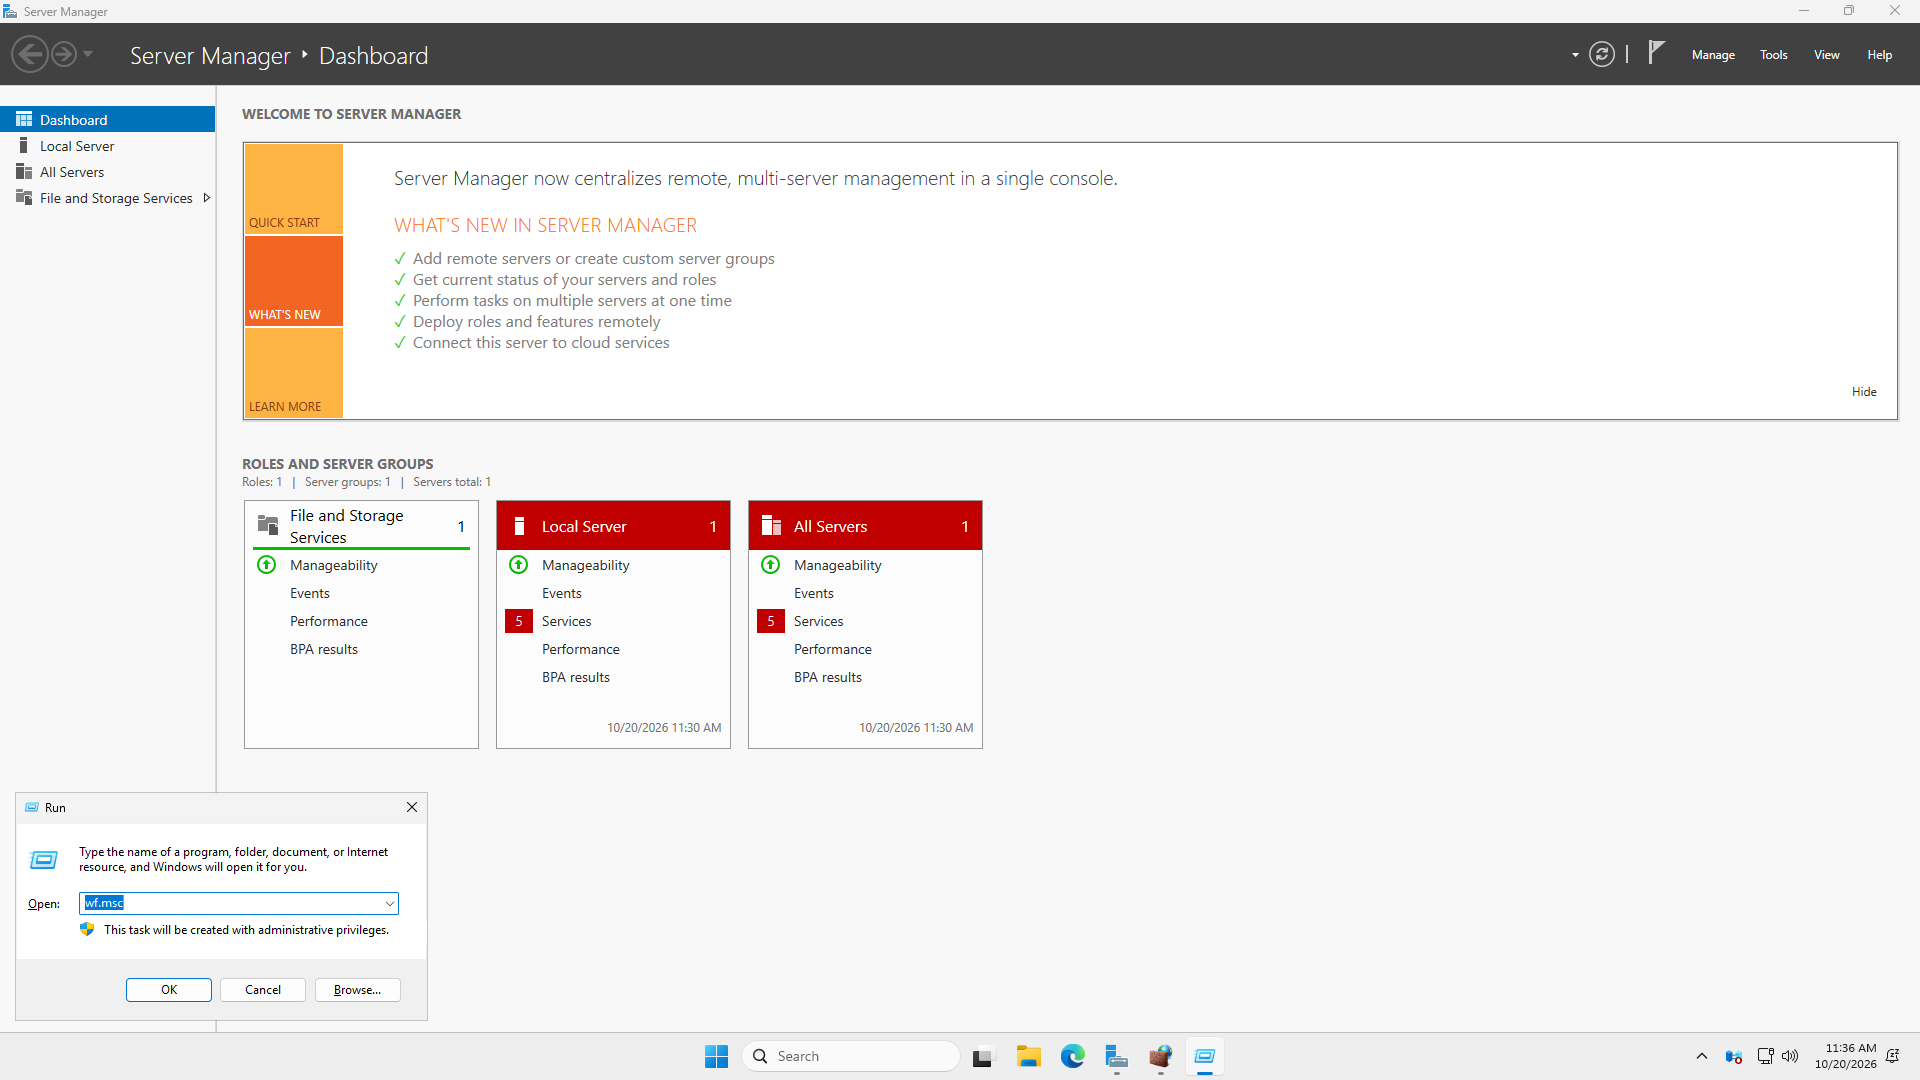
- Once logged in to your Windows Server, press Windows + R.
- Type wf.msc and click OK or press Enter.
- The Windows Defender Firewall with Advanced Security window will appear.
Step 3: Navigate to Outbound Rules
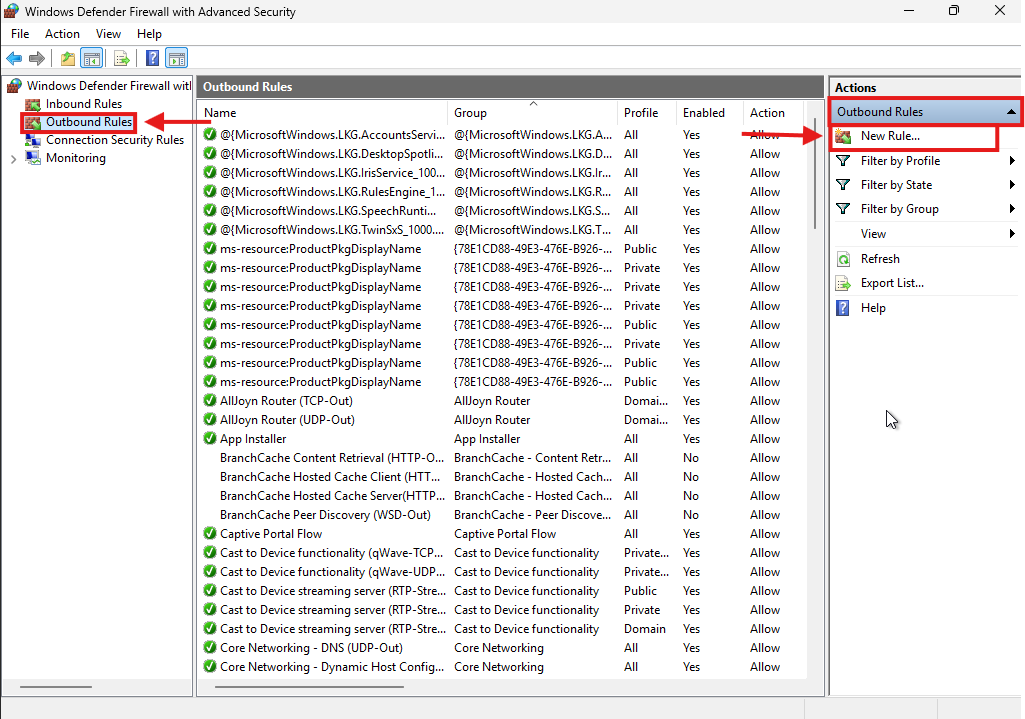
- In Windows Defender Firewall with Advanced Security, select Outbound Rules from the left panel.
- The existing outbound firewall rules will appear in the middle panel.
- In the right-side Actions panel, click New Rule.
Step 4: Select the Rule Type
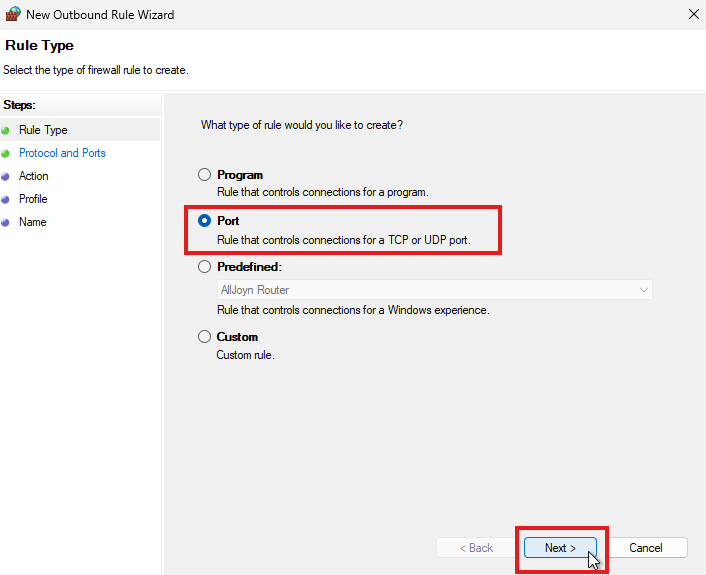
- Under What type of rule would you like to create?, select Port.
- Click Next to continue.
Step 5: Configure the Protocol and Remote Port
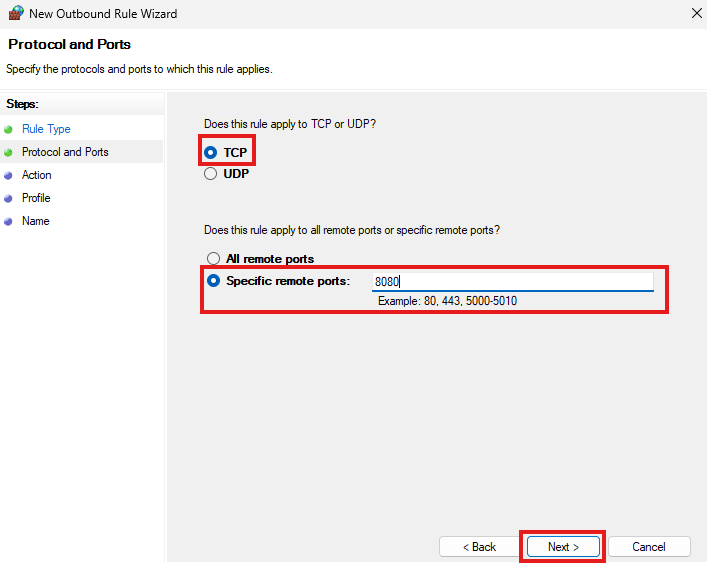
- Under Does this rule apply to TCP or UDP?, select TCP for this example.
- Under Does this rule apply to all remote ports or specific remote ports?, select Specific remote ports.
- Enter 8080. (port 8080 is the example port used in this guide. You may enter any port that you want to apply the rule to)
- Click Next to continue.
Step 6: Select the Firewall Action
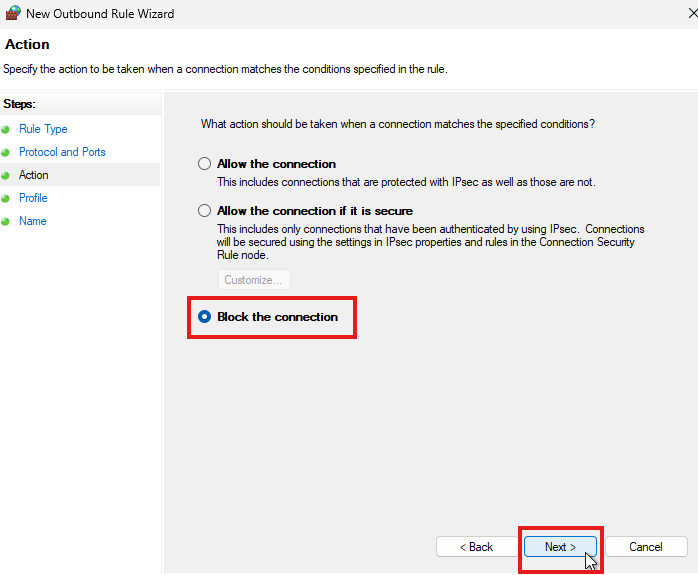
- Under What action should be taken when a connection matches the specified conditions?, select Block the connection for this demonstration.
- Click Next to continue.
Step 7: Select the Network Profile
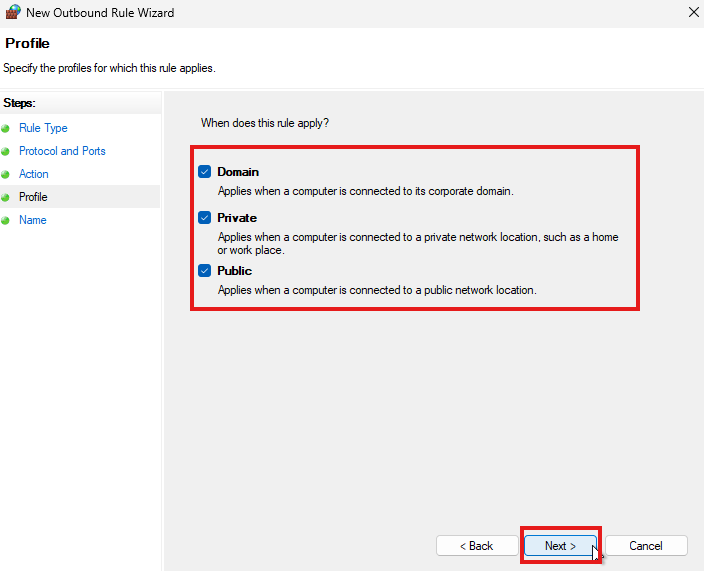
- Under When does this rule apply?, choose the relevant network profile:
- Domain: Applies when the server is connected to its domain network.
- Private: Applies when the server uses a private network profile.
- Public: Applies when the server uses a public network profile.
- Select the profile that applies to your server. You may select all three if required.
- Click Next to continue.
Step 8: Name the Outbound Rule
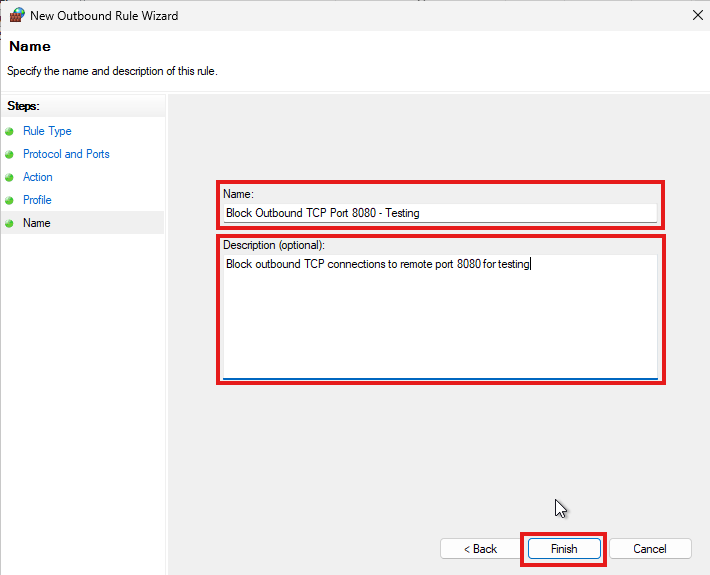
- Under Name, enter a name such as Block Outbound TCP Port 8080 – Testing.
- Under Description (optional), enter Block outbound TCP connections to remote port 8080 for testing.
- Click Finish to create the rule.
Step 9: Verify the Outbound Rule
- Return to the Windows Defender Firewall with Advanced Security window.
- Click Outbound Rules.
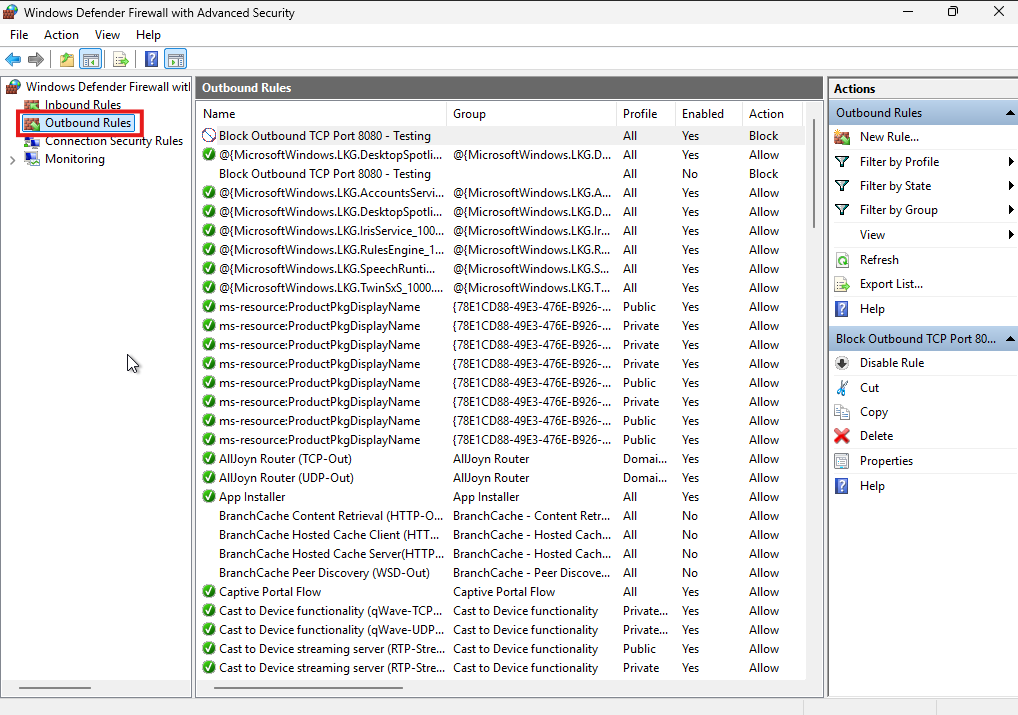
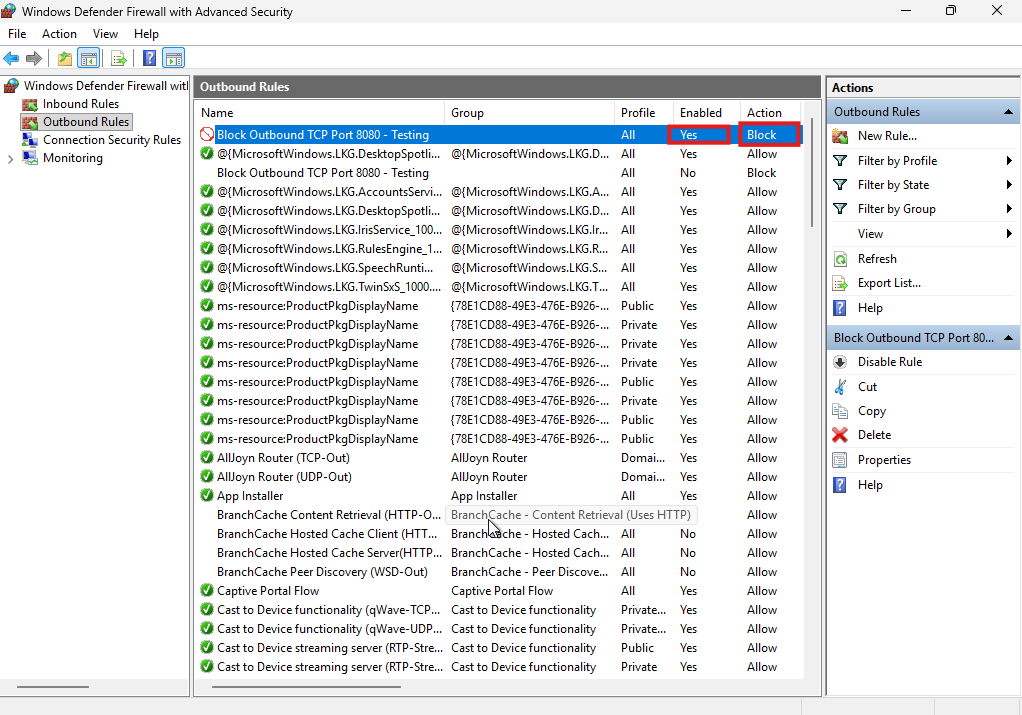
- Locate the newly created rule.
- Confirm that Enabled is set to Yes, Action is Block, and the rule applies to the intended profile and port.
Step 10: Configure IP Address Restrictions Using Scope (Optional)
The Scope tab lets you choose which local and remote IP addresses the outbound rule applies to.
- Right-click your outbound rule and select Properties.
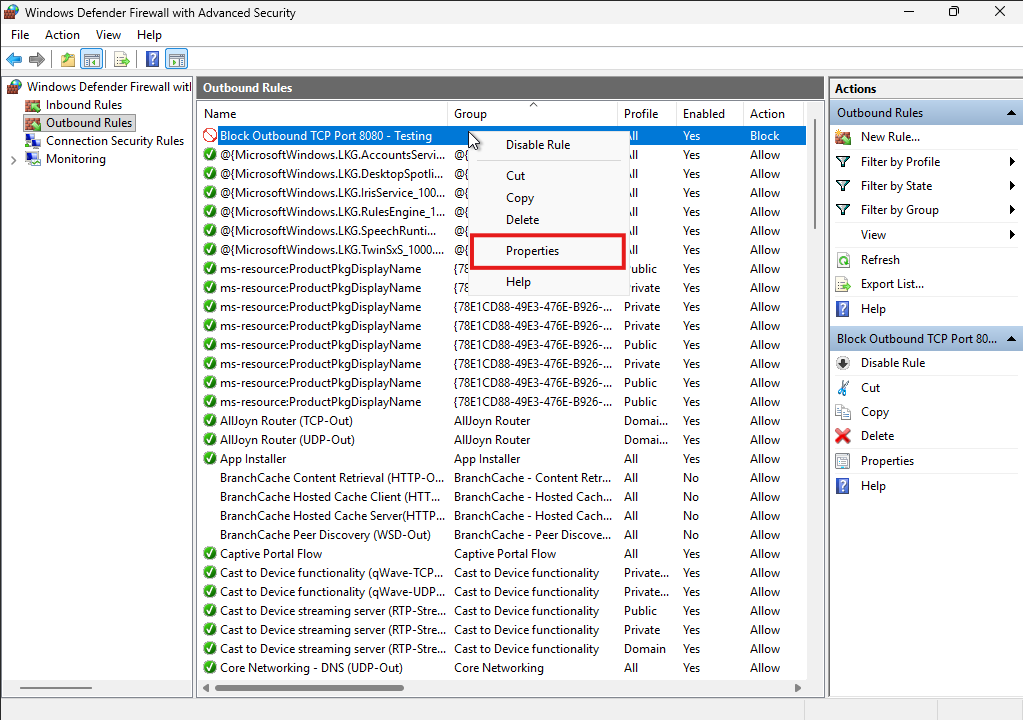
- Open the Scope tab.
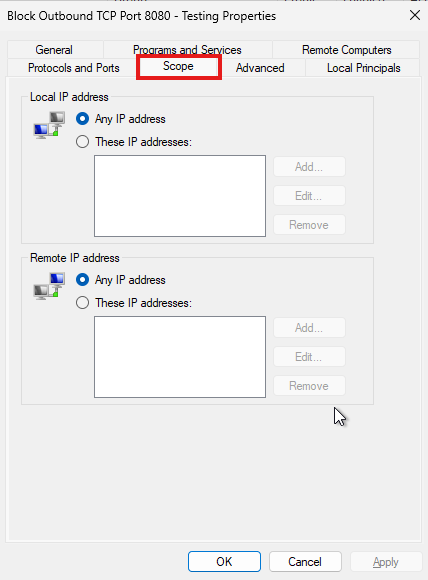
- Under Local IP address, choose Any IP address to apply the rule to all server IP addresses, or These IP addresses to select particular IP addresses assigned to the server.
- Under Remote IP address, choose Any IP address to apply the rule to any destination, or These IP addresses to limit it to particular destination IP addresses or networks.
- To specify an IP, select These IP addresses, click Add.
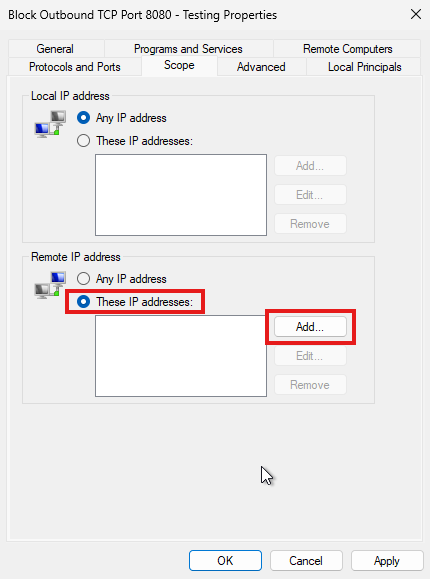
- Enter an address, subnet, or range, then click OK.
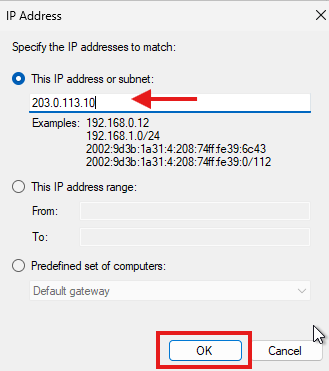
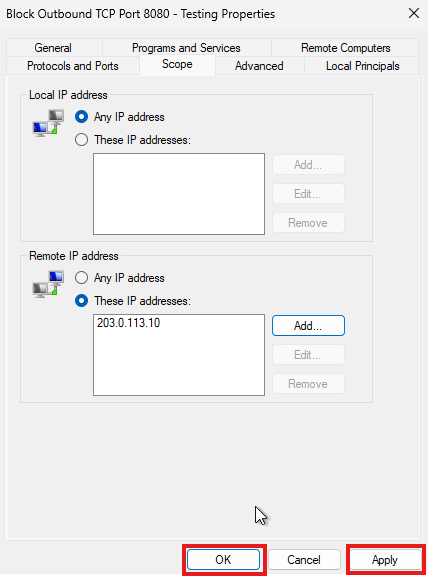
- Click Apply and OK to save the settings.
Step 11: Test the Outbound Connection
To demonstrate the effect of the rule, use a destination server that you control or are authorized to test, with a TCP service listening on port 8080. Perform the test from your Windows Server.
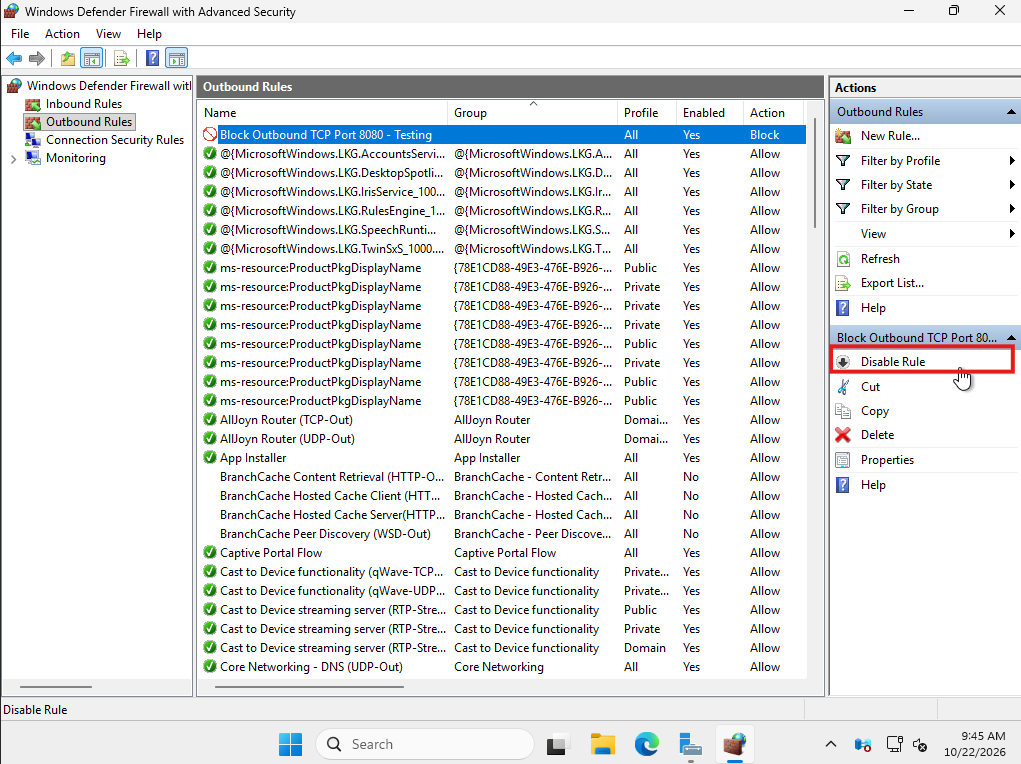
Before enabling the blocking rule:
- Temporarily disable the newly created rule by right-clicking it and selecting Disable Rule.
- Open PowerShell on your Windows Server.
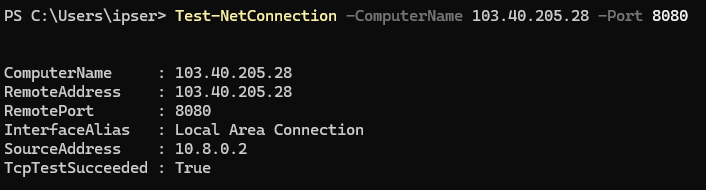
- Run the following command, replacing the placeholder with the destination server’s IP address:
Test-NetConnection -ComputerName <Destination-IP> -Port 8080
If the destination is listening and the route is accessible, the expected result is:
TcpTestSucceeded : True
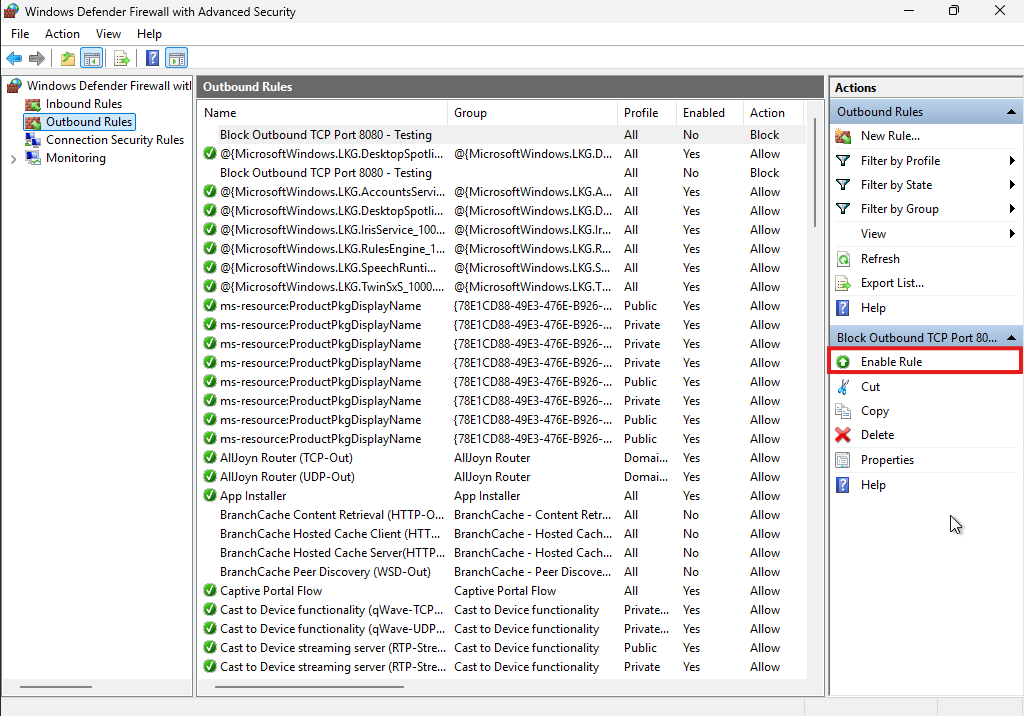
After enabling the blocking rule:
- Right-click the outbound rule and select Enable Rule.
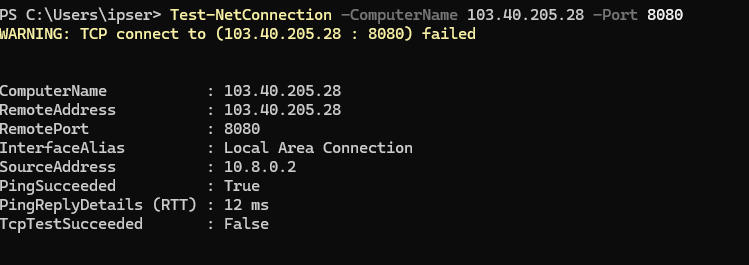
- Run the same PowerShell command again:
Test-NetConnection -ComputerName <Destination-IP> -Port 8080
If the connection matches your new blocking rule, the expected result is:
TcpTestSucceeded : False
Conclusion
By following this guide, you can successfully create and configure an outbound rule in Windows Defender Firewall on your Windows Server. Outbound rules help you control which connections your server can initiate. Use Allow the connection or Block the connection depending on your security requirements.
For additional assistance or if you encounter any issues, please contact our support team at support@ipserverone.com.