
Search Our Database
How to Manage SmarterMail Server Bindings for IP Addresses and Ports
Introduction
Managing server bindings in SmarterMail dictates how the mail server listens for incoming connections on specific IP addresses and ports. System administrators must configure these bindings when setting up a new server or adjusting network configurations to ensure proper routing of email traffic (such as SMTP, IMAP, or POP3). This guide demonstrates how to easily add, edit, or delete IP and port bindings directly through the SmarterMail web interface. Properly configuring these bindings ensures secure and reliable email communication for all domains hosted on your server.
Prerequisite
- Access to the SmarterMail web interface with System Administrator privileges.
- Available IP addresses already configured on the server’s network interface.
Important Note ⚠️:SmarterMail automatically detects these IPs. You can verify they are recognized by navigating to Settings > Bindings > IP Addresses.
Step-by-step guide
Step 1: Access the Bindings settings
- Log in to SmarterMail as a System Administrator.
- Click on Settings on the top menu.
- Expand the Bindings section and click on Ports.
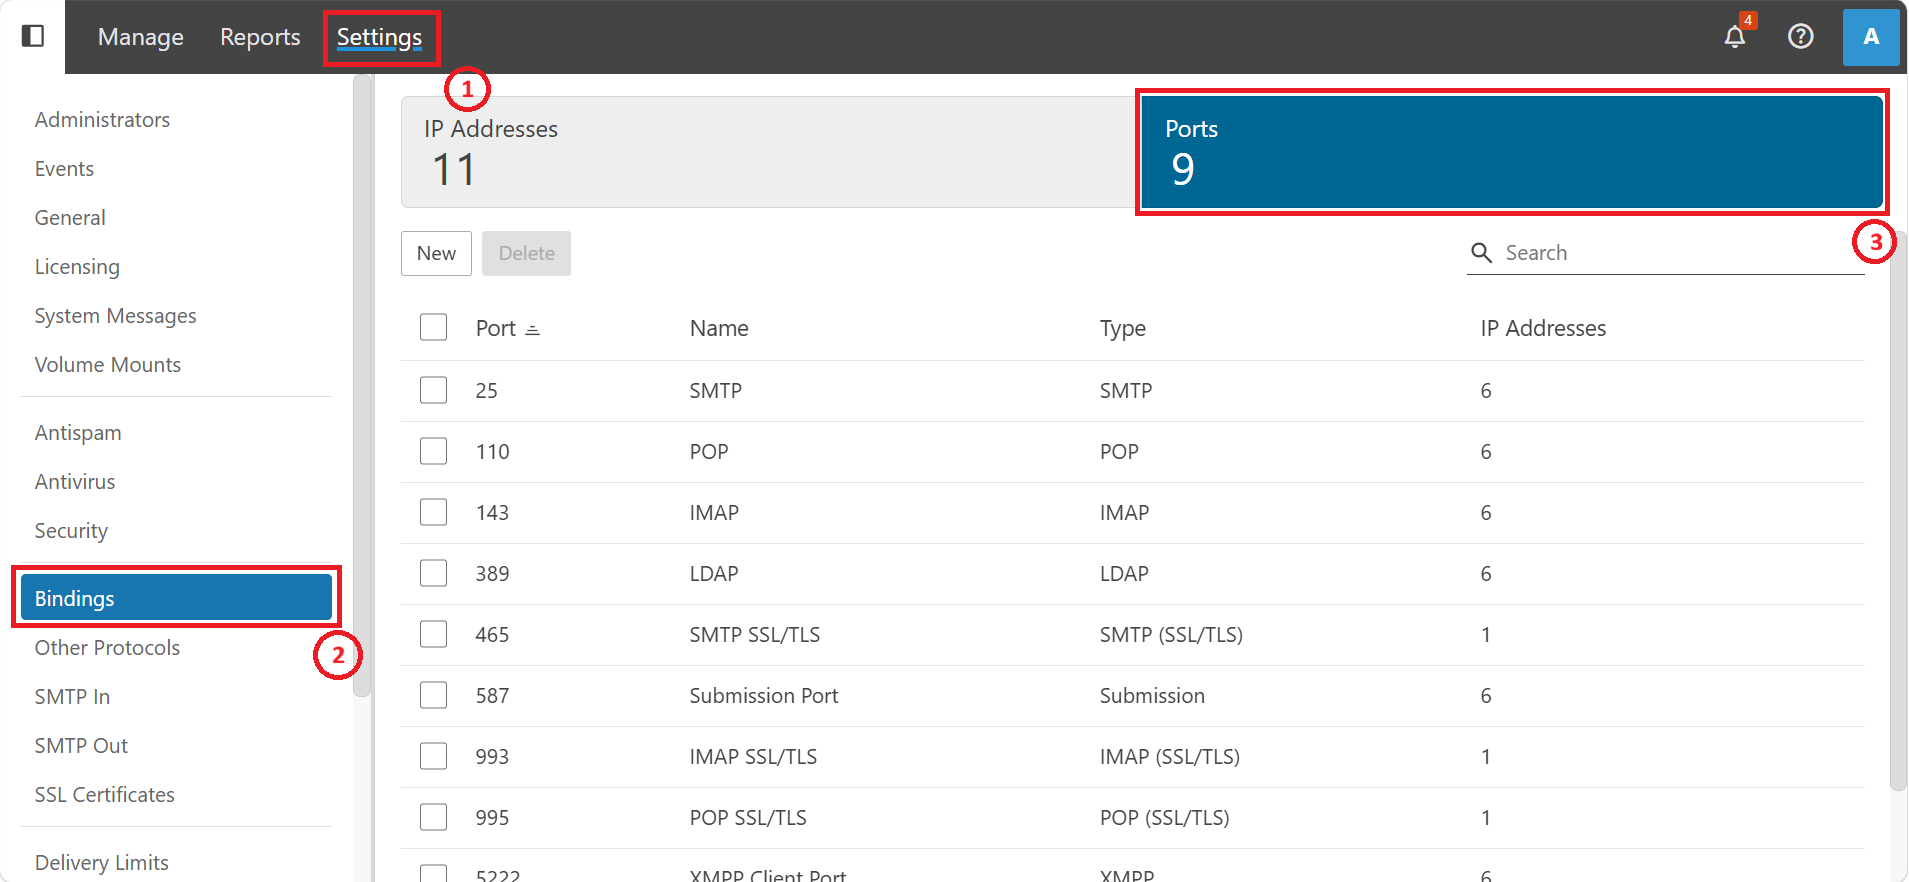
Step 2: Add a new binding
- Click the New button at the top of the content pane to open the New Binding window.
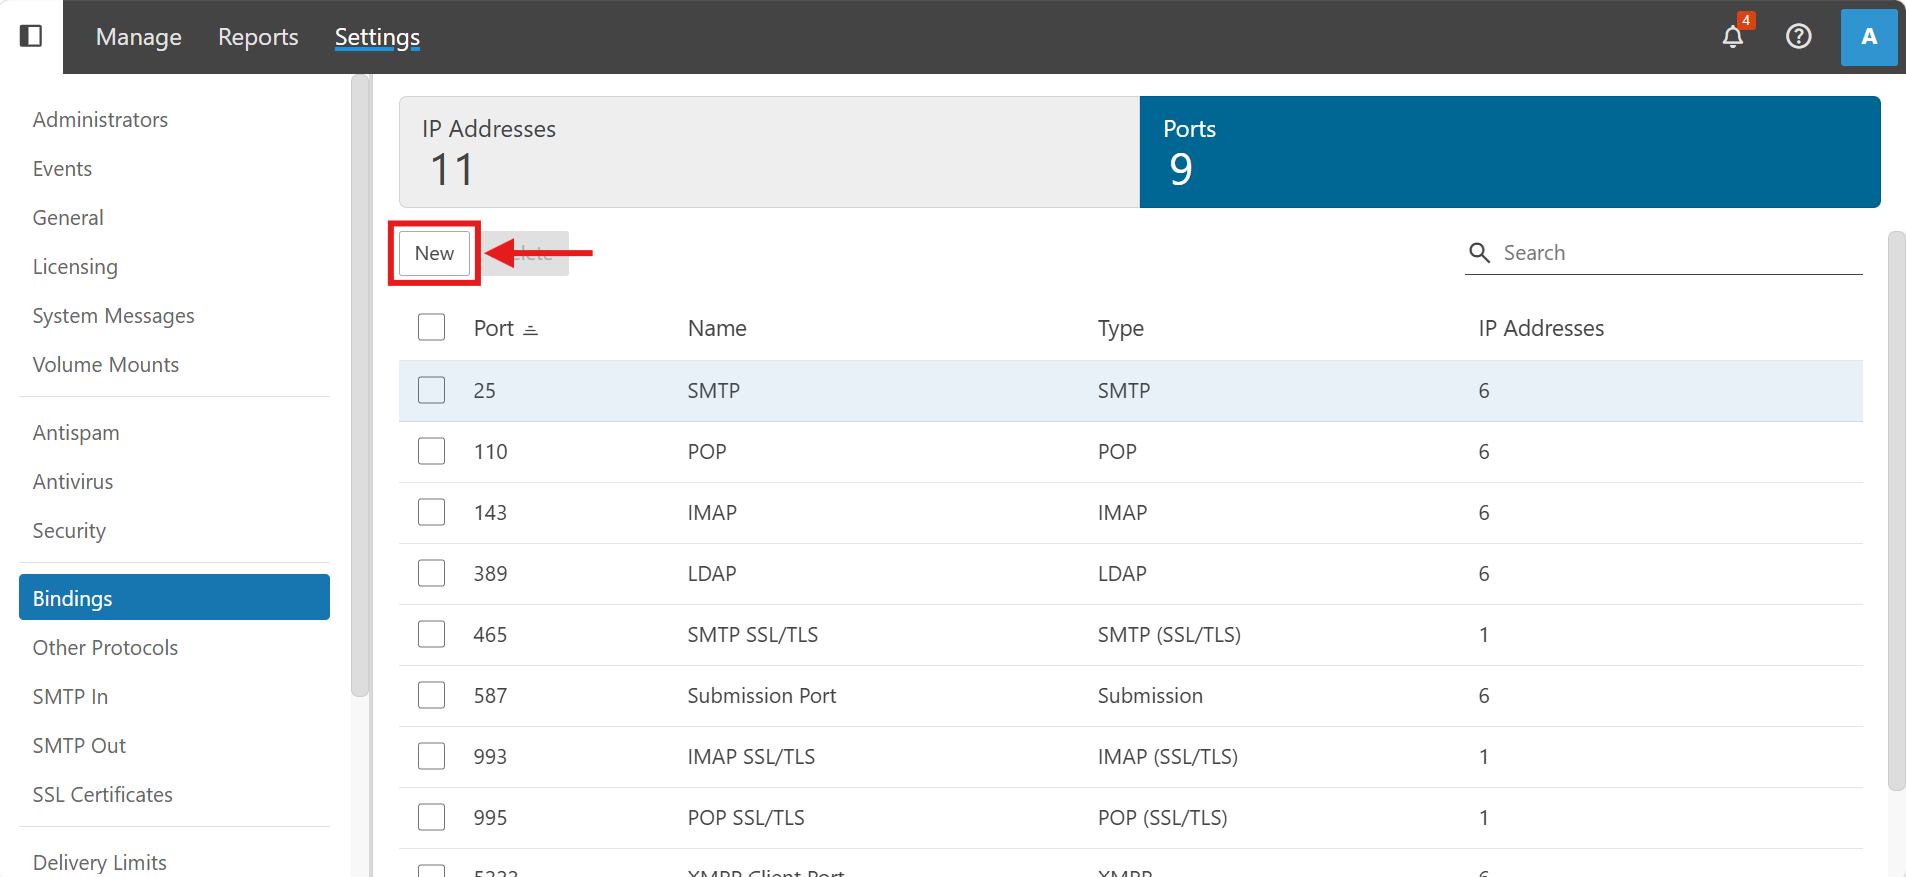
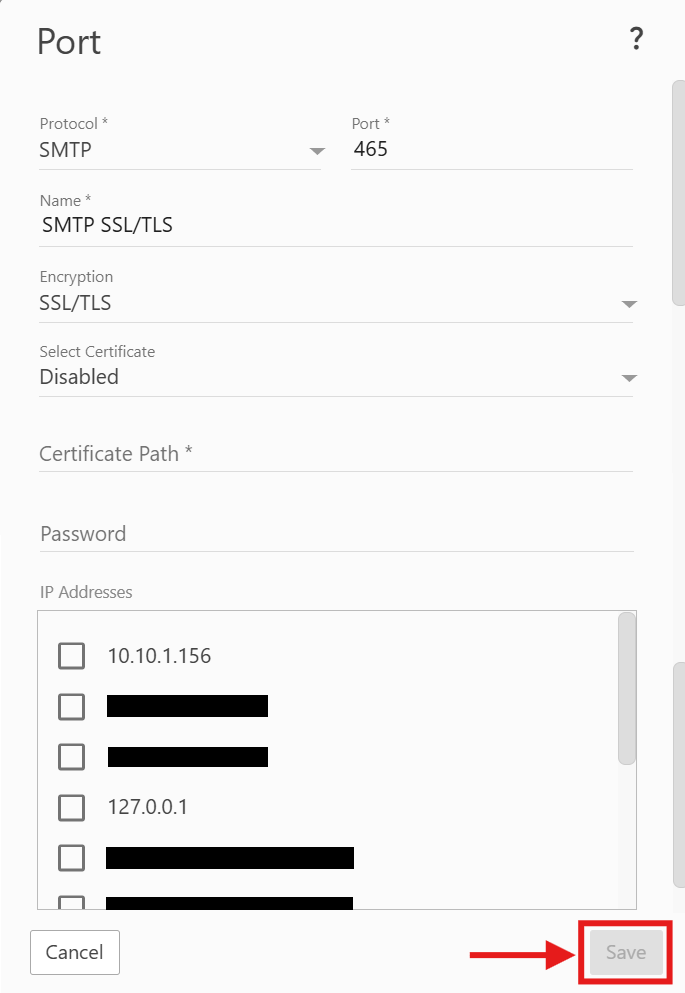
- Configure the following settings based on your requirements:
- Protocol: Select the desired mail service from the dropdown (e.g., SMTP, IMAP, POP3).
- Port: Enter the designated port number (e.g., 25, 465, or 587 for SMTP; 143 or 993 for IMAP).
- Name: Enter a descriptive friendly name for easy identification (e.g., “SMTP TLS – Port 587”).
- Encryption: Choose the appropriate security protocol (None, SSL, or TLS).
- Select Certificate: If you enabled SSL or TLS, select your active SSL certificate from this dropdown.
- Certificate Path & Password: If you are using a custom certificate file (like a .pfx) instead of selecting one from the dropdown, enter its local file path and the associated password here.
- IP Addresses: Check the box next to the specific IP address(es) you want to route this traffic through, or select All IPs.
- Then, click Save at the bottom right of the New Binding window.
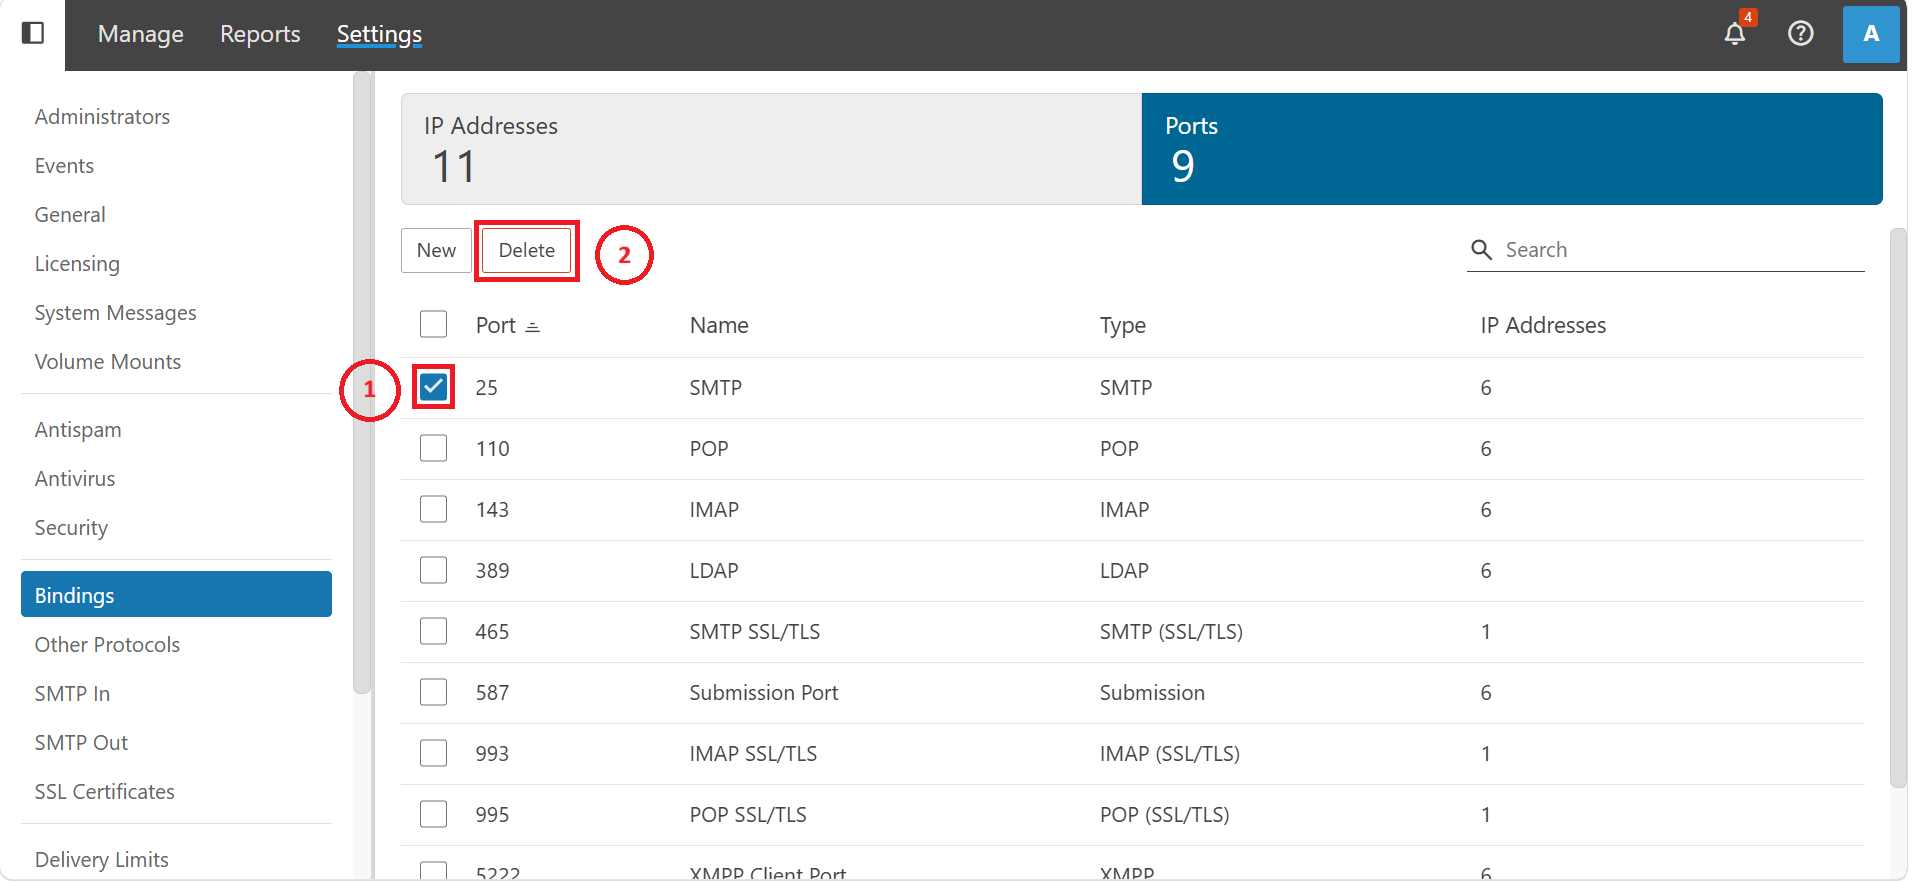
Step 3: Edit or delete an existing binding
- To edit, select the desired binding from the list. The port binding window will show up (same as the new binding window). Update the necessary details and click Save.

- To delete, select the binding by clicking on the checkbox and click Delete, then confirm the action when prompted.
Conclusion
By following this guidance, you can successfully manage IP and port bindings in SmarterMail, ensuring your server listens on the correct network interfaces for all incoming and outgoing email traffic.
For additional assistance or if you encounter any issues, please contact our support team at support@ipserverone.com.